Fixing the Port in use, please wait

Recently, a number of Windows 10 users reported an issue wherein they try to print from their PCs but were unable to and got an error message instead that states, “Port in use, please wait”. However, no matter how long they waited, nothing changed and they were still unable to print from their computers.

On the other hand, when some of the users attempted to print wirelessly from their mobile devices, the printing continues which indicates that there is some issue between the computer and the printer. So if you are one of the users who are currently facing this problem, then this post should help.

To fix this issue with your Printer, here are some possible fixes you can try that might work.

Option 1 – Run the Printer Troubleshooter

The first thing you can do to fix the “Port in use, please wait” error is to run the Printer Troubleshooter. This built-in troubleshooter in Windows 10 can help you fix most print issues. It checks if you have the latest printer drivers and then tries to fix and update them automatically. Aside from that, it also checks if you have connectivity issues or if the Print Spooler and the required Services are running fine. To run it, follow the steps below.

  • Tap the Win + R keys to open the Run dialog box.
  • Next, type “msdt.exe /id PrinterDiagnostic” in the field and click OK or hit Enter to open the Printer Troubleshooter.
  • Then click the Next button and follow the next on-screen instructions to fix the issue with the printer.

Option 2 – Try updating the Printer drivers

You might also want to try updating your printer drivers. All you have to do is locate the USB Composite Device. For complete details, follow the steps below.

  • First, click the Start button and type “device manager”.
  • Then click on the “Device Manager” from the search results to open it.
  • From there, look for the USB Composite Device option and right-click on it, and select the Update Driver from the options.
  • Restart your PC and then click the “Search automatically for updated driver software” option.

Note: You also have the option to download the latest version of your Printer from the manufacturer’s website.

Option 3 – Try selecting the correct port for your Printer

If the first two options given above didn’t work, then maybe it’s time to select a correct port for your printer since the wrong port has been selected which is why you’re getting the “Port in use, please wait” error.

  • Open “Devices and Printers” from the Start search.
  • Next, look for your printer from the list of devices and right-click on it, and then select Printer Properties.
  • Now go to the Ports tab under the newly opened Properties window and make sure that the port type matches the connection on the list of ports currently in use.

Note: If your printer is using a USB connection then the port should have a USB or DOT 4 in its description but if your printer is using a network connection then it should have the following description:

  • WSD
  • Network
  • IP

And if you notice that there are several listings for the same type of port, you have to change the selection to a different one and then click the OK button to save the changes made.

If you like to learn and find out more about various Windows errors, and how to repair them go to our vast archive or use search to find articles that will explain and help you in solving your issue.
However, if you prefer to do things fast and with automatization then we are proposing to use an automated solution for your issues. The application that we are recommending is Advanced System Repair Pro
Advanced System Repair utilizes multiple tools all in one to give you a quick, simple, reliable, and very thorough diagnosis of your PC. It brings you all the tools you need in one program to clean, fix, protect, optimize and boost your PC!
1-Click Maintenance
All the tools to make it simple and easy! It's like having a professional technician at the click of a mouse.

Junk Cleaner
Keeping your computer free from unnecessary clutter also helps make your computer last longer. Like any other machine, if you keep it clean and take care of it, it will serve you better for longer!

Optimize background apps
Optimize applications background activity with the built-in Application Optimizer feature.

Disk Defrag
With a simple 1-click, Advanced System Repair speeds up your PC by assembling fragmented files on your machine and organizing them more efficiently.

Malware Removal
Finds and removes all types of harmful malware including trojans, worms, bots, adware, spyware, PUPs, and more!

Privacy Cleaner
The all-in-one privacy suite to Clean Your Tracks & Protect Your Privacy! Make your computer safe, secure, and more efficient!

System Tweak/Optimizer
ASR will analyze your complete system and settings to adjust your PC to function at its maximum performance.

Registry Cleaner
Over time, as you install and uninstall applications, the registry can become cluttered with old entries and broken settings which can result in program crashes, and annoying messages and slow the computer down.
Visit our Advanced System Repair Pro Download page to inform yourself about all the benefits of this software and get a free trial copy of it.
advanced system repair pro

Advanced System Repair Pro

One-click automated PC repair solution
ASR logo
With Advanced System Repair Pro you can easily
Replace damaged files
Restore performance
Free disk space
Remove Malware
Protects WEB browser
Remove Viruses
Stop PC freezing
DOWNLOAD
Privacy Policy | Terms of Use | Uinstall
Advanced System Repair Pro is compatible with all versions of Microsoft Windows including Windows 11

Share this article:

You might also like

Fix Windows Cannot Find a System Image
If you have encountered the “Windows Cannot Find a System Image on This Computer” error while you are trying to restore a system image, then read on as this post will guide you in resolving this problem. A system image is basically a backup of your whole data in the system. For instance, it can be the backup data of your hard disk or the whole hard disk itself, or one of the volumes. This is really useful in some cases like when you are not able to get back into your system for some reason or when your system has been corrupted. In such cases, you can utilize this feature and get going safe and sound. However, not all things go the way as expected like when you make a system image of a drive for instance, or use that backup to restore data and you suddenly encounter the “Windows Cannot Find a System Image on This Computer” error. This kind of error occurs due to a number of reasons but worry not for your data is safe and you can fix this error easily. This error is most likely triggered by changing the name of the “WindowsImageBackup” folder. Renaming this folder will certainly be an issue since it is the one that stores all your data. Aside from renaming the WindowsImageBackup folder, renaming the sub-folders can also cause this error which means that renaming the sub-folders of the WindowsImageBackup folder can trigger the error. To fix this error, here are some suggestions that might help:

Option 1 – Try putting the WindowsImageBackup folder in the Root directory

Windows will have issues finding the WindowsImageBackup folder if it isn’t in the root directory of the drive so if it is not there, the “Windows Cannot Find a System Image on This Computer” error will pop up. When a folder is in a root directory, it means that it shouldn’t be stored within a folder but in the main directory instead.  Thus, you need to put the WindowsImageBackup folder in the root directory to fix the error.

Option 2 – Don’t add any sub-folders in the WindowsImageBackup folder

Another cause of the error is when you add sub-folders in the WindowsImage Backup folder. Adding any sub-folders in this folder will only trigger the error so you should leave the folder as it is and you must not make any modifications to it. So if you have added sub-folders in it, make sure to remove them right away.

Option 3 – Make sure that there is one system image per USB drive

The error can also appear if you’ve stored multiple images inside a single USB drive as it could confuse Windows and will trigger the “Windows Cannot Find a System Image on This Computer” error. Note that storing system images of different volumes of your hard disk in a single USB will prevent you from restoring your data.

Option 4 – Try renaming the System Image folder

If you’ve just changed the name of the System Image folder after you store it on a USB stick or other external device, then it’s no wonder why you’re getting the “Windows Cannot Find a System Image on This Computer” error. Windows search for the default name, “WindowsImage Backup” folder when restoring your data so if it is not able to find it, it throws up this error instead. To fix the error, you need to change the folder back to its default name which is “WindowsImageBackup”.

Option 5 – Check the WindowsImageBackup sub-folders

As mentioned earlier, renaming sub-folders in the WindowsImageBackup folder can trigger the error so if you have renamed sub-folders in this folder, you need to change them back to their default names so that you can restore your data peacefully.
Read More
How to Fix DISM Error 1726 in Windows 10
What is DISM Error 1726? Every time you encounter some issues in your Windows 10 computer, especially when it comes to corrupted system files, you can always use the SFC scan and if the SFC can isn’t able to resolve the issue, there is also the DISM tool you can use which usually resolve the vast majority of system file corruption sufficiently. However, there are times when even the DISM commands experience issues as well. Such is the case with the 1726 error: “The remote procedure call failed”.

Some users reported that this DISM problem happens right before the process is supposed to end. According to experts, this error in DISM occurs due to any of the following reasons:

  1. A third-party program might have interrupted the DISM operation and is the one that triggered the 1726 error: “The remote procedure call failed”.
  2. The error could also pop up when there is a pending corruption repair. This usually happens when you tried to run a DISM command previously that was terminated manually or was halted because of some malfunction.
  3. Lastly, the error could also occur because the process that’s responsible for the procedure is disabled or was prevented from running.
Whichever the case is, here are some suggestions that might help you in resolving the 1726 error: “The remote procedure call failed”.

Option 1 – Try updating your PC to the latest Windows build available

Since the problem is specific to certain builds in Windows 10, you need to make sure that your computer is updated before you try other troubleshooting steps. Thus, follow the steps below to update your Windows 10 PC.
  • Tap the Win + R keys to open the Run dialog box.
  • Then type “ms-settings:windowsupdate” in the field and hit Enter to open the Windows Update screen.
  • After that, click on Check for Updates and then follow the next on-screen instructions to apply the latest Windows update.
  • Once the update has been installed, restart your PC and run the DISM command again and see if the problem is fixed.

Option 2 – Try to change the Startup Type of the Remote Procedure Call service

As stated early on, the error might also be caused by a disabled Remote Procedure Call service or RPC or that it might be prevented from running for some reason. In case you don’t know, RPC is the service control manager for both COM and DCOM servers and it’s responsible for performing object variation requests, exporting resolution as well as distributing collection for the servers. And so if the server is disabled, all programs that are using COM and DCOM including the DISM commands, will not function correctly. Thus, you need to make sure that the RPC service is scheduled to enable itself on every system boot. To do so, here’s what you have to do:
  • Tap the Win + R keys to open the Run dialog box.
  • Type “services.msc” in the field and hit Enter to open Services.
  • From there, scroll down until you see the Remote Procedure Call (RPC) service and then right-click on it and select Properties.
  • Then go to the General tab and change the drop-down menu next to Startup type to Automatic.
  • After that, click the Apply button and then OK to apply the changes made.
  • Restart your PC and run the DISM command once again at the next startup.

Option 3 – Try to modify the RpcSs registry key value

If the option didn’t work, you can also try enabling the RPC service using the Registry Editor. Before you proceed, make sure to create a System Restore point first and then follow the steps below afterward.
  • Tap the Win + R keys to open the Run dialog box.
  • Type “Regedit” in the field and hit Enter or click OK to open the Registry Editor. And if a User Account Control prompt appears, just click on Yes.
  • After that, navigate to this registry key: HKEY_LOCAL_MACHINE SYSTEM CurrentControlSet Services RpcSs
  • After selecting the aforementioned registry key, go to the right pane and double-click on the Start value.
  • Next, change the Value data of start to 2 and click OK to save the changes made.
  • Exit the Registry Editor and restart your PC and check if the 1726 error in DISM has already been resolved or not.

Option 4 – Try to disable the Windows Search service temporarily

Some users also recommended disabling the Windows Search service for the meantime as it could be the one that’s interrupting the DISM process.
  • Tap the Win + R keys to open the Run dialog box.
  • In the field, type “services.msc” to open the Services window again and hit Enter to open it.
  • Next, scroll down over the services list and double-click on the Windows Update service.
  • Afterward, go to Windows Search properties and click the General tab and then click the Stop button to stop the service from running temporarily.
  • Now try running the DISM commands again and see if the problem’s fixed or not.
  • Restart the Windows Search service and then restart your PC as well.
Read More
Fix Error Code 0x80072EE7 in Windows
Installing or updating Google Chrome does not always go smoothly as there are times when it also encounters some errors like the error code 0x80072EE7. This kind of error in Chrome is most likely caused by the Windows Firewall or third-party Firewall (if you’re using one) that blocks the installation or update process. Aside from this known culprit, there are also other factors to consider such as corrupted or incompatible installation files or it could also be caused by some issue with your internet connection. If you face this kind of problem when installing or updating Chrome, you will see the following error message on your screen:
“An error occurred while checking for updates: Unable to connect to the Internet. If you use a firewall, please whitelist GoogleUpdate.exe. (error code 7: 0x80072EE7 — system level).”
Whatever the cause of this error is, you need to use the options prepared below to fix it.

Option 1 – Whitelist the “googleupdate.exe” in Firewall

If the issue is really caused by the Firewall, you need to whitelist the googleupdate.exe program to fix the error. To do that, follow these steps:
  • Tap the Win + E keys to open the File Explorer.
  • Next, copy and paste the following location in the address bar and tap Enter to go there.
Control Panel/All Control Panel Items/Windows Defender Firewall/Allowed apps
  • After that, click on the Change Settings button, and from the given list, look for Google Chrome.
  • Now check both Private and Public connections for it and then click on OK and see if it fixes the error or not.

Option 2 – Disable the proxy server for LAN

If the problem has something to do with your internet connection, then you can try disabling the proxy server for LAN and see if that helps.
  • Tap the Win + R keys to open the Run dialog box.
  • Then type “inetcpl.cpl” in the field and hit Enter to pull up the Internet Properties.
  • After that, go to the Connections tab and select the LAN settings.
  • From there. Uncheck the “Use a Proxy Server” option for your LAN and then make sure that the “Automatically detect settings” option is checked.
  • Now click the OK and the Apply buttons.
  • Restart your PC.
Note: If you are using a third-party proxy service, you have to disable it.

Option 3 – Check your VPN

If you are using a VPN application, then this option should apply to you, if not, skip this option and proceed to the next one. There are times when VPN software causes some issues like this error. If that’s the case, you can try to disable your VPN temporarily and see if the error is resolved or not and if turns out that your VPN is the culprit, you have to uninstall it and install a new one or its latest version. To uninstall it, follow the steps below.
  • Tap the Win + R keys to open the Run dialog box
  • Then type “appwiz.cpl” in the field and hit Enter to open the Programs and Features in Control Panel.
  • From there, look for the VPN service you are using, select it and then click on Uninstall to remove it.
  • After that, restart your computer and try to install the latest version of the program again. It should work now. If not, proceed to the next available option below.

Option 4 – Try to run the Chrome Cleanup tool

You might want to run Google Chrome’s built-in Malware Scanner & Cleanup tool as it could also help in getting rid of any unwanted ads, pop-ups, and even malware, as well as unusual startup pages, toolbars, and anything else that might overtake the network and could affect the performance of the browser.

Option 5 – Reset Google Chrome

Before you proceed, make sure that the Chrome browser is not running anywhere in the background via Task Manager. Once you’ve made sure that it’s no longer running, refer to these steps:
  • Tap the Win + R keys to open the Run dialog box.
  • Then type “%USERPROFILE%AppDataLocalGoogleChromeUser Data” in the field and tap Enter to open this location.
  • From there, look for the Default folder and then tap the Shift + Delete button and if a confirmation prompt appears, click on Yes.
  • After deleting the Default folder, open Google Chrome and click on the three vertical dots icon located in the top-right corner to open the menu.
  • Next, click on Settings and scroll down and then click on Advanced to open the Advanced Settings.
  • Then scroll down until you see the “Reset and clean up” section and click the “Restore Settings to their original defaults” option.
  • After that, you will see a confirmation box and from there, click on the Reset settings button to reset your Google Chrome browser.
Read More
Microsoft acquires Activision Blizzard
In the latest news, Microsoft has reached a deal to purchase Activision Blizzard for 67.8 billion. Now franchises like Warcraft, Starcraft, Overwatch, Call of duty, Diablo are now the property of Microsoft and I am sure that some of these games we can expect to be included in the Xbox game pass. microsoft activision blizzard
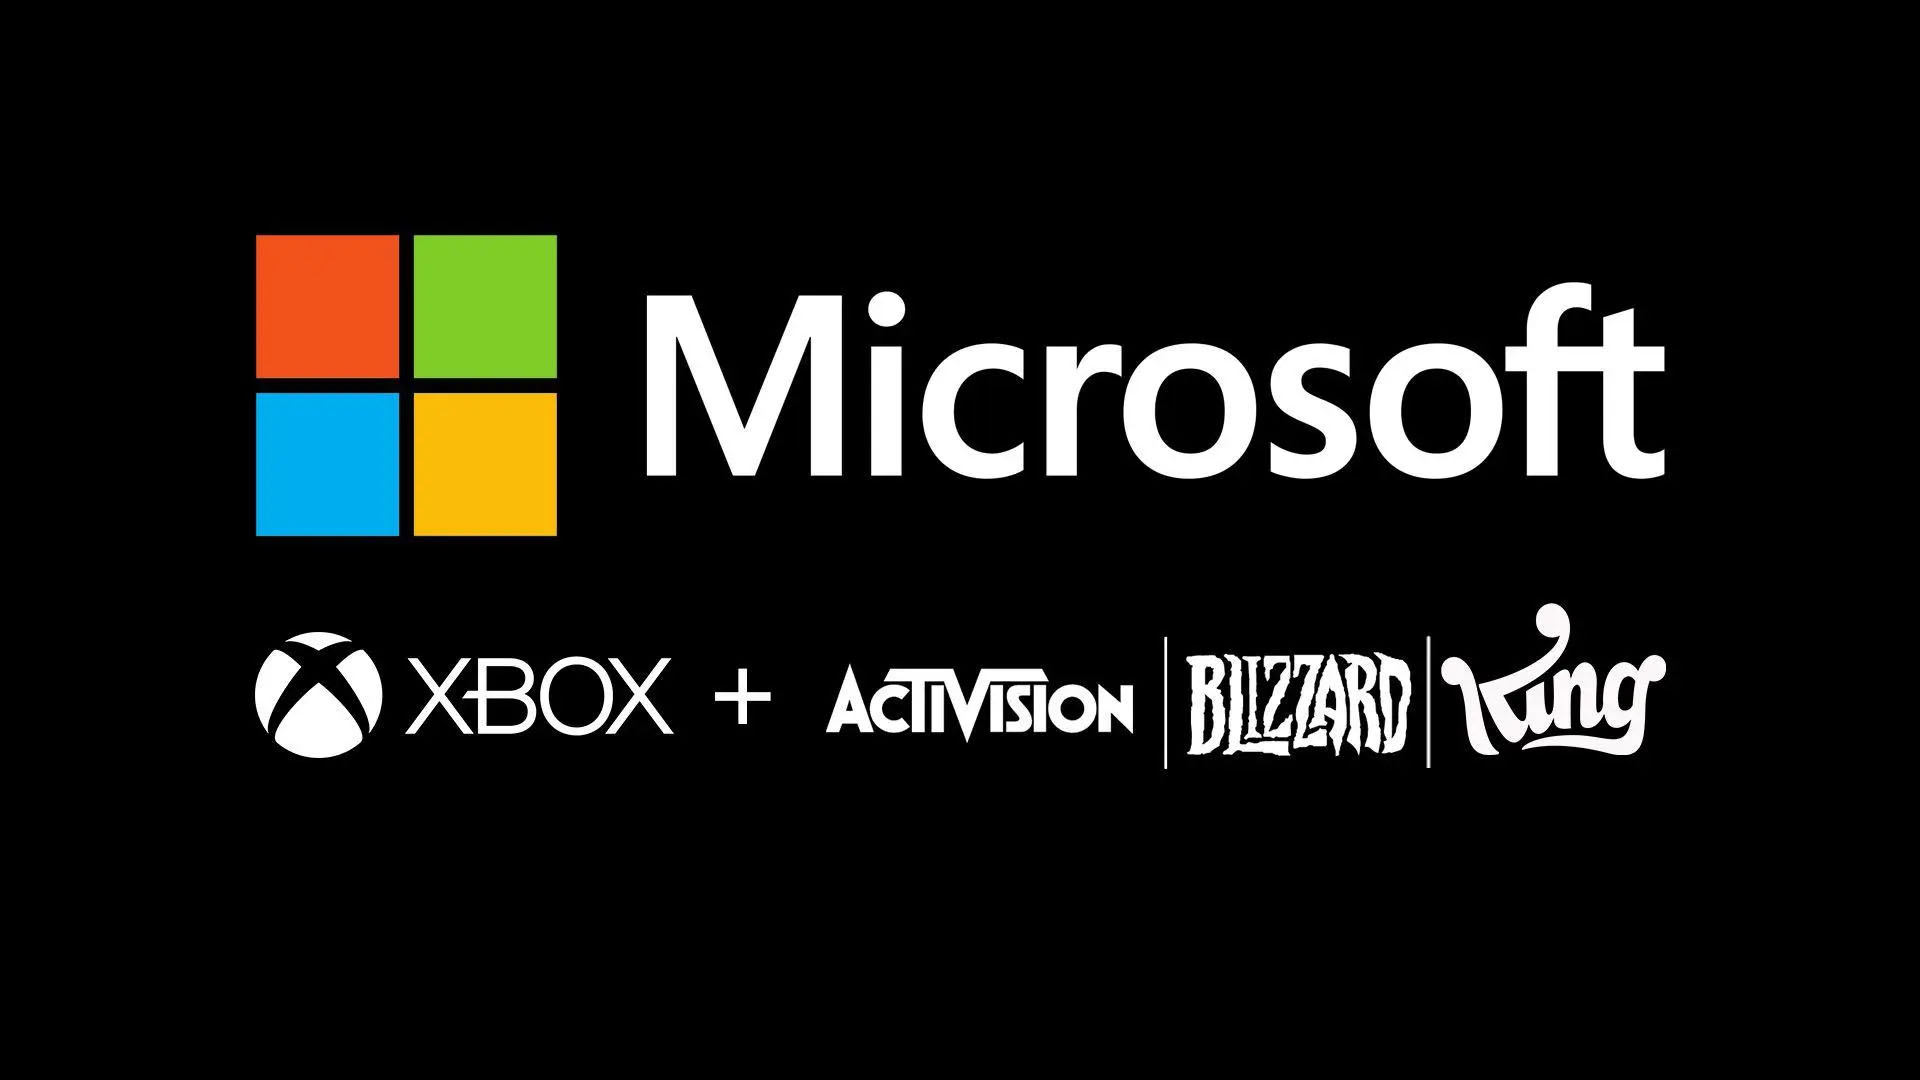
This is the second large game company acquisition by Microsoft, Acquiring Bethesda first and a big hit to Sony since Xbox will now have more games in its catalog and as exclusives. Of course, the sale has to go through the standard closing conditions and completion of regulatory review and Activision Blizzard’s shareholder approval before it’s finalized. Assuming that all goes well, the deal is slated to be completed during the fiscal year 2023, which is July 1, 2022, through June 30, 2023.
Read More
Guide for Removing FullTab From PC

FullTab is a Browser Extension for Google Chrome, Firefox, and Internet Explorer. When installed this extension hijacks your home page, and changes your default search engine to http://search.fulltabsearch.com. This extension usually comes bundled with other freeware software, and while installed it monitors your internet browsing activity, visited links, clicked pages, and other private information that it later uses to distribute targeted unwanted ads in your search results.

While this extension is installed, you will see modified search results, injected ads, sponsored links, web page redirects, and sometimes even pop-up ads. Several anti-virus scanners have detected this extension as a Browser Hijacker, and due to the information it is gathering from your computer it is not recommended to keep.

About Browser Hijackers

Browser hijackers (sometimes called hijackware) are a kind of malicious software that modifies web browser configuration settings without the user’s knowledge or consent. These hijacks appear to be increasing at an alarming rate globally, and they can be truly nefarious and sometimes harmful too. Browser hijackers are capable of doing more than just changing home pages. Usually, browser hijacking is utilized for earning advertising revenue that comes from forced ad clicks and website visits. Most people believe that such websites are legitimate and harmless but that is not the case. Almost every browser hijacker poses an actual threat to your online safety and it is necessary to categorize them under privacy risks. Browser hijackers can also let other vicious programs without your knowledge further damage your personal computer.

Browser hijacking signs and symptoms

There are numerous signs that indicate the web browser is hijacked: 1. your browser’s home page is suddenly different 2. you find redirected to internet sites you never meant to visit 3. the default web browser settings are modified and/or your default web engine is altered 4. you find unsolicited new toolbars added 5. unstoppable flurries of pop-up advertisements appear on your personal computer screen 6. webpages load slowly and sometimes incomplete 7. you can’t navigate to specific web pages, like computer security software-related sites.

Precisely how browser hijacker infects computers

There are many ways your PC can get infected with a browser hijacker. They usually arrive through spam e-mail, via file-sharing networks, or by a drive-by download. They are usually included with toolbars, BHO, add-ons, plug-ins, or browser extensions. Browser hijackers sneak to your pc in addition to free software application downloads also that you unintentionally install along with the original. Examples of popular browser hijackers include Fireball, GoSave, Ask Toolbar, CoolWebSearch, RocketTab, and Babylon Toolbar. The presence of any browser hijacker on your system can considerably diminish the web browsing experience, record your internet activities that lead to troublesome privacy concerns, diminish overall computer performance and cause application instability as well.

Removal

Some browser hijacking can be quite easily corrected by identifying and removing the corresponding malware software through your control panel. However, most hijackers are very tenacious and require specialized tools to remove them. And there’s no denying the very fact that the manual fixes and removal methods can certainly be a difficult job for a rookie PC user. Additionally, there are many risks associated with tinkering around with the pc registry files.

Virus Blocking Access To Safebytes Website And Anti-Malware Downloads - What You Should Do?

All malware is inherently dangerous, but certain types of malicious software do much more damage to your computer than others. Some malware is meant to interfere with or block things that you’d like to do on your computer. It may not allow you to download anything from the net or prevent you from accessing a few or all sites, especially antivirus websites. If you are reading this article now, you have probably recognized that a malware infection is a reason behind your blocked internet traffic. So how to proceed if you want to install an antivirus program such as Safebytes? There are some actions you can take to get around this problem.

Start Windows in Safe Mode

Safe Mode is actually a special, basic version of Microsoft Windows where just minimal services are loaded to counteract viruses and other troublesome programs from loading. If the malware is blocking the internet connection and affecting your PC, running it in Safe Mode will let you download anti-malware and run a scan while limiting possible damage. In order to enter into Safe Mode or Safe Mode with Networking, press F8 while the computer is booting up or run MSCONFIG and look for the “Safe Boot” options under the “Boot” tab. After you restart into Safe Mode with Networking, you can download, install, as well as update the anti-malware program from there. Right after installation, run the malware scanner to eliminate most standard infections.

Utilize an alternate internet browser to download an antivirus program

Malicious program code could exploit vulnerabilities on a specific web browser and block access to all anti-virus software websites. If you appear to have a virus attached to Internet Explorer, then switch over to a different browser with built-in safety features, such as Firefox or Chrome, to download your preferred antivirus program – Safebytes.

Make a bootable USB anti-virus drive

Another solution is to store and run an antivirus program completely from a Thumb drive. Do these simple measures to clean up your affected computer using portable anti-malware. 1) On a virus-free computer, download and install Safebytes Anti-Malware. 2) Put the pen drive into the uninfected PC. 3) Double-click on the downloaded file to run the installation wizard. 4) When asked, select the location of the pen drive as the place where you would like to store the software files. Do as instructed on the screen to finish up the installation process. 5) Now, insert the USB drive into the corrupted PC. 6) Run the Safebytes Anti-malware directly from the pen drive by double-clicking the icon. 7) Hit the “Scan Now” button to start the virus scan.

Ensure the Safety of Your PC by Using SafeBytes Anti-Malware Software

Do you want to install the best anti-malware application for your laptop? There are many applications available in the market that comes in free and paid versions for Windows systems. Some of them are great, some are decent, and some will affect your PC themselves! You need to go with a tool that has obtained a good reputation and detects not only computer viruses but other types of malware too. While thinking about trustworthy applications, Safebytes Anti-Malware is certainly the highly recommended one. SafeBytes anti-malware is a powerful, very effective protection application designed to assist users of all levels of IT literacy in finding and removing malicious threats from their personal computers. After you have installed this program, SafeBytes sophisticated protection system will make sure that absolutely no viruses or malicious software can seep through your computer. SafeBytes has outstanding features when compared to various other anti-malware programs. A few of them are given as below: Real-time Threat Response: SafeBytes provides round-the-clock protection for your personal computer restricting malware intrusions instantly. They’re extremely effective in screening and eliminating different threats because they’re regularly improved with new updates and safety measures. World-class AntiMalware Protection: With its advanced and sophisticated algorithm, this malware removal tool can detect and get rid of the malware threats hiding within your PC effectively. Quick Multithreaded Scanning: SafeBytes’s high-speed malware scanning engine cuts down scanning times and extends battery life. Simultaneously, it will effectively detect and eliminate infected computer files or any internet threat. Web Security: Through its unique safety rating, SafeBytes alerts you whether a site is safe or not to access it. This will make sure that you’re always certain of your safety when browsing the world wide web. Lightweight: This tool is not “heavy” on the computer’s resources, so you’ll not see any overall performance difficulties when SafeBytes is operating in the background. 24/7 Live Professional Support: You can obtain high levels of support round the clock if you’re using their paid software.

Technical Details and Manual Removal (Advanced Users)

To eliminate FullTab manually, navigate to the Add/Remove programs list in the Windows Control Panel and select the program you want to get rid of. For internet browser extensions, go to your web browser’s Addon/Extension manager and select the add-on you want to disable or remove. You’ll probably also want to reset your browser. To ensure the complete removal, find the following Windows registry entries on your system and remove them or reset the values accordingly. However, this is a challenging task and only computer professionals could carry it out safely. Moreover, certain malware keeps replicating which makes it difficult to eliminate. You are advised to do this process in Safe Mode.
Files: %LOCALAPPDATA%GoogleChromeUser DataDefaultExtensionsdddjdbagaalmcfiaklngpcdefppkhpnf %UserProfile%Local SettingsApplication DataGoogleChromeUser DataDefaultExtensionsdddjdbagaalmcfiaklngpcdefppkhpnf %LOCALAPPDATA%GoogleChromeUser DataDefaultExtensionsdfobofkgfnlaibpdigilbhhnampnfphg %UserProfile%Local SettingsApplication DataGoogleChromeUser DataDefaultExtensionskikgikaaibdokmgbiocgoeepfphfllml %LOCALAPPDATA%GoogleChromeUser DataDefaultExtensionskikgikaaibdokmgbiocgoeepfphfllml %LOCALAPPDATA%GoogleChromeUser DataDefaultExtensionsekeidcohoadhbbfgbhppjihllchhdgea %UserProfile%Local SettingsApplication DataGoogleChromeUser DataDefaultExtensionsdokppbonbkemcpplmcghjemlodkjcoif %LOCALAPPDATA%GoogleChromeUser DataDefaultExtensionsdokppbonbkemcpplmcghjemlodkjcoif %UserProfile%Local SettingsApplication DataGoogleChromeUser DataDefaultExtensionsekeidcohoadhbbfgbhppjihllchhdgea Registry: HKEY_CURRENT_USERSoftwareMicrosoftInternet ExplorerDOMStoragewww.search.fulltabsearch.com HKEY_CURRENT_USERSoftwareMicrosoftInternet ExplorerDOMStoragesearch.fulltabsearch.com HKEY_CURRENT_USERSoftwareGoogleChromePreferenceMACsDefaultextensions.settings, value: dfobofkgfnlaibpdigilbhhnampnfphg
Read More
Guide for FormFetcherPro.com Removal

FormFetcherPro.com is a Browser Extension for Google Chrome developed by Mindspark Inc. This extension offers users quick and easy access to various forms required for visas and other documents. While this may seem appealing, all this extension does is point you to the most popular websites online that can easily be found by searching. When installed it hijacks your new tab page and changes it to search.myway.com, enabling it to better target ads.

While browsing the internet with this extension enabled you will see additional sponsored content, additional ads, and sometimes even pop-up ads displaying throughout your browsing sessions. Several anti-virus programs have marked this extension as Potentially Unwanted and as a Browser Hijacker and are therefore recommended to remove it from your computer.

About Browser Hijackers

Browser hijacking means a malicious code has taken control over and altered the settings of your web browser, without your permission. Browser hijackers are capable of doing more than just changing home pages. Usually, hijackers will force hits to internet sites of their preference either to increase targeted traffic generating higher ad earnings, or to obtain a commission for every user visiting there. Many people believe that these types of sites are legitimate and harmless but that is incorrect. Nearly all browser hijackers pose an actual threat to your online safety and it is necessary to classify them under privacy dangers. Browser hijackers can even let other destructive programs without your knowledge further damage your computer.

Key signs that your web browser has been highjacked

When your web browser is hijacked, the following could happen: you find unauthorized changes to your web browser’s home page; your internet browser is constantly being redirected to adult sites; the default browser configurations have been changed, and/or your default search engine is altered; you see many toolbars on your internet browser; you’ll find random pop-ups start showing regularly; your web browser starts running slowly or exhibits frequent errors; Inability to navigate to certain sites, especially antivirus and other security software websites.

How it infects the computer

Browser hijackers can enter a PC in some way or other, for example via file sharing, downloads, and email as well. They sometimes are included with toolbars, add-ons, BHO, plugins, or browser extensions. Browser hijackers sneak into your pc in addition to free software application downloads also that you unwittingly install alongside the original. Common examples of browser hijackers include CoolWebSearch, Conduit, RocketTab, OneWebSearch, Coupon Server, Delta Search, Searchult.com, and Snap.do.

How you can fix a browser hijack

Some types of browser hijackers can be removed from the computer by uninstalling malicious software or any other recently added shareware. Having said that, the majority of hijackers are really tenacious and require specialized applications to eliminate them. Also, browser hijackers might modify the Windows registry so that it can be very tough to restore all the values manually, particularly when you are not a very tech-savvy individual. Anti-malware software is very efficient when it comes to catching and removing browser hijackers that regular anti-virus software has missed. SafeBytes Anti-Malware will counter relentless browser hijackers and provide you active PC protection against all types of malware. Utilize a pc optimizer (such as Total System Care) together with your anti-malware to repair various registry issues, eliminate system vulnerabilities, and improve your computer performance.

How To Install Safebytes Anti-Malware On An Infected Computer system

Practically all malware is bad, but certain kinds of malware do more damage to your computer or laptop than others. Some malware sits in between your PC and your internet connection and blocks some or all sites that you would like to check out. It would also prevent you from the installation of anything on your PC, especially antivirus software. If you are reading this article right now, you’ve perhaps realized that a malware infection is a reason for your blocked internet traffic. So what to do if you want to install an anti-virus program like Safebytes? There are a few actions you can take to get around this issue.

Use Safe Mode to resolve the issue

In Safe Mode, you can modify Windows settings, un-install or install some software, and eradicate hard-to-delete malware. In case the malicious software is set to load automatically when the PC starts, shifting to this particular mode can prevent it from doing so. In order to get into Safe Mode or Safe Mode with Networking, press F8 while the system is booting up or run MSConfig and locate the “Safe Boot” options in the “Boot” tab. Once you restart the PC into Safe Mode with Networking, you could download, install, and update anti-malware software from there. Now, you are able to run the anti-virus scan to remove viruses and malware without interference from another malicious application.

Switch to a different internet browser

Some malware mainly targets certain web browsers. If this is your case, utilize another browser as it could circumvent the malware. If you suspect that your Internet Explorer has been hijacked by a trojan or otherwise compromised by cybercriminals, the best course of action would be to switch over to a different internet browser like Google Chrome, Mozilla Firefox, or Apple Safari to download your chosen security program – Safebytes Anti-Malware.

Make a bootable USB anti-virus drive

Another approach is to download and transfer an anti-malware application from a clean computer to run a scan on the affected computer. To run anti-virus from a USB pen drive, follow these simple steps: 1) Use another virus-free PC to download Safebytes Anti-Malware. 2) Mount the pen drive on the same computer. 3) Double-click on the downloaded file to open the installation wizard. 4) When asked, select the location of the pen drive as the place in which you would like to store the software files. Do as instructed on the screen to finish off the installation process. 5) Unplug the flash drive. Now you can use this portable anti-virus on the infected computer. 6) Double-click the EXE file to open the Safebytes tool right from the thumb drive. 7) Click on “Scan Now” to run a complete scan on the affected computer for viruses.

SafeBytes Anti-Malware Overview

If you are planning to buy anti-malware for your PC, there are many brands and utilities for you to consider. Some are very good ones, some are ok types, while some are simply just fake anti-malware software that can harm your personal computer themselves! When looking for anti-malware software, select one that gives reliable, efficient, and comprehensive protection against all known computer viruses and malware. On the list of strongly recommended software by industry, analysts are SafeBytes Anti-Malware, popular security software for Microsoft Windows. SafeBytes anti-malware is a powerful, highly effective protection software designed to help end-users of all levels of computer literacy in finding and removing harmful threats out of their computer. When you have installed this program, SafeByte's state-of-the-art protection system will ensure that no viruses or malware can seep through your PC.

SafeBytes has outstanding features when compared with other anti-malware programs. Listed below are some of the features you will like in SafeBytes.

Most effective AntiMalware Protection: This deep-cleaning antimalware program goes much deeper than most antivirus tools to clean your personal computer. Its critically acclaimed virus engine detects and disables hard to remove malware that hides deep inside your PC. Real-time Active Protection: SafeBytes provides complete and real-time security for your personal machine. This tool will continuously keep track of your computer for any suspicious activity and updates itself continuously to keep current with the constantly changing threat scenarios. Internet Security: Through its unique safety score, SafeBytes tells you whether a website is safe or not to visit it. This will ensure that you’re always certain of your safety when browsing the internet. Minimal CPU and RAM Usage: This application is not “heavy” on your computer’s resources, so you’ll not find any performance troubles when SafeBytes is working in the background. Premium Support: For any technical inquiries or product guidance, you may get 24/7 professional assistance through chat and email. SafeBytes can keep your computer protected from the latest malware threats automatically, thereby keeping your web experience safe and secure. Malware trouble can become a thing of the past once you put this tool to use. So if you’re searching for the best malware removal tool out there, and when you don’t mind spending some money for it, go for SafeBytes Anti-Malware.

Technical Details and Manual Removal (Advanced Users)

To get rid of FormFetcherPro manually, go to the Add/Remove programs list in the Control Panel and select the program you want to get rid of. For browser plug-ins, go to your browser’s Addon/Extension manager and select the add-on you intend to disable or remove. You will most probably also want to reset your web browser to its default settings. To make sure of complete removal, find the following registry entries on your computer and delete it or reset the values accordingly. However, this is a tough task and only computer professionals can carry it out safely. In addition, some malware is capable of replicating or preventing removal. Carrying out this in Safe Mode is recommended.
Files: %UserProfile%\Local Settings\Application Data\Google\Chrome\User Data\Default\Sync Extension Settings\jcohbbeconnbknaeaodohnjcelemnlfc %LOCALAPPDATA%\Google\Chrome\User Data\Default\Local Extension Settings\jcohbbeconnbknaeaodohnjcelemnlfc %UserProfile%\Local Settings\Application Data\Google\Chrome\User Data\Default\Local Extension Settings\jcohbbeconnbknaeaodohnjcelemnlfc %LOCALAPPDATA%\Google\Chrome\User Data\Default\Extensions\jcohbbeconnbknaeaodohnjcelemnlfc %UserProfile%\Local Settings\Application Data\Google\Chrome\User Data\Default\Extensions\jcohbbeconnbknaeaodohnjcelemnlfc Registry: HKEY_LOCAL_MACHINE\Software\Google\Chrome\PreferenceMACs\Default\extensions.settings, valeur: jcohbbeconnbknaeaodohnjcelemnlfc HKEY_LOCAL_MACHINE\Software\Microsoft\Internet Explorer\DOMStorage\formfetcherpro.dl.myway.com HKEY_LOCAL_MACHINE\Software\Microsoft\Internet Explorer\DOMStorage\formfetcherpro.dl.tb.ask.com HKEY_CURREN_USER\SOFTWARE\Wow6432Node\FormFetcherPro HKEY_CURREN_USER\SOFTWARE\FormFetcherPro
Read More
Microsoft vs Google & Facebook
microsoft hqMicrosoft wants to escalate the situation from Australia to the EU, what a surprise. Hello all and welcome to another news article, this time we are focusing on Microsoft pushing the EU to accept law proposition from Australia. For all of you who are not familiar with the given situation let me quickly explain. The feud began when the Australian government proposed a new law that targeted Facebook and Google specifically. The government said that it believed that both of the tech giants were using content from news outlets without paying. Have you ever seen the little news snippets that Google or Facebook sometimes show its users to keep them up to date? These are lifted directly from news websites, and the Australian government claimed that this practice meant that people didn't bother visiting the news website. This then staved news websites of revenue. As such, the government put forward a new law that would mean Google and Facebook would have to pay the source website for every time they displayed a news snippet. Facebook responded by removing its Australian news coverage in light of the law. Google, however, put up a fight. It argued that its snippets encouraged people to click on it to read more, thus driving more traffic to the news website. It also said that such a law would be too expensive to maintain in the long run. As such, Google threatened to remove itself from Australia if the law passed. This was likely a scare tactic, as 95 percent of Australian web users use Google; however, it actually opened the door for its rival, Microsoft. Microsoft saw how it could push its own search engine BING to replace google. It of course went and reached the Australian government to assure them that BING is more than capable to fulfill its needs and fully abide by the proposed law. Now Microsoft knows that if this law passes it could see a similar situation happening in Europe and it is pushing it. US News reported on how Microsoft plans to encourage EU countries to adopt this new law too. The company has teamed up with the European Publishers Council and News Media Europe to make the following statement: Publishers might not have the economic strength to negotiate fair and balanced agreements with these gatekeeper tech companies, who might otherwise threaten to walk away from negotiations or exit markets entirely
Read More
Fixing SYNTP.SYS Blue Screen error in Windows
What is SYNTP.SYS file? it is a system file created by Synaptics Touchpad drivers that are responsible for all the gestures and tracking users’ touch on the Touchpad. However, what happens when this driver fails? Well, it’s either that your touchpad will partially stop working or it will completely stop working at all. And in such cases, you will encounter the SYNTP.SYS Blue Screen error along with any of the following error codes:
  • IRQL_NOT_LESS_EQUAL
  • KMODE_EXCEPTION_NOT_HANDLED
  • INVALID_PROCESS_ATTACH_ATTEMPT
To resolve the problem, use the instructions given below as a reference.

Option 1 – Run the Memory Diagnostic Tool to check for Memory leaks

  • Tap the Win + R keys to open Run and type exe and hit Enter to open the Windows Memory Diagnostic Tool.
  • After that, it will give two options such as:
    • Restart now and check for problems (Recommended)
    • Check for problems the next time I start my computer
  • Once your computer has restarted, perform a basic scan or you could also go for the “Advanced” options such as “Test mix” or “Pass count”. Simply tap the F10 key to start the test.
Note: After you select the option, your PC will restart and check for memory-based issues. If it finds any issues, it will automatically fix them and if there’s no issue found, then it’s most likely not a memory-based issue so you should try the other options given below.

Option 2 – Try reinstalling the Synaptics Driver

You might want to reinstall the Synaptics driver to resolve the SYNTP.SYS Blue Screen error.
  • Tap the Win + R keys to open the Run dialog box.
  • After that, type “appwiz.cpl” in the field and hit Enter to open the Programs and Features section in the Control Panel.
  • Next, you have to look for the “Synatics Point Device driver” and right-click on it, and then click on Uninstall to remove it from your computer.
  • Restart your PC and then check for updates under the Windows Update section.
  • After that, it will find the latest available and stable Synaptics driver and then install it.
  • Then click the “Check or Updates” under the Windows update section and it will automatically look for the latest available Synaptic driver and install it for you.
  • Now restart your PC and for the changes to take effect.

Option 3 – Try to run a System File Checker scan

You can also try to run a System File Checker or SFC scan in order to scan your computer for corrupted files that might be the cause behind the Error 0x80000003. Once it finds any corrupted system files, it will automatically fix them. To run System File Checker, here’s what you have to do:
  • Tap Win + R to launch Run.
  • Type in cmd in the field and tap Enter.
  • After opening Command Prompt, type in sfc /scannow
The command will start a system scan which will take a few whiles before it finishes. Once it’s done, you could get the following results:
  1. Windows Resource Protection did not find any integrity violations.
  2. Windows Resource Protection found corrupt files and successfully repaired them.
  3. Windows Resource Protection found corrupt files but was unable to fix some of them.
  • Restart your computer after the scan is completed.

Option 4 – Perform a System Restore

Performing System Restore might help you in fixing the SYNTP.SYS Blue Screen error. You can do this option either by booting into Safe Mode or in System Restore. If you are already in the Advanced Startup Options, just directly select System Restore and proceed with the next steps. And if you have just booted your PC into Safe Mode, refer to the steps below.
  • Tap the Win + R keys to open the Run dialog box.
  • After that, type in “sysdm.cpl” in the field and tap Enter.
  • Next, go to the System Protection tab then click the System Restore button. This will open a new window where you have to select your preferred System Restore point.
  • After that, follow the on-screen instructions to finish the process and then restart your computer and check if the problem is fixed or not.

Option 5 – Try to run the CHKDSK utility

Running the CHKDSK utility might also help you resolve the SYNTP.SYS errors. If your hard drive has issues with integrity, the update will really fail as the system will think that it’s not healthy and that’s where the CHKDSK utility comes in. The CHKDSK utility repairs hard drive errors that might be causing the problem.
  • Open Command Prompt with admin privileges.
  • After opening Command Prompt, execute the following command and hit Enter:
chkdsk /f /r
  • Wait for the process to be completed and then restart your computer.

Option 6 – Use the Blue Screen Troubleshooter

The Blue Screen troubleshooter is a built-in tool in Windows 10 that helps users in fixing BSOD errors like SYNTP.SYS Blue Screen error. It can be found on the Settings Troubleshooters page. To use it, refer to these steps:
  • Tap the Win + I keys to open the Settings panel.
  • Then go to Update & Security > Troubleshoot.
  • From there, look for the option called “Blue Screen” on your right-hand side and then click the “Run the troubleshooter” button to run the Blue Screen Troubleshooter and then follow the next on-screen options. Note that you might have to boot your PC into Safe Mode.
Read More
Windows 11 Insider Preview Build 22000.71
Microsoft just released Windows 11 Insider build 22000.71. Let’s dive in and see what it brings with you.

windows insider 2000Changes and features

New entertainment widget. The entertainment widget allows you to see new and featured movie titles available in the Microsoft Store. Selecting a movie will direct you to the Microsoft Store to see more information about that title. Just open widgets and click or tap on the “Add widgets” button and choose the entertainment widget. For now, the entertainment widget is available for Insiders in the following countries: US, UK, CA, DE, FR, AU, JP. The new context menus and other right-click menus have been updated to use acrylic material. We are testing the usability of a SplitButton for making new folders and files in the File Explorer command bar. The Taskbar previews (when you mouse-over open apps on the Taskbar) have been updated to reflect the new visual design of Windows 11.

Fixes

Taskbar:

  • We fixed an issue where if you drag app icons on the Taskbar to rearrange them, it was making the apps launch or minimize when you released the icon.
  • Using a long press with a touch on an app icon in the Taskbar to open the jump list should now work.
  • After right-clicking the Start icon in the Taskbar, clicking somewhere else should now dismiss the menu more reliably.
  • Shift + Right-click on an app icon in the Taskbar will now bring up the window menu like it used to and not the jump list.
  • We’ve addressed an issue that was making your mouse move slowly when hovering over the Taskbar previews.
  • We’ve included the fix for an issue when using multiple Desktops where an app icon in the taskbar might give the appearance of multiple windows being open when that wasn’t the case on that Desktop.
  • When using the Amharic IME you should no longer see an unexpected X next to the IME icon in the taskbar.
  • The issue where if you click on the input indicator on the Taskbar and it would unexpectedly highlight Quick Settings has been fixed.
  • When you hover over Task View, the preview flyout for your Desktops will no longer pop back up after using Esc to dismiss them.
  • We made a fix to address an issue where explorer.exe might crash after hovering over the Task View icon in the Taskbar.
  • We fixed an issue where the selected date in the calendar flyout was out of sync with the date in the Taskbar.
  • We made an update to address a scenario resulting in some Insiders not seeing the lunar calendar text in the calendar flyout when enabled in Settings.
  • This flight addressed an issue that could unexpectedly make the Taskbar background transparent.
  • Right-clicking the focus assist icon in the taskbar should now show a context menu.
  • The issue from the previous flight where icons in the taskbar corner were getting crushed against the top of the Taskbar has been addressed.
  • The tooltip for the location in use icon in the Taskbar should no longer appear blank sometimes.

Settings:

  • We fixed an issue making Settings crash on launch periodically.
  • Using the volume mixer sliders in Sound Settings should be more responsive now, as well as the page responsiveness as a whole.
  • We fixed an issue resulting in Disk and Volumes Settings’ change size option being clipped.
  • There was a non-functional verify link under Backup Settings – this has been fixed.
  • The Power and Battery Settings page should no longer be reporting that the battery saver is engaged if it’s not.
  • The Power and Battery Settings page should also now not crash when launched from Quick Settings.
  • We fixed a grammatical error in the Sign-in Settings text.
  • The “I forgot my PIN” link was unexpectedly missing in Sign-in Settings when a PIN was set up and has now been returned.
  • The issue where the Move option under Apps & Features in Settings wasn’t working reliably should be addressed in this build.
  • We’ve mitigated a problem where some of the colors in Settings weren’t updating after switching between dark and light mode, leaving the unreadable text.
  • We’ve done some work to help improve the performance of Settings when switching between light and dark mode.
  • We addressed an issue where some of the elements of the Themes page in Settings would end up crowded together when the window size was small.
  • We resolved an issue where the Pen menu toggle under Taskbar Settings was not in sync with the actual state of the feature.
  • Changes made to “Dismiss notification after this amount of time” in Accessibility Settings should now persist.
  • Some of the icons you could enable in Taskbar Settings were erroneously labeled Windows Explorer even though that’s not what they were – this should now be fixed.
  • The Connect text in Quick Settings has been updated to say Cast.

File Explorer:

  • Clicking the command bar button twice should now close any dropdown that appeared.
  • The new command bar should now appear when “Open folders in a separate process” is enabled under File Explorer Options > View.
  • This build addresses an issue where right-clicking a file and selecting Open With > Choose another app might launch the file in the default app rather than opening the Open With dialog.
  • Fixed an issue the desktop and File Explorer context menu would stop launching.

Search:

  • We fixed an issue where the option to verify your account in Search wasn’t working.
  • Hovering over the Search icon on a secondary monitor will now show the flyout on the correct monitor.
  • Search should now work if you open Start and start typing after having gone to the apps list and back.

Widgets:

  • When using the Outlook client with a Microsoft account, Calendar, and To-Do updates should sync faster down to the widgets.
  • We addressed an issue where if you added multiple widgets quickly from the widget's settings, it could result in some of the widgets not being visible on the board.
  • We fixed a bug where widgets could all become stuck in a loading state (blank squares in the window).
  • The traffic widget should now follow the Windows mode (light or dark).
  • The title of the sports widget should no longer mismatch with the content of the widget.

Other:

  • This build addresses an issue where ALT + Tab was getting stuck open sometimes after you released the keys and had to be manually dismissed.
  • We made a fix for an issue where Narrator's focus wasn’t ending up on the emoji panel after using the keyboard shortcut to open it.
  • Magnifier’s lens view has been updated so the lens now has rounded corners.
  • We found an issue that was noticeably impacting Start launch reliability for some Insiders, and have addressed it with this flight.
  • We’ve updated the “Most Used” text in the Start menu’s app list so it should no longer be getting clipped.
  • Using the semantic zoom in Start’s app list should no longer result in the list being pushed down and to the right off the edge of the window.
  • We fixed an issue where if you pressed ⊞ WIN + Z you would need to press Tab before you could use the arrow key to navigate through the snap layouts.
  • We addressed an issue where an acrylic area could get left on the screen after repeatedly snapping and unsnapping a window with touch.
  • We’ve done some work to mitigate an unexpected flash when moving a snapped window with touch.
  • We made a change to help window borders have a little more contrast when “Show accent color on title bars and windows borders” was turned off.

Known issues in Windows 11 repaired

Start:

  • In some cases, you might be unable to enter text when using Search from Start or the Taskbar. If you experience the issue, press ⊞ WIN + R on the keyboard to launch the Run dialog box, then close it.
  • Based on feedback, we are working on adding access keys to ⊞ WIN + X so that you can do things like “⊞ WIN + X M” to launch Device Manager. Insiders may see this functionality in this build, however, we are currently investigating an issue in which sometimes the option is unexpectedly unavailable.

Taskbar:

  • There is an issue in this build where Explorer.exe will crash when the date and time button on the Taskbar is clicked to access new notifications with Focus Assist turned off. The workaround for this is to enable Focus assist to priority or alarms mode. Note that when focus assist is turned on, notification popups won’t appear, but they will be in the notification center when opened.
  • The Taskbar will sometimes flicker when switching input methods.
  • Taskbar previews may draw partially offscreen.

Settings:

  • When launching the Settings app, a brief green flash may appear.
  • When using Quick Settings to modify Accessibility settings, the settings UI may not save the selected state.
  • The button to rename your PC doesn’t work in this build. If needed, this can be done using sysdm.cpl.
  • Settings will crash when clicking “Facial recognition (Windows Hello)” under Sign-in Settings if Windows Hello is already set up.
  • Reset this PC and Go back buttons in Settings > System > Recovery does not function. Reset and rollback can be accessed from the Windows Recovery Environment by selecting System > Recovery > Advanced startup, and pressing Restart now. Once in Windows Recovery, choose Troubleshoot.
  • Choose Reset this PC to perform a reset.
  • Choose Advanced options > Uninstall Updates > Uninstall latest feature update to perform a rollback.

File Explorer:

  • exe crashes in a loop for Insiders using the Turkish display language when the battery charge is at 100%.
  • When right-clicking the desktop or File Explorer, the resulting context menu and submenus may appear partially off-screen.
  • Clicking a desktop icon or context menu entry may result in the wrong item being selected.

Search:

  • After clicking the Search icon on the Taskbar, the Search panel may not open. If this occurs, restart the “Windows Explorer” process, and open the search panel again.
  • When you hover your mouse over the Search icon on the Taskbar, recent searches may not be displayed. To work around the issue, restart your PC.
  • The search panel might appear black and not display any content below the search box.

Widgets:

  • Widgets board may appear empty. To work around the issue, you can sign out and then sign back in again.
  • Launching links from the widgets board may not invoke apps to the foreground.
  • Widgets may be displayed in the wrong size on external monitors. If you encounter this, you can launch the widgets via touch or WIN + W shortcut on your actual PC display first and then launch on your secondary monitors.

Store:

  • The install button might not be functional yet in some limited scenarios.
  • Rating and reviews are not available for some apps.

Windows Security:

  • Device Security is unexpectedly saying “Standard hardware security not supported” for Insiders with supported hardware.
  • “Automatic sample submission” is unexpectedly turned off when you restart your PC.

Localization:

  • There is an issue where some Insiders may be missing some translations from their user experience for a small subset of languages running the latest Insider Preview builds. To confirm if you have been impacted, please visit this Answers forum post and follow the steps for remediation.
That's is so far, the latest update information on Windows 11 insider build. Stay tuned for more information when it comes as it comes.
Read More
Fix Windows Update Error 0x800F0922
A lot of users connect to the internet are using VPN on their Windows 10 computers which means that their regions could be different from the actual region of their Windows 10 computers. Thus, if you are facing some issues in updating your computer in this kind of environment, specifically the Windows Update error 0x800F0922, you need to follow the tips given in this guide to help you resolve the issue. When you encounter this kind of Windows Update error, you might see either of the following error messages on your screen:
“Windows could not search for updates, Code 0x800F0922 Windows Update encountered an unknown error” Or: “Windows failed to install the update with error 0x800F0922”
This issue might be caused by two possible reasons such as:
  1. VPN issues
  2. Not enough space on the System Reserved partition
To resolve the problem, here are some tips that might help:

Option 1 – Try disabling the VPN

As mentioned, if you are using VPN, this could be the reason why you’re getting the Windows Update error 0x800F0922 so the most obvious thing to do is for you to turn off the VPN and try to run the Windows Update once more. And if you use a VPN software that works using their software, you can just completely exit or log-off from its account. On the other hand, if you are using a built-in Windows 10 VPN, you can simply turn it off or delete all the settings you have created there. Although it’s understandable that you might have to use a VPN connection to connect to the work network, you really have to disable it at least until the Windows Update is no longer stuck in the error 0x800F0922. It would be best if you do this when you are not working.

Option 2 – Try to free up space in the System Reserved partition

The System Reserved partition is a part of the hard disk created when Windows is first installed on it. It is where the Boot Configuration Database, Boot Manager Code, Windows Recovery Environment, and the reserves space for the startup files are stored. And as mentioned early on, the error might be due to some insufficient space in the System Reserved partition so the next thing you can do is to increase the space in this partition. Note that it is a complex process so you need to make sure that you have made backups to all your data on the computer. So if ever something goes out of hand, at least you have copies of your important files in case you aren’t able to boot into the system at all.
Read More
1 2 3 162
Logo
Copyright © 2022, ErrorTools. All Rights Reserved
Trademarks: Microsoft Windows logos are registered trademarks of Microsoft. Disclaimer: ErrorTools.com is not affiliated with Microsoft, nor claim direct affiliation.
The information on this page is provided for information purposes only.
DMCA.com Protection Status