SettingSyncHost.exe High CPU usage

One of the important processes in the Windows operating system is the Setting Synchronization or SettingSyncHost.exe. This process is the one responsible for synchronizing the settings of your computer with other devices. It is the one that replicates settings like OneDrive, Internet Explorer, wallpapers, and so on, to other systems. However, it has been known to cause high CPU usage in Windows 10 and there are times when it causes the system to freeze or system lags. So if you notice that the SettingSyncHost.exe process is causing high CPU usage in your computer, worry not for this post will guide you in fixing them.

You have to be cautious when you notice high CPU usages caused by system processes since cybercriminals mostly set the names of viruses in a way that the system or the user won’t be able to identify them. Cyber crooks could name the virus and malware the same as one of the system processes like SettingSyncHost.exe to make it seem like it’s a legitimate process. Thus, you need to keep in mind that original system processes like the SettingSyncHost.exe file are located in the System32 folder.

The original SettingSyncHost.exe file is located in the System32 folder. To check for the same, right-click on the troublesome process in the Task Manager and select Open file location. If the place is any other than the System32 folder, run a full system anti-virus scan on the system.

The SettingSyncHost.exe causes high CPU usage when it gets stuck in the sync process and is not able to come out of the loop. To fix this problem, you need to follow the solutions offered below but before you proceed, make sure that you create a System Restore point first.

Option 1 – Apply some registry tweak

The first thing you can do is to apply some tweaks to the Windows Registry. To get started, follow these steps:

  • Tap the Win + R keys to open the Run utility and type “Regedit” in the field and then tap Enter to open the Registry Editor.
  • Next, navigate to this registry path: HKEY_CURRENT_USERSoftwareMicrosoftInputPersonalizationTrainedDataStore
  • From there, right-click on the key and select Permissions.
  • After that, check the box next to “Allow” for Full Permission for every user group.
  • Now click on the Apply and OK buttons to save the changes made.
  • Then restart your computer.

Option 2 – Close the Host process for setting synchronization

If the registry tweak didn’t work, you can try to close the host process for setting synchronization, especially if this process continues to hog resources. You can terminate this process by opening the Task Manager. From there, end the process or task of the host process. On the other hand, you can also turn off the Host process for synchronization by opening Settings > Accounts > Sync settings located in the left pane. After that, turn off the Sync setting.

Option 3 – Run the Hardware and Devices Troubleshooter or the Performance Troubleshooter

Hardware and Devices Troubleshooter:

  • The first thing you need to do is click on Start and then on the gear-like icon to pull up the window for Settings.
  • After opening Settings, look for the Update and Security option and select it.
  • From there, go to the Troubleshoot option located on the left-hand side of the list.
  • Next, select Hardware and Devices from the list and open the Troubleshooter and run it. Once it is doing its job, wait for it to complete the process and then restart the system.
  • After the system restarts, check if the problem’s now fixed. If not, refer to the next option given below.

Performance Troubleshooter:

  • Tap the Win + R keys to open the Run dialog box.
  • Type “exe /id PerformanceDiagnostic” in the field and hit Enter to open the Performance troubleshooter.
  • Then click on Next to get started. Wait until the process is completed.

Option 4 – Try scanning your computer using Windows Defender

As mentioned, it is possible that the SettingSyncHost.exe could be infected with a virus or malware. To eliminate it, you have to scan your computer using security programs like Windows Defender.

  • Tap the Win + I keys to open Update & Security.
  • Then click on the Windows Security option and open Windows Defender Security Center.
  • Next, click on Virus & threat protection > Run a new advanced scan.
  • Now make sure that Full Scan is selected from the menu and then click the Scan Now button to get started.
If you like to learn and find out more about various Windows errors, and how to repair them go to our vast archive or use search to find articles that will explain and help you in solving your issue.
However, if you prefer to do things fast and with automatization then we are proposing to use an automated solution for your issues. The application that we are recommending is Advanced System Repair Pro
Advanced System Repair utilizes multiple tools all in one to give you a quick, simple, reliable, and very thorough diagnosis of your PC. It brings you all the tools you need in one program to clean, fix, protect, optimize and boost your PC!
1-Click Maintenance
All the tools to make it simple and easy! It's like having a professional technician at the click of a mouse.

Junk Cleaner
Keeping your computer free from unnecessary clutter also helps make your computer last longer. Like any other machine, if you keep it clean and take care of it, it will serve you better for longer!

Optimize background apps
Optimize applications background activity with the built-in Application Optimizer feature.

Disk Defrag
With a simple 1-click, Advanced System Repair speeds up your PC by assembling fragmented files on your machine and organizing them more efficiently.

Malware Removal
Finds and removes all types of harmful malware including trojans, worms, bots, adware, spyware, PUPs, and more!

Privacy Cleaner
The all-in-one privacy suite to Clean Your Tracks & Protect Your Privacy! Make your computer safe, secure, and more efficient!

System Tweak/Optimizer
ASR will analyze your complete system and settings to adjust your PC to function at its maximum performance.

Registry Cleaner
Over time, as you install and uninstall applications, the registry can become cluttered with old entries and broken settings which can result in program crashes, and annoying messages and slow the computer down.
Visit our Advanced System Repair Pro Download page to inform yourself about all the benefits of this software and get a free trial copy of it.
advanced system repair pro

Advanced System Repair Pro

One-click automated PC repair solution
ASR logo
With Advanced System Repair Pro you can easily
Replace damaged files
Restore performance
Free disk space
Remove Malware
Protects WEB browser
Remove Viruses
Stop PC freezing
DOWNLOAD
Privacy Policy | Terms of Use | Uinstall
Advanced System Repair Pro is compatible with all versions of Microsoft Windows including Windows 11

Share this article:

You might also like

Turn On/Off and Clear Windows Clipboard
Windows 10 has a Cloud Clipboard feature that allows users to have a list of multiple copied text in place so that they can reuse it. And each time the computer restarts, the Clipboard Data is cleared. However, you can actually do it manually. How? Read on as this post will walk you through how you can turn on or off as well as clear the Clipboard history in Windows 10. This kind of feature is already available in Windows 10 v1903. In the previous versions of Windows, there was no feature to turn off history in the clipboard and users have to use other ways to clear the clipboard history. And now it seems that Microsoft has put an end to this dilemma as it now allows users to clear the clipboard history. To turn on or off or clear the Clipboard history, here are some instructions you need to follow: Step 1: Tap the Win + X keys to open the power menu and select Settings. Step 2: After that, navigate to Settings > System > Clipboard. Step 3: From there, turn off the toggle button under the Clipboard history section. This will turn off the Cloud Clipboard feature. As a result, the default clipboard will hold one last item and will not display the data on the clipboard. Note: When you tap the Win + V keys to invoke the clipboard manager, you will see a prompt that says, “Can’t show history, See all copied items in place, Turn on clipboard history”. You have the option to turn it back on by simply clicking on the available button. Doing so would only hide the existing data and makes sure that no copy of the data is kept.

Conclusion

On the other hand, if you want to clear the clipboard without affecting its history data, you have to make sure to pin the items on the clipboard that you want to stay. After that, click on the three-dotted icon for the menu and click on the “clear all” option. This will delete all the entries but will keep the pinned items on your clipboard.
Read More
Wallpapers by MyWay (wallpapers.myway.com) removal Guide

Wallpapers by MyWay is a browser hijacker, also known as Wallpaper Homepage adware. It was developed by Mindspark Interactive Network, Inc and it is widely promoted on the Internet as a genuine search engine powered by Google with an ability to customize homepage background and add some quick access links. This hijacker can be found in the most popular web browsers including Mozilla Firefox, Google Chrome, and IE. Generally Wallpaper by MyWay hijacker appears on the user’s computer without the user being fully aware of its modification.

While installed users will experience additional ads showing up in their search results, as well as sponsored content and pop-up ads. This extension has been flagged by several anti-virus scanners and it is recommended to remove it from your computer.

About Browser Hijackers

Browser hijack is a very common type of online fraud where your web browser settings are altered to allow it to do things you never intend. Browser hijacker malware is designed for many different reasons. These are generally used to force visitors to predetermined sites, manipulating web traffic to generate ad revenue. Nevertheless, it’s not that harmless. Your internet safety is jeopardized and it is also really irritating. Additionally, hijackers can make the entire infected system fragile – other harmful malware and viruses would take hold of these opportunities to get into your system very easily.

Signs of browser hijacker infection

Symptoms that your browser is hi-jacked include: 1. you see unauthorized modifications to your web browser’s home-page 2. you find yourself regularly directed to a different site than the one you meant 3. the default web engine and the default browser settings is modified 4. find new toolbars which you did not add 5. you notice lots of pop-up ads on your computer screen 6. your internet browser has instability issues or displays frequent errors 7. you’re blocked to access those sites of anti-malware solution providers.

Exactly how browser hijacker finds its way onto your computer

Browser hijackers can enter a computer by some means or other, for instance via file sharing, downloads, and e-mail also. Many internet browser hijackings come from add-on programs, i.e., browser helper objects (BHO), toolbars, or plug-ins added to web browsers to provide them additional functionality. A browser hijacker can be installed as a part of freeware, shareware, demoware and fake programs. An example of some popular browser hijackers includes Babylon, Anyprotect, Conduit, DefaultTab, SweetPage, RocketTab, and Delta Search, however, the names are often changing. Browser hijackers could record user keystrokes to collect potentially valuable information that leads to privacy issues, cause instability on systems, significantly disrupt user’s browsing experience, and finally slow down the system to a point where it will become unusable.

Browser hijacker removal methods

Certain types of browser hijackers can be quickly removed from your computer by deleting malicious programs or any other recently installed shareware. However, the majority of hijacking codes are certainly not easy to get rid of manually, as they go deeper into the operating system. Furthermore, manual removals require in-depth system knowledge and therefore can be a very difficult job for novices. Installing and running anti-malware programs on the affected computer can automatically delete browser hijackers and other malicious programs. One of the top tools for repairing browser hijacker infections is SafeBytes Anti-Malware. It helps you get rid of any pre-existing malicious software on your computer and gives you real-time monitoring and protection against new threats. Use a system optimizer (such as Total System Care) along with your anti-malware to fix various registry issues, remove computer vulnerabilities, and improve your computer overall performance.

How To Get Remove Malware That Is Preventing Antivirus Installation?

All malware is detrimental and the consequences of the damage will vary according to the specific type of malicious software. Some malware goes to great lengths to stop you from downloading or installing anything on your computer, especially anti-virus software programs. If you are reading this article, you may have infected by a virus that stops you from downloading a security software such as Safebytes Antimalware on your PC. Refer to the instructions below to remove malware in alternative ways.

Use Safe Mode to fix the issue

If the malware is set to run at Windows start-up, then booting in safe mode should avoid it. Only the minimum required applications and services are loaded when you boot your laptop or computer into Safe Mode. To launch your Windows XP, Vista, or 7 computers in Safe Mode with Networking, follow the instructions below. 1) After switching on the computer, press the F8 key before the Windows splash screen starts to load. This would conjure up the Advanced Boot Options menu. 2) Select Safe Mode with Networking with arrow keys and hit ENTER. 3) When this mode loads, you should have an internet connection. Now, make use of your web browser normally and navigate to https://safebytes.com/products/anti-malware/ to download and install Safebytes Anti-Malware. 4) After installation, do a complete scan and allow the program to remove the threats it discovers.

Switch to some other internet browser

Malicious code might exploit vulnerabilities in a specific internet browser and block access to all anti-malware software websites. When you suspect that your Internet Explorer happens to be hijacked by a trojan or otherwise compromised by online hackers, the most effective course of action would be to switch over to a different internet browser such as Google Chrome, Mozilla Firefox, or Apple Safari to download your chosen computer security software – Safebytes Anti-Malware.

Install anti-malware on a flash drive

Here’s another solution which is creating a portable USB anti-malware software package that can scan your computer for malware without needing installation. Adopt these measures to employ a flash drive to fix your corrupted PC. 1) On a clean PC, download and install Safebytes Anti-Malware. 2) Plug in the pen drive into the uninfected computer. 3) Run the setup program by double-clicking the executable file of the downloaded software, with a .exe file format. 4) Choose the flash drive as the destination for saving the software file. Follow the activation instructions. 5) Now, transfer the thumb drive to the infected computer. 6) Double-click the antivirus software EXE file on the thumb drive. 7) Click on the “Scan Now” button to start the malware scan.

How SafeBytes Anti-Malware Keep your Machine Virus Free

If you are looking to download an anti-malware application for your computer, there are plenty of tools on the market to consider but you just cannot trust blindly anyone, no matter whether it is a free or paid program. A few of them do a good job in eliminating threats while many will ruin your computer themselves. You must select one that is dependable, practical, and has a good reputation for its malware source protection. When considering commercial anti-malware application options, many people select well-known brands, like SafeBytes, and they are quite happy with it. SafeBytes is a powerful, real-time antivirus application that is designed to assist everyday computer user in safeguarding their PC from malicious threats. With its most advanced virus detection and repair technology, this software will help you protect your personal computer against infections caused by different types of malware and other internet threats, including adware, spyware, viruses, worms, trojans, keyloggers, ransomware, and potentially unwanted program (PUPs).

There are lots of wonderful features you’ll get with this security product. Some of them are listed as below:

Robust Anti-malware Protection: Using its advanced and sophisticated algorithm, this malware elimination tool can detect and remove the malware threats hiding within your computer system effectively. Active Protection: SafeBytes gives you round-the-clock protection for your PC limiting malware attacks in real-time. It will check your personal computer for suspicious activity at all times and safeguards your PC from unauthorized access. Fast Scan: This computer software has one of the fastest and most efficient virus scanning engines in the industry. The scans are very accurate and take a short amount of time to complete. Web Protection: Safebytes allots all sites a unique safety score that helps you to have an idea of whether the website you’re about to visit is safe to view or known to be a phishing site. Light-weight: SafeBytes gives complete protection from online threats at a fraction of the CPU load due to its enhanced detection engine and algorithms. 24/7 Customer Service: Expert technicians are at your disposal 24/7! They will quickly resolve any technical issues you may be experiencing with your security software. To conclude, SafeBytes Anti-Malware is really great for securing your PC against all kinds of malware threats. Malware problems will become a thing of the past once you put this software program to use. So if you’re looking for the best anti-malware subscription for your Windows-based PC, we highly recommend SafeBytes Anti-Malware software

Technical Details and Manual Removal (Advanced Users)

If you’d like to manually remove Wallpapers by MyWay without using an automated tool, it may be possible to do so by removing the application from the Microsoft Windows Add/Remove Programs menu, or in cases of web browser extensions, going to the browsers AddOn/Extension manager and removing it. You will probably also want to reset your internet browser to its default configuration settings. If you opt to manually delete the system files and registry entries, use the following checklist to make sure you know exactly what files to remove before performing any actions. Please keep in mind that this is for professional users only and might be difficult, with wrong file removal leading to additional system errors. In addition, some malware is capable of replicating or preventing deletion. Carrying out this malware-removal process in Safe Mode is recommended.
Files: %UserProfile%\Local Settings\Application Data\WallpapersMyWayTooltab %LOCALAPPDATA%\WallpapersMyWayTooltab %LOCALAPPDATA%\Google\Chrome\User Data\Default\Extensions\glhahjphgpghoefihgllamaapanabkmp %UserProfile%\Local Settings\Application Data\Google\Chrome\User Data\Default\Extensions\glhahjphgpghoefihgllamaapanabkmp Registry: HKEY_CURRENT_USER\Software\WallpapersMyWay
Read More
How to Turn off Advertising ID in Windows
In case you don’t know, Microsoft hooks up every machine that is running Windows 10 with an Advertising ID which helps them in providing Windows 10 users with relevant ads. These ads are delivered to users in the Action Center, Start Menu as well as the ads inside the UWP Applications. What makes these advertisements relevant is that they keep track of your browsing trends, likes and dislikes, with the help of the Advertising ID. However, if you are not fond of advertisements and you do not want this feature of Microsoft to track your usage, worry not for you actually have the option to disable targeted ads on your Windows 10 computer by turning off the Advertising ID. And you can do that during Windows 10 Setup or using the Group Policy Editor. For more details, refer to the instructions provided below for each one of the methods.

Option 1 – Turn off Advertising ID during Windows 10 setup

If you are about to install Windows 10, then during the installation process, your computer boots into the Install and Configure Windows 10 screen with Cortana that assist you during the setup. Once you reach the last page which is “Choose privacy settings for your device”, you will see the Advertising ID of your computer. Under the Advertising ID, you have to disable or toggle off the “Apps can use advertising ID to provide more personalized advertising in accordance with the privacy policy of the app provider” option. After you disable it, click on the Accept button to proceed with the installation. After that, the copy of your Windows 10 you are using will have the Advertising ID disabled by default.

Option 2 – Turn off Advertising ID via Group Policy Editor

  • First, tap the Win + R keys to launch the Run utility.
  • Then, type “gpedit.msc” in the field and click OK or tap Enter to open the Group Policy Editor.
  • Next, navigate to this group policy setting: Computer Configuration > Administrative Templates > System > User Profiles
  • Now double click on the “Turn off the advertising ID” option and set the radio button to Enabled. Once you do, you will see the following description on your screen:
“This policy setting turns off the advertising ID, preventing apps from using the ID for experiences across apps. If you enable this policy setting, the advertising ID is turned off. Apps can’t use the ID for experiences across apps. If you disable or do not configure this policy setting, users can control whether apps can use the advertising ID for experiences across apps.” Note that setting the radio button to Enabled or Not Configured will turn off the data collection of the Advertising ID.
  • Finally, exit the Group Policy Editor and then restart your computer to apply the changes made successfully.
Read More
Fix Chrome Error ERR_ICANN_NAME_COLLISION
If you are browsing the internet using the Google Chrome browser in your Windows 10 computer but you suddenly encounter an error message that states, “ERR_ICAN_NAME_COLLISION”, read on as this post will walk you through in fixing the problem. Here’s the full content of the error message:
“The site can’t be reached, This site on the company, organization, or school intranet has the same URL as an external website. Try contacting your system administrator. ERR ICAN NAME COLLISION.”
This kind of error is caused by an error in a private namespace or a random redirection to an incorrect proxy server. There are several ways to fix this error. You can try to check the integrity of the Hosts file or check the proxy. You could also try to use the Registry Editor and apply some tweaks or remove any conflicting browser extensions or flush the DNS cache, as well as run a malware scan.

Option 1 – Try to check the integrity of the Hosts file

To check the integrity of the Hosts file, refer to the following steps:
  • You have to navigate to this path inside File Explorer: C:/Windows/System32/driversetc
  • After that, look for a file named “Hosts” and right-click on it, and open it with the Notepad app.
  • Next, make sure that you write the block URLs in your computer in the list and then save the file.
Note: There are times when you are logged in with administrator credentials and you may receive an error message. In such case, type “notepad” in the Start Search and right-click on Notepad from the search results, and then select the “Run as administrator” option. After that, open the Hosts file and make the necessary changes and save it.

Option 2 – Try to check the Proxy server

There are some users who reported that they’ve fixed the problem after they’ve disabled the use of a proxy server using the built-in way. Follow the steps below to disable the proxy server.
  • Tap the Win + R keys to open the Run dialog box.
  • Then type “inetcpl.cpl” in the field and hit Enter to pull up the Internet Properties.
  • After that, go to the Connections tab and select the LAN settings.
  • From there. Uncheck the “Use a Proxy Server” option for your LAN and then make sure that the “Automatically detect settings” option is checked.
  • Now click the OK and the Apply buttons.
  • Restart your PC.
Note: If you are using a third-party proxy service, you have to disable it.

Option 3 – Try to use the Registry Editor

Before you apply some registry tweaks, make sure that you create a System Restore point. Once you have that covered, follow these steps:
  • Tap the Win + R keys to open the Run utility and type “Regedit” in the field and tap Enter to open the Registry Editor.
  • After that, navigate to this registry key: HKEY_LOCAL_MACHINESYSTEMCurrentControlSetServicesTcpipParametersDataBasePath
  • Look for the default key and double click on it and make sure that its Value data is set as “C:/Windows/System32/driversetc”.
  • Now exit the Registry Editor and restart your computer to apply the changes made

Option 4 – Flush the DNS cache

You could also try to flush the DNS cache to fix the “ERR_ICAN_NAME_COLLISION” error. All you have to do is open Command Prompt as an administrator and then execute each one of the following commands sequentially to flush the DNS cache:
  • ipconfig/release
  • ipconfig/renew
  • ipconfig/flushdns

Option 5 – Get rid of any conflicting browser extensions

  • Open Chrome and press Alt + F keys.
  • Go to More tools and click Extensions to look for any suspicious browser extensions or toolbars.
  • Click the Recycle bin and select Remove.
  • Restart Chrome and press Alt + F keys again.
  • Proceed to On Startup and mark Open a specific page or set of pages.
  • To check if the browser hijacker is still active, click Set pages, if it is active, overwrite the URL.
Note: If removing the browser extensions or toolbars didn’t work, you can also try to reset your Google Chrome browser.
  • Open Google Chrome, then tap the Alt + F keys.
  • After that, click on Settings.
  • Next, scroll down until you see the Advanced option, once you see it, click on it.
  • After clicking the Advanced option, go to the “Restore and clean up option and click on the “Restore settings to their original defaults” option to reset Google Chrome.
  • Now restart Google Chrome.

Option 6 – Run a malware scan using Windows Defender

It is possible that your computer is infected with malware which could be why you’re getting the “ERR_ICAN_NAME_COLLISION” error. Thus, you need to scan your computer using Windows Defender.
  • Tap the Win + I keys to open Update & Security.
  • Then click on the Windows Security option and open Windows Defender Security Center.
  • Next, click on Virus & threat protection > Run a new advanced scan.
  • Now make sure that Full Scan is selected from the menu and then click the Scan Now button to get started.
Read More
14 things we had in W10 but are gone in W11
W11 missing features
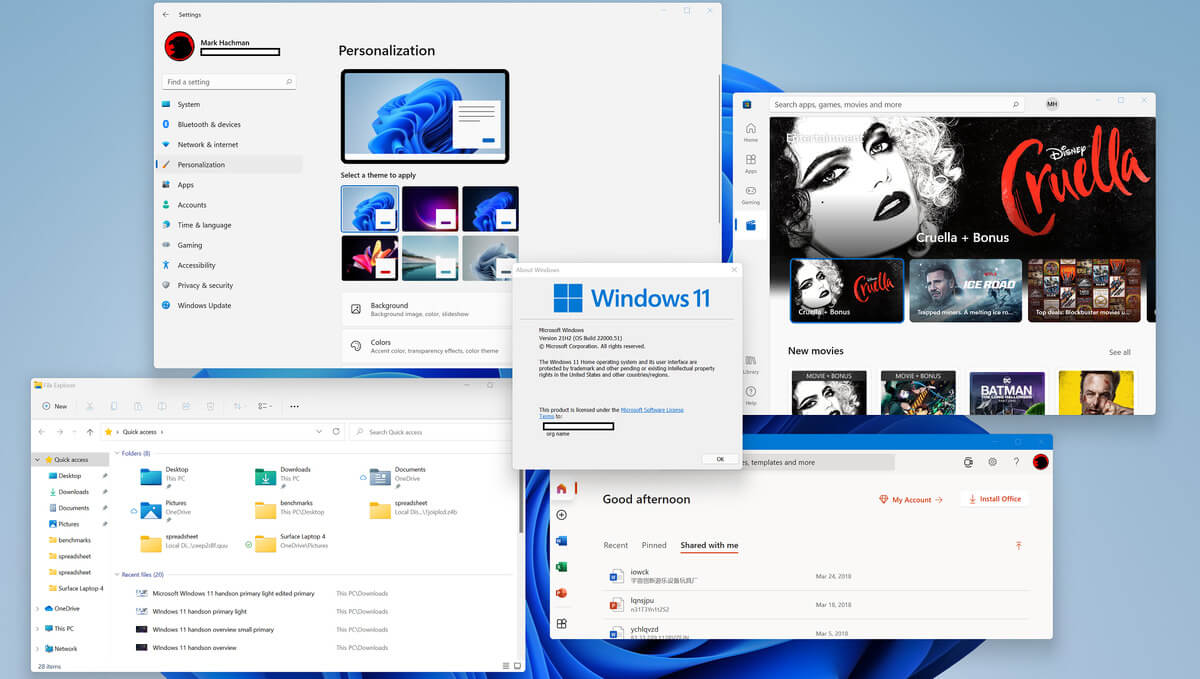
So far we probably all know what are good new and exciting features that W11 is bringing to the table, let’s talk now about features that will be removed and are not there but we had them in W10
  1. Taskbar, do not worry, it is still there but it will be locked hard only to the bottom, people is removed, applications cannot customize areas and some icons will not appear in the system tray.
  2. Start Menu, No more named groups, cannot be resized, live tiles are history and pinned apps and sites will not migrate
  3. Tablet mode is completely removed
  4. Touch keyboard will not dock or undock on screen sizes bigger than 18 inches
  5. The timeline feature is no more
  6. The wallet is also removed
  7. Cortana is not active on first boot experience and it is no longer pinned to the taskbar
  8. Desktop wallpapers are not synched anymore when using an MS account
  9. IE is disabled, IE mode in edge here to fill the gap
  10. Math panel is removed with math recognizer as separate install on demand
  11. News and interests are now Windows Widgets
  12. Quick status is no longer on the lock screen nor in the settings
  13. S Mode exclusive only to Windows 11 home edition
  14. Snipping Tool continues to be available but functionality has been replaced with the Snip & Sketch tool functionality.3D Viewer, OneNote for Windows 10, Paint 3D, and Skype won't be installed anymore on new systems. They remain available when systems are upgraded.
Read More
What is Trojan Kryptik and what does it do
Trojan. Kryptik is a malicious computer infection known as a Trojan horse. Trojan. Kryptik can load at startup and recreate itself which makes it difficult to manually remove from the infected computer. Trojan. Kryptik can compromise the infected system by allowing a remote hacker to gain access without the user's permission or knowledge. Trojan. Kryptik can also lead to the infection of other unknown malware parasites.

trojan kryptic
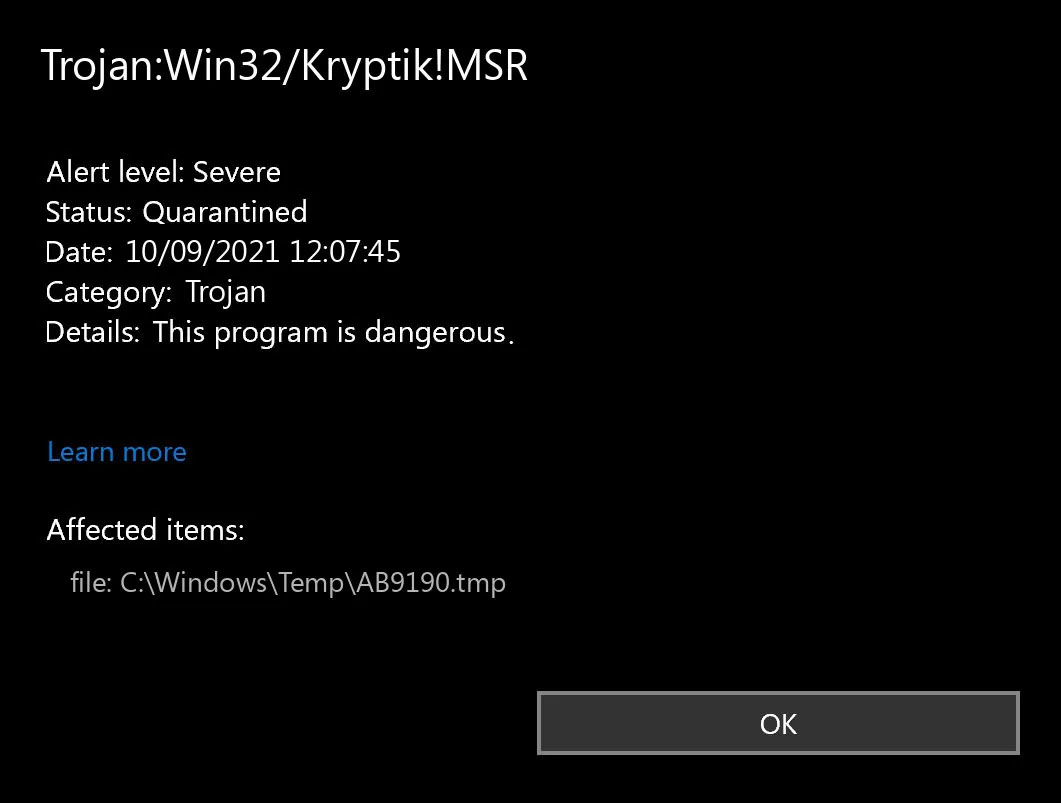
Trojan.Kryptik creates the following registry entry or registry entries:

Directory %ALLUSERSPROFILE%\windrivgr 19.7 %LOCALAPPDATA%\DsHcaJnIIz File name without path scaalqtw.exe Regexp file mask %ALLUSERSPROFILE%\sqldump.exe %APPDATA%\b[NUMBERS].exe %APPDATA%\Microsoft\Windows\Start Menu\Programs\Startup\[RANDOM CHARACTERS].com.url %APPDATA%\Origin\update.vbe %APPDATA%\Stanfind.exe %APPDATA%\vpn gui.exe %LOCALAPPDATA%\Microsoft\Windows\Symbols\wvfilters.sys %TEMP%\nvc.exe %TEMP%\system.exe %TEMP%\winsrvcs32.exe
Read More
Fix missing files in Recycle bin
Have you ever deleted a file by mistake? Do not feel bad, we all have, but what if you deleted the file by mistake and then you went to Recycle bin to restore it only to find out that the bin is empty? If you experienced this kind of issue then you know how unpleasant and frustrating it is but do not worry, we are here to help and provide you with solutions to this problem and hopefully get your file back. Follow the next steps from first to last since they are organized in a way to minimalize the permanent deletion of lost files.
  1. Refresh Recycle bin view

    If you spend any amount of time on this site reading through articles, you know I am a big fan of simple and effective solutions and there is nothing simpler than a single press of a button. Open your recycle bin and press F5 to refresh view or right-click anywhere inside and choose refresh. If your file does not appear with this method go to the next step.
  2. Set Windows to show hidden system files

    In order for this to work first, you will need to open File Explorer by pressing ⊞ WINDOWS + E Keyboard with windows and e markedWhen File Explorer opens go to VIEW > OPTIONS. Inside options select “Show hidden files, folders, and drives”, uncheck “Hide protected operating system files (Recommended)”, and click APPLY > OK Go to the recycle bin and check to see if files have managed to show up.
  3. Check if Don't move the file to the recycle bin is enabled

    Right-click on recycle bin and choose properties, under properties, there is the option that says Don’t move files to the Recycle Bin, Remove files immediately when deleted. This option is not selected by default, but it could be turned on by someone else or by mistake. If you see that this option is enabled sadly your file is gone and you will have to get the file back by using some third-party undelete application, uncheck this option to prevent future deletion of files by mistake.
  4. Increase recycle bin size

    This will not help you to get your file back sadly but it will help you in storing more files in recycle bin. This is helpful since if you reach your recycle bin limit all further files will be permanently deleted and not been able to get them back. So by increasing bin size you will have more space for deleted files to be saved. To do that, right-click on Recycle Bin, select Properties. Now, increase the Maximum size from the Custom size option, and click Apply and OK.
  5. Reset recycle bin

    To reset and fix corrupted recycle bin do the following: Press ⊞ WINDOWS + X to open the secret Windows menu and click on command prompt (admin) keyboard with windows and x markedIn the command prompt type in the following: rd /s /q C:\$Recycle.bin Reboot your system
Read More
ERR_SSL_VERSION_OR_CIPHER_MISMATCH
If you encounter an error message saying, “ERR SSL VERSION OR CIPHER MISMATCH” while visiting a website, then it is not primarily your fault as an end-user. In fact, it can happen on any website like Chrome, Edge, Firefox, and even Internet Explorer. Getting this error means that the website you are visiting is using an SSL certificate which your browser seems to be rejected because there is some issue with the certificate. It is also possible that the certificate that’s downloaded on your computer is corrupted or that your computer configuration for TSL/SSL is misconfigured. Here are the complete details of the error message:
“A secure connection cannot be established because this site uses an unsupported protocol, Error code ERR_SSL_VERSION_OR_CIPHER_MISMATCH”
To resolve the ERR_SSL_VERSION_OR_CIPHER_MISMATCH error, refer to the options given below and see which one works for you.

Option 1 – Try to access the website with the only HTTP

The first thing you can do is to try accessing the website using HTTP instead of HTTPS. If you can open the website using HTTP then it means that the problem is in the website itself. And if you are the website owner, you can check the following:
  • Check if your website’s SSL certificate name is mismatched. Here you need to ensure that the name and alias of the websites match with the actual website URL where the certificate is installed.
  • Second, check if your server is using the RC4 Cipher. If it is, then you need to fix that.
On the other hand, you may also check if your CDN also supports SSL since most of the CDN nowadays supports SSL. All you have to do is configure it correctly and it should be good to go.

Option 2 – Try enabling SSL 3 / TLS and disable QUIC Protocol

If you were using Google Chrome when you got the ERR SSL VERSION OR CIPHER MISMATCH error, then you need to follow the protocol fixes for SSL3/TLS and QUIC which are usually some of the reasons that cause the SSL version / Cipher Mismatch. It also has a few fixes for Windows 10 computer where you can clear the certificates and make sure that your computer date and time is in sync with your time zone and so on. If you were using Edge or Internet Explorer when you got the error, then you have to follow the steps below.
  • Type “Internet” in the search box of your browser. After that, you should see the Internet Options from the search results.
  • Next, open the Internet Properties window and switch to the Advanced tab and then scroll down to the Security section.
  • From there, check the “Use TLS 1.1” checkbox as well as the “Use TLS 1.2” checkbox and then click OK to save the changes made.
  • Restart the browser.
On the other hand, if you were using Firefox when you go the error, here’s what you have to do.
  • Open Firefox and in the address bar, type “about:config” and hit Enter.
  • If a warning appears, just click on the “I accept the risk!” button to proceed.
  • Next, type in “TLS” in the search field and hit Enter.
  • Then look for “security.tls.version.min” and double click on it and set its integer value to 3 to force the protocol of TLS 1.3.
  • Now click OK and restart Firefox and do the same thing with SSL.
Read More
Disabling Windows 10 startup delay
First time when your computer is turned ON and when Windows is booting it will wait 10 seconds before starting your startup applications. This 10 second is used to load all of Windows services so everything is running smoothly. If by any chance you do not want to wait for this startup delay and wish to start applications right away then keep on reading and follow this guide precisely. This guide will require you to play ad tweak with the registry of Windows, it is always recommended to make a registry backup before attempting any tweaks. Also, it is imperative to follow the guide as it is presented step by step. be aware that this guide will eliminate a 10-second delay for all of your starting applications, there is no way currently to remove delay for only one or a few.
  1. Press ⊞ WINDOWS + R to open the run dialog
  2. In run dialog type Regedit and press ENTER
  3. Locate HKEY_CURRENT_USER\SOFTWARE\Microsoft\Windows\CurrentVersion\Explorer\Serialize
  4. If the key does not exist, make a new one,  Go to HKEY_CURRENT_USER\SOFTWARE\Microsoft\Windows\CurrentVersion\Explorer\, right-click on the explorer and choose new > key. Name it Serialize
  5. Right-click on Serialize and choose New > DWORD (32-bit) Value
  6. Name the value StartupDelayInMSec
  7. Double click on StartupDelayInMSec and locate Value data
  8. Set the value to 0
  9. Save changes and Exit Registry editor
  10. Reboot
If you want to reverse changes and enable delay again, go back to the Registry Editor and delete the StartupDelayInMSec value.
Read More
Fix Windows Activation Error 0xC004F212
Microsoft allows its users to download a copy of Windows to install on PCs. However, when you enter the key after the installation and you got the Activation Error 0xC004F212 instead, then it means that the license key and the Windows version you’ve just installed, do not match. When you encounter this error, you will see the following error message on your screen:
“The product key used on this PC didn’t work with this edition of Windows. Activation Error 0xC004F212.”
Every time Microsoft generates a license for a copy of Windows, it is associated with one particular Windows variant. Windows comes in many editions like Enterprise, Home, Professional, and so on. For instance, if you bought a license for Windows 10 Enterprise but you have installed Windows 10 Professional instead, then the activation will surely fail and you’ll encounter the Activation Error 0xC004F212. You will be asked to select which edition you want to install when you reinstall Windows 10 using a digital license. If you opted for an edition other than the one you are licensed to use, then you will most likely get the Activation Error 0xC004F212. If you have purchased your license key from a store or some website, you might want to check back with them about the exact version of Windows. Doing so will help you narrow down the problem. And if you have second thoughts about the license key’s validity, you can just reach out to a Microsoft Support agent to check the validity of the license key. Also, if have bought it from the store, there should be an option to get a refund. That way you can choose to buy the right version of Windows.

Option 1 – Try running the Windows 10 Activation Troubleshooter

The first thing you can do to resolve the Activation Error 0xC004F212 is to run the Windows 10 Activation Troubleshooter. To do so, follow these steps:
  • Go to Settings and then select Activation.
  • After that, click on the Windows Activation and then troubleshoot. This will help you address most of the commonly found activation issues in Windows devices.
The Windows 10 Activation Troubleshooter will determine if your license key is a valid Windows 10 digital license for an edition that is not currently installed. If it turns out that it’s not, then the troubleshooter will show you how to install the correct edition.

Option 2 – Try forcing Windows 10 ISO to use the right version

You can also try to force Windows 10 ISO to use the correct version depending on the product key. Note that this option only works between Windows 10 Home and Professional version since they both have a common ISO. So if it’s Enterprise, then this option won’t work for you.
  • Extract the Windows 10 ISO files using an extractor.
  • Then browse to the folder you created and go to the sources folder.
  • From there, you need to create a text file named “PID.txt” and make sure to follow the exact format given below:
[PID] Value=xxxxx-xxxxx-xxxxx-xxxxx-xxxxx
Note: “xxxxx” is the KEY to your Windows version.
  • Next, you need to create the ISO again or bootable media that will repack everything and then create the Media file. You can use the Media Creation tool for this.
Note: Windows will check the key during the installation and will figure out the right version of Windows.

Option 3 – Contact Microsoft Support for assistance

If you’re at your wits’ end in trying to update your Windows 10 computer, you should consider contacting Microsoft Support for help as they can offer you various options that would make fixing Windows Activation Error 0xC004F212 a lot easier and faster.
Read More
1 2 3 162
Logo
Copyright © 2022, ErrorTools. All Rights Reserved
Trademarks: Microsoft Windows logos are registered trademarks of Microsoft. Disclaimer: ErrorTools.com is not affiliated with Microsoft, nor claim direct affiliation.
The information on this page is provided for information purposes only.
DMCA.com Protection Status