Fix Chrome Error ERR_ICANN_NAME_COLLISION

If you are browsing the internet using the Google Chrome browser in your Windows 10 computer but you suddenly encounter an error message that states, “ERR_ICAN_NAME_COLLISION”, read on as this post will walk you through in fixing the problem. Here’s the full content of the error message:

“The site can’t be reached, This site on the company, organization, or school intranet has the same URL as an external website. Try contacting your system administrator. ERR ICAN NAME COLLISION.”

This kind of error is caused by an error in a private namespace or a random redirection to an incorrect proxy server. There are several ways to fix this error. You can try to check the integrity of the Hosts file or check the proxy. You could also try to use the Registry Editor and apply some tweaks or remove any conflicting browser extensions or flush the DNS cache, as well as run a malware scan.

Option 1 – Try to check the integrity of the Hosts file

To check the integrity of the Hosts file, refer to the following steps:

  • You have to navigate to this path inside File Explorer: C:/Windows/System32/driversetc
  • After that, look for a file named “Hosts” and right-click on it, and open it with the Notepad app.
  • Next, make sure that you write the block URLs in your computer in the list and then save the file.

Note: There are times when you are logged in with administrator credentials and you may receive an error message. In such case, type “notepad” in the Start Search and right-click on Notepad from the search results, and then select the “Run as administrator” option. After that, open the Hosts file and make the necessary changes and save it.

Option 2 – Try to check the Proxy server

There are some users who reported that they’ve fixed the problem after they’ve disabled the use of a proxy server using the built-in way. Follow the steps below to disable the proxy server.

  • Tap the Win + R keys to open the Run dialog box.
  • Then type “inetcpl.cpl” in the field and hit Enter to pull up the Internet Properties.
  • After that, go to the Connections tab and select the LAN settings.
  • From there. Uncheck the “Use a Proxy Server” option for your LAN and then make sure that the “Automatically detect settings” option is checked.
  • Now click the OK and the Apply buttons.
  • Restart your PC.

Note: If you are using a third-party proxy service, you have to disable it.

Option 3 – Try to use the Registry Editor

Before you apply some registry tweaks, make sure that you create a System Restore point. Once you have that covered, follow these steps:

  • Tap the Win + R keys to open the Run utility and type “Regedit” in the field and tap Enter to open the Registry Editor.
  • After that, navigate to this registry key: HKEY_LOCAL_MACHINESYSTEMCurrentControlSetServicesTcpipParametersDataBasePath
  • Look for the default key and double click on it and make sure that its Value data is set as “C:/Windows/System32/driversetc”.
  • Now exit the Registry Editor and restart your computer to apply the changes made

Option 4 – Flush the DNS cache

You could also try to flush the DNS cache to fix the “ERR_ICAN_NAME_COLLISION” error. All you have to do is open Command Prompt as an administrator and then execute each one of the following commands sequentially to flush the DNS cache:

  • ipconfig/release
  • ipconfig/renew
  • ipconfig/flushdns

Option 5 – Get rid of any conflicting browser extensions

  • Open Chrome and press Alt + F keys.
  • Go to More tools and click Extensions to look for any suspicious browser extensions or toolbars.
  • Click the Recycle bin and select Remove.
  • Restart Chrome and press Alt + F keys again.
  • Proceed to On Startup and mark Open a specific page or set of pages.
  • To check if the browser hijacker is still active, click Set pages, if it is active, overwrite the URL.

Note: If removing the browser extensions or toolbars didn’t work, you can also try to reset your Google Chrome browser.

  • Open Google Chrome, then tap the Alt + F keys.
  • After that, click on Settings.
  • Next, scroll down until you see the Advanced option, once you see it, click on it.
  • After clicking the Advanced option, go to the “Restore and clean up option and click on the “Restore settings to their original defaults” option to reset Google Chrome.
  • Now restart Google Chrome.

Option 6 – Run a malware scan using Windows Defender

It is possible that your computer is infected with malware which could be why you’re getting the “ERR_ICAN_NAME_COLLISION” error. Thus, you need to scan your computer using Windows Defender.

  • Tap the Win + I keys to open Update & Security.
  • Then click on the Windows Security option and open Windows Defender Security Center.
  • Next, click on Virus & threat protection > Run a new advanced scan.
  • Now make sure that Full Scan is selected from the menu and then click the Scan Now button to get started.
If you like to learn and find out more about various Windows errors, and how to repair them go to our vast archive or use search to find articles that will explain and help you in solving your issue.
However, if you prefer to do things fast and with automatization then we are proposing to use an automated solution for your issues. The application that we are recommending is Advanced System Repair Pro
Advanced System Repair utilizes multiple tools all in one to give you a quick, simple, reliable, and very thorough diagnosis of your PC. It brings you all the tools you need in one program to clean, fix, protect, optimize and boost your PC!
1-Click Maintenance
All the tools to make it simple and easy! It's like having a professional technician at the click of a mouse.

Junk Cleaner
Keeping your computer free from unnecessary clutter also helps make your computer last longer. Like any other machine, if you keep it clean and take care of it, it will serve you better for longer!

Optimize background apps
Optimize applications background activity with the built-in Application Optimizer feature.

Disk Defrag
With a simple 1-click, Advanced System Repair speeds up your PC by assembling fragmented files on your machine and organizing them more efficiently.

Malware Removal
Finds and removes all types of harmful malware including trojans, worms, bots, adware, spyware, PUPs, and more!

Privacy Cleaner
The all-in-one privacy suite to Clean Your Tracks & Protect Your Privacy! Make your computer safe, secure, and more efficient!

System Tweak/Optimizer
ASR will analyze your complete system and settings to adjust your PC to function at its maximum performance.

Registry Cleaner
Over time, as you install and uninstall applications, the registry can become cluttered with old entries and broken settings which can result in program crashes, and annoying messages and slow the computer down.
Visit our Advanced System Repair Pro Download page to inform yourself about all the benefits of this software and get a free trial copy of it.
advanced system repair pro

Advanced System Repair Pro

One-click automated PC repair solution
ASR logo
With Advanced System Repair Pro you can easily
Replace damaged files
Restore performance
Free disk space
Remove Malware
Protects WEB browser
Remove Viruses
Stop PC freezing
DOWNLOAD
Privacy Policy | Terms of Use | Uinstall
Advanced System Repair Pro is compatible with all versions of Microsoft Windows including Windows 11

Share this article:

You might also like

Software review series: KRITA
Krita Desktop is a free and open-source painting application. Krita is a full-featured free digital painting studio for artists who want to create professional work from start to end. Krita is used by comic book artists, illustrators, concept artists, matte and texture painters, and in the digital VFX industry. Krita has been in development for over 10 years and has had an explosion in growth recently. It offers many common and innovative features to help the amateur and professional alike. Krita has a user-friendly interface. The dockers and panels can be moved and customized for your specific workflow. Once you have your setup, you can save it as your own workspace. You can also create your own shortcuts for commonly used tools. In addition to painting, Krita comes with vector, filter, group, and file layers. Combine, order, and flatten layers to help your artwork stay organized. There are also three different views on how to see the layers. Krita supports full color management through LCMS for ICC and OpenColor IO for EXR, allowing you to incorporate Krita into your existing color management pipeline. Open PSD files that even Photoshop cannot open. Load and save to PSD when you need to take your artwork across different programs. Krita is the only dedicated painting application that lets you open, save, edit and author HDR and scene-referred images. Furthermore, with OCIO and OpenEXR support, you can manipulate the view to examine HDR images, and use it in the most cutting-edge workflows from the film and visual effects industries.
Read More
A Quick Guide to Fix Error 0x0000001e

Correct Error 0x0000001e

What is Error 0x0000001e?

Error 0x0000001e is when you start the Windows XP Setup and you see a message which says something like: STOP: 0x0000001E (0x80000003, 0xBFC0304, 0x0000000, 0x0000001)

Solution

Restoro box imageError Causes

You are most likely to face this error if you restart your PC while the Windows Setup is still under process and yet to complete. Other causes of this error include any of the following conditions:
  1. The drive on which you are installing Windows has insufficient disk space to accommodate the installation.
  2. An incompatible or outdated third-party driver (or more) is installed on your PC which is conflicting with the installation. For instance, this could be a problematic video driver.
  3. The system BIOS has incompatibilities with the installation.

Further Information and Manual Repair

This error is also called the “Bug check code”. The STOP 0x1E signifies that there was an unknown or illegal processor instruction detected by the Windows XP kernel. You will see the exception address which shows up to indicate the root of the problem which is usually a driver or faulty hardware. You should note this address down as well as the link date of the faulty driver or image which includes it. If at any point it becomes impossible for you to handle and you end up contacting the Windows support center to help you out with the process then this information will help you out in making things a lot easier while the support team tries to troubleshoot the problem. The parameters included in the STOP 0x1E error message are the following:
  1. is the exception code which couldn’t be handled.
  2. shows the module’s address where the exception took place.
  3. signifies the exception’s parameter 0.
  4. represents the exception’s parameter 1.
You can use this information which usually is provided in error 0x0000001e message to pinpoint the root cause of the problem and troubleshoot it. In order to fix this error, you need to follow either one of the following procedures as needed according to your situation.

Clean Up Your Disk

local disk propertiesIf your disk doesn’t have ample space to accommodate the installation then you should free up some of the space on your disk to make sure the Windows can be installed on it. You can also reinstall the Windows on another disk that has sufficient space.

Get Rid of the Third Party Driver

If the error 0x0000001e message gives you the name of the driver due to which the installation process is being halted, then get rid of that driver by disabling it or removing it. If the problem is resolved by this then you should contact the manufacturer of the third-party driver and ask them about any newer versions of the driver that wouldn’t conflict with the installation of Windows.

Upgrade System BIOS

Upgrading your system BIOS is something that you can’t do on your own. You will need to find out more about how you can upgrade. For this, you should contact either your PC’s manufacturer or your motherboard’s manufacturer. If nothing else works, you can always make use of the Microsoft Debugging Tools which will provide you ample information about the error message. You will find the Debugging Tools and further information about them including the downloading and installation process on Microsoft’s website.
Read More
Steam 2021 Winter sale official date
Each year Steam makes a couple of large sales, and each year there are speculations and leaks on the date when the sale is going to happen and when it is starting. It seemed that Steam has become aware that these leaks will not stop and that store really cannot hide that kind of important date from the public so in the latest news Steam Purley has just given the date of this year's big winter sale. steam winter saleProbably tired of even trying to hide it, Steam has released that this year's big Steam Winter sale is officially starting on December 22nd, 2021, and closing on January 5th, 2022. So if you have someone to buy a gift or just want to drop a few great games in your library at a low price this is the time when you should do it.
Read More
Stellar Phoenix Outlook PST Repair Vs. ScanPST.Exe

Outlook PST Errors

Problems occur when your PST file becomes corrupted or hits the size limit. Outlook will start to display error messages. These errors include like 0x80040119, 0x80040600, and 0x8004060c.

Error Causes

You might think Outlook problems are just a minor inconvenience. You can’t access your emails and contact information, but that doesn’t actually affect computer security, right? Wrong! Outlook problems can indicate serious corruption issues within your system.

In many cases, your PST file can even be targeted specifically by a virus.

Today, many viruses are specially designed to steal personal information and then sell that information on the online black market. Since so much personal data is stored within Outlook’s PST file, this is often the first place that viruses look.

If you don’t want some hacker in a foreign country to read your emails, steal your contact information, or do all sorts of other dangerous tasks, then we advise you to fix your PST problem as soon as possible.

Other causes include hitting the 2GB memory limit on older versions of Outlook, erroneous SMTP settings, etc,.

Further Information and Manual Repair

PST errors are an incredibly annoying problem. However, thanks to powerful software like Stellar Phoenix Outlook PST Repair, it has never been easier to fix Outlook and recover all of the data inside your PST file. That means that you won’t lose contact information, calendar entries, emails, or any other information stored in Outlook.

ScanPST.exe rarely fixes problems with the PST file. Since the application is only a few megabytes in size, its effectiveness is very limited. Although Microsoft designed ScanPST.exe to be an effective solution to any PST files, it fails miserably.

Better Alternatives to Microsoft's ScanPST.Exe

Ultimately, after downloading ScanPST.exe and running it, your Microsoft Outlook will still be unable to send or receive emails. And, to make matters worse, you might also be unable to access contact data or read your old emails.

Unlike other PST repair solutions, ScanPST.exe will not recover deleted emails or other lost Outlook data. In fact, using ScanPST.exe can sometimes cause your personal data to become even more difficult to recover.

If you do want to try out ScanPST.exe, then go ahead. While it probably won’t make your PST errors worse, it won’t even come close to fixing them. If you’re ready for a more serious solution to PST problems, then keep reading.

Why are Outlook problems dangerous?

You might think Outlook problems are just a minor inconvenience. You can’t access your emails and contact information, but that doesn’t actually affect computer security, right? Wrong!

Outlook problems can indicate serious corruption issues within your system. In many cases, your PST file can even be targeted specifically by a virus.

Today, many viruses are specially designed to steal personal information and then sell that information on the online black market. Since so much personal data is stored within Outlook’s PST file, this is often the first place that viruses look.

If you don’t want some hacker in a foreign country to read your emails, steal your contact information, or do all sorts of other dangerous tasks, then we advise you to fix your PST problem as soon as possible.

How do I actually fix Microsoft Outlook PST errors?

Microsoft’s ScanPST.exe application clearly doesn’t work. So what’s the next best option? Well, a program called Stellar Phoenix Outlook PST Repair has been helping PC users solve Outlook problems for several years. As the world’s leading Outlook solution, Stellar Phoenix Outlook PST Repair will quickly and effectively repair any PST problems you encounter.

So how does Stellar Phoenix Outlook Repair work? Well, it starts by finding your PST file. Once the PST file has been found, Stellar Phoenix Outlook PST Repair determines if the file is corrupt or full. It will then repair your PST file either by removing the size limit or by fixing the corrupt files.

How Does Stellar Phoenix Outlook Repair Work?

Once Stellar Phoenix Outlook PST Repair determines that your calendar appointments, contact data, and emails have all been successfully recovered, it permanently restores access to your PST file.

In fact, Stellar Phoenix Outlook PST Repair can even restore Outlook data that you deleted a long time ago. So, instead of just being a PST error recovery tool, Stellar Phoenix Outlook PST Repair is also a powerful data recovery program.

After letting Stellar Phoenix Outlook PST Repair go to work, open up Outlook and try it out. You’ll have full access to all of your Outlook files and folders, and all of those ScanPST.exe problems will be a thing of the past.

Advantages of Stellar Phoenix Outlook PST Repair Software

Stellar Phoenix Outlook PST Repair comes with many advantages. Here are just a few reasons why it’s such a popular program:

  • Easy-to-use: Don’t worry if you’re not a computer genius. Stellar Phoenix Outlook Repair is incredibly easy to use. Even if you barely know how to send an email over your computer, the program has a straightforward interface that anybody can understand. If you can click the left mouse button, then Stellar Phoenix will be easy to use.
  • Goes to work instantly: It takes only seconds to download and install Stellar Phoenix Outlook PST Repair. Once you’re ready to perform a scan, the program goes to work instantly. It identifies your PST file in an incredibly short amount of time, and before long, you’ll be able to access Outlook once more.
  • Effective: Unlike the infamously useless ScanPST.exe application, Stellar Phoenix Outlook PST Repair actually works like it’s supposed to. It allows users to safely recover all of their most important data. While ScanPST.exe can actually damage your PST file, Stellar Phoenix Outlook PST Repair simply goes to work quickly and effectively.
  • Multiple support packages: Stellar Phoenix Outlook Repair comes with three different pricing plans. One is designed for people who only need to install the program on a single computer. Another is designed for businesses or households that want to install the program on multiple PCs.And with the third option, the technician package, users can install Stellar Phoenix Outlook PST Repair on an unlimited number of computers. One of the biggest advantages of these packages is that you can spread out the cost of the program among multiple users. If several different people at your workplace are having PST error problems, for example, then you can buy a multiple-license package and share the cost.
  • Data recovery: Along with fixing corrupt PST files and removing the size limits from the PST file, Stellar Phoenix Outlook PST Repair can actually recover any Outlook data on your computer. This is useful if you uninstalled Outlook a few months ago but still need to recover that data. In fact, Stellar Phoenix can recover Outlook data even if Outlook is not currently installed on your computer. In that sense, Stellar Phoenix Repair is more than just an Outlook repair program; it’s also a full-service data recovery solution.

Stellar Phoenix PST Repair is superior to ScanPST.exe in every way. But Stellar Phoenix’s most important advantage is that it actually works. If you’re ready to quickly fix your Outlook PST errors, then Stellar Phoenix Outlook PST Repair can help. Download it here today to experience the magic of PST repair for yourself.

Read More
Fix Windows Activation error code 0xC004F078
As you know, Windows 10 has a complicated mechanism for Activation which helps in the verification of a genuine copy of Windows 10. However, there are times when you might encounter some errors during the activation process. One of these errors is the error code 0xc000f074. This kind of error could be due to the Key Management Service or KMS which is unreachable by the client computer or if the key used in the SLSetAuthenticationData function call is incorrect. This kind of error mostly affects surfaces on computers that are upgraded from either Windows 7 or Windows 8.1 to Windows 10. In such cases, you may encounter any of the following error messages:
“Windows is unable to reach your company’s activation service. Please connect to your corporate network. If you are connected and continue to see the error, contact your system administrator. You can also click on the error detail to find the exact error. Error code: 0xC004F074.” “Activating Windows(R), (Key hash)… Error: 0xC004F074 The Software Licensing Service reported that the computer could not be activated. No Key Management Service (KMS) could be contacted. Please see the Application Event Log for additional information.” “Error 0xC004F074, SL_E_AUTHN_MISMATCHED_KEY, The Software Licensing Service reported that the key is mismatched.”
To fix the Windows 10 Activation error 0xC004F078, you have to use the correct key for your type of Windows copy or use Command Prompt to reinstall the key or you could also try running the Activation troubleshooter.

Option 1 – Try running the Windows 10 Activation Troubleshooter

The first thing you can do to resolve the Activation error code 0xc000f074 is to run the Windows 10 Activation Troubleshooter. To do so, follow these steps:
  • Go to Settings and then select Activation.
  • After that, click on the Windows Activation and then troubleshoot. This will help you address most of the commonly found activation issues in Windows devices.
The Windows 10 Activation Troubleshooter will determine if your license key is a valid Windows 10 digital license for an edition that is not currently installed. If it turns out that it’s not, then the troubleshooter will show you how to install the correct edition.

Option 2 – Try to use the correct key for the type of Windows version you have

If the Windows Activation troubleshooter wasn’t able to resolve the error, then you can try using the correct key for your type of Windows version. All you have to do so is check the type of your Windows copy if it’s OEM, retail, or volume. And make sure that you have the correct, valid product key for your operating system.

Option 3 – Try to use Command Prompt to reinstall the key

  • In the Start Search, type “command prompt” and right-click on Command Prompt from the search results, and then select “Run as administrator”.
  • After that, execute this command to uninstall the existing key: vbs /upk
  • Next, you need to install the KMS product key by executing this command: vbs /ipk <The KMS Product Key>
  • Once you’re done, you will see a prompt that’ll tell you whether the operation was either successful or not.
  • To active, the KMS product key online, use this command: vbs /ato
  • Use this command to activate the key using the telephone: exe 4
  • After you’ve activated the KMS product key, restart the Software Protection Service. You can also verify the Activation Status to check if your fix was successful or not.

Option 4 – Contact Microsoft Support for assistance

If you’re at your wits’ end in trying to upgrade your computer, you should consider contacting Microsoft Support for help as they can offer you various options that would make fixing Windows Activation error code 0xc000f074 a lot easier and faster.
Read More
Fix Operating System Loader has no signature
Booting up your Windows 10 computer does not always go smoothly as it is a complex process and you may encounter some issues along the way. There are various files that get loaded and executed while the Windows 10 operating system is loaded. You might encounter a page that displays the following error message:
“Operating System Loader has no signature. Incompatible with SecureBoot. All bootable devices failed Secure Boot verification.”
There are two main causes for this error – it could be that your computer is using a bad unauthentic Boot Image File or the Windows operating system is installed in the BIOS Mode. To fix this error, you can try performing a “cold” boot or reset the BIOS or reset your Windows 10 computer.

Option 1 – Try to perform a Cold Boot

To perform a cold boot, all you have to do is press and hold the power button of your CPU until it goes off. Once it’s off, boot your computer normally and then check if the problem is now fixed.

Option 2 – Try resetting the BIOS

If performing a cold boot did nothing to fix the problem, you can try to reset the BIOS instead.
  • Start your computer and tap the F10 key during the booting process to enter the BIOS. If it does not work, you can try tapping the F1 or F2 key as well as the Del key.
  • Once you’re already in the BIOS, tap the F9 key to get the prompt to RestoreLoad default configuration now for the BIOS.
  • Next, click on Yes and then follow the next on-screen instructions that appear to set the BIOS back to its default settings.
  • Once you’re done restoring the default settings of the BIOS, restart your computer and then check if it now boots properly.

Option 3 – Try to change the Boot Sequence

You could also try to change the Boot Sequence to fix the error. To change the Boot Sequence, follow these steps:
  • Open Windows Settings and then go to Update & Security > Recovery Advanced Startup and then click on Restart Now.
  • Once your computer has restarted, you should see the Advanced Options.
  • Next, select Troubleshoot > Advanced Options. This will offer another set of options and from there, select the UEFI Firmware Settings and it will let your restart your computer.
  • After the restart, it will take you to the Firmware settings and from there, switch to the Boot tab where you’ll see the “Boot Priority” which contains the list of the connected hard drive, CD/DVD, ROM, and USB drive.
  • Use the arrow keys on your keyboard to change the boot sequence.
  • Once you’re done, save and exit.

Option 4 – Reset your computer

  • Tap the Win key or click on the Start button located in the Taskbar.
  • Then click on the Power button at the bottom right portion of the screen.
  • Next, press and hold the Shift key on your keyboard and then click on Restart. This will restart your Pc into the Advanced Startup options.
Note: Once you have access to the Advanced Startup options, you have to go to the setting which allows you to Reset your Windows 10 PC. All you have to do is select Troubleshoot > Reset this PC to reach the following screen
  • Afterward, select either the “Keep my files” option and then proceed to the next on-screen instructions that follow to reset your Windows 10 computer without losing your files.
Read More
How to Disable Restart in Firefox
Mozilla Firefox has introduced a new feature known as Restart with Windows which allows the browser to automatically start when your Windows 10 computer boots. This means that if you leave the Firefox browser opened while shutting down your computer, Firefox will re-open automatically along with the tabs that were opened right before you shut down your computer. Although some users may find this feature convenient, there are others who do not approve at all as it could be a nuisance. So if you’re one of the latter, then read on as this post will show you how you can disable the Restart with Windows feature in the Firefox browser on your Windows 10 computer. Refer to the instructions laid out below to get started.
  • Step 1: Open Mozilla Firefox and if it’s opened already, just open a new tab and then type the following text in the address bar:
about:config
  • Step 2: After typing the text given above, hit Enter and if a prompt with a warning message pops up, simply click on the “I accept the risk!” button to proceed.
  • Step 3: Next, type “Restart” in the search filter which should display the following preference in the window:
“toolkit.winRegisterApplicationRestart”
  • Step 4: After that, check for the preference value and then see if it’s set to true or not. If it is set to true, then it means that the Restart with Windows feature is enabled so obviously, to disable it, you need to set its value to false.
  • Step 5: Now restart your computer without closing Firefox. After restarting your computer, you should no longer see Firefox starting automatically.
The Restart with Windows feature by default is disabled for most users. On the other hand, Mozilla will have this feature enabled as the default configuration in the coming weeks so it’s best that you now know what to do when that time comes since the newer versions of Mozilla Firefox are already being shipped with the Restart with Windows feature. However, if this post did not help you, then you might want to check if the feature has been added to the Startup folder, and from there, you can disable this startup program using the Task Manager > Startup tab.
Read More
Copy and Paste feature is not working
One of the most basic and commonly used features in the Windows operating system is the copy and paste feature that helps users accomplish tasks in a faster and easier way. However, if you notice that it’s not working properly for some reason, then this post might be of help as it will provide you with options you can check out to resolve the problem. You can encounter this kind of problem with the copy and paste feature if some system files are corrupted or if there’s some third-party application or process that interferes with this function. Worry not though for there are some options you can check out to fix this. You can try to restart the rdpclip.exe process or the explorer.exe process. You could also try to reinstall the program where you encountered the issue with the Copy and Paste function. In addition, you could try clearing the clipboard history or run the built-in tools like the DISM tool and SFC scan. You could also troubleshoot the problem in a Clean Boot State or use the Refresh Windows tool. For more information, refer to each one of the options below.

Option 1 – Try to restart the rdpclip.exe and the explorer.exe processes

The first thing you can do to resolve the problem is to restart certain processes namely, the rdpclip.exe process and the explorer.exe process via Task Manager.
  • First, right-click on your Taskbar and select the Task Manager.
  • Next, look for the rdpclip.exe process and right-click on it, and select the End process option.
  • After that, click on the File tab > Run new task and then type “rdpclip.exe” and tap Enter.
  • This should help fix the problem. If not, you could also try to restart the explorer.exe process – just look for the explorer.exe process in the Task Manager and right-click on it, and then select the Restart option.

Option 2 – Try reinstalling the concerned program

If you only experience this issue on a particular program, you might want to uninstall this program and install it back again, and then see if it fixed the problem or not.

Option 3 – Try to clear the clipboard history

You could also try clearing the clipboard history as it has been known to help in fixing this kind of issue. You can clear the clipboard history using the command line.
  • Tap the Win + R keys to launch the Run dialog box and type “cmd” in the field and hit Enter to open Command Prompt.
  • Next, execute this command: echo off | clip
  • After that, check if the Copy and Paste function is now working properly or not.

Option 4 – Try running the DISM tool

You can run the DISM tool as well to help fix the “Tile Database is corrupt” error. Using this built-in tool, you have various options such as the “/ScanHealth”, “/CheckHealth”, and “/RestoreHealth”.
  • Open the Command Prompt with admin privileges.
  • Then type in the following commands and make sure to hit Enter right after you type each one of them:
    • Dism /Online /Cleanup-Image /CheckHealth
    • Dism /Online /Cleanup-Image /ScanHealth
    • DISM.exe /Online /Cleanup-image /Restorehealth
  • Do not close the window if the process takes a while as it will probably take a few minutes to finish.
  • Once it’s done, check if it was able to fix the corrupted Start Menu or not.

Option 5 – Try to run System File Checker or SFC scan

  • Tap Win + R to launch Run.
  • Type in cmd in the field and tap Enter.
  • After opening Command Prompt, type in sfc /scannow and hit Enter.
  • Once done, restart your computer.

Option 6 – Restart your computer in a Clean Boot State

If a third party program like antivirus is the one that’s causing the problem, you can try to put your computer in a Clean Boot State to isolate the issue by following these steps:
  • Log onto your PC as an administrator.
  • Type in msconfig in the Start Search to open the System Configuration utility.
  • From there, go to the General tab and click “Selective startup”.
  • Clear the “Load Startup items” check box and make sure that the “Load System Services” and “Use Original boot configuration” options are checked.
  • Next, click the Services tab and select the “Hide All Microsoft Services” check box.
  • Click Disable all.
  • Click on Apply/OK and restart your PC. (This will put your PC into a Clean Boot State. And configure Windows to use the usual startup, just simply undo the changes.)
  • Now try to connect your device or copy the files to your external device again and check if the problem with the Copy and Paste function is fixed.
Read More
Windows 11 launch date set for October 5th
windows 11 release date
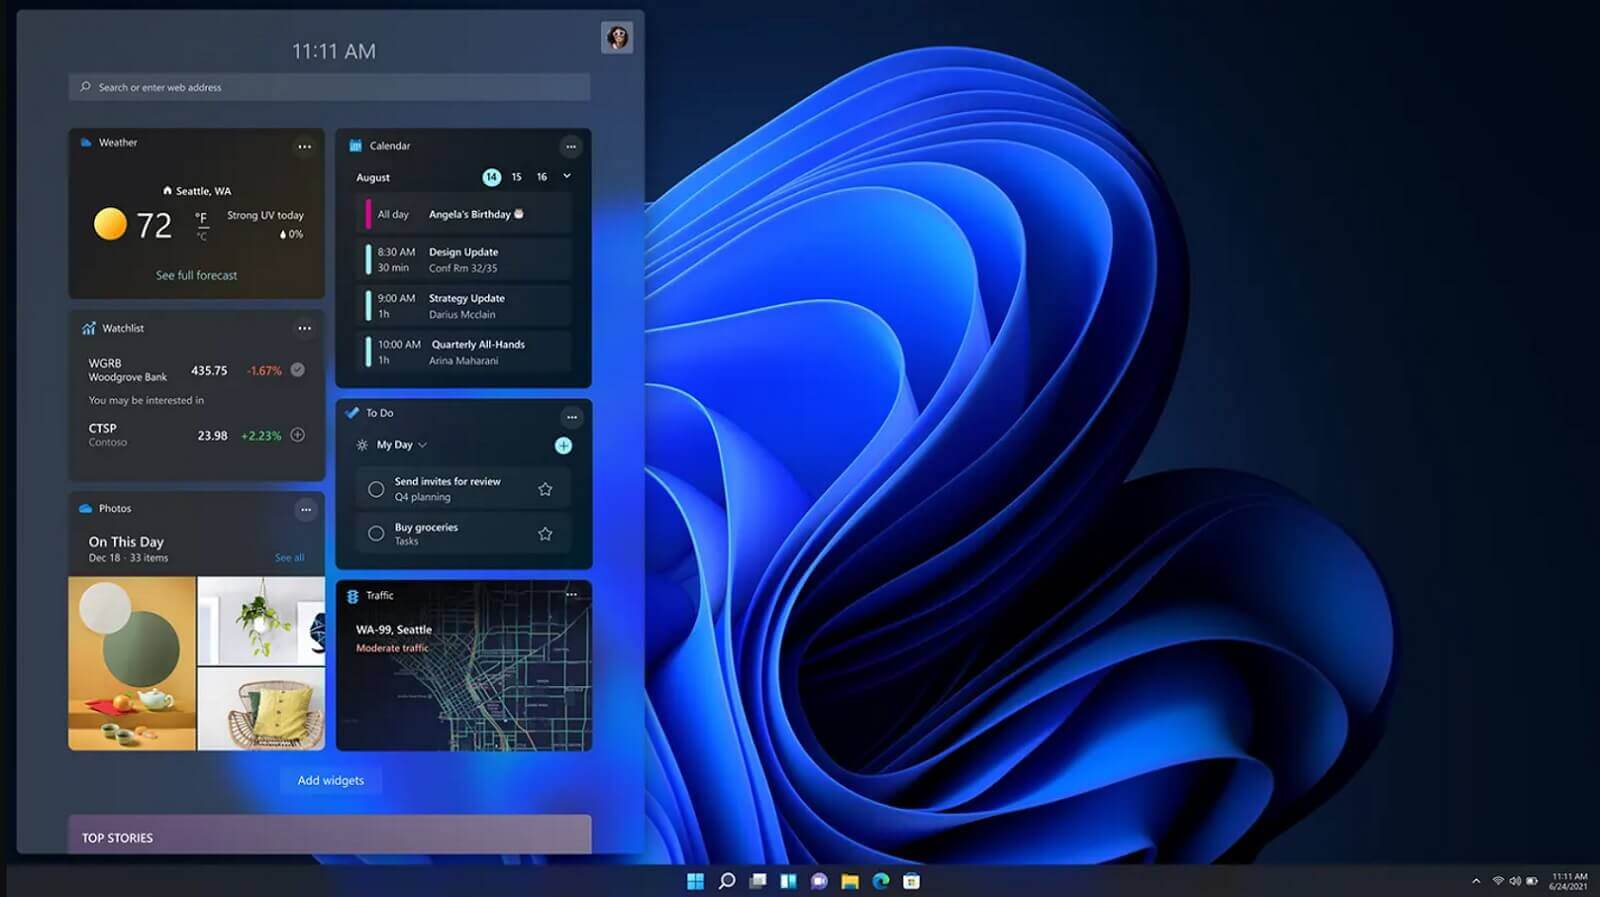
It is officially confirmed, Windows 11 release date is October 5th. Windows 11 will be released as a free upgrade to all registered Windows 10 users that have supported hardware for it. The rest of the users will be able to install it via ISO file as a clean installation if their computer supports Windows 10 hardware requirements. The official price for the license for Windows 11 has not yet been set but I assume after release it will be set. Priority for W11 will have users who are upgrading from W10 as stated by Microsoft. Also, it was officially confirmed that Android apps will not be running natively in this first release of Windows 11, that feature will come in a future update, official statement below:
"We look forward to continuing our journey to bring Android apps to Windows 11 and the Microsoft Store through our collaboration with Amazon and Intel; this will start with a preview for Windows Insiders over the coming months,"
The rest of the features will be all included inside Windows 11 on launch.
Read More
How to always run the app in admin mode in W11
Each time you open an application inside your Windows 11 operating system, it is opened with standard privileges. Now, please note that your account privileges and application privileges are two different things, you might be the administrator of the system but when you open the app, it still opens with standard privilege. admin privileges
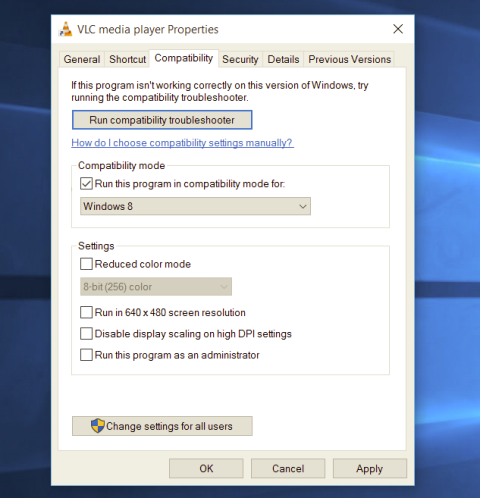
Most of the time running applications with typical settings is fine but from time to time we might have some applications that will require running with administrator privilege in order to work properly. In this case, it is very easy to do it, you just right-click and choose run as administrator. Although a very easy solution, it can be quite annoying if running the app is on a daily basis or even more times per day. If this is the case then right-clicking and choosing to run as administrator can be a daunting task, sometimes you can even forget to run it like this in heat of work and some unforeseen consequences might occur. Luckily there is an easy hack so you can open the chosen application each time as an administrator with a simple double click each time.

Setting application to run as administrator always

  1. Locate application executable file
  2. Right-click on in and choose properties
  3. Click on the Compatibility tab
  4. Check the box next to Run this Program as an Administrator
  5. Click on Apply
  6. Click on OK
From now on each time you open an application normally with a double click, it will be opened as administrator privileges.
Read More
1 2 3 162
Logo
Copyright © 2022, ErrorTools. All Rights Reserved
Trademarks: Microsoft Windows logos are registered trademarks of Microsoft. Disclaimer: ErrorTools.com is not affiliated with Microsoft, nor claim direct affiliation.
The information on this page is provided for information purposes only.
DMCA.com Protection Status