A Quick Guide to Fixing Error C00D1199

Guide to Correcting Error C00D1199

What is Error C00D1199?

This is a typical Windows Media Player error code. Developed by Microsoft, Window Media Player is a media player and media library application that is used for playing audios and videos on the computer.

Error C00D1199 appears when Windows Media Player is unable to play the file requested by you. The error code is displayed in the following format:

C00D1199: Cannot play the file

Solution

Restoro box imageError Causes

You might encounter an error C00D1199 message on your PC for one of the following reasons:

  • The file type you requested is not supported by the Windows Media Player
  • The file type was not compressed by using a codec that is not supported by the Player
  • Your sound card or controller is not configured properly or outdated
  • Registry corruption

The good news is that error C00D1199 is not fatal. But if this error code is generated due to registry problems, then it can lead to serious issues.

Therefore it is advisable to fix it immediately.

Further Information and Manual Repair

Here are some of the best and easy do-it-yourself methods to resolve the error C00D1199 right away.

Method 1 - Ensure File Type is Supported by Windows Media Player.

If it is supported then make sure the codec used to compress the file is installed on your system.

There are hundreds of audio and video Codecs in use today but the most popular Codecs used on Windows Media Player are Windows Media Audio, Windows Media Video, and MP3.

If these Codecs are not installed on your PC, then it is advisable to download them from the web. But make sure you download these codecs from a reliable and a trusted website.

Method 2 - Check Sound Card Settings

Another method to resolve error C00D1199 is to check Sound card settings. Make sure it is configured properly. Improper configuration can also trigger the error.

Nonetheless, if it is configured the right way but the error still persists then it is advisable to change update the driver. To do this, go to the Device Manager. Here use the Driver update wizard to make updates.

Method 3 - Check the Windows Registry

The registry is an important part of the PC. It stores all the activities performed on the PC and all files including both junk and important files.

If unnecessary files like junk files, cookies, and bad registry entries are not removed frequently from the registry, it can corrupt and damage it and generate error codes like C00D1199.

To clean the registry and resolve the error it is advisable to download Restoro. This is a user-friendly PC Fixer embedded with a registry cleaner. The registry cleaner wipes away all the clutter from the registry and cleans it instantly. It also repairs the damaged files and restores the registry.

Click here to download Restoro and resolve error C00D1199 on your PC.

If you like to learn and find out more about various Windows errors, and how to repair them go to our vast archive or use search to find articles that will explain and help you in solving your issue.
However, if you prefer to do things fast and with automatization then we are proposing to use an automated solution for your issues. The application that we are recommending is Advanced System Repair Pro
Advanced System Repair utilizes multiple tools all in one to give you a quick, simple, reliable, and very thorough diagnosis of your PC. It brings you all the tools you need in one program to clean, fix, protect, optimize and boost your PC!
1-Click Maintenance
All the tools to make it simple and easy! It's like having a professional technician at the click of a mouse.

Junk Cleaner
Keeping your computer free from unnecessary clutter also helps make your computer last longer. Like any other machine, if you keep it clean and take care of it, it will serve you better for longer!

Optimize background apps
Optimize applications background activity with the built-in Application Optimizer feature.

Disk Defrag
With a simple 1-click, Advanced System Repair speeds up your PC by assembling fragmented files on your machine and organizing them more efficiently.

Malware Removal
Finds and removes all types of harmful malware including trojans, worms, bots, adware, spyware, PUPs, and more!

Privacy Cleaner
The all-in-one privacy suite to Clean Your Tracks & Protect Your Privacy! Make your computer safe, secure, and more efficient!

System Tweak/Optimizer
ASR will analyze your complete system and settings to adjust your PC to function at its maximum performance.

Registry Cleaner
Over time, as you install and uninstall applications, the registry can become cluttered with old entries and broken settings which can result in program crashes, and annoying messages and slow the computer down.
Visit our Advanced System Repair Pro Download page to inform yourself about all the benefits of this software and get a free trial copy of it.
advanced system repair pro

Advanced System Repair Pro

One-click automated PC repair solution
ASR logo
With Advanced System Repair Pro you can easily
Replace damaged files
Restore performance
Free disk space
Remove Malware
Protects WEB browser
Remove Viruses
Stop PC freezing
DOWNLOAD
Privacy Policy | Terms of Use | Uinstall
Advanced System Repair Pro is compatible with all versions of Microsoft Windows including Windows 11

Share this article:

You might also like

An Easy Guide to Resolve Xpcom.dll Error

How to Fix Xpcom.dll Error

Xpcom.dll Error Code - What is it?

To understand the Xpcom.dll error better, first, you need to know what Xpcom.dll file is. Xpcom.dll is basically a typical DLL (Dynamic Link Library) file. It is associated with Firefox developed by Mozilla Foundation for the Windows Operating System. DLL file contains small programs similar to exe (executable) files. Just like any other DLL file, Xpcom.dll helps loads and run programs smoothly. Xpcom.dll functions as a shared file that can be used to run multiple programs on your PC. Xpcom.dll error code occurs when Windows cannot properly load the xpcom.dll file. The error may pop up on the screen in any one of the following formats:
  • "Xpcom.dll not found."
  • "The file xpcom.dll is missing."
  • "Cannot register xpcom.dll."
  • "Cannot find C:\Windows\System32\xpcom.dll."
  • "This application failed to start because xpcom.dll was not found. Re-installing the application may fix this problem."
  • "Xpcom.dll Access Violation."
  • "Cannot start Firefox. A required component is missing: xpcom.dll. Please install Firefox again."
The xpcom.dll error can occur during program installation or while rebooting your PC or when shutting it down.[/section]

Solution

Restoro box imageError Causes

It is difficult to narrow down a single cause of this error code simply because the Xpcom.dll error code may be triggered due to several reasons. Some of the common causes include:
  • Invalid or corrupt xpcom.dll registry entry
  • Viral infection
  • Outdated PC drivers
  • Another program overwrote the required version of xpcom.dll
  • Xpcom.dll file is accidentally deleted or uninstalled
  • Mozilla Foundation hardware failure

Further Information and Manual Repair

Here are the best, quick and easy DIY methods to resolve Xpcom.dll error code on your system within minutes:

Method 1: Update Window Drivers

To resolve the xpcom.dll error on your system, try updating Window drivers. To do this simply use the driver update wizard from within Device Manager. The driver update wizard walks you through the entire drive update process, making it easy and hassle-free for you to update drivers.

Method 2: Download and Install Xpcom.dll File

Since DLL are shared files and used to run and load multiple programs, it is possible that you might have accidentally removed this file while uninstalling a program on your system. This is the reason why the Xpcom.dll file goes missing. To retrieve the Xpcom.dll file simply go to the recycle bin. Reinstall the deleted program. However, if it still doesn’t resolve the error, then it is advisable to download and install the Xpcom.dll file from a trusted DLL file website over the internet.

Method 3: Scan for Viruses and Repair the Registry

If the error code occurs due to malware infection or is related to registry issues, then simply download Restoro. This is a user-friendly and multi-functional PC Fixer deployed with 6 scanners including a powerful antivirus and a registry cleaner. It is compatible with all Windows versions. Simply run it to remove all types of viruses infecting your system and clean/repair the registry. Click here to download Restoro and resolve the Xpcom.dll error on your PC.
Read More
Fix update error 0x8024ce0e in Windows 10
The Windows update error 0x8024ce0e can happen as a result of improper installation, a virus, or due to file corruption. Follow this guide to easily fix errors and continue with your work.
  1. Restart Windows

    As awkward as it seems this method actually works most of the time. Click on the start button and restart your system.
  2. Check hard disk space

    Of course, when installing updates there should be enough disk space for updates to be downloaded and installed. Check your disk space to see if there is sufficient available space.
  3. Disconnect external components

    External components can interfere sometimes with the update process, disconnect external hard drives, USB, and other devices, leaving only the keyboard, mouse, and core ones.
  4. Check devices in the device manager

    Open device manager and visually check to see if there is a device with a yellow exclamation sign next to it. If there is such a device, right-click on it and choose update driver.
Read More
Fix blank or empty dialog boxes with no text
The dialog boxes that you see on your Windows computer exist to send you a message or to notify you. However, you can also encounter issues with them. Recently, some users reported that they’re getting empty or blank dialog boxes. It’s definitely hard to choose between Yes or No or to click OK when you don’t know the context of the dialog box. If the same thing happened to you, worry not for there are some possible solutions that can help you fix the problem. This kind of problem usually happens when there are some issues with the graphics driver or when there is some corrupted software. Whichever the case is, here are some fixes you can check out to fix the empty or blank dialog boxes on your Windows 10 computer.

Option 1 – Run the System File Checker

System File Checker or SFC is a built-in command utility that helps in restoring corrupted files as well as missing files. It replaces bad and corrupted system files with good system files that might be the cause why you’re getting the errors 0x8024a11a and 0x8024a112. To run the SFC command, follow the steps given below.
  • Type “cmd” in the Start search and then right-click on the appropriate search result.
  • Next, select “Run as administrator” to open Command Prompt with admin privileges.
  • After opening Command Prompt, type in sfc /scannow
The command will start a system scan which will take a few whiles before it finishes. Once it’s done, you could get the following results:
  1. Windows Resource Protection did not find any integrity violations.
  2. Windows Resource Protection found corrupt files and successfully repaired them.
  3. Windows Resource Protection found corrupt files but was unable to fix some of them.
 Now restart your computer and see if the problem is fixed or not.

Option 2 – Try to update or rollback the Graphics driver

You can try to update your Graphics card driver using the Device Manager in your computer to resolve the blank dialog boxes problem or you can also go directly to the website of your graphics card manufacturers like NVIDIA, Intel, or AMD and go to the section called Drivers then check if there’s a new available update – if there is, download and install it. To update your Graphics driver via Device Manager, refer to these steps:
  • First, boot your computer into Safe Mode.
  • After that, tap the Win + R keys to launch Run.
  • Type in devmgmt.msc into the box and tap Enter or click OK to open the Device Manager.
  • After that, a list of device drivers will be displayed. From there, look for the Display Adapters and click on them.
  • After that, right-click on each entry under the Display Adapters and select the “Uninstall Device” option from the menu.
  • Now restart your computer.
  • After restarting your computer, go to the Settings app and Check for Updates in the Windows Update section.
Note: If updating the Graphics driver didn’t fix the problem, you can also try to roll back to its previous version and see if that helps.

Option 3 – Run the DISM tool

The next thing you can do is run the DISM tool. This tool is known to repair potentially corrupted files in your system as having them could also system issues like the blank dialog boxes. To repair these corrupted system files, you can run the DISM commands:
  • Tap the Win + X keys and click on the “Command Prompt (Admin)” option.
  • After that, input each one of the commands listed below sequentially to execute them:
    • Dism /Online /Cleanup-Image /CheckHealth
    • Dism /Online /Cleanup-Image /ScanHealth
    • Dism /Online /Cleanup-Image /RestoreHealth
  • Once you’ve executed the commands given above, restart your computer and check if the problem is now fixed.

Option 4 – Try to repair or reinstall the software

If the issue with the empty dialog boxes only occurs in a specific program, you can either try to repair the program or reinstall it. You can find the Repair option in the Add/Remove program section when you select the concerned program. If repairing the program didn’t work, you might have to uninstall it and then reinstall it.

Option 5 – Try troubleshooting the problem in a Clean Boot State

You might also want to troubleshoot the problem in a Clean Boot State. Doing so will help you isolate the problem. Refer to the steps below to do so:
  • Log onto your PC as an administrator.
  • Type in MSConfig in the Start Search to open the System Configuration utility.
  • From there, go to the General tab and click “Selective startup”.
  • Clear the “Load Startup items” check box and make sure that the “Load System Services” and “Use Original boot configuration” options are checked.
  • Next, click the Services tab and select the “Hide All Microsoft Services” check box.
  • Click Disable all.
  • Click on Apply/OK and restart your PC. (This will put your PC into a Clean Boot State. And configure Windows to use the usual startup, just simply undo the changes.)
Read More
Fix Can’t initialize disk in Windows 10
If you have recently installed a new internal or external hard drive or SSD and you’ve noticed that its status on the left side of the Disk Management tool states “Unknown Not Initialized”, this indicates that Windows can’t initialize the disk and that you won’t be able to use this new SSD or hard drive. You can encounter this kind of issue randomly and not just with a new hard drive or SSD but also with existing drives. There are times when you won’t be able to find your drive or partition in the File Explorer. In such a case, you have to check the Disk Management if your drive or partition is there physically. You also have to check if you can see it as Not Initialized. If it is, then this means that the disk or partition does not have a valid signature that is if it’s not registered with the system properly. Note that a disk is registered when you format it at least once so if the disk was available before, then it could be somehow corrupted. To resolve the problem, you can try to initialize the disk manually or bring it online and add a drive letter. You can also try checking the Device Manager for issues or check the cable physically.

Option 1 – Try to manually initialize the disk

Since initializing the disk is the most common way to resolve the “Unknown Not Initialized” error, this is what you have to try first.
  • To initialize the disk manually, you have to open the Disk Management from the WinX menu by tapping Win + X keys and selecting Disk Management.
  • From there, you can find the non-initialized disk. Right-click on it and select the “Initialize Disk” option.
  • Next, select the partition style. It is recommended that you use the MBR option instead of the GPT or GUID Partition Table.
  • Now click the OK button. Your hard drive or SSD should now initialize without any problem.

Option 2 – Set the disk Online and add the Drive letter

  • If the disk appears to be offline under Disk Management, right-click on it and select the Online option.
  • On the other hand, if the disk is already set Online but does not have a drive letter, right-click on it and select the Change drive letter and path option.
  • Select a letter that is not allocated yet.
  • Once you’re done, you have the option to format the disk in either NTFS or FAT32 but if you are using a 64-bit computer, make sure that you opt for NTFS.

Option 3 – Try to check any issues in the Device Manager

It is also possible that the hard drive is not working properly due to some driver issues. Thus, it’s better if you check the Device Manager and see if that drive is listed with a yellow exclamation mark next to it. And if that’s the case, you have to right-click on that drive and select the Uninstall drive option. After that, click on Action and then run the Scan for hardware changes. It should fix the problem.

Option 4 – Try to physically check the cable

You might also want to check the physical status of the wires and see if they are connected properly or not. Specifically, you have to check two cables, such as:
  • The first one is the power cable that’s connected to your SMPS.
  • Next is the one that’s connected to your motherboard.
If any of the two cables are not working or missing, then it’s no wonder why your drive has an “Unknown Not Initialized” status. Thus, you need to have them replaced to fix the problem.
Read More
An Easy Guide to Fixing Error Code 800b0100

An easy guide to Fixing Error Code 800b0100

Error Code 800b0100 - What is it?

800b0100 is a typical Windows Update error. This error message occurs when you try to install the latest updates from Microsoft Updates and Windows Updates. The error message is displayed in the following format:
“Code 800B0100 Windows Update encountered an unknown error.”

Solution

Restoro box imageError Causes

Error code 800b0100 may pop up on your computer screen due to different reasons. However, some of the common causes include:
  • The file needed by Windows Update is corrupt or missing
  • Security software conflict such as Firewall
  • Incorrect Registry keys
  • Windows security .dll files are registered incorrectly

Further Information and Manual Repair

To resolve error code 800b0100 on your system, you don’t have to hire a professional. This error is quite easy to repair and requires no technical expertise. In other words, you don’t need to be a computer programmer or technically sound to repair this issue. Here are some of the easy and effective DIY methods that you can try to resolve error code 800b0100 on your system:

Method 1

Download System Update Readiness Tool from Microsoft’s website on your PC. This tool can help you fix this problem that might prevent Windows Updates from installing. Typically it will take 15 minutes or less to scan your entire PC.  The System Update Readiness Tool will scan your computer for inconsistencies that may cause errors to occur.

Method 2

Disable Security Software on your PC for example if you use Windows Vista then you will have Firewall already built in. Disable it to resolve error 800b0100. To do this, simply go to the start menu and open the control panel and then select security. Now locate the option Windows Firewall and upon finding, simply choose the option Turn Windows Firewall on or off. Select off (not recommended) option, then click Apply and OK to reset and confirm changes. After that, go back to the Windows Update screen and then click the try again button. The download and installation would start. After the installation is complete, restart your PC to activate changes. Once the updates are successfully installed, not re-enable the Firewall, to ensure your PC is not exposed to potential security threats or viruses.

Method 3

Remove Invalid Keys from the Registry by downloading Restoro. This is a PC Fixer deployed with a registry cleaner. It scans your entire PC and removes all the obsolete and unnecessary files like cookies, bad and invalid registry keys. It cleans and repairs the registry in a few clicks. Click here to download Restoro.
Read More
Moving mouse pointer via the keypad in W11
windows 11 mouse pointer
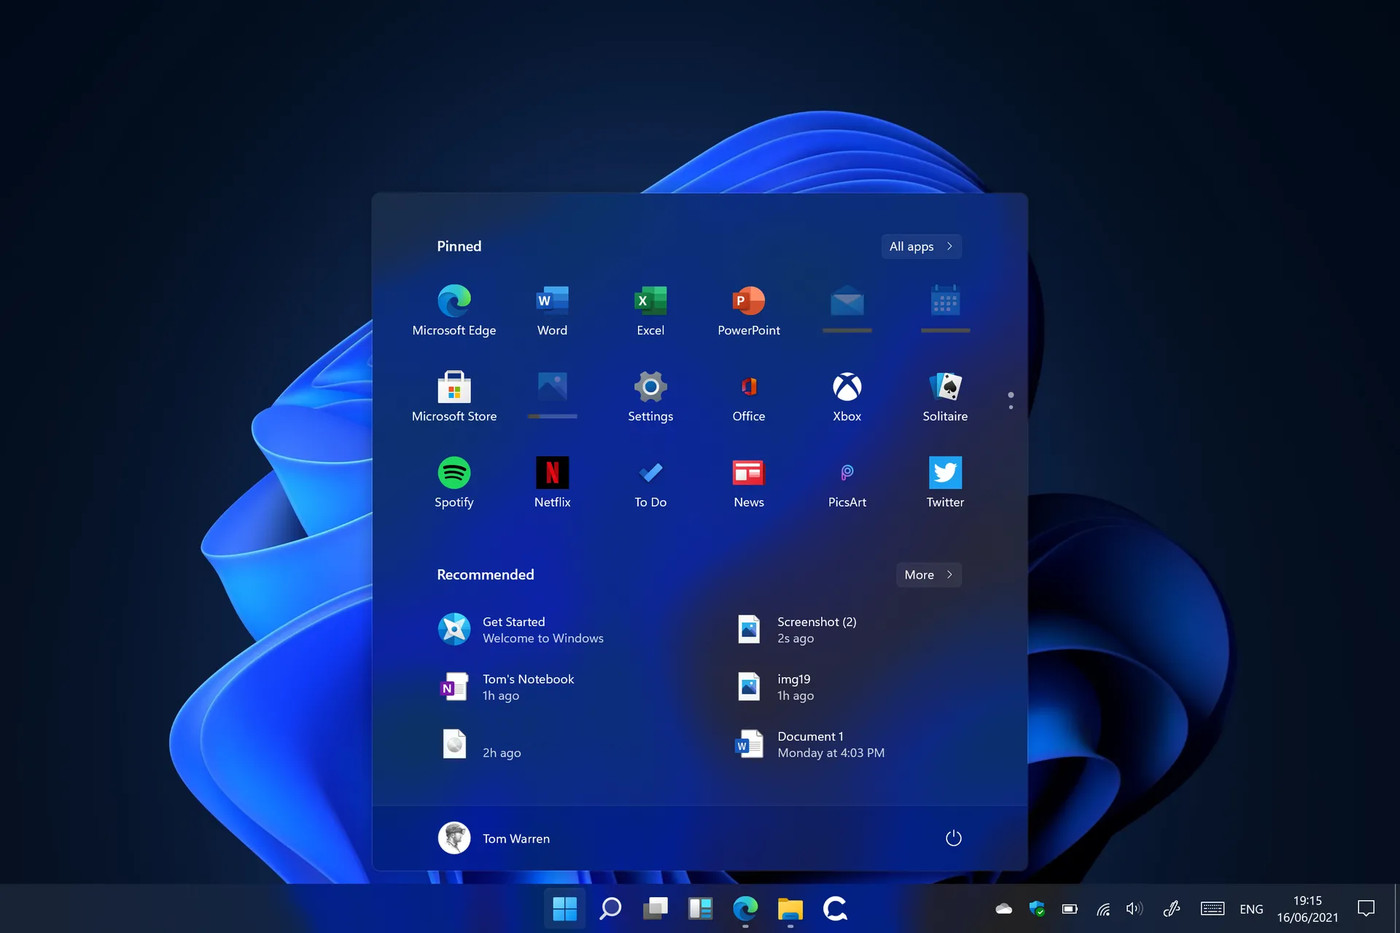
In Windows 11 if you do not own a mouse or it has suddenly malfunctioned you can still move your arrow on-screen using the numeric pad. In this guide, we will guide you on how to turn this option ON, follow this easy guide step by step.
  1. Press ⊞ WINDOWS + I to open Windows settings
  2. Click on Accessibility on left
  3. Scroll down to reach the interaction section on the right and click on Mouse
  4. Click on Switch beside Mouse keys under accessibility options
  5. Set your preferences
  6. Close settings
Settings will be as always automatically applied.
Read More
Fix Windows Update Error Code 0x80246017
Updating your Windows 10 computer isn’t always as easy as it should be since there are times when you might encounter some errors along the way. One of these errors is the error code 0x80246017 that comes with the error message “WU_E_DM_UNAUTHORIZED_LOCAL_USER”. According to Microsoft, the cause of this particular Windows Update error is that “The download failed because the local user was denied authorization to download the content”. So if you got this error when you tried updating your computer, read on as this post will provide you some suggestions on how you can fix it. Before you troubleshoot the problem using the options given below, make sure that you are logged in as administrator. If you are already logged in as an administrator, follow each one of the options carefully.

Option 1 – Try to check the status of some Windows Update Services

  • Tap the Win + R keys to open the Run dialog box.
  • Next, type “services.msc” in the field and hit Enter or click OK to open Services.
  • From the list of Services, look for the following services and make sure that their Startup type is as follows:
    • Windows Update – Manual (Triggered)
    • Background Intelligent Transfer Service – Manual
  • After that, check if the Service status of the listed services above is set to Running. If they’re not, click on the Start button to start these services and then check if you can now enable the Windows Update service or not.

Option 2 – Try to grant Full Control of the System Volume Information directory

  • First, tap the Win + X key combination and then select Command Prompt (Admin) from the given menu.
  • After opening Command Prompt with admin privileges, type the following command and tap Enter to execute it:
c md.exe /c takeown /f "C:System Volume Information*" /R /D Y && icacls "C:System Volume Information*" /grant:R SYSTEM:F /T /C /L
  • Once the command is executed, it will run a batch of tasks and will show each one of their statuses on the command line window and once they’re done, exit Command Prompt.
  • Now restart your computer and see if it fixed the problem or not.

Option 3 – Try to disable your antivirus program or Firewall

Disabling the antivirus program or Firewall or any other security software installed in your computer is always a good idea you can try when the Windows Update process does not go smoothly. So before you try updating your computer again, make sure to disable the antivirus or security program and once the Windows Update is done, don’t forget to enable the antivirus program back again.

Option 4 – Try running the DISM tool

You can try running the Deployment Imaging and Servicing Management or DISM tool to fix the Windows Update error. Using this built-in tool, you have various options such as the “/ScanHealth”, “/CheckHealth”, and “/RestoreHealth”.
  • Open the Command Prompt with admin privileges.
  • Then type in the following commands and make sure to hit Enter right after you type each one of them:
    • Dism /Online /Cleanup-Image /CheckHealth
    • Dism /Online /Cleanup-Image /ScanHealth
    • exe /Online /Cleanup-image /Restorehealth
  • After that, wait until the process is finished and do not close the window as the process will probably take a couple of minutes.
  • Once it’s done, restart your computer.

Option 5– Run the Windows Update Troubleshooter

If the DISM tool didn’t work in fixing the error, you could also try running the Windows Update Troubleshooter as it could also help in fixing any issues related to Windows Update including the Windows Update error code 0x80246017. To run it, go to Settings and then select Troubleshoot from the options. From there, click on Windows Update and then click the “Run the troubleshooter” button. After that, follow the next on-screen instructions and you should be good to go.

Option 6 – Run Microsoft’s online troubleshooter

Running Microsoft’s online troubleshooter might also help you fix the Windows Update error code 0x80246017. This online troubleshooter is known to help in fixing Windows Update errors, it scans your computer for issues that might be causing the problem and then fixes them automatically.
Read More
Intel i9 Alder Lake better than AMD Ryzen 9
Alder Lake
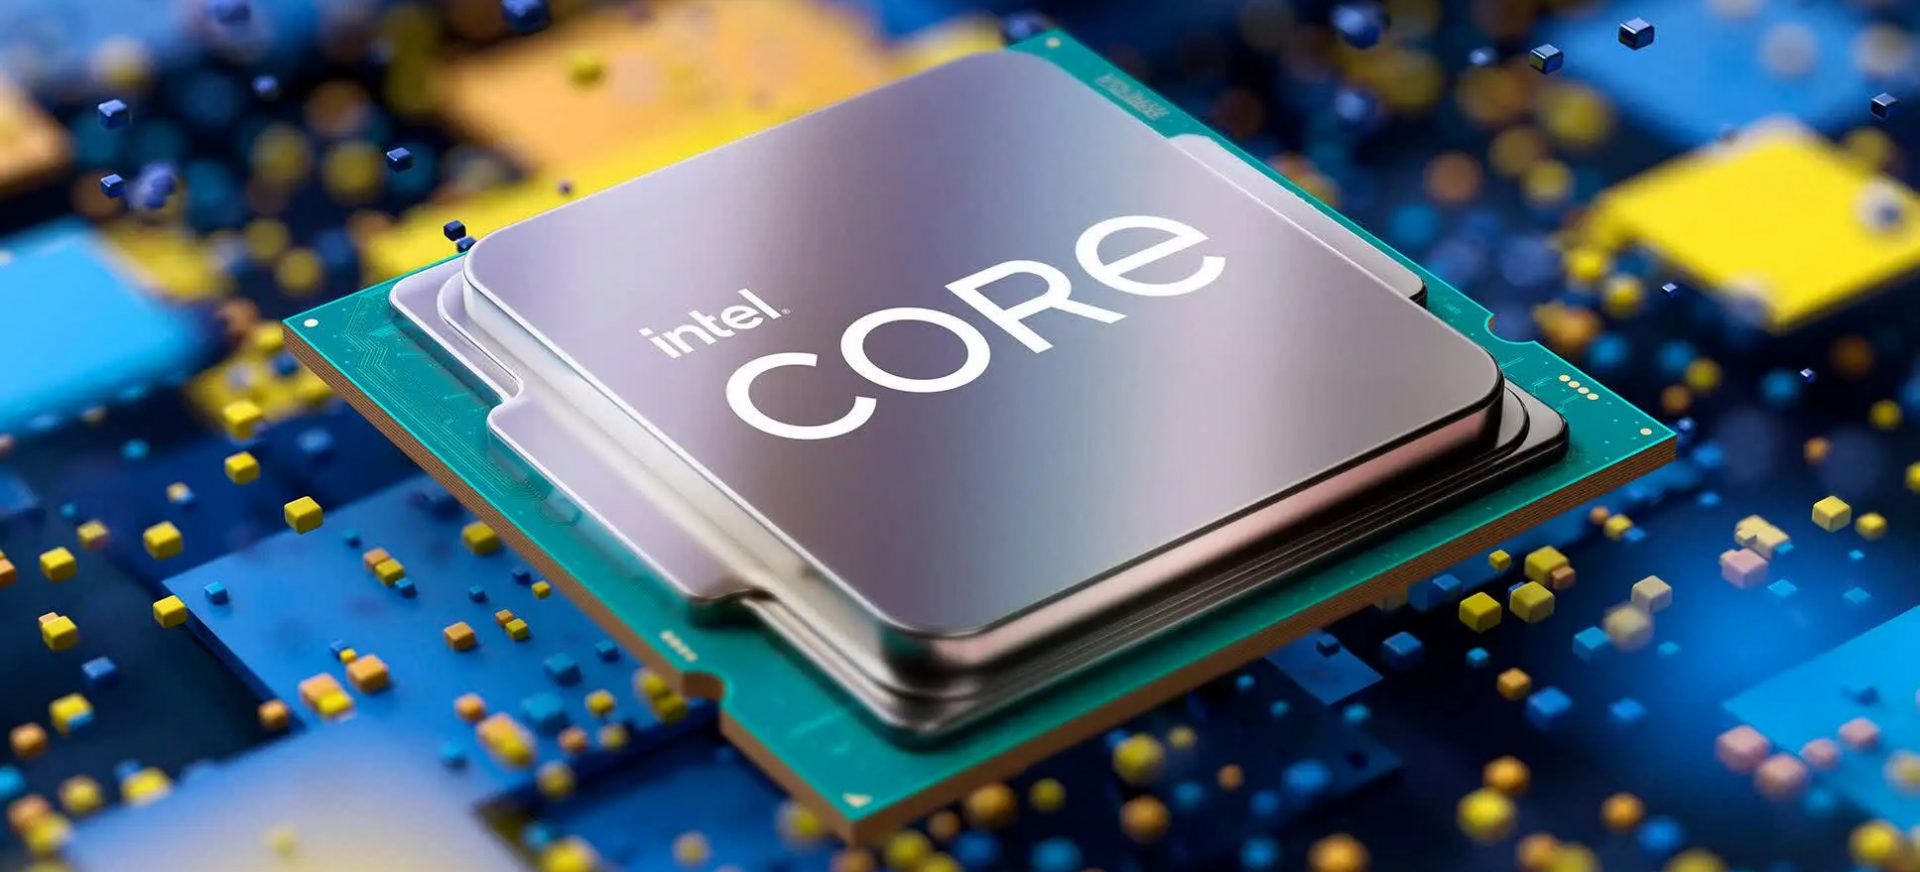
If we are to believe news from Intel, new series of processors based on Alder Lake architecture are about to be released somewhere in October. Alder Lake is the 12th Generation Core of Intel processors and it is meant to have all advantages of the current CPU structure. I9 is aimed to pack a punch against its competitors with technology including eight high-performance Golden Cove cores (P-cores) with Hyper-Threading and eight energy-efficient Goldmont (E-cores) equipped with a 30MB L3 cache and operating at high clock speeds. During the benchmark test, the new CPU outperformed all of Intel’s previous Rocket Lake structure processors which is logically expected but the big surprise came from results that indicate better performance than Apple’s new M1 processor even in single-threaded performance which is supposed to be best in that field. Another surprise was really beating AMD Ryzen 9 in each field. If we take into account that i9 has 16 cores in total and can process 24 threads against Ryzen 9 with 16 Cores and 32 threads this is an impressive feature. Now truth to be told Alder lake has massive L3 cache and microarchitectural advantages and consumes much more power but the results of performance are high. Also, note that this early CPU is not really a mass production one and maybe some things will still change but early results are very satisfactory. We will see what will price tag be since in this age of shortage and competition that will also play a big role in its overall success. Speaking of competition I eagerly await AMD’s response to this, in any way it seems that the CPU market is for some turbulence which is always a good thing for the final customer and I welcome it.
Read More
Some update files aren’t signed, 0x800b0109
Windows Updates are checked for their validity every time they are downloaded from Microsoft servers just like how browsers check websites for a valid certificate. And so if you got an error message saying, “ Some update files aren’t signed correctly, error code 0x800b0109 ” while trying to update your computer, it indicates that the Windows service was unable to verify the validity of the Windows Update. To fix this error, you can try out the options prepared in this post.

Option 1 – Reboot your computer and try again

Save your work and reboot your computer and then try checking for updates again. In some cases, all you need is a restart to fix errors like error code 0x800b0109.

Option 2 – Try to update Windows after an hour or so

There are times when the issue is from Microsoft’s end. It could be that there’s some issue with Microsoft’s server so it would be better if you give it an hour or so before trying to run Windows Update again.

Option 3 – Try running the Windows Update Troubleshooter

Running the built-in Windows Update troubleshooter is one of the things you can first check out as it is known to automatically resolve any Windows Update errors like Error 0x8007001E. To run it, go to Settings and then select Troubleshoot from the options. From there, click on Windows Update and then click the “Run the troubleshooter” button. After that, follow the next on-screen instructions and you should be good to go.

Option 4 – Delete the contents in the Temporary folder

You can also try deleting the contents in the Temporary folder – all the downloaded, pending, or failed Windows 10 updates. You can do that using the simple and easy steps below.
  • Tap the Win + R keys to open the Run dialog box.
  • Then type “%temp%” in the field and press Enter to open the Temporary folder.
  • After that, select all the folders and files within the Temp folder and delete all of them.

Option 5 – Clear the contents in the Software distribution and Catroot2 folders

  • Open the WinX Menu.
  • From there, open Command Prompt as admin.
  • Then type in the following command – don’t forget to hit Enter right after typing each one of them.
net stop wuauserv net start cryptSvc net start bits net start msiserver
  • After entering these commands, it will stop the Windows Update Service, Background Intelligent Transfer Service (BITS), Cryptographic, and the MSI Installer
  • Next, go to the C:/Windows/SoftwareDistribution folder and get rid of all the folders and files thereby tapping the Ctrl + A keys to select them all and then click on Delete. Note that if the files are in use, you won’t be able to delete them.
After resetting the SoftwareDistribution folder, you need to reset the Catroot2 folder to restart the services you just stopped. To do that, follow these steps:
  • Type each one of the following commands.
net start wuauserv net start cryptSvc net start bits net start msiserver
  • After that, exit Command Prompt and restart your computer, and then try to run Windows Update once more.

Option 6 – Install the updates in a Clean Boot State

You might want to try putting your computer in a Clean Boot state and then install Windows Updates again without any trouble. During this state, you can start the system with a minimum number of drivers and startup programs that will surely help you in isolating the root cause of the issue.
  • Log onto your PC as an administrator.
  • Type in MSConfig in the Start Search to open the System Configuration utility.
  • From there, go to the General tab and click “Selective startup”.
  • Clear the “Load Startup items” check box and make sure that the “Load System Services” and “Use Original boot configuration” options are checked.
  • Next, click the Services tab and select the “Hide All Microsoft Services” check box.
  • Click Disable all.
  • Click on Apply/OK and restart your PC. (This will put your PC into a Clean Boot State. And configure Windows to use the usual startup, just simply undo the changes.)
  • After that, try to install the Windows Updates or upgrade again.
Read More
Delete last 15 min of browsing history on phone
google browsing 15min history delete
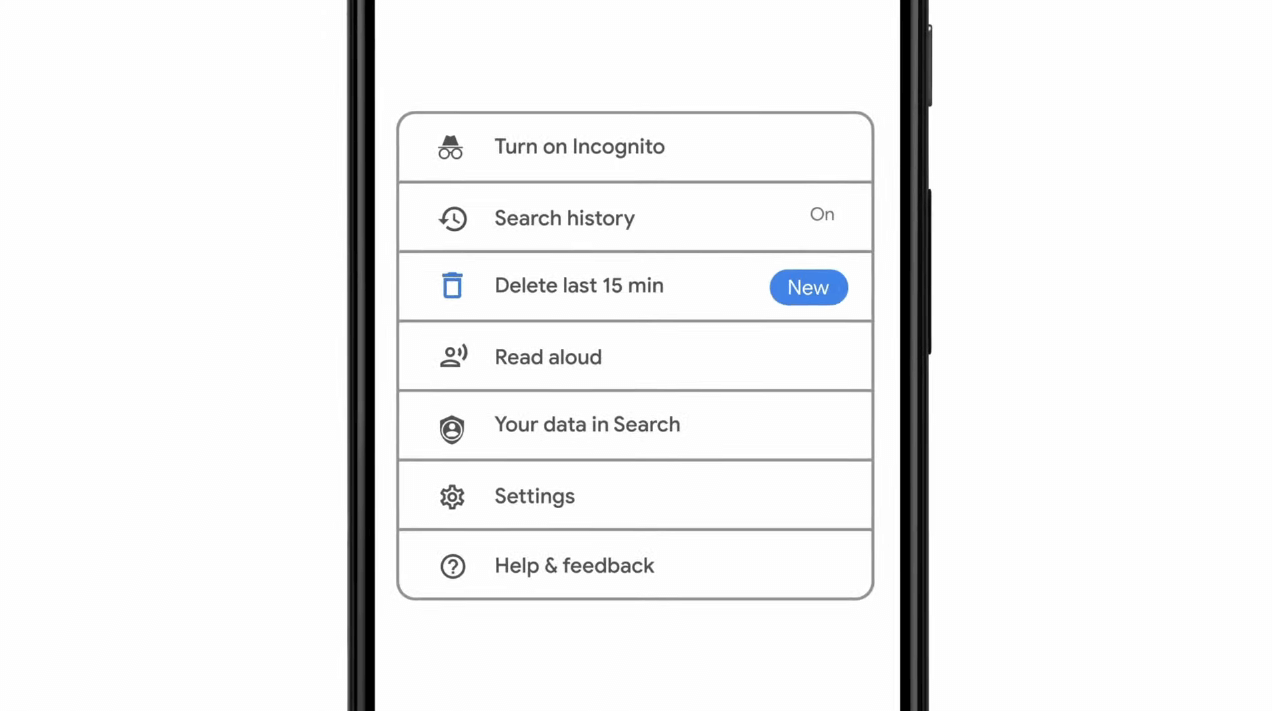
As previously announced by Google feature to quickly delete the last 15min of browsing history via one button is rolling out now. For now, only Apple users will be available to use this feature but the Android update is scheduled for later this year, a strange move by Google but it is what it is. For anyone who is unfamiliar with this feature, basically, Google wants a quick way to remove the last 15min of browsing history as a supposedly stated request to make deleting browsing history much easier. Google came up with this idea so you can keep the previous history intact but remove just 15min time frame, no additional explanation was given on why 15 but I presume it is some round number that came up as the middle one with research, read telemetry info. Using quick delete requires being signed into Search with a Google account. Users can access the option by simply tapping on the avatar icon to access the settings then choosing "Delete last 15 minutes."
Read More
1 2 3 162
Logo
Copyright © 2022, ErrorTools. All Rights Reserved
Trademarks: Microsoft Windows logos are registered trademarks of Microsoft. Disclaimer: ErrorTools.com is not affiliated with Microsoft, nor claim direct affiliation.
The information on this page is provided for information purposes only.
DMCA.com Protection Status