Fixing error 0xc000000e in Windows 10

If you encounter a Recovery Error code 0xc000000e, “Your PC needs to be repaired” error on your Windows 10 computer, then it means that there is some hardware failure or an incorrect drive configuration. Apart from the error, it may be accompanied by different error message such as:

  • A required device is inaccessible
  • The selected entry could not be loaded
  • A required device isn’t connected or cannot be accessed
  • The selected entry could not be loaded because the application is missing or corrupt
  • The boot selection failed because a required device is inaccessible.

As mentioned, the error code 0xc000000e or STATUS_NO_SUCH_DEVICE error indicates that there is a hardware failure or an incorrect drive configuration and to fix it, you have to check your cables as well as check the drive with the diagnostic utility available from the manufacturer of the drive. And if you are using older PATA (IDE) drives, then this kind of error also indicates an incorrect master/subordinate drive configuration.

There could be different causes for this error. It could be that the winload.exe file is not accessible or is corrupted or that the boot location for the operating system cannot be found. Thus, for you to boot into and access the operating system, you can try the suggestions given below.

Option 1 – Try rebuilding the Boot Configuration Data (BCD) file

  • Once you get to the Welcome Screen part, click on Next.
  • Afterward, click on the Repair your computer option located on the bottom-left part of the window.
  • Then click on Troubleshoot.
  • Next, select the Advanced Options and then Command Prompt.
  • Once Command Prompt has been pulled up, the following command to rebuild BCD files.

bootrec /rebuildbcd

  • Once the command line is successful in finding out a Windows installation, hit Y to let it boot from the list which will successfully rebuild BCD.
  • Now type “exit” to close Command Prompt and then restart your computer to successfully apply the changes made.

Option 2 – Try to run the Automatic Repair Utility

You might also want to use Automatic Repair in fixing the error code 0xC000000E. To do so, follow the steps below.

  • You can start by creating and booting from a bootable Windows 10 USB Stick.
  • After that, click on Repair your computer located in the bottom left corner when you are on the initial Windows Startup screen.
  • Next, click on Troubleshoot, and then on the other screen, click the Startup Repair option.
  • Now select the operating system you want to repair. Once you do that, it will start to repair your operating system. Wait until the process is completed and then check if the problem’s now fixed.

Option 3 – Try checking the physical device connections

You might also want to try checking if there are other devices that are connected to your PC. This is because of the configuration of the BIOS or UEFI might be configured in a way that any external device connected to the computer has a higher boot priority compared to the hard disk.  And if it’s really the case, the externally attached disk might be the drive your computer is trying to boot into and not the hard disk. In such cases, Pen Drives, USB storage devices, CDs, DVDs, and so on, are included in this category of physical device connections.

Option 4 – Try updating the BIOS

As you know, the BIOS is a sensitive part of a computer. Even though it is a software component, the functioning of the hardware depends on it largely. Thus, you must be careful when modifying something in the BIOS. So if you don’t know much about it, it’s best if you skip on this option and try the other ones instead. However, if you are well-versed in navigating the BIOS, then follow the steps below.

  • Tap the Win + R keys to open the Run dialog box.
  • Next, type “msinfo32” in the field and press Enter to open System Information.
  • From there, you should find a search field on the bottom where you have to search for the BIOS version and then press Enter.
  • After that, you should see the developer and version of the BIOS installed on your PC.
  • Go to your manufacturer’s website and then download the latest version of BIOS on your computer.
  • If you are using a laptop, make sure that you keep it plugged in until you have updated the BIOS.
  • Now double click on the downloaded file and install the new BIOS version on your computer.
  • Now restart your computer to apply the changes made.

Option 5 – Try resetting the BIOS/UEFI configuration

You might also want to reset the BIOS configuration which will lead to arranging the boot configuration since it is intended by the manufacturer. Note that this will get rid of any blockage in the boot process.

Option 6 – Try marking your Disk as Online

Marking your Disk as Online can also help in resolving the error code 0xC000000E. To do so, follow the steps below.

  • You need to first create a bootable Windows 10 Media and then boot from it.
  • After that, click on Repair your computer on the first window of the Windows 10 installation setup.
  • Now, choose the operating system partition from the options and click on Next.
  • Then select Command Prompt from the System Recovery Options box.
  • Next, type in “diskpart” and hit Enter to initiate the Diskpart utility inside the Command Prompt.
  • Now type in either “list disk” or “list volume” and hit Enter. Either of these commands will help you in listing all the Disk connects or all the partitions on those disks formed. So you have to select one command depending on the list command you entered.
  • Afterward, type in “select disk #” or “select volume #” and hit Enter to select the Disk or Partition you want to select.
  • Now type in “online disk #” or “online volume #” and press Enter to mark the disk you selected as Online.
If you like to learn and find out more about various Windows errors, and how to repair them go to our vast archive or use search to find articles that will explain and help you in solving your issue.
However, if you prefer to do things fast and with automatization then we are proposing to use an automated solution for your issues. The application that we are recommending is Advanced System Repair Pro
Advanced System Repair utilizes multiple tools all in one to give you a quick, simple, reliable, and very thorough diagnosis of your PC. It brings you all the tools you need in one program to clean, fix, protect, optimize and boost your PC!
1-Click Maintenance
All the tools to make it simple and easy! It's like having a professional technician at the click of a mouse.

Junk Cleaner
Keeping your computer free from unnecessary clutter also helps make your computer last longer. Like any other machine, if you keep it clean and take care of it, it will serve you better for longer!

Optimize background apps
Optimize applications background activity with the built-in Application Optimizer feature.

Disk Defrag
With a simple 1-click, Advanced System Repair speeds up your PC by assembling fragmented files on your machine and organizing them more efficiently.

Malware Removal
Finds and removes all types of harmful malware including trojans, worms, bots, adware, spyware, PUPs, and more!

Privacy Cleaner
The all-in-one privacy suite to Clean Your Tracks & Protect Your Privacy! Make your computer safe, secure, and more efficient!

System Tweak/Optimizer
ASR will analyze your complete system and settings to adjust your PC to function at its maximum performance.

Registry Cleaner
Over time, as you install and uninstall applications, the registry can become cluttered with old entries and broken settings which can result in program crashes, and annoying messages and slow the computer down.
Visit our Advanced System Repair Pro Download page to inform yourself about all the benefits of this software and get a free trial copy of it.
advanced system repair pro

Advanced System Repair Pro

One-click automated PC repair solution
ASR logo
With Advanced System Repair Pro you can easily
Replace damaged files
Restore performance
Free disk space
Remove Malware
Protects WEB browser
Remove Viruses
Stop PC freezing
DOWNLOAD
Privacy Policy | Terms of Use | Uinstall
Advanced System Repair Pro is compatible with all versions of Microsoft Windows including Windows 11

Share this article:

You might also like

How to install and remove fonts in Windows 10
Once a tedious and unfriendly task of installing fonts has been severely made easier and more user-friendly. As technology advances daily so do some tasks. One of these tasks which today look unnecessarily complicated is fonts installation in Windows. What was once complicated navigation to control panel with an administrative account, today is two-click with the mouse anywhere, well anywhere on your hard drive, but still a great improvement nonetheless. Ok, so you have found cool new font which you like very much and you are eager to try it out, but how do you install it in Windows so your other software can find it and use it? The task is incredibly easy, let's presume that you have downloaded desired font or fonts to your hard drive from the internet, they are nicely placed in a folder, all you have to do is select which one you would like to install, right-click on any one selected and click on install. That's it, that is all that you need to do. Now in order to remove fonts first, you will have to go to the folder which has all fonts installed in the system. The location of this folder is conveniently enough c:\Windows\Fonts. In there select all fonts that you would like to uninstall from the system and simply delete them, that's it.
Read More
How to always run the app in admin mode in W11
Each time you open an application inside your Windows 11 operating system, it is opened with standard privileges. Now, please note that your account privileges and application privileges are two different things, you might be the administrator of the system but when you open the app, it still opens with standard privilege. admin privileges
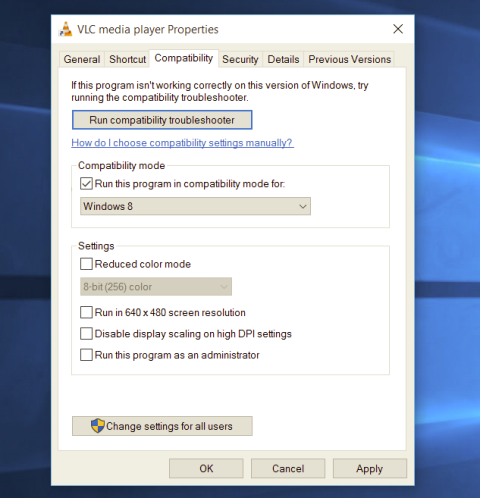
Most of the time running applications with typical settings is fine but from time to time we might have some applications that will require running with administrator privilege in order to work properly. In this case, it is very easy to do it, you just right-click and choose run as administrator. Although a very easy solution, it can be quite annoying if running the app is on a daily basis or even more times per day. If this is the case then right-clicking and choosing to run as administrator can be a daunting task, sometimes you can even forget to run it like this in heat of work and some unforeseen consequences might occur. Luckily there is an easy hack so you can open the chosen application each time as an administrator with a simple double click each time.

Setting application to run as administrator always

  1. Locate application executable file
  2. Right-click on in and choose properties
  3. Click on the Compatibility tab
  4. Check the box next to Run this Program as an Administrator
  5. Click on Apply
  6. Click on OK
From now on each time you open an application normally with a double click, it will be opened as administrator privileges.
Read More
How to Repair Windows 10 Error 0x800F0922

Repair Windows 10 Error 0x800F0922

Error Code 0x800F0922 – What is it?

Error Code 0x800F0922 refers to an issue with downloading the newest version of Microsoft Windows, Windows 10. It could mean that your PC doesn't have enough free space in the System Reserved partition, or that it couldn't connect to the Windows Update servers. This issue is not very common, most users will never see this error code. Some, however, will need to follow the below fixes in order to download and upgrade their systems properly. Common symptoms include:
  • Dialog box appears with the Error Code 0x800F0922
  • Microsoft Windows 10 upgrade is unsuccessful and/or incomplete
  • Users are unable to open applications after attempting the Microsoft Windows 10 upgrade

Solution

Restoro box imageError Causes

There are two standard reasons why this error occurs during the Microsoft Windows 10 upgrade.
  • There may not be enough free space in the “System Reserved” partition of your hard drive.
  • Error Code 0x800F0922 could also mean that your PC was not able to successfully connect to the Microsoft Windows update servers due to a VPN (virtual private network) connection in your home or office network.
  • The .Net framework installation portion of the Windows 10 upgrade fails.

Further Information and Manual Repair

Error Code 0x800F0922 as stated is somewhat rare, but it does occur occasionally. Users who have experienced this error while attempting to upgrade their system to Microsoft Windows 10 have the following options for do-it-yourself fixes.

Method 1:

Use this method if you are operating on a network that uses a VPN connection.
  1. Disconnect from your office or home network.
  2. Turn off your VPN software.
  3. Run the Microsoft Windows 10 upgrade.
  4. Restart your PC.
  5. Reconnect to your home or office network.
  6. Turn your VPN software back on.

Method 2:

This will run the Windows 10 Update troubleshooter that is built into your PC.
  1. Click on the Windows icon on the lower-left corner of your desktop.
  2. Press the “w” key to open the SEARCH function.
  3. Type “troubleshooting” in the search field and press ENTER
  4. When the troubleshooting window opens, select the “view all” option from the left window pane.
  5. Select “Windows update”.
  6. Select “advanced” and then choose the “run as administrator” option.
  7. Click the NEXT button and follow the on-screen prompts.
  8. This troubleshooter will walk you through the steps needed for your specific situation.

Method 3:

This method will run the DISM (deployment image servicing and management) tool built into your PC.
  1. Press the “windows key” on your keyboard followed by the “x” key.
  2. Select the “command prompt admin” option.
  3. Type the command “exe /online /cleanup-image /scanhealth” into the command prompt field and press ENTER.
  4. Wait for the scan to run completely.
  5. When the scan is complete, a message will appear telling you that “the operation completed successfully”.
  6. Type the command “dism.exe /online /cleanup-image /restorehealth” into the command prompt field and press ENTER.
  7. This will take a while to run completely, but it will restore any missing or corrupted files necessary for the Microsoft Windows 10 update.
  8. Restart your computer.
  9. Attempt the Windows 10 upgrade again.

Method 4: Use this option if you believe the issue is a result of the .NET framework being disabled.

  1. Press the “windows” key followed by the “x” key.
  2. Select the “control panel” option.
  3. When the control panel window opens, click your cursor in the search field on the upper right hand corner.
  4. Search for the phrase “windows features”, then select the link “turn Windows features on or off”.
  5. Select the check box (add a check) to the box next to “.Net framework”.
  6. Click the OK button.
  7. Proceed with your Microsoft Windows 10 upgrade.
To resolve this, all you need is third-party software to increase the size of the System Reserved partition. One of the four methods listed above should fix your Error Code 0x800F0922 issue and allow for a successful Windows 10 upgrade. On an occasion where there isn't enough space, use third-party software to increase the size of the System Reserved partition.  If you do not possess the technical expertise required to accomplish this yourself or do not feel comfortable doing so, download and install a powerful automated tool to get the job done.
Read More
Fix Error Code 30088-26 in Windows 10
Error Code 30088-26 is shown when the user tries to install the MS Office suite to their PC. It is mostly due to several reasons including corrupted Office installation, the remnant of old office installation, or even Windows updates. We will cover all reasons along with provided solutions to each one. Follow the guide below to address each scenario with the fix for it.

Corrupted Office installation

In order to fix this issue, you will need to repair the installation itself.
  • Press ⊞ WINDOWS + R to open the run dialog keyboard with windows and r marked
  • Inside run dialog type in Control Panel run dialog with control panel typed in
  • In the control panel double click on Programs and features control panel programs and features selected
  • In the list of installed application find MS Office and click on it to select it
  • On top, just above the application list click on the change uninstall office screen
  • Office dialog will be opened with multiple choices
  • Click and select Online repair and then click on Repair
  • Make sure that you have a stable internet connection and leave the process to be finished

Remnants of old office installation

Manually cleaning remnants of old office installation is not an easy task and it can be different from system to system depending on the previous Office version. Luckily Microsoft has a dedicated office cleaning tool made for purpose of removing old tails and remnants of old office installations.
  • Download tool heremicrosoft troubleshooter
  • After the tool has been successfully downloaded, double-click on the .diagcab file to open it
  • Click on Advanced and make sure that the box associated with Apply repair automatically is checked.
  • Click the Next button to proceed
  • Wait until the initial detection phase is complete, then click on Installing at the first prompt
  • Select the program that you’re encountering issues with (most likely Microsoft Office) and click Next once again
  • At the next screen, click on Yes, try to uninstall
  • Wait until the operation is complete, then restart your computer and re-install the Microsoft Office suite

Windows Updates

After digging and trying out various solutions for this issue we came to the conclusion that this error can occur if Windows is not fully updated, and by fully updated we mean fully, not just critical updates, but all available ones. Check-in your setting to see if there are some uninstalled or pending updates waiting to be installed and if that is the case install them all. After completely updating your Operating system error should vanish and you should be able to install Microsoft office without issues.

Use dedicated-toll to fix error

If there is any chance that any provided solution has not provided you with satisfactory results or simply you do not want to tackle things manually you can always use a dedicated tool for Windows errors fixing. We recommend RESTORO, reason is quite simple, you only need to install it and click on it to start it, Restoro will then automatically scan your whole computer for errors, and then it will fix all found errors. Basically, it is a one-click solution for all of your errors.
Read More
Check if your data has been stolen for free

Website breaches and stealing user data is nothing new in the world of the internet. Although a very unpleasant experience it still happens even on some high-quality websites. In this article, we will not focus on how can you not be the target of this kind of attack, because you really cannot. Weel you can kind of if you decide not to have your data on websites at all, but let's just say that is not something you are willing to do.

stolenSo, in this case, you have some social, forum, or gaming accounts but you heard that service has been breached and that your email or password might be stolen. Well in this case all you need to do is of course to login into the service and change your password. But, what happens if you are not aware at all that service has been compromised?

Mozilla foundation has asked themselves this same question it seems and they have decided to help us out. They have placed a free online service where you can just by typing in your email address find out if your email or data has been compromised in any way.

Go to https://monitor.firefox.com/ and check it out, if you find out that there is some website that you did not know was breached, change your password right away, and if you have used the same password for anything else (I hope not), change them as well.

Read More
This Publisher has been blocked
There are times when you try to open a file, an executable file for instance, but were unable to do so since you encounter an error in an Open File – Security Warning dialog box that says, “This publisher has been blocked from running software on your machine, You must unblock this publisher to run this software”. This kind of error is most likely thrown by your operating system because it considers the file to be unsafe and could potentially harm your computer. However, if you’re certain that the file is harmless, read on as this post will walk you through fixing the error so you can open the file without getting an error. There are various options you can check out to fix the error. You may run the program using Command Prompt or unblock it using File Properties. You could also try turning off SmartScreen or use the unblock file command in Windows PowerShell.

Option 1 – Try running the program via Command Prompt

  • Tap the Win + R keys to open the Run dialog box and type “cmd” in the field and hit Enter to open Command Prompt.
  • Next, tap the Shift key and right-click on the program or the executable file, and then select the “Copy as path” option.
  • After that, paste this path in the Command Prompt window and tap Enter to open the program.

Option 2 – Try to unblock the file using File Properties

  • Right-click on the file you were trying to open and select Properties.
  • Next, click the Unblock button and then click on the Apply and OK buttons.
  • You should now be able to open or access the file without getting the error.

Option 3 – Turn off SmartScreen

The next thing you can do is to turn off SmartScreen temporarily. All you have to do is open the Windows Defender Security Center and from there, go to the App & browser control section. After that, click on the radio button for Off under Check apps and files. Once you’re done, try opening the file again. Don’t forget to enable the SmartScreen back on.

Option 4 – Try to use the Unblock-File command in PowerShell

You might also want to utilize the Unblock-File command in Windows PowerShell as it will unblock the file so you can open it. To execute this command, follow these steps:
  • Tap the Win + X keys and then click on Windows PowerShell.
  • After opening PowerShell, type or copy and paste this command and tap Enter to execute it: Get-ChildItem -Path 'C:Users<username>Downloads' | Unblock-File
  • The command you entered will unblock all the files in the Downloads folder, assuming that’s where the file you were trying to open is stored. If it’s not, then replace the path with the path where the file is located. Take note to also replace “<username>” with your Username.
  • Now check if the file has been unblocked by accessing or opening it.
Read More
Malware Guide: How to Remove Solimba

How to Easily remove Solimba from your system

What is Solimba?

Solimba is a bundled executable program. It was created to be launched as a promotional tool to get advertisements loaded on a user’s system, upon installation. As a bundle, Solimba offers installation of various programs, with the objective of promoting various products and services. It utilizes unethical techniques, as in the case with adware tactics to influence or for want of a better word, hijack an Internet Browser to affect a website’s result on a search results page. In this assessment, Solimba distributed ads on Internet Explorer, Chrome, and Mozilla browsers, by hijacking various Internet Browsers to change the user's experience. (Images are shown below) Technical details about Solimba PUP include:
Digital Signature:  POPELER SYSTEM, S.L. Entry Point:   0x0000C1DC

Assessment of Solimba Potentially Unwanted Program

Solimba PUP is all about the ads. Once this executable is installed, it penetrates your computer system and sends ads all over your Internet Browser – Chrome, Internet Explorer, Mozilla Firefox, and the likes. For this assessment of Solimba.exe PUP, two installations were carried through. In layman's terms, I actually installed Solimba on two occasions to decipher the true nature of the PUP. It was shocking to find that both installations revealed different bundled programs and advertisements. In the first instance (as shown below), Solimba proved more aggressive in featuring ads for revenue advancements.
 Solimba employed aggressive advertising techniques
It’s important to note that hijacked results resulting from the installation of Solimba. This affected the results of the website on the Internet browser to boost its ranking, even without the use of a search engine. The advertisement displayed on the Internet Explorer search page routes the user to a software installation website. The utility tool in question was a “Windows 8.1 PC Repair” tool used to identify threats present on the Windows 8.1 OS.Advertisement shown on Chrome after Solimba Installation The advertisement displayed on the Chrome Browser search page routes the user to a health and beauty magazine website. This site advocates health and beauty, especially issues concerning weight loss. Several ads were visible on-site, displaying products to assist people in losing weight. During my installation of Solimba, the installation wizard underscored that four programs would be downloaded. These programs included N8Fanclub.com_KinoniRemoteDesktop, Lolliscan, PaceItUp, and SearchProtect. Interestingly, only two programs from the list were apparent or obvious. An N8Fanclub.com_KinoniRemoteDesktop file was made on the Desktop and SearchProtect was seen in “All Programs”, along with files stored on the computer’s Local Drive. The other programs that were “supposedly” installed remained concealed. A test was done to determine whether these were counted as extensions or add-ons to the varying web browsers but nothing was found on any of the tested browsers – Google Chrome, Internet Explorer, and Mozilla Firefox.

Description of 4 Installed Files

N8Fanclub.com_KinoniRemoteDesktop

When this file was initially found on the Desktop, a rootkit came to mind. A rootkit was used as a means to an end. Whoever was on the receiving end of this unwanted file would be able to connect to an infiltrated system without the knowledge of the user. After running the file to determine its behavior, nothing much happened. A message appeared indicating that the software couldn’t execute on the computer. That was pretty tricky since, to begin with, I didn’t place that specific file on the desktop but it came along with the territory and so I had to accept it. Further research online into N8Fanclub.com_KinoniRemoteDesktop proved very rewarding. A search of the entire file name was not able to do the trick so I had to do research on both terms separately. After landing on N8Fanclub.com, I was nicely asked to disable my adblocker. There seemed nothing harmful about the site. However, due to the fact that it was not what I initially installed, the program was an unwanted program. That’s exactly what Solimba does. It installs several other programs that were not requested by the user in an attempt to make money from advertising. The mere fact that this program got installed meant that it was to promote an online service.

KinoniRemoteDesktop

was a separate program. It was combined with N8Fanclub as a way to allow users to use their PC computer “as if they were sitting in front of it.” A user would be able to make use of a full web browser, watch Flash videos, play games, and even use office applications. This would be done from the user’s Nokia device. This is an advertisement at its best.

Lolliscan

This program did not allow me to see much since it didn’t leave a physical trace behind. However, during the installation, Lolliscan was listed as one of the four programs that would be installed. Overall, Lolliscan supposedly should be able to save people money since this form of the ad focuses on showing coupons when visiting sites such as Amazon. While this seems like a good deal, this ad will invade your personal space and distribute pop-ups at the most inopportune times.

PaceItUp

As the name states, PaceItUp is software added to a browser with the intent to speed your computer. Quite the contrary, PaceItUp does the total opposite since it installs bundled programs that slow down a computer system. PaceItUp is also known for displaying ads and tracking what the user does on his/her computer system.

SearchProtect

It’s known for hijacking your computer’s homepage. In fact, this addition is very stubborn and often possesses a challenge when a request to uninstall is made.

Further Information on Solimba

The second installation of Solimba also had its own dose of bundles to display. In comparison to the first installation, two programs from the bundle were different while two remained the same. two additional programs were installed along with the second installation of this bundle. These were dubbed Optimizer Pro and GamesDesktop. SearchProtect and N8Fanclub.com_KinoniRemoteDesktop remained triumphant and unbeatable. They were repeated within the installation. To completely remove Solimba from your computer, click here to download and install Spyhunter.
Read More
How to Turn off Advertising ID in Windows
In case you don’t know, Microsoft hooks up every machine that is running Windows 10 with an Advertising ID which helps them in providing Windows 10 users with relevant ads. These ads are delivered to users in the Action Center, Start Menu as well as the ads inside the UWP Applications. What makes these advertisements relevant is that they keep track of your browsing trends, likes and dislikes, with the help of the Advertising ID. However, if you are not fond of advertisements and you do not want this feature of Microsoft to track your usage, worry not for you actually have the option to disable targeted ads on your Windows 10 computer by turning off the Advertising ID. And you can do that during Windows 10 Setup or using the Group Policy Editor. For more details, refer to the instructions provided below for each one of the methods.

Option 1 – Turn off Advertising ID during Windows 10 setup

If you are about to install Windows 10, then during the installation process, your computer boots into the Install and Configure Windows 10 screen with Cortana that assist you during the setup. Once you reach the last page which is “Choose privacy settings for your device”, you will see the Advertising ID of your computer. Under the Advertising ID, you have to disable or toggle off the “Apps can use advertising ID to provide more personalized advertising in accordance with the privacy policy of the app provider” option. After you disable it, click on the Accept button to proceed with the installation. After that, the copy of your Windows 10 you are using will have the Advertising ID disabled by default.

Option 2 – Turn off Advertising ID via Group Policy Editor

  • First, tap the Win + R keys to launch the Run utility.
  • Then, type “gpedit.msc” in the field and click OK or tap Enter to open the Group Policy Editor.
  • Next, navigate to this group policy setting: Computer Configuration > Administrative Templates > System > User Profiles
  • Now double click on the “Turn off the advertising ID” option and set the radio button to Enabled. Once you do, you will see the following description on your screen:
“This policy setting turns off the advertising ID, preventing apps from using the ID for experiences across apps. If you enable this policy setting, the advertising ID is turned off. Apps can’t use the ID for experiences across apps. If you disable or do not configure this policy setting, users can control whether apps can use the advertising ID for experiences across apps.” Note that setting the radio button to Enabled or Not Configured will turn off the data collection of the Advertising ID.
  • Finally, exit the Group Policy Editor and then restart your computer to apply the changes made successfully.
Read More
Microsoft acquires Activision Blizzard
In the latest news, Microsoft has reached a deal to purchase Activision Blizzard for 67.8 billion. Now franchises like Warcraft, Starcraft, Overwatch, Call of duty, Diablo are now the property of Microsoft and I am sure that some of these games we can expect to be included in the Xbox game pass. microsoft activision blizzard
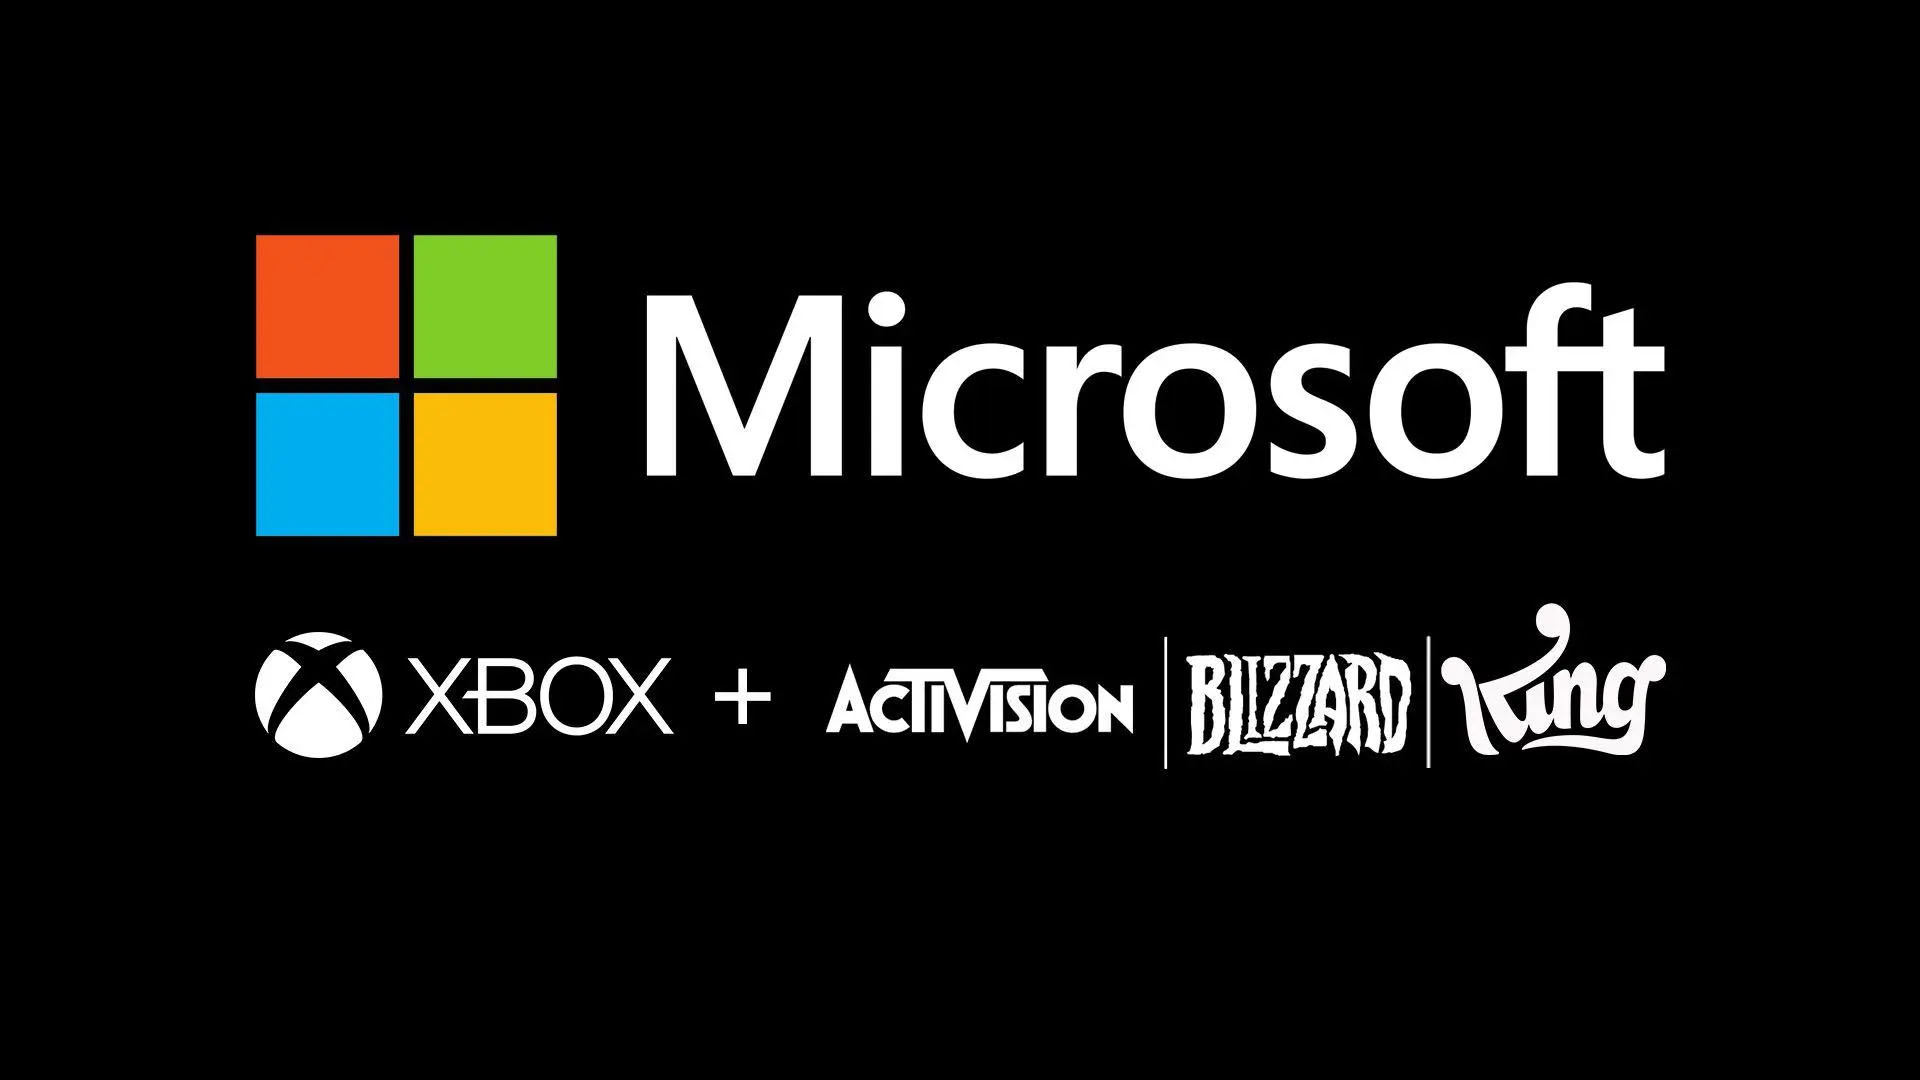
This is the second large game company acquisition by Microsoft, Acquiring Bethesda first and a big hit to Sony since Xbox will now have more games in its catalog and as exclusives. Of course, the sale has to go through the standard closing conditions and completion of regulatory review and Activision Blizzard’s shareholder approval before it’s finalized. Assuming that all goes well, the deal is slated to be completed during the fiscal year 2023, which is July 1, 2022, through June 30, 2023.
Read More
How to Fix Windows 10 Error 0x80070490

How to Fix Windows 10 Error 0x80070490

Error Code 0x80070490 - What is it?

When downloading a Windows update, it is important to remember that these updates are what keeps your computer safe. Some users have reported seeing error code 0x80070490 when allowing updates for their Windows PC. This error code may appear when the user is trying to connect to the update site for Windows and maybe a result of a corrupted CBS manifest. Having this error code will not only stop the update of the system, but it will also certainly halt any work being done with the computer. Quite a few Windows users have written in complaints about this error while updating from any prior Windows update to Windows 10.

Common symptoms include:

  • While a user is performing the updates, the Windows computer will stop running the updates, and it will show the error code 0x80070490.
  • Windows updates will not install any new features and will not install security patches.
  • The computer will not continue with the Windows update, and it may revert back to the previous state that the computer was in, prior to attempting the updates.

Error Causes

There is not a lot known about what exactly causes the error code 0x80070490, but it is something critical that makes Windows abruptly stop its updates. It could be caused by a simple glitch in the computer system, or it could be caused by a larger problem. One thought is that the CBS (Component-Based Servicing) manifest can be corrupt. Another thought is that the computer's anti-virus software may be interfering with the computer's ability to perform the necessary updates.

Further Information and Manual Repair

There is very little information known about error code 0x80070490 and why it exists, but there are a few methods in which to correct it. Users should be careful when trying to fix this error themselves. If the user feels that the methods are too complicated or they are uncomfortable taking it on themselves, they should contact a Windows repair technician to fix the problem. Not all methods listed will suit the user's needs, but it is dependent upon the problem at hand as to which method will be the best fit to fix the error code. If these steps are taken and the error is not corrected, it is vital to contact the Windows repair technician.

Method One: Creating a new local account

Create a new local account on the computer, and allow administrator privileges on it. Next, move all of your documents and personal files to the new account. Delete the old account (you will no longer be using this) and switch over to the new one. After switching to the new local account, add the Microsoft account to it.

Method Two: Delete user ID, Store cache from the registry

  • You will need to open the Registry Editor. Do this by pressing the Windows Key and R, then typing in “Regedit”. After this is typed in, press Enter or click the OK button to start the registry editor.
  • When this starts, you will need to navigate all the way to the following key on the left pane:
  • HKEY_LOCAL_MACHINESOFTWAREMicrosoftWindowsCurrentVersionAppxAppxAllUserStore After this, find the key that is similar to this: S-1-5-21-1505978256-3813739684-4272618129-1016
  • NOTE: this is just an example. The keys will be in a similar format but will not look exactly like this.
  • Select all the keys that look like this, and then delete them. After these keys are deleted, close the Registry Editor and restart the computer.

Method Three: Check to see if BITS, MSI Installer, Cryptographic, and Windows Update Services are running

Press the Windows key and R. Then, type in services.msc. After the Services window starts up, find the following services:  BITS, MSI Installer, Cryptographic, and Windows Update Services. When these services are found, make sure that they are up and running. If one or more of these services is not running, make sure that they are started. To do this, select the service and then click on Start the Service.

Method Four: Windows Update Troubleshooting

Press the Windows key plus W and then type in “troubleshooting”.  Select Troubleshooting. On the top left corner, select View All. Click on Windows Update troubleshooter. After this, follow the on-screen instructions in order to run the troubleshooter. After the troubleshooter has run, the issue should be fixed.

Congratulations, you have just fixed Error Code 0x80070490 in Windows 10 all by yourself. If you would like to read more helpful articles and tips about various software and hardware visit errortools.com daily. Now that’s how you fix Error Code 0x80070490 in Windows 10 on a computer. On the other hand, if your computer is going through some system-related issues that have to get fixed, there is a one-click solution known as Restoro you could check out to resolve them. This program is a useful tool that could repair corrupted registries and optimize your PC’s overall performance. Aside from that, it also cleans out your computer for any junk or corrupted files that help you eliminate any unwanted files from your system. This is basically a solution that’s within your grasp with just a click. It’s easy to use as it is user-friendly. For a complete set of instructions in downloading and using it, refer to the steps below Perform a full system scan using Restoro. To do so, follow the instructions below.
      1. Download and install Restoro from the official site.
      2. Once the installation process is completed, run Restoro to perform a full system scan. restoro application screen
      3. After the scan is completed click the “Start Repair” button. restoro application screen
Read More
1 2 3 162
Logo
Copyright © 2022, ErrorTools. All Rights Reserved
Trademarks: Microsoft Windows logos are registered trademarks of Microsoft. Disclaimer: ErrorTools.com is not affiliated with Microsoft, nor claim direct affiliation.
The information on this page is provided for information purposes only.
DMCA.com Protection Status