Fixing Error 0xc0000005 in Windows

If you encounter Error 0xc0000005 when you try to launch a program on your Windows 10 computer then this means that Windows was unable to process the files and the configuration correctly needed in order to run the program properly. You can encounter this kind of error with an installed program and even as the installer for a particular program. To fix this error, this post will provide you with some potential fixes that might help.

Error 0xc0000005 occurs due to Access Violation which happens when a user tries to open a program and this error code may be accompanied by any of the following three error messages:

  • The application was unable to start correctly
  • Access violation Exception Error
  • Windows Installation Error

To fix this error, you need to follow the given options below carefully but before you do that, you can try to use System Restore Point first to put your computer back to its previously known stable state.

  • Tap the Win + R keys to open the Run dialog box.
  • After that, type in “sysdm.cpl” in the field and tap Enter.
  • Next, go to the System Protection tab then click the System Restore button. This will open a new window where you have to select your preferred System Restore point.
  • After that, follow the on-screen instructions to finish the process and then restart your computer and check if the problem is fixed or not.

After performing System Restore check if Error 0xc0000005 is now fixed or not. If not, then make sure to use the options given below to resolve the problem.

Option 1 – Update or rollback drivers

If the System Restore didn’t work, then it’s time to either update or roll back the device drivers. It is most likely that after you updated your Windows computer that your driver also needs a refresh. On the other hand, if you have just updated your device drivers then you need to roll back the drivers to their previous versions. Whichever applies to you, refer to the steps below.

  • Open the Devices Manager from the Win X Menu.
  • Then locate the device drivers and right-click on them to open the Properties.
  • After that, switch to the Driver tab and click on the Uninstall Device button.
  • Follow the screen option to completely uninstall it.
  • Finally, restart your computer. It will just reinstall the device drivers automatically.

Note: You can install a dedicated driver on your computer in case you have it or you could also look for it directly from the website of the manufacturer.

Option 2 – Try running the System File Checker Scan

The SFC or System File Checker scan could detect and automatically repair damaged system files that could be causing Error 0xc0000005. SFC is a built-in command utility which helps in restoring corrupted files as well as missing files. It replaces bad and corrupted system files to good system files. To run the SFC command, follow the steps given below.

  • Tap Win + R to launch Run.
  • Type in cmd in the field and tap Enter.
  • After opening Command Prompt, type in sfc /scannow

The command will start a system scan which will take a few whiles before it finishes. Once it’s done, you could get the following results:

  1. Windows Resource Protection did not find any integrity violations.
  2. Windows Resource Protection found corrupt files and successfully repaired them.
  3. Windows Resource Protection found corrupt files but was unable to fix some of them.

 Now restart your computer.

Option 3 – Run the Windows Memory Diagnostic tool

Since this error could be caused by some issues in the memory, you can try running the Windows Memory Diagnostic tool and see if it helps.

  • Tap the Win + R keys to open Run and type exe and hit Enter to open the Windows Memory Diagnostic Tool.
  • After that, it will give two options such as:
    • Restart now and check for problems (Recommended)
    • Check for problems the next time I start my computer
  • Once your computer has restarted, perform a basic scan or you could also go for the “Advanced” options such as “Test mix” or “Pass count”. Simply tap the F10 key to start the test.

Note: After you select the option, your PC will restart and check for memory-based issues. If it finds any issues, it will automatically fix them and if there’s no issue found, then it’s most likely not a memory-based issue so you should try the other options given below.

Option 4 – Try recreating the Boot records

If your system files are infected and modified by some malware, then it’s no wonder why you’re getting Error 0xc0000005 since this error can also be due to malware. To fix this, you can try to recreate the boot records on your computer. How? Follow these steps:

  • Tap the Win + R keys to open the Run dialog box.
  • Then type “cmd” in the field and hit Enter to open Command Prompt.
  • After that, type in each one of the following commands below and hit Enter right after you input each one of them.
    • Del D:WindowsSystem32xOsload.exe
    • Del D:WindowsSystem32xNtKrnl.exe
    • Del D:WindowsSystem32Driversoem-drv64.sys
    • attrib c:bootbcd -h -r –s
    • ren c:bootbcd bcd.old
    • bootrec /rebuildbcd
  • After you input the listed commands above, it will recreate all the files needed inside the boot record.

Option 5 – Try turning off Data Execution Prevention or DEP

You might want to turn off Data Execution Prevention or DEP if it could be the one that’s blocking your process to run a particular program. To disable DEP, refer to the steps below.

  • Type “cmd” in the Start Search and then right-click on Command Prompt from the results and select Run as Administrator.
  • After that, type the following command and hit Enter to disable DEP:

bcedit.exe /set {current} nx AlwaysOff

  • Restart your computer.

Option 6 – Try to fix Registry

  • Tap the Win + R keys to open the Run dialog box.
  • Next, type “Regedit” in the field and hit Enter to open the Registry Editor.
  • After that, go to this registry path: HKEY_LOCAL_MACHINESOFTWAREMicrosoftWindows NTCurrentVersionWindows
  • From there, double click on LoadAppInit_DLLs located at the right side of the panel and change its value from “0” to “1”.
  • Now restart your computer.

Option 7 – Try checking RAM

You can also check RAM physically and see if it is in an operable condition. You might want to consider replacing it and see if it fixes the error.

Option 8 – Try to disable your antivirus program temporarily

Disabling the antivirus program or any security software installed in your computer might help in resolving the error since there is a good chance that it’s blocking the program from execution due to suspicious behavior. Just don’t forget to enable the antivirus program back again.

Option 9 – Troubleshot the problem in a Clean Boot State

There are some instances that some conflicting programs installed in your computer might be the one that’s causing Error 0xc0000005. To identify which program is causing the problem, you need to put your computer in a Clean Boot State. To do so, follow the steps below.

  • Log onto your PC as an administrator.
  • Type in MSConfig in the Start Search to open the System Configuration utility.
  • From there, go to the General tab and click “Selective startup”.
  • Clear the “Load Startup items” check box and make sure that the “Load System Services” and “Use Original boot configuration” options are checked.
  • Next, click the Services tab and select the “Hide All Microsoft Services” check box.
  • Click Disable all.
  • Click on Apply/OK and restart your PC. (This will put your PC into a Clean Boot State. And configure Windows to use the usual startup, just simply undo the changes.)
  • From there, start to isolate the problem by checking which one of the programs you installed recently is the root cause of the problem.

Option 10 – Try resetting Windows 10

To fix this error, you can try resetting Windows 10. Doing so won’t get rid of any file in your system – instead of erasing all your media files and documents, this reset option resets all the system settings and files.

If you like to learn and find out more about various Windows errors, and how to repair them go to our vast archive or use search to find articles that will explain and help you in solving your issue.
However, if you prefer to do things fast and with automatization then we are proposing to use an automated solution for your issues. The application that we are recommending is Advanced System Repair Pro
Advanced System Repair utilizes multiple tools all in one to give you a quick, simple, reliable, and very thorough diagnosis of your PC. It brings you all the tools you need in one program to clean, fix, protect, optimize and boost your PC!
1-Click Maintenance
All the tools to make it simple and easy! It's like having a professional technician at the click of a mouse.

Junk Cleaner
Keeping your computer free from unnecessary clutter also helps make your computer last longer. Like any other machine, if you keep it clean and take care of it, it will serve you better for longer!

Optimize background apps
Optimize applications background activity with the built-in Application Optimizer feature.

Disk Defrag
With a simple 1-click, Advanced System Repair speeds up your PC by assembling fragmented files on your machine and organizing them more efficiently.

Malware Removal
Finds and removes all types of harmful malware including trojans, worms, bots, adware, spyware, PUPs, and more!

Privacy Cleaner
The all-in-one privacy suite to Clean Your Tracks & Protect Your Privacy! Make your computer safe, secure, and more efficient!

System Tweak/Optimizer
ASR will analyze your complete system and settings to adjust your PC to function at its maximum performance.

Registry Cleaner
Over time, as you install and uninstall applications, the registry can become cluttered with old entries and broken settings which can result in program crashes, and annoying messages and slow the computer down.
Visit our Advanced System Repair Pro Download page to inform yourself about all the benefits of this software and get a free trial copy of it.
advanced system repair pro

Advanced System Repair Pro

One-click automated PC repair solution
ASR logo
With Advanced System Repair Pro you can easily
Replace damaged files
Restore performance
Free disk space
Remove Malware
Protects WEB browser
Remove Viruses
Stop PC freezing
DOWNLOAD
Privacy Policy | Terms of Use | Uinstall
Advanced System Repair Pro is compatible with all versions of Microsoft Windows including Windows 11

Share this article:

You might also like

Proven Solutions For Error Code 0x80131700

Fix Error Code 0x80131700

Error Code 0x80131700 - What is it?

0x80131700 is a Windows 7 error that occurs when there is a problem with the Troubleshooting Wizard. The wizard fails to function and with an error message displaying the following message on the computer screen:

‘An unexpected error has occurred’- The troubleshooting wizard can’t continue

Error code: 0x80131700'

Windows 7 features Troubleshooting Wizard, an automated tool that helps users resolve several PC-related problems such as accessing shared files or internet connectivity to name a few.

Error Causes

The error code 0x80131700 largely occurs because of two reasons:
  • The .NET framework is not properly installed on your system
  • Mis-configured System Files and Registry Issues

Further Information and Manual Repair

0x80131700 Windows error is rated easy to fix error code. Thus, repairing this error code is not difficult. It is so easy to fix that you don’t need any technical expertise or professional help for that matter. To begin with, there are 2 methods to resolve the 0x80131700 error code. Let’s take a look at the solutions:

Cause: The .NET framework not properly installed on your system

Solution: If the underlying cause for the error code 0x80131700 is the improper installation of .NET framework on your PC, then the best and easy way to resolve this error is to reinstall it. By default, the built-in version of the .NET framework in Windows is 3.5.1 to reinstall this again on your system follow the steps given below:
  1. Go to the Start menu and type: features in the search box
  2. Now Choose the option ‘Turn Windows Features on or off’ and then press Enter
  3. After this, look for Microsoft .NET framework 3.5.1 and uncheck the box
  4. Once you uncheck it, restart your computer
  5. Repeat the step 1 and 2
  6. Now check the box before .NET framework 3.5.1
  7. Restart your system
  8. Now try using the Troubleshooting Wizard.

Cause: Mis-configured System Files and Registry Issues

Solution: If the error code 0x80131700 triggered due to misconfigured files and registry issues, then the easiest way to fix this error on your system is to download Restoro This program is a useful tool that could repair corrupted registries and optimize your PC’s overall performance. Aside from that, it also cleans out your computer for any junk or corrupted files that help you eliminate any unwanted files from your system. This is basically a solution that’s within your grasp with just a click. It’s easy to use as it is user-friendly. For a complete set of instructions in downloading and using it, refer to the steps below Perform a full system scan using Restoro. To do so, follow the instructions below.
      1. Download and install Restoro from the official site.
      2. Once the installation process is completed, run Restoro to perform a full system scan. restoro application screen
      3. After the scan is completed click the “Start Repair” button. restoro application screen
Read More
Fix Downloader.dll Not Found Error in Windows
Stumbling upon downloader.dll not found error is not pleasant to experience, usually, it means that desired application can not be started. There could be several reasons why this error happens from user mistakes, corrupted files, bad installation, and even bad RAM memory. Whatever the reason might be solutions provided are the same for all and offer a fix to this issue. it is advisable to follow provided solutions from start to finish not skipping any one of them since they are tailored to address the simplest solutions and issues and move toward more complicated ones.
  1. Reinstall application

    If you are receiving Downloader.dll not found when trying to run just a single certain application, reinstall the application, there is the possibility that the application has somehow corrupted downloader.dll during the installation process. Reinstalling might fix the problem.
  2. Run SFC scan

    SFC scan is the tool meant to scan all files and fix any corrupted ones. To run this tool, open the command prompt in administrator mode by right-clicking on the windows start button and then left-clicking on the command prompt (admin). When you are in command prompt type in SFC /scannow and let the whole process finish.
  3. Update device driver

    If previous steps have not provided results, go to device manager and visually check is there a device with an exclamation or other sign next to it, if there is, right-click on it and choose update driver.
  4. Use RESTORO to fix the issue

    If you have not managed to fix the issue with provided steps, use a dedicated fixing error tool like RESTORO to fix your PC errors.
Read More
Microsoft removed password as a requirement
ms password gone
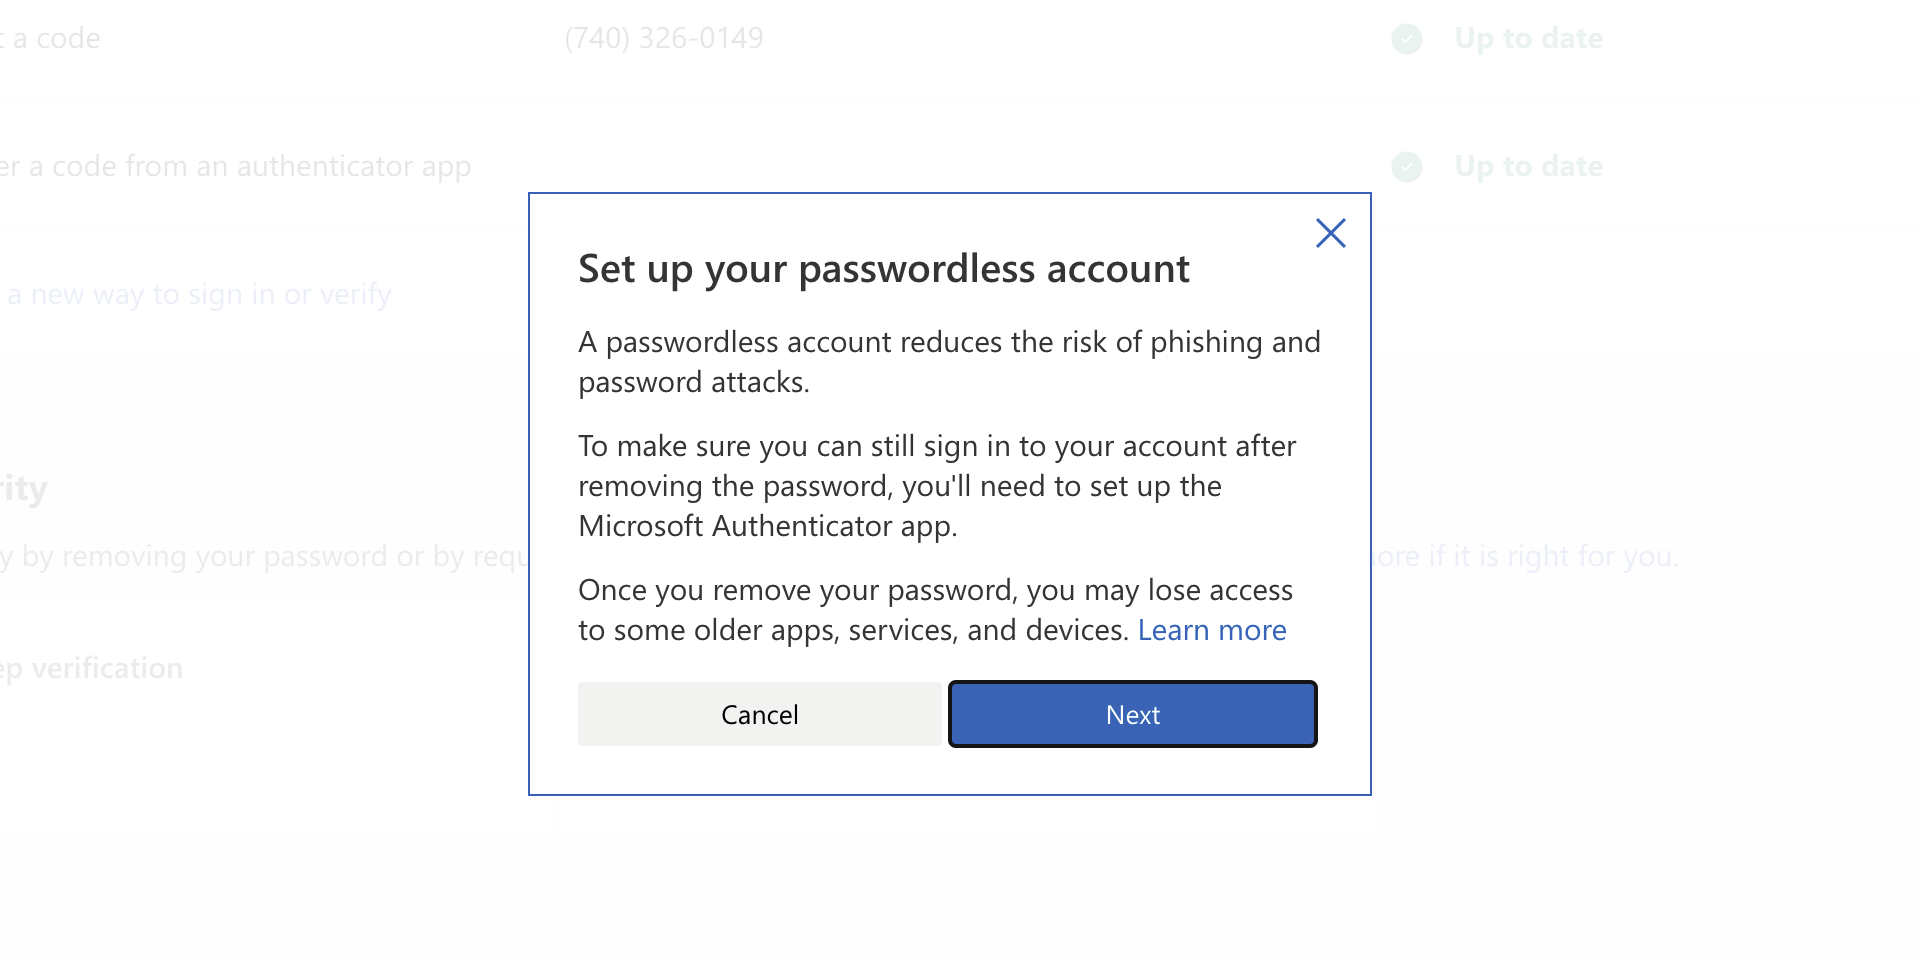
As of the time of writing this article you no longer need or are required to have a password if you plan to log in to your Microsoft account. Microsoft explored various options for account security and came to the conclusion that passwords are obsolete. Microsoft is letting you access your account through the Microsoft Authenticator app, Windows Hello, a security key, SMS verification, or email verification code. All of these methods are way better in terms of security than passwords.

How to turn these features on?

To get rid of your Microsoft password, the process is simple. You simply need to go to your Microsoft account, click “advanced security options,” then “enable passwordless accounts” under the Additional security section.
Read More
Surefire Methods of Fixing Error Code 47

Repair Error Code 47

Error Code 47 – What is it?

It is a device driver error that users encounter when they use Windows 2000 operating system and its later versions.

The error occurs when the connected peripheral device, upon removal using the ‘Safe Removal Hardware’ program, hangs up a problem within the process. The error prompt you then see is referred to within the operating system as error code 47.

It usually pops up on your computer screen with the following message:

Windows cannot use this hardware device because it has been prepared for "safe removal", but it has not been removed from the computer. (Code 47)

Solution

driverfix boxError Causes

There are many factors responsible for the Error Code, the primary ones are listed below:

  • An incomplete program installation
  • An incomplete program uninstallation
  • System recovery from viruses
  • Corrupted Windows system registry entries

Further Information and Manual Repair

Error Code 47, like other device driver error codes, is relatively easy to solve. You can fix the error code in the following ways:

Method 1 – Reconnect the device to your computer

Unplugging and plugging the USB cable of the device into the computer is the easiest way to resolve the error.

Doing this will help refresh the system and increase the likelihood of the device driver files loading and function properly.

Method 2 – Restart your PC

Another simple method you can use to solve your PC error code is to simply restart your Windows system.

It may be that the error prompted upon connecting the device you have connected is merely a temporary problem, and upon restart, will resume functioning smoothly.

Method 3 – Manually uninstall then reinstall the device driver

If both of the above-listed methods fail to resolve the problem, you may have to resort to manually uninstalling and then reinstalling the device driver causing the problem.

This would be necessary since the remaining incomplete files due to a partial removal or installation of programs is what contributes to the error code. By uninstall and reinstalling the device driver program, it would lead to the completion of the files.

You can do this by firstly logging in as Administrator and open Device Manager. Select the device that is causing the problem and double click it and make sure that the peripheral is connected properly to the PC.

Upon opening, click on the ‘Driver’ tab and then select ‘Update Driver’. Make sure to refer to the system documentation that you received with your PC or computer to check for the motherboard details and driver specifics.

Method 4 – Use software to automatically download the driver

Manually uninstalling and reinstalling the driver will usually do the trick; however, it may be time-consuming especially when you would have to resort to your hardware user manual.

Therefore, using a program such as DriverFIX can save you a lot of time and frustration in having your device work properly on your computer.

DriverFIX, with its user-friendly approach to help you fix your PC issues, comes with an integrated database that detects which drivers you need to reconfigure within just a few seconds and downloads it automatically. It further ensures that your drivers are installed in their entirety leaving no room for any incomplete files to remain that create Error Code 47. It also has the added advantage of being able to backup and restores your files should there be the slightest possibility of system file damage. Thus, registry damage can be averted by letting the software roll back the system files to an earlier healthy checkpoint. DriverFIX is the answer to fixing your PC error codes accurately and quickly. Click here to download DriverFIX to fix Error Code 47 quickly and effectively!
Read More
Fix fatal error C0000034 applying update
Fatal error C0000034 happens during the installation of the Windows update and if you are one of the unlucky users who sadly run into this, keep reading as we will provide solutions to this error and how to get around it. Start from point 1 to the bottom and hopefully you will have your PC back into working order in no time.
  1. Run Windows Update troubleshooter

    Usually, a built-in Windows troubleshooter can solve issues painlessly and fast, my advice is to try this as the first option, it is a simple and clean solution worth trying and in 90% it solves the issue all by itself.
  2. Do a clean boot

    Using task manager, remove all nonessential applications and services from starting up, reboot your computer, and once it is cleanly booted try re-running the update process again, if the issue was running the application this time everything will work since the problematic application is not running.
  3. Reset Windows update components to the default

    This solution requires you to use the Reset Windows Update Agent Tool to reset Windows Update components to default or use this PowerShell script to reset Windows Update Client. You can also manually reset each Windows Update component to default and then re-run the update.
  4. Disable firewall and antivirus

    Altho not likely it is still a possibility that some firewalls and antivirus can detect windows updates as malicious software and cut them off. If everything else failed, disable the firewall and your PC protection and when it is fully disabled try updating.
  5. Do automatic startup repair

    This should be the last thing to do but if everything else failed, do it. Perform Windows 10 Startup Repair. Once the startup repair completes successfully, you can re-run the update. The update should install without errors.
Read More
Software review series: Wolfram Mathematica
For three decades, Wolfram Mathematica has defined the state of the art in technical computing and provided the principal computation environment for millions of innovators, educators, students, and others around the world. Widely admired for both its technical prowess and elegant ease of use, Mathematica provides a single integrated, continually expanding system that covers the breadth and depth of technical computing—and seamlessly available in the cloud through any web browser, as well as natively on all modern desktop systems. With energetic development and consistent vision for three decades, Mathematica stands alone in a huge range of dimensions, unique in its support for today's technical computing environments and workflows.

A Vast System, All Integrated

Mathematica has nearly 5,000 built-in functions covering all areas of technical computing—all carefully integrated so they work perfectly together, and all included in the fully integrated Mathematica system.

Not Just Numbers, Not Just Mathematica But Everything

Building on three decades of development, Mathematica excels across all areas of technical computing—including neural networks, machine learning, image processing, geometry, data science, visualizations, and much more.

Unimaginable Algorithm Power

Mathematica builds in unprecedentedly powerful algorithms across all areas—many of them created at Wolfram using unique development methodologies and the unique capabilities of the Wolfram Language.

Higher Level Than Ever Before

Superfunctions, meta-algorithms... Mathematica provides a progressively higher-level environment in which as much as possible is automated—so you can work as efficiently as possible.

Everything Is Industrial Strength

Mathematica is built to provide industrial-strength capabilities—with robust, efficient algorithms across all areas, capable of handling large-scale problems, with parallelism, GPU computing, and more.

Powerful Ease of Use

Mathematica draws on its algorithmic power—as well as the careful design of the Wolfram Language—to create a system that's uniquely easy to use, with predictive suggestions, natural language input, and more.

Documents As Well As Code

Mathematica uses the Wolfram Notebook Interface, which allows you to organize everything you do in rich documents that include text, runnable code, dynamic graphics, user interfaces, and more.

The Code Makes Sense

With its intuitive English-like function names and coherent design, the Wolfram Language is uniquely easy to read, write, and learn.

Make Your Results Look Their Best

With sophisticated computational aesthetics and award-winning design, Mathematica presents your results beautifully—instantly creating top-of-the-line interactive visualizations and publication-quality documents.

150,000+ Examples

Get started with almost any project with help from 150,000+ examples in the Documentation Center, over 10,000 open-code Demonstrations in the Wolfram Demonstrations Project—and a host of other resources.

Instant Real-World Data

Mathematica has access to the vast Wolfram Knowledgebase, which includes up-to-the-minute real-world data across thousands of domains.

Seamless Cloud Integration

Mathematica is now seamlessly integrated with the cloud—allowing sharing, cloud computing, and more in a unique and powerful hybrid cloud/desktop environment

Connected to Everything

Mathematica is built to be connected to everything: file formats (180+), other languages, Wolfram Data Drop, APIs, databases, programs, the Internet of Things, devices—and even distributed instances of itself. If you would like to read more helpful articles and tips about various software and hardware visit errortools.com daily.
Read More
Microsoft acquires Activision Blizzard
In the latest news, Microsoft has reached a deal to purchase Activision Blizzard for 67.8 billion. Now franchises like Warcraft, Starcraft, Overwatch, Call of duty, Diablo are now the property of Microsoft and I am sure that some of these games we can expect to be included in the Xbox game pass. microsoft activision blizzard
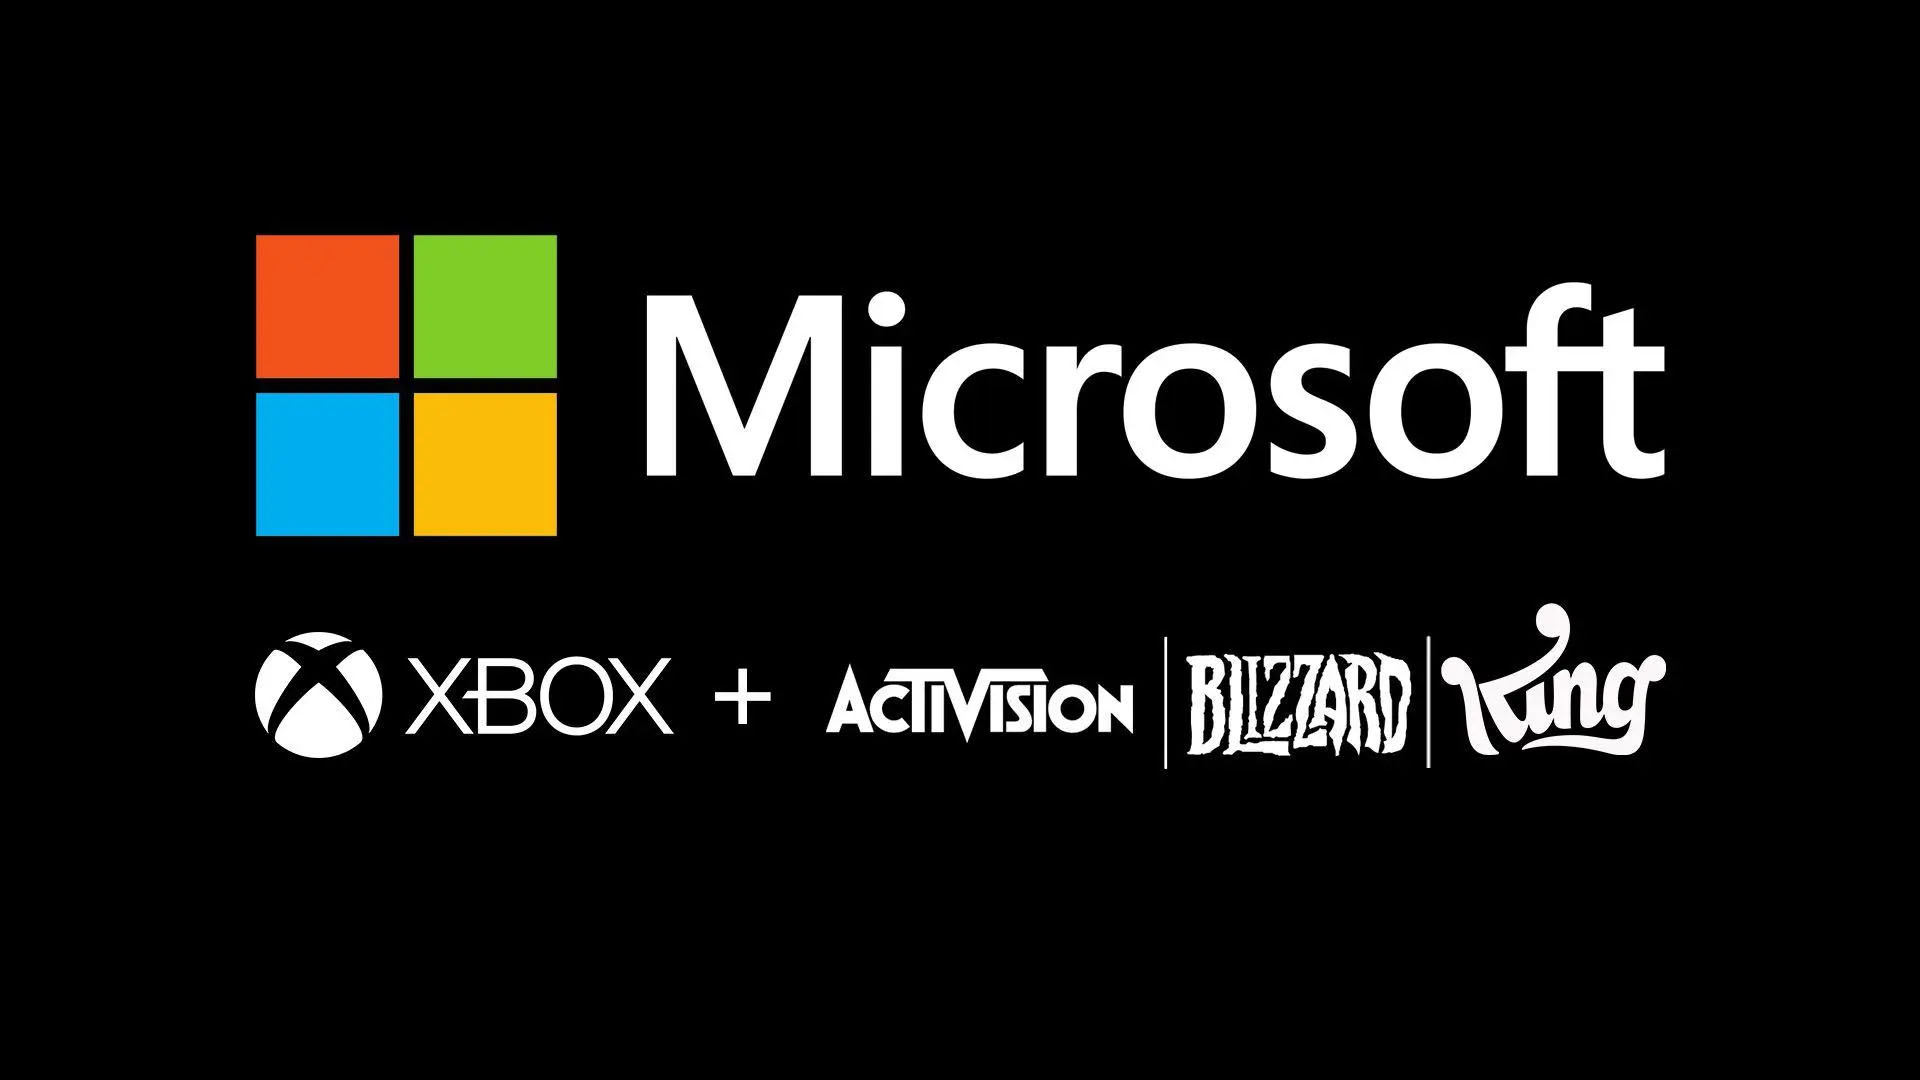
This is the second large game company acquisition by Microsoft, Acquiring Bethesda first and a big hit to Sony since Xbox will now have more games in its catalog and as exclusives. Of course, the sale has to go through the standard closing conditions and completion of regulatory review and Activision Blizzard’s shareholder approval before it’s finalized. Assuming that all goes well, the deal is slated to be completed during the fiscal year 2023, which is July 1, 2022, through June 30, 2023.
Read More
Installing Wi-Fi drivers in Windows
If you don’t have the required drivers installed in your computer, the hardware that you try to connect to your computer will most likely fail. In order to keep the operating system running on your computer, manufacturers develop drivers that can work harmoniously with your devices and applications. However, internet Wi-Fi connections can fail if suitable drivers are not installed. Worry not though for this post will guide you in installing Wi-Fi drivers on your Windows 10 computer. As you know, a driver is an essential piece of software designed for a specific operating system like Windows 10, Linux, and many more. The operating system uses it to communicate with other hardware devices such as printers and mice. Most hardware manufacturers feature a support page of their own product where you can look for the necessary drivers available for download. You will see that the Windows operating system has a set of drivers that are already installed and you do not have to do anything except plug in the device. So if the driver is not locally available, it will pull it down from its web server and automatically install it for you after you connect the device. However, there are instances when you might encounter some issues while using your Wi-Fi and during these times, you might have to reinstall your Wi-Fi drivers so read on as this post will provide you guidelines in installing Wi-Fi drivers in Windows 10. Refer to the steps below to do so. Step 1: First, go to your manufacturer’s website and look for the right driver you want to install to download your Wi-Fi driver. Step 2: After that, you have to download the correct Wi-Fi driver if it’s available. You have to know the exact name and version of the driver so that you can download it and this information can be found from the Device Manager. Just make sure that you have the right wireless adapter driver downloaded. Step 3: Once done, open the setup of the new driver that you’ve downloaded earlier and run the file and then follow the next on-screen instructions that appear right after. Step 4: You’re not done yet as you need to verify if you have downloaded and installed the correct Wi-Fi driver. Refer to the sub-steps below to do so:
  • First, right-click on the Start button and select the Device Manager to open it.
  • From there, look for the Network Adapters and expand its category to make all the network adapters visible including the wireless adapter.
  • You can easily spot the wireless adapter as it has the “wireless” term in its entry.
  • Next, right-click on the wireless driver entry in the Device Manager and select Network adapters, and then click on Properties to check the version number of the driver.
  • Now select the Driver tab and view the details. If it looks well then it means that you have the right version of the driver installed.
Step 5: Restart your computer.
Read More
Fixing 0x00000050 Stop Error – A How to Guide

What Is 0x00000050 Stop Error?

While running your Windows 7/Windows Server 2008 R2, your system suddenly stops responding out of complete randomness and you see an error message popping up which says something like this:

0x00000050 (parameter1, parameter2, parameter3, parameter4)

Solution

Restoro box imageError Causes

The stop error 0x00000050 signifies that there’s a PAGE_FAULT_IN_NONPAGED_AREA problem. If you’ve seen this error on different occasions then you will find the parameters in the message to be varying. That is because they are dependent on your PC’s configuration. Not all Stop errors "0x00000050” occur due to a single issue.

However, the most common problem which is encountered which results in the stop error popping up is due to a pool corruption occurring in the Srvnet.sys file.

This issue might be caused because of software incompatibility or a defective physical memory which resulted in requests for data for a hardware driver or service which was not found in the memory.

If you find the error occurring after you’ve installed a new application or a device driver then you should access Safe Mode and uninstall, disable or remove that application or driver.

Further Information and Manual Repair

In order to fix this issue, you should try booting your computer to the “Last Known-Good Configuration” as listed during startup.

For this you have to follow the below-mentioned steps:

  1. Start your system.
  2. When you see the message which says “For Troubleshooting And Advanced Startup Options For Windows, Press F8” hit F8 and proceed.
  3. Use the up and down arrow keys to highlight “Last Known-Good Configuration” and hit enter (This method will only work if your system boot was not successfully carried out ever since you made any specific changes).
  4. When you are starting the computer, press F12 and proceed with the PSA/32 Bit Diagnostics.
  5. Do the following so that a clean boot can be performed:
  • Go to the Start menu when the Windows 7 desktop shows up.
  • On the search bar, type “msconfig” and hit search.
  • Disable all the applications which are listed on the “Startup” tab.
  • Now head over to the “Services” tab and mark the option which reads "Hide all Microsoft Service".
  • Select the “Disable All Services” option.
  • Apply the changes by clicking on “Apply” then restart your PC. You should now check the performance of your computer. If you don’t see a BSOD then you start re-enabling all the Services and Startup applications one by one until you finally figure out which one is causing the BSOD to appear.
6. Update your Windows with “Windows Updates”.
Read More
How to Fix CoreFoundation dll Error

Troubleshoot CoreFoundation dll Error

CoreFoundation dll Error – What is it?

The CoreFoundation dll error is a common error associated with Apple Software products. Most of the Apple Software products rely on this dll file to load and run. This dll file is Apple’s proprietary. The error message is prompted in the following format:
“CoreFoundation.dll was not found” or “Apple Application Support is missing’.

Solution

Restoro box imageError Causes

The CoreFoundation.dll error message is triggered because of several reasons. These include:
  • Deleted CoreFoundation dll file
  • The CoreFoundation dll file has been overwritten
  • Poor installation of the Apple software
  • Corrupt software due to viral infection
  • Registry problems

Further Information and Manual Repair

It is advisable to fix CoreFoundation dll error code right away to avoid inconvenience. This error may stop you from accessing and running your desired Apple application. Here are some of the best ways to resolve this error on your system:

1. Restore the Deleted CoreFoundation dll File

Since Dynamic Link Library is a shared program, if you happen to delete an Apple program on your PC, chances are you might have deleted that file too in the process. Therefore, the easiest way to recover and restore the CoreFoundation dll file and resolve the error is to look for the file in the recycle bin. If you can’t locate it, then another way to restore the missing CoreFoundation dll file is to download the files from the internet.

2. Reinstall  Apple Software

If the error still persists then it is advisable to re-install Apple software via iTunes or any other Apple Software that you have on your PC. For example, if you have iTunes, then to reinstall it first go to the start menu and then the control panel. Now click on Add/Remove programs and locate iTunes software. Click the Uninstall button next to iTunes. Wait for a while until the program is completely uninstalled. After the installation is complete, restart your PC and then download the latest version on iTunes and install it. Now try running the software again. Hopefully, this will resolve the issue.

3. Scan for Viruses

Another way to resolve CoreFoundation dll error on your system is to scan for viruses. Run an antivirus to detect viruses and remove them from your PC.

4. Clean Your Registry

Remember DLL file errors also indicate a corrupt registry. When you don’t clean the registry it overloads with unnecessary and obsolete files like junk files, cookies, temporary internet history, and bad /invalid registry entries. When these files accumulate, they damage the registry, dll, and system files too. It also causes disk fragmentation. To repair the registry and fix dll files again, download a registry cleaner. Whether you want to scan for viruses or clean the registry, it is advisable to download Restoro. This is a multi-functional and advanced PC Fixer deployed with an intuitive algorithm and multiple powerful utilities. These include an antivirus, a registry cleaner, Active X controls, and class scanner, and a system optimizer. The registry cleaner detects all registry issues and resolves them instantly. It wipes out the unnecessary files cluttering and damaging the registry. It fixes and restores the damaged dll files including CoreFoundation dll file thereby resolving the error. It takes a few clicks to resolve this error. The antivirus feature scans your entire PC and removes all kinds of malicious software including spyware, malware, viruses, and Trojans. To ensure the antivirus does not slow down the speed of your PC, Restoro also features a system optimizer that boosts the performance of your computer significantly. It is powerful and bug-free software with a user-friendly interface that makes it quite easy to operate. You can download it on any Windows version as it is compatible with all. Click here to download Restoro and resolve CoreFoundation dll error now!
Read More
1 2 3 162
Logo
Copyright © 2022, ErrorTools. All Rights Reserved
Trademarks: Microsoft Windows logos are registered trademarks of Microsoft. Disclaimer: ErrorTools.com is not affiliated with Microsoft, nor claim direct affiliation.
The information on this page is provided for information purposes only.
DMCA.com Protection Status