Fixing Error 0xc0000005 in Windows

If you encounter Error 0xc0000005 when you try to launch a program on your Windows 10 computer then this means that Windows was unable to process the files and the configuration correctly needed in order to run the program properly. You can encounter this kind of error with an installed program and even as the installer for a particular program. To fix this error, this post will provide you with some potential fixes that might help.

Error 0xc0000005 occurs due to Access Violation which happens when a user tries to open a program and this error code may be accompanied by any of the following three error messages:

  • The application was unable to start correctly
  • Access violation Exception Error
  • Windows Installation Error

To fix this error, you need to follow the given options below carefully but before you do that, you can try to use System Restore Point first to put your computer back to its previously known stable state.

  • Tap the Win + R keys to open the Run dialog box.
  • After that, type in “sysdm.cpl” in the field and tap Enter.
  • Next, go to the System Protection tab then click the System Restore button. This will open a new window where you have to select your preferred System Restore point.
  • After that, follow the on-screen instructions to finish the process and then restart your computer and check if the problem is fixed or not.

After performing System Restore check if Error 0xc0000005 is now fixed or not. If not, then make sure to use the options given below to resolve the problem.

Option 1 – Update or rollback drivers

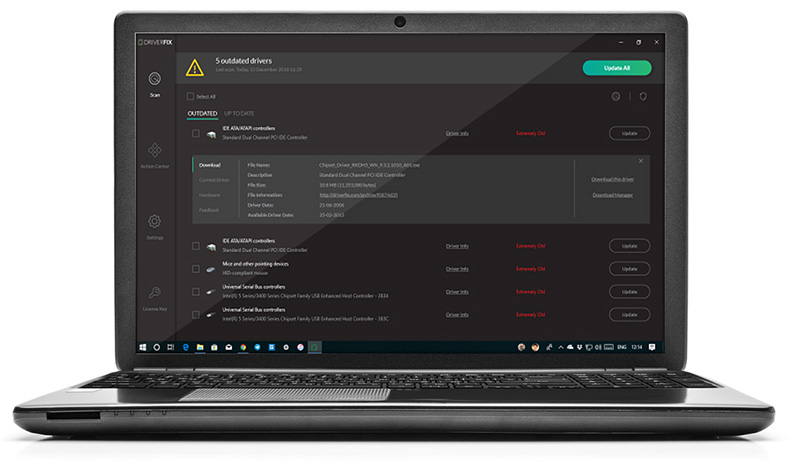
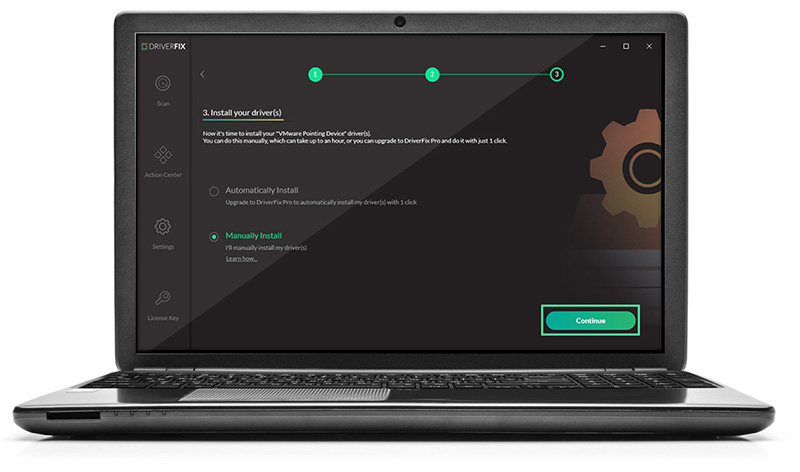
If the System Restore didn’t work, then it’s time to either update or roll back the device drivers. It is most likely that after you updated your Windows computer that your driver also needs a refresh. On the other hand, if you have just updated your device drivers then you need to roll back the drivers to their previous versions. Whichever applies to you, refer to the steps below.

  • Open the Devices Manager from the Win X Menu.
  • Then locate the device drivers and right-click on them to open the Properties.
  • After that, switch to the Driver tab and click on the Uninstall Device button.
  • Follow the screen option to completely uninstall it.
  • Finally, restart your computer. It will just reinstall the device drivers automatically.

Note: You can install a dedicated driver on your computer in case you have it or you could also look for it directly from the website of the manufacturer.

Option 2 – Try running the System File Checker Scan

The SFC or System File Checker scan could detect and automatically repair damaged system files that could be causing Error 0xc0000005. SFC is a built-in command utility which helps in restoring corrupted files as well as missing files. It replaces bad and corrupted system files to good system files. To run the SFC command, follow the steps given below.

  • Tap Win + R to launch Run.
  • Type in cmd in the field and tap Enter.
  • After opening Command Prompt, type in sfc /scannow

The command will start a system scan which will take a few whiles before it finishes. Once it’s done, you could get the following results:

  1. Windows Resource Protection did not find any integrity violations.
  2. Windows Resource Protection found corrupt files and successfully repaired them.
  3. Windows Resource Protection found corrupt files but was unable to fix some of them.

 Now restart your computer.

Option 3 – Run the Windows Memory Diagnostic tool

Since this error could be caused by some issues in the memory, you can try running the Windows Memory Diagnostic tool and see if it helps.

  • Tap the Win + R keys to open Run and type exe and hit Enter to open the Windows Memory Diagnostic Tool.
  • After that, it will give two options such as:
    • Restart now and check for problems (Recommended)
    • Check for problems the next time I start my computer
  • Once your computer has restarted, perform a basic scan or you could also go for the “Advanced” options such as “Test mix” or “Pass count”. Simply tap the F10 key to start the test.

Note: After you select the option, your PC will restart and check for memory-based issues. If it finds any issues, it will automatically fix them and if there’s no issue found, then it’s most likely not a memory-based issue so you should try the other options given below.

Option 4 – Try recreating the Boot records

If your system files are infected and modified by some malware, then it’s no wonder why you’re getting Error 0xc0000005 since this error can also be due to malware. To fix this, you can try to recreate the boot records on your computer. How? Follow these steps:

  • Tap the Win + R keys to open the Run dialog box.
  • Then type “cmd” in the field and hit Enter to open Command Prompt.
  • After that, type in each one of the following commands below and hit Enter right after you input each one of them.
    • Del D:WindowsSystem32xOsload.exe
    • Del D:WindowsSystem32xNtKrnl.exe
    • Del D:WindowsSystem32Driversoem-drv64.sys
    • attrib c:bootbcd -h -r –s
    • ren c:bootbcd bcd.old
    • bootrec /rebuildbcd
  • After you input the listed commands above, it will recreate all the files needed inside the boot record.

Option 5 – Try turning off Data Execution Prevention or DEP

You might want to turn off Data Execution Prevention or DEP if it could be the one that’s blocking your process to run a particular program. To disable DEP, refer to the steps below.

  • Type “cmd” in the Start Search and then right-click on Command Prompt from the results and select Run as Administrator.
  • After that, type the following command and hit Enter to disable DEP:

bcedit.exe /set {current} nx AlwaysOff

  • Restart your computer.

Option 6 – Try to fix Registry

  • Tap the Win + R keys to open the Run dialog box.
  • Next, type “Regedit” in the field and hit Enter to open the Registry Editor.
  • After that, go to this registry path: HKEY_LOCAL_MACHINESOFTWAREMicrosoftWindows NTCurrentVersionWindows
  • From there, double click on LoadAppInit_DLLs located at the right side of the panel and change its value from “0” to “1”.
  • Now restart your computer.

Option 7 – Try checking RAM

You can also check RAM physically and see if it is in an operable condition. You might want to consider replacing it and see if it fixes the error.

Option 8 – Try to disable your antivirus program temporarily

Disabling the antivirus program or any security software installed in your computer might help in resolving the error since there is a good chance that it’s blocking the program from execution due to suspicious behavior. Just don’t forget to enable the antivirus program back again.

Option 9 – Troubleshot the problem in a Clean Boot State

There are some instances that some conflicting programs installed in your computer might be the one that’s causing Error 0xc0000005. To identify which program is causing the problem, you need to put your computer in a Clean Boot State. To do so, follow the steps below.

  • Log onto your PC as an administrator.
  • Type in MSConfig in the Start Search to open the System Configuration utility.
  • From there, go to the General tab and click “Selective startup”.
  • Clear the “Load Startup items” check box and make sure that the “Load System Services” and “Use Original boot configuration” options are checked.
  • Next, click the Services tab and select the “Hide All Microsoft Services” check box.
  • Click Disable all.
  • Click on Apply/OK and restart your PC. (This will put your PC into a Clean Boot State. And configure Windows to use the usual startup, just simply undo the changes.)
  • From there, start to isolate the problem by checking which one of the programs you installed recently is the root cause of the problem.

Option 10 – Try resetting Windows 10

To fix this error, you can try resetting Windows 10. Doing so won’t get rid of any file in your system – instead of erasing all your media files and documents, this reset option resets all the system settings and files.

If you like to learn and find out more about various Windows errors, and how to repair them go to our vast archive or use search to find articles that will explain and help you in solving your issue.
However, if you prefer to do things fast and with automatization then we are proposing to use an automated solution for your issues. The application that we are recommending is Advanced System Repair Pro
Advanced System Repair utilizes multiple tools all in one to give you a quick, simple, reliable, and very thorough diagnosis of your PC. It brings you all the tools you need in one program to clean, fix, protect, optimize and boost your PC!
1-Click Maintenance
All the tools to make it simple and easy! It's like having a professional technician at the click of a mouse.

Junk Cleaner
Keeping your computer free from unnecessary clutter also helps make your computer last longer. Like any other machine, if you keep it clean and take care of it, it will serve you better for longer!

Optimize background apps
Optimize applications background activity with the built-in Application Optimizer feature.

Disk Defrag
With a simple 1-click, Advanced System Repair speeds up your PC by assembling fragmented files on your machine and organizing them more efficiently.

Malware Removal
Finds and removes all types of harmful malware including trojans, worms, bots, adware, spyware, PUPs, and more!

Privacy Cleaner
The all-in-one privacy suite to Clean Your Tracks & Protect Your Privacy! Make your computer safe, secure, and more efficient!

System Tweak/Optimizer
ASR will analyze your complete system and settings to adjust your PC to function at its maximum performance.

Registry Cleaner
Over time, as you install and uninstall applications, the registry can become cluttered with old entries and broken settings which can result in program crashes, and annoying messages and slow the computer down.
Visit our Advanced System Repair Pro Download page to inform yourself about all the benefits of this software and get a free trial copy of it.
advanced system repair pro

Advanced System Repair Pro

One-click automated PC repair solution
ASR logo
With Advanced System Repair Pro you can easily
Replace damaged files
Restore performance
Free disk space
Remove Malware
Protects WEB browser
Remove Viruses
Stop PC freezing
DOWNLOAD
Privacy Policy | Terms of Use | Uinstall
Advanced System Repair Pro is compatible with all versions of Microsoft Windows including Windows 11

Share this article:

You might also like

Change Font Size in Sticky Notes in Windows
Sticky Notes is one of the useful programs and in the early days, the option is available for users to change the font size of the text a lot easier. However, for some unknown reason, Microsoft decided to get rid of this feature in the latest Windows Update. One would expect that the feature will be replaced by an even more useful feature but it’s not which makes the Sticky Notes app worse than before. Worry not though for it doesn’t have to stay that way as there is another thing you can try to change the font size in your Sticky Notes app and that’s what we’re going to cover in this post. As mentioned, Microsoft removing this font feature is quite strange and in the past, users asked for this feature and since it’s no longer available, you can try following the steps given below to bring it back. And for that, you need to go to the Ease of Access section in the Settings app. Refer to the steps given below for more instructions. Step 1: First, tap the Win + I keys to open Settings and then go to the Ease of Access section. Step 2: After going to the Ease of Access menu and select Display from the list of options. Step 3: From there, you should see an option that says “Make text bigger”. And then use your mouse to navigate to the slider to change the size of the font. Note: Take note that after doing all the steps above, it will change not just the Sticky Notes app but also everything in Windows 10. This method is actually the best since it only changes the size of the apps rather than a wholesale change in your Windows 10 computer. Step 4: Next, scroll under Display until you see the “Change the size of apps and text on the main display” option where you’ll see that the option is 100% but you’ll want to change that to 125%. Step 5: After that, click on the drop-down menu and select 125% and then restart your Windows 10 computer. Step 6: Now open the Sticky Notes app and check if you can now change the font size in the Sticky Notes app.
Read More
Fix 0x80070013 for Restore, Backup and Update
In this post, you will be guided on how you can fix error 0x80070013 while executing various operations in your Windows 10 computer like System Restore, Windows Backup, or Windows Updates. When you encounter error 0x80070013, you will see the following error messages. For System Restore, it states:
“System Restore did not complete successfully. Your computer’s system files and settings were not changed. Details: System Restore failed while scanning the file system on the drive <Partition Letter> The drive might be corrupt. You might want to retry System Restore after running chkdsk /R on this disk. An unspecified error occurred during System Restore. (0x80070013) You can try System Restore again and choose a different restore point. If you continue to see this error, you can try an advanced recovery method.”
Whereas in Windows Backup, it states:
“Check your backup, Windows Backup failed while trying to read from this shadow copy on one of the volumes being backed up. Please check in the event logs for any relevant errors. The backup failed, The media is write protected (0x80070013).”
On the other hand, you will see the following error message in Windows Update:
“There were some problems installing updates, but we’ll try again later. If you keep seeing this and want to search the web or contact the support for information, this may help: (0x80070013).”
There are several suggestions you can check out to fix the error depending on where you encountered it. If you encountered it while running Windows Updates, then you can try to reset the Windows Update components or run the Windows Update Troubleshooter. And if you got the error when running System Restore, you can try to run a System File Checker scan or the DISM tool as well as the CHKDSK utility. Lastly, if you got this error when running the Windows Backup service, you can try to check its status in the Services Manager. Error 0x80070013 in Windows Updates:

Option 1 – Try to reset the Windows Update components

  • Open Command Prompt with admin privileges.
  • After that, type each one of the following commands and hit Enter after you key in one after the other.
    • net stop wuauserv
    • net stop cryptsvc
    • net stop bits
    • net stop msiserver
Note: The commands you entered will stop the Windows Update components such as Windows Update service, Cryptographic services, BITS, and MSI Installer.
  • After disabling WU components, you need to rename both the SoftwareDistribution and Catroot2 folders. To do that, type each one of the following commands below, and don’t forget to hit Enter after you type one command after the other.
    • ren C:/Windows/SoftwareDistribution/SoftwareDistribution.old
    • ren C:/Windows/System32/catroot2/Catroot2.old
  • Next, restart the services you’ve stopped by entering another series of commands. Don’t forget to hit Enter after you key in one command after the other.
    • net start wuauserv
    • net start cryptsvc
    • net start bits
    • net start msiserver
  • Close Command Prompt and reboot your PC.

Option 2 – Run the Windows Update Troubleshooter

You might also want to run the Windows Update Troubleshooter as it could also help in fixing error 0x80070013. To run it, go to Settings and then select Troubleshoot from the options. From there, click on Windows Update and then click the “Run the troubleshooter” button. After that, follow the next on-screen instructions and you should be good to go. Error 0x80070013 in System Restore:

Option 3 – Try to run both Systems File Checker scan and DISM tool

Running the System File Checker scan as well as the DISM tool can help you resolve error 0x80070013 while performing System Restore. Refer to these steps to do so.
  • Open the Command Prompt with admin privileges.
  • After opening Command Prompt, execute this command to run a System File Checker scan: sfc /scannow
  • Once the scan is completed, restart your computer and then see if the error is now fixed. If not, you can run the DISM tool.
  • Open Command Prompt with admin privileges again.
  • Then type in the following commands and make sure to hit Enter right after you type each one of them in order to properly run the DISM tool:
    • Dism /Online /Cleanup-Image /CheckHealth
    • Dism /Online /Cleanup-Image /ScanHealth
    • Dism /Online /Cleanup-image /Restorehealth
  • Do not close the window if the process takes a while as it will probably take a few minutes to finish.

Option 4 – Run the CHKDSK utility

  • In the Windows Search box, type “command prompt” and from the search results, right-click on Command Prompt and select “Run as administrator”.
  • After opening Command Prompt, type this command and tap Enter: chkdsk <Partition Letter>: /f /r /x /b
  • The command you entered will start to check for errors and fix them automatically. Else, it will throw an error message saying, “Chkdsk cannot run because the volume is in use by another process. Would you like the schedule this volume to be checked the next time the system restarts? (Y/N)”.
  • Tap the Y key to schedule Disk Check the next time your computer restarts.
Error 0x80070013 in Windows Backup:

Option 5 – Try checking the status of the Windows Backup Service

  • First, you need to tap the Win + R keys on your keyboard to open the Run dialog box.
  • Next, type “services.msc” in the field and click OK or tap Enter to open the Windows Services Manager.
  • After that, you will see a list of services and from there, look for the Windows Backup Service and double click on it to open its Properties.
  • Then check if its Startup type is set to Disabled. If it is, then change it to “Manual”. Note that this service is essential as it provides backup and restores capabilities.
  • Now click on the Apply and OK buttons to save the changes made and then restart your computer. Check if the error is now gone.
Read More
System Restore gets stuck or hangs up
As you know, System Restore is a useful tool in Windows operating system that helps users in fixing system issues by undoing any recent changes to the computer that may have caused the problem. However, there are times when you might encounter some issues when running this tool and one of these issues is when System Restore suddenly gets stuck or hangs up on initializing the restoration of the Registry in Windows 10. If you encounter a similar problem, read on as this post will guide you on what you can do in such cases. There are several things you can do when you face this kind of problem in System Restore. First, you can try to wait it out, give it more time to load, which should not take longer than 5 minutes. And if it’s still stuck after that time, give it another hour. However, if nothing changed after an hour, then you need to troubleshoot the problem further. Keep in mind that you must not interrupt System Restore by shutting it down abruptly, it could result in an unbootable system. To get started in troubleshooting the problem, you need to follow each one of the suggestions offered below.

Option 1 – Try to use the Windows Recovery Environment

The first troubleshooting option you need to try is to simply tap the power button for about 10 seconds. This is what you have to do when you have to interrupt System Restore or reset your Windows 10 computer. Tapping the power button for 10 seconds will perform a hard shutdown and once your computer shuts down, restart your computer again and follow the steps below but before you do that, make sure that you have a Windows bootable USB or DVD.
  • First, insert the bootable USB or DVD and boot into it, and select the “Repair your computer” option.
  • Next, once you see the manufacturer logo on your computer, tap the key to enter into Windows Recovery Environment.
  • After that, change the Boot sequence to DVD drive under the UEFI Firmware settings and restart your computer.
  • Once your computer has restarted, select the boot order and make changes accordingly as displayed in the BIOS.

Option 2 – Try to run the Automatic Repair Utility

You might also want to use Automatic Repair in fixing the error. To do so, follow the steps below.
  • You can start by creating and booting from a bootable Windows 10 USB Stick.
  • After that, click on Repair your computer located on the bottom left corner when you are on the initial Windows Startup screen.
  • Next, click on Troubleshoot, and then on the other screen, click the Startup Repair option.
  • Now select the operating system you want to repair. Once you do that, it will start to repair your operating system. Wait until the process is completed and then check if the problem’s now fixed.

Option 3 – Try to run System Restore in Safe Mode

If you can’t boot into your Windows 10 computer, you can try to run System Restore again in the Advanced Startup Options.
  • Boot your computer into Safe Mode.
  • After that, select an option > Troubleshoot > Advanced Options > Startup Settings > Restart.
  • Once your computer has restarted, tap the F6 key to enable Safe Mode with Command Prompt and to run System Restore from there.
  • Now in Command Prompt, type the “rstrui.exe” command to run System Restore in Safe Mode. This will help in fixing the problem since it would be safer to perform System Restore of the computer.
Read More
Fix Google Chrome error “He’s dead, Jim!”
If you always use the Google Chrome browser in browsing the internet, then you might have come across an error message saying, “He’s dead, Jim!” along with a funny looking face that’s peeking its tongue out and another detailed message saying, “Either Chrome Ran out of memory or process for the webpage has terminated for some other reason. To continue, reload the webpage or go to another page”. This error message in Google Chrome is actually quite famous and it appears for various reasons but it may have something to do with a memory issue. The Google Chrome browser is known to consume a lot of memory and the more web pages you open and load, it takes up more resources. Thus, the first thing you need to do when you encounter this error is to simply click the Reload button to continue browsing the internet or close the browser and then open it again. On the other hand, if you keep seeing this error message, then that’s a whole different story as you have to take some action to prevent it from popping up again, for good. Follow the instructions given below to fix the error in Chrome.

Option 1 – Reduce Google Chrome’s memory usage

The first thing you can try is reducing the memory usage of the Chrome browser. However, this option has a bit of a disadvantage. If a website crashes, all the instances of that website will also crash although other open tabs and websites won’t be affected. This process is referred to as “Process-per-site” mode which you will have to launch Chrome within this parameter.

Option 2 – Run Google Chrome with Strict Site Isolation

Aside from reducing Chrome’s memory usage, you can also run the browser with the Strict Site Isolation which makes sure that the crashing of one tab in the browser won’t affect the entire Windows as this feature will run every website you open on its own isolated process.

Option 3 – Run the built-in Malware Scanner and Cleanup tool in Chrome

In case you don’t know, there is actually a built-in malware scanner and cleanup tool in Chrome that helps you get rid of any unwanted ads, pop-ups, and even malware, as well as unusual startup pages, toolbars, and other things that could affect the performance of the browser.

Option 4 – Reset Google Chrome

Resetting Chrome can also help you get rid of the “He’s dead, Jim!” error message for good. Resetting Chrome means restoring its default settings, disabling all the extensions, add-ons, and themes. Aside from that, the content settings will be reset as well and the cookies, cache, and site data will also be deleted. To reset Chrome, here’s what you have to do:
  • Open Google Chrome, then tap the Alt + F keys.
  • After that, click on Settings.
  • Next, scroll down until you see the Advanced option, once you see it, click on it.
  • After clicking the Advanced option, go to the “Restore and clean up the option and click on the “Restore settings to their original defaults” option to reset Google Chrome.
  • Now restart Google Chrome.

Option 5 – Perform a clean reinstall on the Chrome browser

Although reinstalling any program is easy, not so much for Google Chrome as you need to make sure that the User Data folder is deleted before you reinstall it.
  • Tap the Win + R keys to open the Run prompt.
  • Then type %LOCALAPPDATA%GoogleChromeUser Data in the field and hit Enter.
  • Next, rename the “Default” folder inside the path you were redirected to. For instance, you can rename it to “Default-old”.
  • After that, install the Chrome browser again.

Option 6 – Try to flush the DNS and reset the TCP/IP

There are instances when a network goes into haywire because of a bad DNS. Thus, a bad DNS might be the one that’s causing this headache so it’s time for you to reset the entire network to resolve the issue. To reset the network, here’s what you have to do:
  • Click the Start button and type in “command prompt” in the field.
  • From the search results that appear, right-click on Command Prompt and select the “Run as administrator” option.
  • After opening Command Prompt, you have to type each one of the commands listed below. Just make sure that after you type each command, you hit Enter
    • ipconfig /release
    • ipconfig /all
    • ipconfig /flushdns
    • ipconfig /renew
    • netsh int ip set dns
    • netsh winsock reset
After you key in the commands listed above, the DNS cache will be flushed and the Winsock, as well as the TCP/IP, will reset.
  • Now restart your computer and open Google Chrome then try opening the website you were trying to open earlier.
Note: You can also try changing the DNS server to the Google Server, i.e. 8.8.8.8, and then see if it works for you or not.

Option 7 – Disable both the antivirus and firewall temporarily

As you know, both the firewall and antivirus programs are there to protect the operating system from any malicious threats. So if they find that there is some malicious content in a website you are visiting, they will block the site right away. Thus, it could also be the reason why you’re getting the “He’s dead, Jim!” error so you need to disable both the firewall and antivirus program temporarily and then try opening the website again. If you are able to open the website, you need to add this site as an exception and then enable the firewall and antivirus program back.
Read More
How to Fix Windows 10 Error 0x8007001

How to Fix Windows 10 Error 0x8007001

Error Code 0x8007001 - What is it?

Error Code 0x8007001 occurs during installations that take place in Windows 10.  Various versions of this same error have also been present in previous editions of the software and the methods to resolve the error across these versions are the same

Common symptoms include:

  • Inability to complete the installation process for updates, programs, and system versions.
  • Installations quitting out in the middle of the process, particularly as the files are unpacked.

Several solutions for Error Code 0x8007001 require the user to complete semi-complex tasks. If you aren’t comfortable with the processes necessary to finish the methods below, make sure that you get in touch with a certified professional who is familiar with the Windows operating system to assist you in the resolution of the error code.

Solution

Restoro box imageError Causes

In many cases, Error Code 0x8007001 is caused by an installation disk that is not functioning properly or installation files that have been corrupted or changed. When this is the case, the operating system will not be able to begin actually installing the files and will instead hang up as the files are unpacked from the installation set.

Further Information and Manual Repair

For Error Code 0x8007001 to be repaired properly, the missing or corrupted installation files need to be repaired or the system needs to be able to recognize the files that it is missing. This can require some advanced computing knowledge. If you don’t feel comfortable with the idea of undertaking the methods below on your own, contact a computer repair technician who can assist you in following these steps.

Method One:  Load the Install Files on an Alternative Disk

In some cases, the operating system simply cannot recognize the installation files that are present on the disk in question, whether it is on a hard drive, a set of downloaded files, or files from a flash drive. If this is the case on your particular machine, the simplest way to work around the problem is to load the installation files onto an alternative disk source, whether it be a flash drive, CD, DVD, or secondary hard drive. After these files have been properly loaded onto that alternative disk, attempt to run the installation from the alternative source instead.

If this method is successful, it means that the system may have had trouble recognizing the files involved in the installation from the first source, but that the files themselves were not corrupted or changed.

Make sure that you save the alternative disk source after your installation is complete in case you ever need to do a fresh installation on your machine.

Method Two:  Clean Your Disc and Your Drive

If you are installing files from a DVD or CD, check to make sure that the back of the disc is free from scratches and dust. If there are no visible marks on the disc, you may need to open up your disk drive to see if there is a build-up of dust or debris inside of the drive. If this is the case, simply clean your drive and re-attempt your installation process from the included disk.

Method Three:  Run the Windows Update Troubleshooter and Update Your Programs

If the error code is still appearing on your machine, you can open up your Windows Update tool and run the troubleshooting wizard, which will then scan your machine to see if there are any potential problems that it can fix. Next, run the Update tool itself if there are any updates that need to be performed. Sometimes, this can resolve the error at hand. Make sure to restart your computer after any updates or changes have been made so that you can ensure that they are applied by the operating system appropriately.

Method Four: Use An Automated Tool

If you wish to always have at your disposal a utility tool to fix these Windows 10 and other related issues when they do arise, download and install a powerful automated tool.
Read More
How to remove MyWebFace

MyWebFace is a browser extension developed by Mindspark. This extension claims to allow users to easily access websites that allow them to make a cartoon portrait of themselves. While this may seem interesting in the beginning, all this extension does is to add links to already popular websites that are easy to find.

When installed MyWebFace changes your default search engine and your home page to MyWay.com.

While the extension is running it gathers user browsing information, allowing it to mine data and better server unwanted ads throughout your browsing sessions. MyWebFace has been marked as a Browser Hijacker by many anti-virus programs, and while not considered malware, it is not recommended to keep it on your computer.

About Browser Hijackers

Browser hijackers (sometimes referred to as hijackware) are a type of malicious software that alters web-browser configurations without the user’s knowledge or consent. These hijacks happen to be rising at a worrying rate worldwide, and it could be really nefarious and sometimes harmful too. Browser hijackers are capable of doing a variety of things on your PC. In general, hijackers are made for the benefit of online hackers often through revenue generation that comes from forced ad clicks and website visits. Although it may seem naive, all browser hijackers are harmful and thus always classified as security risks. Browser hijackers could also let other destructive programs without your knowledge further damage the computer.

Indications of browser hijack

There are numerous signs that indicate the browser is highjacked: 1. the browser’s home page is changed 2. if you enter a URL, you find yourself constantly directed to a different web page than the one you intended 3. the default web engine has been changed and your web browser security settings have been lowered without your knowledge 4. unsolicited new toolbars are added to your web browser 5. you observe numerous ads pop up on the web browsers or computer screen 6. your browser gets sluggish, buggy crashes often 7. you can’t go to certain websites like home pages of anti-malware software.

How does a browser hijacker infect a PC

Browser hijackers can get into a PC in some way or other, for instance via downloads, file sharing, and e-mail also. They also come from add-on applications, also known as browser helper objects (BHO), web browser extensions, or toolbars. Also, some shareware and freeware can put the hijacker within your computer through “bundling”. Typical examples of browser hijackers include Conduit, CoolWebSearch, OneWebSearch, Coupon Server, RocketTab, Snap.do, Delta Search, and Searchult.com. Browser hijacking can cause severe privacy problems and even identity theft, disrupt your browsing experience by taking control over outgoing traffic, substantially slows down your PC by deleting lots of system resources, and lead to system instability at the same time.

Browser Hijacker Malware – Removal

Certain hijackers can be removed simply by uninstalling the corresponding freeware or add-ons from the Add or Remove Programs in the Windows control panel. In some cases, it can be a difficult task to discover and get rid of the malicious piece because the associated file will be running as part of the operating system process. Moreover, manual removal requires you to execute several time-consuming and complex procedures that are tough to conduct for inexperienced computer users. Browser hijackers could be effectively removed by installing the anti-malware application on the affected system. To get rid of any type of browser hijacker from your computer, you could download this particular top-notch malware removal program – SafeBytes Anti-Malware. And use a system optimizer, such as Total System Care, to eliminate all related files from the registry and repair browser issues.

Tips on How to Eliminate a Virus that is Blocking Websites or Preventing Downloads

Malware may cause several different types of damage to PCs, networks, and data. Some malware is meant to restrict or block things that you wish to do on your personal computer. It may well not permit you to download anything from the internet or stop you from accessing some or all sites, in particular the anti-virus sites. If you’re reading this, chances are you’re stuck with a malware infection that is preventing you to download or install the Safebytes Anti-Malware program on your system. Even though this type of problem can be tougher to get around, there are a few actions you can take.

Start Windows in Safe Mode

The Windows OS includes a special mode known as “Safe Mode” where just the bare minimum required programs and services are loaded. In case the virus is set to load immediately when the PC starts, switching to this mode may prevent it from doing so. To start the computer into Safe Mode, press the “F8” key on the keyboard right before the Windows boot screen appears; Or after normal Windows boot up, run MSCONFIG, look over “Safe Boot” under the Boot tab, and click Apply. Once you’re in safe mode, you can attempt to install your antivirus software application without the hindrance of the malicious software. Following installation, run the malware scanner to eliminate standard infections.

Switch over to an alternate internet browser

Some malware only targets certain internet browsers. If this is your case, utilize another web browser as it might circumvent the computer virus. If you suspect that your Internet Explorer has been hijacked by malware or otherwise compromised by hackers, the best course of action is to switch to an alternate browser like Chrome, Firefox, or Safari to download your favorite computer security software – Safebytes Anti-Malware.

Install and run anti-virus from a USB drive

To effectively get rid of the malware, you should approach the problem of running an anti-malware software program on the affected computer from a different angle. To run anti-virus using a USB flash drive, follow these simple steps: 1) Use another virus-free computer system to download Safebytes Anti-Malware. 2) Insert the USB drive into the uninfected PC. 3) Double-click the Setup icon of the anti-malware software package to run the Installation Wizard. 4) When asked, select the location of the USB drive as the place in which you would like to store the software files. Do as instructed on the screen to complete the installation process. 5) Transfer the thumb drive from the clean computer to the infected computer. 6) Double-click the anti-malware software EXE file on the USB flash drive. 7) Click the “Scan Now” button to start the virus scan.

Highlights of SafeBytes Anti-Malware

If you are looking to install an anti-malware program for your PC, there are numerous tools on the market to consider nonetheless, you just cannot trust blindly anyone, irrespective of whether it is a free or paid program. A few of them do a good job in removing threats while some will harm your computer by themselves. You should choose one that is efficient, practical, and has a strong reputation for its malware source protection. On the list of strongly recommended software is SafeBytes Anti-Malware. SafeBytes has a superb history of top-quality service, and customers appear to be very happy with it. SafeBytes anti-malware is a reliable tool that not only secures your PC permanently but is also quite easy to use for people of all ability levels. With its outstanding protection system, this utility will quickly detect and remove the majority of the security threats, including browser hijackers, viruses, adware, ransomware, trojans, worms, and PUPs.

There are many amazing features you will get with this particular security product. Listed below are a few of the great ones:

Antimalware Protection: Using its enhanced and sophisticated algorithm, this malware elimination tool can identify and remove the malware threats hiding in your PC effectively. Real-time Threat Response: Malware programs looking to enter the computer are discovered and stopped as and when detected by the SafeBytes real-time protection shields. This tool will continuously monitor your PC for any suspicious activity and updates itself continuously to keep abreast of the constantly changing threat scenarios. Faster Scanning: This software has one of the fastest and most powerful virus scanning engines in the industry. The scans are extremely accurate and take a little time to complete. Safe Web Browsing: Through its unique safety ranking, SafeBytes notifies you whether a site is safe or not to visit it. This will assure that you’re always certain of your online safety when browsing the net. Minimal CPU Usage: SafeBytes is a lightweight and user-friendly anti-virus and anti-malware solution. As it uses very low computer resources, this program leaves the computer’s power exactly where it belongs: with you actually. 24/7 Guidance: You can obtain absolutely free 24/7 technical assistance from their computer experts on any product queries or PC security issues. To conclude, SafeBytes Anti-Malware is really great for securing your computer against all kinds of malware threats. You now may understand that this particular software does more than just scan and eliminate threats in your PC. You will get the best all-around protection for the money you spend on SafeBytes Anti-Malware subscription, there isn’t any doubt about it.

Technical Details and Manual Removal (Advanced Users)

If you wish to manually remove MyWebFace without the use of an automated tool, it might be actually possible to do so by removing the program from the Windows Add/Remove Programs menu, or in cases of browser plug-ins, going to the browsers AddOn/Extension manager and removing it. You will likely also want to reset your browser. Lastly, check your hard disk for all of the following and clean your computer registry manually to remove leftover application entries after uninstallation. However, editing the registry can be a difficult job that only advanced users and professionals should try to fix it. Moreover, certain malicious programs are capable to defend against its deletion. You’re advised to do this process in Safe Mode.
Files: %PROGRAMFILES%\MyWebFace_5aEI\Installr.binaEZSETP.dll %PROGRAMFILES%\MyWebFace_5aEI\Installr.bin\NP5aEISb.dll Search and Delete: 5aauxstb.dll 5abar.dll 5abarsvc.exe 5abrmon.exe 5abrstub.dll 5adatact.dll 5adlghk.dll 5adyn.dll 5afeedmg.dll 5ahighin.exe 5ahkstub.dll 5ahtmlmu.dll 5ahttpct.dll 5aidle.dll 5aieovr.dll 5aimpipe.exe 5amedint.exe 5amlbtn.dll 5amsg.dll 5aPlugin.dll 5aradio.dll 5aregfft.dll 5areghk.dll 5aregiet.dll 5ascript.dll 5askin.dll 5asknlcr.dll 5askplay.exe 5aSrcAs.dll 5aSrchMn.exe 5atpinst.dll 5auabtn.dll CREXT.DLL CrExtP5a.exe NP5aStub.dll T8EXTEX.DLL T8EXTPEX.DLL T8HTML.DLL T8RES.DLL T8TICKER.DLL Folders: C:\Documents and Settings\username\Application Data\Mozilla\Firefox\Profiles\gb5e8gtn.default\extensionsaffxtbr@MyWebFace_5a.com C:\Documents and Settings\username\Application Data\MyWebFace_5a C:\Program Files\MyWebFace_5a Registry: Key HKLM\SOFTWARE\MyWebFace_5a Key HKLM\SOFTWARE\MozillaPlugins\@MyWebFace_5a.com/Plugin Key HKLM\SOFTWARE\Microsoft\Windows\CurrentVersion\Uninstall\MyWebFace_5abar Uninstall Key HKLM\SOFTWARE\Microsoft\Windows\CurrentVersion\Explorer\Browser Helper Objects\b1df253a-9e7a-480d-b6a5-7a435b520dbb Key HKLM\SOFTWARE\Microsoft\Windows\CurrentVersion\Explorer\Browser Helper Objects\14d02517-c8be-4735-a344-3c8366c77aa0 Key HKLM\SOFTWARE\Classes\MyWebFace_5a.ThirdPartyInstaller Key HKLM\SOFTWARE\Classes\MyWebFace_5a.SkinLauncherSettings Key HKLM\SOFTWARE\Classes\MyWebFace_5a.SkinLauncher Key HKLM\SOFTWARE\Classes\MyWebFace_5a.ScriptButton Key HKLM\SOFTWARE\Classes\MyWebFace_5a.SettingsPlugin Key HKLM\SOFTWARE\Classes\MyWebFace_5a.RadioSettings Key HKLM\SOFTWARE\Classes\MyWebFace_5a.Radio Key HKLM\SOFTWARE\Classes\MyWebFace_5a.PseudoTransparentPlugin Key HKLM\SOFTWARE\Classes\MyWebFace_5a.MultipleButton Key HKLM\SOFTWARE\Classes\MyWebFace_5a.HTMLPanel Key HKLM\SOFTWARE\Classes\MyWebFace_5a.HTMLMenu Key HKLM\SOFTWARE\Classes\MyWebFace_5a.FeedManager Key HKLM\SOFTWARE\Classes\MyWebFace_5a.DynamicBarButton Key HKLM\SOFTWARE\Microsoft\Windows\CurrentVersion\Run\ Value: MyWebFace_5a Browser Plugin Loader Data: 5aPlugin.dll Key HKLM\SOFTWARE\Microsoft\Windows\CurrentVersion\Run\ Value: MyWebFace Search Scope Monitor Data: 5abrmon.exe Key HKLM\SOFTWARE\Microsoft\Windows\CurrentVersion\Run\ Value: MyWebFace Data: MyWebFace.dll
Read More
How to Fix REGISTRY_ERROR in Windows
As you know, you can encounter Blue Screen errors at any given point after your computer boots up and can just reboot it randomly which results in loss of unsaved work. One of these Blue Screen errors is the “REGISTRY_ERROR”. This kind of Stop error has a bug check value of 0x00000051 which indicates your computer’s registry has encountered a severe error. There could be a number of causes for this error but at the time of writing, it is quite difficult to narrow them down to one component. If you face this kind of Blue Screen error, worry not as this post will guide you in fixing it. As mentioned, this error indicates that there is something wrong with the registry, particularly an I/O error while it tried to read one of its files. This may be caused by hardware issues or file system corruption. It could also be due to failure in a refresh operation which is only used by the security system and only when resource limits are encountered. To fix the Registry_Error Blue Screen, you can try to use the CHKDSK utility or the System File Checker, or the DISM tool or run the Blue Screen troubleshooter. You may also try to reset your computer or repair Windows by using installation media.

Option 1 – Run the Check Disk utility

The first thing you can do to fix the REGISTRY_ERROR Blue Screen error is to run the Check Disk utility. How? Follow these steps:
  • In the Windows Search box, type “command prompt” and from the search results, right-click on Command Prompt and select “Run as administrator”.
  • After opening Command Prompt, type this command and tap Enter: chkdsk <Drive Letter>: /f /r /x /b
  • The command you entered will start to check for errors and fix them automatically. Else, it will throw an error message saying, “Chkdsk cannot run because the volume is in use by another process. Would you like the schedule this volume to be checked the next time the system restarts? (Y/N)”.
  • Tap the Y key to schedule Disk Check the next time your computer restarts.

Option 2 – Run the Blue Screen Troubleshooter

The Blue Screen troubleshooter is a built-in tool in Windows 10 that helps users in fixing BSOD errors like REGISTRY_ERROR. It can be found in the Settings Troubleshooters page. To use it, refer to these steps:
  • Tap the Win + I keys to open the Settings panel.
  • Then go to Update & Security > Troubleshoot.
  • From there, look for the option called “Blue Screen” on your right-hand side and then click the “Run the troubleshooter” button to run the Blue Screen Troubleshooter and then follow the next on-screen options. Note that you might have to boot your PC into Safe Mode.

Option 3 – Run System File Checker

  • Open Command Prompt with admin privileges.
  • After that, execute this command: sfc /scannow
  • Once the scan is completed, restart your computer and then check if the REGISTRY_ERROR is now fixed.

Option 4 – Run the DISM tool

You can try running the Deployment Imaging and Servicing Management or DISM tool to fix the REGISTRY_ERROR Blue Screen error. Using this built-in tool, you have various options such as the “/ScanHealth”, “/CheckHealth”, and “/RestoreHealth”.
  • Open the Command Prompt with admin privileges.
  • Then type in the following commands and make sure to hit Enter right after you type each one of them:
    • Dism /Online /Cleanup-Image /CheckHealth
    • Dism /Online /Cleanup-Image /ScanHealth
    • exe /Online /Cleanup-image /Restorehealth
  • Do not close the window if the process takes a while as it will probably take a few minutes to finish. Once it’s done, restart your computer.

Option 5 – Reset your computer

  • Tap the Win key or click on the Start button located in the Taskbar.
  • Then click on the Power button at the bottom right portion of the screen.
  • Next, press and hold the Shift key on your keyboard and then click on Restart. This will restart your Pc into the Advanced Startup options.
Note: Once you have access to the Advanced Startup options, you have to go to the setting which allows you to Reset your Windows 10 PC. All you have to do is select Troubleshoot > Reset this PC to reach the following screen Afterward, select either the “Keep my files” option and then proceed to the next on-screen instructions that follow to reset your Windows 10 computer without losing your files.

Option 6 – Try to perform repair install by creating a Windows 10 installation media

  • Click this link and then click the Download Tool Now button.
  • Next, click the “Use the tool to create installation media (USB flash drive, DVD, or ISO file)…” option and follow the next given instructions on the screen.
  • Now select the ISO file option in step 5.
  • After that, you should now have an ISO file.
  • Next, go to the location where you’ve downloaded the ISO file.
  • Then right-click on the Windows 10 ISO file and select the Open with option and then select File Explorer.
  • Now click on “setup.exe” and follow the next instructions that appear on the screen. When asked, you have to select either Nothing (clean install) or Keep personal files only option. Take note that you must not select the “Keep personal files, apps, and Windows settings”.
Read More
How to Fix The Rtl70.bpl Error on Your System

Repair Rtl70.bpl Error on Your System

Rtl70.bpl Error - What is it?

To understand Rt170.bpl error code, it is important to have a good understanding of .bpl files first. BPL is the abbreviation of Borland Package Library. BPL is a developer file format used by Borland. It contains dynamic link libraries which are used for constructing Borland programs. BPL files are most commonly used for Borland Delphi programs. Delphi competes with Visual Basic as an offering for an object-oriented visual programming approach to application development. There are many programs/applications on your system that use rtl70.bpl file format to run successfully on Windows PC. The rtl70.bpl error occurs when this file gets damaged or corrupted. It fails to execute the command and run the application on your system. When your computer experiences this problem with this file, the following error messages are likely to appear:
  • rtl70.bpl is not responding
  • Runtime error: rtl70.bpl
  • Symantec User Session has encountered a problem and needs to close. We are sorry for the inconvenience. Application Name: rtl70.bpl
This error code exposes you to system freeze, crash, abrupt system shutdowns, blue screen of death errors, and it also reduces your PC performance.

Solution

Restoro box imageError Causes

The potential causes of rtl70.bpl error code includes:
  • DLL file was damaged due to viral infection or spyware
  • DLL file was overwritten by an incompatible version
  • Poor program installation
  • Too many invalid and obsolete registry entries stored in the RAM
  • Related Registry entries are corrupt

Further Information and Manual Repair

Here are some of the best yet simple solutions for you to resolve rtl70.bpl error on your PC:

1. Reboot Your PC

Sometimes this error can be resolved by simply restarting your system. Try rebooting your system and running .bpl supported program. If the program runs after you reboot your PC, then that’s great! But you should keep in mind that this is a temporary solution. The error may reappear anytime soon. So, it is advisable to consider a long-term solution for repairing the error code for the longest time.

2. Uninstall and then Reinstall the Program Causing the Error

If the error occurred after a certain program installed on your system,  it is advisable to uninstall it and then reinstall the program. Simply go to the control panel, select Add/Remove program option and uninstall the program that you recently installed that could be triggering the rtl70.bpl error code. Now reinstall and run it on your system. If the error is resolved, then this means the poor installation was the cause. If not, then this means the cause of the error is related to the registry.

3. Registry Restore to Fix rt170.bpl error

There are two ways to go about it. The first one is to click on the start menu, type registry editor, and press run. This will open the registry editor. Now click on the computer option then click file and import. This helps restore the registry but it is possible that the problem might persist. The error code may pop up again. Also, if the registry is damaged due to viral infection, then this solution may not work and you may still experience the error on your system. Then you will also have to download an antivirus which may further reduce the speed of your PC. However, the best way to restore the registry and to get rid of the error code for the longest time is to download Restoro. This is a new, user-friendly, high and multi-functional repair tool that functions as a registry cleaner and a system optimizer. It cleans the registry by scanning and removing all the unnecessary and obsolete files saved in RAM such as junk files, internet history, invalid registry entries, and more. It also repairs the damaged dll files and restores the registry thereby resolving the rtl70.bpl error. Restoro is easy to use, safe, efficient, and compatible on all Windows versions. To get started and resolve the rtl70.bpl error code in just a few seconds on your system click here and download Restoro.
Read More
UNMOUNTABLE_BOOT_VOLUME
One of the worst Blue Screen of Death errors you can encounter is the UNMOUNTABLE_BOOT_VOLUME BSOD on Windows 10. In this BSOD error, your computer won’t be able to properly boot. Meaning to say, even if you want to reinstall Windows, you won’t be able to back up your important files. Thus, it wouldn’t be really feasible to fix the system files, and besides, reinstalling Windows 10 would take a lot of time, not to mention resources. The UNMOUNTABLE BOOT VOLUME error is the kind of BSOD error that occurs if Windows is not able to access the volume that contains the boot files. Resolving this BSOD error won’t be easy but you will surely manage by following the suggestions laid out below but before you go on, make sure to create a System Restore Point.

Option 1 – Try checking the hardware

If you got the UNMOUNTABLE BOOT VOLUME BSOD error while trying to update your computer to a higher version of Windows, then you need to check if you have the compatible drivers for the disk controller as well as re-check the drive cabling and make sure that it is properly configured. And if you’re reusing either ATA-100 or ATA-66 drivers, ensure that you have an 80-connector cable and not the standard 40-connector IDE cable.

Option 2 – Try using Automatic Repair

You might also want to use Automatic Repair in fixing the BSOD error. To do so, follow the steps below.
  • You can start by creating and booting from a bootable Windows 10 USB Stick.
  • After that, click on Repair your computer located in the bottom left corner when you are on the initial Windows Startup screen.
  • Next, click on Troubleshoot, and then on the other screen, click the Startup Repair option.
  • Now select the operating system you want to repair. Once you do that, it will start to repair your operating system. Wait until the process is completed and then check if the problem’s now fixed.

Option 3 – Try fixing the Master Boot Record or MBR

The MBR or Master Boot Record is the location and is where the architecture of the operating system is installed. Thus, if either the location or the architecture has tampered with, it can cause lots of BSOD errors like the UNMOUNTABLE BOOT VOLUME error.
  • Boot your computer into Safe mode with Networking using the Advanced startup options which you can access by tapping the F2 or F8 key. Once you’ve accessed the Advanced startup options.
  • After you access the Advanced Startup options, select Command Prompt by using the arrow keys on your keyboard.
  • After opening Command Prompt, execute the following command and hit Enter:
bootrec /fixboot
  • After entering the command, wait until the process is completed and then restart your computer to apply the changes made successfully.

Option 4 – Run the CHKDSK command to repair hard disk errors

Running the Chkdsk utility could help you fix the UNMOUNTABLE BOOT VOLUME error. If your hard drive has issues with integrity, the update will really fail as the system will think that it’s not healthy and that’s where the Chkdsk utility comes in. The Chkdsk utility repairs hard drive errors that might be causing the problem.
  • After you access the Advanced Startup options, select Command Prompt by using the arrow keys on your keyboard.
  • After opening Command Prompt, execute the following command and hit Enter:
chkdsk /f /r
  • The command you entered will scan the hard disk for any errors and will automatically fix it if it finds some issues. Wait for the process to be completed and then reboot your PC.
Read More
How to Fix the Error Code 28

How to Fix the Error Code 28

Error Code 28- What is it?

The error code 28 is a driver error. This is one of the many device manager error codes. When this error occurs on your computer, the following message is displayed:

“The drivers for this device are not installed. (Code 28)”

Another driver device error message you might encounter is error code 41. 

Error Causes

Error 28 occurs because of unsuccessful device driver installation. This usually happens when you try to update new drive versions on your system. It is advisable to repair this error right away as it can hamper your ability to use certain hardware. For example, if error 28 occurs due to the unsuccessful installation of the USB driver, then it if not fixed and resolved it may prevent you from using hardware devices. Unsuccessful driver installation means you either didn’t install it properly or your computer has registry issues. If it’s the registry then you must fix it without any delay because it can expose your PC to serious threats like system crash and failure. To avoid such inconvenience, repair it.

Further Information and Manual Repair

When it comes to repairing the error code 28, here’s what you can do: Simply go to the control panel and click on the Device Manager option:
  • In the details pane with the list of devices, locate the device for which you want to reinstall the driver software.
  • Double click on it to open the properties dialog box.
  • Now click on the driver tab and then click update driver.
After updating, try using that device again if it doesn’t work and shows the error code 28 on your computer screen then this means the underlying cause is the registry. Congratulations, you have just Fixed Error Code 28 In Windows 10 all by yourself. If you would like to read more helpful articles and tips about various software and hardware visit errortools.com daily. Now that’s how you fix Error Code 28 In Windows 10 on a computer. On the other hand, if your computer is going through some driver-related issues that have to get fixed, there is a one-click solution known as DRIVERFIX you could check out to resolve them. This program is a useful tool that could repair corrupted drivers and optimize your PC’s overall performance. This is basically a solution that’s within your grasp with just a click. It’s easy to use as it is user-friendly. For a complete set of instructions in downloading and using it, refer to the steps below Perform a full system scan using DRIVERFIX. To do so, follow the instructions below.
  1. Download and install DRIVERFIX. from the official site.
  2. Once the installation process is completed, run DRIVERFIX. to perform a full system scan. driverfix screenshot
  3. After the scan is completed click the “Update All” button. driverfix screenshot
Read More
1 2 3 162
Logo
Copyright © 2022, ErrorTools. All Rights Reserved
Trademarks: Microsoft Windows logos are registered trademarks of Microsoft. Disclaimer: ErrorTools.com is not affiliated with Microsoft, nor claim direct affiliation.
The information on this page is provided for information purposes only.
DMCA.com Protection Status