Fix DISM Error: The scratch directory size ...

One of the most useful and powerful built-in utility in Windows 10 is the DISM tool. This tool can be used with the Command Prompt command line as well as for other purposes. However, it is not without flaws and there are times when you may encounter some issues while using it.

One of the problems you can get while using the DISM tool is the following error:

“The scratch directory size might be insufficient to perform this operation”

This kind of error in DISM occurs when the DISM command is executed from the Windows Recovery Environment due to the limited size permissions of a delivery where the operating is being performed. To fix this DISM error, you need to follow the instructions laid out below.

Step 1: First, tap the Win + R keys to open the Run utility and then type “cmd” in the field and tap Enter to open Command Prompt.

Step 2: Next, you have to specify a scratch directory that contains the Windows folder and to do that, you can either use the DIR command or the BCEDIT command. So in the elevated command prompt type and enter “dir” or “bcedit”.

Step 3: After that, you will see a list of folders inside the C: partition. Now you have to create a folder named “scratch” inside the partition. To do so, execute the following command:

mkdir C:Scratch

Note: The command you just entered will create a directory inside the root of the C: partition named Scratch.

Step 4: Now that you’ve created the Scratch folder, note that each time you run any of the DISM commands, you have to enter the following code snippet in them:

/ScratchDir:C:Scratch

 Note: For instance, if you are using the DISM tool to repair the offline Windows image, instead of executing the “Dism /Online /Cleanup-Image /RestoreHealth” command, you now have to execute the “DISM /Image:C: /ScratchDir:C: Scratch /Cleanup-Image /Restorehealth” command. And if you want to remove a selected installed update package, you can use the “DISM /image:C: /ScratchDir:C:Scratch /Remove-Package /PackageName:Package_for_RollupFix~31bf3856ad364e75~amd64~~16299.196.4.9” command. Keep in mind that the mentioned package is only an example. And lastly, you also have to replace the drive letter in the new code snippet when you execute the commands given above.

If you like to learn and find out more about various Windows errors, and how to repair them go to our vast archive or use search to find articles that will explain and help you in solving your issue.
However, if you prefer to do things fast and with automatization then we are proposing to use an automated solution for your issues. The application that we are recommending is Advanced System Repair Pro
Advanced System Repair utilizes multiple tools all in one to give you a quick, simple, reliable, and very thorough diagnosis of your PC. It brings you all the tools you need in one program to clean, fix, protect, optimize and boost your PC!
1-Click Maintenance
All the tools to make it simple and easy! It's like having a professional technician at the click of a mouse.

Junk Cleaner
Keeping your computer free from unnecessary clutter also helps make your computer last longer. Like any other machine, if you keep it clean and take care of it, it will serve you better for longer!

Optimize background apps
Optimize applications background activity with the built-in Application Optimizer feature.

Disk Defrag
With a simple 1-click, Advanced System Repair speeds up your PC by assembling fragmented files on your machine and organizing them more efficiently.

Malware Removal
Finds and removes all types of harmful malware including trojans, worms, bots, adware, spyware, PUPs, and more!

Privacy Cleaner
The all-in-one privacy suite to Clean Your Tracks & Protect Your Privacy! Make your computer safe, secure, and more efficient!

System Tweak/Optimizer
ASR will analyze your complete system and settings to adjust your PC to function at its maximum performance.

Registry Cleaner
Over time, as you install and uninstall applications, the registry can become cluttered with old entries and broken settings which can result in program crashes, and annoying messages and slow the computer down.
Visit our Advanced System Repair Pro Download page to inform yourself about all the benefits of this software and get a free trial copy of it.
advanced system repair pro

Advanced System Repair Pro

One-click automated PC repair solution
ASR logo
With Advanced System Repair Pro you can easily
Replace damaged files
Restore performance
Free disk space
Remove Malware
Protects WEB browser
Remove Viruses
Stop PC freezing
DOWNLOAD
Privacy Policy | Terms of Use | Uinstall
Advanced System Repair Pro is compatible with all versions of Microsoft Windows including Windows 11

Share this article:

You might also like

Fix GeForce Experience error code 0x0001
The GeForce Experience on graphics card manufactured by NVIDIA is an advantage for users who loves gaming as it makes enhances users’ gaming experience. However, there are times when it may also encounter some problems. One of the problems users may encounter is the error code 0x0001. This kind of error occurs when users open the NVIDIA GeForce Experience utility. Here’s the full content of the error message:
“Something went wrong, try rebooting your PC and then launch GeForce Experience, ERROR CODE: 0x0001.”
Errors like this one diminish the overall experience of users due to the fact that when this error occurs, the NVIDIA GeForce experience wouldn’t even start which renders its features useless. There are several potential fixes you can check out to resolve this error but before you check them out, you can try to restart your computer first and then open the NVIDIA GeForce Experience once again, if you still encounter the error, then you need to check the NVIDIA Display Driver Services or update your NVIDIA display drivers or switch to the BETA release. You could also try to install and reinstall the NVIDIA display drivers or perform System Restore and see if it helps. For detailed instructions, follow the given options below.

Option 1 – Try to check the NVIDIA Display driver services

  • Tap the Win + R keys to open Run and then type “services.msc” in the field and hit Enter to open the Services Manager.
  • From there, look for the following NVIDIA services and make sure that their Startup types are as follows:
    • NVIDIA Display Container LS – Automatic
    • NVIDIA NetworkService Container – Manual
    • NVIDIA LocalSystem Container – Automatic
    • NVIDIA LocalSystem Container – Automatic
    • NVIDIA GeForce Experience Service – Automatic (Delayed Start)
    • NVIDIA Geforce Experience Backend Service – Automatic (Delayed Start)
    • NVIDIA Telemetry Container service – Automatic
  • Next, double click on each one of the services and go to Properties. Here, check if the service is running. If it’s not, just click on the Start button. On the other hand, if they’re already running, just click on Stop and then click on Start again.

Option 2 – Try to update the NVIDIA Display drivers

You can also try updating the NVIDIA display drivers as it might help in fixing the error. To update them, follow the steps below.
  • Tap the Win + R keys to open the Run dialog box.
  • Next type in “dxdiag” in the field and click OK or hit Enter to open the DirectX Diagnostic Tool.
  • From there, you can see what type of NVIDIA graphics card that your system is on.
  • Take note of your graphics card information and then look for the best drivers for your operating system. Once you’ve downloaded and installed the file, restart your PC.
Note: If you want to try out the beta release of the NVIDIA display drivers, click on this link. Beware though that the beta software is unstable and buggy and may cause some different bugs.

Option 3 – Try to roll back the driver to the previous version

If updating the NVIDIA display drivers didn’t work for you, then it’s time to roll back the device drivers. It is most likely that after you updated your Windows computer that your driver also needs a refresh.
  • Tap the Win + R keys to launch the Run window and then type in the “msc” command and hit Enter to open the Device Manager window.
  • Under the Device Manager, you will see a list of drivers. From there, look for the NVIDIA Drivers and expand it.
  • Next, select the driver entries that are labeled appropriately.
  • Then select each one of them and double click to open a new mini window.
  • After that, make sure that you’re on the Driver tab and if you are not, just navigate to it then click the Roll Back Driver button to switch back to the previous version of the NVIDIA Drivers.
  • Now restart your computer to successfully apply the changes made.

Option 4 – Try to run System Restore

You could also run System Restore as it might help fix the error code 0x0001 in NVIDIA GeForce Experience.
  • Tap the Win + R keys to open the Run dialog box.
  • After that, type in “sysdm.cpl” in the field and tap Enter.
  • Next, go to the System Protection tab then click the System Restore button. This will open a new window where you have to select your preferred System Restore point.
  • After that, follow the on-screen instructions to finish the process and then restart your computer and then check if the error code 0x0001 in GeForce Experience is now fixed.

Option 5 – Do a clean install on the NVIDIA driver

  • Before you do a clean install on the NVIDIA driver, you have to download the latest version of the Display Driver first.
  • Boot your Windows 10 PC into Safe Mode.
  • After that, double click on the executable file of the Display Driver Uninstaller to run and install it.
  • After the installation, open the program. Once you do, you should see the following window on your screen:
  • In the program window, click on the “Clean and restart” button.
  • After your PC has rebooted, download the NVIDIA drivers.
  • Then select your Product Type, Product Series, Product, Operating System, and Language appropriate for your hardware specifications as well as personal requirements.
  • Next, click on Search to display the latest available driver as per the information you entered.
  • And click on Agree and Download to start downloading the latest driver executable file.
  • Run the executable file after you finished downloading the latest driver executable file and then select Custom and click on Next.
  • Afterward, select “Clean Install” and proceed. Doing so would install the latest driver on your PC.
  • Restart your PC and check if the error’s now fixed. If not, you can try installing an older version of the driver instead.
Read More
Bluetooth Headset in Windows gets disconnected
Many Windows 10 users use a Bluetooth headset as these kinds of Audio devices, as you know, lack wires since wires tend to get entangled and break which could get quite inconvenient. This is why using a wireless headphone is more preferable since it’s much simpler, however, using a wireless headphone also means it comes with a charging requirement and if it fails to charge, there is no music or audio or anything that you need a Bluetooth headphone for. However, wireless headphones are also susceptible to problems as you might encounter some problems when connecting your wireless headphone to your Windows 10 computer. One of these problems include when you try to get sound from the wireless device but nothing happened. This indicates that the Bluetooth headphone is disconnected in some way for some unknown reason even if you’ve already plugged it in. Thus, if you encounter this scenario, then there are several options you need to check out to fix the problem. To start troubleshooting the problem, here are the options you need to use as a reference.

Option 1 – Try turning off the device and turning it back on

The first thing you can do to resolve the problem is to turn off your wireless audio device and wait for a couple of seconds before you turn it back on. In most cases, this should fix the problem. In fact, you can also try to unpair and pair the Bluetooth audio device and see if it fixes the problem or not.

Option 2 – Try to set the headphone as the default device manually

There are times when you plug a headphone, it does not toggle the default audio device. Thus, to fix this issue, you have to set the default audio device to the headphones manually. To do that, follow these steps:
  • First, right-click on the volume icon located on the system tray.
  • Next, select the Open sound settings option to open the Sound section in the Windows 10 Settings app.
  • After that, go to the Output section and select Headphones for the “Choose your output device” option. This should fix the problem for you.

Option 3 – Try running the Bluetooth Troubleshooter

As you know, Windows 10 has various troubleshooters with user-friendly interfaces where you can utilize them to fix issues in your PC. And since you’re dealing with some Bluetooth problem, you have to run the built-in Bluetooth Troubleshooter. To do this, follow these steps:
  • Open the Windows 10 Settings.
  • Then go to Update & Security > Troubleshoot.
  • You should find the option for Bluetooth on your right-hand side – click on it then click on the “Run the troubleshooter” option.
  • Now follow the next screen options.

Option 4 – Try to update or reinstall the Bluetooth driver

The issue might have something to do with the Bluetooth drivers. It could be that it is outdated and needs to be updated or that you recently updated it and since then you have trouble in removing the Bluetooth devices and so to fix the issue, you can update, roll back or uninstall the Bluetooth drivers. How? Follow the steps below.
  • Tap the Win + X keys to open the Device Manager.
  • Next, look for the Bluetooth device and right-click on it.
  • Select the option “Update driver”.
  • After that, a new popup window will appear. In there, select the option, “Search automatically for updated driver software”.
Note: Checking the update may take a few minutes so you’ll have to wait until it finishes. If it is able to find an update, you must install it. And if you want to reinstall the Bluetooth driver, just select the “Uninstall driver” option and follow the next on-screen instructions that follow.
Read More
Quick Fix Guide for Error 0xe06d7363

How To Fix Error 0xe06d7363

What is Error 0xe06d7363?

Error 0xe06d7363 is displayed when a process or an operation is not launched, or completed by an application.

This error can prevent the user from performing some operations. It might close the application unconditionally. Sometimes a ‘GetLastError()’, a ‘GetExceptionCode()’, or a ‘GetExceptionInformation()’ is displayed with this error.

Error Causes

Error 0xe06d7363 can occur for a number of reasons. Damaged, corrupted, or missing files in the registry database are the main reasons why the error might occur. Another reason is when the system files are not configured correctly, thus they corrupt system files in applications. They can also affect the hardware devices.

All code-generated exceptions in the Microsoft Visual C + + compiler will contain this error. As this error is compiler-generated, the code will not be listed in Win32 API header files. This code is a cryptic device, with ‘e’ for exception while the final 3 bytes represent ‘msc’ ASCII values.

Further Information and Manual Repair

To resolve this error, you will have to debug an application. While using Microsoft Visual Studio, you can stop the program when the error 0xe06d7363 occurs. To start debugging, follow these steps:

  • Start debugging application
  • From Debug menu, click on Exceptions
  • In the Exceptions window, select error 0xe06d7363
  • In Action, Change to Stop always from Stop if not handled

Another fix for this issue is reverting back to an earlier copy or the last update of the same Windows. Error 0xe06d7363 can occur is when you try running a client application using Microsoft.SqlServer.Types.dll component on your computer that has Microsoft SQL Server 2008 Server Pack 2 installed. With the error, the following text can be seen:

“unable to load DLL ‘SqlServerSpatial.dll’ Exception from HRESULT 0xe06d7363".

A Cumulative Update 7 was initially released for SQL Server 2008 Service Pack 2 in order to fix this issue. Since the builds are cumulative, every new fix released contains hotfixes and all security fixes which were also included in the previous SQL Server 2008 fix release. This error can be found in all Microsoft products that are listed in the Applies to Category.

Microsoft SQL Server 2008 hotfixes are created to resolve errors like 0xe06d7363 on specific SQL Server service packs. This error is by design and has commonly occurred in the previous versions of Windows before Windows 7.

Congratulations, you have just fixed Error 0xe06d7363 in Windows 10 all by yourself. If you would like to read more helpful articles and tips about various software and hardware visit errortools.com daily. Now that’s how you fix Error 0xe06d7363 in Windows 10 on a computer. On the other hand, if your computer is going through some system-related issues that have to get fixed, there is a one-click solution known as Restoro you could check out to resolve them. This program is a useful tool that could repair corrupted registries and optimize your PC’s overall performance. Aside from that, it also cleans out your computer for any junk or corrupted files that help you eliminate any unwanted files from your system. This is basically a solution that’s within your grasp with just a click. It’s easy to use as it is user-friendly. For a complete set of instructions in downloading and using it, refer to the steps below Perform a full system scan using Restoro. To do so, follow the instructions below.
      1. Download and install Restoro from the official site.
      2. Once the installation process is completed, run Restoro to perform a full system scan. restoro application screen
      3. After the scan is completed click the “Start Repair” button. restoro application screen
Read More
DuckDuckGo for better privacy
Many of us are taking the google search engine for granted and it is no true that it has crawled in almost every spore of our digital lives but if we wanted a little more privacy? Do we have options or we are destined to use google and send our information to this company. What if we really wanted that our searches are well safe, secure, and private? We could try other search engines like BING but since BING belongs to Microsoft we would exchange only one company for another without making any progress in the privacy battle. Enter DuckDuckGo. DuckDuckGo is a privacy-focused search engine that’s been online since 2008. Find websites, maps, videos, news, and more without tracking your searches and serving you targetted ads. It took DUckDuckGo as you can tell sometimes to gain ground and to be recognized but finally, it got the attention it deserves. Its big breakthrough happened in September of 2014 when Apple offered it as a default search engine in Safari and since it has gained more and more ground. It seems people care about their privacy after all. Since then DuckDuckGo has been gaining ground and all the major browsers have integrated it as an option for a default search engine. In this article, we will show you how to switch to DuckDuckGo and set it as your preferred search engine in all major browsers.
  1. Google Chrome

    Launch Chrome and click on the three dots in the upper right. Choose settings. Choose Search engine in the list on the left of the screen. Click on the drop-down box next to Search engine used in the address bar and choose DuckDuckGo.
  2. Mozilla Firefox

    Launch Firefox, click on the three lines hamburger menu icon in the top-right corner of the window. Click on Preferences. Click on Search in the menu to the left of the screen. Under Default Search Engine, click the drop-down box and choose DuckDuckGo.
  3. Microsoft Edge

    Click on the three dots menu button in the top-right corner of the window Then select Settings. Click on Privacy, Search and Services in the menu that appears on the left Scroll down to the Services menu and choose Address bar and search. Click the dropdown menu next to Search engine used in the address bar and choose DuckDuckGo.
  4. Apple Safari

    Click Safari in the menu bar at the top of the screen Then click Preferences. You can also use the Command+, shortcut to quickly bring up Safari’s Preferences. Click on the Search tab, then choose DuckDuckGo under the Search engine drop-down box.
  5. Opera

    Click on the Settings cog button in the sidebar on the left of the screen. Under Basic settings scroll down until you see Search engine and a drop-down box. Select DuckDuckGo from the list.
Read More
Razer Hazel, an RGB mask for max protection
Razer Hazel
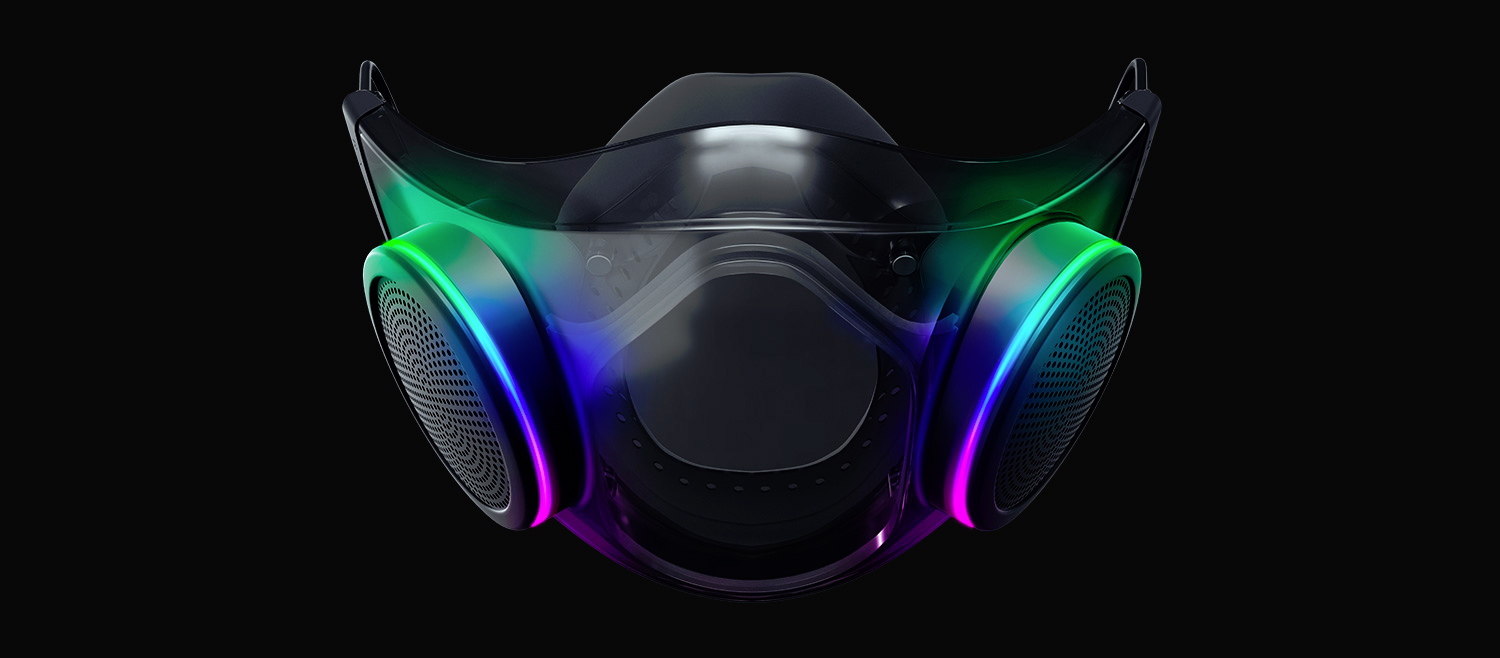
The world today is still sadly under pandemic and by the looks of it, COVID-19 is here to stay, well at least for some time in the near future. Razer seems to think so as well since their upcoming gear is not really what you would expect. Enter Hazel, a new and upcoming Razer smart mask.

Protection

Hazel mask has a high bacterial surgical N95 filter with fluid resistance that will protect you against large droplets and splashes. A detachable active ventilator regulates airflow and is capable of filtering around 95% of airborne particles. Mask comes with a special charging case that has an auto sterilization UV light that will kill bacteria and viruses inside the case interior while it charges. When the mask is recharging it will change color from red to green visually showing the level of the current charge. Mask of course has easy to replace filters inside ventilators and Razer is standing by that fully charged mask will last enough for full-day use. An active ventilation system brings cool air while releasing breathing heat at the same time drastically reducing CO2 inside the mask that could produce dizziness and headache. Silicon guard is on its edge gluing to around your face in order to prevent exterior air sneaking inside the mask and positioning it firmly so it does not rest on your lips in order for easier and clearer communication.

Hazel personalization and technical features

Hazel has a clear and transparent design making it better for social interaction since other people will be able to see your lips and smiles thus making it more natural. A low light mode that turns on automatically when it is dark outside is also aimed for easier communication. Speaking of communication, the mask comes with voice Amp technology that has a built-in mic and amplifier thus making your voice lines clear so you are not muffled when wearing the mask itself. Your friends and other people will be able to hear you like you are not wearing a mask at all. Thicker air loops apply less pressure on ears and can be adjusted for a more secure fit, while the mask itself can be custom-made to fit your face shape. And of course Hazel comes with 16.8 million colors and a suite of effects with Razer Chroma RBG
Read More
Screen of death colors in Windows 10
Receiving a screen of death is not a pleasant experience at all and most users would agree that they would very much like not to face one during their work with the computer. Sadly PC is not a perfect machine and it is not working in a perfect environment so errors happen. The most famous and well-known death screen is blue which is also the most common one, my bet would be that there is not a user which has not been faced with this blue error screen. There is no simple explanation why these stop errors occur as several factors can be involved. However, it is known that the malfunctioning of hardware drivers or drivers that are installed by third-party software drive this unwanted change. But did you know that there is more colors for infamous death screens and not just blue one? Microsoft has coded different errors to different colors in the goal for the technical team to be aware right away of what type and kind of error they are dealing with. Color for screen errors are: Blue, Black, Pink, Brown, Yellow, Red, Orange, Green and White If you are interested in what color represents what keep reading.

BLUE

blue screen of deathA stop error or exception error commonly called the blue screen of death (BSoD) or blue screen, is an error screen displayed on Windows computers following a fatal system error. It indicates a system crash, in which the operating system has reached a condition where it can no longer operate safely. This is caused by many different problems, such as a general hardware failure or a crucial process terminating unexpectedly.

BLACK

black screen of deathOn Windows 10 systems, a Black Screen of Death can be caused by an unfinished Windows Update. To resolve this problem, simply hold the power button down on your PC or laptop to switch off the computer. A cold start should result in the system booting properly.

PINK

pink screen of deathIt is a diagnostic screen with a white type on a pink background. Pink Screen is mainly seen when the VMkernel of an ESX/ESXi host experiences a critical error, becomes inoperative, and terminates any virtual machines that are running. It is not fatal and generally considered more of a developer testing issue. When encountered, it can be fixed quickly by following the simple action of pressing and holding your computer’s power button to shut down the device.

BROWN

brown screen of deathThe Microsoft Windows 10 Operating System Brown Screen of Death is an on-screen fatal error notification with bug check codes which is seen when a computer crashes due to graphics hardware or software-related problems (failing graphics drivers).

YELLOW

yellow screen of deathIt affects the functioning of a browser, particularly Mozilla Firefox. The Yellow Screen of Death makes the appearance with a weird buzzing sound in the background when the XML parser refuses to process an XML document causing a parsing error and a weird buzzing sound. The issue persists unless the computer is manually rebooted.

RED

red screen of deathCommonly the Windows 10 red screen is caused due to the hardware error, particularly if you overclock your Windows PC/laptop. Despite this, sometimes the red screen of death is also caused by outdated or incompatible drivers or due to BIOS issues.

ORANGE

orange screen of deathThe Orange Screen of Death on Windows occurs due to fatal hardware errors. Multiple reasons have been reported for the Orange Screen of Death. Some had this issue when watching a YouTube video, some were not able to boot into Windows. It can even occur when waking up from Sleep.

GREEN

green screen of deathThe green screen of death only appears when you're running an Insider Preview version of Windows 10. It's the same as the blue screen of death, and it will show the same error messages. ... If you see a green screen of death (GSOD) on your PC, that's a sign you're using an Insider Preview build of Windows 10.

WHITE

white screen of deathThe White Screen on Windows is also an error where the screen of the computer just turns white and freezes. There can be several things that can cause the white screen to appear on the Windows laptop monitor. But the main issue could be because of malfunctioning of the graphics hardware.
Read More
March 2021: List of data breaches & attacks
March 2021 – 21 million records breached full list of incidents:

Cyber attacks March 2021

Ransomware March 2021

Data breaches March 2021

Financial information

Malicious insiders and miscellaneous incidents

If you would like to read more helpful articles and tips about various software and hardware visit errortools.com daily.
Read More
How to Repair Windows 10 Error 0x800F0922

Repair Windows 10 Error 0x800F0922

Error Code 0x800F0922 – What is it?

Error Code 0x800F0922 refers to an issue with downloading the newest version of Microsoft Windows, Windows 10. It could mean that your PC doesn't have enough free space in the System Reserved partition, or that it couldn't connect to the Windows Update servers. This issue is not very common, most users will never see this error code. Some, however, will need to follow the below fixes in order to download and upgrade their systems properly. Common symptoms include:
  • Dialog box appears with the Error Code 0x800F0922
  • Microsoft Windows 10 upgrade is unsuccessful and/or incomplete
  • Users are unable to open applications after attempting the Microsoft Windows 10 upgrade

Solution

Restoro box imageError Causes

There are two standard reasons why this error occurs during the Microsoft Windows 10 upgrade.
  • There may not be enough free space in the “System Reserved” partition of your hard drive.
  • Error Code 0x800F0922 could also mean that your PC was not able to successfully connect to the Microsoft Windows update servers due to a VPN (virtual private network) connection in your home or office network.
  • The .Net framework installation portion of the Windows 10 upgrade fails.

Further Information and Manual Repair

Error Code 0x800F0922 as stated is somewhat rare, but it does occur occasionally. Users who have experienced this error while attempting to upgrade their system to Microsoft Windows 10 have the following options for do-it-yourself fixes.

Method 1:

Use this method if you are operating on a network that uses a VPN connection.
  1. Disconnect from your office or home network.
  2. Turn off your VPN software.
  3. Run the Microsoft Windows 10 upgrade.
  4. Restart your PC.
  5. Reconnect to your home or office network.
  6. Turn your VPN software back on.

Method 2:

This will run the Windows 10 Update troubleshooter that is built into your PC.
  1. Click on the Windows icon on the lower-left corner of your desktop.
  2. Press the “w” key to open the SEARCH function.
  3. Type “troubleshooting” in the search field and press ENTER
  4. When the troubleshooting window opens, select the “view all” option from the left window pane.
  5. Select “Windows update”.
  6. Select “advanced” and then choose the “run as administrator” option.
  7. Click the NEXT button and follow the on-screen prompts.
  8. This troubleshooter will walk you through the steps needed for your specific situation.

Method 3:

This method will run the DISM (deployment image servicing and management) tool built into your PC.
  1. Press the “windows key” on your keyboard followed by the “x” key.
  2. Select the “command prompt admin” option.
  3. Type the command “exe /online /cleanup-image /scanhealth” into the command prompt field and press ENTER.
  4. Wait for the scan to run completely.
  5. When the scan is complete, a message will appear telling you that “the operation completed successfully”.
  6. Type the command “dism.exe /online /cleanup-image /restorehealth” into the command prompt field and press ENTER.
  7. This will take a while to run completely, but it will restore any missing or corrupted files necessary for the Microsoft Windows 10 update.
  8. Restart your computer.
  9. Attempt the Windows 10 upgrade again.

Method 4: Use this option if you believe the issue is a result of the .NET framework being disabled.

  1. Press the “windows” key followed by the “x” key.
  2. Select the “control panel” option.
  3. When the control panel window opens, click your cursor in the search field on the upper right hand corner.
  4. Search for the phrase “windows features”, then select the link “turn Windows features on or off”.
  5. Select the check box (add a check) to the box next to “.Net framework”.
  6. Click the OK button.
  7. Proceed with your Microsoft Windows 10 upgrade.
To resolve this, all you need is third-party software to increase the size of the System Reserved partition. One of the four methods listed above should fix your Error Code 0x800F0922 issue and allow for a successful Windows 10 upgrade. On an occasion where there isn't enough space, use third-party software to increase the size of the System Reserved partition.  If you do not possess the technical expertise required to accomplish this yourself or do not feel comfortable doing so, download and install a powerful automated tool to get the job done.
Read More
Fix Chrome Error ERR_ICANN_NAME_COLLISION
If you are browsing the internet using the Google Chrome browser in your Windows 10 computer but you suddenly encounter an error message that states, “ERR_ICAN_NAME_COLLISION”, read on as this post will walk you through in fixing the problem. Here’s the full content of the error message:
“The site can’t be reached, This site on the company, organization, or school intranet has the same URL as an external website. Try contacting your system administrator. ERR ICAN NAME COLLISION.”
This kind of error is caused by an error in a private namespace or a random redirection to an incorrect proxy server. There are several ways to fix this error. You can try to check the integrity of the Hosts file or check the proxy. You could also try to use the Registry Editor and apply some tweaks or remove any conflicting browser extensions or flush the DNS cache, as well as run a malware scan.

Option 1 – Try to check the integrity of the Hosts file

To check the integrity of the Hosts file, refer to the following steps:
  • You have to navigate to this path inside File Explorer: C:/Windows/System32/driversetc
  • After that, look for a file named “Hosts” and right-click on it, and open it with the Notepad app.
  • Next, make sure that you write the block URLs in your computer in the list and then save the file.
Note: There are times when you are logged in with administrator credentials and you may receive an error message. In such case, type “notepad” in the Start Search and right-click on Notepad from the search results, and then select the “Run as administrator” option. After that, open the Hosts file and make the necessary changes and save it.

Option 2 – Try to check the Proxy server

There are some users who reported that they’ve fixed the problem after they’ve disabled the use of a proxy server using the built-in way. Follow the steps below to disable the proxy server.
  • Tap the Win + R keys to open the Run dialog box.
  • Then type “inetcpl.cpl” in the field and hit Enter to pull up the Internet Properties.
  • After that, go to the Connections tab and select the LAN settings.
  • From there. Uncheck the “Use a Proxy Server” option for your LAN and then make sure that the “Automatically detect settings” option is checked.
  • Now click the OK and the Apply buttons.
  • Restart your PC.
Note: If you are using a third-party proxy service, you have to disable it.

Option 3 – Try to use the Registry Editor

Before you apply some registry tweaks, make sure that you create a System Restore point. Once you have that covered, follow these steps:
  • Tap the Win + R keys to open the Run utility and type “Regedit” in the field and tap Enter to open the Registry Editor.
  • After that, navigate to this registry key: HKEY_LOCAL_MACHINESYSTEMCurrentControlSetServicesTcpipParametersDataBasePath
  • Look for the default key and double click on it and make sure that its Value data is set as “C:/Windows/System32/driversetc”.
  • Now exit the Registry Editor and restart your computer to apply the changes made

Option 4 – Flush the DNS cache

You could also try to flush the DNS cache to fix the “ERR_ICAN_NAME_COLLISION” error. All you have to do is open Command Prompt as an administrator and then execute each one of the following commands sequentially to flush the DNS cache:
  • ipconfig/release
  • ipconfig/renew
  • ipconfig/flushdns

Option 5 – Get rid of any conflicting browser extensions

  • Open Chrome and press Alt + F keys.
  • Go to More tools and click Extensions to look for any suspicious browser extensions or toolbars.
  • Click the Recycle bin and select Remove.
  • Restart Chrome and press Alt + F keys again.
  • Proceed to On Startup and mark Open a specific page or set of pages.
  • To check if the browser hijacker is still active, click Set pages, if it is active, overwrite the URL.
Note: If removing the browser extensions or toolbars didn’t work, you can also try to reset your Google Chrome browser.
  • Open Google Chrome, then tap the Alt + F keys.
  • After that, click on Settings.
  • Next, scroll down until you see the Advanced option, once you see it, click on it.
  • After clicking the Advanced option, go to the “Restore and clean up option and click on the “Restore settings to their original defaults” option to reset Google Chrome.
  • Now restart Google Chrome.

Option 6 – Run a malware scan using Windows Defender

It is possible that your computer is infected with malware which could be why you’re getting the “ERR_ICAN_NAME_COLLISION” error. Thus, you need to scan your computer using Windows Defender.
  • Tap the Win + I keys to open Update & Security.
  • Then click on the Windows Security option and open Windows Defender Security Center.
  • Next, click on Virus & threat protection > Run a new advanced scan.
  • Now make sure that Full Scan is selected from the menu and then click the Scan Now button to get started.
Read More
How to Fix Error 118

Repair Error 118

Error 118 - What is it?

Error 118 is a typical Google Chrome error. It pops up when Google Chrome fails to load websites like Facebook. It is usually displayed in the following format:
‘Error Message: Error 118 (net::ERR_CONNECTION_TIMED_OUT): The operation timed out.’

Solution

Restoro box imageError Causes

Error 118 may be triggered due to several reasons. This includes:
  • Problems with DNS setting
  • IP Address is filtering websites
  • Cookies and invalid registry entries

Further Information and Manual Repair

To ensure smooth internet browsing on Google Chrome, it is advisable to repair the error 118. If error 118 is not resolved you will be unable to load and access your desired websites. To avoid inconvenience and resolve the issue immediately, try the methods suggested below. These are easy and effective do-it-yourself methods that require no technical skills.

Method 1 - Change Proxy Settings

If your IP address is filtering websites, then you might experience error 118 while using Google Chrome. When this is the error cause, then it is advisable to add a proxy for your PC. To change proxy settings and add a new proxy, simply click on Customize and Control Google Chrome menu. Now click the options button. Under the Google Chrome Options window select the Under the Hood tab. After that in the Network, section click the change proxy settings button. Check Show Suggestions for navigation errors and Use DNS pre-fetching to improve page load performance boxes. Now under Internet Properties, click LAN Settings. Under LAN settings you will see the Proxy Server box, check it, and enter your new proxy settings. Click OK to confirm and save settings. This will hopefully resolve the issue.

Method 2 - Change to Google DNS

When the error is related to DNS settings then try this method to resolve it. Simply set DNS to use Google DNS. Here’s how it’s done:
  1. Go to the start menu, click Windows Control Panel, Network and Internet, and change adapter settings. Here you will see Local Area Connection.
  2. Right click to select properties at the bottom.
  3. Check Internet Protocol Version 4 and click properties.
  4. Now check the ‘Obtain an IP address automatically’ box and also select the option that says ‘Use the following DNS server addresses’.
  5. Change Preferred DNS to 8.8.4.4 and Alternate DNS server to 8.8.8.8 now click OK to confirm.

Method 3 - Remove the Bad Entries and Cookies Damaging the Registry

Bad entries and cookies saved in the registry can also trigger error 118. To fix the issue immediately download Restoro. This is PC Fixer with multiple utilities including a registry cleaner. The registry cleaner removes all bad entries and cookies in seconds and repairs the damaged registry. Click here to download Restoro and resolve error 118.
Read More
1 2 3 162
Logo
Copyright © 2022, ErrorTools. All Rights Reserved
Trademarks: Microsoft Windows logos are registered trademarks of Microsoft. Disclaimer: ErrorTools.com is not affiliated with Microsoft, nor claim direct affiliation.
The information on this page is provided for information purposes only.
DMCA.com Protection Status