Fix Windows is not starting

Hello everyone and welcome to how to fix Windows when it is not starting tutorial. Here we will tackle some common problems and solutions in order to help you to get back both your computer and Windows in working order.

Windows not booting and loading is an annoying issue that can even result in complete loss of your data and can also consume a lot of time if no other solution than clean install remains. Also if you are not tech-savvy, this issue can cost you as well since you will have to hire a professional to solve this problem for you.

Here at errortools, we aim to help you so you alone can overcome your PC issues either by providing you daily with tutorials, tips, and tricks or directly helping you by providing you with a one-click software solution for all of your Windows issues.

All of that being said, let's see what are issues that can prevent your computer or Windows from booting up and get around them so everything is back in working order.

  1. Use repair tool

    Windows 10 comes with a startup repair tool that has the goal to repair and fix errors preventing Windows from booting up. To use this tool however you will need Windows 10 bootable USB stick. You can create a bootable USB directly on the Microsoft site. Once you have it ready, plug it in and reboot your computer, choose to boot from USB. When you are on the Windows setup screen, click on next and then on Repair your computer.
    Go to troubleshoot > Advanced options > Startup repair.
    When Startup repair is clicked, Windows will boot, scan files for issues, and if they are found he will automatically fix them.

  2. “Windows Failed to Start” 0xc00000f error

    If you get this error on your boot of Windows, then you have corrupted boot configuration data. In order to fix this error, you will also need a bootable USB with Windows 10 on it. Make one on the Microsoft site if you don't have it and reboot your computer, boot from USB, on the setup screen click on next and then on Repair your computer. Click on Troubleshoot and then on the command prompt. In the command prompt type the following:
    bootrec /FixMbr
    bootrec /FixBoot
    bootrec /ScanOs
    bootrec /RebuildBcd
    exit
    Reboot your PC without a USB

  3. Boot into safe mode

    Safe mode for Windows loads only its core without drivers and with minimal services. If you can boot into safe mode then the issue is with some application or driver causing the problem. Try the selective boot option to eliminate what is causing the error.

  4. Make sure your hardware is connected

    Some RAM or hard drive out of socket can cause Windows not to be able to boot, check all connections just in case.

If everything else fails, perform a clean Windows installation. The reason for Windows not booting up can be caused by various viruses and malware also if that case it would be best to format and perform a clean install.

If you like to learn and find out more about various Windows errors, and how to repair them go to our vast archive or use search to find articles that will explain and help you in solving your issue.
However, if you prefer to do things fast and with automatization then we are proposing to use an automated solution for your issues. The application that we are recommending is Advanced System Repair Pro
Advanced System Repair utilizes multiple tools all in one to give you a quick, simple, reliable, and very thorough diagnosis of your PC. It brings you all the tools you need in one program to clean, fix, protect, optimize and boost your PC!
1-Click Maintenance
All the tools to make it simple and easy! It's like having a professional technician at the click of a mouse.

Junk Cleaner
Keeping your computer free from unnecessary clutter also helps make your computer last longer. Like any other machine, if you keep it clean and take care of it, it will serve you better for longer!

Optimize background apps
Optimize applications background activity with the built-in Application Optimizer feature.

Disk Defrag
With a simple 1-click, Advanced System Repair speeds up your PC by assembling fragmented files on your machine and organizing them more efficiently.

Malware Removal
Finds and removes all types of harmful malware including trojans, worms, bots, adware, spyware, PUPs, and more!

Privacy Cleaner
The all-in-one privacy suite to Clean Your Tracks & Protect Your Privacy! Make your computer safe, secure, and more efficient!

System Tweak/Optimizer
ASR will analyze your complete system and settings to adjust your PC to function at its maximum performance.

Registry Cleaner
Over time, as you install and uninstall applications, the registry can become cluttered with old entries and broken settings which can result in program crashes, and annoying messages and slow the computer down.
Visit our Advanced System Repair Pro Download page to inform yourself about all the benefits of this software and get a free trial copy of it.
advanced system repair pro

Advanced System Repair Pro

One-click automated PC repair solution
ASR logo
With Advanced System Repair Pro you can easily
Replace damaged files
Restore performance
Free disk space
Remove Malware
Protects WEB browser
Remove Viruses
Stop PC freezing
DOWNLOAD
Privacy Policy | Terms of Use | Uinstall
Advanced System Repair Pro is compatible with all versions of Microsoft Windows including Windows 11

Share this article:

You might also like

OneXPlayer Mini Handheld Gaming PC
OneXPlayer is a direct competitor to Valve’s upcoming steam deck. This device is clearly inspired by Valve’s offering and it shows all over the place, from its looks to its purpose and aims to PC gamers as a handheld device.

OneXPlayer miniHardware under the hood

This device is packing a 7-inch 1080p display, 11th generation Intel Core i7-1195G7 CPU, stunning 16GB of RAM, 512GB SSD drive with the option to purchase 1TB or 2TB model. GPU of choice is Intel iris Xe Graphics that is in our opinion a bottleneck in the whole system and for more demanding games, we believe switching them to 720p would be a better option. Everything here is powered with a 10455 mAh lithium-ion battery.

OneXPlayer inputs and other stuff

Handheld is equipped with dual bumpers and dual linear triggers. The console comes with dual speakers on both sides of it. Inside the console, there is an aluminum heat sink with copper heat pipes and a fan in order to cool internal hardware. On the outside, we have two USB-C ports and one USB-A port for connections, and of course, a headphone jack for headphones. The console comes with Wi-Fi 6 and Bluetooth 5.0 for wireless connectivity.

Price

The base entry model will cost you a whopping $1.259, 1TB model $1.399 and 2TB one will go as far as $1,599. With this kind of price, I am not sure it can come up as a winner against Valve. Sure it is packing fully licensed Windows 11 that will for sure offer more options than Stem’s OS based on Linux but even with that advantage I do not think it justifies such a big price difference.

Conclusion

Of course, this kind of console or handheld PC will still find its customer base, many users will probably like it since it comes Windows ready out of the box. Sure, you can place Windows on Steam deck as well but you will need to know how, where everything is ready and you can run beside steam other launchers without issues like origin, uplay, gog, etc. How this will be accepted by community time will tell but it is good to see that there is variety and competition in handheld PC space.
Read More
How to Fix the Dnssd.dll Error Code

Repair Dnssd.dll Error

What is Dnssd.dll Error Code?

Dnssd.dll is a type of dynamic link library. It is developed for Windows Operating System by Apple Computer Inc. The latest version of fnssd.dll is 3.0.0.10 used in Windows Vista.  This file also functions like a typical dynamic link library.  DDL files are small programs similar to executable files which are used by multiple programs to load and run properly. Dnssd.dll error occurs when the dnssd.dll file fails to function properly and load to run the desired application/program.  The error may occur most often during computer startup and program startup. The dnssd.dll error message may be displayed on your PC on either one of the following formats:
  • "Dnssd.dll not found."
  • "Dnssd.dll Access Violation."
  • "Cannot register dnssd.dll."
  • "The file dnssd.dll is missing."
  • "Cannot find C:WindowsSystem32\dnssd.dll."
  • "This application failed to start because dnssd.dll was not found. Re-installing the application may fix this problem."
  • "Cannot start Bonjour. A required component is missing: dnssd.dll. Please install Bonjour again."

Solution

Restoro box imageError Causes

To narrow down the cause of the dnssd.dll error is difficult virtually because there are multiple reasons why this error occurs on your system. However, here are the most common causes for this error:
  • Missing  Dnssd.dll file
  • Corrupt and damaged Dnssd.dll file
  • Invalid  dnssd.dll registry entry
  • Viral Infection
  • Improperly shutting down your PC
  • Poor PC maintenance
  • Broken registry keys
  • Hardware failure
  • Dnssd.dll file deleted when uninstalling another program
It is advisable to fix this error right away, as it can create many troublesome problems on your PC such as slow system performance, computer freeze up, blue screen of death errors, system failure, and crash.

Further Information and Manual Repair

Here are some of the best and easiest DIY solutions that you can try to resolve this issue on your PC without hiring a professional.

1. Use System Restore Function

Since this error largely indicates poor PC maintenance, it is advisable to use the System Restore function built-in Windows to resolve the Dnssd.dll file error. It will help you restore the system back to its previous healthy status. It can also help you get a fresh copy of damaged and corrupted files. Here’s what you need to do:
  • Go to the start menu of Windows, type restore in the search box.
  • Choose the option that says ‘choose a different restore point’ this presents customizable options for users.
  • Here you will be presented with a list of restore points, choose the one that you believe has most likely caused the dnssd.dll error.
  • Confirm your selection.
This will help resolve the error. Now restart to see changes made. If the error still persists then try other solutions given below.

2. Reinstall the Program Causing the Dnssd.dll Error to Pop Up

As dll files are shared files, there is a possibility that the file got deleted when you tried to uninstall a certain program. Therefore, if this is the reason, then try to reinstall the program that is causing the error message. By doing so, you can set up the dnssd.dll file again on your PC.

3. Scan for Viruses and Registry Issues

Other reasons for the error are associated with viral infection and registry issues. Therefore it is advisable to download software to scan for these issues and remove them from your PC. Viruses can also corrupt dll files. On the other hand, dll errors like Dnssd.dll can also occur if the registry is not cleaned frequently. The registry becomes corrupt due to the accumulation of invalid/wasted and irrelevant files. This also causes disk defragmentation and hard disk problems which can also lead to hardware failure and dll file damage and corruption. Now to repair it you can either download 2 different programs, an antivirus, and a registry cleaner, or you can install multi-functional and advanced software, Restoro. Downloading 2 separate programs can reduce your PC performance even furthermore. Therefore we recommend you opt for Restoro. This is a one-stop solution for all your PC problems. It includes multiple utilities like an antivirus that detects all malicious software including spyware, malware, adware, Trojans, and viruses. A powerful registry cleaner that resolves all registry issues, wipes out bad registry entries and repairs broken registry keys, damaged dll files like Dnssd.dll, and restores the registry back to its optimum health. This software also functions as a system optimizer that boosts the speed of your PC dramatically. It is safe, bug-free, and efficient. All PC issues are resolved in seconds in just a few clicks. It is user-friendly and compatible with all Windows versions. Click here to download Restoro and resolve the dnssd.dll file error right away!
Read More
How to share games on Steam with someone
Sharing is caring, an old saying says. I completely agree and that is reason enough for this article filled with sharing goodness. Holidays are coming and I hope that the holiday spirit is strong with you, that you will spend them in peace and with loved ones. All that being said wouldn’t it be great if you can spend some joy with close ones and share some of your games on their account so they can enjoy them as well? steam libraryWell, you can and it is not complicated as well. Follow this easy guide to see how can you get someone’s account up and running with some of your games.

The steam Family sharing feature

The family Sharing feature inside Steam will let you share your games to another account so owners of that account can play games that you have purchased without the need to buy themselves. You can allow up to 5 accounts and 10 devices to play your library games, and owners of these accounts will have their own achievements. Be aware that enabling this option will place your entire library on the share, you will not be able to choose which games you would like to share and therefore any kind of parental controls are not applying here. Also know that once the game is running on one device, others will have to wait for one playing to finish before they can get a spin on it. Only the owner of the game can play whenever he wants as a priority but others will have to wait for the game to be not run by someone else.

How to Share Your Game Library

In order to share your game library have a person, you wish to share games with at his device on ready to go and enable steam guard on your account. To enable steam guard login into your account and on the top left corner click on Steam and then on Settings. Inside settings click on the Manage Steam Guard Account Security button. Choose the way of authentication either by mail or steam guard mobile app. Check Get Steam guard codes by email radio button and re-login into account.

Sharing Games on another Steam account

Now that Steam Guard is enabled on the primary account let’s share some games!!! Inside client again, in the top left click on Steam and again on settings. In the left panel choose and click on Family. Inside Family section check box beside Authorize Library Sharing on This Computer. Log out of your account and login into the client user account credentials you wish to share your library with (this is your friend or cousin account, they need to log in to Steam client on your computer but with their credentials). After they have successfully logged in, log them out and re-log with your account again. Now go again into Steam > Family and now you should see an account in the box at the bottom with the user name or your friend or relative. Confirm that this is an account that you wish to share the library with by clicking on the checkbox next to the name. Now let users login into the desired device with their credentials and they will have access to your entire library. Happy gaming!
Read More
Android apps inside Windows 11
Android apps inside Windows 11
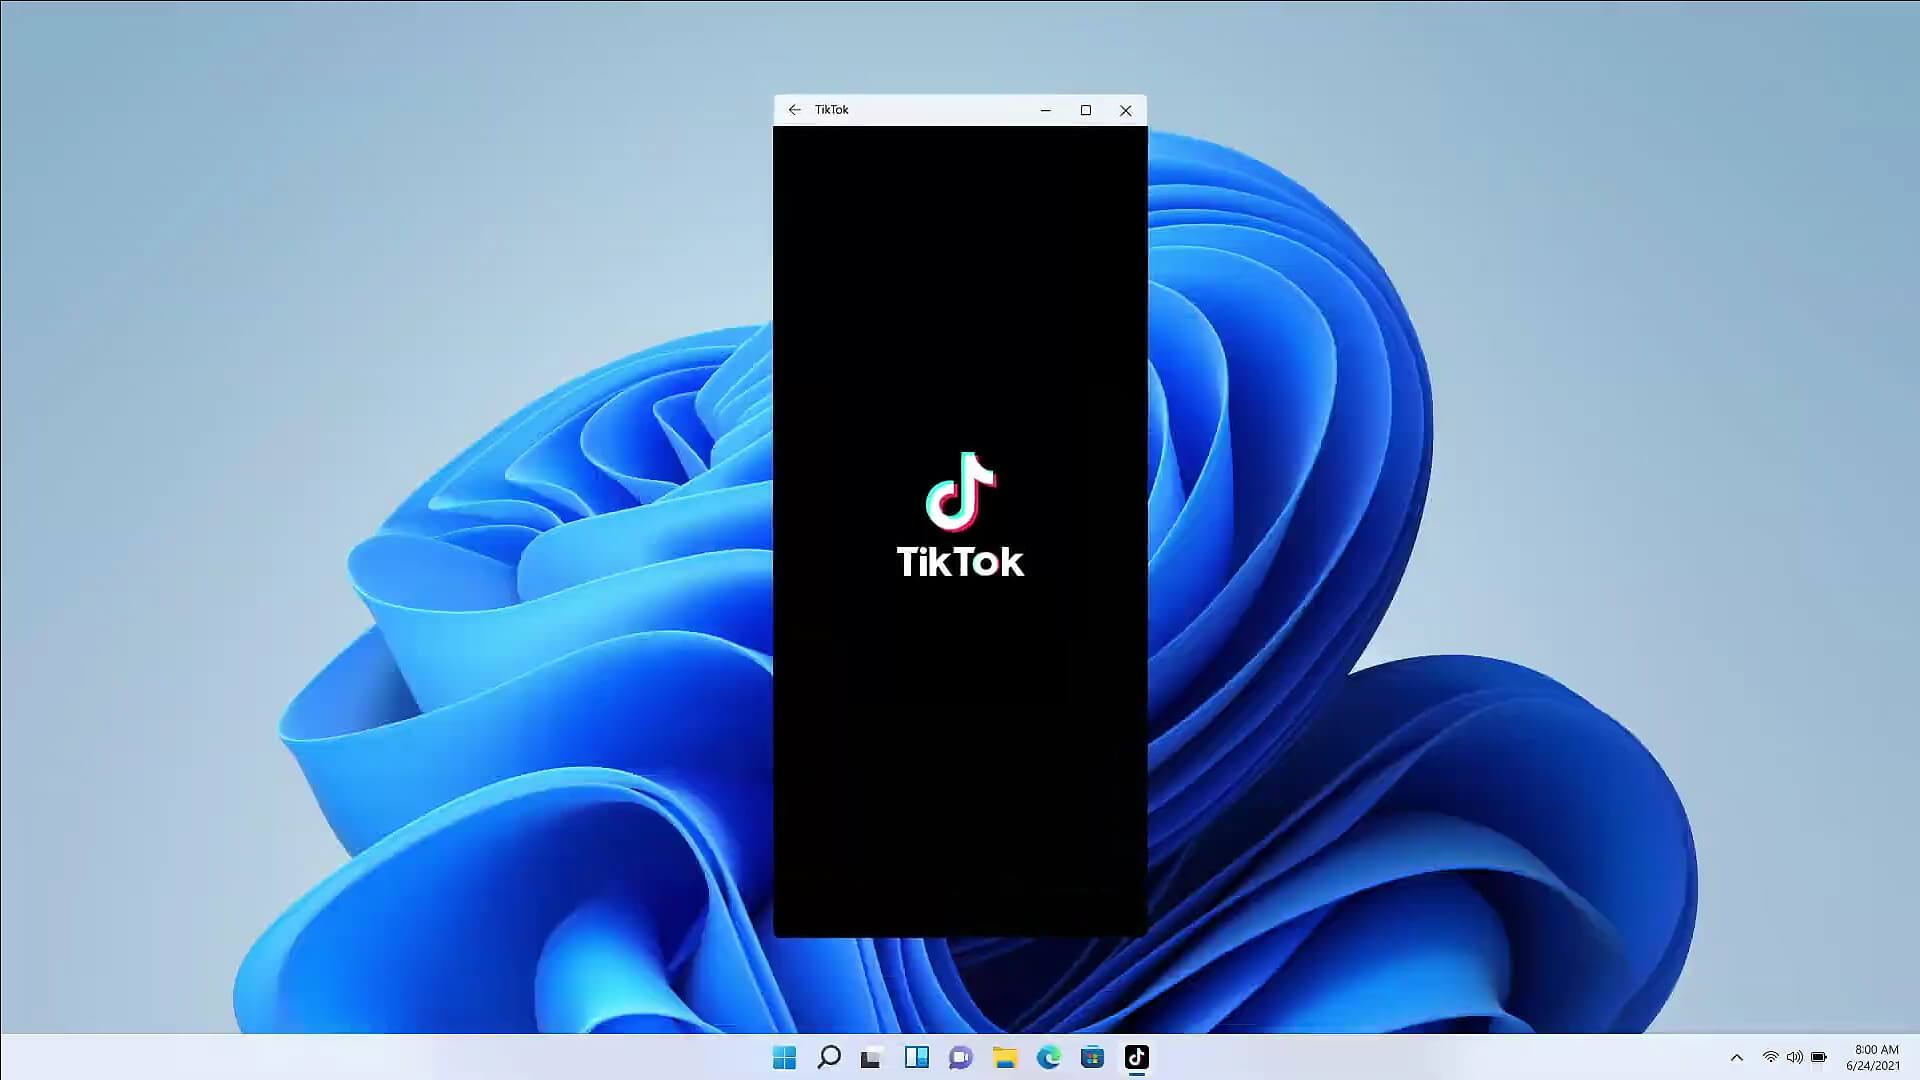
The euphoria around Windows 11 is not dying and reveal that Android apps will work natively inside Windows 11 has raised many emotions and questions. So, Microsoft has announced that Android apps will run natively inside Windows 11 OS and that they will reside alongside your other installed ones as icons, etc. It is no secret that many users have been using emulation software to run Android apps inside Windows so far, so what is the difference?

It is still emulation

Whatever you would like to believe it is still emulation and Android apps are at the end of the day still Android apps running inside emulated environment. This time we will not need third-party emulation software running inside Windows, we will have third-party emulation services running inside Windows. Intel has teamed up with Microsoft in order to integrate Intel bridge algorithms in order to run Android apps, meaning that yea, pretty much we have emulation services running in order to run the application. The problem with this kind of approach is that well emulation software is running and consuming system resources only when we start it, this kind of service is always running and always consuming resources and for someone who really does not care about Android apps at all, this is just a waste of resources.

Android store

The store is another issue here, instead of the Google play store we will have the Amazon app store integrated inside the new Microsoft store. This means that any kind of for example game progress or login information from Google store cannot be transferred into Windows 11, add to that information that in the Amazon app store there are tons of missing applications like SLACK, TRELLO, BitWarden, etc and we might have a serious question here about the use of this feature.

Android apps that do not use Android services

If you even look past that it is still emulation and that it is available on the Amazon app store there is still concern about applications not using Google services for their running. Many Android apps are relying on Google services like location or optimize their use of on-device resources, handle in-app purchases, etc. that cannot be found on this system. Uber is a prime example that uses Google location service to determine your location and for its mapping data, with that application, is useless. Other like Guardian will even pop up message that says Google play service is required in order to even work.

Android apps without Eero system

Amazon Eero system for enhanced internet access is not even yet available in its own app store which brings us to missing some key players like Bank of America, Chase mobile, Bueller, etc. And across the board, the apps that are present in the Amazon Appstore are often as good as abandoned. Lots of titles are numerous versions behind their up-to-date Play Store counterparts, and plenty of programs you encounter in the Amazon environment clearly haven't been touched in years.

Conclusion

Many new Windows 11 features are quality features that I personally consider good but although this one seems innovative and good I simply cannot stand back it up. Android apps were already inside Windows with emulation software which used google services and was working just fine, this was not needed in my opinion.
Read More
Easy Guide to Resolving Error Code 16

Easy Guide to Resolving Error Code 16

Error Code 16 - What is it?

Code 16 is a type of Device Manager error code. Windows XP users are most likely to encounter it. This error pops on XP systems that are running legacy or not plug-and-play hardware.

Error code 16 is displayed in the following format:

‘Windows cannot identify all the resources this device uses. (Code 16)’

Solution

driverfix boxError Causes

Error code 16 occurs when you use a peripheral device such as an external drive or a printer and that device is not properly or completely configured. Though the device may have been recognized before Windows fails to verify its configuration. Simply put, error code 16 appears when devices are partially configured.

In addition to this, another cause of error 16 is outdated or corrupt device drivers. Devices often fail to run successfully because of driver problems.

Device drivers are programs that provide instructions to control different devices attached to the computer system such as audio devices and printers to name a few.

Though error code 16 is not fatal like other PC error codes such as BSoD; however, it may hamper your ability to use certain devices installed on your system and lower your work productivity.

To avoid inconvenience, it is advisable to resolve the error immediately to avoid inconvenience.

Further Information and Manual Repair

PC error codes are often considered technical and difficult to resolve which is why many prefer to hire a professional for the repair job rather than doing it themselves.

Small repair jobs like fixing error code 16 by a professional computer programmer may cost you hundreds of dollars.

So, why incur so much cost when you can repair it easily by yourself even if you are not a technical whiz.

Error code 16 is easy to repair.

Here are some effective DIY methods that you can use for resolving error code 16 on your PC. These methods require no technical background, knowledge or expertise for that matter. Just simply follow the instructions and resolve the error code 16 issue.

Let’s get started…

Method 1 - Setup from the Disk that Came with the Hardware Device

Run setup from the disk that came with the hardware device, or you can simply copy the setup software file to your hard drive/flash drive. Refer to the vendor’s direction to set up.

If for any reason you’re unable to find the directions, simply uninstall the device. Then go to the start menu, Control Panel, and select ‘Add New Hardware’.

Now pick the appropriate hardware and follow the steps that the Wizard suggests. This is most likely to resolve the error code.

Nonetheless, if the error code still persists, then try method 2.

Method 2 - Allocate More PC Resources

Another alternative method to resolve error code 16 is to allocate more PC resources to the device. To specify additional resources:

  • Go to the start menu
  • Type Device Manager
  • Then go to the Device properties and click the resources
  • Here specify the device in the Device Manager
  • If you see a resource with a question mark, assign that resource to the device
  • However, if for any reason the resource is unable to change, then simply click ‘Change Setting’.
  • If Change Settings is not available, then click the box to the ‘Use Automatic Settings’ box. This will make the option available.

Method 3 - Install DriverFIX

As previously stated above, device manager error codes like error code 16 may also occur due to driver problems. If this is the underlying reason for error code 16 on your system, then the best way to resolve it is to install DriverFIX.

DriverFIX is user-friendly, advanced, and feature-filled software deployed with an intelligent programming system, which detects all problematic device drivers automatically in seconds.

It matches these drivers with their latest versions and updates them smoothly without any hassle, resolving error code 16 right away.

And furthermore, once you install this software on your PC, you don’t have to worry about driver problems anymore typically because it updates drivers on a regular basis with compatible and new versions, ensuring that your computer functions properly. It is easy to install and is compatible with all Windows versions.

Click here to download DriverFIX to repair error code 16

Read More
Disabling Windows 10 startup delay
First time when your computer is turned ON and when Windows is booting it will wait 10 seconds before starting your startup applications. This 10 second is used to load all of Windows services so everything is running smoothly. If by any chance you do not want to wait for this startup delay and wish to start applications right away then keep on reading and follow this guide precisely. This guide will require you to play ad tweak with the registry of Windows, it is always recommended to make a registry backup before attempting any tweaks. Also, it is imperative to follow the guide as it is presented step by step. be aware that this guide will eliminate a 10-second delay for all of your starting applications, there is no way currently to remove delay for only one or a few.
  1. Press ⊞ WINDOWS + R to open the run dialog
  2. In run dialog type Regedit and press ENTER
  3. Locate HKEY_CURRENT_USER\SOFTWARE\Microsoft\Windows\CurrentVersion\Explorer\Serialize
  4. If the key does not exist, make a new one,  Go to HKEY_CURRENT_USER\SOFTWARE\Microsoft\Windows\CurrentVersion\Explorer\, right-click on the explorer and choose new > key. Name it Serialize
  5. Right-click on Serialize and choose New > DWORD (32-bit) Value
  6. Name the value StartupDelayInMSec
  7. Double click on StartupDelayInMSec and locate Value data
  8. Set the value to 0
  9. Save changes and Exit Registry editor
  10. Reboot
If you want to reverse changes and enable delay again, go back to the Registry Editor and delete the StartupDelayInMSec value.
Read More
Wallpapers by MyWay (wallpapers.myway.com) removal Guide

Wallpapers by MyWay is a browser hijacker, also known as Wallpaper Homepage adware. It was developed by Mindspark Interactive Network, Inc and it is widely promoted on the Internet as a genuine search engine powered by Google with an ability to customize homepage background and add some quick access links. This hijacker can be found in the most popular web browsers including Mozilla Firefox, Google Chrome, and IE. Generally Wallpaper by MyWay hijacker appears on the user’s computer without the user being fully aware of its modification.

While installed users will experience additional ads showing up in their search results, as well as sponsored content and pop-up ads. This extension has been flagged by several anti-virus scanners and it is recommended to remove it from your computer.

About Browser Hijackers

Browser hijack is a very common type of online fraud where your web browser settings are altered to allow it to do things you never intend. Browser hijacker malware is designed for many different reasons. These are generally used to force visitors to predetermined sites, manipulating web traffic to generate ad revenue. Nevertheless, it’s not that harmless. Your internet safety is jeopardized and it is also really irritating. Additionally, hijackers can make the entire infected system fragile – other harmful malware and viruses would take hold of these opportunities to get into your system very easily.

Signs of browser hijacker infection

Symptoms that your browser is hi-jacked include: 1. you see unauthorized modifications to your web browser’s home-page 2. you find yourself regularly directed to a different site than the one you meant 3. the default web engine and the default browser settings is modified 4. find new toolbars which you did not add 5. you notice lots of pop-up ads on your computer screen 6. your internet browser has instability issues or displays frequent errors 7. you’re blocked to access those sites of anti-malware solution providers.

Exactly how browser hijacker finds its way onto your computer

Browser hijackers can enter a computer by some means or other, for instance via file sharing, downloads, and e-mail also. Many internet browser hijackings come from add-on programs, i.e., browser helper objects (BHO), toolbars, or plug-ins added to web browsers to provide them additional functionality. A browser hijacker can be installed as a part of freeware, shareware, demoware and fake programs. An example of some popular browser hijackers includes Babylon, Anyprotect, Conduit, DefaultTab, SweetPage, RocketTab, and Delta Search, however, the names are often changing. Browser hijackers could record user keystrokes to collect potentially valuable information that leads to privacy issues, cause instability on systems, significantly disrupt user’s browsing experience, and finally slow down the system to a point where it will become unusable.

Browser hijacker removal methods

Certain types of browser hijackers can be quickly removed from your computer by deleting malicious programs or any other recently installed shareware. However, the majority of hijacking codes are certainly not easy to get rid of manually, as they go deeper into the operating system. Furthermore, manual removals require in-depth system knowledge and therefore can be a very difficult job for novices. Installing and running anti-malware programs on the affected computer can automatically delete browser hijackers and other malicious programs. One of the top tools for repairing browser hijacker infections is SafeBytes Anti-Malware. It helps you get rid of any pre-existing malicious software on your computer and gives you real-time monitoring and protection against new threats. Use a system optimizer (such as Total System Care) along with your anti-malware to fix various registry issues, remove computer vulnerabilities, and improve your computer overall performance.

How To Get Remove Malware That Is Preventing Antivirus Installation?

All malware is detrimental and the consequences of the damage will vary according to the specific type of malicious software. Some malware goes to great lengths to stop you from downloading or installing anything on your computer, especially anti-virus software programs. If you are reading this article, you may have infected by a virus that stops you from downloading a security software such as Safebytes Antimalware on your PC. Refer to the instructions below to remove malware in alternative ways.

Use Safe Mode to fix the issue

If the malware is set to run at Windows start-up, then booting in safe mode should avoid it. Only the minimum required applications and services are loaded when you boot your laptop or computer into Safe Mode. To launch your Windows XP, Vista, or 7 computers in Safe Mode with Networking, follow the instructions below. 1) After switching on the computer, press the F8 key before the Windows splash screen starts to load. This would conjure up the Advanced Boot Options menu. 2) Select Safe Mode with Networking with arrow keys and hit ENTER. 3) When this mode loads, you should have an internet connection. Now, make use of your web browser normally and navigate to https://safebytes.com/products/anti-malware/ to download and install Safebytes Anti-Malware. 4) After installation, do a complete scan and allow the program to remove the threats it discovers.

Switch to some other internet browser

Malicious code might exploit vulnerabilities in a specific internet browser and block access to all anti-malware software websites. When you suspect that your Internet Explorer happens to be hijacked by a trojan or otherwise compromised by online hackers, the most effective course of action would be to switch over to a different internet browser such as Google Chrome, Mozilla Firefox, or Apple Safari to download your chosen computer security software – Safebytes Anti-Malware.

Install anti-malware on a flash drive

Here’s another solution which is creating a portable USB anti-malware software package that can scan your computer for malware without needing installation. Adopt these measures to employ a flash drive to fix your corrupted PC. 1) On a clean PC, download and install Safebytes Anti-Malware. 2) Plug in the pen drive into the uninfected computer. 3) Run the setup program by double-clicking the executable file of the downloaded software, with a .exe file format. 4) Choose the flash drive as the destination for saving the software file. Follow the activation instructions. 5) Now, transfer the thumb drive to the infected computer. 6) Double-click the antivirus software EXE file on the thumb drive. 7) Click on the “Scan Now” button to start the malware scan.

How SafeBytes Anti-Malware Keep your Machine Virus Free

If you are looking to download an anti-malware application for your computer, there are plenty of tools on the market to consider but you just cannot trust blindly anyone, no matter whether it is a free or paid program. A few of them do a good job in eliminating threats while many will ruin your computer themselves. You must select one that is dependable, practical, and has a good reputation for its malware source protection. When considering commercial anti-malware application options, many people select well-known brands, like SafeBytes, and they are quite happy with it. SafeBytes is a powerful, real-time antivirus application that is designed to assist everyday computer user in safeguarding their PC from malicious threats. With its most advanced virus detection and repair technology, this software will help you protect your personal computer against infections caused by different types of malware and other internet threats, including adware, spyware, viruses, worms, trojans, keyloggers, ransomware, and potentially unwanted program (PUPs).

There are lots of wonderful features you’ll get with this security product. Some of them are listed as below:

Robust Anti-malware Protection: Using its advanced and sophisticated algorithm, this malware elimination tool can detect and remove the malware threats hiding within your computer system effectively. Active Protection: SafeBytes gives you round-the-clock protection for your PC limiting malware attacks in real-time. It will check your personal computer for suspicious activity at all times and safeguards your PC from unauthorized access. Fast Scan: This computer software has one of the fastest and most efficient virus scanning engines in the industry. The scans are very accurate and take a short amount of time to complete. Web Protection: Safebytes allots all sites a unique safety score that helps you to have an idea of whether the website you’re about to visit is safe to view or known to be a phishing site. Light-weight: SafeBytes gives complete protection from online threats at a fraction of the CPU load due to its enhanced detection engine and algorithms. 24/7 Customer Service: Expert technicians are at your disposal 24/7! They will quickly resolve any technical issues you may be experiencing with your security software. To conclude, SafeBytes Anti-Malware is really great for securing your PC against all kinds of malware threats. Malware problems will become a thing of the past once you put this software program to use. So if you’re looking for the best anti-malware subscription for your Windows-based PC, we highly recommend SafeBytes Anti-Malware software

Technical Details and Manual Removal (Advanced Users)

If you’d like to manually remove Wallpapers by MyWay without using an automated tool, it may be possible to do so by removing the application from the Microsoft Windows Add/Remove Programs menu, or in cases of web browser extensions, going to the browsers AddOn/Extension manager and removing it. You will probably also want to reset your internet browser to its default configuration settings. If you opt to manually delete the system files and registry entries, use the following checklist to make sure you know exactly what files to remove before performing any actions. Please keep in mind that this is for professional users only and might be difficult, with wrong file removal leading to additional system errors. In addition, some malware is capable of replicating or preventing deletion. Carrying out this malware-removal process in Safe Mode is recommended.
Files: %UserProfile%\Local Settings\Application Data\WallpapersMyWayTooltab %LOCALAPPDATA%\WallpapersMyWayTooltab %LOCALAPPDATA%\Google\Chrome\User Data\Default\Extensions\glhahjphgpghoefihgllamaapanabkmp %UserProfile%\Local Settings\Application Data\Google\Chrome\User Data\Default\Extensions\glhahjphgpghoefihgllamaapanabkmp Registry: HKEY_CURRENT_USER\Software\WallpapersMyWay
Read More
New focus sessions in Windows 11
focus session
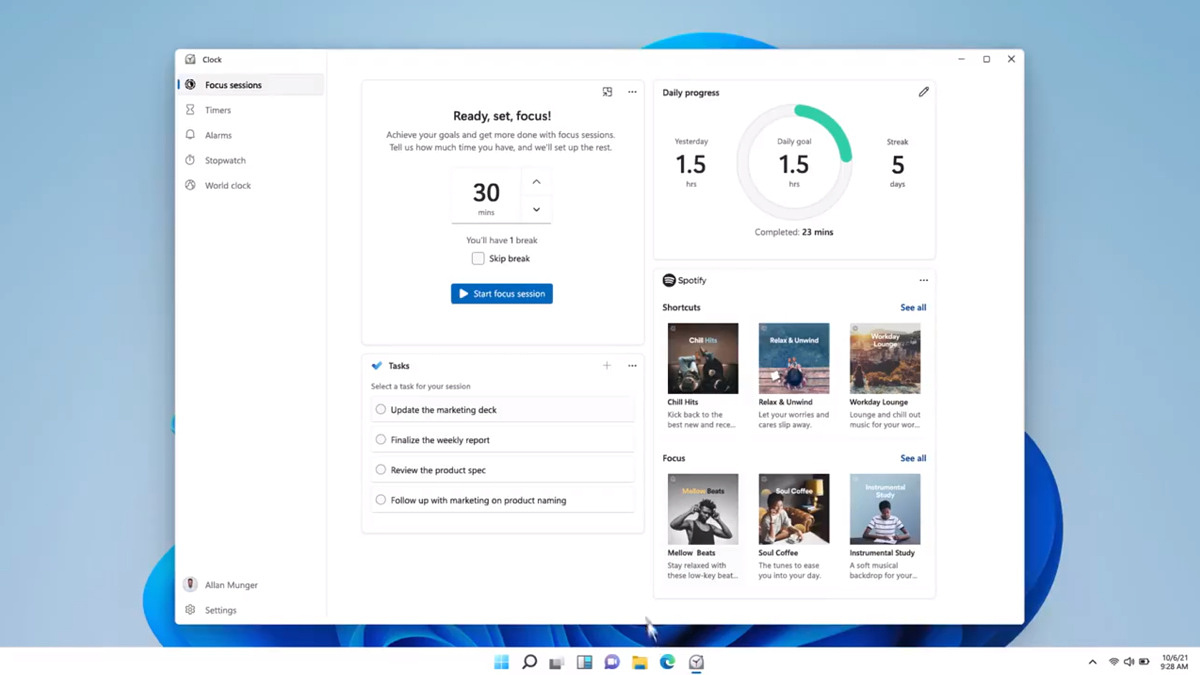
Windows and Devices chief Panos Panay has revealed new focus sessions feature that will be in Windows 11 on his Twitter account today. He himself is referring to it as a game-changer especially with Spotify integration.

So what is a focus session?

From the video clip provided on Twitter, we can see that focus session users will be able to choose a specific task from the previously made task list, choose songs that will play in the background while the task is active, and set a timer for the chosen task with breaks. Maybe the best comparison and explanation would be a desktop google calendar task with music, basically, that’s it. A neat and good organizer inside your Windows 11 operating system. I think that this is generally a good idea and for sure it will find its audience.
Read More
Removing Search.schooldozer.com hijacker

What is Search.schooldozer.com? And how does it function?

Search.schooldozer.com is a browser extension that functions as a search engine. It is developed and maintained by “Schooldozer”. It claims to improve users’ browsing experience by providing them with improved search results. However, it does not really do the things it claims to do. In fact, they’re quite the opposite ones – instead of improving the browsing experience, it makes users’ browsing experience unsafe and full of sponsored content. This is in contrast to what it states in its Privacy Policy:
“Install applications the easy way and without the hassle, using the Schooldozer downloader. The Schooldozer platform stems from years of experience with installing applications, resulting in a highly optimized process, yielding faster downloads, better user experience, and more successful installations.”
In addition, once installed Search.schooldozer.com is installed, it will change the default settings of a browser such as the default search engine, homepage, and new tab page. This is why security experts regard this browser extension as a browser hijacker and a potentially unwanted program. The modification of the browser's settings allows it to control users’ browsing by redirecting them to sponsored sites as well as deliver sponsored content from its affiliated sites in order to gain profit via pay-per-click marketing. And if you think that the ads it displays are harmless, think again for some of these ads can redirect you to suspicious websites that might contain harmful content. What’s more is that this browser hijacker can also keep track and monitor all your browsing activities in order to obtain your browsing data like search queries, what sites you always visit, browsing history, browser type, OS version, and so on. The information collected is then used and may even be shared with its affiliated third parties to deliver more customized and personalized advertisements.

How is Search.schooldozer.com distributed over the web?

Like a typical browser hijacker, Search.schooldozer.com is distributed using the software bundling method where several unknown and unwanted programs are bundled in a software package. Thus when you install any software bundle, make sure to always opt for the Custom or Advanced installation setup rather than the quick setup to avoid installing unwanted programs like Search.schooldozer.com. To remove Search.schooldozer.com from your computer, follow the removal guide below carefully. Step 1: Start the removal process by closing all the browsers infected with Search.schooldozer.com. If you’re having a hard time closing them, you can close them using the Task Manager just tap on Ctrl + Shift + Esc. Step 2: After you open the Task Manager, go to the Processes tab and look for the infected browser’s process and end it. Step 3: Then close the Task Manager and tap the Win + R keys to open Run and then type in appwiz.cpl to open Programs & Features in Control Panel. Step 4: From there, look for Search.schooldozer.com or any unfamiliar program that could be related to it under the list of installed programs and once you’ve found it, uninstall it. Step 5: Edit your Hosts File.
  • Tap the Win + R keys to open then type in %WinDir% and then click OK.
  • Go to System32/drivers/etc.
  • Open the host file using Notepad.
  • Delete all the entries that contain Search.schooldozer.com.
  • After that, save the changes you’ve made and close the file.
Step 6: Reset all your browsers to default to their default state.

Google Chrome

  1. Launch Google Chrome, press Alt + F, move to More tools, and click Extensions.
  2. Look for Search.schooldozer.com or any other unwanted add-ons, click the Recycle Bin button, and choose Remove.
  3. Restart Google Chrome, then tap Alt + F, and select Settings.
  4. Navigate to the On Startup section at the bottom.
  5. Select “Open a specific page or set of pages”.
  6. Click the More actions button next to the hijacker and click Remove.

Mozilla Firefox

  1. Open the browser and tap Ctrl + Shift + A to access the Add-ons Manager.
  2. In the Extensions, menu Remove the unwanted extension.
  3. Restart the browser and tap keys Alt + T.
  4. Select Options and then move to the General menu.
  5. Overwrite the URL in the Home Page section and then restart the browser.

Internet Explorer

  1. Launch Internet Explorer.
  2. Tap Alt + T and select Internet options.
  3. Click the General tab and then overwrite the URL under the homepage section.
  4. Click OK to save the changes.
Step 7: Hold down Windows + E keys simultaneously to open File Explorer. Step 8: Navigate to the following directories and look for suspicious files associated to the browser hijacker such as the software bundle it came with and delete it/them.
  • %USERPROFILE%Downloads
  • %USERPROFILE%Desktop
  • %TEMP%
Step 9: Close the File Explorer. Step 10: Empty the contents of Recycle Bin.
Read More
Proven Solutions For Error Code 0x80131700

Fix Error Code 0x80131700

Error Code 0x80131700 - What is it?

0x80131700 is a Windows 7 error that occurs when there is a problem with the Troubleshooting Wizard. The wizard fails to function and with an error message displaying the following message on the computer screen:

‘An unexpected error has occurred’- The troubleshooting wizard can’t continue

Error code: 0x80131700'

Windows 7 features Troubleshooting Wizard, an automated tool that helps users resolve several PC-related problems such as accessing shared files or internet connectivity to name a few.

Error Causes

The error code 0x80131700 largely occurs because of two reasons:
  • The .NET framework is not properly installed on your system
  • Mis-configured System Files and Registry Issues

Further Information and Manual Repair

0x80131700 Windows error is rated easy to fix error code. Thus, repairing this error code is not difficult. It is so easy to fix that you don’t need any technical expertise or professional help for that matter. To begin with, there are 2 methods to resolve the 0x80131700 error code. Let’s take a look at the solutions:

Cause: The .NET framework not properly installed on your system

Solution: If the underlying cause for the error code 0x80131700 is the improper installation of .NET framework on your PC, then the best and easy way to resolve this error is to reinstall it. By default, the built-in version of the .NET framework in Windows is 3.5.1 to reinstall this again on your system follow the steps given below:
  1. Go to the Start menu and type: features in the search box
  2. Now Choose the option ‘Turn Windows Features on or off’ and then press Enter
  3. After this, look for Microsoft .NET framework 3.5.1 and uncheck the box
  4. Once you uncheck it, restart your computer
  5. Repeat the step 1 and 2
  6. Now check the box before .NET framework 3.5.1
  7. Restart your system
  8. Now try using the Troubleshooting Wizard.

Cause: Mis-configured System Files and Registry Issues

Solution: If the error code 0x80131700 triggered due to misconfigured files and registry issues, then the easiest way to fix this error on your system is to download Restoro This program is a useful tool that could repair corrupted registries and optimize your PC’s overall performance. Aside from that, it also cleans out your computer for any junk or corrupted files that help you eliminate any unwanted files from your system. This is basically a solution that’s within your grasp with just a click. It’s easy to use as it is user-friendly. For a complete set of instructions in downloading and using it, refer to the steps below Perform a full system scan using Restoro. To do so, follow the instructions below.
      1. Download and install Restoro from the official site.
      2. Once the installation process is completed, run Restoro to perform a full system scan. restoro application screen
      3. After the scan is completed click the “Start Repair” button. restoro application screen
Read More
1 2 3 162
Logo
Copyright © 2022, ErrorTools. All Rights Reserved
Trademarks: Microsoft Windows logos are registered trademarks of Microsoft. Disclaimer: ErrorTools.com is not affiliated with Microsoft, nor claim direct affiliation.
The information on this page is provided for information purposes only.
DMCA.com Protection Status