Fix Windows 11 Black Screen Error

A black screen error inside Windows 11 is a typical screen turning to solid black without any error message. This can be very annoying since it can randomly appear out of nowhere and it will appear while you are using the computer. Worry not, this is not a serious error and we have several solutions for it, so please keep reading and try them as presented in order.

Black screenRestart graphic driver

This is the first thing to check if the issue is due to software or driver malfunctioning, there is a shortcut for rebooting graphic driver inside Windows 11. Press WINDOWS + CTRL + SHIFT + B to reboot the graphic driver and see if this fixes the issue. A beep sound should be heard during this process and the screen should turn back to normal.

Check connections

Sometimes the screen can go black due to a faulty connection or cable. If you have it at your hand try a different cable or slightly and gently nudge the existing one to see will screen flicker. If you are on a laptop try gently moving the lid from back to front and pay attention to the screen. If screen flickers or picture returns with this method, cable or connector needs to be replaced.

Clean your computer

The black screen can be because the computer is overheating. If this is the case either fan inside is not working properly or there is a lot of dirt and dust that needs to be removed so airflow can be established again for proper cooling. We have an article on errortools.com on how to properly clean your PC but if you are not technical enough maybe the best solution would be to call someone who is or to take the PC to service for cleaning.

Change The Projection Settings

Press WINDOWS + P to open projection settings, check to see if PC is set to PC screen only. If any other option is selected change it to PC screen only since this can cause random black screen issues.

Uninstall latest updates

If this problem has started to manifest itself during the latest update, go to setting and roll back from the latest update to fix this issue.

Scan system for malware

The black screen can also be caused by various viruses and malware. IF you have anti-virus software, run a full system scan to check it for malware. If you do not have one, download a free one and run a system scan, we recommend Bitdefender.

If you like to learn and find out more about various Windows errors, and how to repair them go to our vast archive or use search to find articles that will explain and help you in solving your issue.
However, if you prefer to do things fast and with automatization then we are proposing to use an automated solution for your issues. The application that we are recommending is Advanced System Repair Pro
Advanced System Repair utilizes multiple tools all in one to give you a quick, simple, reliable, and very thorough diagnosis of your PC. It brings you all the tools you need in one program to clean, fix, protect, optimize and boost your PC!
1-Click Maintenance
All the tools to make it simple and easy! It's like having a professional technician at the click of a mouse.

Junk Cleaner
Keeping your computer free from unnecessary clutter also helps make your computer last longer. Like any other machine, if you keep it clean and take care of it, it will serve you better for longer!

Optimize background apps
Optimize applications background activity with the built-in Application Optimizer feature.

Disk Defrag
With a simple 1-click, Advanced System Repair speeds up your PC by assembling fragmented files on your machine and organizing them more efficiently.

Malware Removal
Finds and removes all types of harmful malware including trojans, worms, bots, adware, spyware, PUPs, and more!

Privacy Cleaner
The all-in-one privacy suite to Clean Your Tracks & Protect Your Privacy! Make your computer safe, secure, and more efficient!

System Tweak/Optimizer
ASR will analyze your complete system and settings to adjust your PC to function at its maximum performance.

Registry Cleaner
Over time, as you install and uninstall applications, the registry can become cluttered with old entries and broken settings which can result in program crashes, and annoying messages and slow the computer down.
Visit our Advanced System Repair Pro Download page to inform yourself about all the benefits of this software and get a free trial copy of it.
advanced system repair pro

Advanced System Repair Pro

One-click automated PC repair solution
ASR logo
With Advanced System Repair Pro you can easily
Replace damaged files
Restore performance
Free disk space
Remove Malware
Protects WEB browser
Remove Viruses
Stop PC freezing
DOWNLOAD
Privacy Policy | Terms of Use | Uinstall
Advanced System Repair Pro is compatible with all versions of Microsoft Windows including Windows 11

Share this article:

You might also like

How to Fix Jp2klib.dll Error Code

How to Fix Jp2klib.dll Error Code

Jp2klib.dll Error - What is it?

Jp2klib.dll is a type of Dynamic Link Library. This file is developed by Adobe Systems Inc and associated with CS2 (Creative Suite 2 Premium). Like all DLL files, this file also contains small programs that support programs developed by Adobe Systems on your PC. The function of Jp2klib.dll is to load and run programs. Jp2klib.dll error occurs when it fails to do so. It occurs during program startup. Jp2klib.dll error is displayed in several different formats depending on the cause of the error. Here are some common error messages that you may come across:
  • "JP2KLib.dll not found."
  • "Cannot find C:\WindowsSystem32\JP2KLib.dll."
  • "Cannot start Creative Suite 2 Premium. A required component is missing: JP2KLib.dll. Please install Creative Suite 2 Premium again."
  • "Cannot register JP2KLib.dll."
  • "The file JP2KLib.dll is missing."
  • "This application failed to start because JP2KLib.dll was not found. Re-installing the application may fix this problem."
  • JP2KLib.dll Access Violation."

Solution

Restoro box imageError Causes

There are several causes for the Jp2klib.dll error code pop-up. These include:
  • Hardware failure
  • Jp2klib.dll file not properly registered
  • Viral infection
  • Deleted, missing, or corrupted Jp2klib.dll file
  • Registry problems
  • Another program overwrote the Jp2klib.dll file
The good news is that this is not a fatal error code like the blue screen of death errors. However, it is still advisable to resolve it right away to avoid inconvenience.  This error may limit your ability to access your desired program.

Further Information and Manual Repair

Follow these methods to resolve Jp2klib.dll error code on your PC in a few minutes without any professional assistance or technical know-how:

Method 1 - Re-register the Jp2klib.dll file

Sometimes Jp2klib.dll error may occur if the DLL file is not registered properly. In such a situation "JP2KLib.dll not registered" error message will pop on your computer screen. To resolve, all you need to do is register this file. Follow these steps to register the Jp2klib.dll file on your PC:
  1. Go to the start menu, type the command in the search box. Don’t press enter yet.
  2. First, hold CTRL-SHIFT and then press it. This action will prompt a permission dialog box. Click yes to proceed.
  3. You will be asked to enter a command, here simply type regsvr32 /u JP2KLib.dll and then press enter.
  4. This will first unregister the previous Jp2klib.dll file. Now type regsvr32 /i JP2KLib.dll and press enter to re-register the same file.
  5. After this, close the command window and reboot your PC to activate changes.

Method 2 - Check the Recycle Bin and Restore the Jp2klib.dll file

If you come across this error message "JP2KLib.dll not found”, this indicates a missing Jp2klib.dll file. This usually happens if you recently uninstalled a program on your system which was also supported by the Jp2klib.dll file due to which the file was also deleted. But don’t worry! Check your recycle bin to retrieve the accidentally deleted file on your system. If you find it restore, but if you don’t then simply download it from a reliable DLL website.

Method 3 - Scan for Viruses

Install and run an antivirus to detect viruses. Viruses are malicious programs that damage and corrupt DLL files like the Jp2klib.dll file. Scan for all viruses on your PC and remove them to fix the problem.

Method 4 - Repair the Registry

If you don’t clean the registry often it becomes accumulated with obsolete files like bad and broken entries, cookies, and junk files. These files corrupt the registry and damage system and DLL files also stored in the same location. It then leads to such error message pop-ups. To resolve, download Restoro. This is an advanced PC Fixer deployed with a registry cleaner. It is easy to use and in just a few clicks can repair the Jp2klib.dll error on your PC. The registry cleaner scans and removes all obsolete files. It cleans the registry and repairs the damaged system and DLL files. Click here to download Total System Care and fix the Jp2klib.dll error.
Read More
A Guide to Fixing Error 0x8007007e on Windows 10

Error Code 0x8007007e – What is it?

Error code 0x8007007e often occurs when users attempt to use Windows Update but are unable to access updates or webpages. To resolve this issue, you will need to use tools that detect and correct corrupted files as this is usually the main reason for the error.

Solution

Restoro box imageError Causes

Once this error code is encountered, it's a clear indication that your Operating System has malfunctioned. This could be a consequence of an incorrect or failed installation of software. The software might leave invalid entries in the Windows registry. Improper shut down of your system and a malware attack are also causes of error code 0x8007007e. Additionally, someone with little or no technical knowledge might have deleted a system file by accident. Missing system files can also equate to other error codes such as registry error code 19.

You may not always be able to prevent issues from affecting your computer, but proper measures can be taken to limit your risk of experiencing problems like error code 0x8007007e. See the following suggestions below:

  • Ensure proper system maintenance by regularly using your automated tool. This will ensure your system is in good shape and error-free. It will also clean your system regularly leading to a boost in PC performance
  • Keep antivirus software up-to-date. Antivirus software if crucial for the proper functioning of your computer. Keeping your antivirus updated is one of the best ways you can avoid problems with your PC.

Further Information and Manual Repair

Method One: System File Checker

System File Checker is a Windows tool that allows users to check their system for corrupt or bad system files. The utility scans for corrupt files and repairs them as well as files that may have gone missing.

Depending on the type of Windows operating system on your computer, you may need to follow varying instructions. However, note that Windows operating systems including Windows 10 and Windows 8 or 8.1 and Windows Vista all provide access to System File Checker via Command Prompt.

Once you run System File Checker, the tool should be able to repair and replace corrupted files. However, in cases where the repair process does not take place, you can attempt a manual repair by replacing the corrupt file the tool identifies with a good file. The process may require technical knowledge of Command Prompt so consider help from a Windows repair technician or consider contacting Windows for instructions based on your computer’s operating system.

Method Two: Run System Restore Tool

The System Recovery Options menu in Windows contains many tools which can enable users to resolve serious errors. In the case of Error Code 0x8007007e, one of the best tools in this menu is System Restore.

When an error occurs which inhibits users from accessing key functions on their system, System Restore enables the user to restores the computer to an earlier period without causing harm to files, photos, or documents.

However, once you run this tool, you will only be able to access files available within the period to which your computer is restored. For this reason, carefully consider which period is best suited to your purposes. Also, ensure you restore the system to a time when error code 0x8007007e was not present on your machine.

If System Restore does not resolve the error, you may undo the restoration changes. Ensure you have sufficient free space on your machine hard disk before you proceed (300 MB at least for hard drives above 500MB or at least 50 MB for smaller sized disks).

Method Three: Download Automated Software

When it comes to resolving error codes, it can often be a frustrating and tricky venture, especially when you are attempting to fix the problem manually. The Internet is awash with bits and pieces of instruction, some misleading at best with uncertain success rates.

But what if there was a one-stop-shop or better yet a tool that offered solutions for error codes including 0x8007007e?  Download a powerful automated tool that offers easy and effective, user-friendly solutions for users with varying error code problems.

Read More
Schedule restart update on Windows 11
windows 11 schedule update
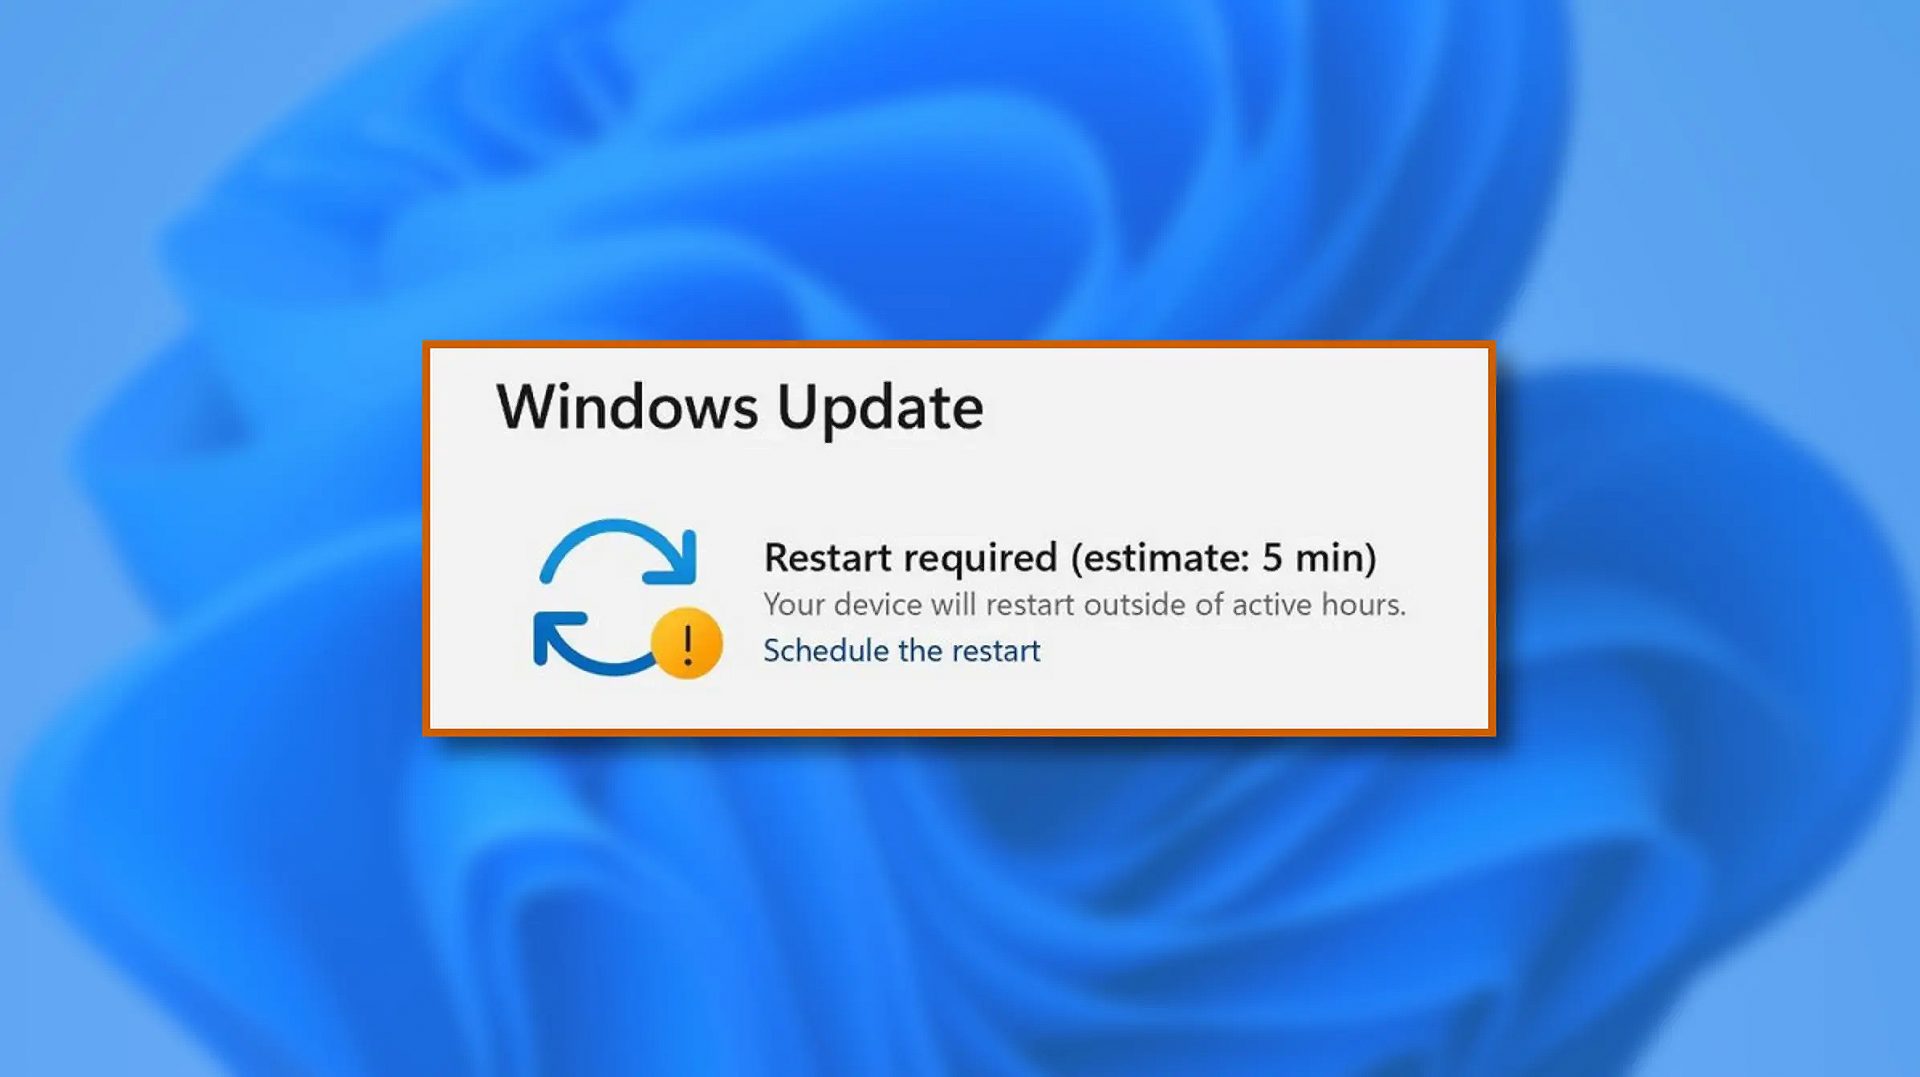
When Windows 11 update is available but you do not wish to restart right away because you are in the middle of using a computer, you can schedule a restart for up to 7 days. It is very easy and we will show you how to do it.
  1. Press ⊞ WINDOWS + I to open settings
  2. Click on Windows Update
  3. At the top, under the Restart required to click on Schedule the Restart
  4. Click the switch under Schedule a Time to turn it ON
  5. Use the Pick a Time and Pick a Day menu to set time and day when you want to update
  6. Go back to one screen and visually confirm that the date is set
  7. Close the settings
The scheduled restart will be confirmed in a message on the Windows Update page.
Read More
What to do if JPEG files won’t open in Windows 10
As you know, “JPEG” is one of the commonly used formats for image files which is a compression of digital images. It is one of the topmost used file formats by mobile phones and digital cameras and usually achieves a 10:1 compression with little visible loss in the quality of the image. There are tons of cases as of late, most particularly after the latest Windows 10 update where users were not able to open JPEG files on their PCs. Every time they try to open any JPEG file, they either get an error or nothing happens at all. This issue could be due to the default handler application for JPEG applications not being set or there could be some third-party image viewer not working properly. To fix this issue with JPEG files, refer to the troubleshooting options below.

Option 1 – Try to change the file type association

You need to check if the file type association of the JPEG files are correctly set or not since there are tons of third party programs that change the file type association automatically to themselves without your permission the instant they are installed and so if any of these third-party programs are broken, then naturally, your JPEG files won’t really open. That’s why you can try changing the setting to the default photo viewer instead of the third-party one. To do so, follow the steps below.
  • Tap the Win + R keys to open the Run dialog box.
  • Then type in “control panel” in the field and hit Enter to open the Control Panel.
  • After opening Control Panel, click on the Programs category and select the “Default Programs” option from the menu.
  • Next, select the second option “Associate a file type or protocol with a program” and then select the “Choose default apps by file type” option.
  • After that, click on the .jpg file extension and choose the option from the pop-up.
  • Now restart your PC to refresh all your programs and then see if it has fixed the problem or not.

Option 2 – Try to update your computer

Microsoft frequently releases updates to target bugs and improve users’ experience. And this particular error where JPEG files won’t open is already acknowledged by Microsoft so you need to make sure that your Windows 10 PC is updated to the latest released update and that there are no pending updates.
  • Tap the Win + S keys to open Search and then type in “update” in the field and open the system setting from the search results.
  • After that, check for updates and then download and install them if needed.
  • Now restart your PC once the update is done and check if you can now open JPEG files.

Option 3 – Try to reset the Photos app via Settings

Resetting the Photos app could also help you in fixing the problem. Note that this option will reset all the configurations and your data associated with your Photos and makes the application go into a state when you first started using it and that this option will fix any discrepancies that your application might be experiencing right now.
  • Tap the Win + S keys to open the search bar.
  • Then type in “settings” in the field to open the Settings application.
  • After opening Settings, click the “Apps” category.
  • From there, a list of applications installed on your computer will appear.
  • Navigate through these applications until you find the Photos app and then click on the Advanced options.
  • Afterward, click the Reset button that appears on the next screen. Then a new pop-up comes up and will warn you that all the preferences, as well as sign-in information, will be lost. Click on “Reset” anyway to proceed in resetting the Photos app.
  • Restart your PC once the reset is done.

Option 4 – Try to reinstall the Photos app

Before you start using other third-party image viewers just yet, you can try to reinstall the Photos app first. Thus, if there is something wrong with it, it will instantly get fixed right after it reinstalls. Just take note that this option requires administrative privileges so you need to be logged in as an administrator.
  • The first thing you have to do is tap the Windows + S keys and type in “PowerShell”.
  • Next, right-click on the file and click on the “Run as administrator” option from the context menu.
  • Once PowerShell is opened, execute this command: get-appxpackage *Microsoft.Windows.Photos* | remove-appxpackage
  • The command you just entered will remove the Photos app. After the process is done, go to the Microsoft Store and look for Microsoft Photos then download and install it again.
Read More
Fix GeForce Experience error code 0x0001
The GeForce Experience on graphics card manufactured by NVIDIA is an advantage for users who loves gaming as it makes enhances users’ gaming experience. However, there are times when it may also encounter some problems. One of the problems users may encounter is the error code 0x0001. This kind of error occurs when users open the NVIDIA GeForce Experience utility. Here’s the full content of the error message:
“Something went wrong, try rebooting your PC and then launch GeForce Experience, ERROR CODE: 0x0001.”
Errors like this one diminish the overall experience of users due to the fact that when this error occurs, the NVIDIA GeForce experience wouldn’t even start which renders its features useless. There are several potential fixes you can check out to resolve this error but before you check them out, you can try to restart your computer first and then open the NVIDIA GeForce Experience once again, if you still encounter the error, then you need to check the NVIDIA Display Driver Services or update your NVIDIA display drivers or switch to the BETA release. You could also try to install and reinstall the NVIDIA display drivers or perform System Restore and see if it helps. For detailed instructions, follow the given options below.

Option 1 – Try to check the NVIDIA Display driver services

  • Tap the Win + R keys to open Run and then type “services.msc” in the field and hit Enter to open the Services Manager.
  • From there, look for the following NVIDIA services and make sure that their Startup types are as follows:
    • NVIDIA Display Container LS – Automatic
    • NVIDIA NetworkService Container – Manual
    • NVIDIA LocalSystem Container – Automatic
    • NVIDIA LocalSystem Container – Automatic
    • NVIDIA GeForce Experience Service – Automatic (Delayed Start)
    • NVIDIA Geforce Experience Backend Service – Automatic (Delayed Start)
    • NVIDIA Telemetry Container service – Automatic
  • Next, double click on each one of the services and go to Properties. Here, check if the service is running. If it’s not, just click on the Start button. On the other hand, if they’re already running, just click on Stop and then click on Start again.

Option 2 – Try to update the NVIDIA Display drivers

You can also try updating the NVIDIA display drivers as it might help in fixing the error. To update them, follow the steps below.
  • Tap the Win + R keys to open the Run dialog box.
  • Next type in “dxdiag” in the field and click OK or hit Enter to open the DirectX Diagnostic Tool.
  • From there, you can see what type of NVIDIA graphics card that your system is on.
  • Take note of your graphics card information and then look for the best drivers for your operating system. Once you’ve downloaded and installed the file, restart your PC.
Note: If you want to try out the beta release of the NVIDIA display drivers, click on this link. Beware though that the beta software is unstable and buggy and may cause some different bugs.

Option 3 – Try to roll back the driver to the previous version

If updating the NVIDIA display drivers didn’t work for you, then it’s time to roll back the device drivers. It is most likely that after you updated your Windows computer that your driver also needs a refresh.
  • Tap the Win + R keys to launch the Run window and then type in the “msc” command and hit Enter to open the Device Manager window.
  • Under the Device Manager, you will see a list of drivers. From there, look for the NVIDIA Drivers and expand it.
  • Next, select the driver entries that are labeled appropriately.
  • Then select each one of them and double click to open a new mini window.
  • After that, make sure that you’re on the Driver tab and if you are not, just navigate to it then click the Roll Back Driver button to switch back to the previous version of the NVIDIA Drivers.
  • Now restart your computer to successfully apply the changes made.

Option 4 – Try to run System Restore

You could also run System Restore as it might help fix the error code 0x0001 in NVIDIA GeForce Experience.
  • Tap the Win + R keys to open the Run dialog box.
  • After that, type in “sysdm.cpl” in the field and tap Enter.
  • Next, go to the System Protection tab then click the System Restore button. This will open a new window where you have to select your preferred System Restore point.
  • After that, follow the on-screen instructions to finish the process and then restart your computer and then check if the error code 0x0001 in GeForce Experience is now fixed.

Option 5 – Do a clean install on the NVIDIA driver

  • Before you do a clean install on the NVIDIA driver, you have to download the latest version of the Display Driver first.
  • Boot your Windows 10 PC into Safe Mode.
  • After that, double click on the executable file of the Display Driver Uninstaller to run and install it.
  • After the installation, open the program. Once you do, you should see the following window on your screen:
  • In the program window, click on the “Clean and restart” button.
  • After your PC has rebooted, download the NVIDIA drivers.
  • Then select your Product Type, Product Series, Product, Operating System, and Language appropriate for your hardware specifications as well as personal requirements.
  • Next, click on Search to display the latest available driver as per the information you entered.
  • And click on Agree and Download to start downloading the latest driver executable file.
  • Run the executable file after you finished downloading the latest driver executable file and then select Custom and click on Next.
  • Afterward, select “Clean Install” and proceed. Doing so would install the latest driver on your PC.
  • Restart your PC and check if the error’s now fixed. If not, you can try installing an older version of the driver instead.
Read More
Windows Upgrade/Activation error 0xc03f6506
There are a lot of home users that often get a computer that comes installed with the Windows 10 Home. And since Windows 10 Pro offers more features and utilities compared to Windows 10 Home, a lot of users also prefer to upgrade their Windows 10 Home computers to Windows 10 Pro. However, while doing so, a number of users reported that they encountered error 0xc03f6506 and they were not able to proceed with the upgrade. If you are one of these users, when you encounter error 0xc03f6506, you will see the following error message on your screen:
“The last product key you entered can’t be used on this copy of Windows (0xc03f6506).”
This particular error tends to occur when you go on to activate Windows 10 although it can also appear during the upgrade process. In such cases, you will see the following error message:
“Unable to upgrade your edition, We can’t upgrade your edition of Windows. Try upgrading your edition of Windows again. (0xc03f6506).”
To fix the Activation Error Code 0xc03f6506 in Windows 10, use the options provided below as references but before you proceed, make sure that you create a System Restore point first.

Option 1 – Try to use the Registry Editor

If you have already upgraded from Windows 10 Home to Windows 10 Pro and you’re having trouble with its Activation, then you might want to apply some registry tweaks to fix the problem. How? Refer to these steps:
  • Tap the Win + R key combination to open the Run dialog box.
  • Then type “Regedit” in the field and click OK or tap Enter to open the Registry Editor.
  • Next, navigate to this registry key: ComputerHKEY_LOCAL_MACHINESOFTWAREMicrosoftWindows NTCurrentVersion
  • From there, look for a DWORD named “EditionID” and once you found it, double click on it and change its Value data to Windows 10 Professional.
  • After that, look for another DWORD named “ProductName” and double click on it to change its Value data to Windows 10 Professional.
  • Once you’re done, restart your computer to apply the changes made successfully.

Option 2 – Try to use Command Prompt

If the registry tweaks you applied didn’t fix the Activation error, then you can try using Command Prompt instead. Note that you can use this option in both scenarios pointed out above.
  • First, you have to insert a bootable drive of the Windows10 installer.
  • Next, tap the Win + X keys and select Command Prompt (Admin) from the menu.
  • After opening Command Prompt as admin, navigate to the root location of the bootable drive inside the Command Prompt command line.
  • Once you’re already there, type the following command and tap Enter:
setup.exe /auto upgrade /pkey <YOUR WINDOWS 10 PRO EDITION PRODUCT KEY>
After entering the command, check if it was able to fix the Windows Upgrade or Activation error 0xc03f6506. If not, refer to the next given option below.

Option 3 – Try to disable the Network Adapter

Just like the second option, you can also use this option for both the given scenarios above.
  • Tap the Win + X keys and select Network Connections from the menu.
  • This will open the settings for your network and on the left side panel, click on the “Change adapter settings” link. This will open Control Panel.
  • From there, click on the network your computer is connected to, and then right-click on the Network Adapter that you are using and select Disable.
  • After disabling the Network Adapter, try to switch to the edition of your copy of Windows 10 again and see if the problem is now fixed and don’t forget to double click on the disabled Network Adapter to get back on the Network.
Read More
Cannot start new hardware device, Error 49
In case you don’t know, the Windows Registry contains a System Hive which is a core part of Windows. The Windows operating system store various settings, options, and configurations. And if you encounter a Device Manager Error 49 for a device then it means that the system hive has exceeded its size limit. Worry not for this post will provide you with possible solutions that can help you in fixing error code 49. You will see the following error message when you encounter error code 49:
“Windows cannot start new hardware devices because the system hive is too large (exceeds the Registry Size Limit), (Code 49)”
There are instances when it may so happen that the device or devices are no longer attached to the computer but they are still listed in the system hive of the registry. For instance, if you were removing hardware and application for years but they weren’t removed from the registry then the size of the system hive keeps on growing until it hits the maximum limit. As you know, making changes in the registry manually, no matter how knowledgeable you are on such things is not sage since the registry is not only important but also complex. In addition, the System Hive is also a permanent part of the Registry associated with a set of files that contain information related to the configuration of the computer on which the OS is installed. To resolve this error, you must remove or uninstall any hardware devices that are no longer in the system. In fact, the Device Manager hides them by default so you need to enable hidden or non-present devices. Follow the instructions given below to set the Devices Manager to display devices that are no longer connected to the computer. Step 1: Tap the Win + R keys to open the Run dialog box. Step 2: After that type in “cmd” and hit Enter to open the Command Prompt. Step 3: Type “set devmgr_show_nonpresent_devices=1” in the Command Prompt and hit Enter to enable the hidden devices option. Step 4: After that, exit Command Prompt and tap Win + X + M to open the Devices Manager. Step 5: After opening the Devices Manager, click on View and then select the “Show hidden devices” option. This will show you all the devices that are not connected to the computer but are still mentioned. Step 6: Next, select a non-present device and click Uninstall from the Driver tab. Step 7: After that, repeat what you’ve done on step 5 for any other device that you no longer use. Step 8: Restart your computer. You can check the device Properties dialog box in the Device Manager after you’re done removing all the useless devices, to check if the error is now fixed or not. Moreover, you can also try running the Hardware and Devices Troubleshooter as it can also help resolve hardware-related problems. To use it, refer to the steps below.
  • The first thing you need to do is click on Start and then on the gear-like icon to pull up the window for Settings.
  • After opening Settings, look for the Update and Security option and select it.
  • From there, go to the Troubleshoot option located on the left-hand side of the list.
  • Next, select Hardware and Devices from the list and open the Troubleshooter and run it. Once it is doing its job, wait for it to complete the process and then restart the system.
  • After the system restarts, check if the problem’s now fixed. If not, refer to the next option given below.
Read More
There is insufficient disk space to ...
If you are trying to copy a folder or file in your Windows 10 computer but encountered an error that says, “There is insufficient disk space to complete operation”, then you’ve come to the right place as this post will walk you through how you can fix the error. This kind of problem could be due to lack of disk space, corrupted disk, and many more. In such cases, this error usually pops up when you move or copy a file or folder to a particular location. There are several potential fixes you can check out to fix this error. You can try to run the Storage Sense or Disk Cleanup or try copying or moving the file in a Clean Boot State. You could also try formatting the given partition to NTFS. For more information, refer to each one of the options provided below.

Option 1 – Try to delete the temporary files

The error could be caused by some temporary or junk files in your computer and so you need to clear them up to fix the problem. You can achieve that using the Storage Sense feature.
  • Open Setting > System > Storage from the WinX Menu.
  • From there, you will see a list of all the local and connected storage devices along with the details on the free space. Make sure that Storage Sense is on.
  • Next, find a link that says “Free Up Space” and click it to open.
  • After that, a screen which is the built-in program in Windows 10 will appear and will scan your computer for the following junk files so you can free up disk space:
    • Windows Upgrade Log Files
    • The system created Windows Error Reporting Files
    • Thumbnails
    • Temporary Internet Files
    • Previous Windows Installation Files
    • Delivery Optimisation Files
    • DirectX Shader Cache
  • Choose the files you want to get rid of and then click on the remove files option. Note that you’ll have an idea of the total size as you select any of the junk files listed above.
  • Now go to the “Free Up Space Now” section and click the Clean now button. This will get rid of all the temporary or junk files in your computer and should hopefully fix the “There is insufficient disk space to complete operation” error.

Option 2 – Restart your computer in a Clean Boot State

If the first options didn’t work and you still see the “There is insufficient disk space to complete operation” error when you copy folder or files, you can try putting your computer in a Clean Boot State and then again.
  • Log onto your PC as an administrator.
  • Type in MSConfig in the Start Search to open the System Configuration utility.
  • From there, go to the General tab and click “Selective startup”.
  • Clear the “Load Startup items” check box and make sure that the “Load System Services” and “Use Original boot configuration” options are checked.
  • Next, click the Services tab and select the “Hide All Microsoft Services” check box.
  • Click Disable all.
  • Click on Apply/OK and restart your PC. (This will put your PC into a Clean Boot State. And configure Windows to use the usual startup, just simply undo the changes.)
  • Now try to connect copy the folder or file once more and check if the error is now gone.

Option 3 – Try formatting the given partition to NTFS

Even though this option may take a lot of your time, it is proven to fix the “There is insufficient disk space to complete operation” error as reported by many users who also went through the same dilemma. So if the removable disk is showing the same error message no matter which computer you insert it, you might have to format the drive with the help of Command Prompt. But before you do that, you must know that all the contents of your drive will be permanently deleted after you format it.
  • Tap Win + R to launch Run.
  • Type in cmd and then tap Enter or click OK to open the Command Prompt.
  • And in the elevated window of Command Prompt, type in the following command:
format F: /fs:ntfs
In the command given above, “F” is the drive letter and “NTFS” is the file system you want. Just remember to replace “F” with the drive letter you want to format as well as the file system you prefer. Brace yourself as this process might take quite a while even if you only have a 4 GB USB drive – so you must not close the window under any circumstances as the drive might get corrupted and wait for the process to finish.
Read More
Fix microphone not working in Windows 10
The microphone has become from exclusive niche hardware to everyday requirements. In today's world when we live in a pandemic most of the work has shifted from office to home where people need working computers with microphones, working microphones. So what do we do when the microphone stops working? Keep reading on to find out and hopefully, we will fix this as fast as possible.

Check Microphone Privacy Settings

In 2019, Microsoft introduced new privacy features to Windows that give you more granular control over which apps are accessing your microphone. The side effect of this is that certain apps may be blocked from using your microphone without you even knowing. To find out if this is the issue, go to Settings > Privacy > Microphone. Click Change and make sure the slider is set to On. This will broadly mean that the mic is now enabled on your PC.
Next, make sure the slider under Allow apps to access your microphone is set to On, then look through the list of Microsoft Store apps to make sure the apps you want to use are selected.
You’re likely to be using many apps, not from the Microsoft Store, so to make sure these are enabled, scroll down even further and set the Allow desktop apps … slider to On.

Check Microphone Driver

The outdated or corrupted driver could be the issue for the microphone not working in Windows 10. To check the driver status, follow these steps:
  1. In your Start menu search for Device Manager
  2. In the device manager window search for sound and expand it.
  3. Once expanded, you should see your audio drivers. Note that the names of these will vary depending on the manufacturer.
  4. On Audio, right-click, and select properties. On the General tab, check to see if the device is working properly.
  5. If it is not working properly, click on the driver tab and select the update option.
  6. Repeat for the other audio drivers.
  7. Restart the computer.

Check the Sounds setting

  1. In the taskbar, right-click on the speaker icon at the far-right corner and select the sound option.
  2. On the Recording tab, click on the microphone and select the Properties option.
  3. Select the levels tabs and increase the volume for both microphone and microphone boost.
  4. Go to the Enhancement tab of the same pop-up and make sure that the immediate mode checkbox is checked.
  5. Click Ok and restart the computer.

The sound troubleshooter

  1. Right-click on the sound icon at the far-right corner of the taskbar and select troubleshoot sound problems.
  2. The computer will detect any fault that exists with your audio and recommend fixes for you. You just need to read through the prompts and click the options that you think will work for you.

Try microphone on another computer

If previous steps have not produced results, try the microphone on another computer, if it is not working there then it is a hardware malfunction
Read More
Fix Windows Update Error 0x80072EE2
If you got an error code of 0x80072EE2 while trying to download a Windows 10 update then it could be that something is blocking the Windows Update service on your Windows 10 PC and is preventing it from connecting to the Microsoft server. In addition, the error code 0x80072EE2 also indicates “ERROR_INTERNET_TIMEOUT” and together with this message, you might also see a message as Windows Update encountered an unknown error or you might also find it hard to search for new updates. So in this post, you will be guided on how you can fix the Windows Update error code 0x80072EE2. Make sure to follow the steps below carefully.

Option 1 – Restart your computer and try installing the Updates again

You can restart your computer and then try installing the updates once again. There are instances when a simple restart resolves Windows Update errors. Aside from that, it would also be better if you make sure that your internet connection is working and that it’s stable. And so after you restart your computer, check for updates once again and see if you’re still getting the error or not.

Option 2 – Run the Windows Update Troubleshooter

Running the built-in Windows Update troubleshooter is one of the things you can first check out as it is known to automatically resolve any Windows Update errors like error code 0x80072EE2. To run it, go to Settings and then select Troubleshoot from the options. From there, click on Windows Update and then click the “Run the troubleshooter” button. After that, follow the next on-screen instructions and you should be good to go.

Option 3 – Try to disable your antivirus program

Disabling the antivirus program or any security software installed in your computer is always a good idea you can try when the Windows Update process does not go smoothly. So before you try updating your computer again, make sure to disable the antivirus or security program and once the Windows Update is done, don’t forget to enable the antivirus program back again.

Option 4 – Try to restart the Background Intelligent Transfer Service

The Background Intelligent Transfer Service or BITS is a part of the Windows Update service and is the one that manages the background download of Windows Update, as well as scans for new updates and so on. And if Windows Update is experiencing some problems, you can try restarting BITS but make sure that you have admin privileges to do so.
  • Tap the Win + R keys to open the Run dialog box.
  • Next, type “services.msc” in the field and hit Enter to open Windows Services.
  • From the list of Services, look for the Background Intelligent Transfer Service and double-click on it to open Properties.
  • After that, you need to set the Startup type to “Automatic (Delayed Start) and click on Apply.
  • Now click the Stop button to stop BITS and then click the Start button to restart the service.
  • Click OK to save the changes made and then restart your PC.

Option 5 – Try installing the updates in a Clean Boot State

It could be that some third-party application is the one that’s causing the problem so it’s best if you put your computer in a Clean Boot state. During this state, you can start the system with a minimum number of drivers and startup programs that will surely help you in isolating the root cause of the issue.
  • Log onto your PC as an administrator.
  • Type in MSConfig in the Start Search to open the System Configuration utility.
  • From there, go to the General tab and click “Selective startup”.
  • Clear the “Load Startup items” check box and make sure that the “Load System Services” and “Use Original boot configuration” options are checked.
  • Next, click the Services tab and select the “Hide All Microsoft Services” check box.
  • Click Disable all.
  • Click on Apply/OK and restart your PC. (This will put your PC into a Clean Boot State. And configure Windows to use the usual startup, just simply undo the changes.)
  • After that, try to install the Windows app again.
Note: If you are able to install the app without any trouble at all then it means that the error is caused by some third-party application on your computer. You need to look for the culprit and uninstall it once you found it.

Option 6 – Run Microsoft’s online troubleshooter

Running Microsoft’s online troubleshooter might also help you fix the Windows update error code 0x80072EE2. This online troubleshooter is known to help in fixing Windows Update errors, it scans your computer for issues that might be causing the problem and then fixes them automatically.
Read More
1 2 3 162
Logo
Copyright © 2022, ErrorTools. All Rights Reserved
Trademarks: Microsoft Windows logos are registered trademarks of Microsoft. Disclaimer: ErrorTools.com is not affiliated with Microsoft, nor claim direct affiliation.
The information on this page is provided for information purposes only.
DMCA.com Protection Status