How to Fix Stop Error 7B

Repair Stop Error 7B

What is Stop Error 7B?

Stop error 7B is a blue screen of death error code that occurs during Windows XP setup or after installation. The error message is displayed in either of the following formats:

  • STOP: 0x0000007B (parameter1, parameter2, parameter3, parameter4)
  • INACCESSIBLE_BOOT_DEVICE
  • ‘A problem has been detected and Windows has been shut down to prevent damages’
  • Setup has encountered a fatal error that prevents it from continuing.
  • Setup cannot continue. Power down or reboot your computer now.

Solution

Restoro box imageError Causes

There is no one particular cause for this error. The Stop error 7B may be triggered due to multiple reasons. These include:

  • Boot Sector Viruses
  • Device Driver Issues
  • Poor Windows XP installation
  • Registry Corruption

If you come across this error code on your PC, it is advisable to fix it right away particularly because it is a blue screen of death error that can cause severe damages to your system. It can lead to system failure, crash, and valuable data loss.

Further Information and Manual Repair

Here we’ve listed for you the best PC repair solutions to resolve and fix stop error 7B.

Cause: Boot Sector Viruses

Solution: Stop error 7B can occur when infected with a boot sector virus. If this is the cause, then first download a powerful antivirus on your system. After downloading it, run it to scan your PC for viral infection. Immediately delete the viruses if found.

However, if the virus is too powerful, the antivirus may fail to remove it. In such an event, you will have to repartition and format your hard disk and then later reinstall Windows XP.

Cause: Device Driver Issues

Solution: If the boot controller is not properly configured or the driver is not updated, Stop error 7B can occur.  When this happens, simply restart your system and press F8 to go to the advanced boot options.

Here choose the Last Known Good Configuration option. After that boot into Windows and then perform a system restore. Now go to the start menu and type Device Manager in the search box.

To access the Device Manager window it may prompt you to enter an administrator password, insert it to proceed. Now go to Device Manager and perform a driver rollback to reinstall the drivers generating this stop error.

By following these simple steps you can easily resolve device driver and configuration issues.

Cause: Poor Windows XP Installation

Solution:  In this case, you will have to perform a Windows start-up repair. This can be done by booting Windows XP from CD. Simply press enter at setup Windows Screen when prompted. Then press R to repair Windows XP installation.

This procedure copies the original Windows files over the bad ones.

Cause: Registry Corruption

Solution: Sometimes the stop error 7B is also triggered by the registry corruption. When this happens, it is advisable to download and run Restoro software for PC scan and repair.

Restoro is a powerful, advanced, and highly functional registry cleaner. It is deployed with intuitive algorithms that detect registry issues and errors like Stop error 7B on your system in seconds.  It wipes out clutter from your hard disk, repairs damaged files and the corrupted registry.

It is safe, efficient, and bug-free. It is also compatible with all Windows versions. In addition to this, it is also embedded with other utilities like an antivirus, a system optimizer, and Active X controls, and a class ID scanner.

Click here to download Restoro and resolve to stop error 7B on your PC immediately!

If you like to learn and find out more about various Windows errors, and how to repair them go to our vast archive or use search to find articles that will explain and help you in solving your issue.
However, if you prefer to do things fast and with automatization then we are proposing to use an automated solution for your issues. The application that we are recommending is Advanced System Repair Pro
Advanced System Repair utilizes multiple tools all in one to give you a quick, simple, reliable, and very thorough diagnosis of your PC. It brings you all the tools you need in one program to clean, fix, protect, optimize and boost your PC!
1-Click Maintenance
All the tools to make it simple and easy! It's like having a professional technician at the click of a mouse.

Junk Cleaner
Keeping your computer free from unnecessary clutter also helps make your computer last longer. Like any other machine, if you keep it clean and take care of it, it will serve you better for longer!

Optimize background apps
Optimize applications background activity with the built-in Application Optimizer feature.

Disk Defrag
With a simple 1-click, Advanced System Repair speeds up your PC by assembling fragmented files on your machine and organizing them more efficiently.

Malware Removal
Finds and removes all types of harmful malware including trojans, worms, bots, adware, spyware, PUPs, and more!

Privacy Cleaner
The all-in-one privacy suite to Clean Your Tracks & Protect Your Privacy! Make your computer safe, secure, and more efficient!

System Tweak/Optimizer
ASR will analyze your complete system and settings to adjust your PC to function at its maximum performance.

Registry Cleaner
Over time, as you install and uninstall applications, the registry can become cluttered with old entries and broken settings which can result in program crashes, and annoying messages and slow the computer down.
Visit our Advanced System Repair Pro Download page to inform yourself about all the benefits of this software and get a free trial copy of it.
advanced system repair pro

Advanced System Repair Pro

One-click automated PC repair solution
ASR logo
With Advanced System Repair Pro you can easily
Replace damaged files
Restore performance
Free disk space
Remove Malware
Protects WEB browser
Remove Viruses
Stop PC freezing
DOWNLOAD
Privacy Policy | Terms of Use | Uinstall
Advanced System Repair Pro is compatible with all versions of Microsoft Windows including Windows 11

Share this article:

You might also like

Problem prevented document from being scanned
If an error suddenly pops up that states, “A problem prevented the document from being scanned” when you’re scanning a document in your computer, then you’ve come to the right place as this post will guide you on how exactly you can fix the problem. A lot of users have reported that they receive a two-layer error message when they try to scan their documents – the first screen throws an error message that says, “Error applying Settings to Driver” while the next error message states, “A problem prevented the document from being scanned”. As a result, the scanning won’t be completed which defeats the whole process of buying a printer with a scanner. As you can see the two error messages point to two different situations, while the other one is pointing at the driver, the second one points to the scanning problem. To resolve these issues, there are several suggestions you need to check such as follows:

Option 1 – Run the Printer Troubleshooter

One of the first basic troubleshooting you can perform to resolve the printer issue is running the Printer Troubleshooter. This built-in troubleshooter can detect and automatically fix the problem for you. To use it, follow these steps:
  • Tap the Win + R keys to open the Run dialog box.
  • Next, type “msdt.exe /id PrinterDiagnostic” in the field and click OK or hit Enter to open the Printer Troubleshooter.
  • Then click the Next button and follow the next on-screen instructions to fix the issue with the printer.

Option 2 – Try updating the Printer drivers

You might also want to try updating your printer drivers. All you have to do is locate the USB Composite Device. For complete details, follow the steps below.
  • First, click the Start button and type “device manager”.
  • Then click on the “Device Manager” from the search results to open it.
  • From there, look for the USB Composite Device option and right-click on it, and select the Update Driver from the options.
  • Restart your PC and then click the “Search automatically for updated driver software” option.
Note: You also have the option to download the latest version of your Printer from the manufacturer’s website.

Option 3 – Try to reset the settings of the Printer or reinstall it

If none of the two options given above worked, you can try to either reset the printer settings or reinstall the printer so that it can go back to its default state. However, if it doesn’t work, you can try to uninstall the printer as well as its related drivers. To do so, follow these steps:
  • First, go to Settings > Devices > Printer and Scanners.
  • After that, select the printer and select the Remove Device option.
  • Once done, restart your computer and check again and see if the error is now fixed.

Option 4 – Try to modify the Registry settings for the Still Image devices

In case you don’t know, Windows has Registry settings for the Still Image devices like Scanners and Printers. And these devices have vendor-specific settings that if ended up getting corrupted or misconfigured then you will most likely encounter errors like “A problem prevented the document from being scanned”. Thus, to fix this error, you can try modifying the Still Image devices registry settings, and to do that, you need to follow the instructions below but before that, make sure that you create a System Restore Point first.
  • Once you’ve created a System Restore point, tap the Win + R keys to open the Run dialog box and type “Regedit” in the field, and then hit Enter to open the Registry Editor.
  • Next, navigate to this registry key: HKEY_LOCAL_MACHINESYSTEMCurrentControlSetControlStillImage
  • From there, right-click on the “StillImage” registry key and delete it.
  • After that, exit the Registry Editor and restart your computer.
  • Once your computer has restarted, Windows will recreate the settings of the Still Image devices back to their default settings.
Read More
New calculator features in Windows 11 and more
Calculator GraphingWindows 11 will bring some old applications in new looks and some will get additional features as well. One of the old apps that will get new stuff is a calculator. The calculator was always a way to go application for quick calculations but Microsoft aims to expand on that and make the calculator a little more useful. The first thing that you will notice is the calculator look, the calculator has now an application theme setting that allows you to change the look of the application. It comes in standard and professional mode as usual but this time calculator will come with features that will enable it to handle some programming and engineering tasks. 
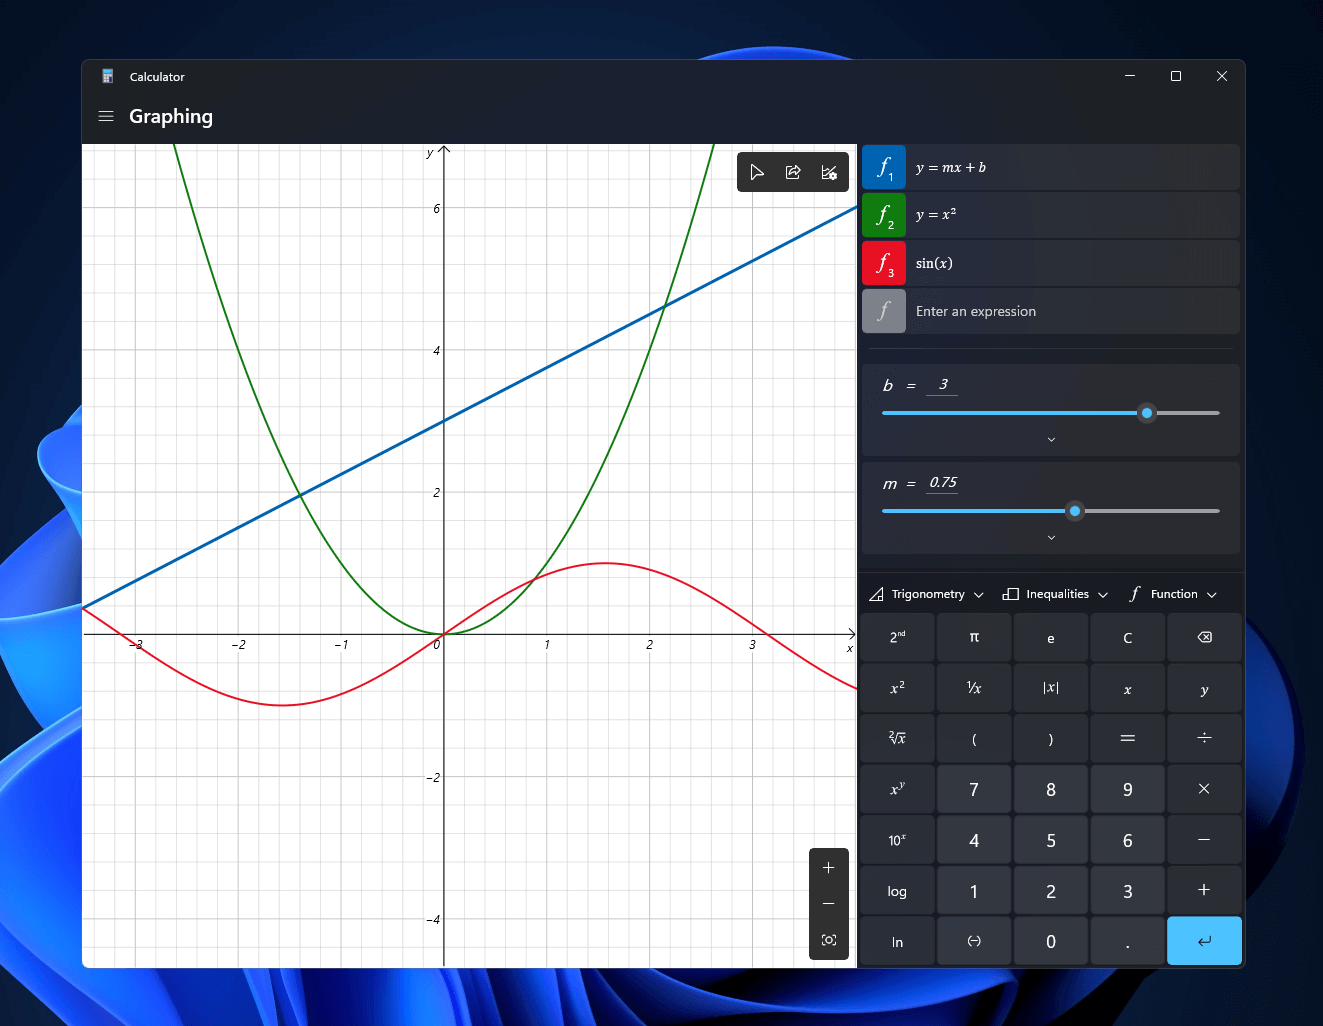
The new calculator features a full graphing mode that lets you visually analyze a graph to identify key features. It also packs a deep converter that can switch between more than 100 units and currencies.

Other Windows 11 apps

A new snipping tool will be delivered with this latest update as well packed with new functionality. We have covered new features of the snipping tool in another article, if you are interested you can find the article here: https://errortools.com/windows/new-snipping-tool-redesigned-in-windows-11/ Mail and Calendar apps will also get a redesign, sadly all redesign that they will include will be of visual nature to fit in the overall Windows 11 theme, functionality will remain the same.
Read More
0x80071771, The specified file could not ...
If you are tried encrypting or decrypting a file using the default EFS engine but you receive an error message instead saying, “Error Applying Attributes, An error occurred applying attributes to the file: The specified file could not be decrypted”, read on as this post will help you sort out the problem. If you encounter this error you can use the error code in it. You will most likely get error code 0x80071771. This kind of error occurs when the File Explorer’s copy and paste feature was not able to read the source file being encrypted or decrypted. It could also occur if you try to access a file that has been on another computer previously.

To fix error code 0x80071771 when decrypting or encrypting a file, refer to the instructions provided below.

Step 1: You need to check first if you can decrypt the files encrypted by EFS. However, if you can’t, just proceed and then take full control of the file. Step 2: To take control of the file, open File Explorer and right-click on the partition, and then click on Properties. Step 3: After that, click on the Edit button under the Security tab. Step 4: Next, make sure that “Everyone” is selected under the Group or user names section. Step 5: Afterwards, the Permissions for Everyone section will be activated. Just make sure that all the checkboxes for Allow are checked and then click on the Apply button. Step 6: Once you’re done, click on the Advanced button. This will open a new window labeled Advanced Security Settings. From there, click on the Change link under the Owner section. Step 7: Now type your account name in the field and click on Check Names to verify the account name and click OK. Step 8: After that, select the “Replace owner on sub-containers and objects” option and then click OK. Step 9: Next, select Administrators in the Group or User names list and select Full Control in the Permissions for Administrators panel and click OK.
Read More
How To Fix The "Referenced Memory At" Error Code

"Referenced Memory At" Error Code

Referenced Memory at - What is it?

0x Referenced Memory at 0x is an error code that occurs when the random memory addresses conflict. This error causes running programs or browsers to crash. Referenced memory at error code is considered as a service violation error. It is displayed as the following:

“The instruction at 0xf77041d24 referenced memory at 0×00000000. The memory could not be read.”

Solution

Restoro box imageError Causes

The ‘referenced memory at’ errors is either triggered by:
  • Hardware failure
  • Problems with the RAM and the registry
Hardware failure may result if the driver is not installed properly. The problems in the RAM indicate registry issues that occur due to data overload in the hard disk and poor PC maintenance. The registry saves all the information and activities you perform on your system on the hard disk. This includes the junk files, temporary files, invalid registry entries, and files of both installed and uninstalled programs.  These files accumulate and take over a lot of RAM space. Also, the referenced memory at error can be considered to be a form of memory leak where unknown third-party software can take up the memory space that has been reserved for a particular program. For example, if you have toolbars and add-ons installed in your browser, it can also lead to invalid registry storage in the registry. If you don’t clean the registry, these unnecessary files can overload your data and lead to hard disk/RAM damage and corruption triggering obscure error messages like referenced memory at error.

Further Information and Manual Repair

Referenced memory is a critical error; if not resolved it can lead to serious PC damages like a system failure. To avoid this, it is advisable to fix it right away. Here are a couple of ways to repair this issue on your system:

Cause: Hardware Failure

Solution: If the referenced memory at error is generated due to hardware failure then to resolve this error you must reinstall the driver that has caused the error to appear. Let’s say if the error pops up because of the printer driver, reinstall it. For re-installation of the driver, simply go to the control panel and click on the Device Manager option. Once you click it you will see a detailed page with a list of devices. Now click on the printer (the problematic driver in this situation) to reinstall the driver software. Double click on it to open the properties dialog box and then click the driver tab and update the driver. Once you have updated the driver, try using the printer. Check if it works. If it works and the referenced memory at the error code does not appear on the screen, this means the problem was with the hardware. However, if the error still pops up then this means the problem is deeper. It’s related to the registry.

Cause: Problems with the RAM and the registry

Solution: If the problem is with the RAM and the registry, then it is advisable to download Restoro. Restoro is a new, next-generation, and highly functional registry cleaner. It detects and removes all the registry issues, unnecessary and obsolete files saved in the hard disk taking up a lot of RAM space. It clears the RAM and cleans up the disk. Furthermore, it repairs the damaged files, fragmented disk, and the corrupt registry in seconds enabling you to resume the program that you were running before the error occurred. Restoro has a user-friendly interface and easy navigation. To run and operate this system you don’t need any kind of technical expertise. In just a few clicks you can resolve the critical referenced memory at error on your PC. It is compatible with all Windows versions Click here to download and install Restoro on your PC and fix the referenced memory error code now.
Read More
Fix NMI_HARDWARE_FAILURE in Windows
If you encounter the NMI_HARDWARE_FAILURE Blue Screen error while using your Windows 10 computer, then read on as this post will guide you in resolving this kind of Blue Screen of Death error. NMI HARDWARE FAILURE or “Non-Maskable Interrupt” Blue Screen error occurs when there is some hardware malfunction in your computer. When you encounter this Blue Screen error, you may get a stop code of 0x00000080 which can randomly occur while you use your computer. However, a lot of users reported encountering this error while they were trying to update or install their Graphics Card drivers. The stop code that you may get for this BSOD error is 0x00000080. The error can occur randomly during your usage of the computer – but a large number of users have reported this error while they are updating or installing their Graphics Card drivers. In this post, we will be covering all the possible fixes for this error. NMI_HARDWARE_FAILURE error on Windows The NMI_HARDWARE_FAILURE bug check has a value of 0x00000080. This bug check indicates that a hardware malfunction has occurred. There are various hardware malfunctions that can cause this kind of Blue Screen error. However, pinpointing the exact cause is quite difficult. Worry no more for the following fixes provided below can help you resolve the NMI_HARDWARE_FAILURE Blue Screen error no matter what the cause of the problem is.

Option 1 – Try removing hardware or drivers that you’ve installed recently

If you have recently installed some hardware or drivers, you might want to disable or remove them since external devices are proven to be one of the factors that trigger Blue Screen errors like NMI_HARDWARE_FAILURE. All you have to do is physically disconnect any external devices that are connected to your computer and then check if it fixes the BSOD error or not.

Option 2 – Try to rollback, update, or disable the Graphics card drivers

Since the NMI_HARDWARE_FAILURE Blue Screen error has something to do with Graphics card drivers, you can either roll back, update or disable them depending on your preference in order to resolve the error.
  • First, boot your computer into Safe Mode.
  • After that, tap the Win + R keys to launch Run.
  • Type in devmgmt.msc into the box and tap Enter or click OK to open the Device Manager.
  • After that, a list of device drivers will be displayed. From there, look for the Display Adapters and click on them.
  • After that, right-click on each entry under the Display Adapters and select the “Uninstall Device” option from the menu.
  • Now restart your computer.
  • After restarting your computer, go to the Settings app and Check for Updates in the Windows Update section.
Note: You also have the option to go directly to the website of your graphics card manufacturers like NVIDIA, Intel, or AMD and go to the section called Drivers then check if there’s a new available update – if there is, download and install it.

Option 3 – Make sure that all memory modules have the same type

This third option is quite technical and tricky. If you often use multiple physical RAMS on your Windows 10 computer, then you have to check first if they are of the same frequency. After that, the first thing you should verify is if the chip is properly compatible or not. And if the sockets are attached using some kind of adapter or non-recommended device, it could cause some issues while giving a performance hit to your computer.  If you were able to find such a setup, you have to undo it or install the proper and recommended as well as compatible hardware.

Option 4 – Try to run the Blue Screen Troubleshooter

As you know, the Blue Screen troubleshooter is a built-in tool in Windows 10 that helps users in fixing BSOD errors like the NMI_HARDWARE_FAILURE error. It can be found on the Settings Troubleshooters page. To use it, refer to these steps:
  • Tap the Win + I keys to open the Settings panel.
  • Then go to Update & Security > Troubleshoot.
  • From there, look for the option called “Blue Screen” on your right-hand side and then click the “Run the troubleshooter” button to run the Blue Screen Troubleshooter and then follow the next on-screen options. Note that you might have to boot your PC into Safe Mode.
Read More
How to Fix Windows 10 Error Code 0x80070570

Error Code 0x80070570 - What is it?

Error Code 0x80070570 is a common Windows 10 error code that generally is seen by users who are attempting to install a new version of the operating system. While it is most often associated with Windows 10, variations on this same error code have been present in previous versions of the operating system, going all the way back to Windows 7.

Common symptoms include:

  • Inability to run through the installation process to completion when attempting to install a new version of the operating system
  • Error message regarding corrupt or missing files
While it is frustrating to encounter an error like Error Code 0x80070570 as you try to install a new operating system version on your device, there are several methods that can be used to try to resolve the issue. If you do not feel like you have the skill or knowledge necessary to successfully apply the steps below, be sure to get in touch with a trusted computer repair technician that is competent in the repair of Windows 10 errors.

Solution

Restoro box imageError Causes

In some cases, Error Code 0x80070570 arises erroneously when the system isn’t able to find a particular file that it needs. Other times, it happens when there is a conflict with the antivirus software that you are running and the installation software. Finally, there may be a faulty source of RAM in your computer that needs to be removed before the installation can be completed.

Regardless of what you believe to be the cause behind the error code, there are at least two different methods that you can use to try to resolve Error Code 0x80070570 on your device. The first is fairly simple and easy to follow, while the second requires a little bit more knowledge of your hardware in order to complete it successfully.

Further Information and Manual Repair

There are two common ways that users can attempt to get around Error Code 0x80070570 on their devices. Each requires a little more skill and technical knowledge than the last. If you don’t feel like you have the skill, time, or ability to invest in the methods below, be sure to get in touch with a Windows repair technician who can help you to complete the necessary steps in the right ways.

Here are the best ways to attempt to resolve Error Code 0x80070570 on your Windows device:

Method One:  Reattempt Installation

In some cases, when Error Code 0x80070570 appears on your computer, you can simply click on the OK button and then go back to the screen immediately proceeding where your installation has left off, choosing to restart the process of installation. For some users, repeating this method at least four times has allowed them to bypass the error without undertaking more serious and time-consuming methods to resolve the issue at hand.

Method Two:  Check Your Various Sources of RAM

If you have more than one source of RAM in your computer, first remove one of the sources, then re-attempt installation. If you are still encountering Error Code 0x80070570 after removing one of the sources, continue to remove each until you are down to a single source, then trade that last source for one of the ones that have been pulled.

If you have a bad source of RAM, this can help you to figure out which input is causing the error to appear and to address the problem appropriately. Once you have determined which specific source is causing the problem, you can reboot your computer and attempt to run the installation process one more time.

If your RAM sources are not specifically causing the issue, you may still need to run diagnostics tests on your hardware to identify the source of the problem at hand.

Method Three: Use An Automated Tool

If you wish to always have at your disposal a utility tool to fix these Windows 10 and other related issues when they do arise, download and install a powerful automated tool.

Read More
Repairing a corrupt Group Policy in Windows
If you recently made some changes in your Windows 10 computer using the Group Policy Editor but they were not reflected and you got errors instead, it could be that your Windows computer wasn’t able to read the Group Policy file (registry.pol). To resolve this kind of issue, you have to repair the potentially corrupted Group Policy using the options given in this post. .As you know, Group Policy is a feature in the Microsoft Windows Active Directory which allows an admin to make changes in the features on Windows PCs that are on the network. So if the modifications you just made weren’t successfully applied, then there could be something wrong with the registry.pol file on the client or it could also be that the Group Policy folder is missing. To fix this issue in the Group Policy, you need to refer to the given suggestions below and make sure that you have admin privileges as you execute them.

Option 1 – Try to delete or recreate the missing registry.pol file

The entire settings of the Group Policy are stored in the registry.pol file so if it went missing, all the changes you make will not be reflected. The good thing is that you can recreate it but if the file exists and is corrupted, you need to delete it first before you recreate it.
  • First, go to the C:/Windows/System32/GroupPolicy/Machine location.
  • And from there, check if the registry.pol file exists or not. If it’s there, just delete it permanently by tapping the Shift + Delete keys.
  • Now it’s time to recreate the file. Just open Windows PowerShell with admin privileges by tapping Win + X + A keys.
  • After opening PowerShell, type this command: gpupdate /force
  • The command you entered will recreate the registry.pol file and will refresh the Group Policy. Restart your computer.

Option 2 – Try recreating the secedit.sdb file

The security settings of Group Policy are stored in the secedit.sdb file so if you made some changes to security and they weren’t reflected, you can try to delete and recreate the secedit.sdb file instead of deleting the Group Policy file. All you have to do is navigate to the C:/WINDOWS/security/Database folder and look for the secedit.sdb file and rename it or move it to another folder. After that, restart your computer. Once your computer has restarted, the secedit.sdb file will be created again.

Option 3 – Try to reset the Group Policy to default

You can also try to reset the Group Policy back to its default state. There are several ways you can do that. You can either use the gpupdate or the secedit command in the Windows PowerShell to do that. Resetting the Group Policy will resolve any issues that could be caused by its current settings.

Option 4 – Try to perform System Restore

System Restore can also help resolve the Group Policy issue. It could be that prior to the issue, you’ve made some changes in the system that might have affected the Group Policy. To undo these changes, perform System Restore.
  • First, tap the Win + R keys to open the Run dialog box.
  • After that, type in “sysdm.cpl” in the field and tap Enter.
  • Next, go to the System Protection tab then click the System Restore button. This will open a new window where you have to select your preferred System Restore point.
  • After that, follow the on-screen instructions to finish the process and then restart your computer and check if the problem is fixed or not.

Option 5 – Use the DISM tool

You can also try running the Deployment Imaging and Servicing Management or DISM tool. This tool will repair the Windows System Image as well as the Windows Component Store in your Windows 10 computer. So if there are any missing or corrupted folders and files, the DISM tool can restore and repair them. As a result, any system consistencies and corruptions will be fixed. To run this tool, follow these steps:
  • Tap the Win + X keys and click on the “Command Prompt (Admin)” option.
  • After that, input each one of the commands listed below sequentially to execute them:
    • Dism /Online /Cleanup-Image /CheckHealth
    • Dism /Online /Cleanup-Image /ScanHealth
    • Dism /Online /Cleanup-Image /RestoreHealth
  • Once you’ve executed the commands given above, restart your computer.
Read More
Removing BEEP when adjusting volume in Windows
I often switch between my desktop speakers and headphones and because of this I very often use the volume adjustment bar to adjust sound levels so it is not too loud and each time when I set it I get annoying BEEP at the end. Now personally this might not bother you and you might want to leave it since it can be a useful feature to tell you how much volume is loud but if you are adjusting multiple times volume during the say it can become really frustrating to hear it each time, especially when switching to headphones and it beeps into your ears. In this guide, I will show you how to remove the beep so it is not heard anymore when you adjust the volume. Please know that beep is part of the Windows sound scheme and you can either remove specific sound with a completely silent wave or just turn off all windows alert sounds.
  • Open Windows settings and go to system > sound
  • in system sound, go to the right part of the screen and click on the sound control panel
  • In the sound control panel click on the Sounds tab
  • In the sounds, tab click on the drop-down menu under the sound scheme and choose no sounds.
There you go! You have successfully removed annoying BEEP each time you adjust the volume in Windows 10
Read More
Fixing To use System Restore you must ...
There are cases when you want to undo some changes you’ve made to your computer and to do that you have to perform the System Restore task. However, if you encounter an error that states “To use System Restore you must specify which Windows installation to restore”, when doing so, read on as this post will help you fix the problem. This kind of error in System Restore could be due to corrupted files in the system. There are also situations where you are not able to boot up once you encounter this error which could be a big problem. On the other hand, this error might have something to do with corrupted BCD files. Whatever the cause is, here are some potential fixes you have to try.

Option 1 – Try to run System File Checker offline

Like pointed out, since the error might be due to corrupted system files, you can try to run System File Checker offline. How? Refer to these steps:
  • You need to go to the Advanced Startup Options and from there select Troubleshoot.
  • Next, select the Advanced Options and then Command Prompt.
  • After opening Command Prompt, type the commands given below and tap Enter right after you type each one of them.
    • Cd /
    • Dir
  • If you can see the “Users” folder, that is your system’s drive. However, if you can’t see it, you can just change the drive-by assigning “D” as its alphabet volume.
  • Then execute this command where “C” is the system drive: sfc /scannow /offbootdir=C: /offwindir=C:Windows
  • Now repeat the given steps sequentially.

Option 2 – Try to run DISM tool

You can also run the DISM tool to repair the potentially corrupted system image. First, you have to check the health of the system like checking the integrity of the system files and Windows services. To run DISM, follow the given steps below sequentially.
  • Open Command Prompt from the Advanced Startup options.
  • After that, execute this command where “C:” is the system volume: DISM /Image:C:Windows /Cleanup-Image /RestoreHealth /Source:C:WindowsWinSxS
  • If you encounter an error after executing the given command, insert the Windows USB or DVD and then execute this next command where “E:” is the USB or DVD drive: DISM /Image:C:Windows /Cleanup-Image /RestoreHealth /Source:esd:E:SourcesInstall.esd:1 /limitaccess
  • In some cases, “install.esd” would be “install.wim” and in such case, you have to modify and execute this command: DISM /Image:C:Windows /Cleanup-Image /RestoreHealth /Source:wim:E:SourcesInstall.wim /limitaccess

Option 3 – Try to repair corrupted BCD

As mentioned, the error could also be due to corruption in BCD, and to fix it, you can use Bootrec.exe – a built-in command-line tool used to troubleshot issues related to boot up and Windows Startup. Before you run this tool, make sure that you have inserted a bootable USB or DVD into your computer. Once you have that covered, follow these steps:
  • You need to go to the Advanced Startup Options.
  • Then click on Troubleshoot.
  • Next, select the Advanced Options and then Command Prompt.
  • Once Command Prompt has been pulled up, enter each one of the following commands and in the sequence that they are given to rebuild BCD files and repair MBR files:
    • Bootrec /Fixmbr
    • Bootrec /FixBoot
  • After you execute the commands given above, you should see a confirmation message that says, “The operation completed successfully”.
  • Now type the “Bootrec /RebuildBCD” command to rebuild BCD.
  • Finally, close Command Prompt and then restart your computer to successfully apply the changes made.

Option 4 – Try to run the Automatic Repair Utility

You might also want to use Automatic Repair in fixing the error. To do so, follow the steps below.
  • You can start by creating and booting from a bootable Windows 10 USB Stick.
  • After that, click on Repair your computer located in the bottom left corner when you are on the initial Windows Startup screen.
  • Next, click on Troubleshoot, and then on the other screen, click the Startup Repair option.
  • Now select the operating system you want to repair. Once you do that, it will start to repair your operating system. Wait until the process is completed and then check if the problem’s now fixed.

Option 5 – Try to use the Windows Recovery Environment

If the four options given above didn’t help fix the problem, you could try running Windows Repair and a Windows bootable USB or DVD.
  • First, insert the bootable USB or DVD and boot into it, and select the “Repair your computer” option.
  • Next, once you see the manufacturer logo on your computer, tap the key to enter into Windows Recovery Environment.
  • After that, change the Boot sequence to DVD drive under the UEFI Firmware settings and restart your computer.
  • Once your computer has restarted, select the boot order and make changes accordingly as displayed in the BIOS.

Option 6 – Try running System Restore in Advanced Startup Options

Since you probably can’t boot into your Windows 10 computer, you can try to run System Restore again in the Advanced Startup Options.
  • Boot your computer into the Advanced Startup Options screen.
  • From there, you will see some options to troubleshoot when you can’t log in to Windows in the usual way.
  • Now select Troubleshoot > Advanced Options > Command Prompt.
  • After that, type “exe /OFFLINE:C:Windows” and hit Enter to execute the command which will start the System Restore process.
Note: You need to replace “C” with the drive where Windows Installation is located.
Read More
How to Fix Error 0x800CCC90

Repair 0x800CCC90 Error

Error 0x800CCC90 - What is it?

Error 0x800CCC90 is a typical Outlook error. This error indicates that Outlook has failed to connect to the mail server that handles and manages the incoming and outgoing emails. The error message is displayed in the following format:

“There was a problem logging onto your mail server. Your User Name was rejected.”

This error limits your ability to send and receive emails on Outlook. If you largely communicate at the workplace using your Outlook account, this error may slow down your work productivity and performance dramatically. Therefore it is advisable to fix it immediately.

Solution

Restoro box imageError Causes

The error 0x800CCC90 is triggered several reasons including but not limited to:
  • Authentication issues
  • Failure of POP 3 Server
  • PST File Corruption
  • Registry issues- Invalid Entries
  • Viral infection

Further Information and Manual Repair

To resolve error 0x800CCC90, try the methods given below:

Method 1 - Adjust the Authentication Settings

To resolve the error 0x800CCC90, adjust the authentication settings. Here’s what you need to do:
  • First, go to the ‘Tools’ tab and select the ‘Accounts’ option.
  • Once you select the account option, an internet accounts box will appear on the computer screen.
  • Simply double click on the account property box after that go to the server tab and click on it.
  • Check the box that says ‘My Server Requires Authentication’.
  • Click on apply to accept changes tab to save changes and close the window.
  • To activate changes made, restart Outlook and then try sending emails again.

Method 2 - Download a PST Repair Tool

If the error is triggered by PST file corruption, then the best way to resolve it is to download the PST repair tool. Download the PST repair tool from a trusted website. Run it on your system to fix PST file issues and resolve error 0x800CCC90.

Method 3 - Scan for Viruses

Another way to resolve this error is to scan for viruses. Viruses usually enter computer systems through phishing emails or while downloading attachments. You may not know this but viruses may be affecting your PC. Due to viruses, errors like error 0x800CCC90 can also be triggered. Therefore install an antivirus to scan and remove errors on your PC.

Method 4 - Clean the Registry and Remove Invalid Entries

Due to poor PC maintenance, misconfigured and invalid registry entries may be stored in the registry. Such entries may lead to Outlook errors too. Thus to resolve you must clean the registry and remove these entries right away. Download a registry cleaner to fix the error. Whether the error is triggered by viral infection or registry issues, it is recommended you download only Restoro. This is the one-stop solution to resolve all PC related errors. This software is deployed with 6 scanners including a registry cleaner, an antivirus, and a system optimizer. It is user-friendly and has simple navigation. It is compatible with all Windows versions. In just a few clicks this software resolves practically all types of PC-related errors including error 0x800CCC90. Click here to download Restoro today!
Read More
1 2 3 162
Logo
Copyright © 2022, ErrorTools. All Rights Reserved
Trademarks: Microsoft Windows logos are registered trademarks of Microsoft. Disclaimer: ErrorTools.com is not affiliated with Microsoft, nor claim direct affiliation.
The information on this page is provided for information purposes only.
DMCA.com Protection Status