Fix Steam stuck on Allocating disk space

If you have been stuck on allocating disk space on steam you know how annoying this error could be. Here you are, with your new game eager to play it and relax a little and all of the sudden steam gets stuck on allocating disc space.

Luckily this error is fixable, follow provided guide to fix the error and continue with installing the game.

  1. Restart computer

    An old age solution of turning it off and turning it back on but in this case, it works 90% of the time.

  2. Run Steam as administrator

    Allocating disk space when done by a third-party application can be a task that requires privileges higher than the normal user. Find the steam executable file in the installation folder, right-click on it and run it as an administrator

  3. Clear Steam cache

    Launch Steam in admin mode.
    Once in the client, click on Steam at the top left corner of the screen.
    From the drop-down box, click on Settings.
    Once in the Settings, navigate to the Downloads tab.
    Click the Clear Download Cache option.
    Click OK on the prompt to confirm your action. Wait for the process to complete.
    When done, save changes and exit the client.

  4. Change download server

    Launch Steam client in admin mode.
    Once in the client, click on Steam at the top left corner of the screen.
    From the drop-down box, click on Settings.
    Once in the Settings, navigate to the Downloads tab.
    Click the drop-down menu under the Download Region.
    Choose a different server to download from.
    Exit the Steam client.

  5. Refresh installation files

    • Kill a Steam process in Task Manager.
    • Navigate to your Steam folder
    • Inside the Steam folder, select everything except the steamapps folder and the Steam.exe executable file.
    • Tap the Delete key on your keyboard.
  6. Turn off firewall

    Firewall can prevent steam and cut access to system operations, disable firewall to fix this issue.

  7. Stop overclocking

    If you have overclocked your PC, you can simply reverse the change. The steps you will need to take depends on the overclocking software. Launch the software and look for the option to stop the overclocking. Once done, restart your computer, rerun the game installation.

If you like to learn and find out more about various Windows errors, and how to repair them go to our vast archive or use search to find articles that will explain and help you in solving your issue.
However, if you prefer to do things fast and with automatization then we are proposing to use an automated solution for your issues. The application that we are recommending is Advanced System Repair Pro
Advanced System Repair utilizes multiple tools all in one to give you a quick, simple, reliable, and very thorough diagnosis of your PC. It brings you all the tools you need in one program to clean, fix, protect, optimize and boost your PC!
1-Click Maintenance
All the tools to make it simple and easy! It's like having a professional technician at the click of a mouse.

Junk Cleaner
Keeping your computer free from unnecessary clutter also helps make your computer last longer. Like any other machine, if you keep it clean and take care of it, it will serve you better for longer!

Optimize background apps
Optimize applications background activity with the built-in Application Optimizer feature.

Disk Defrag
With a simple 1-click, Advanced System Repair speeds up your PC by assembling fragmented files on your machine and organizing them more efficiently.

Malware Removal
Finds and removes all types of harmful malware including trojans, worms, bots, adware, spyware, PUPs, and more!

Privacy Cleaner
The all-in-one privacy suite to Clean Your Tracks & Protect Your Privacy! Make your computer safe, secure, and more efficient!

System Tweak/Optimizer
ASR will analyze your complete system and settings to adjust your PC to function at its maximum performance.

Registry Cleaner
Over time, as you install and uninstall applications, the registry can become cluttered with old entries and broken settings which can result in program crashes, and annoying messages and slow the computer down.
Visit our Advanced System Repair Pro Download page to inform yourself about all the benefits of this software and get a free trial copy of it.
advanced system repair pro

Advanced System Repair Pro

One-click automated PC repair solution
ASR logo
With Advanced System Repair Pro you can easily
Replace damaged files
Restore performance
Free disk space
Remove Malware
Protects WEB browser
Remove Viruses
Stop PC freezing
DOWNLOAD
Privacy Policy | Terms of Use | Uinstall
Advanced System Repair Pro is compatible with all versions of Microsoft Windows including Windows 11

Share this article:

You might also like

Fix System doesn’t have any USB boot option
Lately, some users reported getting an error that says, “System doesn’t have any USB boot option, Please select other boot option in Boot Manager Menu” when they tried to reinstall the Windows 10 operating system on their PCs or boot from an installation media. If you have the same problem, then this post should help. This kind of error is applicable to multiple devices by various OEMs and is mostly due to the Secure boot being enabled, or the Legacy or CSM support being disabled. It could also be that the bootable USB device was not correctly made and so on. Whatever the cause may be, here are some suggestions you need to check out to resolve the “System doesn’t have any USB boot option, Please select other boot option in Boot Manager Menu” error and reinstall Windows 10 successfully.

Option 1 – Disable the Secure Boot in the BIOS

Disabling the Secure Boot in the BIOS settings is definitely recommended to resolve the error. To disable Secure Boot, here’s what you have to do:
  • First, boot your computer into Windows 10.
  • Next, go to Settings > Windows Update. From there, check if there is anything that you have to download and install if you see any available updates. Usually, OEMs send and update the list of trusted hardware, drivers, and operating systems for your computer.
  • After that, go to the BIOS of your computer.
  • Then go to Settings > Update & Security > Advanced Startup options. If you click on Restart Now, it will restart your computer and give you all the advanced options.
  • Next, select Troubleshoot > Advanced Options. As you can see, this screen offers you further options including System restore, Startup repair, Go back to the previous version, Command Prompt, System Image Recovery, and UEFI Firmware Settings.
  • Select the UEFI Firmware Settings which will take you to the BIOS.
  • From there, go to the Security > Boot > Authentication tab where you should see Secure Boot. Note that every OEM has its own way of implementing the options so it varies.
  • Next, set Secure Boot to Disabled and set Legacy Support to On or Enabled.
  • Save the changes made and exit. Afterward, your computer will reboot.

Option 2 – Try to reset the BIOS or the UEFI Settings

If updating the BIOS didn’t help in fixing Error 0199, you can try to reset the BIOS instead.
  • Start your computer and tap the F10 key during the booting process to enter the BIOS. If it does not work, you can try tapping the F1 or F2 key as well as the Del key.
  • Once you’re already in the BIOS, tap the F9 key to get the prompt to RestoreLoad default configuration now for the BIOS.
  • Next, click on Yes and then follow the next on-screen instructions that appear to set the BIOS back to its default settings.
  • Once you’re done restoring the default settings of the BIOS, restart your computer and then check if it now boots properly.

Option 3 – Make a proper bootable USB Drive/Stick

To make a proper bootable USB drive, you need to use the Windows Media Creation tool. The Media Creation tool in Windows allows you to use the ISO installation file to make a bootable device that you can use to install Windows on your PC. Note that this is kind of different from the usual installation process as it could erase your computer’s current settings and data on the primary drive. Thus, before you proceed, you need to backup all your data into some removable drive and then use the Media Creation Tool to make a bootable drive.
  • After making the bootable drive, you need to plug it into your computer and then reboot.
  • Next, tap the F10 or Esc key to open the boot options.
  • Now set the boot priority of the removable drive the highest. Once the setup comes forth, follow the next onscreen instructions and install Windows without any problems.

Option 4 – Try enabling Legacy or CSM boot support

If the Legacy or CSM boot support is disabled, then it’s no wonder why you’re getting an error. Thus, you need to enable it by following these steps:
  • Open Settings and go to Update & Security > Advanced Startup options.
  • Next, click on Restart Now to reboot your computer.
  • After that, select Troubleshoot > Advanced Options where, you will see more options such as System Restore, Startup Repair, Go back to the previous version, Command Prompt, System Image Recovery, and UEFI Firmware Settings.
  • From there, enable Legacy Support and then save the changes and exit. This will restart the computer.
  • Once your computer has restarted, check if the error is now fixed.
Read More
Fix Feature Update failed, error 0x8007000e
In every task carried out in the Windows 10 operating system, some of them don’t go smoothly and it could encounter a couple of errors along the way. One of these errors you could encounter is the Windows Update error code 0x8007000e. This particular error was reported to occur a lot when downloading and installing a Feature update via Windows Updates. And recently, it has been reported to occur a couple of times for the Windows 10 1903 May 2019 update. According to security experts, this error could be caused by a lack of memory or disk space as well as issues in the Windows Update mechanism. Whatever the cause is, troubleshooting this problem shouldn’t be hard as this post will give you some potential fixes you can check out. To fix this error, here are some options you need to consider:

Option 1 – Clear up temporary or junk files

The error could be caused by some temporary or junk files in your computer and so you need to clear them up to fix the problem. You can achieve that using the Storage Sense feature.
  • Open Setting > System > Storage from the WinX Menu.
  • From there, you will see a list of all the local and connected storage devices along with the details on the free space. Make sure that Storage Sense is on.
  • Next, find a link that says “Free Up Space” and click it to open.
  • After that, a screen which is the built-in program in Windows 10 will appear and will scan your computer for the following junk files so you can free up disk space:
    • Windows Upgrade Log Files
    • System created Windows Error Reporting Files
    • Thumbnails
    • Temporary Internet Files
    • Previous Windows Installation Files
    • Delivery Optimisation Files
    • DirectX Shader Cache
  • Choose the files you want to get rid of and then click on the remove files option. Note that you’ll have an idea of the total size as you select any of the junk files listed above.
  • Now go to the “Free Up Space Now” section and click the Clear Now button. This will get rid of all the temporary or junk files in your computer and should hopefully fix the Windows Update error 0x8007000e.

Option 2 – Reset the Windows Update components

If by any chance that the second option didn’t work, resetting the Windows Update components could also help you resolve the problem. How? Refer to the following steps:
  • Open Command Prompt with admin privileges.
  • After that, type each one of the following commands and hit Enter after you key in one after the other.
    • net stop wuauserv
    • net stop cryptsvc
    • net stop bits
    • net stop msiserver
Note: The commands you entered will stop the Windows Update components such as Windows Update service, Cryptographic services, BITS and MSI Installer.
  • After disabling WU components, you need to rename both the SoftwareDistribution and Catroot2 folders. To do that, type each one of the following commands below and don’t forget to hit Enter after you type one command after the other.
    • ren C:/Windows/SoftwareDistribution/SoftwareDistribution.old
    • ren C:/Windows/System32/catroot2/Catroot2.old
  • Next, restart the services you’ve stopped by entering another series of commands. Don’t forget to hit Enter after you key in one command after the other.
    • net start wuauserv
    • net start cryptsvc
    • net start bits
    • net start msiserver
  • Close Command Prompt and reboot your PC.

Option 3 – Try configuring the Windows Update-related Services

  • Tap the Win + R keys to open the Run dialog box.
  • Then type “cmd” in the field and tap Enter to open an elevated Command Prompt.
  • Next, execute the following commands. Note that you have to type and enter each the command one after the other.
    • SC config wuauserv start= auto
    • SC config bits start= auto
    • SC config cryptsvc start= auto
    • SC config trustedinstaller start= auto
  • The commands you executed will make sure that the Windows Update-related services are available. Once it’s done, restart your computer and see if the Windows Update error is now fixed.

Option 4 – Try running the Windows Update troubleshooter

Windows 10 have various troubleshooters that can help you resolve many system issues. So if you’re dealing with Windows Update errors like Error 0x8007000e, you can run the Windows Update troubleshooter to resolve it. To run it, go to Settings and then select Troubleshoot from the options. From there, click on Windows Update and then click the “Run the troubleshooter” button. After that, follow the next on-screen instructions and you should be good to go.

Option 5 – Try to use the Media Creation tool

The Media Creation tool in Windows allows you to use the ISO installation file to make a bootable device that you can use to install Windows on your PC. Note that this is kind of different from the usual installation process as it could erase your computer’s current settings and data on the primary drive. Thus, before you proceed, you need to backup all your data into some removable drive and then use the Media Creation tool to make a bootable drive.
  • After making the bootable drive, you need to plug it in your computer and then reboot.
  • Next, tap the F10 or Esc key to open the boot options.
  • Now set the boot priority of the removable drive the highest. Once the setup comes forth, follow the next onscreen instructions and install Windows without any problems.
Read More
How to Fix the TWCU.EXE Failed to Load Library File Error in Windows 10
The TWCU.EXE or TP-LINK Wireless Client Utility is a configuration application required to run wireless adapters successfully. The TP-LINK Wireless Client Utility application only exists on computers that are using the TP-LINK adapters. Upon the installation of this application, the service will be automatically added to the Windows service list that will continuously run in the background. The Twcu.exe is placed at the C:\Program Files\TP-LINKTP-LINK\Wireless Utility folder and is used by TP-LINK to connect to the internet. The name of the main executable file is twcu.exe and can be viewed in the Services tab of the Task Manager. If you are one of the users who just upgraded to Windows 10 from the previous Windows versions, then you’ll most likely see an error saying, “Failed to load the library file!” that has something to do with twcu.exe or TWCU. This error pops up when you go to your desktop and every time you log into your Windows 10 PC. Like pointed out, this error is related to the TP-LINK Wireless Client Utility and every user who is using the TP-LINK Wireless Client Utility is experiencing this problem which may be due to some compatibility issues especially when you start getting this error right after you upgraded to Windows 10. To fix this problem, follow each one of the options given below.

Option 1 – Try running in Compatibility Mode

The best thing you can do is to run the TP-LINK Wireless Client Utility in the compatibility mode since the problem is due to some compatibility issue. To run this utility in the compatibility mode, here’s what you have to do:
  • Look for the TP-LINK Wireless Client Utility which should be located on your desktop.
  • Once you find it, right-click on it and select Properties from the context menu.
  • After that, go to the Compatibility tab and mark the checkbox for “Run this program in compatibility mode for:” and from the drop-down list, select either Windows 7 or Windows 8.
  • Click the Apply button and then click OK to save the changes made and check if it has resolved the issue or not.

Option 2 – Try troubleshooting compatibility

This option is almost the same as the first one except it is an alternative way of fixing the TP-LINK Wireless Client Utility in case the first one didn’t work. In this option, you will troubleshoot the compatibility issue of the TP-LINK Wireless Client Utility.
  • Look for the TP-LINK Wireless Client Utility which as mentioned, is on your desktop.
  • Then right-click on it and select the “Troubleshoot compatibility” from the context menu.
  • After that, click on the “Try recommended setting” option. Once the process is done, the error message should be gone.
Read More
A Quick Guide to Resolving Error Code 0x800ccc92 on Your PC

How to Fix Error Code 0x800ccc92

0x800ccc92 - What is it?

Do you come across this error message “Receiving’ reported error (0x800ccc92): “Your e-mail server rejected your login”? Verify your user name and password in your account properties. The server responded: - ERR invalid user names and password” when you try to send or open emails using your Outlook account? If yes, then this article is a must-read for you as we explain why this error occurs and how you can resolve it. To begin with, 0x800ccc92 is a common Microsoft Outlook error. This error restricts your ability to send and receive emails on your Outlook email address. In other words, it locks you out and hampers your ability to use your account successfully causing a great deal of inconvenience especially if you use your Outlook account for communication in and across your office.

Solution

Restoro box imageError Causes

The 0x800ccc92 error message may occur due to numerous reasons so narrowing it down to one particular reason for occurrence is not easy. However, here we have listed down some of the most common causes of this error code:
  • Incorrect Outlook configuration settings
  • Invalid password or username
  • PST file crosses its fixed file size limit
  • Failure of POP3 and Protocol STMP in database server connection
  • Improper synchronization between Outlook and the server
  • Virus Infection
  • Invalid registry entries

Further Information and Manual Repair?

To fix the error code 0x800ccc92 on your system, here are some quick, effective, and easy DIY solutions that you can try:

Solution 1:

Sometimes the error code may occur due to an invalid password and usernames entry. Therefore, first, cross-check user ID and password. If you’ve entered the wrong password, try inserting the correct password to access your account.

Solution 2:

If the error still persists, then try installing the latest available Server Service Pack for Exchange. This solution works best if compatibility is the issue and the underlying reason for the error is improper synchronization between Outlook and the server.

Solution 3:

The presence of malware and viruses can also lead to such errors. Therefore, it is advisable to scan your entire PC for malware and viruses using a powerful antivirus.

Solution 4:

If the issue occurs due to bad and invalid registry entries, then it is important that you remove them right away. Due to such entries, you may experience the 0x800ccc92 error on your PC. To remove them, you need to download a registry cleaner. Downloading two programs an antivirus and a registry cleaner separately may slow down the speed of your PC. Therefore, to ensure this does not happen it is recommended you install Restoro Restoro is an advanced and multi-functional PC Fixer. This software is deployed with an intuitive algorithm and multiple powerful PC repair utilities including a registry cleaner, anti-virus, and a system optimizer. It is a one-stop solution for all PC-related issues. Using this tool, you can scan your entire PC and remove all types of malicious software including malware, viruses, spyware, and Trojans corrupting your PC in seconds. Simultaneously, it also removes all bad registry keys and entries and files the damaged system file, thereby restoring the registry back to normal. The system optimizer utility ensures your PC speed is not compromised due to the repair process. This software is safe, bug-free, efficient, and user-friendly. It is compatible with all Windows versions. Click here to download Restoro on your PC to instantly remove viruses and invalid registry entries to resolve the 0x800ccc92 error message on your system now!
Read More
Fix MUP_FILE_SYSTEM Blue Screen Error
If you encounter the MUP_FILE_SYSTEM Blue Screen error with a value of 0c00000103, then it indicates that the multiple UNC provider or MUP has got an invalid of unexpected data. This can lead to the fact that the MUP cannot channel a remote file system request to a network redirector, the UNC, or Universal Naming Convention provider. There are several ways you can fix the MUP_FILE_SYSTEM Blue Screen Error on your Windows 10 computer, you can try to check the hardware of your computer physically, update or rollback some device drivers, run the Driver Verifier Manager, remove any hardware you’ve installed recently or fix issues related to IRQ. Use the given options below as reference to fix the MUP_FILE_SYSTEM Blue Screen Error.

Option 1 – Try to physically check the hardware

The first thing you can do is to check the physical status of the hardware in your computer. You can clean the dust off the hardware components like the Network Card of the computer. You might want to use a small blower or you could also use a soft cloth and run the components gently. Make sure that you don’t damage any parts with moisture or cause harm to any circuits while you carry out this task.

Option 2 – Try to rollback, update several device drivers

You can try to roll back, update or disable certain device drivers on your computer to resolve the MUP_FILE_SYSTEM Blue Screen error.
  • First, boot your computer into Safe Mode.
  • After that, tap the Win + R keys to launch Run.
  • Type in devmgmt.msc into the box and tap Enter or click OK to open the Device Manager.
  • After that, a list of device drivers will be displayed. From there, look for the device drivers related to the Network Card, Chipset, Disk Drive, and the Graphics Drivers and any other driver related to MUP.sys and SwapBuffers.sys system files
  • After that, right-click on each entry of the device drivers and select the “Update Device” option from the menu.
  • Now follow the next on-screen instructions that appear and then restart your computer.
  • After restarting your computer, check if the Stop error is now fixed.

Option 3 – Configure the Driver Verifier Manager

The Driver Verifier Manager is another tool in Windows that could help you fix driver-related issues. And so if you want to fix the MUP_FILE_SYSTEM Blue Screen error you need to use the Driver Verifier Manager:
  • Type in the keyword “Verifier” in the Cortana search box to search for Verifier in Windows 10.
  • After that, select the option “Create custom settings”.
  • Make sure that you have checked everything except the options “DDI compliance checking” and “Randomized low resources simulation”.
  • Next, select the option “Select driver names from a list” option.
  • Afterward, you have to select all the drivers from any unofficial or third-party provider. To simply put it, you have to select all the drivers that are not supplied by Microsoft.
  • Then click on the Finish button.
  • Open Command Prompt as administrator and execute this command – verifier /querysettings
  • The command you just executed will display the Driver Verifier settings so if you see any of the flags enabled boot your Windows 10 PC into Safe Mode.
  • Open the Command Prompt as admin again and run this command – verifier /reset
  • The command will reset the Driver Verifier. Once the process is done, restart your PC and check.

Option 4 – Try to disconnect or disable newly installed hardware

In this option, you will have to disable or remove the hardware you’ve just installed recently since external devices could be the one that’s causing the Blue Screen of Death error to appear. To do that, just disconnect any external device that’s connected to your computer physically and then check if it fixes the MUP_FILE_SYSTEM Blue Screen error.

Option 5 – Try fixing IRQ-related issues

The Stop error might have something to do with an issue related to IRQ. You can verify it by switching your PCI Cards around. Aside from that, you can also check if the IRQ2 is assigned to a COM Port that is unavailable at that time.

Option 6 – Run the Blue Screen Troubleshooter

The Blue Screen troubleshooter is a built-in tool in Windows 10 that helps users in fixing BSOD errors like MUP_FILE_SYSTEM. It can be found in the Settings Troubleshooters page. To use it, refer to these steps:
  • Tap the Win + I keys to open the Settings panel.
  • Then go to Update & Security > Troubleshoot.
  • From there, look for the option called “Blue Screen” on your right-hand side and then click the “Run the troubleshooter” button to run the Blue Screen Troubleshooter and then follow the next on-screen options. Note that you might have to boot your PC into Safe Mode.

Option 7 – Perform a System Restore

Performing System Restore might help you in fixing the Blue Screen error. You can do this option either by booting into Safe Mode or in System Restore. If you are already in the Advanced Startup Options, just directly select System Restore and proceed with the next steps. And if you have just booted your PC into Safe Mode, refer to the steps below.
  • Tap the Win + R keys to open the Run dialog box.
  • After that, type in “sysdm.cpl” in the field and tap Enter.
  • Next, go to the System Protection tab then click the System Restore button. This will open a new window where you have to select your preferred System Restore point.
  • After that, follow the on-screen instructions to finish the process and then restart your computer and check if the problem is fixed or not.
Read More
Fixing Upside Down Screen in Windows 10
As you know, Windows 10 comes with a pre-packed feature that allows you to rotate the screen at different angles, and to facilitate this feature, there are keyboard shortcuts you can use as well. However, from time to time, no matter how useful this feature is, users still experience a handful of issues. One of which is that they suddenly find their screen rotated or Upside Down even when they didn’t do a thing or adjust the setting. You may have pressed the shortcut on the keyboard by accident or some other program changed the setting on your computer without your permission – whichever the case is, this post will show you what you can do to fix the upside-down screen on your Windows 10 PC using the options laid out below.

Option 1 – Try using hotkeys

As mentioned earlier, Windows have hotkeys in the UI that changes the orientation of the display. So the first thing you need to do is to make sure that these hotkeys are enabled and if they are, you can use the keyboard shortcut to adjust the orientation of your screen.
  • Right-click on an empty part of your Desktop and then select the Graphic options.
  • Next, select “Hot Keys” > “Enable”. After verifying that the hotkeys are enabled, you can tap the Ctrl + Alt + Up arrow keys to change your computer screen’s orientation.
  • Alternatively, you can also tap the Ctrl + Alt + Right or Left or Down arrow keys to change the direction the other way.

Option 2 – Try using the Graphics Properties

You will probably see the “Graphics Properties” option if you use the Intel HD Graphics every time you click on your Desktop. Note that this option has all the graphics driver properties and helps you in changing the configurations as well as control several options like refresh rate, resolution, color-depth and many more. You have to navigate to these options to see if the orientation is changed in these properties. To do so, follow the steps below.
  • Right-click on any empty space on your Desktop and then select Graphics Properties or Intel Graphics Settings.
  • After that, select Display from the list of sub-options that appears.
  • From there, you will see the rotation of the screen under the “Display settings” option where you have to make sure that the slider is set to “0”.
  • Click the Apply button to save the changes made and then click on Exit. The orientation of your screen should automatically change.

Option 3 – Try using the Windows Display Settings

Since the Windows Settings have a section where you can manage the display settings of your computer, you can use them to help control the resolution of your PC’s display without any trouble. There is a possibility that the settings are changed there so that’s probably why your screen is turned upside down all of a sudden.
  • Tap the Win + S keys to open search and then type in “settings” in the field and then hit Enter to open Settings.
  • After opening Settings, click on System and then on Display using the left navigation bar and then scroll to the end and select the Advanced display settings.
  • Next, click on the Display adapter properties and click on Intel HD Graphics control panel.
  • Now change the rotation to 0 Degrees. Afterward, the display should revert back to its original form automatically.

Option 4 – Check your monitor’s physical controls

There are monitors that have buttons in them that allows users to shift the rotation of the screen to 90 degrees. It could be that your monitor has these buttons without you knowing and you suddenly pressed them by mistake which caused your screen to rotate. Thus, you have to check your monitor for any physical buttons on the side and if you see a menu, navigate to its options and check if there are screen rotation options. To make it easier for you, you can simply search your monitor’s model online and see if these buttons exist. You could also go over your monitor’s manual if you still have it as it contains details with regards to screen rotation.

Option 5 – Update your Graphics drivers

  • Tap the Win + R keys to open the Run dialog box and then type in devmgmt.msc and tap Enter or click OK to open the Device Manager.
  • Expand the section for the outdated device drivers.
  • And then select the outdated driver(s) and right-click on it/them.
  • From the drop-down menu, select the Update Driver option if you wish to update the driver or select the Uninstall device if you want to uninstall the driver and then follow the on-screen instructions to install the latest version of the driver.
  • Restart your PC after the installation to allow the system to reinstall the driver.
Read More
Diablo 2 is trending after launch looking good
Finally, some good news for Blizzard entertainment after tons of bad stuff happening around it regarding lawsuits and people layoffs. Diablo 2 has become the most-watched game on Twitch after its official release and sold copies are on a satisfactory level. Diablo 2 resurrectedFor people not familiar with recent events, the state of California has sued Blizzard for various things including discrimination and offensive behavior. Later Blizzard executives were caught shredding some evidence and things just started to go to worse from there. After much drama, many people believed that this is the end for Blizzard entertainment and that they would not be able to recover from this since the community has sided with California and Blizzard has received a large punch as many subscribed WOW players have left the game. 
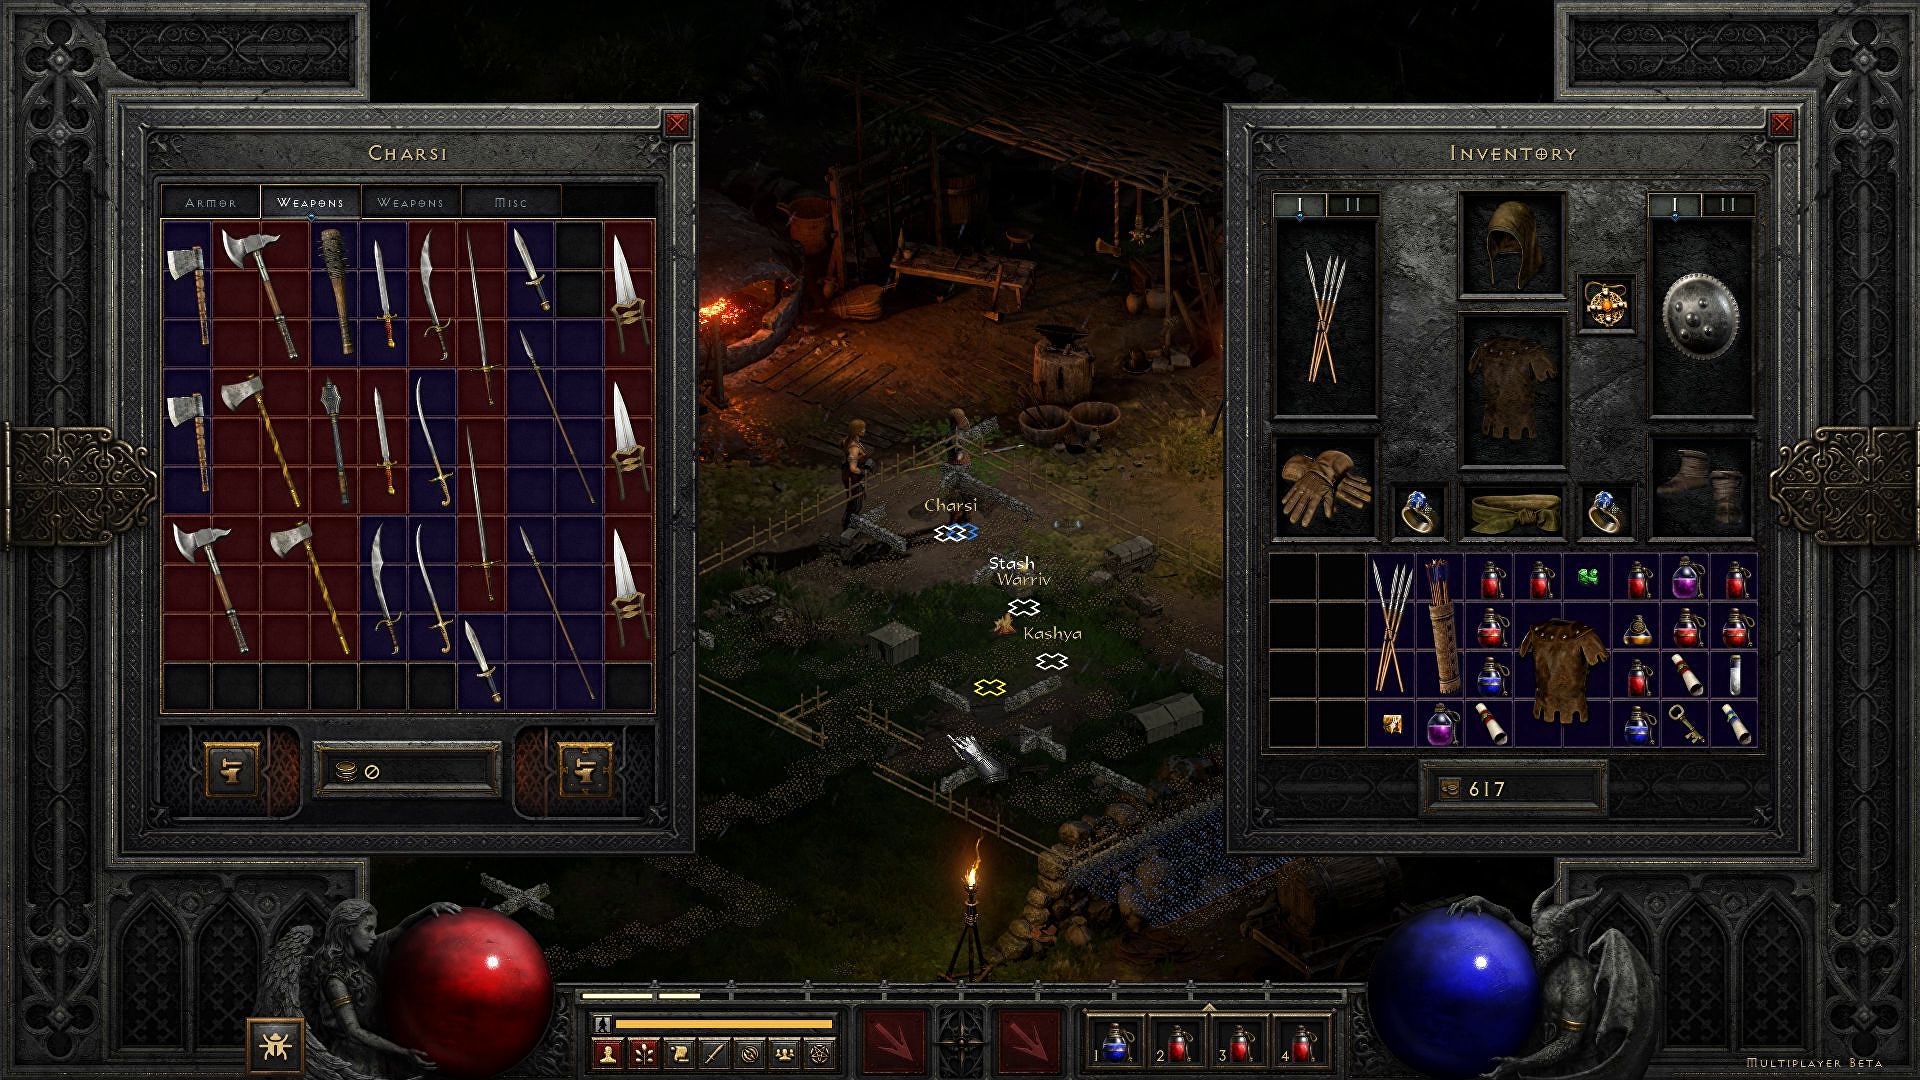
Things are not so grim as they were looking as their Diablo 2 remake has made moderate success despite being released in these troubling times and there are rumors of Overwatch 2 planned release date as of the first quarter of 2022. overwatch 2
Read More
Fix Err_Connection_Closed in Windows
If you suddenly encounter an error message that says, “This webpage is not available, Err_Connection_Closed” while browsing the internet or visiting a website and the website fails to load, then it means that there is some problem with your network connection. Similarly, you may also get other error messages like “Err_Network_Changed”, “Err_Connection_Reset” and “Err_Internet_Disconnected” errors in different browsers like Chrome, Firefox, and Edge. The problem lies in your Windows 10 computer and your internet connection since this is a network issue. So before you troubleshoot the problem using the suggestions given below, you need to refresh your browser first or you could also tap Ctrl + F5 on your keyboard to hard reload the webpage. If you’re still getting the same error message, then proceed to the guide below.

Option 1 – Try removing the Proxy

Removing the Proxy might also help you in fixing the “This webpage is not available, Err_Connection_Closed” error. Here’s how you can do it:
  • Tap the Win + R keys to open the Run dialog box.
  • Then type “inetcpl.cpl” in the field and hit Enter to pull up the Internet Properties.
  • After that, go to the Connections tab and select the LAN settings.
  • From there. Uncheck the “Use a Proxy Server” option for your LAN and then make sure that the “Automatically detect settings” option is checked.
  • Now click the OK and the Apply buttons.
  • Restart your PC.
Note: If you are using a third-party proxy service, you have to disable it.

Option 2 – Try using Google Public DNS

If the first option didn’t resolve the issue, you can try to use the Public DNS by Google and see if it can help fix the problem. You have to modify the DNS settings in your system explicitly and use the DNS IP addresses.
  • The first thing you have to do is right-click on the network icon in the Taskbar and select Network and Sharing Center.
  • Next, click on the “Change Adapter Settings” option.
  • After that, search for the network connection that you are using to connect to the internet. Note that the option might be “Wireless Connection” or “Local Area Connection”.
  • Right-click on your network connection and click on Properties.
  • Then select the new window to choose the “Internet Protocol 4 (TCP/IPv4)” option.
  • After that, click on the Properties button and click the checkbox in the new window for the option “Use the following DNS server addresses”.
  • Type in “8.8.8.8” and “8.8.4.4” and click OK and exit.

Option 3 – Reset Winsock, TCP/IP & Flush DNS

Resetting Winsock, TCP/IP, and flushing DNS might help you resolve the Err_Connection_Closed error. To do so, follow these steps:
  • Right-click on the Start button and click on Command Prompt (administrator) so you can pull up an elevated Command Prompt.
  • After that, execute each one of the commands listed below. And after you typed in one after the other, you have to hit Enter.
  1. netsh winsock reset – type in this command to reset Winsock
  2. netsh int ip reset resettcpip.txt – type in this command to reset TCP/IP
  3. ipconfig /flushdns – type in this command to flush the DNS cache
  • Next, restart your PC and check if the problem’s fixed.

Option 4 – Disable both the Antivirus program and Firewall temporarily

There are times when antivirus programs and the firewall blocks a website that they consider to be malicious or even because of false-positive effects which is why you have to disable these programs temporarily as it might be the reason why you’re getting the “This webpage is not available, Err_Connection_Closed” error when trying to browse the internet.

Option 5 – Try to check the network cables and then restart your router

The most obvious thing you can do first is to try checking if the network cables connected to your computer or router are properly connected or not. If it turns out that some network cables are not connected properly, then it’s probably why you’re getting this error.

Option 6 –Try a Network Reset

When all else fails, you might have to consider resetting your entire network settings. Simply follow the steps below to do so.
  • Click on the Start button and then click on the gear-like icon for Settings to open it.
  • Next, select Network and Internet.
  • Then scroll down and look for “Network Reset” – click on it and then click on the Reset now button.
Read More
How to Fix a Windows PC Crash Dump

How to Fix a Windows PC Crash Dump

What Exactly Is Crash Dump?

Crash Dump is a type of malfunction that can happen when a few portions of the processor's data or RAM memory are erroneously copied to one or more files. It is common among Windows PCs. It used to be most prominent on the Windows 95 edition but subsequent versions have mostly remedied the situation. Even with the remedies over time though, this error still occurs.

Error Causes

A Crash Dump usually points to some serious and critical errors with your Computer. Below are some of the possible causes for this error:-
  • Corrupt memory
  • Incorrect configurations on hardware
  • Programming errors.
  • Incompatible drivers
  • Faulty Operating system
Despite the listed causes for Crash Dumps. Nobody is ever ready for them. A crash dump is classified as an unexpected error simply because it can happen anytime.

Further Information and Manual Repair

Most PC users get scared and anxious when a crash dump happens. Which need not be the case. You can easily repair a Crash Dump without necessarily requiring a computer technician. Follow these simple steps and the malfunction will soon dissipate:

a) Re-Install the Operating System

Put the setup CD into the computer disk drive. Once you've completed this, reboot the pc.

b) Push F8

Push the F8 function key on your keyboard while the pc is re-booting. This takes you to a menu where you should choose “Advanced Boot Options”

c) Click "Repair My Computer"

As soon as you push the F8 option, and do what's suggested in the last measure above, you must click on "Repair My Computer" and press the "Return/Enter" key.

d) Click on the "Startup Repair"

Search for the start-up repair option, and choose it. Subsequently, move to Next. Using this method, the cause of the Crash dump will undoubtedly be recognized and ended after a thorough scan of your system. Additionally, it is smart to take note of the whole Crash Dump information that appears on your screen. Windows supplies you with detailed error messages. Write down each of the error codes in hexadecimal values as well as capital characters as displayed on the screen.
  • Disconnect Hardware  and Un-Install all Drivers

Disconnect and remove any new hardware that is causing your PC to crash dump. Uninstall any drivers you used to install the hardware. If this solves the problem, contact the hardware manufacturer and request the latest and updated device drivers. At length, prior to starting panicking, see the error information that appears on your own display. Browse to see whether it includes info on a certain driver that you ought to search for and install. Bottom line, remain calm when your computer crash dumps and use the mentioned steps to repair it. Congratulations, you have just fixed Windows PC Crash Dump in Windows 10 all by yourself. If you would like to read more helpful articles and tips about various software and hardware visit errortools.com daily. Now that’s how you fix Windows PC Crash Dump in Windows 10 on a computer. On the other hand, if your computer is going through some system-related issues that have to get fixed, there is a one-click solution known as Restoro you could check out to resolve them. This program is a useful tool that could repair corrupted registries and optimize your PC’s overall performance. Aside from that, it also cleans out your computer for any junk or corrupted files that help you eliminate any unwanted files from your system. This is basically a solution that’s within your grasp with just a click. It’s easy to use as it is user-friendly. For a complete set of instructions in downloading and using it, refer to the steps below Perform a full system scan using Restoro. To do so, follow the instructions below.
      1. Download and install Restoro from the official site.
      2. Once the installation process is completed, run Restoro to perform a full system scan. restoro application screen
      3. After the scan is completed click the “Start Repair” button. restoro application screen
Read More
Stopping automatic redirects in Browsers
As you know, the internet has changed the world immensely. Nowadays, JavaScript is pushing the modern web ahead. One of the things that make these experiences with the internet seamless and with less clutter is redirection. It is often used on web pages and there are times when a user is prompted about them and most of the time, we barely notice them. However, there are also instances when things can go wrong with redirects as they could become a loop that could mess things up. And since the browser takes a lot of system resources, redirection can result in a poor user experience. That’s why in this post, you will be guided on how you can stop these automatic redirects on browsers such as Microsoft Edge, Google Chrome, and Mozilla Firefox, on your Windows 10 computer. To get started, refer to each one of the options provided below to stop automatic redirects in Microsoft Edge, Google Chrome, and Mozilla Firefox.

Option 1 – Configure the browsers to stop pop-ups and deceptive contents

There are a lot of browsers with built-in settings that allow users to stop pop-ups and deceptive content. To configure these settings, refer to these steps:
  • Microsoft Edge:

    • Click on the three horizontal dots icon or the menu button.
    • Next, click on Settings and select Privacy & Security from the left side navigation.
    • After that, scroll down on the right-side panel and look for Block pop-ups and Windows Defender SmartScreen and then turn their toggle buttons to On.
  • Google Chrome:

    • Open Google Chrome and click on the three vertical dots icon for the menu located in the top right corner of the browser.
    • Next, click on Settings and scroll down until you see the Advanced option. Click on it to open the Advanced Settings.
    • Now scroll down until you reach the Privacy and Security section and look for the Safe browsing option and turn its toggle button to On.
  • Mozilla Firefox

    • Open Mozilla and click on the three horizontal lines icon for the menu button located in the top right corner of the browser and click on Options.
    • Next, go to the Settings section and click the Privacy & Security tab and scroll down and then click on Permissions.
    • From there, make sure that the Block pop-up windows checkbox is checked.
    • Finally, scroll down until you reach the Security section and make sure that the checkbox for the Block dangerous and deceptive content is checked.

Option 2 – Try to reset Winsock, TCP/IP & Flush DNS

To stop redirects, you can also reset Winsock and the TCP/IP as well as flush the DNS cache. To do so, follow these steps:
  • Right-click on the Start button and click on Command Prompt (administrator) so you can pull up an elevated Command Prompt.
  • After that, execute each one of the commands listed below. And after you typed in one after the other, you have to hit Enter.
  1. netsh winsock reset – type in this command to reset Winsock
  2. netsh int ip reset resettcpip.txt – type in this command to reset TCP/IP
  3. ipconfig /flushdns – type in this command to flush the DNS cache
  • Next, restart your PC and check if the problem’s fixed.

Option 3 – Edit your Hosts File

  • Tap the Win + R keys to open then type in %WinDir% and then click OK.
  • Go to System32/drivers/etc.
  • Open the host file using Notepad.
  • Delete all the suspicious entries.
  • After that, save the changes you’ve made and close the file.
Read More
1 2 3 162
Logo
Copyright © 2022, ErrorTools. All Rights Reserved
Trademarks: Microsoft Windows logos are registered trademarks of Microsoft. Disclaimer: ErrorTools.com is not affiliated with Microsoft, nor claim direct affiliation.
The information on this page is provided for information purposes only.
DMCA.com Protection Status