How to Fix Propsys.dll Error

Propsys.dll Error Repair

What is Propsys.dll Error?

Isn’t it annoying when you get an error message pop up stating ‘Cannot find propsys.dll” or “propsys.dll not found” when you start your computer or open a particular program?

The propsys.dll file is crucial to the Windows operating system. This file is located in one of the following locations: "C:\Windows", C:\Program Files, C:\WINDOWS\system32, or C:\Program Files\Common Files". And the propsys.dll error indicates that the propsys digital library file is damaged and corrupt.

The propsys.dll error may lead to a very unstable operating system.

It may also hamper your ability to access many programs on your computer, lead to program and system crash and slow down the system’s performance. Therefore, to avoid these system threats, it is advisable to fix the error immediately.

Solution

Restoro box imageError Causes

The common causes of propsys.dll file error are:

  • Registry problem
  • The propsys.dll file is damaged due to a virus or spyware
  • Improper software removal
  • Hardware Failure

The propsys.dll error message is displayed in either of the following forms:

  • Propsys.dll not found
  • Cannot find [Path]propsys.dll
  • This application failed to start because propsys.dll was not found. Reinstalling the application may fix this problem
  • The propsys.dll file is missing

Further Information and Manual Repair

There are many ways to fix the propsys.dll error. However, for optimum results from the fix, you must first identify the cause of the error and then choose the solution accordingly.

  • Recommended Solution for Registry Issue

If you use your system daily the resulting wasted/invalid/junk entries may dilate the registries.

This can result in registry malfunctioning which may result in a propsys.dll error on your screen. When this happens, it is advisable to use a registry cleaner to fix the problem.

Registry cleaner helps clean up the junk entries and repairing the corrupted registries.

For this, you will first have to download a registry cleaner repair tool. Download and install the software on your computer. After downloading it, click the start scan button to run. This helps scan and diagnose system errors on your computer in seconds.

Once the scanning is complete, click on the fix button to repair the registry problem.

  • Recommended Solution for File Damage and Corruption

Use the ‘System Restore’ option to restore corrupt and damaged files.  The ‘System Restore’ function will help you get a fresh copy back and simultaneously help fix the error. Here’s how to use and access the ‘System Restore’ function on your computer:

Simply go to the start menu and in the search box type restore. Once you type, it will show you the system restore option. Now select ‘choose a different restore point’. After this, you will be presented with a list of restore points.

Choose a point that you believe happened before the propsys.dll error. Confirm your selection and restart.

Another alternative solution for file damage is to run a virus scan of your entire system; the damage could be related to a virus or malware infection.

  • Recommended Solution for Hardware Failure

If a propsys.dll error occurs due to hardware failure, then it is advisable to update the drivers for hardware devices that you think are related to propsys.dll. For example, if you receive the propsys.dll error when you play a 3D video game, then try updating the driver for your video card.

If you like to learn and find out more about various Windows errors, and how to repair them go to our vast archive or use search to find articles that will explain and help you in solving your issue.
However, if you prefer to do things fast and with automatization then we are proposing to use an automated solution for your issues. The application that we are recommending is Advanced System Repair Pro
Advanced System Repair utilizes multiple tools all in one to give you a quick, simple, reliable, and very thorough diagnosis of your PC. It brings you all the tools you need in one program to clean, fix, protect, optimize and boost your PC!
1-Click Maintenance
All the tools to make it simple and easy! It's like having a professional technician at the click of a mouse.

Junk Cleaner
Keeping your computer free from unnecessary clutter also helps make your computer last longer. Like any other machine, if you keep it clean and take care of it, it will serve you better for longer!

Optimize background apps
Optimize applications background activity with the built-in Application Optimizer feature.

Disk Defrag
With a simple 1-click, Advanced System Repair speeds up your PC by assembling fragmented files on your machine and organizing them more efficiently.

Malware Removal
Finds and removes all types of harmful malware including trojans, worms, bots, adware, spyware, PUPs, and more!

Privacy Cleaner
The all-in-one privacy suite to Clean Your Tracks & Protect Your Privacy! Make your computer safe, secure, and more efficient!

System Tweak/Optimizer
ASR will analyze your complete system and settings to adjust your PC to function at its maximum performance.

Registry Cleaner
Over time, as you install and uninstall applications, the registry can become cluttered with old entries and broken settings which can result in program crashes, and annoying messages and slow the computer down.
Visit our Advanced System Repair Pro Download page to inform yourself about all the benefits of this software and get a free trial copy of it.
advanced system repair pro

Advanced System Repair Pro

One-click automated PC repair solution
ASR logo
With Advanced System Repair Pro you can easily
Replace damaged files
Restore performance
Free disk space
Remove Malware
Protects WEB browser
Remove Viruses
Stop PC freezing
DOWNLOAD
Privacy Policy | Terms of Use | Uinstall
Advanced System Repair Pro is compatible with all versions of Microsoft Windows including Windows 11

Share this article:

You might also like

Facebook messengers alternatives
People are becoming more and more concerned with their privacy and Facebook's flagship messaging application is caught between it all. While still widely popular it has becoming to lose its ground due to many unanswered questions about privacy encryption. Lucky for all of us there are alternatives for more secure messaging.

SIGNAL

Arguably the most secure of all well-regarded messaging apps, Signal is the favorite of the European Commission, as well as newsrooms around the world. While Signal doesn’t disclose how many daily or monthly users the app has, Google’s Play Store says it has been installed more than 50 million times. While using Signal, each voice or video call connected through the app includes full end-to-end encryption. Signal takes an extra step by hiding message metadata so that the location of the original message is missing. While it asks for your mobile number, that number isn’t used with your profile. Instead, it acts as a numeric username. Once registered, you will find 1-1 chat, audio, and video calls, disappearing or “secret” chats, and a privacy lock so nobody can access the app even if they have your phone. Best of all, it’s completely free to use.

TELEGRAM

One of the biggest competitors to Facebook Messenger (and WhatsApp), Telegram is a very strong alternative. With more than 400 million users, it offers an interface that should feel right at home for anyone coming from Messenger. Telegram offers some huge benefits over Messenger, including features like groups that can hold up to 200,000 members for a chat. There is no limit on your media or chat size, and you can share all types of files between users and in groups. From a privacy standpoint, Telegram has robust security, but it is worth noting that only “secret” messages are end-to-end encrypted and can self-destruct. Non-secret messages can be stored on Telegram’s servers so you can pick them up between your devices quickly. That’s a consideration worth knowing prior to making Telegram your default Messenger replacement. Telegram is free across all platforms.

THREEMA

Rising in popularity, Threema is another privacy-focused alternative that has quickly become a competitor to Facebook Messenger. This paid service ($2.99 on both App Store and Play Store) is a pay-once, use forever option. Once you pay the small fee, you gain all of Threema’s touted privacy options, like open-source end-to-end encryption for both messages and calls. Like Signal, Threema won’t require you to link any phone numbers or emails to your account. All chats are handled anonymously, and the service generates a random user ID when you first open and register for the app. No data is collected from any of your chats and no ads are shown. The Swiss-made app does have its own servers hosted in Switzerland, which do not store any chat messages. Another privacy benefit of Threema is the notion that all of your contact lists, groups, and user profiles are hosted on your device, not on the Swiss servers. Because of that, Threema can once again state that none of your personal info is stored anywhere they have access.
Read More
Razer is making only 1337 smartwatches
razer smartwatch
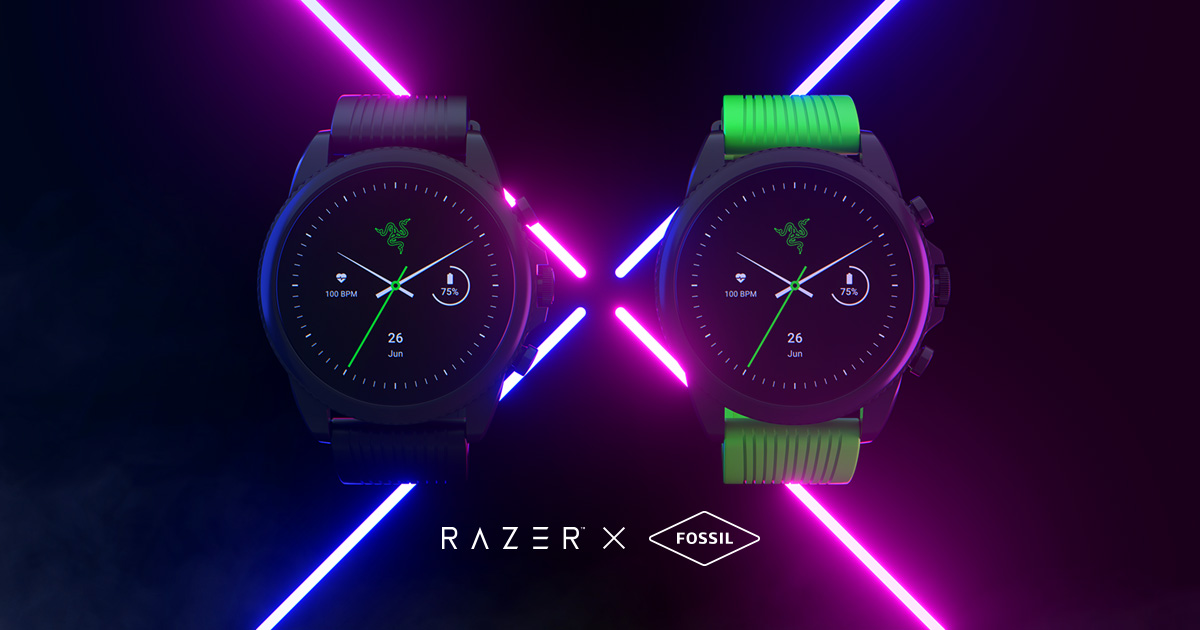
Razer had some strange dives into stuff not really aimed at gamers and the gaming community overall like its Zephir smart mask and now it is venturing into the area of smartwatches teaming up with Fossil. I am not clear if this initiative was set in motion by Razer or Fossil and I really do not know why limited production numbers. Officially named RAZER X FOSSIL GEN 6 SMARTWATCH, this watch comes with the official following text on Razer's page:
Way more. Way faster. Way ahead of the game. Get time on your side with the limited-edition Razer X Fossil Gen 6 Smartwatch—only 1,337 pieces worldwide. Designed for the next generation of gamers, supercharge your style with customizable straps, dials, Razer Chroma™ RGB effects, and more.
Now, I am a fan of Razer and I like their products, mostly keyboards and mouse altho chair is also very good and in top of the product line in that field but I can not really stand behind this product and decision, and the only reason why I can not stand behind it is this 1337 (leet, or elite) a limited number of available pieces that is nothing more than a gimmick to sell watches at a higher price. Watch itself is not really bad, as a matter of fact, it has some solid hardware statistics.

Technical characteristics

Featuring a 1.28-inch AMOLED Display with 3 unique Razer watch faces (Analog, Text, Chroma*), 4 customizable Razer Chroma™ RGB effects, and 2 custom-designed, interchangeable straps, this Razer's baby is packing 44mm, Stainless Steel case with 22mm, straps. It runs on Wear OS by Google as an operating system of a choice and under software, it is packing Qualcomm Snapdragon Wear 4100+ CPU paired with 1GB of RAM and 8GB Storage. The display is running at 416x416 resolution with 326ppi. Watch input is with 2 configurable Push buttons, One rotating Home button, touchscreen, and voice. It has in it a loudspeaker, microphone, and vibration. Connection is via Bluetooth 5.0, GPS, NFC SE, and Wi-Fi. The battery can in their word work for 24 Hr + multi-day Extended Mode **Varies based on usage and after updates install**. USB data cable with magnetic dock snaps to split rings on the watch case back and spins 360 degrees for ease of use. Approximately half an hour to reach 80%. Sensors included in the watch itself are: Accelerometer, Altimeter, Ambient Light, Compass, Gyroscope, Off-body IR, PPG Heart Rate, SPO2. Smartwatch is water-resistant up to 3 ATM & it comes with preloaded apps like: Agenda, Alarm, Battery-Optimized Activity Mode, Calendar, Cardio Level Tracking, Cardiogram, Contacts, Enhanced Phone Dialer App, Google Assistant, Google Fit (Workout, Heart Rate, Goals, Breathe), Google Maps, Google Pay™, Google Play Store, Nike Run Club, Noonlight, Smart Battery Modes, Spotify, Stopwatch, Timer, Translate, Wellness Apps with Sleep Tracking.

Conclusion

Watch is Dropping on 01.10.22, 8 AM PST which is 4 days from now and altho it is an interesting device with solid hardware I can not stand behind it due to its limited edition numbers and with $329 price tag. With the same amount of money, you can get yourself Samsung or Apple watch with more features packing. But of course, that is just my personal preference and if you want to own this limited edition Razer smartwatch, go for it.
Read More
InternetSpeedTracker Removal Guide

InternetSpeedTracker is a browser extension developed by MindSpark Inc. This browser add-on offer uses tips on how to boost their “bad” internet connection speed. It displays false internet speed in order to get you to open the sponsored links listed in the toolbar.

This extension also hijacks your browser home page and replaces your default search engine with MyWay. While browsing the internet you will see additional unwanted sponsored ads and links throughout your search results, and sometimes even pop-up ads might appear. While active this extension gathers personal information, website visits, links, and clicks and uses this data to serve ads.

InternetSpeedTracker has been flagged as a Browser Hijacker by several anti-virus scanners, and due to its data mining behavior, it is not recommended to keep it on your computer, especially because it gives false data about your internet speed.

About Browser Hijackers

Browser hijack is a very common type of online fraud where your internet browser settings are modified to allow it to carry out things you don’t intend. They’re created to disrupt browser functions for several purposes. It redirects you to the sponsored sites and inserts ads on the web browser which helps its developer generate earnings. Nevertheless, it’s not that naive. Your web safety is jeopardized and it is also extremely irritating. They don’t just ruin your web browsers, but browser hijackers could also modify the computer registry, making your PC vulnerable to other attacks.

How one can know if your web browser is hijacked

Signs that an internet browser is a hi-jacked include: the browser’s home-page is modified; you find yourself regularly directed to a different site than the one you meant; the default search engine is changed; unwanted new toolbars are added to your web browser; never-ending pop-up ads show up and/or your browser pop-up blocker is disabled; your web browser starts running sluggishly or displays frequent glitches; You simply can’t access specific sites, particularly anti-virus sites.

How they infect PCs

A browser hijacker can be installed on your computer when you check out an infected website, click an e-mail attachment, or download something from a file-sharing website. They are usually included with toolbars, BHO, add-ons, plugins, or browser extensions. A browser hijacker could also be installed as a part of freeware, shareware, demoware, and fake programs. A good example of a notorious browser hijacker is the most recent Chinese malware known as “Fireball”, which has attacked 250 million computer systems worldwide. It acts as a hijacker but can be turned into a fully functioning malware downloader afterward. Browser hijackers could affect the user’s browsing experience greatly, keep track of the websites visited by users and steal private information, cause difficulty in connecting to the internet, and ultimately create stability issues, making software programs and systems freeze.

How to repair a browser hijack

Some hijackers could be removed by uninstalling the freeware they came with or by eliminating any extension you have recently added to your system. But, many hijackers are hard to get rid of manually. No matter how much you attempt to eliminate it, it can keep coming back over and over again. And there’s no denying the fact that the manual fixes and removal methods can be quite a complicated job for a rookie PC user. Furthermore, there are several risks connected with fiddling around with the system registry files.

What you can do if Virus Stops You From Downloading Anything?

Malware could cause all kinds of damage after they invade your system, ranging from stealing your private information to deleting data files on your computer system. Certain malware variants modify web browser settings by adding a proxy server or modify the computer’s DNS configuration settings. In such cases, you’ll be unable to visit some or all of the websites, and thus not able to download or install the necessary security software to remove the infection. If you’re reading this article, chances are you’re stuck with a virus infection that is preventing you to download or install the Safebytes Anti-Malware program on your PC. There are some fixes you can try to get around with this issue.

Install antivirus in Safe Mode with Networking

If the malware is set to load at Windows startup, then booting in Safe Mode should prevent it. Since only the minimal programs and services start-up in safe mode, there are rarely any reasons for issues to take place. Listed below are the steps you should follow to start your computer into the Safe Mode of your Windows XP, Vista, or 7 computers (visit Microsoft site for instructions on Windows 8 and 10 PCs). 1) At power on/start-up, tap the F8 key in one-second intervals. This will bring up the Advanced Boot Options menu. 2) Select Safe Mode with Networking with arrow keys and hit Enter. 3) As soon as this mode loads, you will have an internet connection. Now, utilize your web browser normally and navigate to https://safebytes.com/products/anti-malware/ to download and install Safebytes Anti-Malware. 4) Right after the software program is installed, let the diagnostic scan run to remove trojans and other malware automatically.

Switch to an alternate web browser

Web-based viruses can be environment-specific, aiming for a particular internet browser or attacking specific versions of the browser. The best solution to avoid this issue is to opt for a browser that is known for its security features. Firefox comprises built-in Phishing and Malware Protection to keep you safe online.

Run anti-virus from a pen drive

Another technique is to download and transfer an anti-malware application from a clean PC to run a scan on the affected computer. Follow these steps to use a flash drive to clean your infected system. 1) Download Safebytes Anti-Malware or Microsoft Windows Defender Offline onto a clean PC. 2) Insert the pen drive on the same system. 3) Double-click the Setup icon of the anti-malware software package to run the Installation Wizard. 4) Pick a USB flash drive as the place when the wizard asks you exactly where you would like to install the application. Follow the instructions on the computer screen to complete the installation process. 5) Now, transfer the pen drive to the infected computer. 6) Run the Safebytes Anti-malware directly from the thumb drive by double-clicking the icon. 7) Click the “Scan” button to run a full system scan and remove malware automatically.

Let's Talk About SafeBytes Anti-Malware!

Want to install the best anti-malware application for your laptop or computer? There are many applications available in the market which comes in free and paid versions for Windows computers. Some of them are great and some are scamware applications that pretend as legitimate anti-malware programs waiting to wreak havoc on your PC. When looking for an antimalware program, pick one which gives reliable, efficient, and total protection against all known viruses and malware. One of the recommended tools by industry leaders is SafeBytes Anti-Malware, the most dependable program for Windows computers. SafeBytes anti-malware is a reliable tool that not only secures your system permanently but is also quite user-friendly for people of all ability levels. This application could easily identify, remove, and protect your personal computer from the most advanced malware attacks such as spyware, adware, trojan horses, ransomware, worms, PUPs, and other possibly damaging software applications. SafeBytes has excellent features when compared to other anti-malware programs. Below are a few of the great ones: World-class AntiMalware Protection: Built upon a greatly acclaimed anti-virus engine, this malware removal application can identify and remove numerous obstinate malware threats such as browser hijackers, PUPs, and ransomware that other common antivirus applications will miss. Live Protection: SafeBytes gives real-time active supervision and protection from all known viruses and malware. They’re very effective in screening and eliminating different threats because they are regularly improved with new updates and alerts. Web Security: SafeBytes provides an instant safety rating on the web pages you are going to visit, automatically blocking risky sites and making sure that you are certain of your safety while browsing the internet. Very Low CPU and Memory Usage: SafeBytes provides complete protection from online threats at a fraction of the CPU load due to its enhanced detection engine and algorithms. Premium Support: SafeBytes provides 24/7 technical support, automatic maintenance, and updates for the best user experience.

Technical Details and Manual Removal (Advanced Users)

If you wish to manually remove InternetSpeedTracker without the use of an automated tool, it may be possible to do so by removing the program from the Windows Add/Remove Programs menu, or in cases of browser extensions, going to the browsers AddOn/Extension manager and removing it. You will likely also want to reset your browser. To ensure the complete removal, manually check your hard drive and registry for all of the following and remove or reset the values accordingly. Please note that this is for advanced users only and may be difficult, with incorrect file removal causing additional PC errors. In addition, some malware is capable of replicating or preventing deletion. Doing this in Safe Mode is advised.

The following files, folders, and registry entries are created or modified by InternetSpeedTracker

Files: C:DOCUME1USER1LOCALS1Tempnsk1.tmp C:b418207fbd4b466002312b66521c390947518e9a0d787e4e059af0505f607f3e C:DOCUME1USER1LOCALS1Tempnsk2.tmp C:DOCUME1USER1LOCALS1Tempnsk2.tmpnsDialogs.dll C:DOCUME1USER1LOCALS1Tempnsk2.tmpSystem.dll C:DOCUME1USER1LOCALS1Tempnsk2.tmpnsDialogs.dll C:DOCUME1USER1LOCALS1Tempnsk2.tmpSystem.dll C:Program FilesInternetSpeedTracker_9tEIInstallr.binNP9tEISb.dl_ C:PROGRA1INTERN2Installr.binNP9tEISb.dl_ C:Program FilesInternetSpeedTracker_9tEIInstallr.binNP9tEISb.dll C:Program FilesInternetSpeedTracker_9tEIInstallr.bintEIPlug.dl_ C:PROGRA1INTERN2Installr.bintEIPlug.dl_ C:Program FilesInternetSpeedTracker_9tEIInstallr.bintEIPlug.dll C:Program FilesInternetSpeedTracker_9tEIInstallr.bintEZSETP.dl_ C:PROGRA1INTERN2Installr.bintEZSETP.dl_ C:Program FilesInternetSpeedTracker_9tEIInstallr.bintEZSETP.dll C:WINDOWSsystem32rundll32.exe C:Program FilesInternetSpeedTracker_9tEIInstallr.binNP9tEISb.dl_ C:Program FilesInternetSpeedTracker_9tEIInstallr.binNP9tEISb.dll C:Program FilesInternetSpeedTracker_9tEIInstallr.bintEIPlug.dl_ C:Program FilesInternetSpeedTracker_9tEIInstallr.bintEIPlug.dll C:Program FilesInternetSpeedTracker_9tEIInstallr.bintEZSETP.dl_ C:Program FilesInternetSpeedTracker_9tEIInstallr.bintEZSETP.dll Registry: HKLMSOFTWAREClassesInternetSpeedTracker_9t.HTMLMenu HKLMSOFTWAREClassesInternetSpeedTracker_9t.HTMLPanel HKLMSOFTWAREClassesInternetSpeedTracker_9t.SettingsPlugin HKLMSOFTWAREClassesInternetSpeedTracker_9t.ToolbarProtector HKLMSOFTWAREWow6432NodeMicrosoftWindowsCurrentVersionexplorerBrowser Helper Objects9e28b297-11d4-4293-aa6f-558658ee66ae HKLMSOFTWAREWow6432NodeMicrosoftWindowsCurrentVersionexplorerBrowser Helper Objectscc28794a-99d4-4b1b-bccf-b065ce5f9feb HKLMSOFTWAREWow6432NodeInternetSpeedTracker_9t HKLMSYSTEMControlSet001servicesInternetSpeedTracker_9tService HKLMSYSTEMCurrentControlSetservicesInternetSpeedTracker_9tService HKUS-1-5-21-1633355155-4214755471-2067616181-1000SoftwareAppDataLowSoftwareInternetSpeedTracker_9t HKLMSOFTWAREWow6432NodeMicrosoftWindowsCurrentVersionRunInternet Speed Tracker EPM Support
Read More
Removing old drivers from Windows 10
So you have just got home from that new computer store with your fancy and all-new mouse, screen, keyboard, etc. You plugged in your new component, Windows detected it, installed drivers for it and it is working like a charm. A few months later down the road and the computer starts little by little to slow down. Plug and play is a great concept, and automatic detection is even greater but how time passes old unused stuff piles in your hard drive and in Windows itself thus slowing down your computer and taxing it more and more as new components and software are added. Old drivers from old components sadly are not removed from Windows itself and over some larger period of time they can pile up and slow down your daily operations on the computer or even cause some problems in it. This guide will teach you how to manually remove old unused device drivers from your Windows so it is fresh and like new again.

Making old devices visible

In order for us to remove old drivers, the first thing we must do is make them visible in our device manager, old drivers are hidden and will not show up, we must make this happen. We do this by pressing WINDOWS + X keys on your keyboard to bring up a hidden menu in Windows. keyboard with windows and x markedOnce the menu appears, click on Command Prompt (admin) Windows menu command prompt adminOnce the command prompt with administrator privileges comes on-screen type in it following string: The device manager will open, go to view > snow hidden devices in order to show unused devices. device manager show hidden devices

Removing old device

Open any category and if there is a device that was once used and still has its drivers in the system it will be shown as faded out. device manager hidden device shownRight-click on the device and click on uninstall device to remove it completely from your system. device manager uninstall device driverPlease always be careful when removing devices so you do not remove the device which is being used by mistake and always double-check that you are removing something that you used to have on your system. This method will show all hidden devices even ones that are hidden but crucial to the system working properly.
Read More
Fix Failed to create a graphics device Error
As you know, the Windows 10 operating system has support for a dedicated high-end graphics processor that brings in capabilities inside to support Graphics Cards from NVIDIA or AMD. This helps the operating system to function in a much better way by segregating the graphics-intensive operations from the CPU to a dedicated processor. However, there are times when it also experiences some issues that lead to some errors like the “Failed to create a graphics device” error. It is possible that your computer has more than one screen or graphics card which is why you’re getting this error. To fix it, you need to try reinstalling DirectX or reinstall the Graphics Card driver. You could also try to manually check the hardware or power cycle of your computer. To start troubleshooting the “Failed to create a graphics device” error, follow the given suggestions below.

Option 1 – Try running the DirectX Diagnostic Tool

Since the error has something to do with the DirectX Graphics APIs, you can run the DirectX Diagnostic tool to resolve the problem.

Option 2 – Try updating or re-installing DirectX

If the DirectX Diagnostic tool didn’t work, you can try to update or reinstall DirectX instead. This can help in fixing the problem because when you reinstall or update DirectX, it will replace the incompatible or corrupted components of DirectX from your computer.

Option 3 – Update or reinstall the Graphics card drivers

  • First, boot your computer into Safe Mode.
  • After that, tap the Win + R keys to launch Run.
  • Type in MSC into the box and tap Enter or click OK to open the Device Manager.
  • After that, a list of device drivers will be displayed. From there, look for the Display Adapters and click on them.
  • After that, right-click on each entry under the Display Adapters and select the “Uninstall Device” option from the menu.
  • Now restart your computer.
  • After restarting your computer, go to the Settings app and Check for Updates in the Windows Update section.
Note: You also have the option to go directly to the website of your graphics card manufacturers like NVIDIA, Intel, or AMD and go to the section called Drivers then check if there’s a new available update – if there is, download and install it.

Option 4 – Try to physically check the hardware of your computer

You might also want to check the physical status of the hardware in your computer. You can clean the dust off the hardware components like the Graphics Card of the computer. In doing so, you have to use a small blower or you could also use a soft cloth and run the components gently. Make sure that you don’t damage any parts with moisture or cause harm to any circuits while you carry out this task.

Option 5 – Try to power cycle your computer

You could also try to power cycle your computer to fix the error. To do that, you have to turn off your computer in a way that the power is completely cut off and all the fresh configurations of files are loaded when your computer is booted up. The first thing you have to do is to shut down your computer and if you are using a laptop with a removable battery, you must remove the battery for a couple of minutes before you plug it back in and boot your laptop. On the other hand, if you are using a desktop computer, press and hold the power button until the CPU goes off and take out the power cable for a minute or so and then plug it back in. Boot your computer and see if the error has been resolved.
Read More
How to Resolve Runtime Error 372

TuneUp Runtime Error 372

What is the Runtime Error 372?

Runtime Error 372 is one of the various types of runtime errors on Windows PC. This error code hampers your ability to access and run Microsoft Visual Basic applications on the system.

Solution

Restoro box imageError Causes

Runtime Error 372 can occur due to multiple reasons:
  • Corrupt application due to viral infection
  • Missing or damaged DLL file
  • Poor PC maintenance
  • Data overload
  • Registry damages
Delay in resolving the runtime error 372  exposes your PC to further problems like the inability to install new programs, Windows startup issues, slow PC performance, system hang-ups, and crashes, etc. Therefore, it is recommended to take measures to resolve the runtime error 372 immediately.

Further Information and Manual Repair

The registry is one of the most critical components of Windows PC. It stores every data and configuration of your computer. Every hardware and software on the system has to connect to the registry to function properly. However, everyday and frequent PC usage keeps creating wasted, obsolete and invalid entries on your system and saves them in the registry. And if not cleaned, these files dilate the registry and eventually cause the registry to malfunction. DLL files go missing and often get damaged or corrupt. This leads to runtime error pop-ups like the error code 372. Furthermore, sometimes the registry also gets damaged due to malware attacks and viral infections. This malicious software damages the registry and exposes your system to serious PC threats like system failures, data loss, and data breaches.

Solutions To Runtime Error 372

To resolve the runtime error 372 on your system, clean and restore your registry. For this, you don’t have to hire a technician and spend hundreds of dollars when you can repair it for free. All you have to do is download Restoro. This is a powerful one-stop solution for all your PC-related problems. It functions as a registry cleaner and a system optimizer. Restoro is a user-friendly Windows PC repair tool that can be used by all levels of users. To run and operate this software on your system you don’t have to be a computer programmer or an expert. Its simple navigation and layout make it very easy to use. It resolves disk fragmentation issues which lead to missing DLL files. It also repairs the damaged and corrupted registry thereby resolving runtime errors like the error code 372. Restoro is a bug-free, reliable, and efficient tool. It is compatible with all Windows versions. Click here to download Restoro to repair the runtime error 372 on your PC.
Read More
7 Ways to Fix Error 0x80070020 in Windows 10

Error Code 0x80070020 – What is it?

One of the problems encountered by Windows users when upgrading to Windows 10 from Windows 7 or Windows 8/8.1 is the Error Code 0x80070020. This error code normally occurs when users try to download updates from the Windows Update Website or simply by upgrading to Windows 10. Error Code 0x80070020 also occurs when the device already has a Windows 10 installed.

Once this error is encountered, it will cause malfunction of update installs and display the following message:

An error (-5006 : 0x80070020) has occurred while running the setup. Or The process cannot access the file because it is being used by another process”

Solution

Restoro box imageError Causes

In an attempt to fix Error Code 0x80070020, it is important to pinpoint what the cause is. The most probable cause of this error is due to interference. This error code most likely occurs when there is another automatic update running, for instance, an Antivirus scanning in real-time. If you’re scheduled to have an automatic update during real-time scanning, the Windows 10 update might malfunction.

Get up to 25% off when you download Total System Care and apply our exclusive discount. Only available for a limited time. 

Further Information and Manual Repair

In trying to fix Error Code 0x80070020, you can perform manual repair methods to resolve the issue effectively and efficiently. Most Windows users can easily employ these manual repair methods, even those who do not have technical abilities. However, there are certain instances where a Windows professional’s help is needed. If you don’t want to face any risk in resolving the issue, it would be best to consult a professional Windows technician or you can also make use of a powerful automated tool.

NOTE: It is best to attend immediately to errors encountered since unresolved errors can result in slowing down your computer’s performance. This might also cause other error messages to arise such as Error Code 0x80070057.

Method One: Restart Your Device

Since Error Code 0x80070020 is most likely encountered due to interference during your update, the easiest method you can do is to close all opened programs and restart your device. After restarting, try to start the update process again.

Method Two: Disable Antivirus Temporarily

Another quick and safe way to fix Error Code 0x80070020 is to disable your antivirus. You must take note though that in doing so, your computer will be susceptible to virus attacks. If you want to proceed with this method, follow these steps:

  1. Locate all programs in process in the notifications area, found in the lower right-hand section of your screen. If in case the antivirus icon is not visible on the taskbar, you may have to click an arrow pointing up to show what programs are currently running.
  2. Right-click on the antivirus icon then select the disable option.

Method Three: Run the Update Troubleshooter for Windows

The Windows Update Troubleshooter may resolve many of the errors encountered by Windows users when installing updates from Windows Update. To execute the troubleshooter, follow the steps below:

  1. Access a menu by holding the Windows key and X. Wait for the menu to appear on the bottom left corner of the screen.
  2. Open the Control Panel.
  3. Change the appearance of files by selecting large or small icons in the View by option located on the upper right section of your screen.
  4. Once you change the appearance of the files, choose the troubleshooting
  5. Run the Windows Update Troubleshooter.
  6. Restart your device then check if this resolves the problem.

Method Four: Execute A Clean Boot

Executing a clean boot means starting Windows using only a few resources, including startup programs and drivers. This safeguards minimizing conflicts and prevent software clash when an update is received. In performing a clean boot, you will be able to pinpoint what caused the manifestation of error code 0x80070020. Check Microsoft’s Support website to know how to execute a clean boot.

Method Five: Reset Windows Update Components

Performing this method is a bit risky and should be your last option if all methods were unsuccessful. This process will alter your device’s registry so you must ensure to perform accurately the steps. A single mistake can lead to modifying your registry erroneously, which might result in the occurrence of other error messages. Carefully follow the steps found on Microsoft’s Support website to successfully reset Windows Update components.

Resetting Windows Update components can also be done by implementing the following steps:

  1. Open the Command Prompt by pressing Windows Key + X. Select Command Prompt (Admin) from the menu.
  2. Stop the BITS, MSI Installer, Cryptographic, and the Windows Update Services.
  3. Rename both the SoftwareDistribution and Catroot2 folders to <name of folder> old.
  4. Start now the BITS, MSI Installer, Cryptographic, and the Windows Update Services.
  5. Exit the Command Prompt then restart your device. After restarting, try installing the updates again.

Method Six: Disable Third-Party Antivirus

A third-party antivirus such as BitDefender may recognize the Windows Update as a threat since the new update of Windows 10 is probably not yet registered with this third-party antivirus vendor. To solve this, you must disable temporarily the antivirus before performing the update. Once the third-party antivirus is disabled, you can now proceed with the updating process. Update as well your third-party antivirus.

Method Seven: Use the DISM Tool for Windows 10

The Deployment Image Servicing and Management (DISM) is a command-line utility that is installed by default in Windows 10 system. This program is used to fix images in Windows. In the case of Error Code 0x80070020, the DISM can repair the recovery image in Windows 10 and can perform as a virtual hard disk as well.

  1. Scan and check files for errors.
  2. Open the Command Prompt by pressing Windows Key + X. Select Command Prompt (Admin) from the menu.
  3. Type sfc /scannow
  4. You can also use the following commands to check for corrupted files:

/CheckHealth – to check for corrupted files or components

/ScanHealth – to check for corrupted Windows image. This may take up to 10 minutes to finish

/RestoreHealth – to check for corrupted Windows image and do an automatic repair. This may take up to 20 to 30 minutes to finish

NOTE: In an instance where you cannot locate the good files in your computer, the system image files may be corrupted. If this happens, you need to have a copy of install.wim from a computer with good Windows 10 OS or the Windows 10 ISO file. Make sure that the source of the good files has the same language, version, and edition of your OS.

Cleaning corrupted files using DISM utility:

Enter the following commands one by one to perform the /RestoreHealth switch using the source path location of good files you copied:

  1. DISM /Online /Cleanup-Image /RestoreHealth /Source:repairSource install.wim
  2. DISM /Online /Cleanup-Image /RestoreHealth /Source:repairSource install.wim /LimitAccess
  3. DISM /Online /Cleanup-Image /RestoreHealth /Source:repairSource install.wim:1 /LimitAccess

For example purposes, the “repairSource” is the source of the good files.

Read More
Delete large System Error Reporting files
In case you don’t know, Windows contains a feedback mechanism that generates error reports from hardware and software problems. These reports are temporarily stored in the system and send them back to Microsoft so that it can find solutions to the reported problems and fix them in the upcoming updates.  However, as time goes by, these reports actually take a lot of space in your computer which is why end-users like you are free to delete them with the help of the new Free Up Space feature in Windows 10. As useful the Free Up Space feature may be, there are times when you won’t be able to use it for some reason which is why in this post, you will be guided on how to use alternative ways in deleting very large System queued Windows Error Reporting file, some of which may run in Gigabytes. Every time the Windows Error Reporting or WER sends out an error file and looks for a solution, the WER server at Microsoft sends out a solution instantly. And if the solution is under investigation or is unknown, then you will be notified about it right away and will be asked for more details. As mentioned, even though the Free Up Space feature in Settings will be able to clear the error reporting files, there are instances when it won’t be able to delete very large System queued Windows Error Reporting files. Alternatively, there is an option to delete these files using the Disk Cleanup Utility. Feel free to select which option you’d like to use to get rid of Windows Error Reporting Files.

Option 1 – Delete Windows Error Reporting Files via Settings

  • Go to Settings.
  • From there, go to System > Storage > Free Up Space and then click on it to launch it.
  • Afterward, give it some time to populate all the files and folders. Once it’s done, select “System created Windows Error Reporting files” to mark its checkbox while leaving the other options unchecked.
  • Next, click on the Remove files button to delete all the Windows Error Reporting files from your computer.

Option 2 – Manually delete the Windows Error Reporting Files

  • Tap the Win + E keys to open File Explorer.
  • Next, enable the Hidden Files view from the menu.
  • Then go to C:/ProgramData/MicrosoftWindowsWER.
  • From there, you will see various folders like LocalReportArchive, ReportArchive, ReportQueue, and Temp.
  • Open each one of the aforementioned folders and delete the archive files. Note that these files will have names similar to “00c58c1f-b836-4703-9bcf-c699ca24d285”.
Note: If you are not able to delete any of these files, you have to take ownership of the folder. To do so, refer to these steps:
  • Right-click on the folder and then select Properties.
  • Next, click on the Edit button in the Properties window and click OK to confirm if you got a User Account Control elevation request.
  • After that, select user/group from the permission windows or click on the Add button to add another user or group. It would be best if you add “Everyone” to give permission.
  • Then check “Full Control” under the “Allow” column to assign full access rights control permissions.
  • Now edit the permission to Full Control for “Everyone”.
  • Click OK to save the changes made and then exit.
On the other hand, if you do not want to go through all these troubles in deleting the Windows Error Reporting files, you can just disable it especially if it already becomes a daily annoyance as the files generate every day and their sizes are mostly gigabytes. And besides, there are times when these files do not make it to the Microsoft WER server and end up only occupying a lot of space for nothing.
Read More
Malware Guide: How to Remove Bandoo

Malware Guide: How to Remove Bandoo

What is Bandoo?

Bandoo application, specifically product version 5.0.2.4762, is a bundled program. What does this mean? Simply, Bandoo, upon installation, installs additional programs, extensions, and add-ons to a computer and computer’s browser, without the knowledge of the user. This version of Bandoo concentrates on providing features for entertainment and also functionality/tools for backing up your computer files. Once executed, the file installs the iLivid Download Manager Software. Additional tools installed within the bundle include a Movie Toolbar and the thriving search engine ‘Ask.com.’ Technical details about Bandoo include: 
Digital Signature/Publisher:  Bandoo Media, Inc. Product Version: 5.0.2.4762 Entry Point:  0x000038AF

Assessment of Bandoo Potentially Unwanted Program

Interestingly, before the installation of Bandoo product version 5.0.2.4762 was complete, Spyhunter detected that the software was a PUP. After the installation was complete, product version 5.0.2.4762 of Bandoo added add-ons and extensions to both Internet Explorer and Chrome Browsers (these were the only 2 browsers used within the assessment). These appeared in the form of a Movie toolbar, providing quick access to movie trailers, reviews, ratings, and other video functionality, and ‘Ask’ (Ask.com) search engine.

Areas of Infiltration by Bandoo

Bandoo product version 5.0.2.4762 infiltrated several areas of the computer system. After installation, folders were neatly placed as files within all programs. Within “All Programs” there were 3 newly added programs. These included:
  • iLivid
  • Movies Search App for Chrome
  • Movies Search App for Internet Explorer
The iLiVid application seems to be the main offer while the others, namely Movies App for Internet Explorer by Ask was featured as promotions or advertisements. Additionally, just below the 'END USER LICENSE AGREEMENT AND PRIVACY POLICY' a request was made that the user set Ask.com as both their homepage, new tab, and default search engine. This is just another well-concocted plan to get Internet users onto the 'Ask.com' search engine. Along with the 3 programs installed as a bundle,  a new folder was found within the computer's local drive. This program was termed OLBPre.

What is OLBPre?

OLBPre.exe is reputed as dangerous adware that weakens the security settings of a computer system. It's also covertly used for dropping files on a targeted computer, often without the user's consent or knowledge.

Manual Steps for Removal of Movie Search Apps

I found this removal pretty simple. Depending on your Operating System, there will be slight discrepancies in the manual removal steps. Using the Windows 8 (8.1) OS on your computer:
  • Step 1: from your desktop, right-click on the ‘Start Button’.  A menu box will then appear.
  • Step 2: from the menu box, click ‘Search’.
  • Step 3: enter “Programs and Features” within the Input Box.
  • Step 4: locate the installed apps. You should be able to see “Movies Search App for Chrome” & “Movies Search App for Internet Explorer”.
  • Step 5: right-click on the names of the Apps (the ones you want to remove) when you’ve located them.
  • Note: you will have to remove the apps one after the other.
  • Step 6: after right-clicking the app, click the uninstall option (probably the only option available anyway).
  • Note: If a box appears asking If you wish to ‘block’ or ‘allow’, select the allow option. That’s just the Publisher’s way to annoy you out of uninstalling the app.
  • Step 7: follow instructions until the app is fully removed.
  • Step 8: Repeat steps for the other app.
Since Bandoo also changed your search engine, you’ll have to reset that manually for Internet Explorer and Chrome. Follow the steps below:
  • Step 1: Open your Internet Explorer browser.
  • Step 2: Click the tool option located in the top right-hand corner of the page.
  • Step 3: Click the “Internet Options” option.
  • Step 4: Under the “General” tab, you’ll be able to see approximately 3 buttons. Click the button labeled ‘Use Default”.
  • Step 5: At the bottom right-hand corner of the pop-up menu, select the “Apply” button and “OK”. That should do the trick.

Removal for Chrome Extension

This removal is simple.
  • Step 1: Open your Chrome browser.
  • Step 2: A pop-up box will be visible.
  • Step 3: Click the “Remove from Chrome” option.
After removing the extensions/add-ons, perform another scan with Spyhunter. You’ll pick up a few threats. The second scan should clear up everything. To completely remove Bandoo from your computer, click here to download and install Spyhunter.
Read More
Fix Your PC can’t project to another screen
In case you don’t know, Windows 10 comes with a native ability to project to another screen, be it wireless or wired. All it takes to do that is by tapping the Win + P key combination to display options to manage the extended display. However, there are times when you might encounter errors when you do that like the “Your PC can’t project to another screen” error. This kind of error stops you from projecting your computer to the other screen. Here’s the full content of the error message:
“Your PC can’t project to another screen, Try reinstalling the driver or using a different video card.”
This error could be due to loosely connected hardware or the display adapter. It is also possible that a recent Windows Update has messed up its settings. To resolve this issue, you can try several suggestions that will be given in this post. You can try to check the hardware cable connections or run the Hardware and Devices troubleshooter. You could also update or reinstall the display adapters or replace the graphics card.

Option 1 – Try checking the hardware connections

The first thing you have to do before you further troubleshoot the problem is to check the hardware connections of your computer and see if there are damaged ones, just like with the ports as it would also affect the overall connectivity of the device with the computer. You also have to make sure that no pin is missing from the ports. So if you notice some irregularities in the connecting cable physically, you might have to buy another one and replace it and then see if it fixes the problem or not.

Option 2 – Run the Hardware and Devices Troubleshooters

  • The first thing you need to do is click on Start and then on the gear-like icon to pull up the window for Settings.
  • After opening Settings, look for the Update and Security option and select it.
  • From there, go to the Troubleshoot option located on the left-hand side of the list.
  • Next, select Hardware and Devices from the list and open the Troubleshooter and run it. Once it is doing its job, wait for it to complete the process and then restart the system.
  • After the system restarts, check if the problem’s now fixed. If not, refer to the next option given below.

Option 3 – Try to update or reinstall the display adapters

You might also want to update the drivers for Display adapters and Monitors or you might also have to update or reinstall your NVIDIA driver if you’re using one. To update or reinstall the display adapters, follow these steps:
  • Tap the Win + R keys to open the Run dialog box and then type in MSC and tap Enter or click OK to open the Device Manager.
  • Expand the section for Display Adapters.
  • And then select the Display Driver and right-click on it.
  • From the drop-down menu, select the Update Driver option and follow the on-screen instructions to install the latest version of the Display Driver.
  • Restart your PC after the installation.
If you find that updating the drivers does not help, you can try to reinstall them. How? Simply follow the steps below.
  • Tap the Win + X keys and select the Device Manager.
  • After that, look for the affected driver in the Device Manager window. And if you see a yellow exclamation mark beside it, right-click on it and select the option “Rollback” to roll back the driver.
  • And if the Rollback option is not available, just select Uninstall and then restart your PC.
  • Finally, open the Devices Manager once again and select the option “Scan for hardware changes” to install the driver.

Option 4 – Consider replacing the graphics card

You might also want to consider replacing the graphics card of your computer to resolve the problem if the options provided above didn’t work.
Read More
1 2 3 162
Logo
Copyright © 2022, ErrorTools. All Rights Reserved
Trademarks: Microsoft Windows logos are registered trademarks of Microsoft. Disclaimer: ErrorTools.com is not affiliated with Microsoft, nor claim direct affiliation.
The information on this page is provided for information purposes only.
DMCA.com Protection Status