How to Fix Logon.scr Application Error

Repair Logon.scr Application Error

Logon.scr Application Error - What is it?

To understand Logon.scr application error, it is first important to understand the function of logon.scr. Logon.scr is an important file that is located in the Windows\System32 folder. It guarantees Windows systems stability.

Logon.scr application error occurs when logon.scr file gets corrupt. It is a common system error that can happen in most Windows platforms. It usually pops up during system start-ups and when trying to launch certain programs.

Some of the common systems of this error code include: system halt, freeze, no application icons are visible on the desktop, random blue screen of death and system performance decreases dramatically.

Solution

Restoro box imageError Causes

Two of the most common causes of logon.scr application error is:

  • Corrupted and damaged logon.scr file
  • Viral infection

It is advisable to fix this error code immediately because it leads to serious damages. It is fatal and can result in a system crash; therefore resolve it right away.

Further Information and Manual Repair

To resolve this issue on your computer you don’t have to spend hundreds of dollars to hire a professional for the job. The good news is that it can be repaired easily and does not require any technical expertise.

Here are some of the most effective and easy DIY methods to resolve the error on your screens.

Method 1 - Replace the Damaged and the Corrupted Logon.scr File

Whether the file gets corrupted or is accidentally deleted, the best way to fix the issue is to download the Logon.scr file again from a reliable website and install in the following location C:\Windows\System32.

Alternatively you can also get the file copy form another proper functioning computer by using flash drive if you don’t have an internet connection to download the logon.scr file online.

Method 2 - Restore Points by Applying System Restore of Windows

Another way to resolve this is to restore points to bring back your system to the previous state before the error occurred. To do this, simply click the start button and type ‘System Restore’.

Now click System Restore in the result and click next. Select the restore point in the list and click the next button to proceed. To activate changes reboot your PC.

Method 3 - Scan and Remove Viruses

If Logon.scr application error still persists, then it could be due to viruses. To resolve, install a powerful anti-virus. Scan your entire PC and remove viruses.

Method 4 - Repair the Registry

Corrupt and damaged Logon.scr file also triggers issues with the registry. DLL files and other important files like Logon.scr application files may get damage due to too many bad and invalid registry entries.

Registry stores all the activities performed on the PC including unnecessary files like junk files and cookies. If these are not removed timely, these files accumulate and corrupt important files. Therefore, to fix the error it is advisable to clean and repair the registry.

The best way to go about is to download Restoro. This is a user-friendly and multi-functional PC Fixer deployed with a registry cleaner. It scans for all registry errors and removes all the invalid entries. It cleans the registry and repairs the damaged files thereby resolving the issue in seconds.

Click here to download Restoro and resolve the Logon.scr application error now!

If you like to learn and find out more about various Windows errors, and how to repair them go to our vast archive or use search to find articles that will explain and help you in solving your issue.
However, if you prefer to do things fast and with automatization then we are proposing to use an automated solution for your issues. The application that we are recommending is Advanced System Repair Pro
Advanced System Repair utilizes multiple tools all in one to give you a quick, simple, reliable, and very thorough diagnosis of your PC. It brings you all the tools you need in one program to clean, fix, protect, optimize and boost your PC!
1-Click Maintenance
All the tools to make it simple and easy! It's like having a professional technician at the click of a mouse.

Junk Cleaner
Keeping your computer free from unnecessary clutter also helps make your computer last longer. Like any other machine, if you keep it clean and take care of it, it will serve you better for longer!

Optimize background apps
Optimize applications background activity with the built-in Application Optimizer feature.

Disk Defrag
With a simple 1-click, Advanced System Repair speeds up your PC by assembling fragmented files on your machine and organizing them more efficiently.

Malware Removal
Finds and removes all types of harmful malware including trojans, worms, bots, adware, spyware, PUPs, and more!

Privacy Cleaner
The all-in-one privacy suite to Clean Your Tracks & Protect Your Privacy! Make your computer safe, secure, and more efficient!

System Tweak/Optimizer
ASR will analyze your complete system and settings to adjust your PC to function at its maximum performance.

Registry Cleaner
Over time, as you install and uninstall applications, the registry can become cluttered with old entries and broken settings which can result in program crashes, and annoying messages and slow the computer down.
Visit our Advanced System Repair Pro Download page to inform yourself about all the benefits of this software and get a free trial copy of it.
advanced system repair pro

Advanced System Repair Pro

One-click automated PC repair solution
ASR logo
With Advanced System Repair Pro you can easily
Replace damaged files
Restore performance
Free disk space
Remove Malware
Protects WEB browser
Remove Viruses
Stop PC freezing
DOWNLOAD
Privacy Policy | Terms of Use | Uinstall
Advanced System Repair Pro is compatible with all versions of Microsoft Windows including Windows 11

Share this article:

You might also like

Watch old game intros in 4k or 8K hi-definition
AI and neural networks are more and more being used in all parts of our lives. From face detections to deep fakes it is both amusing and frightening to watch at the same time. From some really bad uses of neural networks and AI overall, looking at you deep fakes, upscaling videos or images are mostly harmless pieces of work not harming anyone. There is one cool YouTube channel, well there are more but this one seems to have most of the videos on it and if I am wrong I apologize. https://www.youtube.com/channel/UC33rC3GO1UZFAkMcCCwjyWg So upscale is like previously mentioned a YouTube channel that hosts old game trailers and into videos but in full 4K or 8K video resolution, fully upscaled using neural networks. There are some videos that are not maybe top-notch but the large quantity of them is pretty well upscaled and they do indeed look great. So if you have some time and want that old nostalgia fix, go and check it out. You might find something that will bring that old you out and you might even drop a smile or two remembering old good days, I know I have.
Read More
A Quick Guide to Fixing Error Code 0x80070057 in Windows 10

Error Code 0x80070057 – What is it?

Error code 0x80070057 occurs when Windows users are having problems installing updates on their machines. The error code may result due to issues affecting Windows Update, for instance, problems with system files or settings that can be accessed or modified using the registry in Windows. Error code 0x80070057 affects multiple versions of the Windows operating system including Windows 10. Common symptoms manifested when this error code and other update error codes occur include the following:

  • Inability to complete the installation of updates via Windows Update
  • Presence of error code message box

Error Causes

Update error codes like error code 0x80070057 occur when there are issues related to system files, programs or malicious software is present on one’s machine. To combat these issues, users may need to implement manual repair procedures, depending on the specific error code present on their device.

Solution

Restoro box imageFurther Information and Manual Repair

Windows users can fix error code 0x80070057 by manually repairing or deleting subkeys and values within the Windows registry. This enables Windows Update to function as the proper modification of settings and other information present in the registry can fix problems associated with certain error codes.

The manual repair procedures also enable users to address specific problems on the devices that may not be fixed through the use of other methods.

Method One: Back-Up Registry in Windows

The Windows registry contains information regarding applications installed on the version of Windows you use on your device. This information as well as settings related to hardware are all accessible to users and can be useful when combating problems like error code 0x80070057.

However, users will need to be very careful when making modifications within the registry in Windows. This is due to the fact that errors made while accessing the registry can lead to serious issues on your PC. Backing up your registry before you modify it is crucial since it will provide protection against any problems that may arise if you make an error. This is the first step in resolving error code 0x80070057. Follow the steps below to back up your registry properly.

  • Step one: Type regedit.exe in the search box near the Start button.
  • Step two: Type the appropriate password or provide confirmation if you are prompted to do so
  • Step three:  Locate Registry Editor
  • Step four: Select registry key or subkey that you want to back up
  • Step five: Click File > Export
  • Step six:  In the Export Registry File dialog box, choose a location where you will save the backup copy
  • Step seven: Name the backup file then select Save.
In the case of fixing error code 0x80070057, the registry file or subkey you will need to back up relates to this: HKEY_LOCAL_MACHINE. This contains configuration details or information related to your machine regardless of the user. Also note that the registry, once you have created a backup file, will be protected, thus enabling you to move to the manual method mentioned below.

Method Two: Make Changes to the Windows Registry

The execution of modifications to the registry can be a complex procedure, especially if you are an average Windows 10 user who lacks technical knowledge. Thankfully, even non-technical users can access the solutions they need by simply following the instructions provided in this article.

You may also contact a Windows repair technician as well, in case you have trouble implementing the steps mentioned for modifying your Windows registry or if other problems arise while you are proceeding with these instructions.

Step one: Access the Windows Registry Editor by typing regedit.exe in the search box near the Start button.

Step two: Type the appropriate password or provide confirmation if you are prompted to do so

Step three:  Locate Registry Editor

Step four: Enter the following:

[HKEY_LOCAL_MACHINESOFTWAREMicrosoftWindowsUpdateUX] "IsConvergedUpdateStackEnabled"=dword:00000000

[HKEY_LOCAL_MACHINESOFTWAREMicrosoftWindowsUpdateUXSettings] "UxOption"=dword:00000000

After making these modifications in the Windows registry, restart your machine. You can then check Windows Update to see if the problem has been resolved. If the modifications to the registry have proven successful, you will no longer see the error code 0x80070057 message box. You will also be able to complete all updates via Windows Update.

Method Three: Download an Automated Tool

If you wish to always have at your disposal a utility tool to fix these Windows 8 and other related issues when they do arise, download and install a powerful automated tool.

Read More
Troubleshooting Fortnite Connection Issues
It is no secret that Fortnite is one of the most played games in the world. Epic has done a great job offering it to plenty of other platforms with cross-play feature meaning that you can play with your friends no matter on what platform they are on. But how Fortnite is a piece of software which is constantly updated and maintained it is pretty normal to have some bugs or issues from time to time. One of the before-mentioned issues is a connection issue or unable to connect to game servers. In our article, we will go through common fixes and solutions in order to get you back in-game as fast as possible. Keep on reading.

fortnite cannot connect
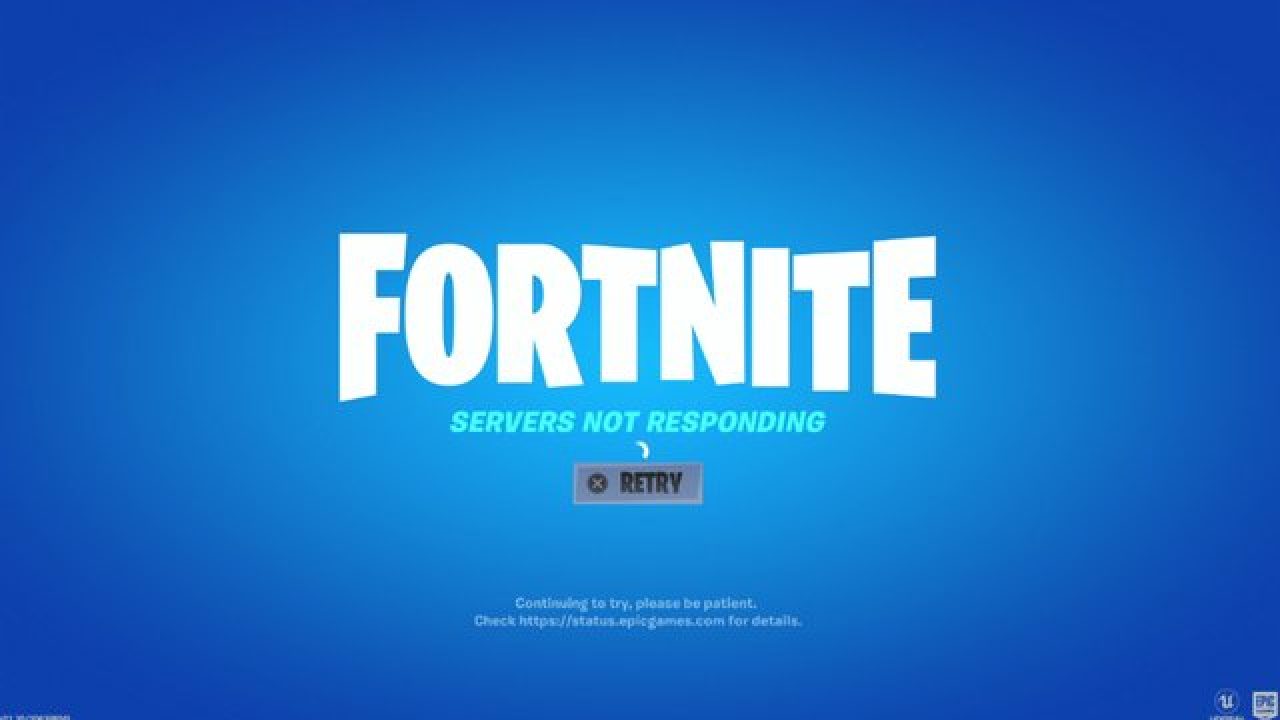
Check the Epic Games Status page

Check the Epic Games Server Status page to make sure all systems are operational. If the issue you’re experiencing is related to an outage or system-wide issue, you won’t be able to connect to the Epic Games Launcher or Fortnite until it's resolved.

Use a wired connection

Wireless connections are not as stable as wired connections. This means that the signal can be unreliable and result in packet loss, connection problems, or higher latency or ping. Connect directly to your modem or router with an Ethernet cable to eliminate this possibility and have the fastest connection possible.

Disable your firewalls

Often the quickest way to fix connection problems due to firewalls is to temporarily uninstall and/or disable it.

Windows Firewall disable guide:

  1. Click on Start.
  2. Click on Control Panel.
  3. Click on System and Security.
  4. Click on Windows Firewall.
  5. Click on Turn Windows Firewall on or off (You might need to provide the Administrator password at this step)
  6. Under each Network location, select the Turn off Windows Firewall option

Uninstall any other firewalls

Using a third-party firewall may prevent you from being able to connect to the Epic Games Launcher, Fortnite, or another Epic Games product. We recommend removing any third party firewalls temporarily to see if this resolves your issue. If it does resolve the problem, make sure to add the following executables as exceptions to your firewall:

Epic Games Launcher

  • C:\Program Files (x86)\Epic Games\Launcher\Engine\Binaries\Win64\EpicGamesLauncher.exe
  • C:\Program Files (x86)\Epic Games\Launcher\Engine\Binaries\Win32\EpicGamesLauncher.exe

Fortnite

  • C:\Program Files\Epic Games\Fortnite\FortniteGame\Binaries\Win64\FortniteClient-Win64-Shipping.exe
  • C:\Program Files\Epic Games\Fortnite\FortniteGame\Binaries\Win64\FortniteClient-Win64-Shipping_BE.exe
  • C:\Program Files\Epic Games\Fortnite\FortniteGame\Binaries\Win64\FortniteClient-Win64-Shipping_EAC.exe
  • C:\Program Files\Epic Games\Fortnite\FortniteGame\Binaries\Win64\FortniteLauncher.exe
Contact your firewall manufacturer for instructions on how to add these as exceptions to it as this varies between them.

Unblock your network ports

Network ports allow certain types of data to be successfully sent over a network that is used by our services. If you have any of these blocked, it may result in you being unable to connect to our games or use our services properly. To unblock your ports on your router do the following:

Windows

First, you will need to get your default gateway and internal IP address:

  1. Click on Start.
  2. Type cmd and press Enter.
  3. Type ipconfig and press Enter.
  4. Take note of your Default Gateway and IPv4.

Configuring your router to unblock the ports

  1. Open your web browser.
  2. Type your Default Gateway into the address bar and press Enter. (A common Default Gateway is 192.168.1.1)
  3. You may be asked for a username and password. This varies for each router. Before entering anything, try just hitting OK. If that doesn't work, try the common default username and password below: Username: admin Password: password If these don't work, you can check this website for a list of usernames and passwords based on your router model.
  4. Locate the Port Forwarding page in the administration tool and click on it.
  5. Make sure you have Port Forwarding selected and not Port Triggering as this is completely different.
  6. On this screen, you will need to enter the ports and port ranges below with the correct protocol and local IP of which you took note of above: 80 (TCP/UDP), 433 (TCP), 443 (TCP), 3478 (TCP/UDP), 3479 (TCP/UDP), 5060 (TCP/UDP), 5062 (TCP/UDP), 5222 (TCP), 6250 (TCP/UDP), and12000-65000 (TCP/UDP).
If you have any trouble doing the above on your router, make sure to check out the router manufacturer's support site for additional instructions as these will vary from router to router.

VPN and Proxy Servers

Do NOT use VPN or Proxy Servers. These cause issues that can't be resolved by us without having you disable them. Check out this article for information on how to disable your proxy server.

Switch Domain Name Systems (DNS)

Switching your DNS can result in better connectivity and performance for your internet connection. There are two different DNS services we recommend to have you try if you are having issues with your connection. Below are the followings links with instructions on how to change your DNS:

Epic Games Launcher: Edit your Engine.ini file (Windows only)

Editing these settings can result in better download speeds using the Epic Games Launcher:
  1. Click on Start.
  2. Type %localappdata% and press Enter.
  3. Open the EpicGamesLauncher
  4. Open the Saved
  5. Open the Config
  6. Open the Windows
  7. Open ini and add the following lines to it: [HTTP] HttpTimeout=10 HttpConnectionTimeout=10 HttpReceiveTimeout=10 HttpSendTimeout=10[Portal.BuildPatch] ChunkDownloads=3 ChunkRetries=20 RetryTime=0.5
  8. Save the file and open the Epic Games Launcher.
fortnite gameplay
Read More
How to Fix the AVFoundationCF.dll Error on Your PC

AVFoundationCF.dll - What is it?

AVFoundationCF.dll is a type of Dynamic Link Library file. This DLL file is associated with AVFoundationCF and is developed by Apple Computer Inc. for Windows PC. This file functions similarly to any other DLL files. It comprises of small programs. This DLL file is typically needed to load and start the Apple iTunes utility. The inability to call this file or the files to load triggers the AVFoundationCF.dll error message on your system. The error message can be displayed in either of the formats on your PC:
“The program can’t start because AVFoundationCF.dll is missing from your computer. Try reinstalling the program to fix this problem.” "This application failed to start because avfoundationcf.dll was not found.” "Cannot find %COMMONFILES%AppleApple Application Supportavfoundationcf.dll." "Cannot start AVFoundationCF. A required component is missing: avfoundationcf.dll.” “Avfoundationcf.dll Access Violation." "Cannot register avfoundationcf.dll."

Solution

Restoro box imageError Causes

AVFoundationCF.dll error can occur due to numerous reasons. However, the most common reasons for this error code include:
  • Viral infection
  • Corrupt or invalid registry entries
  • Apple Computer Inc. hardware failure such as bad hard drive
  • Missing or deleted Avfoundationcf.dll file
It is recommended to resolve the error as soon as you experience it virtually because if the error code is related to viral infection on your system, it can expose your PC to privacy errors and data security risk. And if the error is triggered by registry issues, it can lead to serious threats like system crash, failure, and data loss. Therefore, the AVFoundationCF.dll error not only hampers your ability to access and start Apple iTunes program but it also puts your PC at serious risk.

Further Information and Manual Repair

To fix the error AVFoundationCF.dll on your PC, here are some of the best and easy to do solutions that you can try:

Check your Recycle Bin

Since dll files are shared files, there is a possibility that this file accidentally got deleted when you were uninstalling some other program on your system. If you experience missing AVFoundationCF dll file error message after performing any program on your PC, then chances are that it got deleted and maybe in your recycle bin. So, first, check your recycle bin and search for the dll file. If you find it, restore it to fix the error.

Update Device Driver

To resolve the issue, try performing a driver update. This can be done by downloading the latest drivers from the hardware manufacturer’s website. Now open Device Manager from the Control Panel and locate the hardware device that you want to update the driver for. Once you find the hardware you are updating the driver for, right-click on the hardware icon and choose properties. In the properties windows, click the driver tab. Now click the update driver button. To activate changes, restart your PC. To automatically update your computer's drivers when necessary, download and install DriverFIX.

Try Re-installing Apple iTunes Program

To do this, simply go to the control panel, select programs and then uninstall a program and then select iTunes.  Uninstall it and then repeat the same program and install the Apple iTunes program again on your PC by downloading the program from Apple’s official website.

Scan for Viruses

If the error still persists, then it is advisable to scan your PC for viruses. This can be easily done by running a powerful antivirus on your PC. However, please note anti-viruses are notorious for slowing down PC performance. So, may have to compromise on the speed of your system.

Clean and Repair the Registry

If the error is caused by invalid and corrupt registry entries and damaged Avfoundationcf dll file, then the best way to resolve is to download a powerful registry cleaner. We advise you to install Restoro on your PC. This is an advanced and a multi-functional PC Fixer integrated with multiple powerful utilities including a high functional registry cleaner, an antivirus and a system optimizer. The registry cleaning utility scans all the registry issues and removes all errors triggered by the registry immediately. It cleans the registry by wiping out all the unnecessary, obsolete and redundant files including invalid entries and bad registry keys. Furthermore, it also fixes the damaged and corrupt dll files including Avfoundationcf dll file. Thereby resolving the error right away. Furthermore, the antivirus deployed in this software scans for all types of malicious codes like viruses, Trojans, spyware, and malware and removes them. To ensure you don’t compromise on your PC performance, it is deployed with a system optimizer utility that boosts the speed of your computer dramatically. This tool is bug free, has a user-friendly interface and compatible with all Windows versions. Click here to download Restoro and resolve Avfoundationcf.dll error on your PC today!
Read More
USB Security key is not working on Windows
As you know, the USB security keys are a secure medium to validate a lot of components in a computer. They can be used to log in to Windows 10. Now with the advancement of APIs, you can authenticate across the website as well using the same key. However, there are times when it may not work and it could be caused by several factors. It could be due to corrupted or incompatible drivers or it could also be due to compromised integrity of the key, and many more. So if you happen to encounter an issue with the USB security key on your Windows 10 computer, then there are several potential fixes you can try. You can try toggling the Internet Options settings or reinstall the respective USB drivers. You could also try changing the PIN of the security key or disable the antivirus program on your computer or troubleshoot the web browser. Refer to the potential fixes provided below to fix the problem.

Option 1 – Try to toggle the settings of the Internet Options

  • In the Windows Search box, search for Internet Options to open it.
  • Next, go to the Security tab and drag the security slider to the lowest possible security for all the given zones.
  • After that, click on OK to save the changes made and close the Internet Options.
Note that this option is only a temporary measure as it can make your computer vulnerable. Make sure to press the Reset all zones to default level button.

Option 2 – Try to update or reinstall the respective drivers

If updating the drivers of the device did not fix the problem with the USB security key, you can try to update or reinstall the Universal Serial Bus Controller drivers instead of using the Device Manager. Refer to the following steps:
  • First, click the Start button and type “device manager”.
  • Then click on the “Device Manager” from the search results to open it.
  • From there, look for the “Universal Serial Bus controllers” option and then right-click on each one of the USB drivers and select the Update Driver from the menu.
Note: If it is a regular USB drive, then it will be listed as a USB Mass Storage Device but if you have a USB 3.0 device, then look for a USB 3.0 Extensible Host Controller.
  • Restart your PC and then click the “Search automatically for updated driver software” option.
Note: If updating the USB Controller drivers didn’t work, you can try to reinstall them instead.

Option 3 – Try to change the PIN of the security key

If the first two options didn’t work, you can try changing the PIN of the security key. There are instances when the PIN for the security key might have been corrupted. Thus, resetting it can help you resolve the problem.

Option 4 – Temporarily disable Firewall and third-party antivirus

Firewall and antivirus programs are known to block the proper functioning of the USB security key. Thus, your antivirus or firewall programs might be the reason why you can’t download anything on your Windows 10 computer. To isolate the issue, you need to temporarily disable both the Firewall and antivirus programs and then check if you can now download anything from the internet. Do not forget to enable them again as disabling them can leave your computer vulnerable to cyber threats.

Option 5 – Try to troubleshoot the web browser

Troubleshooting your web browser can also help you fix the USB security key problem. You can do that by checking if your web browser supports the security key and you can do that by checking on the official website of your browser. You can also try to update your web browser to its latest version but if it didn’t help, you can try to reinstall it or switch to another web browser.
Read More
A Quick Guide to Fixing Error C00D1199

Guide to Correcting Error C00D1199

What is Error C00D1199?

This is a typical Windows Media Player error code. Developed by Microsoft, Window Media Player is a media player and media library application that is used for playing audios and videos on the computer. Error C00D1199 appears when Windows Media Player is unable to play the file requested by you. The error code is displayed in the following format:
C00D1199: Cannot play the file

Solution

Restoro box imageError Causes

You might encounter an error C00D1199 message on your PC for one of the following reasons:
  • The file type you requested is not supported by the Windows Media Player
  • The file type was not compressed by using a codec that is not supported by the Player
  • Your sound card or controller is not configured properly or outdated
  • Registry corruption
The good news is that error C00D1199 is not fatal. But if this error code is generated due to registry problems, then it can lead to serious issues. Therefore it is advisable to fix it immediately.

Further Information and Manual Repair

Here are some of the best and easy do-it-yourself methods to resolve the error C00D1199 right away.

Method 1 - Ensure File Type is Supported by Windows Media Player.

If it is supported then make sure the codec used to compress the file is installed on your system. There are hundreds of audio and video Codecs in use today but the most popular Codecs used on Windows Media Player are Windows Media Audio, Windows Media Video, and MP3. If these Codecs are not installed on your PC, then it is advisable to download them from the web. But make sure you download these codecs from a reliable and a trusted website.

Method 2 - Check Sound Card Settings

Another method to resolve error C00D1199 is to check Sound card settings. Make sure it is configured properly. Improper configuration can also trigger the error. Nonetheless, if it is configured the right way but the error still persists then it is advisable to change update the driver. To do this, go to the Device Manager. Here use the Driver update wizard to make updates.

Method 3 - Check the Windows Registry

The registry is an important part of the PC. It stores all the activities performed on the PC and all files including both junk and important files. If unnecessary files like junk files, cookies, and bad registry entries are not removed frequently from the registry, it can corrupt and damage it and generate error codes like C00D1199. To clean the registry and resolve the error it is advisable to download Restoro. This is a user-friendly PC Fixer embedded with a registry cleaner. The registry cleaner wipes away all the clutter from the registry and cleans it instantly. It also repairs the damaged files and restores the registry. Click here to download Restoro and resolve error C00D1199 on your PC.
Read More
Could not configure one or more components
If you are trying to install or upgrade your Windows 10 computer but suddenly encountered an error message saying, “Windows could not configure one or more system components”, read on as this post will show you how you can fix the problem. You are not alone in experiencing this problem as other users also reported having the same scenario. Some of them reported getting the following error message:
“Windows could not configure one or more system components. To install Windows restart the computer with error code 0xc1900101-0x30018.”
When you check on the Windows 10 rollback log, you will see a part with the “iisetup.exe” that’s related to the abort. Usually, the upgrade process completes over 50% and gets stuck and then rolls back later on and generates the error logs. This kind of error, in most cases, appears during the upgrade of Windows 10 and is related with the Internet Information Services or IIS in Windows 10. For some unknown reason, it restricts the installation or the upgrade which causes the error to appear. To fix the “Windows could not configure one or more system components” error, you can try to remove the IIS from the Windows Features or rename the “inetsrv” folder. You could also move all the folders related to IIS to another drive. For more details, refer to the options provided below.

Option 1 – Try to remove the IIS from Windows Features

The IIS is installed from the Windows Features and you can find it at Control Panel > Programs. From there, uncheck the checkbox for the Internet Information Services. Once done, click on the OK button to save the changes. Note that this process will get rid of all the related programs, services, and folders from Windows 10. So if you want to, you can just install them later on or use an offline installer from the official site of Microsoft.

Option 2 – Try renaming the inetsrv folder

The next option you can check out to resolve the problem is to rename the “inetsrv” folder. If you have uninstalled IIS from the Windows Features, this should remove the folders as well, however, it didn’t remove the folder then you have to delete the folders that are related to the IIS by following these steps:
  • First, you have to boot into the Advanced Recovery Mode and from there, open Command Prompt.
  • Next, execute this command to rename the folder from this location, C:Windowssystem32inetsrv: rename C:/Windows/system32/inetsrv/inetsrv.old
  • Once done, boot into your computer normally and try to upgrade Windows 10 again, and check if the problem is fixed or not.

Option 3 – Try to move the folders related to IIS to a different drive

  • Tap the Win + R keys to launch the Run utility and type “services.msc” in the field and hit Enter to open the Windows Services Manager.
  • Next, look for the Application Host Helper Service from the list of services and stop it.
  • Once done, take ownership of the “WinSxS” folder and then move the *windows-iis*.*” folders to another drive. You can just search using the “*windows-iis*.*” keyword in the Start Search.
  • Next, tap the Ctrl + X keys and paste the folders to another drive.
  • After that, start the update process for Windows 10 again.
Read More
Problem prevented document from being scanned
If an error suddenly pops up that states, “A problem prevented the document from being scanned” when you’re scanning a document in your computer, then you’ve come to the right place as this post will guide you on how exactly you can fix the problem. A lot of users have reported that they receive a two-layer error message when they try to scan their documents – the first screen throws an error message that says, “Error applying Settings to Driver” while the next error message states, “A problem prevented the document from being scanned”. As a result, the scanning won’t be completed which defeats the whole process of buying a printer with a scanner. As you can see the two error messages point to two different situations, while the other one is pointing at the driver, the second one points to the scanning problem. To resolve these issues, there are several suggestions you need to check such as follows:

Option 1 – Run the Printer Troubleshooter

One of the first basic troubleshooting you can perform to resolve the printer issue is running the Printer Troubleshooter. This built-in troubleshooter can detect and automatically fix the problem for you. To use it, follow these steps:
  • Tap the Win + R keys to open the Run dialog box.
  • Next, type “msdt.exe /id PrinterDiagnostic” in the field and click OK or hit Enter to open the Printer Troubleshooter.
  • Then click the Next button and follow the next on-screen instructions to fix the issue with the printer.

Option 2 – Try updating the Printer drivers

You might also want to try updating your printer drivers. All you have to do is locate the USB Composite Device. For complete details, follow the steps below.
  • First, click the Start button and type “device manager”.
  • Then click on the “Device Manager” from the search results to open it.
  • From there, look for the USB Composite Device option and right-click on it, and select the Update Driver from the options.
  • Restart your PC and then click the “Search automatically for updated driver software” option.
Note: You also have the option to download the latest version of your Printer from the manufacturer’s website.

Option 3 – Try to reset the settings of the Printer or reinstall it

If none of the two options given above worked, you can try to either reset the printer settings or reinstall the printer so that it can go back to its default state. However, if it doesn’t work, you can try to uninstall the printer as well as its related drivers. To do so, follow these steps:
  • First, go to Settings > Devices > Printer and Scanners.
  • After that, select the printer and select the Remove Device option.
  • Once done, restart your computer and check again and see if the error is now fixed.

Option 4 – Try to modify the Registry settings for the Still Image devices

In case you don’t know, Windows has Registry settings for the Still Image devices like Scanners and Printers. And these devices have vendor-specific settings that if ended up getting corrupted or misconfigured then you will most likely encounter errors like “A problem prevented the document from being scanned”. Thus, to fix this error, you can try modifying the Still Image devices registry settings, and to do that, you need to follow the instructions below but before that, make sure that you create a System Restore Point first.
  • Once you’ve created a System Restore point, tap the Win + R keys to open the Run dialog box and type “Regedit” in the field, and then hit Enter to open the Registry Editor.
  • Next, navigate to this registry key: HKEY_LOCAL_MACHINESYSTEMCurrentControlSetControlStillImage
  • From there, right-click on the “StillImage” registry key and delete it.
  • After that, exit the Registry Editor and restart your computer.
  • Once your computer has restarted, Windows will recreate the settings of the Still Image devices back to their default settings.
Read More
Disabling Security Questions in Windows
We’ve already covered disabling Security Questions If you want to disable Security Questions on your Windows 10 computer then you’ve come to the right place as this post will guide you in doing exactly that. In this post, you will be disabling Security Questions using a PowerShell script. This PowerShell script is called “Update-AllUsersQA”. It is designed to remove or disable the security questions and answers for local users on a Windows 10 computer. It lets administrators take control of the security questions in the environment and at the same time minimizes the risk that comes with them. If a user has a Microsoft account that’s configured to sign in to Windows 10 then he will not probably notice the Password Recovery questions. On the other hand, if he has a chosen local account for installing Windows, he will e prompted to create three security questions that can be used to reset the password and log into the Windows 10 account in case there is any misfortune. However, if you do not have much use for these Security Questions, then you can definitely have them disabled using a simple PowerShell script which you can download from GitHub. For more details on how to disable security questions in a Windows 10 machine, refer to the steps provided below. Step 1: You need to first download the .ps1 file from the GitHub repository. Step 2: Once you’ve downloaded the file, open the PowerShell window with admin privileges. Step 3: After that, navigate to the folder where you had saved the .ps1 file. Then copy the address of the folder location. Step 4: Next, change the directory by using the following command:
cd "folder location address"
Step 5: After that, enter the following script to disable the security questions:
Update-AllUsersQA
Once you’ve completed the steps above, the Security Questions should be disabled and you will be notified with a message stating that the feature has been disabled. On the other hand, if you have a change of heart and you want to enable the Security Questions back, here are some steps you need to take: Step 1: First, open the PowerShell window as admin. Step 2: Next, run the same script with one more parameter such as:
Update-AllUsersQA -answer SecretAnswer
Step 3: And that’s about it. Do not forget to replace the Secret Answer with your preferred one and once you’re done, it will be set as the answer for all the Security Questions. Step 4: Now all that’s left to do is go to the Settings app to change the answer to the questions and you should be good to go.
Read More
New Windows 11 update 22000.65
The first major update for Windows 11, 22000.65 has brought some bug fixes and some new features. The previous update was just a bunch of small fixes but this time Microsoft has brought much more with this one.

Windows 11 updateBug and security fixes:

  • Patch for the PrintNightmare vulnerability.
  • Taskbar icons not displaying after you rotate the screen back and forth.
  • Date and time not following format settings.
  • Contrast issues with File Explorer title bar
  • Search dropping the first keystroke when you press the Windows key and type
  • Blurry windows in ALT + Tab

Besides bug and security fixed newest update has also brought us some functional changes:

  • The start menu can no longer be moved from center
  • A search box appears at the top of the Start menu.
  • Taskbar appears on secondary monitors.
  • The refresh option appears on the jump list when you right-click the desktop. It was on the "Show more options" list before.
  • New look for certain dialog boxes such as "battery low" or "display change"
  • New snap layouts for portrait mode screens.
  • Option to troubleshoot sound problems when you right-click the volume icon.
  • Power mode settings on Power & battery settings menu.
  • Right-clicking .ps1 files offers a "Run with PowerShell" option.
  • New GIFs in the emoji panel in China
Honestly, I really like a search box on top of the start menu but really dislike the option to move it to left, I am sure that there are a lot of users who would feel more like at home if they could still move and set Windows to function and work how they want. It is very strange to me that Windows 10 was made to be so user-focused and been able to be user specific and Windows 1 takes most of these things away. I am not sure why Microsoft is going this way but I cannot really see how moving the taskbar on left is a programming issue or why it is wrong for example.
Read More
1 2 3 162
Logo
Copyright © 2022, ErrorTools. All Rights Reserved
Trademarks: Microsoft Windows logos are registered trademarks of Microsoft. Disclaimer: ErrorTools.com is not affiliated with Microsoft, nor claim direct affiliation.
The information on this page is provided for information purposes only.
DMCA.com Protection Status