How to Fix Error 80070103 in Windows 10

Error Code 80070103 –What is it?

Error code 80070103 affects Windows users who attempt to access the latest updates for hardware drivers using Windows Update. Windows 10 users who are affected by this error code will be unable to complete the upgrade process. This error code usually occurs due to the Windows Update attempts to download an incompatible version of a driver or a driver that is already downloaded on one’s device.

Solution

Restoro box imageError Causes

The cause of error code 80070103 in Windows 10 is usually easy to determine. This is due to the fact that the error code only affects users who attempt to access updates related to hardware drivers. In such cases, the error code will only occur if the Windows Update website or tool on your machine attempts to install a driver that is already present on one’s machine or the version of the driver is unsuitable for one’s machine due to lower compatibility.

Further Information and Manual Repair

Manual repair methods are very effective in helping Windows users fix problems related to error code 80070103 as well as other errors. These repair methods can usually be implemented by users with very limited technical skills. In some cases, however, you may need to contact a Windows repair technician, i.e. if you have problems following the manual repair method instructions provided or if the repair methods prove unsuccessful.

In the case of error code 80070103, the problem can be rectified by either hiding the update or reinstalling the hardware driver. Windows users can hide an update on the Windows Update website or via Windows Update within their machine’s Settings. However, users will need to contact their device manufacturer to reinstall hardware drivers in most instances. See below for further details regarding these manual repair methods.

Method One: Hide the Update

In the case where you are informed via an error message box that a driver, for instance, your graphics driver, is incompatible you may need to consider hiding the update to prevent error code 80070103 from reoccurring on your machine.

The incompatible issues will come about when the Windows Update website attempts to download a driver that is already on the device or one with a lower compatibility. When you hide the update, it is in essence, preventing Windows Update from offering this driver in the future. To complete this manual repair method, follow the steps below:

  • Step one: Visit the Microsoft Update site 
  • Step two: Select Custom on the Welcome page after completing the scan for the updates process
  • Step three: Select Hardware, Optional.
  • Step four: Open the second update for the graphics card, then select Don't show this update again check box.
  • Step five: Review and install updates.

You may also complete this process by opening Windows Update within your computer’s settings, then selecting the Optional update or available link. Once you’ve done this, you may then select the updates you would like to install and hide the update that has resulted in the occurrence of error code 80070103.

Method Two: Reinstall Hardware Driver

In the case where you need to install a hardware driver, you will need to contact the manufacturer of your device. Once you’ve contacted the manufacturer or visit the manufacturer’s official website, you can then install the latest device drivers manually. Read the instructions for the installation of the latest drivers carefully. This will ensure you avoid any problems and improve your chances of successfully fixing error code 80070103.

After you’ve contacted your device manufacturer and completed the process of reinstalling the hardware driver, check Windows Update to see whether or not error code 80070103 has been rectified. If the problem was related to your hardware driver and you successfully reinstalled the driver, the error code will not reoccur when you attempt to download the latest updates for your hardware drivers.

However, you may need to take another approach if this manual repair method fails to fix error code 80070103. For instance, consider getting help from a Windows repair technician who is equipped with the skills and expertise necessary to offer a detailed inspection of your machine. Though the error code is related to one’s drivers, the fact that a Windows error code occurred may mean that your system needs a thorough evaluation as other issues may be present.

Method Three: Download an Automated Tool

If you wish to always have at your disposal a utility tool to fix these Windows 10 and other related issues when they do arise, download and install a powerful automated tool.

If you like to learn and find out more about various Windows errors, and how to repair them go to our vast archive or use search to find articles that will explain and help you in solving your issue.
However, if you prefer to do things fast and with automatization then we are proposing to use an automated solution for your issues. The application that we are recommending is Advanced System Repair Pro
Advanced System Repair utilizes multiple tools all in one to give you a quick, simple, reliable, and very thorough diagnosis of your PC. It brings you all the tools you need in one program to clean, fix, protect, optimize and boost your PC!
1-Click Maintenance
All the tools to make it simple and easy! It's like having a professional technician at the click of a mouse.

Junk Cleaner
Keeping your computer free from unnecessary clutter also helps make your computer last longer. Like any other machine, if you keep it clean and take care of it, it will serve you better for longer!

Optimize background apps
Optimize applications background activity with the built-in Application Optimizer feature.

Disk Defrag
With a simple 1-click, Advanced System Repair speeds up your PC by assembling fragmented files on your machine and organizing them more efficiently.

Malware Removal
Finds and removes all types of harmful malware including trojans, worms, bots, adware, spyware, PUPs, and more!

Privacy Cleaner
The all-in-one privacy suite to Clean Your Tracks & Protect Your Privacy! Make your computer safe, secure, and more efficient!

System Tweak/Optimizer
ASR will analyze your complete system and settings to adjust your PC to function at its maximum performance.

Registry Cleaner
Over time, as you install and uninstall applications, the registry can become cluttered with old entries and broken settings which can result in program crashes, and annoying messages and slow the computer down.
Visit our Advanced System Repair Pro Download page to inform yourself about all the benefits of this software and get a free trial copy of it.
advanced system repair pro

Advanced System Repair Pro

One-click automated PC repair solution
ASR logo
With Advanced System Repair Pro you can easily
Replace damaged files
Restore performance
Free disk space
Remove Malware
Protects WEB browser
Remove Viruses
Stop PC freezing
DOWNLOAD
Privacy Policy | Terms of Use | Uinstall
Advanced System Repair Pro is compatible with all versions of Microsoft Windows including Windows 11

Share this article:

You might also like

Run Windows 10 from your USB drive
Windows 10 to goMany Linux users if not all of them can run their distros from a USB drive but did you know you can run Windows 10 from a USB drive as well? Microsoft has introduced all the way back to Windows 8 one feature called Windows To Go and it kept it in Windows 8.1 and in Windows 10 as well. This feature is intended as a convenient way for workers to carry their corporate environments with them, but having your own copy of Windows on a thumb drive could be handy for backup purposes, too, or if you frequently use public machines that lack your preferences/applications or that have a restricted OS.

What you will need?

In order to actually make Windows 10 run from a USB drive you will need the following things:
  1. USB drive with a minimum size of 20GB
  2. Working computer with Windows 10 running on it
  3. Rufus or another ISO to UBS tool, get Rufus here: https://rufus.ie/en_US/
  4. Windows 10 ISO file

Making Windows 10 UBS drive

Install Rufus on your Windows 10 and run it. Stick USB in PC and open Rufus. On the screen that follows choose your Windows 10 ISO image and under Image options choose Windows To Go. Click on ready and you are finished, that’s it. After Rufus finishes you have now fully working Windows 10 bootable drive which you can use on another PC for whatever reason.
Read More
Connecting Cortana on Windows and Android
Microsoft's anniversary update has come with many new features and improvements. One of these features is that Microsoft's Cortana can now be installed on your Android phone and as long as you are logged in to your Microsoft account on different devices, she can pass information between devices. You can not see battery life on your desktop PC, notifications, etc. There are some prerequisites in order to get this going, first is to have a Windows version 1607 or newer. The second is to have the last Android version

Installing Cortana on Android

  1. Download and install the Cortana app from the Google Play store.
  2. Open the app and accept the license terms.
  3. Enter the credentials for the Microsoft account you use to sign in to your PC.
  4. After a few seconds, Cortana will open.
  5. Click the settings button and select Sync Notifications.
  6. By default, missed calls, incoming messages, and low battery notifications will be turned on. You can turn this on\off from here. The only option off by default is for App notifications. Any non-system apps such as Facebook and Instagram can also send alerts to your Windows box. You can choose to enable the App notification sync option or leave it off.
  7. If you enable “App notification sync,” you will need to give Cortana permissions to read and control notifications on your phone.
  8. You can then select exactly which applications will be synched to your PC.
  9. Once done you can exit out of Cortana.

Configuring Cortana on PC

  1. Click the Windows button and type Cortana. Click the icon for Cortana and Search Settings.
  2. Scroll through the settings list and look for Send notifications between devices
  3. Click the switch to turn it on.
  4. Sign in to the same Microsoft account you used in the previous section
  5. Navigate back to the Cortana & Search settings tool.
  6. Click Edit Sync Settings. Make sure that your phone shows up on the list. You can also determine if you want PC notifications are sent to your phone.
With those settings in place, you should now start getting alerts for the items you enabled in your Action Center. As notices come in, you will see them pop up in a small bubble on the lower right of your screen. You can dismiss the notification or use the link to find a compatible app in the Windows store.
Read More
How to Fix (1058) ERROR_SERVICE_DISABLED Error in Windows 10
This post will guide you in fixing the (1058) ERROR_SERVICE_DISABLED error you can encounter when trying to launch various games. Usually, this error pops up during startup and prevents you from running the game. In fact, this error has become quite a headache for many users. Some of the games it affects are Smite, Paladins, Far Cry, and many more. In most cases, this error is caused by missing or corrupted game files. It could also be caused by the anti-cheat utility you might have installed along with your games. Whichever the cause is, you can try to check out the possible fixes given below to resolve the (1058) ERROR_SERVICE_DISABLED error.

Option 1 – Verify the Integrity of the Game files

This is the first option you can try no matter what kind of issues you are having with Steam games.
  • Double click on the game’s icon located on your Desktop and then go to the Library tab in the Steam window.
  • From there, look for GTA V from the list of games installed in your library.
  • Next, right-click on its entry and select Properties.
  • After that, navigate to the Local Files tab and click the “Verify Integrity of Game Files” button.
  • Now, wait for the tool to complete checking the game’s integrity. You should see that some of the files may have been downloaded.
  • Reopen the game and see if it now runs properly without crashing.

Option 2 – Apply some tweaks in the Service’s startup settings

As pointed out earlier, the error can also occur due to the anti-cheat tools that were installed alongside the game. These tools are usually used by games to check if you are running something which might give you an unfair advantage over other players. These anti-cheat tools include but are not limited to BattlEye, EasyAntiCheat, and PunkBuster. The error might occur if the service’s startup settings are not correctly configured which is why you can apply some tweaks in order to resolve the problem.
  • Tap the Win + R keys to open the Run dialog box.
  • Next, type “services.msc” in the field and hit Enter or click OK to open Services.
  • From the list of Services, look for any of the services mentioned above such as BattlEye, EasyAntiCheat Service, or PunkBuster Service. Then right-click on the service and select Properties from the context menu.
  • After that, check if the service is started by checking the Service status. If it is started, click on the Stop button to stop the service and if it is already stopped, leave it as it is, at least for now.
  • Next, make sure that the Startup type menu in the Service’s properties is set to Automatic before you go on.
  • Now confirm any dialog boxes that may appear as you set the Startup type and then click on the Start button located in the middle before you exit Properties.
Note: You might get the following error message when you click on the Start button:
“Windows could not start the service on Local Computer. Error 1079: The account specified for this service differs from the account specified for other services running in the same process.”
If you got the error message above, then here’s how you can fix it:
  • Tap the Win + R keys to open the Run dialog box.
  • Next, type “services.msc” in the field and hit Enter or click OK to open Services.
  • From the list of Services, look for any of the services mentioned above such as BattlEye, EasyAntiCheat Service, or PunkBuster Service. Then right-click on the service and select Properties from the context menu.
  • Now go to the Log On tab and click on the “Browse…” button.
  • After that, type in your account’s name under the “Enter the object name to select” box and click on Check Names then wait for the name to be recognized.
  • Then click OK once you’re done and type in the password in the Password field when you are prompted to do so. This should resolve the issue.

Option 3 – Try reinstalling the Anti-cheat program

If the first two options did not work out, you can try reinstalling the anti-cheat program.
  • Open Steam from your Desktop or by searching for it in the Start menu.
  • After opening the Steam client, go to the Library tab in the Steam window and then look for the Rust entry from the list.
  • Next, right-click on the game’s icon in the library and select Properties.
  • Now go to the Local Files tab under Properties and click the Browse Local Files button.
  • From there, look for BattlEye, EasyAntiCheat, or PunkBuster folder depending on the game, and then double click on it to open the folder.
  • Then right-click on EasyAntiCheat_setup.exe or the BattlEye installed file in the folder or PunkBuster and select the Run as administrator option.
  • Exit the Steam client by clicking Steam > Exit from the menu located at the top.
Read More
Fix ERR_CACHE_MISS error in Google Chrome
One of the most popular and most used web browsers commonly used by Windows users is Google Chrome. This well-known web browser has been introducing various features recently in order to stay at the top. However, it makes the web browser a lot more complex and thus prone to errors. Although this may not be a big deal, it can be quite annoying as it can interrupt your web browsing. There are various errors that can come up with this level of complexity of the web browser. One of these errors is the “This site can’t be loaded from the cache, ERR_CACHE_MISS” error message that can suddenly appear while you browse the web using your Google Chrome browser on your Windows 10 PC. Take note that when you encounter this particular error, there really is no direct fault in the Chrome browser as there are also issues with caching the website data locally in the computer. Moreover, this error can also occur when a website is coded in an incorrect manner or if there are some browser extensions or toolbars that are in conflict with the proper functioning of the website. To fix the ERR_CACHE_MISS error in Google Chrome, refer to the possible solutions laid out below.

Option 1 – Try clearing browser data

There are times when some data in the browser is conflicting with the loading of the website and triggers errors like ERR_CACHE_MISS. And so you can try to clear your browser’s data. This might be a very basic solution but oftentimes it works in fixing this kind of error in Google Chrome. Follow the steps below to clear the data in your browser.
  • Open your Google Chrome browser.
  • After that, tap the Ctrl + H keys. Doing so will open a new panel that allows you to delete the browsing history and other data in your browser.
  • Now select every checkbox that you see and click on the Clear browsing data button.
  • Then restart your Chrome browser and check if you can now open any website or not.

Option 2 – Try using the Developer Tools

You can also try using the Developer tools in Google Chrome to help you fix the ERR_CACHE_MISS error. Refer to the steps below to do so.
  • Open Google Chrome.
  • Tap the Ctrl + Shift + I keys on your keyboard and then tap the F1 key to open the Settings tab inside the Chrome Developer Tools.
  • Next, select the Disable cache option while DevTools is open and apply those settings.
  • After that, refresh your browser and check if the entries you’ve seen previously in the Network tab are gone.
  • Now try to load the same webpage again and see if the problem is resolved.

Option 3 – Reset Winsock, TCP/IP & Flush DNS

Resetting Winsock, TCP/IP, and flushing DNS might help you resolve the ERR_CACHE_MISS error. To do so, follow these steps:
  • Right-click on the Start button and click on Command Prompt (administrator) so you can pull up an elevated Command Prompt.
  • After that, execute each one of the commands listed below. And after you typed in one after the other, you have to hit Enter.
  1. netsh winsock reset – type in this command to reset Winsock
  2. netsh int ip reset resettcpip.txt – type in this command to reset TCP/IP
  3. ipconfig /flushdns – type in this command to flush the DNS cache
  • Next, restart your PC and check if the problem’s fixed.

Option 4 – Get rid of any conflicting browser extensions

  • Open Chrome and press Alt + F keys.
  • Go to More tools and click Extensions to look for any suspicious browser extensions or toolbars.
  • Click the Recycle bin and select Remove.
  • Restart Chrome and press Alt + F keys again.
  • Proceed to On Startup and mark Open a specific page or set of pages.
  • To check if the browser hijacker is still active, click Set pages, if it is active, overwrite the URL.
Note: If removing the browser extensions or toolbars didn’t work, you can also try to reset your Google Chrome browser.
  • Open Google Chrome, then tap the Alt + F keys.
  • After that, click on Settings.
  • Next, scroll down until you see the Advanced option, once you see it, click on it.
  • After clicking the Advanced option, go to the “Restore and clean up option and click on the “Restore settings to their original defaults” option to reset Google Chrome.
  • Now restart Google Chrome.
Read More
How to turn the game mode off in Windows 11
Among other things and innovations, Windows 11 brings to the table is the game mode. The game mode is a system designed to release some resources and optimize your system when Windows 11 detects that you are playing games. It also turns off automatic updates while the game is active. game mode in Windows 11
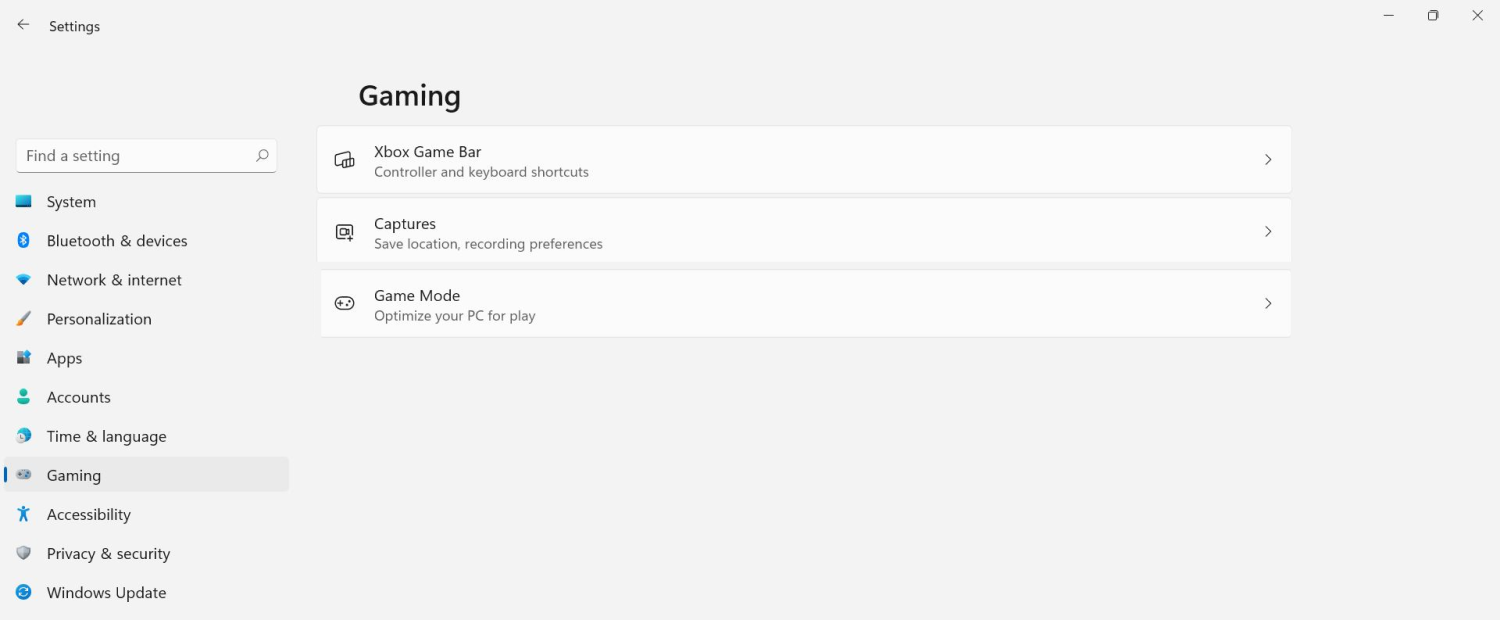
The game mode is active at all times and usually, everything works great but in some instances, it can sadly cause some performance issues. If you are one of these unlucky people where game mode is not working as supposed to do, don’t panic, we have a quick guide for you on how to turn it off.
  1. Press ⊞ WINDOWS + I to open settings
  2. Inside click on Gaming
  3. Select Game mode
  4. Click switch beside Game mode to turn it off
  5. Close settings
Everything will be automatically saved and applied and you should not have any issues from now on. If for any reason you wish to turn game mode back ON, just follow the same steps and turn the switch to ON.
Read More
Open Source Software Alternatives
Open Source Software is developed, tested, or improved through public collaboration and distributed with the idea that the must be shared with others, ensuring an open future collaboration. In other words, it is free software developed and maintained by public contribution. Many open-source projects have reached performance and usability like their paid alternatives, some have even surpassed them. Here we will explore open source alternatives to paid applications, you will find alternatives to paid ones that aim to do the same task.
  1. LINUX - alternative to Windows or macOS

    When it comes to the operating system, Windows and macOS mostly dominate the home market, but if you go a little deeper into the OS world you will hear this talk about LINUX and its distributions. LINUX is an open-source operating system, it has many various distributions aimed at different types of users and they are also open source as well. Its security and account privileges, as well as complete control over it, make it one of the best-operating systems in the world, many servers that run websites today use LINUX as their choice of operating system mostly due to its superior security features. If LINUX is good enough for big web companies, I am sure it will be at least satisfactory to you as well. Get your LINUX distribution here. open source os linux
  2. Thunderbird - alternative to outlook

    A great alternative to any mail client actually, connect all of your emails into thunderbird and use it as the centralized email client for all of your email needs. Thunderbird does not lack any features that its paid counterparts have and overall it is a great application worth installing. Grab it from here. open source email client thunderbird
  3. VLC media player - media player able to play almost anything

    Are you looking for a great media player alternative to Windows media player or iTunes? Look no further, VLC is a lightweight media player that can play almost any file type, it is customizable and packed with features even its paid counterparts would envy. Its playback features are unmatched by other applications and once you try it, I am sure you will hardly go back from it. Give it a go and grab it from here. open source media player vlc
  4. KeePass - password manager

    Keepass is a simple, user-friendly lightweight password generator and manager, it uses industry-standard AES encryption and two-factor authentication to keep the details of your accounts safe and secure. you can store him and the database on a USB stick for safekeeping making it a great one to use on a go, wherever you need it. Get it from this link. open source password manager keypass
  5. FileZilla - FTP client

    A lightweight and future-rich FTP solution. It supports remote file editing and resuming of lost transfers, overall great application which anyone who needs this type of software should not overlook. Download it from its official website. open source FTP client FileZilla
  6. Audacity - alternative to Audition, Fl, apple logic pro,...

    Digital audio editor and recording computer software with some great features like recording audio from multiple sources, post-processing of all types of audio, including podcasts by adding effects such as normalization, trimming, and fading in and out. Audacity has a great following and it is well documented, easy to learn and use. Grab it from here. open source sound editor audacity
  7. Shortcut - alternative to adobe premiere, avid media composer, DaVinci resolve

    The shortcut is a video editor application that demonstrates how long an open-source project can go if enough dedication and work are put into it, started as not so great and not so feature-packed in beginning, today it can easily contend with its paid counterparts with its non-destructive editing, color gradation, keyframing, etc. It is running and using FFmpeg, an open-source video framework that lets it open and works with virtually any video or audio format. Download it from here. open source video editor shotcut
  8. Gimp - alternative to adobe photoshop

    This one has been around since 1996 and it is one of the best maintained open source applications. With its features like built-in support for layers, filters, and automatic photo enhancement. It also makes it easy to create new graphic design elements and you can really take things to the next level by downloading plug-ins created by the broader GIMP open source community. Gimp is the best pixel manipulation-free tool on the market and with the right skills, it can go side by side with adobe's flagship product. Check it out here. open source photo editor gimp
  9. Inkscape - alternative to adobe illustrator, Corel draw

    What is Gimp for photoshop that is Inkscape for illustrator. This free open-source vector graphic tool does not fall behind with its tools in comparison to its paid counterparts and I would highly recommend it for anyone. Features like alpha blending, cloning on-point path manipulations can assure that you can create anything you want inside it. get your copy from here. open source vector tool inkscape
  10. Libre office - alternative to MS office

    Libre office is one of the most quality office suite there, it has spreadsheets, word processor, presentation app, calculation applications, database application, and diagrams. All these applications create and make one great suite that can open Microsoft Office files and even work with them naturally. Completely free and active in development there is no reason, not t use it in your daily routine. Go to its official website and download it for a test run. open source office suite libre office
  11. Amarok - alternative to iTunes

    Amarok is an audio player with a broad range of features like integration with multiple Web audio services, dynamic playlists, bookmarks, scripting, context view, and more. get it from here. open source music player amarok
  12. PDF Creator - alternative to adobe acrobat

    As its paid counterpart PDF Creator lets you make PDF files from any application that could print. It works the same way as adobe acrobat and supports encryption and digital signature, it lacks in PDF forms a little but if that is not something that you need, it is a great alternative to acrobat and completely free. Download it from here. open source PDF maker PDFCreator
  13. Blender - Alternative to Autodesk Maya, Autodesk 3dmax, foundry Modo, cinema4d,...

    3D modeling and animation software is very expensive. From the point of home user long it has been lost dream to have industry quality 3D modeling, animation, and rendering application for an affordable price. Blender has made that dream a possibility, completely free and open-source this package offers everything that its paid counterparts offer, some could even argue that since its open-source nature and availability of full code it offers even more. Why you are still here? Go get it here. open source 3d application blender
  14. Bluefish - alternative to Adobe Dreamweaver

    When it comes to web editing and code editing applications, notepad ++ seems like a person go-to application, but if you prefer a more professional suited IDE for web development check out Bluefish, auto-filling, code syntax, and constant development make sure that this application will not go away soon and it is worth investing your time in it. Get it from here. open source wed editor bluefish
  15. ClamWin - alternative to Kaspersky, BItdefender, Norton

    This antivirus has over 600000 users and active database updates also feature a full email scanner, scanning scheduler, and File Explorer integration. It is far better than other freeware alternatives and if you are looking for a free antivirus option look no further, ClamWin is here to stay. Grab it from here. open source anti virus ClamWin
  16. Natron - alternative to adobe aftereffects, foundry nuke

    Full-featured node-based composition and effects suite. Natron is a powerful Digital Compositor that can handle all of your 2D/2.5D needs. Its robust OIIO file formats and OpenFX architecture is what makes Natron the most flexible open-source compositor for the visual effects community. Its interface and functionally are the same across all platforms such as macOS, Linux, and Windows. Natron has a powerful keying, roto/roto paint, 2D tracking tools that are staple for all current film production project that requires visual effects. Get natron from here. open source composition and effect application natron
  17. Clonezilla - alternative to Norton Ghost

    When it comes to cloning hard drives usually there is only one application, Norton ghost. Clonezilla tends to change that by offering the same usability as the ghost. Grab your copy from here. open source HD clone clonezilla
  18. FreeCAD - alternative to Autodesk AutoCAD

    Autodesk AutoCAD has years of development and dedication of its team behind it to keep it as the best CAD application on the market and it shows. However, if you are not really a hardcore professional who needs all of AutoCAD features and can live without some automation inside it FreeCAD is one of the best free open source options, it will certainly get the job done and with its dynamic simulation and analysis, it is guaranteed that you can achieve same results as in AutoCAD with little more time investment. Get if here. open source CAD freecad
  19. Octave - alternative to MATLAB

    Octave is the best open-source educational tool used for numerical computation with an interactive environment. The tool features powerful mathematics-oriented syntax with built-in plotting and visualization tools and also Octave syntax is largely compatible with Matlab. Get your copy from here. open source math tool octave
  20. Godot - alternative to Unity3D, Unreal

    Godot is a lightweight feature-packed node-based game development engine, completely open-source and free to use for commercial projects. The engine has reached 3.2 version and it is more and more adopted by various independent game makers across the globe, recently there are to of video tutorials and documentation to get you up and running and its open-source nature lets you modify the engine itself in any way that suits and benefits you. Also, any project made with Godot is completely yours, there are no hidden fees or anything similar. Download it from here. open source game engine godot

Conclusion

That's it, my pick for 20 open source alternatives which I believe you should at least try and if you end up with at least one, you have saved some hard-earned money. And always remember:
  1. Open-source programs give you complete freedom without any shady terms and conditions.
  2. Open-source software code is readily available for anyone who wants it, so anyone can use it, share it, modify it for their own needs, and study it.
  3. No spying eyes, no tracking, and no telemetry
  4. In some cases, open-source tools offer features or performance benefits that surpass their commercial counterparts.
  5. No hidden charges, completely free.
If you would like to read more helpful articles and tips about various software and hardware visit errortools.com daily.
Read More
How to Fix Registry Error Code 19

How to Fix Registry Error Code 19

What is the Registry Error Code 19?

Code 19 is a Windows PC error code that indicates a damaged or corrupt registry. This code usually appears when trying to start a connected device, the DVD/ CD ROM drive. Code 19 is a type of Device Manager Error code. When you experience Code 19, the error message is displayed on your Windows screen in either of the following formats:

"Windows cannot start this hardware device because its configuration information (in the registry) is incomplete or damaged. To fix this problem you should uninstall and then reinstall the hardware device. (Code 19)"

"Windows cannot start this hardware device because its configuration information (in the registry) is incomplete or damaged. To fix this problem you can first try running a Troubleshooting Wizard. If that does not work, you should uninstall and then reinstall the hardware device. (Code 19)"

You might encounter other error messages such as error code 42.

Error Causes

Typically the underlying cause of this error code is problems in the registry. The error should be fixed timely without any delays before the damage sets in. Registry issues are critical PC errors. If not resolved it can lead to system freeze, crash, and failure. You are most likely to lose all your important data.

Further Information and Manual Repair

If you have come across this error on your computer, you don’t need to panic. Though this is a serious issue the good news is that it is easy to resolve. You don’t have to be a computer programmer, technically sound or hire a technician to fix the error on your system. Here are a couple of ways to work your way out of this problem:

1. Uninstall and then Reinstall the  DVD/CD ROM Drive

For this here’s what you need to do: simply click on the start menu, and type Device Manager in the search box, and press enter. When the device manager window opens locate the DVD/CD ROM drives. Click on the + sign to expand it. Now right click on the DVD drive click uninstall. After doing this, restart your PC. On the restart, Windows should automatically detect and reinstall the DVD driver. Once the driver installation is complete now see if the DVD drive works. If the error still appears, then you need to repair the registry by deleting the corrupt registry entries. You can download drivers automatically by using a tool such as Restoro.

2. Trouble Shooting Method to Delete the Corrupt Registry Entries

To remove the corrupt registry entries, go to Start and select Run. Type ‘Regedit and press enter to open the registry editor windows. To continue you may be asked to enter the administrator password, insert it to proceed. Now the registry window will be displayed. Here locate the registry key HKEY_LOCAL_MACHINE, then navigate to the following sub registry key HKEY_LOCAL_MACHINESYSTEMCurrentControlSetControlClass{4D36E965-E325-11CE-BFC1-08002BE10318} Here you will see the upper filters registry entry in the right pane. Right-click on the upper filter and select delete. You will be prompted for the confirmation for deletion. Click on the yes tab to confirm. Exit the editor and restart your computer. If you are not technically sound, this may be a little confusing for you, and besides it does not guarantee to resolve all the registry issues on your PC so chances are that Code 19 error may reappear in a short time. To resolve registry issues for the longest time and ensure that errors like Code 19 don’t pop up every now and then, you need to perform proper and in-depth registry cleaning. For this, it is advisable to download Restoro. Congratulations, you have just fixed Registry Error Code 19 in Windows 10 all by yourself. If you would like to read more helpful articles and tips about various software and hardware visit errortools.com daily. Now that’s how you fix Registry Error Code 19 in Windows 10 on a computer. On the other hand, if your computer is going through some system-related issues that have to get fixed, there is a one-click solution known as Restoro you could check out to resolve them. This program is a useful tool that could repair corrupted registries and optimize your PC’s overall performance. Aside from that, it also cleans out your computer for any junk or corrupted files that help you eliminate any unwanted files from your system. This is basically a solution that’s within your grasp with just a click. It’s easy to use as it is user-friendly. For a complete set of instructions in downloading and using it, refer to the steps below Perform a full system scan using Restoro. To do so, follow the instructions below.
      1. Download and install Restoro from the official site.
      2. Once the installation process is completed, run Restoro to perform a full system scan. restoro application screen
      3. After the scan is completed click the “Start Repair” button. restoro application screen
Read More
New toys in new PowerToys for Windows
A new update to popular Microsoft PowerToys has brought a few new features that are aimed at speeding up the workflow. PowerToysThe first new feature that was slid in is Always on top utility. With this cool utility, you can keep the window as the name suggests, always on top of other windows. To enable this cool feature all you have to do is press the key combination of ⊞ WINDOWS + CTRL + T and an active window will be now always on top of all other windows. To reverse and unlock this window from being always on top just press key combination again. A second new feature is a really great one and my favorite thing to happen in power toys. Often we are making the search in our browsers to find stuff, things, maybe some explanations, information, etc. The newest update in power toys brings this to a whole new dimension. While you are on PC you just simply need to type ?? followed by questions like: ?? When doctor strange 2 is coming out and that will launch your default browser with your chosen search engine and provide you with the answer. Third and final thing is G-code support in the file explorer preview pane and thumbnails, meaning that if you work with CNC equipment you can now have a thumbnail preview of the code itself inside File Explorer. And that’s it for now, thank you for coming and reading, Take care and I hope to see you next time.
Read More
Enable or Disable Automatic Encryption
You might be familiar with the Encryption File System or EFS algorithm if you rather keep your files and folders encrypted. Encryption File System is a built-in feature in Windows 10 which allows users to secure their important files. Although there is an alternative way for you to secure your data on your Windows 10 computer, you can’t ignore the fact that the main advantage of an Encryption File System over BitLocker is that the former can help you encrypt a particular folder rather than encrypting the whole hard drive partition. If you move a file inside a folder encrypted with the Encrypting File System it will automatically get encrypted. There are some users who like this feature but unsurprisingly, there are some that don’t. So if whether you want your files encrypted when you place them in an encrypted folder or if you want to keep it as it is, read on as to how you can do it either way. You can enable or disable automatic encryption of files moved to encrypted folders in Windows 10 using the Registry Editor or the Group Policy Editor. Before you proceed, make sure to create a System Restore Point first because the modifications you’re about to make in your computer might affect its overall functioning so if anything goes wrong, you can always undo the changes. Once you have that covered, refer to the options given below to enable or disable automatic encryption in Windows 10.

Option 1 – Enable or disable automatic encryption using Registry Editor

  • Press the Win key + R key at the same time to open the Run dialog box.
  • Then type “Regedit” in the field and press Enter to open the Registry Editor and if a User Account Control or UAC prompt appears, just click Yes to proceed.
  • After opening the Registry Editor, navigate to this key location: HKEY_LOCAL_MACHINESOFTWAREMicrosoftWindowsCurrentVersionPoliciesExplorer
  • Next, right-click on Explorer and select New > DWORD (32-bit) Value and then name the newly create DWORD to “NoEncryptOnMove” and press Enter to save it.
  • After that, double click on the NoEncryptOnMove DWORD and set its value to the following preferences:
    • 1 – Disable Auto Encryption of files moved to encrypted folders.
    • 0 – Enable Auto Encryption of files moved to encrypted folders.
  • Now close the Registry Editor and restart your computer to successfully apply the changes made.

Option 2 – Enable or disable automatic encryption using the Group Policy Editor

  • Press the Win + R keys to open the Run box and type “gpedit.msc” in the field and press Enter to open the Group Policy Editor.
  • After that, navigate to this path: Computer ConfigurationAdministrative TemplatesSystem
  • Next, look for the “Do not automatically encrypt files moved to encrypted folders” option and double click on it to set the policy. From there, you will see the following description:
“This policy setting prevents File Explorer from encrypting files that are moved to an encrypted folder. If you enable this policy setting, File Explorer will not automatically encrypt files that are moved to an encrypted folder. If you disable or do not configure this policy setting, File Explorer automatically encrypts files that are moved to an encrypted folder. This setting applies only to files moved within a volume. When files are moved to other volumes, or if you create a new file in an encrypted folder, File Explorer encrypts those files automatically.”
  • Now select one of the radio buttons below depending on your preference:
    • Not Configured or Disabled: Enable Auto Encrypt of files moved to EFS Encrypted folders.
    • Enabled: Disable Auto Encrypt of files moved to EFS Encrypted folders.
  • Then click on the Apply and OK buttons to save the changes made.
  • Exit the Group Policy Editor and restart your computer.
Read More
Fix The default gateway is not available Error
If you were having some problems with your internet connection and you tried to run the Internet Connections troubleshooter but it displays an error message instead that says, “The default gateway is not available”, read on as this post will show you what you can do to fix this error. The first thing you can do to fix this error is to restart your computer and then try to run the Internet Connections troubleshooter again. However, if you still see the same error message, then you might want to troubleshoot the problem further. You can try to install the Network driver or reinstall the Network adapter drivers. You could also verify the power saving mode or reset TCP/IP as well as disable the Firewall temporarily.

Option 1 – Try installing the Network driver

The very first thing you can do to resolve the error is to install the network driver. It is a common solution to this kind of problem and most users encounter it right after a fresh installation of Windows 10. So if you have done this, then you need to install the network driver so that the network adapters can start working. You can find the network driver in the motherboard CD. On the other hand, if you are using a laptop, you might have to use another computer or mobile to download the network driver from the manufacturer’s website.

Option 2 – Update the Network Adapter drivers

If the first option is not applicable to you since you already have network drivers in your computer, you might want to update the Network Adapter drivers by following these steps:
  • Tap the Win + R keys to launch the Run window and then type in the “msc” command and hit Enter to open the Device Manager window.
  • Under the Device Manager, you will see a list of drivers. From there, look for the Network Adapters and expand them.
  • Then right-click on each one of the Network drivers and update them all.
  • Restart your PC and see if it helped in fixing the BSOD error.
Note: If updating the network drivers didn’t help in fixing the “Windows could not find a driver for your network adapter” error, you can also try to uninstall the very same drivers and restart your Windows 10 PC. After that, the system itself will reinstall the drivers you just uninstalled. Alternatively, you can also download and install the drivers from the manufacturer’s website directly.

You could also try to reinstall the network adapter driver, refer to these steps:

  • Open the Devices Manager from the Win X Menu.
  • Then locate the device drivers and right-click on them to open the Properties.
  • After that, switch to the Driver tab and click on the Uninstall Device button.
  • Follow the screen option to completely uninstall it.
  • Finally, restart your computer. It will just reinstall the device drivers automatically.

Option 3 – Try to verify power-saving mode

If you are using a Windows 10 laptop, then you should know that the Power Options panel plays an important role. So if you’re getting an error in your laptop, you have to check some settings that are related to the Power Saving mode. To do so, follow these steps:
  • Open Control Panel and go to Hardware and Sound and click on Power Options.
  • Next, click on the “Change plan settings” option of your selected plan and then click the “Change advanced power settings” option.
  • After that, you should see the Power Options window, and here, expand the Wireless Adapter Settings and Power Saving Mode.
  • Now make sure that the Maximum Performance option is selected. If it’s not, select it and save the changes you’ve made.

Option 4 – Try to reset the TCP/IP

As you know, the TCP/IP or the Internet Protocol is the most important thing if you want to use the internet on your computer. That’s why if it ends up getting corrupted, you need to reset the TCP/IP to fix the problem. To reset TCP/IP, refer to these steps:
  • In the Windows start the search, type “command prompt” and right-click on Command Prompt from the search results.
  • Then select the “Run as administrator” option to open Command Prompt with admin privileges.
  • After that, execute this command: netsh int ip reset resettcpip.txt
  • Once it’s done, exit Command Prompt and restart your computer and then check if the error is now fixed.

Option 5 – Temporarily disable Firewall

On the other hand, the error could also be due to the Firewall software installed on your computer. Thus, disabling them or any security software installed on your computer is always a good idea you can try when you’re not able to access the shared drive on your computer. There are times when you encounter problems like the error “The default gateway is not available” due to interference of antivirus or security programs. Thus, you have to disable both your antivirus program and Windows Defender Firewall for the meantime and check if it fixes the error or not
Read More
1 2 3 162
Logo
Copyright © 2022, ErrorTools. All Rights Reserved
Trademarks: Microsoft Windows logos are registered trademarks of Microsoft. Disclaimer: ErrorTools.com is not affiliated with Microsoft, nor claim direct affiliation.
The information on this page is provided for information purposes only.
DMCA.com Protection Status