How to Fix Error Code 22

How to Fix Error Code 22

Error Code 22 - What is it?

Code 22 is a type of Device Manager Error code. Device manager errors are reported by the drivers causing the problem. It indicates that the devices are disabled in the Device Manager.

This error code is displayed in the following format:

This device is disabled. (Code 22)

It looks like a very simple matter to enable a device from the Device Manager interface but if the device fails to load then there are likely greater underlying problems with the drivers.

Drivers allow hardware devices to communicate with other hardware devices and the operating system.

Drivers contain instructions and operating procedures for devices. Without a driver, a hardware device will not function and may not even appear in the Device Manager.

Solution

driverfix boxError Causes

Common causes of error code 22 are:

  • Device is disabled
  • Driver is outdated
  • The driver is missing or corrupt
  • The previous attempt to update the driver failed
  • Device is damaged
  • The device is not configured as the default device

This means that though the error code 22 typically indicates that the device reporting the error is disabled but other causes can also be associated with the error occurrence.

Further Information and Manual Repair

Here are some of the best and easy do-it-yourself methods to resolve error 22 on your PC. Try these methods to repair the issue.

Method 1

If the error code 22 is triggered due to a disabled device, then all you need to do to resolve the issue is enable the device.

To enable the disabled device, follow these steps. Simply go to the start menu and type Device Manager in the search bar. Now click on the Device Manager and then click Actions.

After you Click Actions, double click Enable Device. The Enable Device Wizard will pop up. Follow all the prompts from the Enable Device Wizard. This will hopefully resolve the issue.

Method 2

If method 1 doesn’t work then this means the problem is deeper than you think.  The problem can be triggered by the missing, corrupted, or outdated driver for the device reporting the error.

In such a situation it is advisable to reinstall the driver for the device. To do this first uninstall the driver for the device reporting error code 22 then reinstall the driver.

  • For this simply click the Start menu, go to the control panel and then click Performance and Maintenance, and then System.
  • In the new window, you will then see a tab called Hardware and the Device Manager.
  • Double click on the device whose driver you need to uninstall.
  • Click on the properties window with a tab marked driver. Then click on the driver you want to uninstall.

To activate changes reboot your PC. Now reinstall the latest and updated version of the driver uninstalled using the Plug and Play feature.

Method 3

Sometimes devices can also get damaged due to registry issues. In such an event, install Restoro.

It is a PC Fixer deployed with a registry cleaner. The registry cleaner wipes out all the unnecessary and obsolete files damaging the registry and repairs them in a few minutes.

Click here to download Restoro.

If you like to learn and find out more about various Windows errors, and how to repair them go to our vast archive or use search to find articles that will explain and help you in solving your issue.
However, if you prefer to do things fast and with automatization then we are proposing to use an automated solution for your issues. The application that we are recommending is Advanced System Repair Pro
Advanced System Repair utilizes multiple tools all in one to give you a quick, simple, reliable, and very thorough diagnosis of your PC. It brings you all the tools you need in one program to clean, fix, protect, optimize and boost your PC!
1-Click Maintenance
All the tools to make it simple and easy! It's like having a professional technician at the click of a mouse.

Junk Cleaner
Keeping your computer free from unnecessary clutter also helps make your computer last longer. Like any other machine, if you keep it clean and take care of it, it will serve you better for longer!

Optimize background apps
Optimize applications background activity with the built-in Application Optimizer feature.

Disk Defrag
With a simple 1-click, Advanced System Repair speeds up your PC by assembling fragmented files on your machine and organizing them more efficiently.

Malware Removal
Finds and removes all types of harmful malware including trojans, worms, bots, adware, spyware, PUPs, and more!

Privacy Cleaner
The all-in-one privacy suite to Clean Your Tracks & Protect Your Privacy! Make your computer safe, secure, and more efficient!

System Tweak/Optimizer
ASR will analyze your complete system and settings to adjust your PC to function at its maximum performance.

Registry Cleaner
Over time, as you install and uninstall applications, the registry can become cluttered with old entries and broken settings which can result in program crashes, and annoying messages and slow the computer down.
Visit our Advanced System Repair Pro Download page to inform yourself about all the benefits of this software and get a free trial copy of it.
advanced system repair pro

Advanced System Repair Pro

One-click automated PC repair solution
ASR logo
With Advanced System Repair Pro you can easily
Replace damaged files
Restore performance
Free disk space
Remove Malware
Protects WEB browser
Remove Viruses
Stop PC freezing
DOWNLOAD
Privacy Policy | Terms of Use | Uinstall
Advanced System Repair Pro is compatible with all versions of Microsoft Windows including Windows 11

Share this article:

You might also like

What is Trojan Kryptik and what does it do
Trojan. Kryptik is a malicious computer infection known as a Trojan horse. Trojan. Kryptik can load at startup and recreate itself which makes it difficult to manually remove from the infected computer. Trojan. Kryptik can compromise the infected system by allowing a remote hacker to gain access without the user's permission or knowledge. Trojan. Kryptik can also lead to the infection of other unknown malware parasites.

trojan kryptic
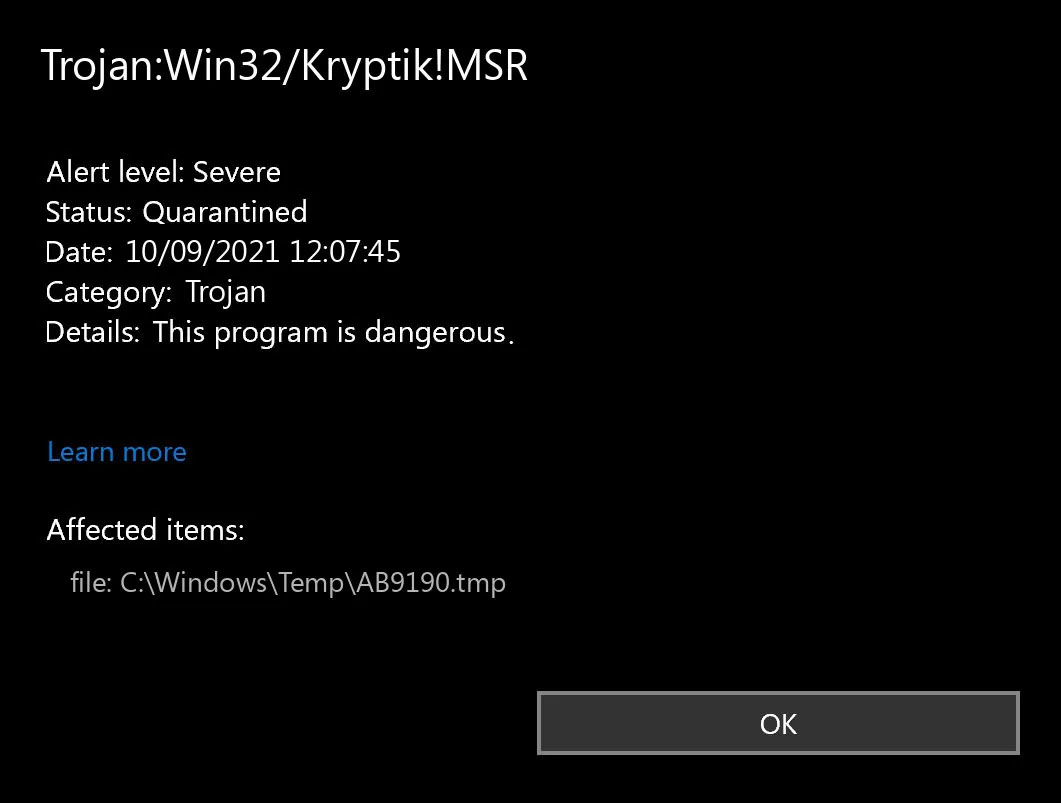
Trojan.Kryptik creates the following registry entry or registry entries:

Directory %ALLUSERSPROFILE%\windrivgr 19.7 %LOCALAPPDATA%\DsHcaJnIIz File name without path scaalqtw.exe Regexp file mask %ALLUSERSPROFILE%\sqldump.exe %APPDATA%\b[NUMBERS].exe %APPDATA%\Microsoft\Windows\Start Menu\Programs\Startup\[RANDOM CHARACTERS].com.url %APPDATA%\Origin\update.vbe %APPDATA%\Stanfind.exe %APPDATA%\vpn gui.exe %LOCALAPPDATA%\Microsoft\Windows\Symbols\wvfilters.sys %TEMP%\nvc.exe %TEMP%\system.exe %TEMP%\winsrvcs32.exe
Read More
Fix Windows Update error 0x80070003
If you are trying to run Windows Update but encountered an Error 0x80070003, read on as this post will guide you on how you can fix it. This kind of error in Windows Update can occur when you activate Windows Firewall or download from the Windows Store. This kind of error indicates that the Windows Update service or WUAUSERV is not started or that the Background Intelligent Transfer Service or BITS can’t be started. Aside from that, you can also encounter this error with the other Windows Update components. To fix the Windows Update error 0x80070003, you can try to run the built-in Windows Update troubleshooter or replace the old Configuration file named “Spupdsvc.exe”. You can also try to reset the Windows Update components or check the status of all the Windows Update-related services, as well as run a System File Checker scan.

Option 1 – Run the Windows Update Troubleshooter

Running the built-in Windows Update troubleshooter is one of the things you can first check out as it is known to automatically resolve any Windows Update errors like error code 0x80070003. To run this troubleshooter, Refer to these steps:
  • Tap the Win + I keys to open Settings.
  • From there, click Update and Security and go to the Troubleshoot section.
  • Next, select Windows Update and click the “Run the troubleshooter” button and wait until it’s finished, and then try to run Windows Update again.

Option 2 – Try replacing the old Configuration file named “Spupdsvc.exe”

The next thing you can do to fix the Windows Update error is to replace the Spupdsvc.exe file. This is a process file that comes under the Microsoft Update RunOnce service. So when an update becomes available for your computer, the process responsible for performing the upgrade is notified. In addition, the RunOnce entry is also added to the registry for the spupdsvc.exe and this process is executed when your computer restarts and when you log on.
  • In the Start Search, type “command prompt” and from the search results, right-click on Command Prompt and select the “Run as administrator” option.
  • Next, execute this command to replace the old configuration of the Spupdsvc.exe file with a new one: c m d (remove spaces on CMD) /c ren %systemroot%System32Spupdsvc.exe Spupdsvc.old
  • After that, try to run Windows Updates again and check if the error is now gone.

Option 3 – Try deleting the files from the SoftwareDistribution folder and resetting the Catroot2 folder

The downloaded Windows Updates are placed in a folder called “SoftwareDistribution”. The files downloaded in this folder are automatically deleted once the installation is completed. However, if the files are not clean up or if the installation is still pending, you can delete all the files in this folder after you pause the Windows Update service. For complete instructions, refer to the steps below.
  • Open the WinX Menu.
  • From there, open Command Prompt as admin.
  • Then type in the following command – don’t forget to hit Enter right after typing each one of them.
net stop wuauserv net start cryptSvc net start bits net start msiserver
  • After entering these commands, it will stop the Windows Update Service, Background Intelligent Transfer Service (BITS), Cryptographic, and the MSI Installer
  • Next, go to the C:/Windows/SoftwareDistribution folder and get rid of all the folders and files thereby tapping the Ctrl + A keys to select them all and then click on Delete. Note that if the files are in use, you won’t be able to delete them.
After resetting the SoftwareDistribution folder, you need to reset the Catroot2 folder to restart the services you just stopped. To do that, follow these steps:
  • Type each one of the following commands.
net start wuauserv net start cryptSvc net start bits net start msiserver
  • After that, exit Command Prompt and restart your computer.

Option 4 – Check the status of some Windows Update Services

  • Tap the Win + R keys to open the Run dialog box.
  • Next, type “services.msc” in the field and hit Enter or click OK to open Services.
  • From the list of Services, look for the following services and make sure that their Startup type is as follows:
    • Windows Update – Manual (Triggered)
    • Background Intelligent Transfer Service – Manual
    • Cryptographic Services – Automatic
    • Workstation Service – Automatic
  • After that, check if the Service status of the listed services above are set to Running. If they’re not, click on the Start button to start these services and then check if the Windows Update error 0x80070003 is now fixed or not.

Option 5 – Run the System File Checker Scan

If manually resetting the Windows Update components didn’t work, you can run a System File Checker scan instead. It is a built-in command-line utility that replaces bad and corrupted system files with good system files that might be the cause why you’re getting the error when you try updating your computer. To run the SFC command, follow the steps given below.
  • Tap Win + R to launch Run.
  • Type in cmd in the field and tap Enter.
  • After opening Command Prompt, type in sfc /scannow
The command will start a system scan which will take a few whiles before it finishes. Once it’s done, you could get the following results:
  1. Windows Resource Protection did not find any integrity violations.
  2. Windows Resource Protection found corrupt files and successfully repaired them.
  3. Windows Resource Protection found corrupt files but was unable to fix some of them.
  • Restart your computer.
Read More
How to Fix Windows 10 Error Code 0x803f7001

How to Fix Windows 10 Error Code 0x803f7001

Error Code 0x803f7001 – What is it?

Error code 0x803f7001 occurs when there is a failure to update your Windows operating system to Windows 10. Usually, a message box pops up with the following statement, “Windows is not activated as your previous version of Windows on this device was not activated prior to upgrade to Windows 10.” When this occurs, common symptoms of the error code will manifest themselves:

  • Inability to upgrade your Windows operating system to Windows 10
  • Message box with error code 0x803f7001

Solution

Restoro box imageError Causes

The cause for error code 0x803f7001 varies. Usually, it occurs for two reasons: 1) when during the process of upgrading to Windows 10, no valid Windows license or product key is found for your device or 2) when a user performs a clean installation of Windows 10. During a clean installation, a new license is usually required to allow you to activate your copy of Windows.

Further Information and Manual Repair

There are two main options available to fix error code 0x803f7001. Usually, the use of a valid product key can help users rectify error code 0x803f7001. You may also try an automated tool to access the best solutions.

Method One: Use a Valid Product Key

A product key is a code containing 25 characters that enable users to activate Windows. You will need to enter the product key in the exact order it appears in order to install your Windows operating system. All users will be able to access this code in an email or on a card within the Windows DVD package they receive upon purchasing a version of the Windows operating system.

To solve error code 0x803f7001, complete the following steps.

  • Step one: Click the Start button then select Settings
  • Step two: Select Update and Security then Activation
  • Step three: Click the Change product key
  • Step four: Type in your valid product key. (To do this ensure the 25 characters are accounted for and in the correct order.)

If the issue causing error code 0x803f7001 relates to your product key, then the instructions within method one will rectify the issue. You will be able to install and activate Windows 10. However, if while attempting to update your Windows operating system, the error occurs once more, you will need to follow the instructions in the manual repair below.

You may also consider contacting a Windows repair technician if you are uncertain of your ability to perform the tasks required to fix error code 0x803f7001. This IT professional will be able to use his or her technical knowledge to perform complex manual repair tasks if the need arises.

Method Two: Install an Automated Tool

Automated tools help PC users eliminate common issues such as Windows error codes. To address or rectify error codes like error code 0x8007007b download a powerful automated tool on your machine. This tool enables users to access quick solutions. It also scans for and corrects issues that may result in error codes or poor PC performance.

Read More
Mapi32.dll Outlook Error - Quick Fix

Mapi32.dll Outlook Error

What is Mapi32.dll Outlook Error?

Mapi32.dll is a Windows Messaging Application Programming Interface that enables Windows to perform various email functions and launch messaging programs like Microsoft Outlook and Microsoft Office. The inability of the interface to execute email functions properly results in the Mapi32.dll Outlook Error. This error occurs mostly when you are attempting to upgrade the operating system to a new version.

Solution

Restoro box imageError Causes

The common causes of the Mapi32.dll Outlook Error during the OS upgrade are:
  • Damaged or Corrupt Outlook user profile
  • The software is overwritten by some other program
  • Outlook PST file corruption
The Mapi32.dll Outlook Error message is displayed in either of the following forms:
  • Mapi32.dll is missing
  • Cannot start Microsoft Office Outlook. Mapi32.dll is corrupt or the wrong version.
  • Mapi32.dll was not found
  • Mail is not installed

Further Information and Manual Repair

So, what if you experience this issue and how do you fix it? Well, first there is no need to panic as Microsoft has recognized this issue and provided adequate solutions to fix this problem in no time. However, to ensure the Mapi32.dll Outlook error is a quick fix, you must first understand the cause of the issue and the message displayed on the screen.
  1. Let’s say the errors occur because your Outlook profile is corrupt. In this scenario, the best solution is to create a new Outlook profile. Regardless of whether you have Windows Vista or XP, to create your new Outlook profile, first, you will have to click on the Control Panel, then User Account, and then Mail. Once you click on the Mail tab, the mail set up dialog box will open. In this dialog box there will be a ‘Show Profiles’ tab, click and then click the Add tab that appears next. Now type the name for your new Outlook profile and then click ‘OK’. After that, add an email account to go with the profile.
  2. If Mapi32.dll is missing or corrupt, you will have to run ‘Fixmapi.exe’ to resolve the problem. It is located in the System32 folder inside the Windows directory in Windows Explorer.
  • Therefore, first start Windows Explorer and then locate the following folder on your computer: C: /Program Files/Common Files/System/Msmapi1033
  • Now find Fixmapi.exe and double click it
  • After that locate the Mapi32.dll file and rename it to MSmapi32.old and press enter.
  • Restart your computer when finished.
A word of advice for computer users is to scan for viruses with an antivirus program or a registry cleaner regularly to prevent the Mapi32.dll Outlook error from occurring in the first place. Viruses often latch onto .dll files and corrupt them. It’s always best to have a forward-looking approach.
Read More
Guide to Patching Error Code 34

Guide to Fixing Error Code 34

Code 34 - What is it?

Code 34 is one of the several Device Manager error codes. This error code indicates that a hardware device on your PC is not properly configured.

This usually occurs when the device installed on your system is a non-plug and play. Non-plug and play devices don’t configure automatically and require manual configuration from the users end.

Error code 34 is usually displayed in the following format:

“Windows cannot determine the settings for this device. Code 34”

Solution

driverfix boxError Causes

Error code 34 may be triggered due to several reasons like:

  • Improper device configuration
  • Missing or outdated drivers

Device Manager error codes like code 34 are easy to fix. These error codes don’t indicate any serious PC problem, nor are they fatal like blue screen of death error codes.

Nonetheless fixing it immediately is advisable to ensure the proper functioning of the plugged-in hardware device. If you don’t resolve it, you may not be able to use the device.

Further Information and Manual Repair

When PC users experience error codes like code 34, they instantly think of hiring a professional for repair especially if they lack technical understanding.

If you are not a technical whiz and you are also thinking of hiring a professional for the repair job, then don’t! Here’s why, to begin with, Device Manager error codes can be resolved easily, better yet you can fix it by yourself without spending a dime even if you are not technically sound.

To help you, below is a list of easy and effective repair solutions for error code 34. Try them to resolve the issue.

Method 1 - Configure the Device by Using Device Manager

This is one of the best ways to resolve error code 34 on your system. The procedure will take 5 to 7 minutes. Simply follow the steps illustrated below to configure the problematic device on your PC.

  1. First off, go to the start menu
  2. Now type Device Manager in the search bar and press enter to continue
  3. Now in the Device Manager locate the problematic device and click on it
  4. Click on the resources tab to change the resource settings
  5. Now click on the Use Automatic Settings check box
  6. After that click on the Settings based on the tab and then click on the hardware configuration of the device you want to change
  7. Press resource type in the resource settings box to make further changes
  8. Once that is done, click change settings and type a new value for the resource type

Method 2 - Consult the Hardware Manufacturer for Resource Settings

You may not be able to configure resource settings for some devices in such an event it is advisable to consult your hardware manufacturer. Your hardware manufacturer can provide you with specific resource settings. Follow the manufacturer’s instructions to repair error code 34.

If the error continues to persist even after device configuration, then the problem may be linked to driver corruption. In that case, try method 3.

Method 3 - Download DriverFIX to Update Drivers Automatically

Whether code 34 is caused by outdated or corrupted drivers, simply download DriverFIX to resolve. DriverFIX is an advanced and user-friendly software program deployed with an intelligent programming system.

The software scans your PC to detect all problematic drivers. It finds and matches the latest and compatible versions and then updates the drivers accordingly that too automatically and on a regular basis.

Click here to download DriverFIX to repair Device Manager error code 34 on your PC automatically.

Read More
Easily repair Server is not accessible
There are a lot of users who use their Windows 10 PCs to create and access data on their servers using their network. However, some of them reported getting an error saying that the server is not accessible. Here’s the full content of the error message:
“\server is not accessible. You might not have permission to use this network resource. Contact the administrator of this server to find out if you have access permissions. Logon Failure: The target account name is incorrect.”
If you are among the users who experience the same issue, read on as this post will help you resolve this error when accessing your server. But before you start troubleshooting the problem, you might want to perform System Restore, especially if tend to create one. To use System Restore, here’s what you have to do:
  • Tap the Win + R keys to open the Run dialog box.
  • After that, type in “sysdm.cpl” in the field and tap Enter.
  • Next, go to the System Protection tab then click the System Restore button. This will open a new window where you have to select your preferred System Restore point.
  • After that, follow the on-screen instructions to finish the process and then restart your computer and check if the problem is fixed or not.
If System Restore didn’t help in fixing the ACPI.sys Blue Screen error now’s the time for you to make use of the potential fixes laid out below.

Option 1 – Try rebooting your router

The first thing you can try to do to fix the error is to simply restart your router. All you need to do is reboot the router from its Admin panel or you can also turn it off manually and turn it back on after a couple of seconds so that it can completely reboot. Once you’re done, try accessing your server again and see if the error is now fixed.

Option 2 – Try checking the status of the Workstation Service

You might want to check the status of the Workstation Service as the error might have something to do with it.
  • Tap the Win + R keys on your keyboard to launch the Run utility.
  • Then type “services.msc” in the field and click OK or hit Enter to open the Windows Services Manager.
  • After opening the Services Manager, you will see a list of all the services on your computer and from there, locate the Workstation Service.
  • Double click on the Workstation Service to open its Properties.
  • Next, Stop the Service and Start it again or you can also right-click on it and select Restart and then make sure that its Startup type is set to Automatic.
  • Now restart your computer and check if the error is fixed.

Option 3 – Try to change the File Sharing Connections setting

You can also try to change the File Sharing connections setting. All you have to do is go to Control Panel > Network and sharing center > Advanced sharing settings > File sharing connections. From there, you need to select “Enable file sharing for devices that use 40 or 56-bit encryption and check if it helps in fixing the problem. If not, undo the changes you’ve made and proceed to the next given option.

Option 4 – Try checking the Network Configuration

Checking the Network Configuration can also help you fix the error. Refer to the steps below to do so:
  • Right-click on the Wi-Fi connection or on the Ethernet connection icon located in the system tray.
  • Then select open Network and Internet Settings and then click on the “Change Adapter Options”.
  • After that, a new window will appear and from there, select the network connection that connects your computer to your network – this can either be a Wi-Fi connection or Ethernet connection.
  • Right-click on that connection and select Properties where you will see a list of items.
  • Select the Internet Protocol Version 4 or Internet Protocol Version 6 from those items according to your system requirement.
  • Then click on the Properties button.
  • Check if everything is now configured as to how it is supposed to be and then check if the error is resolved.

Option 5 – Try to reset Winsock, TCP/IP & Flush DNS

You might also want to try resetting Winsock, TCP/IP, and flushing DNS might help you resolve errors. To do so, follow these steps:
  • Right-click on the Start button and click on Command Prompt (administrator) so you can pull up an elevated Command Prompt.
  • After that, execute each one of the commands listed below. And after you typed in one after the other, you have to hit Enter.
  1. netsh winsock reset – type in this command to reset Winsock
  2. netsh int ip reset resettcpip.txt – type in this command to reset TCP/IP
  3. ipconfig /flushdns – type in this command to flush the DNS cache
  • Next, restart your PC and check if the problem’s fixed.

Option 6 – Run the Network Adapter Troubleshooter

  • Open the Search bar on your computer and type in “troubleshoot” to open the Troubleshoot settings.
  • Next, scroll down and select the “Network Adapter” option from the right pane.
  • Then click on the Run Troubleshooter” button.
  • After that, your computer will check for any possible errors and will pinpoint the root cause of the problem if possible.
Read More
Fix Windows was unable to repair the drive
If you connected your Hard Disk, USB, or SD card to your Windows 10 computer and you suddenly encounter an error that says, “Windows was unable to repair the drive”, read on as this post will help you fix the problem. This kind of error indicates that the file system on the drive has become corrupted and that ChkDsk was not able to repair the problem. You can also encounter this error when you try to run the ChkDsk utility to repair the system. This kind of error is most likely due to the general corruption of the contents in the drive. It is also possible that you removed the external drive without using the “Safely remove hardware” option or it could be that the drive is still in use. To fix the problem, the obvious thing to do is to safely remove the external drive by using the “Safely remove hardware” option. If it didn’t work, you can try to run the CHKDSK utility from the command line or you could also restart your computer in a Clean Boot State and then run the scan. Before you proceed with the potential fixes provided below, make sure that you create a system restore point first or you could also create a backup copy of the data to an external drive.

Option 1 – Run the CHKDSK utility from the command line

Although some users reported getting the “Windows was unable to repair the drive” when they run a CHKDSK scan, other users reported that running it also fixed the error. Thus, you can try to run it and see if it works or not.
  • In the Windows Search box, type “command prompt” and from the search results, right-click on Command Prompt and select “Run as administrator”.
  • After opening Command Prompt, type this command and tap Enter: chkdsk <Partition Letter>: /f
  • The command you entered will start to check for errors and fix them automatically. Else, it will throw an error message saying, “Chkdsk cannot run because the volume is in use by another process. Would you like the schedule this volume to be checked the next time the system restarts? (Y/N)”.
  • Tap the Y key to schedule Disk Check the next time your computer restarts.

Option 2 – Restart your computer in a Clean Boot State

There are some instances that some conflicting programs installed in your computer might be the one that triggers the “Windows was unable to repair the drive” error to appear when you connect your external drive or run the CHKDSK utility. To identify which program is causing the problem, you need to put your computer in a Clean Boot State. To do so, follow the steps below.
  • Log onto your PC as an administrator.
  • Type in MSConfig in the Start Search to open the System Configuration utility.
  • From there, go to the General tab and click “Selective startup”.
  • Clear the “Load Startup items” check box and make sure that the “Load System Services” and “Use Original boot configuration” options are checked.
  • Next, click the Services tab and select the “Hide All Microsoft Services” check box.
  • Click Disable all.
  • Click on Apply/OK and restart your PC. (This will put your PC into a Clean Boot State. And configure Windows to use the usual startup, just simply undo the changes.)
  • Once your computer has restarted in a Clean Boot State, perform your scan again and see if it now works, and then start to isolate the problem by checking which one of the programs you installed recently is the root cause of the problem.
Read More
How to Fix Error 0x00000643

Repair Error 0x00000643

Error 0x00000643 - What is it?

This is a Windows Vista printer error. It occurs when you try to use the plug-and-play service to install a WSD printer on your PC. WSD is the abbreviation for Web Services for Devices. It is a Microsoft API to simply programming connections to web service enabled devices such as printers, file shares and scanners.  The error 0x00000643 code is displayed in the following format:
“Operation could not be completed (error 0x00000643)”

Solution

Restoro box imageError Causes

The error 0x00000643 may occur due to multiple reasons, including:
  • No suitable driver installed for your printer
  • A firewall or other security program is too restrictive
  • Registry file has invalid entries
  • Virus and Trojan
  • Outdated system drivers

Further Information and Manual Repair

To resolve this error code on your PC, you don’t have to hire a professional technician and spend hundreds of dollars to perform system repair. You can resolve it all by yourself, even if you are not a computer programmer or lack technical expertise. Here are some of the easiest and proven methods to fix the error 0x00000643 on your PC:

1. Update Outdated Drivers

This can be done by accessing the ‘Device Manager’. All you have to do is, go to the start menu and type Device Manager in the start search box. Then click on the Device Manager in the list. On the action menu, click the scan for hardware changes or update the driver.

2. Delete the WSD Port to Resolve Error

Go to the start menu and type printers in the search box. Click printers in the given program list and then click the option add a new printer. After that, select the existing WSD port and any printer driver. Now delete the printer. The WSD will be deleted automatically. Once this is done, connect the printer to your computer. You will see the plug-and-play service will begin to install the printer again. This process is most likely to resolve the issue and reinstall your printer.

3. Disable Firewall

Sometimes the error may occur if the security programs are too restrictive such as the Firewall. To fix the problem simply disable Firewall.

4. Viral Infection

If the underlying cause of the error is a viral infection, then download a powerful antivirus and run it on your PC. Scan for viruses and delete them.

5. Registry Invalid Entries

If you don’t clean the registry regularly, this overloads with unnecessary, redundant and obsolete files like cookies, internet history, junk files, bad registry keys and invalid entries. This damages the registry and generates such error codes. Although you can resolve and repair the registry manually, but that method is slight tricky and time consuming. It may require technical expertise. However, another quick and easy way to clean and restore the registry and resolve error 0x00000643 on your system is to download Restoro. This is a next-generation, advanced, and highly functional PC Repair Tool. It is deployed with an intuitive algorithm and multiple utilities such as a smart registry cleaner, a powerful antivirus, and a system optimizer. The registry cleaning utility detects all registry issues on your PC, removes invalid entries cluttering the registry, and repairs it right away thereby resolving error 0x00000643. The antivirus simultaneously detects malware on your PC and removes them while the system optimizer boosts the speed of your computer significantly. Restoro is bug-free, safe, and efficient. It has simple navigations and a user-friendly interface. This software is compatible with all Windows versions including Vista. To fix error 0x00000643 on your system in seconds, click here to download Restoro now!
Read More
How to remove SearchApp

SearchApp by Blpsearch is a Browser Hijacker that is presently targeting Google Chrome browsers. It is offered as a tool gives user enhanced online search experience. Search App also has other amazing tools that let you quickly search the web from a new tab window.

This extension changed your home page and new tab search to blpsearch. While installing you will see additional ads and sponsored links displaying throughout your browsing sessions. It collects user browsing information and uses it to better serve sponsored content.

About Browser Hijackers

Browser hijacking means a malicious code has control over and altered the settings of your web browser, without your approval. There are numerous reasons why you might experience an internet browser hijack; however commercial, marketing, and advertising are the key reasons for their creation. Generally, hijackers will force hits to websites of their preference either to increase web traffic generating higher ad earnings, or to obtain a commission for every user visiting there. Nonetheless, it is not that naive. Your internet safety is jeopardized and it is also very annoying. In a much worst case, your browser could be hi-jacked to download malicious software that will do a lot of damage to your computer or laptop.

Find out how to identify a browser hijack

Symptoms that your internet browser is hijacked include: your web browser’s homepage is suddenly different; bookmark and the new tab are also modified; the default browser configurations have been changed and/or your default web engine is altered; unsolicited new toolbars are added to your web browser; you observe numerous ads appear on your web browsers or display screen; your browser has instability issues or displays frequent errors; Inability to navigate to certain sites, especially anti-malware and other computer security software sites.

How it infects your personal computer

Browser hijackers can enter a PC by some means or other, for example via file sharing, downloads, and email too. Many internet browser hijackings come from add-on applications, i.e., toolbars, browser helper objects (BHO), or extensions added to web browsers to provide them extra capabilities. Some browser hijackers spread in user’s computers by using a deceptive software distribution strategy known as “bundling” (generally through shareware and freeware). Examples of popular browser hijackers are Fireball, GoSave, Ask Toolbar, CoolWebSearch, RocketTab, and Babylon Toolbar. Browser hijackers may record user keystrokes to gather potentially important information leading to privacy issues, cause instability on systems, drastically disrupt the user experience, and ultimately slow down the system to a stage where it becomes unusable.

How to repair a browser hijack

The one thing you could try to remove a browser hijacker is to discover the malicious software within the “Add or Remove Programs” list of the Windows Control Panel. It might or might not be there. When it is, uninstall it. Yet, some hijackers will be more difficult to locate or remove since they might get themselves associated with certain important computer files that enable it to operate as a necessary operating-system process. You should think about carrying out manual fixes only if you’re a tech-savvy individual because there are negative consequences associated with messing around with the system registry and HOSTS file. Installing and running antivirus software on the affected computer could automatically erase browser hijackers and other malicious programs. Safebytes Anti-Malware features a cutting-edge anti-malware engine to help you prevent browser hijacker infection in the first place, and clean up any existing issues. Together with the anti-malware tool, a PC optimizer, like Restoro, can help you in getting rid of all linked files and modifications in the computer registry automatically.

What To Do If You Cannot Install Any Anti-Malware?

Malware can cause plenty of damage to your personal computer. Some malware goes to great lengths to stop you from downloading or installing anything on your computer, particularly anti-virus software programs. If you are reading this now, you’ve perhaps realized that a malware infection is a reason behind your blocked net traffic. So how to proceed if you need to download and install an antivirus application such as Safebytes? There are a few steps you can take to circumvent this problem.

Install anti-virus in Safe Mode with Networking

In Safe Mode, you can actually change Windows settings, uninstall or install some program, and eradicate hard-to-delete malware. In the event the malware is obstructing the internet connection and affecting your computer, running it in Safe Mode allows you to download antivirus and run a scan whilst limiting potential damage. To boot into Safe Mode, hit the “F8” key on the keyboard right before the Windows boot screen shows up; Or right after normal Windows boot up, run MSConfig, check Safe Boot under Boot tab, and click Apply. Once you’re in Safe Mode, you can attempt to install your antivirus software program without the hindrance of the malware. Following installation, run the malware scanner to eliminate most standard infections.

Use an alternate browser to download security software

Some malware only targets particular web browsers. If this is your situation, use another web browser as it could circumvent the virus. In the event you suspect that your Internet Explorer happens to be hijacked by a virus or otherwise compromised by cybercriminals, the most effective thing to do is to switch to an alternate web browser such as Google Chrome, Mozilla Firefox, or Apple Safari to download your chosen security program – Safebytes Anti-Malware.

Install antivirus on a flash drive

Here’s yet another solution which is utilizing a portable USB anti-virus software that can scan your system for malware without needing installation. Do these simple steps to clear up your affected computer using a portable antivirus. 1) On a clean PC, download and install Safebytes Anti-Malware. 2) Connect the flash drive to a USB port on the clean computer. 3) Run the setup program by double-clicking the executable file of the downloaded application, which has a .exe file extension. 4) Select thumb drive as the place when the wizard asks you where you want to install the application. Follow the directions to finish the installation process. 5) Transfer the USB drive from the clean computer to the infected computer. 6) Run the Safebytes Anti-malware directly from the pen drive by double-clicking the icon. 7) Click “Scan Now” to run a scan on the affected computer for viruses.

Protect your Computer against Malware With SafeBytes Security Suite

If you’re looking to download the anti-malware program for your PC, there are various tools in the market to consider but you just cannot trust blindly anyone, irrespective of whether it is paid or free program. Some of them are excellent, some are ok types, and some will ruin your computer themselves! When searching for anti-malware software, pick one that offers reliable, efficient, and complete protection against all known computer viruses and malware. In terms of commercial tool options, most people go with well-known brands, like SafeBytes, and are quite happy with it. SafeBytes anti-malware is a powerful, highly effective protection tool created to help users of all levels of computer literacy in identifying and eliminating harmful threats out of their computer. Through its cutting-edge technology, this software protects your personal computer against infections brought on by different types of malware and other threats, including spyware, adware, computer viruses, worms, trojan horses, keyloggers, potentially unwanted programs (PUPs), and ransomware. SafeBytes anti-malware offers a myriad of enhanced features that sets it apart from all others. Listed below are some of the features you might like in SafeBytes. World-class AntiMalware Protection: Using its enhanced and sophisticated algorithm, this malware elimination tool can identify and eliminate the malware threats hiding in your PC effectively. Active Protection: SafeBytes gives round-the-clock protection for your computer restricting malware attacks in real-time. This software will always keep track of your PC for suspicious activity and updates itself regularly to keep abreast of the latest threats. Website Filtering: SafeBytes checks and gives a unique safety rating to every single website you visit and block access to web pages considered to be phishing sites, thus safeguarding you against identity theft, or known to contain malware. Light-weight: SafeBytes is a lightweight and user-friendly antivirus and anti-malware solution. As it utilizes minimal computer resources, this program leaves the computer’s power exactly where it belongs to: with you. Fantastic Tech Support: You can get high levels of support round the clock if you’re using their paid software. To sum it up all, SafeBytes Anti-Malware gives you outstanding protection combined with very low system resource usage with both great malware detection and prevention. Once you’ve installed SafeBytes Anti-Malware, you no longer need to worry about malware or any other security concerns. So when you need advanced forms of protection features and threat detections, purchasing SafeBytes Anti-Malware could be worth the dollars!

Technical Details and Manual Removal (Advanced Users)

If you don’t wish to use an automated tool and prefer to remove SearchApp manually, you could possibly do so by going to the Windows Add/Remove Programs menu in the control panel and deleting the offending program; in cases of browser extensions, you can uninstall it by going to the browser’s Add-on/Extension manager. You’ll probably also want to totally reset your internet browser to its default configuration settings. In order to ensure the complete removal, manually examine your hard drive and registry for all the following and eliminate or reset the values as needed. But bear in mind, this is often a difficult task and only computer professionals can perform it safely. In addition, some malware is capable of replicating or preventing deletion. It is advisable that you carry out the removal procedure in Safe Mode.
Files: %Documents and Settings%\All Users\Application Data\Blpsearch.com %program files %\internet explorer\Blpsearch.com\random.mof %program files (x86)%\common files\speechengines\ %programData%\suspicious folders\ %windows%\system32\driver\messy code.dll %AppData%\blpsearch.com\toolbar uninstallStatIE.dat %app data%\Blpsearch.comn Blpsearch.com Registry: HKEY_LOCAL_MACHINE\SOFTWARE\Microsoft\MATS\WindowsInstaller\EAF386F0-7205-40F2-8DA6-1BABEEFCBE8914.07.30.07.52.18 ProductName=Blpsearch.com HKEY_LOCAL_MACHINE\SOFTWARE\Wow6432Node\Microsoft\Tracing\Muvic_RASAPI32 HKEY_LOCAL_MACHINE\SOFTWARE\Wow6432Node\Microsoft\Tracing\Muvic_RASMANCS HKEY_LOCAL_MACHINE\SOFTWARE\Wow6432Node\Microsoft\Windows\CurrentVersion\Uninstall\EAF386F0-7205-40F2-8DA6-1BABEEFCBE89\DisplayName=Blpsearch.com HKEY_USERS\S-1-5-21-3825580999-3780825030-779906692-1001\Software\Microsoft\Windows\CurrentVersion\Uninstallf25211-852e-4d10-b6f5-50b1338a9271\DisplayName=Blpsearch.com
Read More
Turn off or on Mobile Hotspot remotely
In case you don’t know, new support has been added by Microsoft to Windows 10 that now allows users to turn off or on the Mobile Hotspot remotely. The Mobile Hotspot feature, known earlier as “Virtual Networks”, was first introduced with the initial release of Windows 10. With this new feature to remotely turn on or off the Mobile Hotspot in Windows 10, users can just use the Bluetooth on their mobile phones to turn off or on the Mobile Hotspot even when their Windows 10 computers are out of their reach. To turn off or on the Mobile Hotspot feature in your Windows 10 computer remotely, there are two options you can try. First, you can do it using the Windows 10 settings app or using the Registry Editor. To get started, refer to the following options.

Option 1 – Turn off or on the Mobile Hotspot remotely via Windows 10 Settings app

  • First, you need to open the Windows 10 Settings app and from there go to Network & Internet and then go to the Mobile Hotspot section.
  • After that, scroll down to the “Turn on remotely” section.
  • Once done, make sure that the toggle button is set to ON and that the Bluetooth of both devices is turned on and paired as well. This should enable the feature to turn on or off the mobile hotspot remotely.

Option 2 – Turn off or on the Mobile Hotspot remotely via Registry Editor

Before you get started with the second option, make sure that you create a System Restore point first. Once done, proceed to the following steps:
  • Tap the Win + R keys to open the Run dialog box and type “Regedit” in the field and then hit Enter to open the Registry Editor.
  • Next, navigate to this registry path: ComputerHKEY_LOCAL_MACHINESOFTWAREMicrosoftWcmSvcTethering
  • From there, look for the DWORD named “RemoteStartupDisabled” and set its Value data to be “0”. This will enable the feature that will allow you to remotely turn on or off the mobile hotspot in your Windows 10 computer. To disable it, just set its Value data to “1”.
Read More
1 2 3 162
Logo
Copyright © 2022, ErrorTools. All Rights Reserved
Trademarks: Microsoft Windows logos are registered trademarks of Microsoft. Disclaimer: ErrorTools.com is not affiliated with Microsoft, nor claim direct affiliation.
The information on this page is provided for information purposes only.
DMCA.com Protection Status