How to Fix Error Code 0xC004C003 When Installing Windows 10

How to Fix Error Code 0xC004C003 When Installing Windows 10

What is Error Code 0xC004C003?

Error code 0xC004C003 has to do with activating Windows 10 after a clean install. This problem has been a frequent nuisance to users trying to update from Windows 7 or 8.1 following the invite path they got from Microsoft.

Solution

Restoro box imageError Causes

There are several problems that may have caused error code 0xC004C003. The most common of them are:

  • The product key entered was invalid, and cannot be used to activate the new OS.
  • The user followed the proper installation procedure, but the Windows update servers were too busy to handle the activation at that moment.
  • The free upgrade invitation was followed but after the reinstallation, the copy of Windows 10 was still not activated.
  • The user tried to perform a full clean install of Windows 10 instead of upgrading from Windows to Windows 10

Further Information and Manual Repair

A lot of solving error code 0xC004C003 has to do with the method in which the user has tried to update the system. If one decided to try and update the program before being invited to do so by the update manager, he must wait. Unfortunately, if one chooses to do it on his own and download a clean install, he was never given a product code to authenticate the process.

There are two options to address error code 0xC004C003 — either restore to the previous Windows Operating System or call Microsoft (or visit their Website) and purchase a product key.

The Windows update servers are very busy. There are lots of Microsoft users around the world, and the servers are doing their best to get to each and every one of the users as fast as possible, but they can only move at a certain speed. Your best bet is to sit back and wait a while.

But what if you were invited, and properly downloaded Windows 10, then decided to do a clean install? It is advised that one do not try to enter Windows 7 or 8.1 serial code as this will not work. However, unlike the problem above, these users will NOT need to purchase a product key.

According to Microsoft Support Staff, the installation servers are also very jammed because of the high numbers of installations going on right now. No matter what posts you may read, the key IS genuine, and it is NOT blocked, broken, or invalid.

To check if Windows has been properly activated, open the Command Window. Make sure you are logged into an administrator profile; otherwise this check will not work. Type in “slmgr.vbs/ato” and click Enter and then wait. While waiting, the command will check on the status of the activation.

Windows Script Host will open and show whether or not it is activated. A lot of users have reported that the activation did not work for the first few times. However they later reported after some more attempts, no issue was found in the way the operating system updated and that the activation process went smoothly. This is most likely due to the overload on the Windows Update servers, so bear with Microsoft.

Users have reported that when trying to correct error code 0xC004C003, they have followed the upgrade path and then been told by Microsoft that the key was invalid and they had to purchase a new one. If the upgrade path provided by Windows 7 and Windows 8.1 is correctly followed then there is nothing to worry about Just wait a while and try it again. If there are prolonged issues, speak with a technician by visiting the Microsoft website and contacting the help center by calling the number provided. Give them all relevant information and they will be sure to help accordingly.

The best solution to fix error code 0xC004C003 is to wait. In essence, the user will be waiting to reenter the same product key. According to Microsoft, and many user posts found online, it is recommended to wait a while and then try to activate again. This seemed to be an answer to most users' problems, and seem to work just fine. If the problem persists, take it to a windows repair technician to have it sorted out. If that does not work, use a powerful automated tool to fix the problem.

If you like to learn and find out more about various Windows errors, and how to repair them go to our vast archive or use search to find articles that will explain and help you in solving your issue.
However, if you prefer to do things fast and with automatization then we are proposing to use an automated solution for your issues. The application that we are recommending is Advanced System Repair Pro
Advanced System Repair utilizes multiple tools all in one to give you a quick, simple, reliable, and very thorough diagnosis of your PC. It brings you all the tools you need in one program to clean, fix, protect, optimize and boost your PC!
1-Click Maintenance
All the tools to make it simple and easy! It's like having a professional technician at the click of a mouse.

Junk Cleaner
Keeping your computer free from unnecessary clutter also helps make your computer last longer. Like any other machine, if you keep it clean and take care of it, it will serve you better for longer!

Optimize background apps
Optimize applications background activity with the built-in Application Optimizer feature.

Disk Defrag
With a simple 1-click, Advanced System Repair speeds up your PC by assembling fragmented files on your machine and organizing them more efficiently.

Malware Removal
Finds and removes all types of harmful malware including trojans, worms, bots, adware, spyware, PUPs, and more!

Privacy Cleaner
The all-in-one privacy suite to Clean Your Tracks & Protect Your Privacy! Make your computer safe, secure, and more efficient!

System Tweak/Optimizer
ASR will analyze your complete system and settings to adjust your PC to function at its maximum performance.

Registry Cleaner
Over time, as you install and uninstall applications, the registry can become cluttered with old entries and broken settings which can result in program crashes, and annoying messages and slow the computer down.
Visit our Advanced System Repair Pro Download page to inform yourself about all the benefits of this software and get a free trial copy of it.
advanced system repair pro

Advanced System Repair Pro

One-click automated PC repair solution
ASR logo
With Advanced System Repair Pro you can easily
Replace damaged files
Restore performance
Free disk space
Remove Malware
Protects WEB browser
Remove Viruses
Stop PC freezing
DOWNLOAD
Privacy Policy | Terms of Use | Uinstall
Advanced System Repair Pro is compatible with all versions of Microsoft Windows including Windows 11

Share this article:

You might also like

Can the Adobe.Dll Error Be Fixed?

Fix Adobe.Dll Error

What Exactly Is Adobe.Dll?

Adobe.DLL is one of the numerous Dll files you are going to encounter on your Personal Computer. This isn't a system-established service and is usually the consequence of the sort of applications you install on your own Personal Computer. Because adobe.dll is a low-program process, in the event that you find it present on your pc, you can easily end it. It isn't required for the normal working of your OS but might trigger permanent harm if left unchecked. Don't forget that the Computer uses the AdobePDF.dll file for assorted tasks, and you need to make sure it's installed correctly.

Solution

Restoro box imageError Causes

When the adobe.dll is left un-fixed, you may shortly have to deal with sluggishness on your Computer. Simply put, this impedes the standard and amount of work you do while using your PC and impacts your productivity. Sometimes, adobe.dll happens because your computer experiences an overload. As a result, while resolving the malfunction, you've got to look for methods of decreasing the system overload. It's possible that lots of processes are functioning on your PC concurrently. Quit these processes. Lousy setup of the adobe.dll file causes this error too. Check and fix the files and settings that Adobe.Dll requires to run and you may not have to content with these error anymore.

Further Information and Manual Repair

Even though the adobe.dll may severely influence the functioning of your Computer, it is really a trouble or malfunction that one can fix manually.
  • Permanently Un-Installing the Adobe.dll Component is one of the better methods for repairing the malfunction.
Yes, you are able to completely eliminate the adobe.dll issue. The thing you really need to do is un-install it from your own computer fully, and for good.
  • Quit the many processes operating on your Computer and you may get rid of the adobe.dll malfunction.
Adobe.dll regularly happens due to system overload. Thus, the first thing you need to assess is if several processes are operating on the device. If they're, search for methods to stop them, and you'll not have to worry about the adobe.dll error anymore.
  • Utilize Microsoft System Configuration Utility
The MS System-Configuration Utility will settle the system overload problem, thus freeing up space for your programs to run smoothly and possibly avoid malfunctions, including adobe.dll. The Microsoft System-Configuration Utility manually locates and eliminates all running processes.
  • Perform Scans On Your Computer
Running scans on your own Computer may enhance or increase its operation. This technique may also aid in examining your Computer for adobe.dll, or such associated malfunctions, and resolve them forever.
  • Repair Adobe.Dll Files and Settings' Errors.
Considering that the adobe.dll malfunctions can be a result of the existence of malfunctions on your own PC's files and options, fix these properly. Begin by fixing the settings on the files and options utilized by your Computer to perform the adobe.dll, and you may have removed this issue completely. Finally, establish the source of the error message to effectively solve it. Once you do that and fix it, your PC will resume normal operations and even boost your work and productivity.
Read More
CcSvcHst.exe Application Error Troubleshoot Guide

CcSvcHst.exe Application Error Fix

What is the ccSvcHst.exe Application Error?

The ccSvcHst.exe is an executable file. This is a part of the Symantec Service Framework. This file is added to your computer database when you install Norton products for example Norton Antivirus or Norton Internet Security. This file is saved in C:\Program Files\Common Files folder location. It runs along with the Norton programs in the background. This file helps to load up services and settings. When the ccSvcHst.exe file becomes infected and corrupt, you experience the ccSvcHst.exe application error pop up on your system. This error code hampers you from running Norton programs on your system.

Solution

Restoro box imageError Causes

The ccSvcHst.exe application error message is triggered by some of the following causes:
  • Temporary system misconfiguration
  • Viral infection
  • Damaged files
  • High CPU usage
  • Registry corruption
The ccSvcHst.exe application error should be repaired immediately as a delay in fixing this error can put you at risk of fatal system crashes and failure.

Further Information and Manual Repair

The best and possibly the easiest way to repair the ccSvcHst.exe application error on your computer is to install Restoro. Restoro is an innovative, intuitive, user-friendly, and feature-filled repair tool. This multi-functional tool functions as a registry cleaner, system optimizer, and antivirus too. With all these essential PC fixings and maintenance features integrated into one, you don’t need to install numerous programs offering limited functions on your PC. This PC Fixer has a sophisticated interface, neat layout along easy navigation. So, using it is not complex or challenging, not even for those trying it for the first time. It resolves PC errors like ccSvcHst.exe application error in seconds. Whether this error is generated due to viral infection or registry damage, it detects all and repairs your PC right away thus ensuring a smooth functioning and error-free PC. With Restoro you can resolve issues in just three simple steps, install the software, scan for errors and click repair to resolve. It’s that fast and easy to use. Now let’s get down to how this PC Fixer resolves the ccSvcHst.exe application error successfully. If a ccSvcHst.exe application error is caused by temporary system misconfiguration, a simple system reboot may stop the error from occurring again. However, if viral infection and registry corruption is the cause then installing Restoro is the way to go.

How Registry Errors Cause ccSvcHst.exe Application Error

ccSvcHst.exe application error indicates that your computer contains too many registry fragments and obsolete entries like junk files, temporary internet files, and files of uninstalled programs occupying a huge amount of RAM and disk space. The cluttering of the disk causes and malicious files causes the registry to corrupt. This is what the registry cleaning feature of Restoro takes care of. The registry cleaner scans and wipes out these unnecessary and obsolete system files freeing your disk space. It resolves errors like ccSvcHst.exe application error by repairing registry damages. With the help of its privacy error detector, it detects malicious viruses hidden on your system and in your hard disk. These usually gain access to your system via unsafe internet browsing, downloading programs from unreliable websites, and opening phishing emails. Without you being aware, these viruses and spyware enter your system giving hackers access to manipulate your confidential and private information like credit card number, bank account number, and SSN number, if such information is present on your PC. The ccSvcHst.exe application error hampers you in running Norton and thus exposes you to serious data security dangers. This is where Restoro not only serves as an error fixer but a powerful antivirus too. It removes all the viruses infecting your PC in a couple of seconds.

Restoro Benefits

Restoro is efficient and ensures user safety. Sometimes during repair, you may lose important data which may be hard to recover if you don’t have a backup. Unlike other tools, Restoro helps users create backup copies for safety purposes thus you don’t have the risk of losing your valuable data. You can restore and recover all your essential files in case data is lost during repair. This PC Fixer is compatible and runs smoothly with all Windows versions. So, if you have come across a ccSvcHst.exe application error on your system fix it by installing Restoro today. Click here to install Restoro.
Read More
Fix rtf64x64.sys Blue Screen error on Windows
rtf64x64.sys Blue Screen error happens in random intervals but it is a regular occurrence, it can happen when playing games, when watching movies, or even when the computer is idle. in this article we will guide you on how to resolve this error from the most simple steps you could take and do not worry, altho the error seems dreadfully and scary, it is nothing to worry about. If you can boot Windows normally after error great, proceed with instructions, else reboot into safe mode or use installation media to boot.
  1. Use official Microsoft online troubleshooter Microsoft has an online blue screen troubleshooter that was made specifically for this kind of situation. Go to Troubleshoot screen error and answer questions needed. Most of the time this will be enough to solve any blue screen issue.
  2. Update network and sound drivers How is this error traced back to Realtek devices, go to the Realtek website and download drivers. Install them and reboot the system.
  3. Use a dedicated software solution DRIVERFIX is an application made for these and other kinds of driver issues and problems, it is one click automated solution for driver fixing. Visit the Driverfix site and download the application
  4. Perform system Restore If you have not managed to fix the issue with previous steps roll back to a previous restore point when everything was working.
  5. Replace network or sound card If everything failed including system restore then it is likely that it is a hardware malfunction. Replace faulty components and you should not receive errors anymore.
Read More
System Restore gets stuck or hangs up
As you know, System Restore is a useful tool in Windows operating system that helps users in fixing system issues by undoing any recent changes to the computer that may have caused the problem. However, there are times when you might encounter some issues when running this tool and one of these issues is when System Restore suddenly gets stuck or hangs up on initializing the restoration of the Registry in Windows 10. If you encounter a similar problem, read on as this post will guide you on what you can do in such cases. There are several things you can do when you face this kind of problem in System Restore. First, you can try to wait it out, give it more time to load, which should not take longer than 5 minutes. And if it’s still stuck after that time, give it another hour. However, if nothing changed after an hour, then you need to troubleshoot the problem further. Keep in mind that you must not interrupt System Restore by shutting it down abruptly, it could result in an unbootable system. To get started in troubleshooting the problem, you need to follow each one of the suggestions offered below.

Option 1 – Try to use the Windows Recovery Environment

The first troubleshooting option you need to try is to simply tap the power button for about 10 seconds. This is what you have to do when you have to interrupt System Restore or reset your Windows 10 computer. Tapping the power button for 10 seconds will perform a hard shutdown and once your computer shuts down, restart your computer again and follow the steps below but before you do that, make sure that you have a Windows bootable USB or DVD.
  • First, insert the bootable USB or DVD and boot into it, and select the “Repair your computer” option.
  • Next, once you see the manufacturer logo on your computer, tap the key to enter into Windows Recovery Environment.
  • After that, change the Boot sequence to DVD drive under the UEFI Firmware settings and restart your computer.
  • Once your computer has restarted, select the boot order and make changes accordingly as displayed in the BIOS.

Option 2 – Try to run the Automatic Repair Utility

You might also want to use Automatic Repair in fixing the error. To do so, follow the steps below.
  • You can start by creating and booting from a bootable Windows 10 USB Stick.
  • After that, click on Repair your computer located on the bottom left corner when you are on the initial Windows Startup screen.
  • Next, click on Troubleshoot, and then on the other screen, click the Startup Repair option.
  • Now select the operating system you want to repair. Once you do that, it will start to repair your operating system. Wait until the process is completed and then check if the problem’s now fixed.

Option 3 – Try to run System Restore in Safe Mode

If you can’t boot into your Windows 10 computer, you can try to run System Restore again in the Advanced Startup Options.
  • Boot your computer into Safe Mode.
  • After that, select an option > Troubleshoot > Advanced Options > Startup Settings > Restart.
  • Once your computer has restarted, tap the F6 key to enable Safe Mode with Command Prompt and to run System Restore from there.
  • Now in Command Prompt, type the “rstrui.exe” command to run System Restore in Safe Mode. This will help in fixing the problem since it would be safer to perform System Restore of the computer.
Read More
A required device isn’t connected
If you are currently facing the “A required device isn’t connected or cannot be accessed” error with codes 0xc0000185, 0xc0000225, 0xc0000001, 0xc00000f, and 0xc000000e on your Windows 10 computer, worry not for this post will help you resolve this problem. All these error codes point out the same thing – your computer needs to be repaired. Some of these error codes are related to the “winload.efi” file which means that you are using the UEFI system. This file also loads up important drivers in order to start the Windows Kernel. And if you got a remark from any of these error codes indicating that there is a hardware failure or that the driver configuration is incorrect, then you must physically check if the wires are connected properly. This kind of error occurs mostly when your computer wasn’t able to locate the system files that are needed to boot up your computer. Thus, the only way to fix this problem is to correct the boot record. It is recommended that you utilize the “/RebuildBCD” option in order to rebuild the BCD files. To do so, follow these steps:
  • You can start by booting into the installation environment for Windows 10 from an installation media.
  • After that, click on Repair your computer and on the blue screen, select Troubleshoot and then select the Advanced options menu.
  • From there, select Command Prompt and once you open it, enter each one of the commands given below by sequence.
    • bootrec /FixMbr
    • bootrec /FixBoot
    • bootrec /ScanOS
    • bootrec /RebuildBcd
  • Once you’re done executing the commands given above, type “exit” to close the Command Prompt window and then restart your computer and see if it fixed error code 0xc000014c.
On the other hand, if rebuilding the BCD using the /RebuildBCD option didn’t help, you can try a crude way to rebuild the boot record from scratch. You can do that by following the given steps below which will export and delete/backup the BCD available in the system.
  • Go to the Advanced Recovery Mode.
  • From there, go to Command Prompt and execute the commands given below and make sure to enter them one after the other.
    • bcdedit /export C:BCD_Backup
    • c:
    • cd boot
    • attrib bcd -s -h –r
    • ren c:bootbcd bcd.old
    • bootrec /RebuildBcd
If it still didn’t help, then troubleshoot the problem further with the help of the following instructions.

Option 1 – Disable the Secure Boot in the BIOS

Disabling the Secure Boot in the BIOS settings is definitely recommended to resolve the error. To disable Secure Boot, here’s what you have to do:
  • First, boot your computer into Windows 10.
  • Next, go to Settings > Windows Update. From there, check if there is anything that you have to download and install if you see any available updates. Usually, OEMs send and update the list of trusted hardware, drivers, and operating systems for your computer.
  • After that, go to the BIOS of your computer.
  • Then go to Settings > Update & Security > Advanced Startup options. If you click on Restart Now, it will restart your computer and give you all the advanced options.
  • Next, select Troubleshoot > Advanced Options. As you can see, this screen offers you further options including System restore, Startup repair, Go back to the previous version, Command Prompt, System Image Recovery, and UEFI Firmware Settings.
  • Select the UEFI Firmware Settings which will take you to the BIOS.
  • From there, go to the Security > Boot > Authentication tab where you should see Secure Boot. Note that every OEM has its own way of implementing the options so it varies.
  • Next, set Secure Boot to Disabled and set Legacy Support to On or Enabled.
  • Save the changes made and exit. Afterward, your computer will reboot.

Option 2 – Run System File Checker

You could also run a System File Checker or SFC scan. All you have to do is select Command Prompt from the Advanced Options. Once you’ve opened Command Prompt, type the “sfc /scannow” command and tap Enter to execute it.

Option 3 – Disable the Early Launch Anti-Malware Protection

  • You need to restart your computer in the Start Menu first while holding down the Shift key on your keyboard.
  • After that, it will restart your computer to Startup Settings.
  • Now ensure that the 8th option is labeled as “Disable early launch anti-malware protection.
  • Then tap the F8 key since the aforementioned option above is listed at number 8. This should launch and load Windows on your PC with the Early Anti-malware protection disabled for that session only when you try to carry out the same task and then check if the error related to the Winload.efi file is now fixed.

Option 4 – Try to run Automatic Startup Repair

In this option, you need to boot your computer into the Advanced Startup Options and from there, run the Automatic Startup Repair and then wait until the process is completed.

Option 5 – Try to reset the BIOS or the UEFI Settings

If updating the BIOS didn’t help in fixing the error, you can try to reset the BIOS instead.
  • Start your computer and tap the F10 key during the booting process to enter the BIOS. If it does not work, you can try tapping the F1 or F2 key as well as the Del key.
  • Once you’re already in the BIOS, tap the F9 key to get the prompt to RestoreLoad default configuration now for the BIOS.
  • Next, click on Yes and then follow the next on-screen instructions that appear to set the BIOS back to its default settings.
  • Once you’re done restoring the default settings of the BIOS, restart your computer and then check if it now boots properly.

Option 6 – Try to physically check the hardware

You should also check the physical status of the hardware in your computer. You can clean the dust off the hardware components like the Network Card of the computer. You might want to use a small blower or you could also use a soft cloth and run the components gently. Make sure that you don’t damage any parts with moisture or cause harm to any circuits while you carry out this task.
Read More
Fix Msvcr120.dll_clr0400.dll Missing Error
DLL files have certain functions that help the programs in the computer run properly. One of these DLL files is the Msvcr120.dll_clr0400.dll. This particular DLL file is responsible for the extraction of the required resources during the installation of a program and is used when the program is launched or when games are launched in the C++ language. However, a number of users recently reported that they’ve encountered an error that says, “Msvcr120.dll_clr0400.dll is missing” when they tried to install an application or when they tried opening an application. This kind of error could be due to several factors. It is possible that the DLL file is corrupted or there are some programs that interfere with the DLL file. On the other hand, it is also possible that it has been infected by a virus. To resolve this error, here are some potential fixes you need to check out:

Option 1 – Run System File Checker scan

The first thing you can do to fix the error is to try running the System File Checker or SFC scan. System File Checker is a command utility built into your computer that helps restore corrupted files and missing files. Refer to the following steps to run it:
  • Hit the Win + R keys to launch Run.
  • Type in cmd in the field and tap Enter.
  • After opening Command Prompt, type in sfc /scannow
The command will start a system scan which will take a few whiles before it finishes. Once it’s done, you could get the following results:
  1. Windows Resource Protection did not find any integrity violations.
  2. Windows Resource Protection found corrupt files and successfully repaired them.
  3. Windows Resource Protection found corrupt files but was unable to fix some of them.
  • Reboot your computer.

Option 2 – Troubleshoot the missing Msvcr120.dll_clr0400.dll error in a Clean Boot State

You can also troubleshoot the isDone.dll error in a Clean Boot state. It could be that there are some third-party applications in your computer that are preventing the application from getting installed and to isolate this possibility, you need to boot your computer in a Clean Boot State and then try installing the program again. Putting your computer in this state can help you identify which program is the culprit and thus isolates the problem. In a Clean Boot state, your computer will start using only the pre-selected minimal set of drivers and startup programs. Note that you have to disable and enable one process at a time.
  • Log onto your PC as an administrator.
  • Type in MSConfig in the Start Search to open the System Configuration utility.
  • From there, go to the General tab and click “Selective startup”.
  • Clear the “Load Startup items” check box and make sure that the “Load System Services” and “Use Original boot configuration” options are checked.
  • Next, click the Services tab and select the “Hide All Microsoft Services” check box.
  • Click Disable all.
  • Click on Apply/OK and restart your PC. (This will put your PC into a Clean Boot State. And configure Windows to use the usual startup, just simply undo the changes.)
  • After you’ve set your computer into a Clean Boot State, make sure that you’re signed in as administrator and then try to install the application again.

Option 3 – Try to re-register the problematic DLL file

You can also try to re-register the DLL to resolve the problem. The Regsvr32 tool is a command-line utility that can be used to register and unregister OLE controls like DLL and ActiveX (OCX) controls in the Windows operating system. Follow the steps below to use it.
  • Open Command Prompt as admin from the WinX menu.
  • Next, type the following commands in the elevated Command Prompt and hit Enter to execute the command. This will re-register the affected DLL file using the Windows operating system tool, regsvr32.exe.
    • exe /[DLL file]
    • exe [DLL file]
Note: Replace “[DLL file]” with the name of the DLL file that was pointed out in the error.
  • After you execute the given commands, you should see a message saying, “DllRegisterServer in vbscript.dll succeeded” if the Regsvr32 tool was able to run successfully. After that, try to install the program again and see if it now works.

Option 4 – Try to replace the DLL file with a trusted source

  • First, you need to get the new DLL file from another computer with preferably the same file version number.
  • After that, you need to boot your PC into Safe Mode and navigate to the paths listed below and then replace the file using a USB drive or other external storage devices.
    • x86: This PC > C:WindowsSystem32
    • x64: This PC > C:WindowsSysWOW64
  • Next, type “cmd” in the Cortana search box and right-click on Command Prompt, and select “Run as administrator” to open it with administrator privileges.
  • Now type the “regsvr32 ntdll.dll” command and hit Enter.
  • Restart your PC and check if the error is now fixed.

Option 5 – Scan your computer using Windows Defender

The DLL file might also be infected with malware or virus and to eliminate it which could explain why you’re getting the “Msvcr120.dll_clr0400.dll is missing” error. Thus, you have to scan your computer using security programs like Windows Defender.
  • Tap the Win + I keys to open Update & Security.
  • Then click on the Windows Security option and open Windows Defender Security Center.
  • Next, click on Virus & threat protection > Run a new advanced scan.
  • Now make sure that Full Scan is selected from the menu and then click the Scan Now button to get started.
Read More
Change Legacy to UEFI without reinstalling
There are some new generation motherboards for laptops and PCs that bring in support for both the Unified Extensible Firmware Interface or UEFI as well as the Basic Input Output System or BIOS. The main advantage of UEFI over the traditional BIOS is the fact that UEFI supports a hard drive that has a capacity of more than 2 terabytes. However, the disadvantage of UEFI is that it only supports the x64 Windows operating system versions and that the hard drive is supposed to use the GPT structure. So if your PC is compatible with and supports UEFI and you want to change from Legacy to UEFI, then you’ve come to the right place as this post will guide you on how you can exactly do that without having to reinstall it. There are two ways to change Legacy to UEFI. You can convert MBR to GPT using either the built-in utilities in Windows or using the Recovery Environment. Before you proceed, make sure that your computer fulfills the following prerequisites:
  • Your PC’s motherboard should support both Legacy and UEFI.
  • Your PC should be running at least the 1703 Windows 10 version or newer on an MBR partition.
Once you’ve made sure that your computer covers the aforementioned prerequisites, refer to the given options below.

Option 1 – Convert MBR to GPT via Windows built-in utilities

  • In the Windows Search box, type “command prompt” and from the search results that appear, right-click on Command Prompt and select the “Run as administrator” option.
  • After that, execute this command: exe /convert /allowfullOS
  • Now, wait until the process is completed since you can track its process on your screen.
  • Once it’s done, go to Settings > Update & Security > Advanced Startup options and from there, click on Restart Now. This will restart your computer and give you advanced options.
  • Next, select Troubleshoot > Advanced Options where you will see further options including System Restore, Startup Repair, Go back to the previous version, Command Prompt, System Image Recovery, and UEFI Firmware Settings.
  • Now select the UEFI Firmware Settings. This will take you to the BIOS. Boot Mode is typically available under Boot > Boot Configuration. Once you’re there, set it to UEFI and then save the changes you’ve made. After that, your computer will restart.

Option 2 – Convert MBR to GPT via the Recovery Environment

  • When the message appears on your screen while running Windows Setup, you need to tap the Shift + F10 keys to open Command Prompt.
  • Make sure to run Command Prompt as admin and then execute this command: exe /convert
  • After that, wait until the process is completed. When it’s done, you have to go to the BIOS just like in the first given option above.
  • As mentioned, you can usually find the Boot Mode under Boot > Boot Configuration. Once you’re there, set it to UEFI.
  • Now save the changes made and exit as your computer will restart.
Read More
A Quick Guide to Resolving Error Code 0x800ccc92 on Your PC

How to Fix Error Code 0x800ccc92

0x800ccc92 - What is it?

Do you come across this error message “Receiving’ reported error (0x800ccc92): “Your e-mail server rejected your login”? Verify your user name and password in your account properties. The server responded: - ERR invalid user names and password” when you try to send or open emails using your Outlook account? If yes, then this article is a must-read for you as we explain why this error occurs and how you can resolve it. To begin with, 0x800ccc92 is a common Microsoft Outlook error. This error restricts your ability to send and receive emails on your Outlook email address. In other words, it locks you out and hampers your ability to use your account successfully causing a great deal of inconvenience especially if you use your Outlook account for communication in and across your office.

Solution

Restoro box imageError Causes

The 0x800ccc92 error message may occur due to numerous reasons so narrowing it down to one particular reason for occurrence is not easy. However, here we have listed down some of the most common causes of this error code:
  • Incorrect Outlook configuration settings
  • Invalid password or username
  • PST file crosses its fixed file size limit
  • Failure of POP3 and Protocol STMP in database server connection
  • Improper synchronization between Outlook and the server
  • Virus Infection
  • Invalid registry entries

Further Information and Manual Repair?

To fix the error code 0x800ccc92 on your system, here are some quick, effective, and easy DIY solutions that you can try:

Solution 1:

Sometimes the error code may occur due to an invalid password and usernames entry. Therefore, first, cross-check user ID and password. If you’ve entered the wrong password, try inserting the correct password to access your account.

Solution 2:

If the error still persists, then try installing the latest available Server Service Pack for Exchange. This solution works best if compatibility is the issue and the underlying reason for the error is improper synchronization between Outlook and the server.

Solution 3:

The presence of malware and viruses can also lead to such errors. Therefore, it is advisable to scan your entire PC for malware and viruses using a powerful antivirus.

Solution 4:

If the issue occurs due to bad and invalid registry entries, then it is important that you remove them right away. Due to such entries, you may experience the 0x800ccc92 error on your PC. To remove them, you need to download a registry cleaner. Downloading two programs an antivirus and a registry cleaner separately may slow down the speed of your PC. Therefore, to ensure this does not happen it is recommended you install Restoro Restoro is an advanced and multi-functional PC Fixer. This software is deployed with an intuitive algorithm and multiple powerful PC repair utilities including a registry cleaner, anti-virus, and a system optimizer. It is a one-stop solution for all PC-related issues. Using this tool, you can scan your entire PC and remove all types of malicious software including malware, viruses, spyware, and Trojans corrupting your PC in seconds. Simultaneously, it also removes all bad registry keys and entries and files the damaged system file, thereby restoring the registry back to normal. The system optimizer utility ensures your PC speed is not compromised due to the repair process. This software is safe, bug-free, efficient, and user-friendly. It is compatible with all Windows versions. Click here to download Restoro on your PC to instantly remove viruses and invalid registry entries to resolve the 0x800ccc92 error message on your system now!
Read More
Fix Error 1061 The service cannot accept control messages at this time Error in Windows 10
If you are trying to run or starting a program on your Windows 10 computer and you suddenly get an error message saying, “Error 1061 The service cannot accept control messages at this time”, read on as this post will show you what you can do to fix the problem. This kind of error pops up since the Application Information Service does not respond to the requests to raise applications to Administrator in Windows 10 like the Task Manager, Service updates, and so on. Thus, you won’t be able to run or open apps and will only get stuck with this error. The “Error 1061 The service cannot accept control messages at this time” message is a type of network error that typically occurs when there is a temporary mismatch between the requested control and the state of the service to be controlled. It’s most likely that the service is in a state of start-pending, stop-pending, stopped or it may already be used by another user which explains why this error message suddenly appears. You can encounter this error message on any Windows operation. Here are some of the most common occurrences:
  • Debugging a Windows service
  • Starting Task Manager
  • Starting Registry Editor
  • Starting Firewall
  • Starting services.msc
  • Starting dsm.exe
  • Updating services
  • Asking for file permissions, etc.

According to Microsoft MSDN, the error occurs because:

“There is a temporary mismatch between the requested control and the state of the service to be controlled. The service may be in a state of start-pending, stop-pending, or stopped. Wait a few minutes, then retry your operation.” If after a few minutes, the error still appears, then you may have to follow the options prepared below.

Option 1 – Try to restart the Credential Manager Service

  • Go to the Start menu.
  • Then type in “services” in the search box.
  • From the search results, right-click on “Services” and select the “Run as Administrator” option.
  • Next, look for the Credential Manager Service in the Services window.
  • Once you found it, double-click on it to open its Properties. From there, you need to click on the Stop button.
  • After that, set the Credential Manager Service to “Automatic” and click on the Start button to restart it.

Option 2 – Try to start the Application Information Service

You can also try starting the Application Information Service to fix the “Error 1061 The service cannot accept control messages at this time”. Just open the Windows Services Manager and make sure that Application Information Service is Started. And if you find that it’s already started, you need to restart it.

Option 3 – Try killing the IIS Worker Process via Task Manager

  • Tap the Ctrl + Alt + Del keys and select the Task Manager.
  • Next, click on More details to expand the Task Manager and then look for the IIS Worker Process entry which should be displayed in the list under the Processes tab. From there, you can see it in the Background processes. Once you find it, kill its process.
  • You can also try to look for the “w3wp.exe” entries and end its process. if you find many entries, right-click on some of them and select the End task option from the context menu.
  • Now restart your PC. That should fix the problem.
Read More
Steam Deck, a modern PC handheld console
steam deck
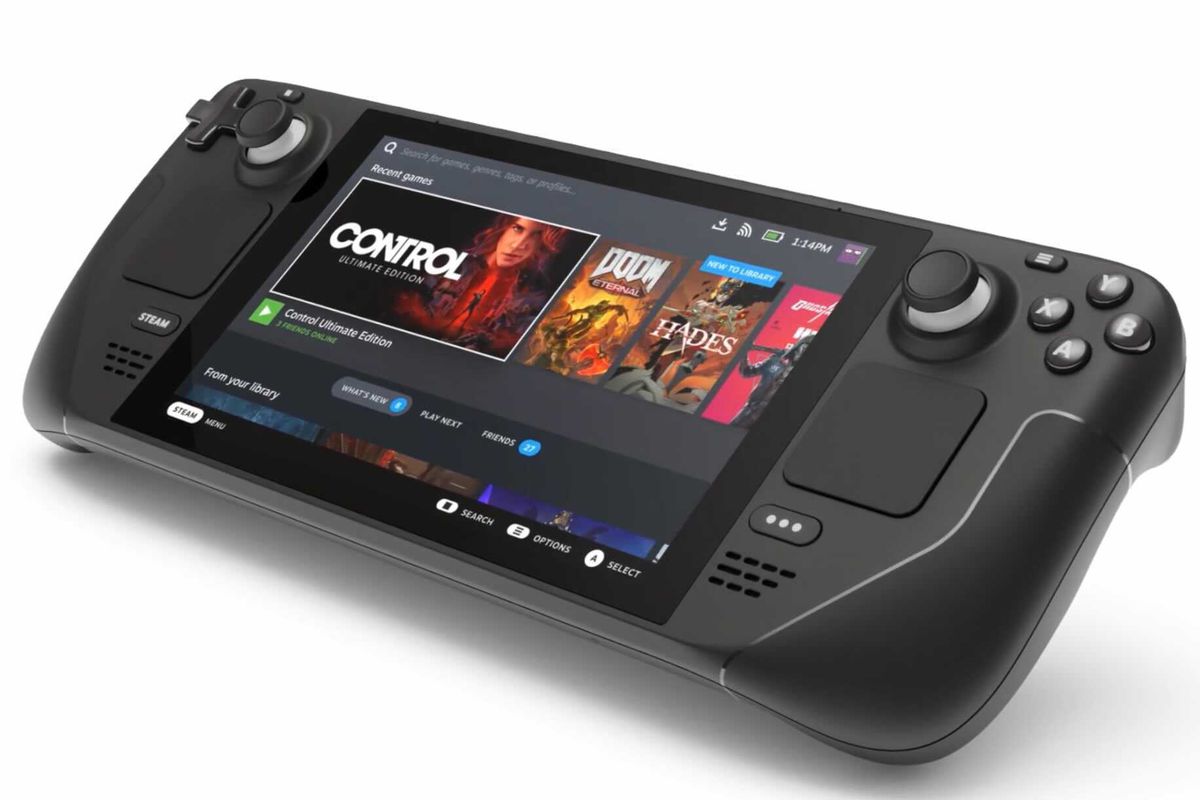
Valve has announced the first gaming PC handheld console: Steam Deck. At its core, Stead Deck is just a portable, small PC in little casing. It uses AMD Zen 2 CPU and RDNA 2 GPU architecture, has 16GB of RAM, Wi-Fi, and Bluetooth. It is a portable device with both a touchpad and joystick packing a seven-inch screen with a resolution of 1280x800 (16:10 aspect ratio). The screen has an ambient light sensor for automatic light adjustments same as your modern mobile device. Stating to Valve battery will hold up from two to eight hours depending on the activity of the user and what exactly he is doing. The handheld comes also with a carrying case.

Steam Deck operating system and software

Out of the box, Steam Dock comes with the latest Valve’s version of SteamOS 3. Just for comparing, the steam box was coming SteamOS 2, so this new Linux-based OS is aimed to provide better performance and better compatibility. Naturally, all Linux games in your Steam library will work right out of the box but Valve has something called PROTON inside OS, it is emulation software based on Wine that will supposedly let you play all of your Library games on a given OS. One big thing to mention here is that this is PC after all meaning that if you do not like having SteamOS on it you can install Windows instead and so far as we know it will support Windows 11. Now with Windows 11, you will be able to play all of your Steam games and run any kind of Windows software on it including EPIC store, battle.net, and others.

Cost and release date

The initial release date is set for December 2021 and today on July 16th Valve is opening you can reserve your copy if you want to pre-purchase. Follow this link if you want to reserve your copy. Reserve your Steam Deck device The price of the device will depend on the memory capacity which you would like to have. Please note that each of the 3 offered devices will have the same hardware, the only difference will be in memory available, and the most expensive version will also have anti-glare screen, everything else is identical. 64GB model will be $399, 256GB model will have the price of $529 and largest one with whooping 512GB will be $649

Conclusion

Valve ventures into the digital hardware domain again but it is unsure will they make it this time. Both Steam machine and their controller were in long run failed and later unsupported products so perhaps some customer caution is advised. Although having a handheld PC is tempting I would advise seeing how the overall market will accept this contraption before throwing money into it.
Read More
1 2 3 162
Logo
Copyright © 2022, ErrorTools. All Rights Reserved
Trademarks: Microsoft Windows logos are registered trademarks of Microsoft. Disclaimer: ErrorTools.com is not affiliated with Microsoft, nor claim direct affiliation.
The information on this page is provided for information purposes only.
DMCA.com Protection Status