How to Fix Error Code 0x802400d on Your PC

How to Fix Error Code 0x802400d on Your PC

Error Code 0x802400d - What is it?

The Error Code 0x802400d most often occurs when users attempt to use the Windows Update tool on their computers to move from one version of the software to another. In some cases, this error is more likely to appear on your computer during the process if you have not performed regular updates to the software as they have been available.

Common symptoms include:

  • Inability to finish the download of the necessary update to Windows 10
  • Incomplete installation of the desired Windows 10 update

While it can take additional time to deal with the issues that cause Error Code 0x802400d to appear on your computer, there are several steps that you can take to address the problem. These are fairly simple to perform and do not require advanced knowledge of the system to employ.

Solution

Restoro box imageError Causes

The most basic cause for Error Code 0x802400d is that there is a file or a process that is causing the update process to hiccup. In many cases, this error appears when a user attempts to begin the process of updating their computer if they have several stacked updates to perform. Computers that are several updates behind where they should be will display this error more often than computers that are kept on a schedule of recommended updates.

Further Information and Manual Repair

While there are multiple reasons why the Error Code 0x802400d may appear on your computer during the Windows Update process, there are several methods that can be used to attempt to resolve the problem on your own. These are generally easy to do and do not require advanced techniques. However, if you do not feel comfortable addressing the issue on your own, contact a qualified Windows repair technician.

Here are some of the best methods that users can employ to resolve Error Code 0x802400d:

Method 1:  Run the System Update Readiness Tool

There are a number of different processes, files, and settings that could cause Error Code 0x802400d to appear on your computer during the Windows 10 Update process. For this reason, the most efficient way to determine what the culprit is for your specific issue is to download and use the System Update Readiness function.

This tool is available directly from Windows. Although there are other tools available on the Internet that claim to be able to fix the problem, these can contain viruses and malware, so be cautious if you decide to employ these instead. There are also several versions of the tool on the Windows website, so be sure to download the version that matches the operating system and version of your computer.

Once you have downloaded the Readiness tool from the Windows website, allow it to run a scan on your system. At a minimum, this process will take about fifteen minutes to complete. Although you will see a progress bar at the bottom of the window, it does not always update effectively. Some users have reported that the update appears to stop when it is two-thirds complete. Continue to let the scan run if this happens, rather than canceling it out. Even if the progress bar doesn’t update, the scan is still running.

Method 2: Remove New Software and Re-Attempt the Update Process

If you have recently installed new software on your machine, it can sometimes cause problems with the update process. The best way to resolve this issue is to remove or uninstall the software, run the update process again, and then reinstall the software once the Windows system has been successfully updated.

If the above methods are not successful in resolving Error Code 0x802400d from your machine and you are still unable to complete the Windows 10 Update process or if you are not confident in your ability to complete these steps successfully on your own, get in touch with a qualified computer repair technician who is familiar with the issues surrounding Windows 10 in particular. Microsoft offers certifications for Windows repair technicians, so look for a professional who has the experience, skills, and knowledge necessary to adequately address Error Code 0x802400d on your machine.

If you wish to always have at your disposal a utility tool to fix these Windows 10 and other related issues when they do arise, download and install a powerful automated tool.

If you like to learn and find out more about various Windows errors, and how to repair them go to our vast archive or use search to find articles that will explain and help you in solving your issue.
However, if you prefer to do things fast and with automatization then we are proposing to use an automated solution for your issues. The application that we are recommending is Advanced System Repair Pro
Advanced System Repair utilizes multiple tools all in one to give you a quick, simple, reliable, and very thorough diagnosis of your PC. It brings you all the tools you need in one program to clean, fix, protect, optimize and boost your PC!
1-Click Maintenance
All the tools to make it simple and easy! It's like having a professional technician at the click of a mouse.

Junk Cleaner
Keeping your computer free from unnecessary clutter also helps make your computer last longer. Like any other machine, if you keep it clean and take care of it, it will serve you better for longer!

Optimize background apps
Optimize applications background activity with the built-in Application Optimizer feature.

Disk Defrag
With a simple 1-click, Advanced System Repair speeds up your PC by assembling fragmented files on your machine and organizing them more efficiently.

Malware Removal
Finds and removes all types of harmful malware including trojans, worms, bots, adware, spyware, PUPs, and more!

Privacy Cleaner
The all-in-one privacy suite to Clean Your Tracks & Protect Your Privacy! Make your computer safe, secure, and more efficient!

System Tweak/Optimizer
ASR will analyze your complete system and settings to adjust your PC to function at its maximum performance.

Registry Cleaner
Over time, as you install and uninstall applications, the registry can become cluttered with old entries and broken settings which can result in program crashes, and annoying messages and slow the computer down.
Visit our Advanced System Repair Pro Download page to inform yourself about all the benefits of this software and get a free trial copy of it.
advanced system repair pro

Advanced System Repair Pro

One-click automated PC repair solution
ASR logo
With Advanced System Repair Pro you can easily
Replace damaged files
Restore performance
Free disk space
Remove Malware
Protects WEB browser
Remove Viruses
Stop PC freezing
DOWNLOAD
Privacy Policy | Terms of Use | Uinstall
Advanced System Repair Pro is compatible with all versions of Microsoft Windows including Windows 11

Share this article:

You might also like

Star Wars movies & series, chronological order
Besides Star Trek, Star Wars was one of my favorite movie franchises, as a kid, it was the first movie I have seen in Theatre and over the years I have rewatched and reached each entry in the franchise. It has significantly grown over the years, sometimes for worse, sometimes for better but what it always did is explored and expanded lore, characters and brought stories interesting and original enough. The Series has always been original and innovative enough with interesting characters and locations and it managed to capture the imagination of many viewers around the globe. If you or someone else is watching the franchise for the first time it is recommended actually to watch everything how it was released because of some information that is spoiled in prequels that could spoil some interesting revelations later. But if you have already watched everything and would like to follow the story from the beginning to end we are presenting you with the list of all TV series and movies in tar Wars canon in their chronological order so you can enjoy some good character developments and see the whole story unfold how it was meant to be. In the following list, as told, we are including TV series (both released and currently in production) in the Star Wars canon.

Chronological order of Star Wars franchise:

Star Wars: The Acolyte Acolyte is upcoming TV series exploring times in the old republic and the rise of the dark side within Star Wars Episode I: The Phantom Menace The first movie entry in the franchise introducing some key characters who will go through various adventures yet to come Star Wars Episode II: Attack of the Clones Continuation of story and deepening of the plot laid out in the previous movie Star Wars: The Clone Wars Animated TV series exploring war in more detail, set in the period between episodes 2 and 3, before series there is clone wars full length animated movie titles simply as Star wars clone wars serving as a pilot to series. Star Wars Episode III: Revenge of the Sith Last movie in so-called prequel trilogy finishing some stories and finalizing some character arcs Star Wars: The Bad Batch Upcoming animated series Bad batch will focus on few troopers find their way in changing the galaxy Solo: A Star Wars Story Story of everyone loved Han Solo character, this origin story will introduce you to some key characters in the later entry of series Obi-Wan Kenobi Upcoming series that will focus on everyone's favorite JEDI master Obi-Wan Star Wars Rebels Animated series exploring first sparks of forming rebel alliance against dreaded empire Andor Upcoming series set five years before the events of Rogue One, the series follows rebel spy Cassian Andor during the formative years of the Rebellion. Star Wars Rogue One Full feature movie setting up events for episode 4 Star Wars Episode IV: A New Hope First Star Wars movie, little outdated today with special effects but with a strong story and introducing some new characters which will become main icons of franchise Star Wars Episode V: The Empire Strikes Back Arguably the best movie in the whole series, leaning more to serious note and darker than previous entries. Besides Episode 3 this is the most serious and dark movie of the series. Star Wars Episode VI: Return of the Jedi Last movie entry in the so-called original trilogy, finishing some stories and wrapping up one era. Star Wars The Mandalorian Set after episode 6 show focuses on a Mandalorian bounty hunter character following his adventures in the galaxy. The Book of Boba Fett Upcoming Mandalorian spin-off TV series focusing on Bobba Fet, one of most loved bounty hunter characters in the Star Wars universe Ahsoka Star Wars: Ahsoka is an upcoming live-action television limited series exploring the character of Ashoka Tano first seen in Clone Wars Rangers of the New Republic Set within the timeline of The Mandalorian, Rangers of the New Republic is a new upcoming live-action series. Star Wars: Resistance Animated series exploring resistance against first-order setting up events to be followed in the newest trilogy of movies. Star Wars Episode VII: The Force Awakens First full feature movie set in the post-empire era introducing new characters and bringing back some fan favorites. Star Wars Episode VIII: The Last Jedi The second movie in the last order trilogy, continuing stories of previously establishes characters Star Wars Episode IX: The Rise of Skywalker Last entry in new order trilogy of movies, finishing some open stories and concluding arcs for characters previously introduced in Force Awakens. That's it, chronological order of canon TV shows and movies of the Star Wars franchise. We are sure there will be more movies and shows in the future and someday we will revisit this list to include them as well. Until then, may the force be with you. If you would like to read more helpful articles and tips about various software and hardware visit errortools.com daily.
Read More
Mapped network drives are not working
When you have to connect to a drive that’s on a different computer or on external storage, that’s where the mapped network drives come in. Mapped network drives make accessing files a lot easier. However, there are times when it won’t work for some reason. Windows will notify you about the unavailability of mapped network drives in several ways. For one, Windows might display a red X on the network drives or it could be that its status will be unavailable when you try to use it from the Command Prompt or via a notification. It is recommended that you run a few scripts when you log in to your PC as it may so happen that the network drive takes more than usual to connect. Before you start troubleshooting the problem using the given options below, keep in mind that some workouts might only work under certain scenarios. You might need some network access at logon or you might need access to the Group Policy settings. So you need to choose what you prefer more. You can try the given workarounds below if the mapped network drives are not showing or connecting or working on your Windows 10 computer. These workarounds use scripts to make sure that you are connected to them as soon as you start to use your PC. As mentioned, before you can troubleshoot, you need to create scripts first. There are two scripts here namely MapDrives.ps1 which is executed by the second script named MapDrives.cmd and is done at a regular and non-elevated Command Prompt. Follow the steps below to get started.
  • You have to create a script file named “MapDrives.cmd” first and then save it on a place where the files are safe. To do that, open a text editor like Notepad and then copy and paste the following script:
PowerShell -Command "Set-ExecutionPolicy -Scope CurrentUser Unrestricted" >> "%TEMP%StartupLog.txt" 2>&1 PowerShell -File "%SystemDrive%ScriptsMapDrives.ps1" >> "%TEMP%StartupLog.txt" 2>&1
  • After that, save the file and name it “MapDrives.cmd”.
  • Next, create a script file named “MapDrives.ps1” and then copy and paste the following content. Just make sure to save both scripts in the same folder.
$i=3 while($True){     $error.clear()     $MappedDrives = Get-SmbMapping |where -property Status -Value Unavailable -EQ | select LocalPath,RemotePath     foreach( $MappedDrive in $MappedDrives)     {         try {             New-SmbMapping -LocalPath $MappedDrive.LocalPath -RemotePath $MappedDrive.RemotePath -Persistent $True         } catch {             Write-Host "There was an error mapping $MappedDrive.RemotePath to $MappedDrive.LocalPath"         }     }     $i = $i - 1     if($error.Count -eq 0 -Or $i -eq 0) {break}     Start-Sleep -Seconds 30 } Note: Now that you’ve created the script files, it’s time for you to proceed to the options given below.

Option 1 – Try creating a startup item

Note that this option only works on devices that have network access at login. So if it’s not there, the script will fail to reconnect the network drivers automatically. To create a startup item, here’s what you have to do:
  • Open the Startup folder located at %ProgramData%MicrosoftWindowsStart MenuProgramsStartUp.
  • From there, copy and paste the MapDrives.cmd.
  • After that, open the Scripts folder located at %SystemDrive%Scripts copy-paste MapDrives.ps1 and then copy and paste MapDrives.ps1 in there.
Note: After you complete the steps above, a log file named “StartupLog.txt” will be created in the %TEMP% folder. Now all that’s left for you to do is to log out of your computer and then log back in. This will ensure that the mapped drives are open.

Option 2 – Create a scheduled task

It is possible to create a scheduled task that runs as soon as you log in to your computer. To create a scheduled task, follow the steps below.
  • You have to copy the MapDrives.ps1 script file to the scripts folder of Windows located at %SystemDrive%Scripts.
  • After that, open the Task Scheduler and select Action > Create Task.
  • Next, type a name and description of the task in the General tab.
  • Then click on the Change User or Group button and select a local user group and click OK.
  • Now check the box labeled “Run with highest privileges” and switch to the Triggers tab.
  • From there, create a new trigger with the “At Logon” option in the Begin the task drop-down menu and then click OK.
  • After that, switch to the Actions tab and create a new action then choose to Start a program.
  • Next, type “Powershell.exe” in the Program/Script field, and in the Add arguments (optional) field, type the following:
-windowsstyle hidden -command .MapDrives.ps1 >> %TEMP%StartupLog.txt 2>&1
  • And in the Start in the (optional) field, type “%SystemDrive%Scripts” as the location of the script file.
  • Now under the Conditions tab, select the “Start only if the following network connection is available” option and then select Any connection and click OK.
  • Restart your computer or log off from your account and then log back in so that the task will be executed.

Option 3 – Use the Group Policy settings

You need this option if the mapped network drives are defined via Group Policy settings. You have to update the action of the drive maps to Replace. As a result, it will delete the existing mapped drive and create the mapping on each logon again. However, any settings on the mapped drive that are changed from the Group Policy settings will be gone on each logon. So if the changes don’t work, you need to run the gpupdate command together with the /force parameter in order to refresh the Group Policy setting quickly.
Read More
STOP 0x00000050 - An Easy Fix Guide

Stop 0x00000050 is an error code that is popularly known as the Blue Screen of Death (BSoD) error. This error occurs when Windows crashes on your system. Stop 0x00000050 error is displayed in a blue screen which is why it is called the BSoD error.

The error message appears in the following form:

Stop 0X00000050 (parameter1, 0, parameter3, parameter4)

PAGE_FAULT_IN_NONPAGED_AREA”

However, the parameters within the Stop 0x0000005 error message sometimes vary depending on your PC configuration.

Solution

Restoro box imageError Causes

The most common causes of the Stop 0x0000005 error are:

  • Hardware malfunctioning
  • Overheating of the components
  • Installation of a faulty device driver
  • Incompatible DLL files
  • Corrupt Registry
  • Spyware and Virus Infection

Whatever the cause may be, the Stop 0x00000050 error message is alarming and should be fixed at the earliest as it indicates major system stability problems that can often lead to data loss and system corruption.

Further Information and Manual Repair

To fix and repair the Stop 0x0000005 error you don’t always have to hire an IT professional. In fact, fixing this error is quite easy and you can do it yourself regardless of whether you have a good know-how of computers or not.

So, let’s get started! Here are some the easy DIY solutions to fix the Stop 0x0000005 error:

Sometimes this error may occur due to a temporary issue like overheating of the computer components. When this happens all you need to do is switch off the computer and allow the components to cool down. Try starting up your computer after a couple of hours. If the blue screen of death does not occur again, then this means there is nothing to worry about and the problem is resolved.

However, if the error appears again on your screen, then you need to try something else to solve and fix this error on your PC. If the cause of the error is a faulty device driver, then it is advisable to disable and remove it. Try updating the latest version of the faulty device driver. Using updated software helps ensure your PC keeps running smoothly.

If the cause of the Stop 0x0000005 error code is your system's exposure to viruses and spyware, then you must immediately download a powerful antivirus program. After you download it, scan for viruses on your system. Once the scanning is complete, you will see a scan report showing viruses on your PC. Delete all of them and click on repair.

Furthermore, you can also add more RAM to prevent and fix the Stop 0x0000005 error message on your computer. This solution is suitable when you try to run a program on your PC and you get this error message.

Read More
Combine Hard drives with storage spaces
Why combining hard drives with storage spaces? Ok, I will admit it, I am a modern digital hamster when it comes to digital goods. I like to collect stuff and more than anything else I like to have all of that at the tip of my fingers. And how digital goods grow in size themselves (movies on Blu-ray are like 50GB each) and the collection grows in size single hard drive is starting to be completely obsolete when it comes to storage. Sometimes we will need large storage for these kinds of personal collections, sometimes we will need it for work reasons. Whatever your reason might be Windows 10 is offering us a solution via Storage spaces. Storage spaces is an integral part of Windows and it is meant as a tool to provide you with a RAID environment without a RAID controller. Of course, combining multiple hard drives via storage paces instead of RAID will not be so fast or stable but for home use of storing a large quantity of data is perfectly enough. With Storage Spaces you will also have an option to reduce some space for increased security of data loss if by any chance one of your HDD fails.

How to Create a Storage Space

To create storage space in Windows, press ⊞ WINDOWS + R to open the run dialog. keyboard with windows and r markedIn the run box type in Control Panel and press ENTER run dialog with control panel typed inIn Control Panel find Storage Spaces and left-click on it. Control panel with storage spaces markedOnce storage spaces open, left-click on Create a new pool and storage space storage spaces manage storage spacesOnce you click on create new, you will be greeted with a list of hard drives you can use for this operation. storage spaces select drivesPlease note that all hard drives you choose will be completely erased and formatted and then assign a single drive letter. Click on Create pool. storage spaces resiliency type optionsYou will find yourself in new storage options where you can assign a drive letter, give storage space a name, etc.

Storage spaces types

One thing I would like to focus on here is resiliency type, when you expand the resiliency type drop-down menu you will see 4 options inside. Simple, Two-way mirror, Three-way mirrors, and Parity. Simple: If you choose Simple as an option, you will have maximum hard drive space but no resiliency at all, meaning that if by any chance any of your hard drives malfunction, you are losing your data from that drive completely. Two-way mirror: This option will save your data if one of your drives fails but you need at least 2 drives and storage space will be limited since some of it will be a safe backup option for the case of a drive failure. However if one of your drives fails, you can replace it in a second and keep on working as nothing happened. Three-way mirror: This option similar to the previous one will offer you safe data-keeping from a hard drive failure. this option will save your data even if 2 hard drives malfunction but it will require having 5 of them connected in order to be able to choose this option. Parity: Maybe the most popular option among people who want to have 2 or 3 drives merged but do not want to lose too much space of the two-way mirror option. It offers some protection and it does not take so much space as two-way does, let us say it is a kind of win-win situation.

Conclusion

I personally go for simple and have an important backup on optical drives but only for reason I could use more space, know that this way is requiring from me to always have a backup in optical media and that I will need to restore all of it back if even one HDD fails which could take time. But if this way is ok with you, go for it, you will have more space to use.
Read More
Razer Huntsman V2 mechanical keyboard
Razer huntsman
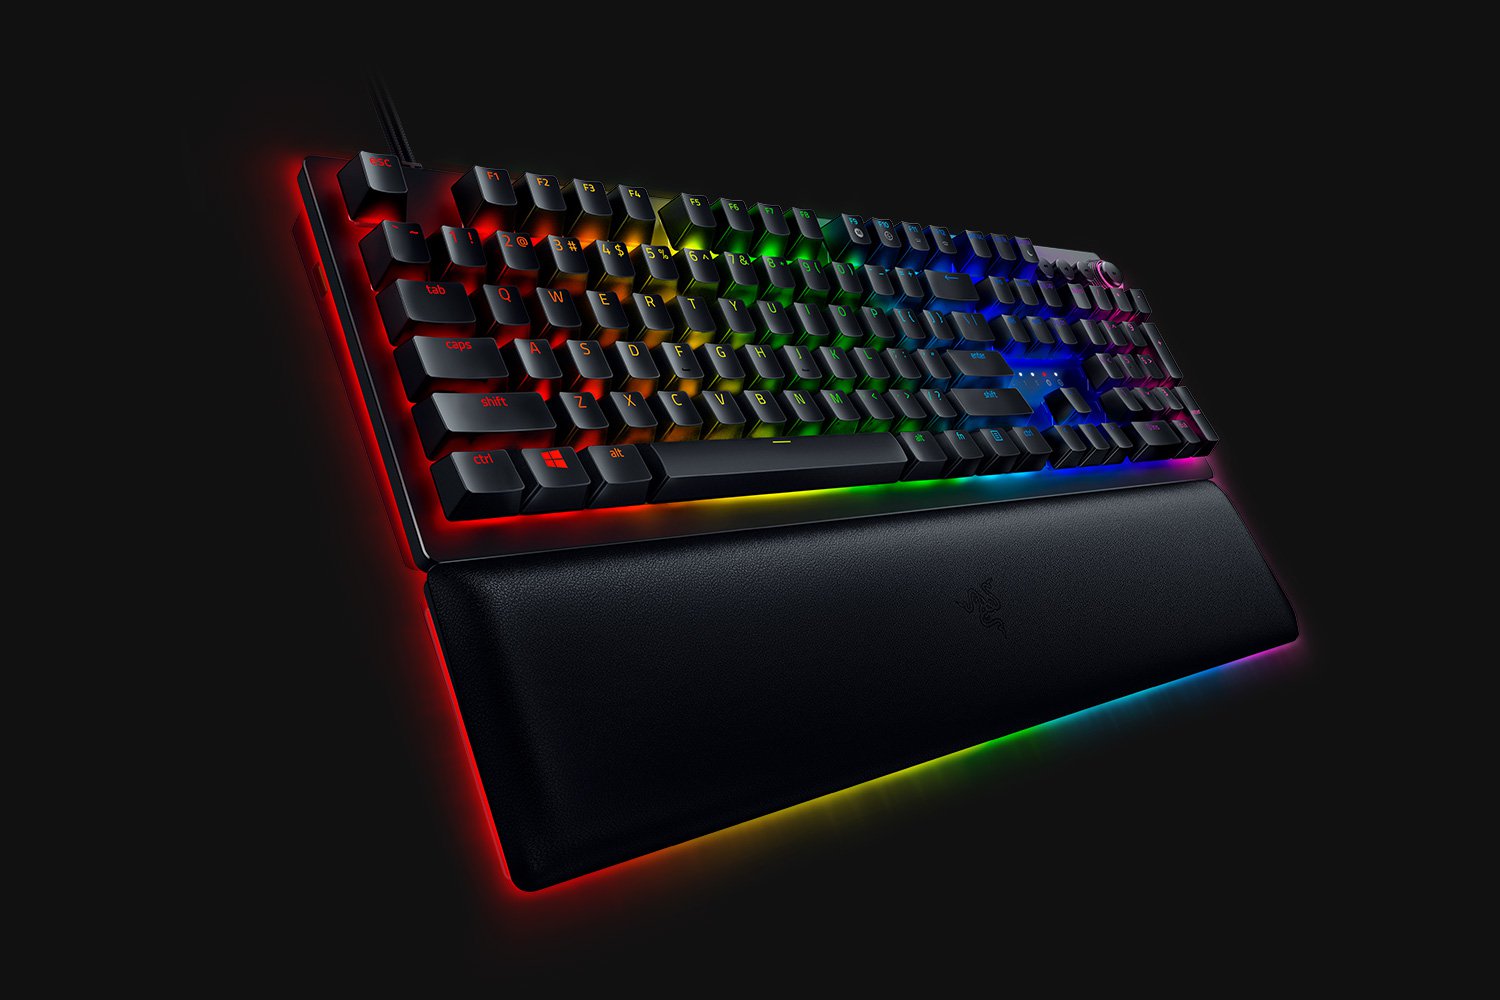
When it comes to computer peripherals first thing that comes to people's minds is probably Mouse and Keyboard. Also when discussing peripherals brands, Razer is not a stranger and over the years it has built its name and cult following. Razer’s mechanical keyboards have been always in the upper field of quality and trust from users and Huntsman is no different.

Tech specifics of Huntsman keyboard

  1. Mechanical optical switches Razer has introduced their new optical technology switch with this keyboard. These switches are faster and more accurate than typical mechanical switches and if tests are to be believed this is the fastest keyboard currently on the market.
  2. Multi-functional digital dial A multi-function digital dial with three tactile media keys gives you instant access to everything from brightness to volume in seconds. All programmable and customizable through Synapse 3, so you can set your preferred configurations right at your fingertips.
  3. 10-key rollover Anti-ghosting technology that enables 10-key simultaneous presses at the same time
  4. 4-side underglow with Razer chroma Go crazy and personalize lighting effects any way you want with a full 4-side underglow and 38 customization zones. Powered by Razer Chroma

Feel and noise

In the department of noise, well it is the mechanical keyboard so naturally, it will be louder than membrane ones but in terms of comparing it to other mechanical keyboards it is within the same noise range, maybe just a tiny bit silenced. The keyboard comes with 2 different types of switches, purple clicky ones that are louder and have that *click* sound for sound feedback, and red ones, that are not equipped with clicky sound but are linear providing slightly faster performance. If you choose the Huntsman elite model of the keyboard it will come with a nice hand resting mat that is very comfortable and feels right. Using a keyboard feels like using a Razer keyboard, it is responsive and gives that superior mechanical feeling.

Conclusion

Razer Huntsman mechanical keyboard is not the cheapest nor the best on the market but it is the fastest one out. It is in the top tier of keyboards and worth the investment.
Read More
Fix Chrome Error ERR_ICANN_NAME_COLLISION
If you are browsing the internet using the Google Chrome browser in your Windows 10 computer but you suddenly encounter an error message that states, “ERR_ICAN_NAME_COLLISION”, read on as this post will walk you through in fixing the problem. Here’s the full content of the error message:
“The site can’t be reached, This site on the company, organization, or school intranet has the same URL as an external website. Try contacting your system administrator. ERR ICAN NAME COLLISION.”
This kind of error is caused by an error in a private namespace or a random redirection to an incorrect proxy server. There are several ways to fix this error. You can try to check the integrity of the Hosts file or check the proxy. You could also try to use the Registry Editor and apply some tweaks or remove any conflicting browser extensions or flush the DNS cache, as well as run a malware scan.

Option 1 – Try to check the integrity of the Hosts file

To check the integrity of the Hosts file, refer to the following steps:
  • You have to navigate to this path inside File Explorer: C:/Windows/System32/driversetc
  • After that, look for a file named “Hosts” and right-click on it, and open it with the Notepad app.
  • Next, make sure that you write the block URLs in your computer in the list and then save the file.
Note: There are times when you are logged in with administrator credentials and you may receive an error message. In such case, type “notepad” in the Start Search and right-click on Notepad from the search results, and then select the “Run as administrator” option. After that, open the Hosts file and make the necessary changes and save it.

Option 2 – Try to check the Proxy server

There are some users who reported that they’ve fixed the problem after they’ve disabled the use of a proxy server using the built-in way. Follow the steps below to disable the proxy server.
  • Tap the Win + R keys to open the Run dialog box.
  • Then type “inetcpl.cpl” in the field and hit Enter to pull up the Internet Properties.
  • After that, go to the Connections tab and select the LAN settings.
  • From there. Uncheck the “Use a Proxy Server” option for your LAN and then make sure that the “Automatically detect settings” option is checked.
  • Now click the OK and the Apply buttons.
  • Restart your PC.
Note: If you are using a third-party proxy service, you have to disable it.

Option 3 – Try to use the Registry Editor

Before you apply some registry tweaks, make sure that you create a System Restore point. Once you have that covered, follow these steps:
  • Tap the Win + R keys to open the Run utility and type “Regedit” in the field and tap Enter to open the Registry Editor.
  • After that, navigate to this registry key: HKEY_LOCAL_MACHINESYSTEMCurrentControlSetServicesTcpipParametersDataBasePath
  • Look for the default key and double click on it and make sure that its Value data is set as “C:/Windows/System32/driversetc”.
  • Now exit the Registry Editor and restart your computer to apply the changes made

Option 4 – Flush the DNS cache

You could also try to flush the DNS cache to fix the “ERR_ICAN_NAME_COLLISION” error. All you have to do is open Command Prompt as an administrator and then execute each one of the following commands sequentially to flush the DNS cache:
  • ipconfig/release
  • ipconfig/renew
  • ipconfig/flushdns

Option 5 – Get rid of any conflicting browser extensions

  • Open Chrome and press Alt + F keys.
  • Go to More tools and click Extensions to look for any suspicious browser extensions or toolbars.
  • Click the Recycle bin and select Remove.
  • Restart Chrome and press Alt + F keys again.
  • Proceed to On Startup and mark Open a specific page or set of pages.
  • To check if the browser hijacker is still active, click Set pages, if it is active, overwrite the URL.
Note: If removing the browser extensions or toolbars didn’t work, you can also try to reset your Google Chrome browser.
  • Open Google Chrome, then tap the Alt + F keys.
  • After that, click on Settings.
  • Next, scroll down until you see the Advanced option, once you see it, click on it.
  • After clicking the Advanced option, go to the “Restore and clean up option and click on the “Restore settings to their original defaults” option to reset Google Chrome.
  • Now restart Google Chrome.

Option 6 – Run a malware scan using Windows Defender

It is possible that your computer is infected with malware which could be why you’re getting the “ERR_ICAN_NAME_COLLISION” error. Thus, you need to scan your computer using Windows Defender.
  • Tap the Win + I keys to open Update & Security.
  • Then click on the Windows Security option and open Windows Defender Security Center.
  • Next, click on Virus & threat protection > Run a new advanced scan.
  • Now make sure that Full Scan is selected from the menu and then click the Scan Now button to get started.
Read More
How to remove CyboScan PC Optimizer

CyboScan PC Optimizer is promoted as a useful program that helps you clean unnecessary files and registry entries on the Windows Operating System. When installed CyboScan PC Optimizer will automatically scan your computer for issues. Upon reviewing the scan results, it was discovered that most, if not all of these issues were exaggerated, and removing them will not give the promised speed boost. The CyboScan PC Optimizer program appears to scan the Registry for installed anti-virus and anti-spyware shields and may recommend users to install products from partners. This Potentially Unwanted Program comes bundled with other Potentially Unwanted Applications that may harm your Operating System or lead to information compromise.

CyboScan PC Optimizer is also known as MySoftScans PC Cleaner, none of these offer any details about the development company and users will end up paying a fee of up to 99.95USD every 3 months for using the program.

About Potentially Unwanted Applications

You have encountered it – you download a free application, then you discover some unwanted applications on your computer or discover a strange toolbar has been added to your web browser. You did not install them, so how did they appear? These unwanted programs, which are called Potentially Unwanted Programs, or PUPs in short, typically tag along as a software bundle when downloading the application and can result in major problems for computer users. The idea of PUP was actually coined to outline this crapware as something other than malicious software. This is because, the majority of PUPs get into a computer not because they slip via the security holes, for instance, but mainly because the users have installed them themselves – 100 % unintentionally needless to say. Even though a PUP isn’t really malware by definition, it could nevertheless be dangerous software that puts the computer at risk exactly the same way a virus does.

Exactly how do unwanted programs look like?

Unwanted programs can be found in many forms. Typically, they could be found in adware bundlers which are known to utilize aggressive and misleading advertising. The majority of bundlers install many adware applications from several companies, each of which has its own EULA policy. Safebytes Anti-malware completely eliminates this threat and protects your machine against PUP or adware infection. Also, the majority of free programs nowadays come with a few unwanted add-ons; in most cases a web browser toolbar or browser modification such as a homepage hijacker. They may track your online routines, redirect your search results to unsafe websites where viruses can be downloaded and installed, hijack your search page, and slow your browser down to a crawl. PUPs lie inside the gray part of the software spectrum. Some PUPs contain keyloggers, dialers, and other software to gather your individual information which often can lead to identity theft. These are software programs that don’t really do anything useful to you; in addition to taking over space on the hard disk, they also slow down your computer, often alter settings without your permission, and the list of bothersome features goes on and on.

How one can prevent PUPs

• Read carefully before agreeing to the license agreement as it might possess a clause about PUPs. • Always pick the custom if you’re provided a choice between Recommended and Custom Installations – never click Next, Next, Next blindly. • Install reputable antivirus software, just like Safebytes Anti-malware that offers real-time protection against PUPs. • Do not download free applications or shareware unless you actually need it. Disable or remove toolbars and browser extensions you don’t actually need. • Always download software from the original site. The majority of PUPs find their way onto your PC is via download portals, so steer clear of it entirely. Remember that although PUPs can cause damage and hinder the proper functioning of your computer, they can’t enter into your computer without your permission, so be watchful not to give it to them.

Malware Blocking Internet And All Anti-Malware Software? Do This!

Malware can cause all kinds of damage when they invade your system, starting from stealing sensitive details to erasing files on your computer. Some malware variants modify web browser settings by adding a proxy server or modify the computer’s DNS settings. In such cases, you will be unable to visit some or all of the internet sites, and therefore unable to download or install the necessary security software to get rid of the computer virus. If you’re reading this article, odds are you’re stuck with a virus infection that is preventing you to download and/or install the Safebytes Anti-Malware program on your PC. There are a few options you can try to get around with this issue.

Make use of Safe Mode to resolve the issue

Safe Mode is a unique, simplified version of Windows in which just essential services are loaded to stop malware and also other problematic applications from loading. In the event, the malware is set to load automatically when the computer boots, switching to this particular mode may well prevent it from doing so. To start the computer into Safe Mode, hit the “F8” key on your keyboard right before the Windows logo screen shows up; Or after normal Windows boot up, run MSConfig, check “Safe Boot” under Boot tab, and then click Apply. Once you’re in Safe Mode, you can try to download and install your antivirus software application without the hindrance of the malicious software. Right after installation, run the malware scanner to remove most standard infections.

Utilize an alternate internet browser to download antivirus software

Some malware only targets certain browsers. If this is your case, use another internet browser as it may circumvent the virus. If you’re not able to download the antivirus application using Internet Explorer, it means malware may be targeting IE’s vulnerabilities. Here, you should switch to an alternate web browser like Firefox or Chrome to download Safebytes software.

Create a portable antivirus for removing malware

Here’s another solution which is using portable USB anti-malware software that can scan your system for viruses without the need for installation. Abide by these steps to run the anti-virus on the affected computer system. 1) On a virus-free computer, install Safebytes Anti-Malware. 2) Plug the Flash drive into the uninfected computer. 3) Double click on the executable file to run the installation wizard. 4) Choose the USB stick as the location for saving the file. Follow activation instructions. 5) Transfer the thumb drive from the uninfected computer to the infected PC. 6) Run the Safebytes Anti-malware directly from the USB drive by double-clicking the icon. 7) Click on “Scan Now” to run a scan on the infected computer for malware.

Protect Your Personal Computer From Viruses and Malware With SafeBytes Security Suite

If you’re looking to install an anti-malware program for your computer, there are various tools on the market to consider but you should not trust blindly anyone, irrespective of whether it is a free or paid program. Some of them do a great job in eliminating threats while some will ruin your PC themselves. When searching for an antivirus program, pick one that provides solid, efficient, and comprehensive protection against all known viruses and malware. On the list of highly recommended software by industry leaders is SafeBytes Anti-Malware, popular security software for Windows computers. Safebytes is among the well-established PC solutions companies, which provide this all-inclusive anti-malware software program. With its most advanced virus detection and repair technology, this software will help you protect your PC against infections caused by different kinds of malware and other internet threats, including spyware, adware, viruses, worms, trojans, keyloggers, potentially unwanted program (PUPs), and ransomware.

SafeBytes anti-malware provides an array of enhanced features that sets it apart from all others. Here are some of the good ones:

Real-time Active Protection: SafeBytes gives complete and real-time security for your personal machine. It will constantly monitor your pc for hacker activity and also gives users superior firewall protection. Antimalware Protection: This deep-cleaning antimalware software program goes much deeper than most antivirus tools to clean out your computer. Its critically acclaimed virus engine detects and disables hard-to-remove malware that hides deep within your PC. Web Security: Safebytes allots all sites a unique safety ranking that helps you to get an idea of whether the webpage you’re going to visit is safe to view or known to be a phishing site. Extremely Speed Scanning: This software has got one of the quickest and most powerful virus scanning engines in the industry. The scans are extremely accurate and take a short amount of time to complete. Lightweight: SafeBytes is a lightweight and easy-to-use anti-virus and anti-malware solution. Since it utilizes low computer resources, this program leaves the computer power exactly where it belongs: with you. 24/7 Guidance: You can get 24/7 technical assistance to promptly resolve any concern with your security tool. On the whole, SafeBytes Anti-Malware is a solid program as it has lots of features and can detect and eliminate any potential threats. Once you have downloaded and installed this software, you will no longer have to worry about malware or any other security worries. If you need sophisticated forms of protection features & threat detections, buying SafeBytes Anti-Malware could be worth the dollars!

Technical Details and Manual Removal (Advanced Users)

If you wish to manually get rid of CyboScan PC Optimizer without the use of an automated tool, it might be possible to do so by removing the application from the Windows Add/Remove Programs menu, or in cases of browser plug-ins, going to the browsers AddOn/Extension manager and removing it. You will likely also want to reset your internet browser. In order to ensure the complete removal, manually check your hard disk and computer registry for all of the following and remove or reset the values accordingly. Having said that, editing the registry is actually a difficult task that only advanced users and professionals should try to fix the problem. Furthermore, certain malware keeps replicating which makes it tough to remove. You’re suggested to do this procedure in Safe Mode.
Files: %APPDATA%\Microsoft\Windows\Start Menu\Programs\Cyboscan PC Optimizer %ALLUSERSPROFILE%\Start Menu\Programs\Cyboscan PC Optimizer %PROGRAMFILES(x86)%\Cyboscan\Cyboscan PC Optimizer Registry: HKEY_LOCAL_MACHINE\Software\[APPLICATION]\Microsoft\Windows\CurrentVersion\Uninstall..Uninstaller E55FEFEA-F506-47DC-A76E-9F7668D6E5C9
Read More
Yellow triangle with exclamation on Battery
Seeing a yellow triangle with an exclamation mark on the battery symbol on the System Tray of your Windows 10 laptop is not really uncommon especially if your battery is about to run out of power. However, if you just purchased your laptop recently and the first thing you’ve noticed when you first opened it is the yellow triangle with an exclamation mark in the battery, read on as this post will help you resolve this issue. Seeing this kind of icon on your computer does not necessarily mean that you have to replace your battery as there are still several potential fixes you can try to resolve the problem. So if you notice this icon, you can try running the Power troubleshooter as it will help you resolve any potential issues with the battery. Aside from that, you can also restore the default settings of the power plan manually or uninstall and reinstall the battery driver. For more information, refer to the given options below.

Option 1 – Try to run the Power troubleshooter

As pointed out, the Power troubleshooter can help you resolve any issues your battery might have automatically. It plans and detects system settings that can affect power usages like timeout and sleep settings, display settings, and screensavers and restores them to their default settings. To run this troubleshooter, follow these steps:
  • Open the Windows Settings and go to the Update and Security option.
  • Next, click on the Troubleshoot option under Update and Security and then scroll down until you see the “Power” option.
  • Under Power, click on the “Run the troubleshooter” button to start running the Power troubleshooter.
  • Wait for a couple of seconds until the Power troubleshooter is done scanning your computer for issues. Once it’s done, follow the next on-screen instructions that appear on the screen.
  • If needed, restart your computer and see if it has fixed the problem.

Option 2 – Restore the default settings of the Power plan manually

  • Open the Windows Settings again and select System.
  • Next, scroll down until you see the “Power & sleep” option.
  • After that, click on the “Additional power settings” option located in the right pane to open the Power Options.
  • Now click on the link that says, “Change Plan Settings” and select the “Restore default settings for this plan” option.

Option 3 – Try to uninstall or reinstall the Battery driver

You might also want to uninstall or reinstall the battery driver as it can also resolve the problem. But before you start, you have to shut down your computer and remove the power chord as well as the battery. Once you’re done, follow these steps:
  • Plug the power chord and restart your computer.
  • Once your computer has restarted, tap the Win + R keys to open the Run utility and type “devmgmt.msc” in the field and tap Enter to open the Device Manager.
  • After that, look for the “Batteries” driver from the list of drivers and expand it.
  • Then right-click on the “Microsoft ACPI-Compliant System” driver and click on the “Uninstall device” option.
  • Once it’s done, restart shut down your computer and remove the power chord and then attach the battery.
  • Now attach the power chord again and restart your computer to automatically install the driver.
Read More
How to Fix Error 1007

Correct Error 1007

Error Code 1007 - What is it?

This is a typical system error.  This error means the requested operation cannot be performed in full-screen mode. It hampers your ability to run your desired program on Windows PC. It is displayed on computer screens in the following format:
"ERROR_FULLSCREEN_MODE" and/or as the hexadecimal value 0x3EF.”

Solution

Restoro box imageError Causes

The system error code 1007 can be triggered due to several reasons. This includes but is not limited to:
  • Windows registry damage or corruption
  • Device driver conflicts
  • Spyware or viral infection
  • Hardware malfunction
  • Software file damage or corruption
Unlike the blue screen of death error codes, this error is not fatal. But it may hamper your ability to run and work on your desired program. To avoid the inconvenience, it is advisable to fix it immediately.

Further Information and Manual Repair

Try these easy and effective do it yourself methods to repair the system error code 1007 on your PC:

Method 1 - Scan Your System for Viruses

If the underlying cause of error 1007 on your system is viral and spyware infection, then it is advisable to download a powerful antivirus and scan your entire PC. An antivirus not only detects but also removes all types of viruses including spyware, Trojans and adware. Once removed, try running your desired program again, if the program runs successfully, this means the error is resolved.

Method 2 - Update the Drivers

When the error code 1007 occurs due to driver conflict, then it is advisable to update the drivers. To do so simply use the driver update wizard from within Device Manager. The wizard will guide you through the entire driver update process, making it extremely simple for you to update the drivers in minutes.

Method 3 - Clean and Repair the Registry

You may experience the error 1077 because of registry damage or corruption. If this is the reason, then it is suggested you download Restoro. This is a user-friendly and multi-functional PC Fixer deployed with a powerful registry cleaner. It scans your entire system for registry related errors and issues, removes all unnecessary and obsolete files like cookies, junk files and bad registry entries, notorious for registry corruption. In addition to this, it also repairs the registry and damaged system files, thereby resolving the system error code 1007 immediately. Click here to download Restoro on your PC and fix system error code 1007 today!
Read More
How to Fix Windows 8 Error 0x80070490

How to Fix Windows 8 Error 0x80070490

Error Code  0x80070490 - What is it?

Error code 0x80070490 occurs in versions of Windows including Windows 8 or 8.1 and Windows 7 or Windows Vista. This error often arises when users attempt to install updates via Windows Update or Microsoft Update.

The main reason for the error relates to the Component-Based Servicing (CBS) manifest which has become damaged. When the error occurs, the Windows device is unable to successfully install updates.

Solution

Restoro box imageError Causes

Error code 0x80070490 might appear for various reasons but is most prominent in the following cases:

  • Attempts to install Windows 8 or 8.1
  • A corrupted Component-Based Servicing (CBS)

Further Information and Manual Repair

The solutions for error code 0x80070490 vary so users may need to attempt each solution to find the best results.

  1. Repair Corrupted Windows Files with System File Checker

The System File Checker (SFC.exe) is a Windows-based utility that enables users to check and repair corrupted or damaged system files. It can also restore missing systems files which can be the cause of errors such as error code 0x80070490.

To repair files, begin scan by swiping the right edge of the screen then opening the search box. Type Command Prompt, right-click this option, then select Run as Administrator. Once the scan begins, wait for the process to be completed then restart your device. Check if the error is resolved by reattempting updates. If error code 0x80070490 in Windows 8 or 8.1 persists on your device, proceed to the solution below.

  1. Perform Clean Boot

A clean boot is one of the best ways to reduce conflict among files – an issue that may arise whenever users update, install or run programs on their Windows device.

To run a clean boot, your device reboots using limited drives and programs. The process allows you to identify which conflict among programs is causing errors on your Windows device.

You can access the clean boot tool by entering msconfig in the search box. Select Services, then System Configuration. Check the Hide all Microsoft services checkbox then select Disable all. Next, go to the Startup tab, click and open Task Manager. After selecting the Startup tab, make sure you right-click each startup program. Click Disable from the context menu then close Task Manager when done. Select OK on the System Configuration menu then restart your machine to clean boot Windows 8 or 8.1.

If the clean boot successfully identifies and resolves issues with corrupted files, you will be able to access updates using Windows Update or Microsoft Update. Error code 0x80070490 will no longer occur. But if that proves unsuccessful, other options are available below including running Windows Update Troubleshooter.

  1. Run Windows Update Troubleshooter

This method can provide a simple solution for users as it verifies whether your Internet connection, network adapter and Windows Update services are functioning properly. However, if you are uncertain as to whether you will be able to troubleshoot, seek assistance from a qualified Microsoft technician.

To run Windows Update Troubleshooter, simply download from Microsoft’s website. Be sure you are downloading the tool recommended for your operating system, in this case Windows 8 or 8.1. After you download Windows Update Troubleshooter, run it to enable the tool to check for and resolve update issues on your device.

  1. Use DSIM or System Update Readiness Tool

The System Readiness Tool or DSIM is another method you can use to correct issues related to error code 0x80070490. This tool checks problems on your system that might prevent your computer from performing Windows updates including issues related to damaged system files.

Once you download and install this tool, it will be able to run automatically. The process may be technical, however, requiring specialized knowledge to successfully download and run the tool. Consider getting assistance from an IT professional in this case. Also, check Microsoft's online resources to download the tool.

  1. Use an Automated Tool

Having an automated tool at hand will enable users to always be prepared. Download a powerful automated utility tool to provide solutions whenever error codes or other problems affect your Windows 8 device.

Read More
1 2 3 162
Logo
Copyright © 2022, ErrorTools. All Rights Reserved
Trademarks: Microsoft Windows logos are registered trademarks of Microsoft. Disclaimer: ErrorTools.com is not affiliated with Microsoft, nor claim direct affiliation.
The information on this page is provided for information purposes only.
DMCA.com Protection Status