An Easy Guide to Resolving Error C00D11B1

How to Fix Error C00D11B1

Error C00D11B1- What is it?

Error C00D11B1 is a type of Windows Media Player error code.

The error C00D11B1 hampers your ability to play videos, MP3 files and songs on Windows Media Player. The error is displayed in the following format:

Error C00D11B1:’Windows Media Player can’t play the file.’

Solution

Restoro box imageError Causes

The cause of error C00D11B1 message pop up on your computer can be narrowed down to one particular reason virtually because this error may be triggered due to several reasons, these include:

  • Corrupt DRM license
  • Enabled codec of the video in Windows Media Player codecs section
  • Registry Corruption

The good news is that this error is not fatal and does not pose serious PC threats like runtime and BSoD error codes.

However, it is still advisable to resolve to ensure you are able to watch movies and listen to songs on Windows Media Player without any difficulty.

Further Information and Manual Repair

Here are some of the best and effective do it yourself methods to resolve the error C00D11B1 on your PC right away:

Method 1- Disable the codec of the video option in the Codecs Section

If you are unable to play downloaded movie files on your PC on Windows Media Player, then try this method to resolve the issue. Simply open Windows Media Player, Go to Tools, Options, DVD and then click Advanced Tab.

Here find the codecs section, scroll down to the codec of the video you are trying to play and see if it says enabled. If it does, then disable it and then select a decorder for the codec. Now try running the video again on your Windows Media Player. This will hopefully resolve the issue.

Nonetheless if the error still persists, try method 2.

Method 2- Delete DRM Licenses & cache and Download it Again

Sometimes the error C00D11B1 can also be trigged by corrupt DRM licenses & cache.

To resolve the issue, simply delete all files. First open Windows Explorer (Windows key + E) and then go to C:ProgramDataMicrosoftWindowsDRM. Now delete all files in this folder. Once deleted, Let Windows Media Player download your license again.

After downloading the DRM license again, run the Windows Media Player to see if it works.

Method 3- Disable Firewall Temporarily

Firewall can also be responsible for blocking the Windows Media Player streaming. Firewalls often block important ports that are required in order to run some programs. If this is the cause, then simply disable Firewall temporarily to resolve the issue.

Method 4- Repair the Registry

Registry is that part of your computer that saves all the activities performed on the PC and all the files too including both important and unimportant files like cookies, junk files and bad registry entries.

If these unimportant and obsolete files are not removed frequently, the registry gets corrupt and damaged. And due to this reason you may experience error code C00D11B1 on your system.

To resolve this issue, simply repair the damaged registry by downloading Restoro. This is a powerful PC Fixer integrated with a registry cleaner. The registry cleaner removes all unnecessary files, cleans and repairs the registry in seconds.

Click here to download Restoro and fix error C00D11B1 on your PC right now!

If you like to learn and find out more about various Windows errors, and how to repair them go to our vast archive or use search to find articles that will explain and help you in solving your issue.
However, if you prefer to do things fast and with automatization then we are proposing to use an automated solution for your issues. The application that we are recommending is Advanced System Repair Pro
Advanced System Repair utilizes multiple tools all in one to give you a quick, simple, reliable, and very thorough diagnosis of your PC. It brings you all the tools you need in one program to clean, fix, protect, optimize and boost your PC!
1-Click Maintenance
All the tools to make it simple and easy! It's like having a professional technician at the click of a mouse.

Junk Cleaner
Keeping your computer free from unnecessary clutter also helps make your computer last longer. Like any other machine, if you keep it clean and take care of it, it will serve you better for longer!

Optimize background apps
Optimize applications background activity with the built-in Application Optimizer feature.

Disk Defrag
With a simple 1-click, Advanced System Repair speeds up your PC by assembling fragmented files on your machine and organizing them more efficiently.

Malware Removal
Finds and removes all types of harmful malware including trojans, worms, bots, adware, spyware, PUPs, and more!

Privacy Cleaner
The all-in-one privacy suite to Clean Your Tracks & Protect Your Privacy! Make your computer safe, secure, and more efficient!

System Tweak/Optimizer
ASR will analyze your complete system and settings to adjust your PC to function at its maximum performance.

Registry Cleaner
Over time, as you install and uninstall applications, the registry can become cluttered with old entries and broken settings which can result in program crashes, and annoying messages and slow the computer down.
Visit our Advanced System Repair Pro Download page to inform yourself about all the benefits of this software and get a free trial copy of it.
advanced system repair pro

Advanced System Repair Pro

One-click automated PC repair solution
ASR logo
With Advanced System Repair Pro you can easily
Replace damaged files
Restore performance
Free disk space
Remove Malware
Protects WEB browser
Remove Viruses
Stop PC freezing
DOWNLOAD
Privacy Policy | Terms of Use | Uinstall
Advanced System Repair Pro is compatible with all versions of Microsoft Windows including Windows 11

Share this article:

You might also like

Windows 11 new features and preview
Microsoft has presented its next version of their flagship product, Windows 11, and feelings are divided among users. Some users like it very much and eager to upgrade, some do not like the graphic overhaul it went through, but overall I think Microsoft has done a good job with it. Here in this article, we will discuss some of the new features which Windows brings to the table, well at least ones that were showed, I am sure there are plenty more which we will see once OS has been released.

New Start menu

Winodws 11 start menu
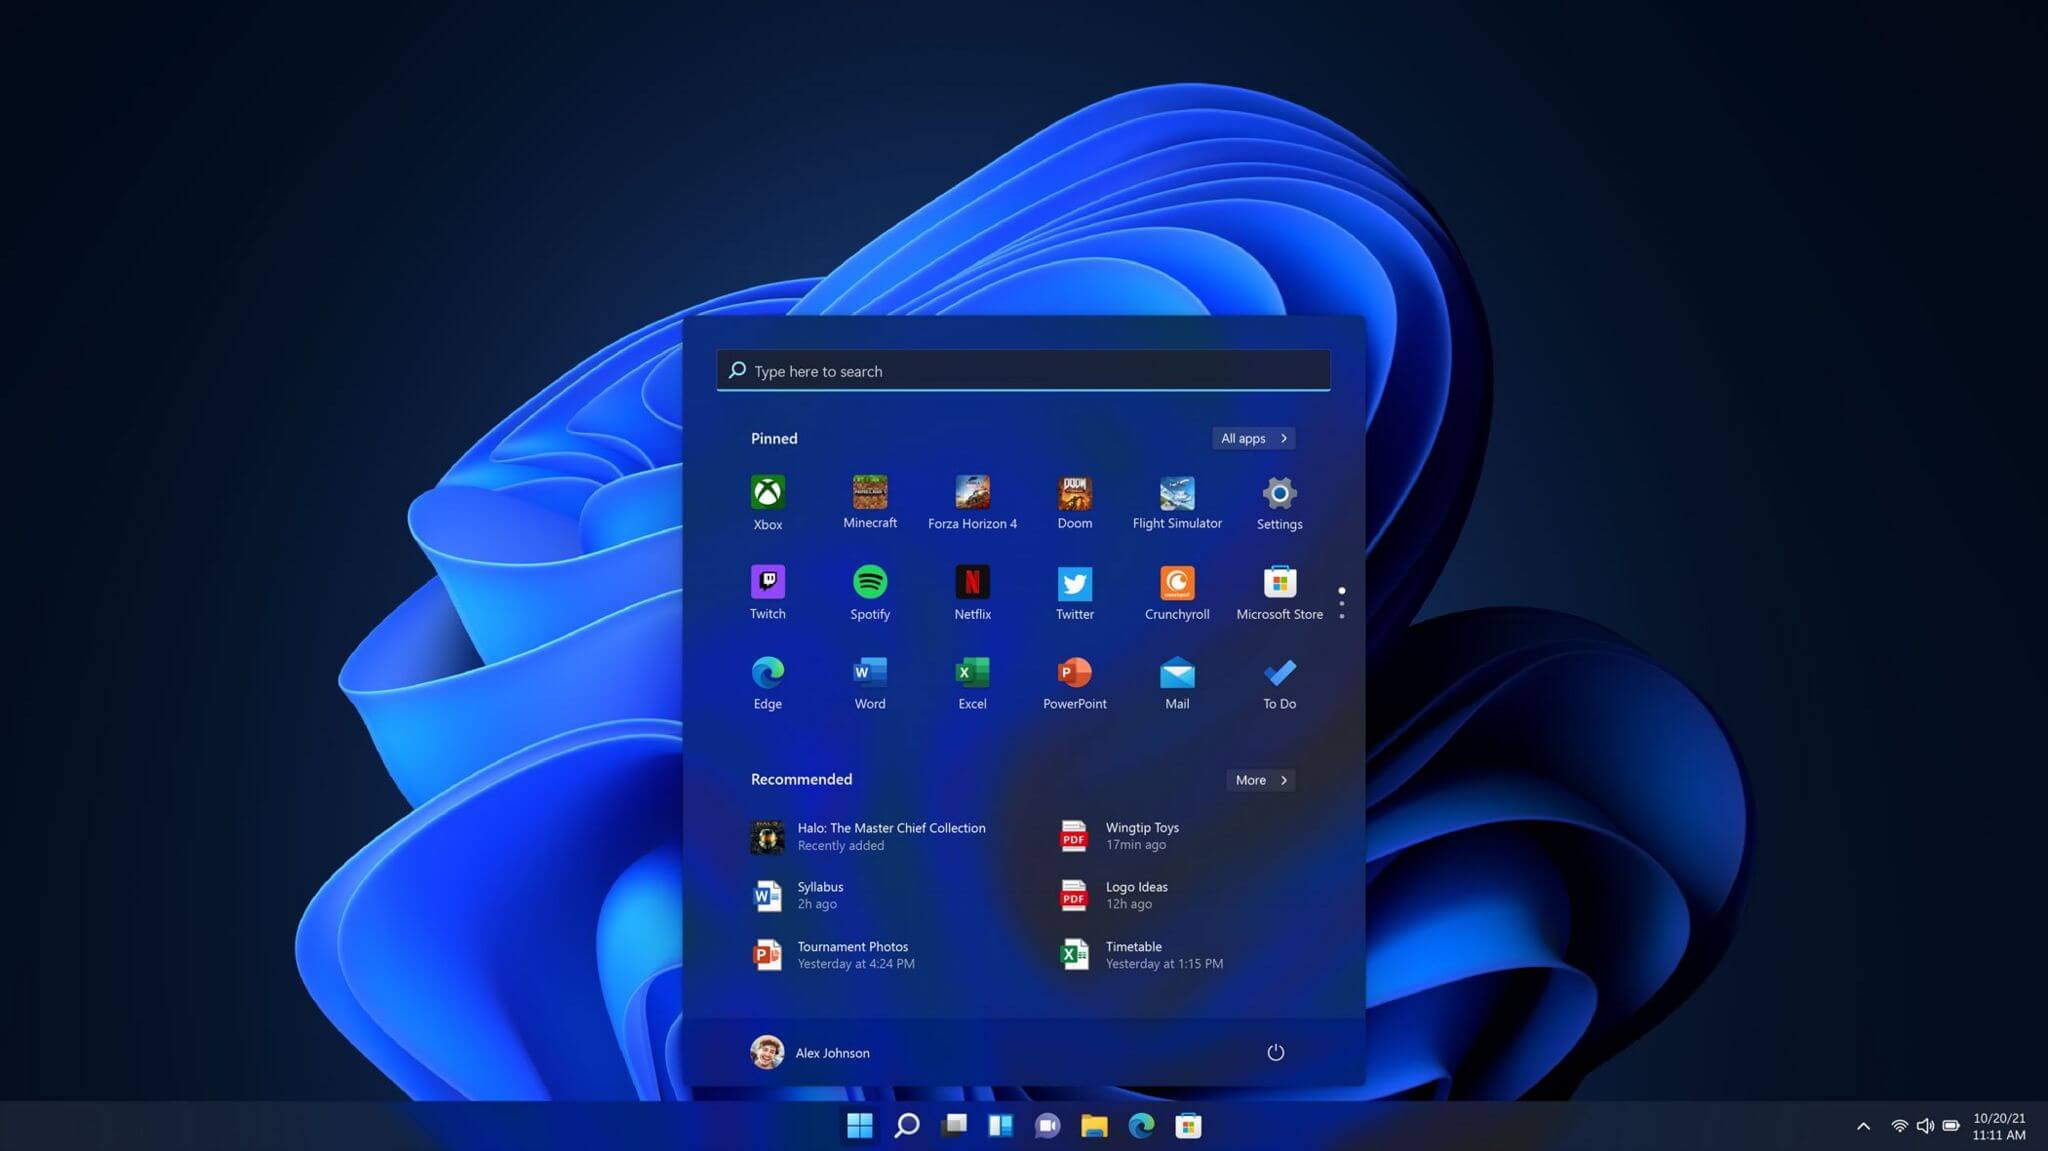
One of the first things that everyone saw when Microsoft has unveiled Windows 11 is its Start menu. Funny enough this is what has caused most of the divide among users, some find it interesting, and some do not like it. Truth is, it is different, and it is centered in the middle instead of the lower left part of the screen. It has been confirmed however that the Start menu can be moved to any part of the screen so if you want, you could place it on the lower left as it has always been. Live tiles do not longer exist in the Start menu, instead, we have styled simple icons.

Windows 11 Snap controls are great

Windows 11 snap controls
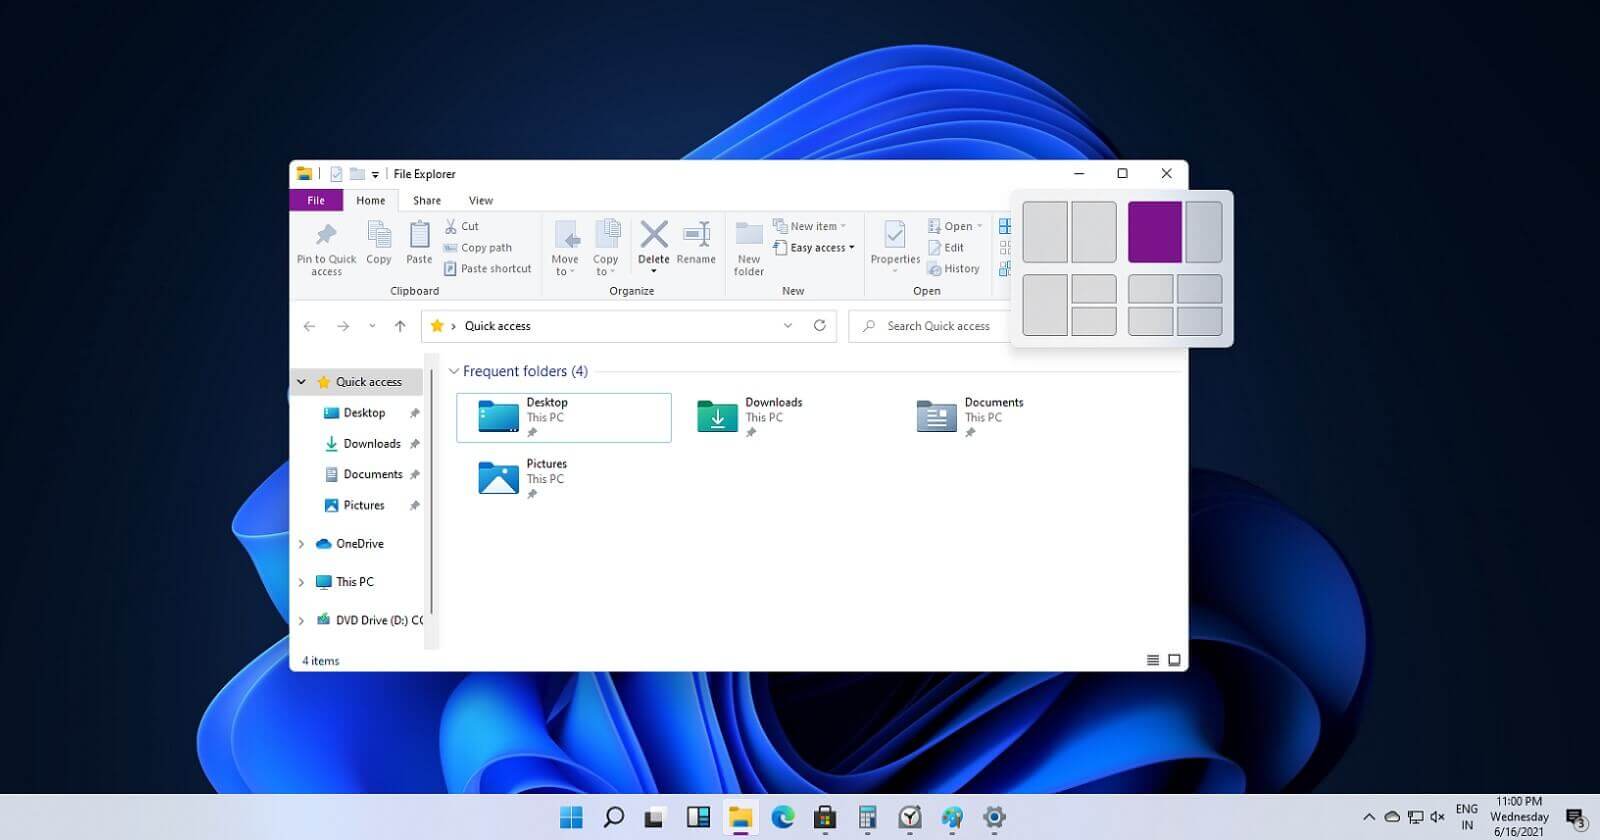
If you have used the cascade option in previous Windows versions then it is most likely that you will like the new Snap controls. You can quickly snap windows side by side, or arrange them in sections on your desktop just by hovering over maximize button on the title bar.

Windows 11 File Explorer

Windows 11 file explorer
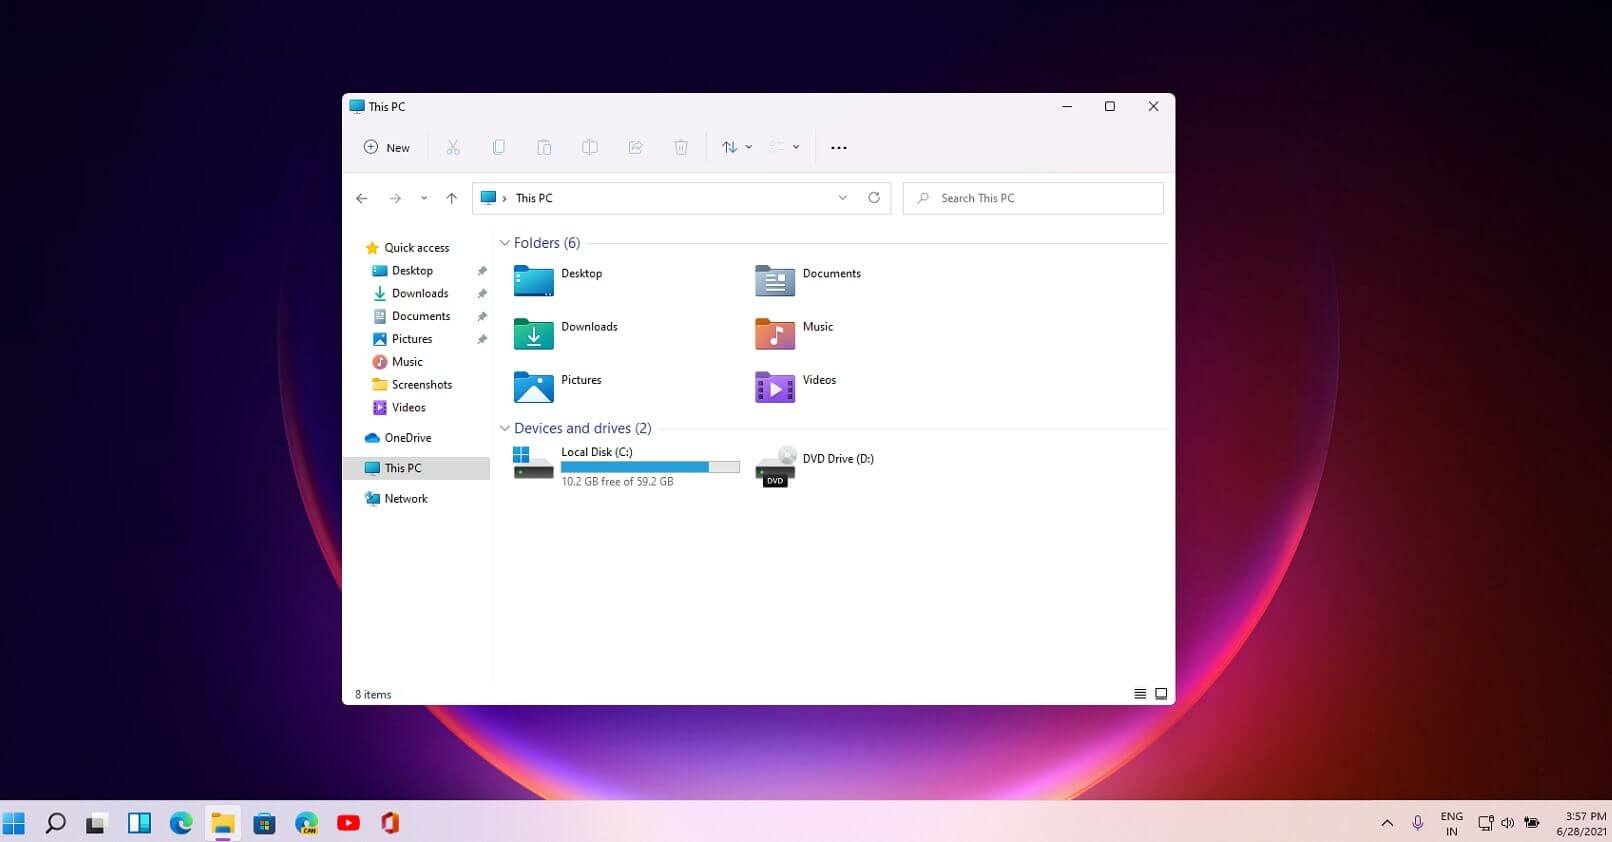
File explorer has gone through some visual and design changes, the ribbon on top has been completely removed and replaced with a header-like feature with a slick and clean design. The header contains a nice organized and designed single row of icons like cut, paste, copy, rename, delete, and new folder icons.

Settings app ovberhaul

Windows 11 settings app
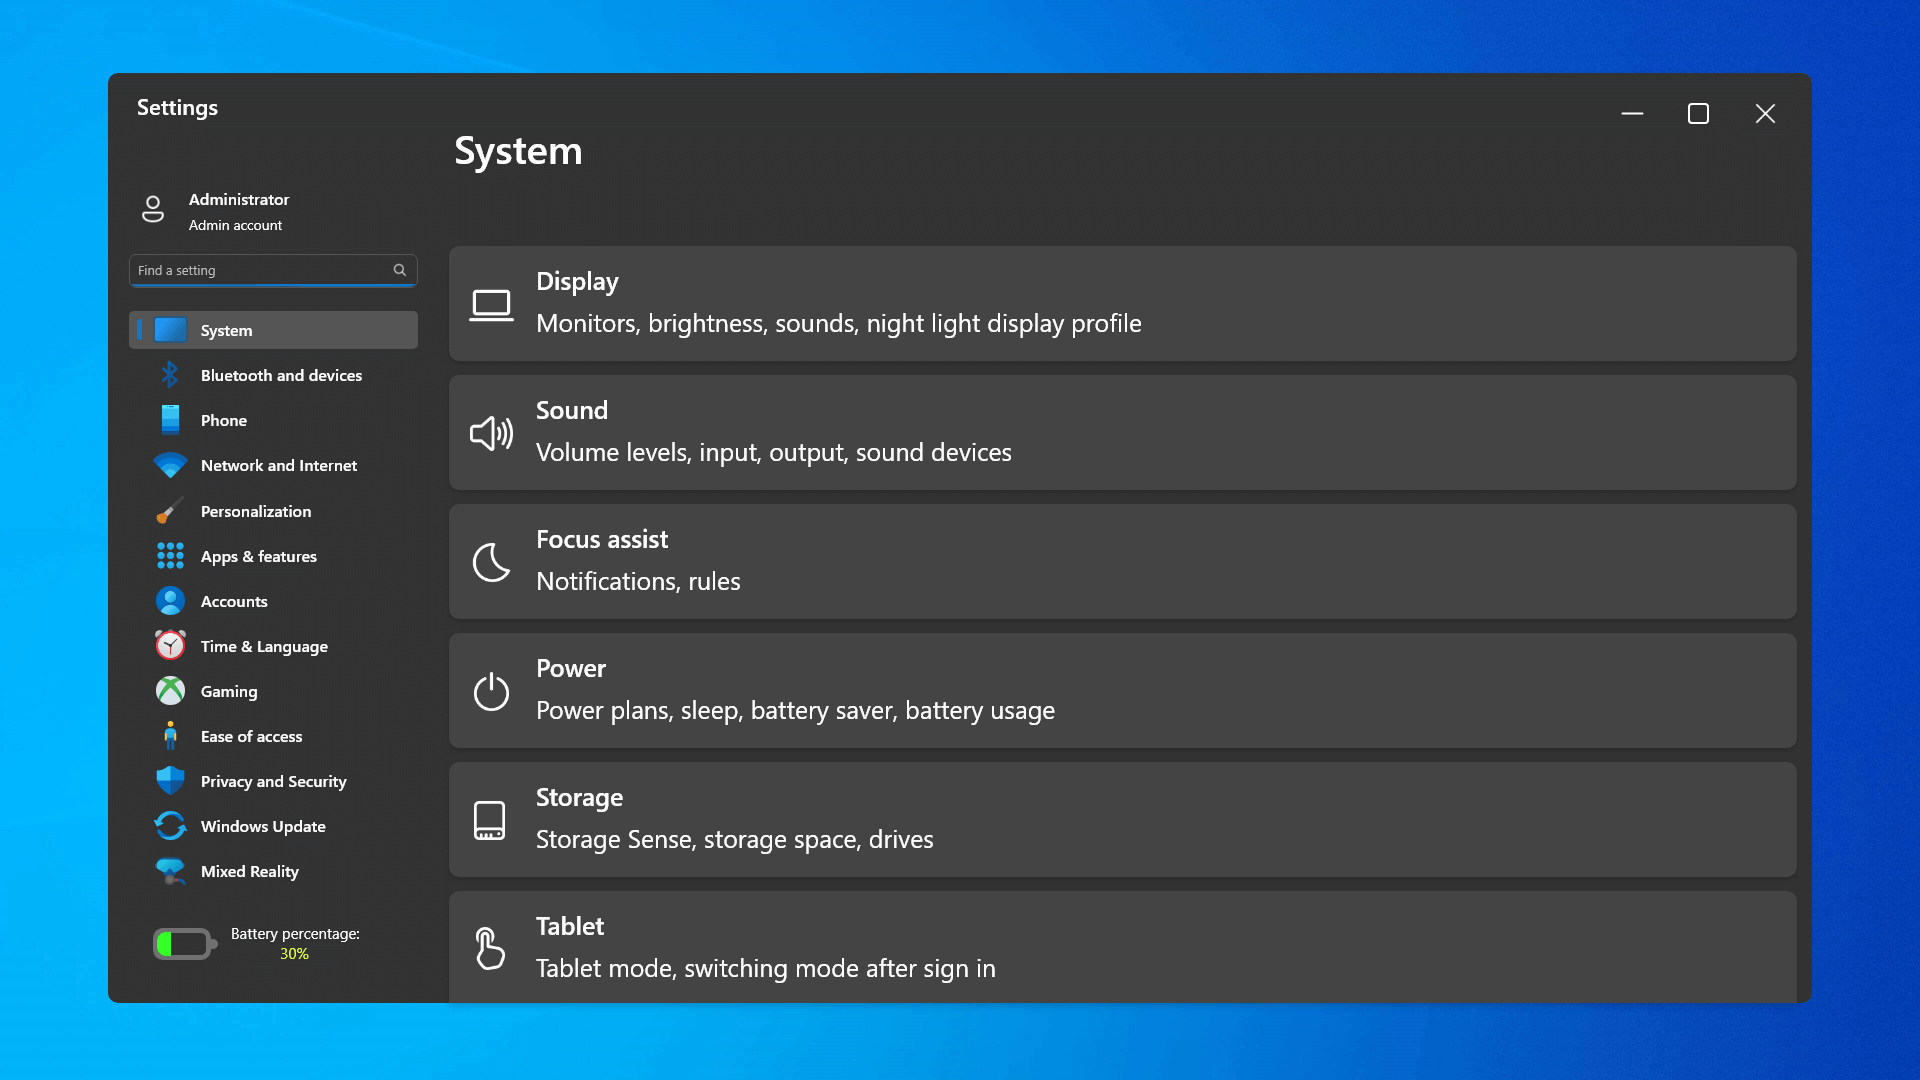
The settings app also has gone through visual and design changes. It has a new design that is very visually appealing and navigation has been simplified and more organized. Finding the right and desired setting is much faster and clearer now.

Widget tab makes comeback in Windows 11

Windows 11 widgets bar
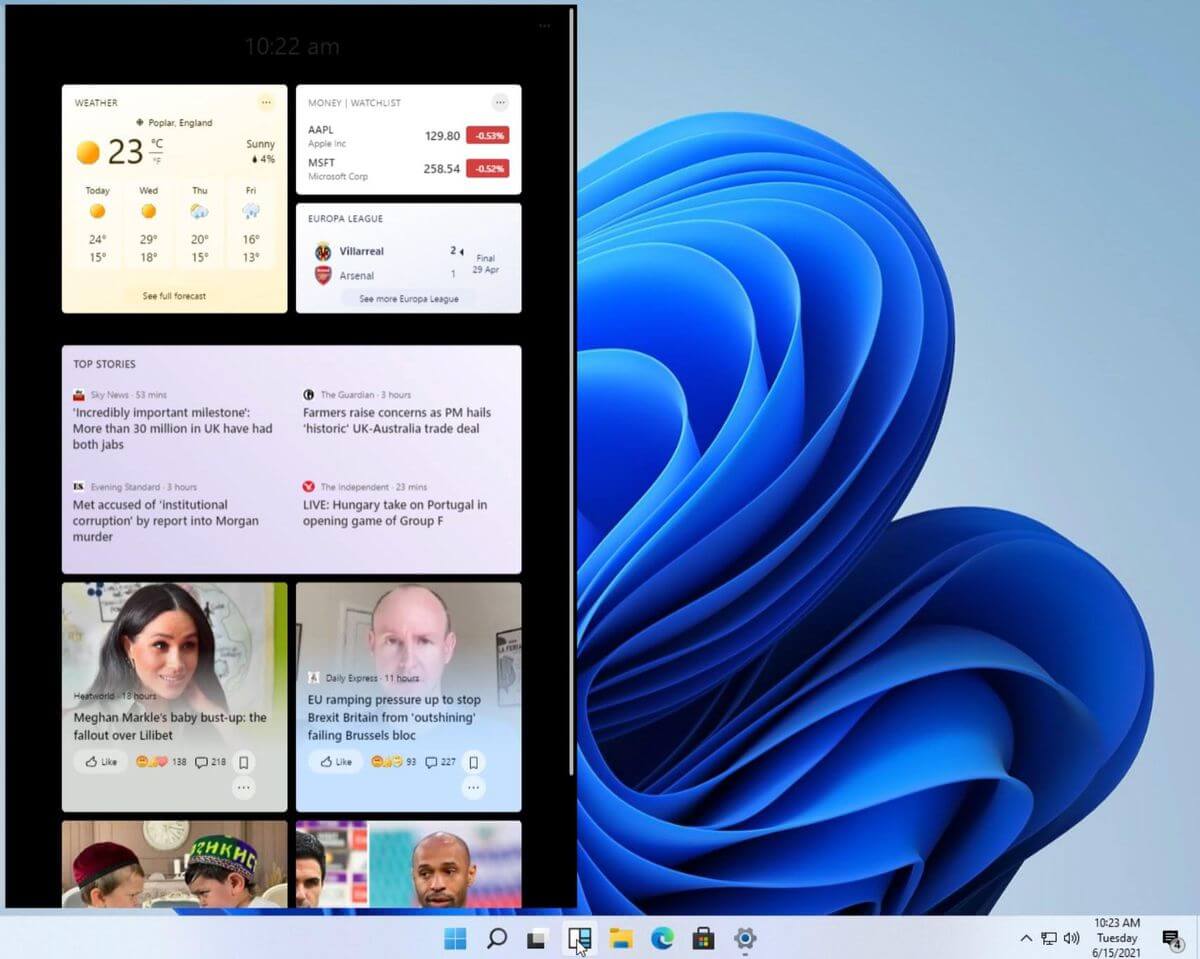
Yes, widgets are back but not like you remember them. Instead of being all-time present at your desktop like once they used to be, now there is a button on the taskbar which brings the widget bar up that contains desired widgets. This way they are easily accessible and do not clutter desktops. So far we have weather, news, calendar, and stocks widget but we will see how development on these goes. I expect to have community-made widgets like in old days for all of our needs.

XBOX app

Windows 11 xbox appThe new Xbox app is now integrated into Windows 11, offering quick access to Xbox Game Pass games, the social parts of the Xbox network, and the Xbox store.

Security and TPM 2.0 in Windows 11

Windows 11As widely known by now Windows 11 will require you to have a TPM 2.0 module capable CPU in order to install it. This system requirement has caused a lot of controversies but essentially it seems that MS's goal is to protect your personal data by using this module. The upside of course is that your data will be protected much more than in previous Windows versions, the downside, of course, will be that you will need newer hardware to run OS on it. and that is essentially it, keep on tuned on more Windows 11 information and overall articles tied to PC and technology here at errortools.com
Read More
Fix Windows Update error 0x80070422
If you were trying to run Windows Update or activate Windows Firewall or download from the Windows Store but encounter the Windows Update Error 0x80070422 instead, read on as this post will show you how you can resolve the problem. This kind of Windows Update error occurs when the Windows Update or WUAUSERVE is not started or when the Background Intelligent Transfer Service or BITS can’t be started. It could be that they are disabled or because they have no enabled devices associated with them. Whichever the case is, you can check out the options given below to fix the Windows Update Error 0x80070422 and make sure that you create a System Restore point first before you start.

Option 1 – Check the status of some Windows Update Services

  • Tap the Win + R keys to open the Run dialog box.
  • Next, type “services.msc” in the field and hit Enter or click OK to open Services.
  • From the list of Services, look for the following services and make sure that their Startup type is as follows:
    • Windows Update – Manual (Triggered)
    • Background Intelligent Transfer Service – Manual
  • After that, check if the Service status of the listed services above is set to Running. If they’re not, click on the Start button to start these services and then check if you can now enable the Windows Update service or not.

Option 2 – Try to disable IPv6 in the Network Center

You might also want to disable IPv6 in the Network Center in order to fix the Windows Update Error 0x80070422. How? Follow these steps:
  • Tap the Win + X key combination on your keyboard and click on Network Connections.
  • This will open the Network Connections section under the Setting app. From there, click on the Network and Sharing Center link located at the right side of the panel which will open a Win32 version of the Windows settings known as Control Panel.
  • In the Control Panel, click on the network your computer is connected to.
  • A mini window will appear and in that window click on Properties which will open another mini window that will provide a list.
  • From this list, uncheck the option that says, “Internet Protocol Version 6 (TCP/IPv6)”.
  • Now click on OK and close all the other windows and see if it fixes the Windows Update error.

Option 3– Run the Windows Update Troubleshooter

If disabling IPv6 didn’t work, you could also try running the Windows Update Troubleshooter as it could also help in fixing any issues related to Windows Update including the Windows Update Error 0x80070422. To run it, go to Settings and then select Troubleshoot from the options. From there, click on Windows Update and then click the “Run the troubleshooter” button. After that, follow the next on-screen instructions and you should be good to go.

Option 4 – Try running the DISM tool

You can also try to run the Deployment Imaging and Servicing Management or DISM tool to fix the Windows Upgrade error. Using this built-in tool, you have various options such as the “/ScanHealth”, “/CheckHealth”, and “/RestoreHealth”.
  • Open the Command Prompt with admin privileges.
  • Then type in the following commands and make sure to hit Enter right after you type each one of them:
    • Dism /Online /Cleanup-Image /CheckHealth
    • Dism /Online /Cleanup-Image /ScanHealth
    • exe /Online /Cleanup-image /Restorehealth
  • Do not close the window if the process takes a while as it will probably take a few minutes to finish.

Option 5 – Run Microsoft’s online troubleshooter

Running Microsoft’s online troubleshooter might also help you fix the Windows Update Error 0x80070422. This online troubleshooter is known to help in fixing Windows Update errors, it scans your computer for issues that might be causing the problem and then fixes them automatically.
Read More
Parallels Desktop 17 brings Windows 11 to MAC
Parallels Desktop 17
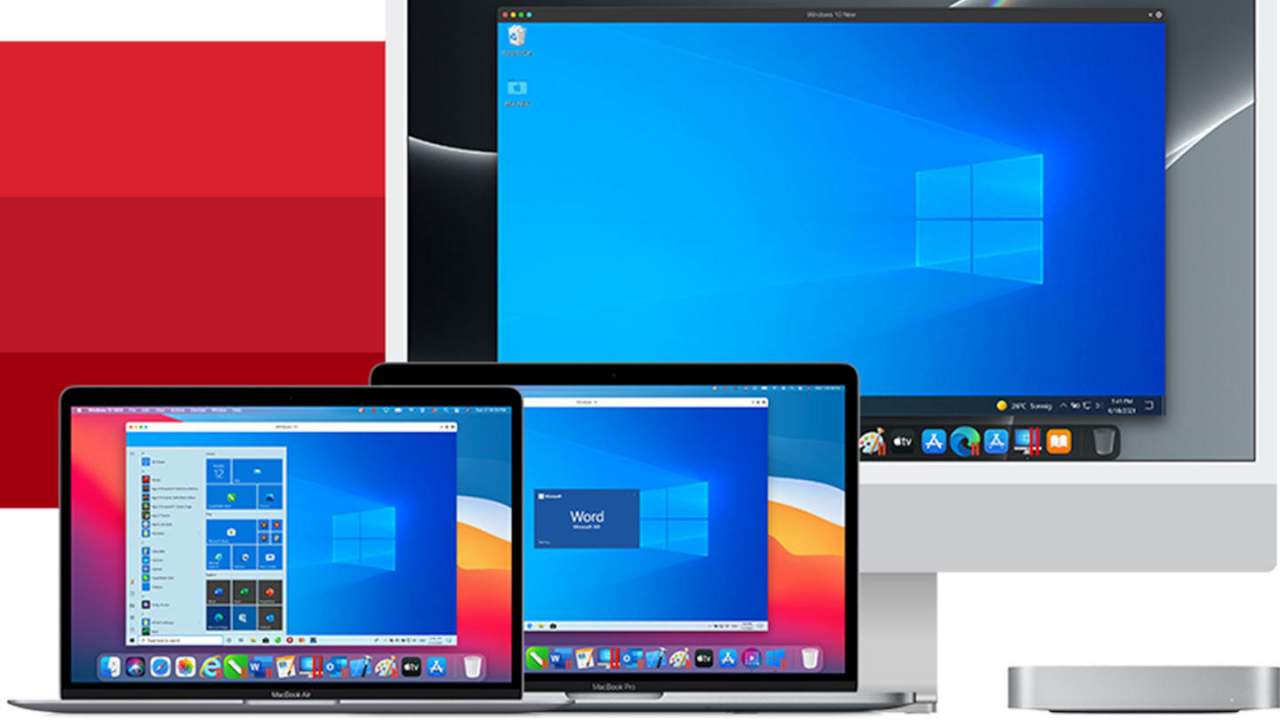
Parallels is an application developer for MAC OS mostly known for its PC virtualization software Parallels Desktop, a PC virtualization software running on Macs enabling running Windows and Linux with respective software on your MAC. With its latest Desktop 17 version, the software can run natively on both Intel-based and M1-based MACs. Thanks to this feature MAC users will be able to benefit from various speed improvements while running both Windows 10 or Windows 11 preview. On both Intel and M1 setups, Parallels resumes Windows and Linux up to 38% faster, provides an up to 25% bump in 2D graphics and a six-time increase in OpenGL graphics processing. M1-centric stats include 33% faster Windows start-up times, up to 28% faster DirectX 11 performance, and up to 20% better disk performance on Windows 10 Insider Preview. Parallels Desktop 17 delivers a set of fresh features including a new video driver that enhances video and game playback and boosts Windows UI responsiveness. An improved Coherence mode lets users run Windows apps within the Mac environment, cutting down on distracting changes in appearance during Windows sign-in, shut down, and software updates. Drag-and-drop operations are also improved, with support for text and graphics between Mac and Windows applications. This function works well with MAC OS Monterey's Quick Note feature, which can accept content from any Windows app. USB support, disk management, copy and paste unformatted text, and automatic virtual machine optimization also receive upgrades.
Read More
Fix This device is currently in use, USB Error
USB storage devices, peripherals, and other devices are almost used on a daily basis. And as you know, when removing the USB storage devices, it is recommended to always use the “Safely remove the USB storage device” option in order to prevent data corruption in the USB storage device. However, there are times when you may see the following error message after you use the “Safely remove the USB storage device” option:
“Problem ejecting USB Mass Storage – This device is currently in use, close any programs or windows that might be using this device, and then try again.”
This kind of error message occurs when the device is still interacting with the operating system in the background. There are several ways you can fix this error but before you check them out below, you need to close all the open windows and programs that may be using the USB storage device and then wait for a couple of seconds and then try safely removing it again. However, if you are still getting the same error message, then here are some tips you should try:

Option 1 – Try to use the Task Manager

  • Tap the Ctrl + Shift + Esc keys on your keyboard to open the Task Manager.
  • After that, look for the running processes and programs hogging on your USB Storage device. The error could be due to a program or process that’s using the USB device. This program or process will hog onto some Disk or CPU while transferring data and interacting with the device.
  • Once you find the culprits, right-click on each one of them and select End Process or End Task. You could also try to restart the process for “Explorer.exe” and see if it fixes the problem.

Option 2 – Try using DISKPART

The next thing you can try to resolve the issue is to use DISKPART. Refer to the given steps below to do so.
  • Tap the Win + R keys to launch Run and then type “cmd” in the field and tap Enter or click OK to open an elevated Command Prompt.
  • Next, type and enter this command to execute it: diskpart
  • The command you entered will initiate the DISKPART utility. After that, type and enter this second command: list disk
  • Next, type and enter this third command: list volume
  • The commands you just executed will help you in either listing all the Disk connects or all the partitions on those disks formed and from there, you need to select one command depending on the “list” command you entered. You can execute either of the two following commands:
    • select disk #
    • select volume #
  • After that, it will select the Disk or Partition you want to select.
  • Now type either one of the following commands:
    • offline disk #offline volume #
  • The command you entered will mark the selected disk is Offline. Afterward, try to safely remove your USB Storage device. Just remember that when you plug it back in again, you have to carry out the same method except for the last given command as this time you will have to enter either of these commands in order to get your USB storage device back online:
    • online disk #
    • online volume #

Option 3– Try using the Disk Management utility

  • Tap the Win + R keys to open Run.
  • Then type “diskmgmt.msc” in the field and hit Enter to open the Disk Management utility.
  • Next, look for the entry for your USB Storage device and once you’ve found it, right-click on it and select Offline.
  • After that, try to safely remove your USB Storage device again and see if the error is fixed. Note that you need to go over the same steps again if you want to plug your USB Storage device back in but make sure to select the Online option instead of Offline to get your device back online.
Read More
What to do if Windows 10 Taskbar Volume Control is not working
The quickest way to control and manage the volume of your Windows 10 PC is using the Volume control icon in the system tray. However, you might encounter issues in using it especially if you recently updated your PC. After the update, if it no longer responds to mouse clicks, be it a right-click or left-click, read on as this post will show you what you can do to remedy that issue. If you think that you’re the only one who has experienced this problem, you are mistaken as several users also reported that the volume icon does highlight and shows the volume level if you hover the cursor over it but it does not really do anything at all. This is definitely the quickest way to change the audio output in Windows 10 especially when you have to change from speakers to your earphone and whatnot. If you are one of the users whose Windows 10 Taskbar Volume Control icon has stopped working and every time you click on the icon and nothing happens and you’re still not able to adjust the volume of your Windows 10 computer, read on as this post will show you what you can do to fix that problem. Although the audio is working just fine, you will still not be able to adjust the volume from its control icon. The problem is most likely related to the UI interaction. There are times when icons in the taskbar also experience the same issue where you can hover your mouse over them but nothing happens when you click on them. As mentioned, the issue with the volume icon does not seem to affect the actual audio of the computer. Double-check to confirm and if it turns out that the audio is indeed working fine, you can use the hardware of your keyboard to manage and control the volume, however, the software just won’t work. This issue is really inconvenient especially for users who connect their laptops to a bigger display. To fix this issue, here are some suggestions you need to check out.

Option 1 – Try to restart the Windows Explorer

This option may sound silly but it has actually worked in fixing the issue for some users. So if anything gets stuck on the taskbar or system tray, the best way to revive them is by restarting Windows Explorer.
  • Right-click on the taskbar and then select the Task Manager.
  • Next, look for Windows Explorer under the Processes tab.
  • Then right-click and select restart.
  • After that, wait for the restart process to be completed and for the user interface to refresh. Note that you will notice the Taskbar disappearing and reappearing again. It will reload the entire user interface and allows you to access the volume icon. It should work this time.

Option 2 – Restart the Audio services

Restarting the audio services in your computer can also help you fix the volume control issue and to do that, refer to these steps:
  • Tap the Win + R keys to open the Run dialog box.
  • Type in “services.msc” in the field and hit Enter to open Services.
  • From there, look for Windows Audio and then right-click on it and go to Properties.
  • After that, you have to make sure that the Startup Type is set to Automatic.
  • Then click on the Stop button. Once it has stopped, start it again.
  • Now restart your computer and see if you can now access the volume icon on the taskbar.

Option 3 – Try to update or roll back the Audio driver

If the glitch in your audio has something to do with software, chances are it might be related to the audio driver – it could be that the newest version of your Windows 10 does not work well with the old version of the driver. This is why you have to update your audio driver to the newest available version.
  • Tap the Win + R keys to open the Run dialog box and then type in devmgmt.msc and tap Enter or click OK to open the Device Manager.
  • Expand the section for the outdated device drivers.
  • And then select the outdated driver(s) and right-click on it/them.
  • From the drop-down menu, select the Update Driver option and follow the on-screen instructions to install the latest version of the driver.
  • Then also click on the option, “Search automatically for updated driver software.
  • Restart your PC after the installation.
Note: If updating the Audio driver didn’t work, you can go to the website of your PC manufacturer and look for the support section where you can download the drivers for your computer. You just need to take note of your PC’s correct model and model number so you can find the appropriate driver.

Option 4 – Try running the Playing Audio Troubleshooter

Since the Windows 10 operating system has the Playing Audio Troubleshooter, you can use this troubleshooter to try and fix the volume control issue on your PC. You can access this tool in the Control Panel or in the Taskbar Search and even on the Troubleshooters page of Windows 10. Run this troubleshooter and see if it can fix the issue or not.
Read More
Changing the Primary and Secondary monitor
If you are using a dual monitor setup on your computer and you wish to change the Primary and Secondary monitor in Windows 10, then you’ve come to the right place as this post will guide you on how exactly you can do that. A lot of users use more than one monitor to be more productive so having dual monitors helps a lot. So if you have more than one monitor, know that you can actually select any monitor as the primary monitor after installing Windows. Changing the primary and secondary monitor in Windows 10 does not really require you to install any third-party application since you can get the job done by simply making some alterations in the Windows 10 Settings panel. You won’t have any problem in making such alterations since it is quite simple – from modifying the wallpaper to scaling and so on.

To get started, follow the instructions given below carefully.

Step 1: First, tap the Win + I key combination to open the Windows 10 Settings app and go to System and click the Display tab. Step 2: Next, look for the Identify button located on your right-hand side and then click on it. This button will help you check which one is the primary and the secondary monitor. Step 3: After that, select the desired monitor that you want to set as the primary one from the drop-down menu. Step 4: After that, mark the checkbox for the “Make this my main display” option. Step 5: After choosing the primary monitor, this will automatically set the other monitor as the secondary monitor. Restart your computer. So that’s how you change the primary and secondary monitor on your Windows 10 computer. Note that you can always go back to the previous setting of your monitor by following the same instructions provided above.
Read More
There was a problem resetting your PC
If you’ve tried resetting your Windows 10 computer using the Reset This PC option in order to restore your computer’s factory settings and the process suddenly fails for some reason and you got an error message instead stating, “There was a problem resetting your PC, No changes were made on your Windows 10 computer”, then this post might help you resolve the problem. Carefully follow each one of the options given below to resolve the “There was a problem resetting your PC error on Windows 10.

Option 1 – Try renaming the System and Software hive

  • If you’re still able to boot to the desktop of your Windows 10 PC, open an elevated Command Prompt from the WinX menu.
  • Now use the CD command and change the directory to Windows\System32\config folder. Simply type in the following command and hit Enter:
cd %windir%system32config
  • After that, you have to rename the System and Software registry hives to “System.001” and “Software.001”, respectively. To do that, just type each one of the following commands and hit Enter after you type each of them.
    • ren system system.001
    • ren software software.001
On the other hand, if your Windows 10 PC isn’t able to boot to the desktop, you can just access Command Prompt from the Advanced Startup options or you can also boot into Sage Mode and open Command Prompt from there and then run the given commands above. Note: If you only want to use the Refresh your PC option, you must only rename System hive and not Software hive. On the other hand, if the Software hive is really corrupted, you might not be able to use the Refresh your PC option in such a case. Thus, you really need to rename the Software hive as well. Once you’ve renamed the Software hive, you won’t be able to use the Refresh your PC option but only the Reset your PC option.
  • Type “exit” to close the Command Prompt and then restart your PC and try resetting your PC again.

Option 2 – Try to disable and re-enable the Windows Recovery Environment

If the first option didn’t help, you can try disabling the Windows Recovery Environment and then enable it back again. To configure a Windows Recovery Environment or Windows RE boot image and recovery options, you have to use the REAgentC.exe tool.
  • Tap the Win + S key and type “REAgentC.exe” to open the REAgentC.exe tool.
  • After that, type the following command and hit Enter to disable the Windows RE:
reagentc /disable
  • After disabling the Windows RE, you need to enable it back by typing the following command:
reagentc /enable

Option 3 – Try to boot the USB recovery drive

If the two previous options failed, you need to try another workaround which is to boot to the USB recovery drive > Troubleshoot > Recover from a drive. From there, follow the on-screen instructions and you should be good to go.
Read More
Fix Shell Infrastructure Host stopped working
The Windows 10 operating system supports the logging in of multiple users at the same time. Aside from that, it also allows administrators to create a Guest Account that has limited rights. However, there are some instances when you could encounter an error when you use the Guest Account. The error may state:
“Shell Infrastructure Host has stopped working. A problem caused the program to stop working correctly. Please close the program”.
This error indicates that the Shell Infrastructure Host or SiHost.exe process that is used for handling graphical elements, has crashed. And to fix this error, there are several options you can check out. You can try to reinstall the Microsoft Redistributable Packages or run a System File Checker scan. In addition, you can also use a new Guest Account or troubleshoot the problem in a Clean Boot State.

Option 1 – Try to install or repair Microsoft Visual C++ Redistributable 2013

A corrupted Microsoft Visual C++ Redistributable package or the absence of it can trigger the “Shell Infrastructure Host has stopped working” error – so if you do not have this package yet, you have to install it but if you already have it, follow the steps below to repair it.
  • Open Control Panel and proceed to Program and Features.
  • Under Programs and Features, look for Microsoft Visual C++ Redistributable package among the list.
  • Then right-click on it and click the Change button.
  • Next, you should see the Repair option – click on it to repair the installation of the Microsoft Visual C++ Redistributable package.
  • The process may take a couple of minutes before it finishes so once it does, you have to restart your PC.
After doing all these steps and you still encounter the problem, you might have to uninstall this package and download it directly from Microsoft’s website. However, if you are using Windows 10, you might not be able to do so since it only supports Windows versions up to Windows 8.1 so just proceed to the next option below.

Option 2 – Try to run a System File Checker scan

  • In the Windows Start Search, type “command prompt” and right-click on Command Prompt from the search results, and then select the “Run as administrator” option.
  • After opening Command Prompt with admin privileges, type the “sfc /scannow” and tap Enter to execute it.
  • Once the scan is finished, restart your computer and see if the Windows Script Host error.

Option 3 – Try using a new Guest Account

You might want to use a new Guest Account as it could help get rid of the error. All you have to do is have your admin delete the old Guest Account and create a new one and see if it helps in fixing the error.

Option 4 – Try troubleshooting the problem in a Clean Boot State

Setting your computer in a Clean Boot State can help you diagnose and later troubleshoot the problems in your computer. During this state, the system will start with a minimal number of drivers and startup programs that help in isolating the problem with the interfering software. To put your computer in a Clean Boot State, follow the given steps below.
  • Log onto your computer as an administrator.
  • Type in MSConfig in the Start Search to open the System Configuration utility.
  • From there, go to the General tab and click “Selective startup”.
  • Clear the “Load Startup items” check box and make sure that the “Load System Services” and “Use Original boot configuration” options are checked.
  • Next, click the Services tab and select the “Hide All Microsoft Services” check box.
  • Click Disable all.
  • Click on Apply/OK and restart your PC. (This will put your PC into a Clean Boot State. And configure Windows to use the usual startup, just simply undo the changes.)
  • From there, start to isolate the problem by checking which one of the programs you installed recently is the root cause of the problem.
Read More
There is no internet when WIFI is connected
If your WIFI signal is strong but you can not connect to the internet then keep reading in order to find out why this happens and what can you do to fix it. One very important thing to know and understand is that WIFI and the internet are two different things and that they altho connected and working together are basically 2 things. WIFI is a name for a group of technologies that are using radio vawes to connect to the router in order to access the internet. The Internet itself is series of computers all connected in LAN. Think of WIFI like some invisible cable that connects your computer to the router. When we put things into perspective this way it becomes clear that we can indeed have a strong WIFI signal and that we are connected to the router but the router itself is not connected to the internet. So basically troubleshooting an internet connection is troubleshooting the router itself. The most common approach is to reset the router, turn it off, then back on, check cables, etc. But be sure that if your WIFI signal is strong and you can not access the internet it is a router issue.
Read More
How to Fix Windows 8 Error Code 0x8007007e

Error Code 0x8007007e – What is it?

Error code 0x8007007e occurs in Windows 8 or 8.1 when users attempt to, but fail to successfully use Windows Update. When this occurs, Windows 8 or 8.1 users will not be able to access updates or certain web pages. This error manifests itself via the following common symptoms:

  • Inability to complete tasks via Windows Update
  • Message box displaying error code 0x8007007e message

Solution

Restoro box imageError Causes

Error code 0x8007007e is usually caused by a malfunction within your system. This malfunction may be due to several issues such as malware on your device, or the accidental removal of a registry entry or system file.

Further Information and Manual Repair

To correct issues related to error code 0x8007007e in Windows 8.1, users may need to employ one or several manual repair methods. Users will not necessarily need technical skills to accomplish this task. However, if you are uncertain of your skills or you are unable to resolve the issue after completing the tasks below, consult a Windows repair technician or use an automated tool.

Method one: System File Checker

System File Checker (SFC) enables users to check their system for corrupt or missing system files. You will need to use Command Prompt. To access System File Checker on Windows 8 or 8.1, follow the instructions below.

  • Step one: Tap or use the mouse to click Search
  • Step two: Type Command Prompt in the Search box
  • Step three: Select Command Prompt, and then click Run as administrator
  • Step four: Type password if prompted by Command Prompt to do so or simply click Allow

Whether you run Windows 8 or 8.1 operating system on your computer, System File Checker will begin to find and repair missing or corrupted system files. If, however, you are unable to successfully complete the task via Command Prompt, repeat the steps above. You may also consider help from a professional or simply move to the next manual repair method listed below.

Method two: Perform a Clean Boot

A Clean Boot will help users determine if error code 0x8007007e in Windows 8.1 is caused by a problem associated with startup programs. Problems may arise when there is conflict among programs that run in the background when users turn on their device. To run a clean boot, follow the steps below:
  • Step one: Click the Start button and type msconfig in the search box
  • Step two: Click Services tab
  • Step three: Click Hide all Microsoft Services box then select Disable All
  • Step four: Click Startup tab
  • Step five: Select Disable All, then OK
  • Step six: Restart the computer then check if you can now update the system

If the Clean Boot is successful, you will be able to successfully update your system without receiving error code 0x8007007e. However, if the error code reappears while you attempt to access updates or web pages, proceed to the next manual repair method below.

Method three: Scan for Malware

Since error code 0x8007007e in Windows 8 or 8.1 can be caused by issues related to malware, it’s important for users to check their system using a powerful antivirus or anti-malware software. If you do not have one on your system, you will need to download such software as soon as possible.

Once you have the software on your PC, run a scan to check if your computer has been infected. If malware is indeed on your device, remove it using the anti-malware tool.

Method four: Run System Restore Tool

Another effective manual repair method relates to System Restore. This tool enables Windows users to restore their computer to an earlier period of time in which the error code was not present. When done properly, it can effectively resolve error code 0x8007007e. Before running this tool, however, be sure you select a time in which all important files and programs are present so as not to lose them.

Method Five: Use an Automated Tool

If you wish to always have at your disposal a utility tool to fix these Windows 8 and other related issues when they do arise, download and install a powerful automated tool.
Read More
1 2 3 162
Logo
Copyright © 2022, ErrorTools. All Rights Reserved
Trademarks: Microsoft Windows logos are registered trademarks of Microsoft. Disclaimer: ErrorTools.com is not affiliated with Microsoft, nor claim direct affiliation.
The information on this page is provided for information purposes only.
DMCA.com Protection Status