Quick Fix Guide to Error 2032

Repair Error 2032

What Is Error 2032?

Error 2032 is essentially the hexadecimal format of the error caused.

This error code is actually a code format used by the Windows operating system. Manufacturers use this code to determine the cause behind the problem. This error is usually the result of the issues that arise with different applications.

When this error occurs, individuals are not able to view multimedia content on their PC. They may also experience system crashes and this makes it crucial to resolve it.

Solution

Restoro box imageError Causes

Error 2032 is caused by problems in Windows system files.

Improper registry entries may also cause this problem. Some of the common causes that trigger Error 2032 are improper deletion of hardware or applications. Similarly, incomplete hardware or application installations or uninstallations may also cause issues.

These file errors are actually caused when a computer has recently been attacked by a virus, spyware, or malware or if the system is trying to recover from an unanticipated shutdown.

Such activities often result in the corruption or deletion of registry entries in Windows system files. The corrupt files will obviously cause problems and the application will fail to perform correctly.

Further Information and Manual Repair

While there are several ways to solve this problem, some of the most useful and practical solutions are listed below as follows.

  • If you are an advanced user, this workaround is for you. First and foremost, restart your computer and log on to it as the administrator. Now click on the ‘Start’ button.  Now follow this path: All programs ->Accessories-> System Tools->System Restore. Once you choose to perform System Restore, you will come across options where you can select to ‘Restore your computer to an earlier time’. This option will appear in a new window. Click on it and then click Next. Click on the Next button again that appears in the confirmation window. Restart your computer after the restoration is finished. You have just resolved the error.
  • Another easier alternative to fix Error 2032 is for novice users. Download an Error 2032 repair utility. Install this program as you are most likely to come across a Scan button. If there is an option to fix and repair an error, select it after the scan is complete. You can then restart your computer again. Look for the error and you will realize that it has disappeared and that your system is now ready to use.
If you like to learn and find out more about various Windows errors, and how to repair them go to our vast archive or use search to find articles that will explain and help you in solving your issue.
However, if you prefer to do things fast and with automatization then we are proposing to use an automated solution for your issues. The application that we are recommending is Advanced System Repair Pro
Advanced System Repair utilizes multiple tools all in one to give you a quick, simple, reliable, and very thorough diagnosis of your PC. It brings you all the tools you need in one program to clean, fix, protect, optimize and boost your PC!
1-Click Maintenance
All the tools to make it simple and easy! It's like having a professional technician at the click of a mouse.

Junk Cleaner
Keeping your computer free from unnecessary clutter also helps make your computer last longer. Like any other machine, if you keep it clean and take care of it, it will serve you better for longer!

Optimize background apps
Optimize applications background activity with the built-in Application Optimizer feature.

Disk Defrag
With a simple 1-click, Advanced System Repair speeds up your PC by assembling fragmented files on your machine and organizing them more efficiently.

Malware Removal
Finds and removes all types of harmful malware including trojans, worms, bots, adware, spyware, PUPs, and more!

Privacy Cleaner
The all-in-one privacy suite to Clean Your Tracks & Protect Your Privacy! Make your computer safe, secure, and more efficient!

System Tweak/Optimizer
ASR will analyze your complete system and settings to adjust your PC to function at its maximum performance.

Registry Cleaner
Over time, as you install and uninstall applications, the registry can become cluttered with old entries and broken settings which can result in program crashes, and annoying messages and slow the computer down.
Visit our Advanced System Repair Pro Download page to inform yourself about all the benefits of this software and get a free trial copy of it.
advanced system repair pro

Advanced System Repair Pro

One-click automated PC repair solution
ASR logo
With Advanced System Repair Pro you can easily
Replace damaged files
Restore performance
Free disk space
Remove Malware
Protects WEB browser
Remove Viruses
Stop PC freezing
DOWNLOAD
Privacy Policy | Terms of Use | Uinstall
Advanced System Repair Pro is compatible with all versions of Microsoft Windows including Windows 11

Share this article:

You might also like

A Guide to Fixing Error 0x8007007e on Windows 10

Error Code 0x8007007e – What is it?

Error code 0x8007007e often occurs when users attempt to use Windows Update but are unable to access updates or webpages. To resolve this issue, you will need to use tools that detect and correct corrupted files as this is usually the main reason for the error.

Solution

Restoro box imageError Causes

Once this error code is encountered, it's a clear indication that your Operating System has malfunctioned. This could be a consequence of an incorrect or failed installation of software. The software might leave invalid entries in the Windows registry. Improper shut down of your system and a malware attack are also causes of error code 0x8007007e. Additionally, someone with little or no technical knowledge might have deleted a system file by accident. Missing system files can also equate to other error codes such as registry error code 19.

You may not always be able to prevent issues from affecting your computer, but proper measures can be taken to limit your risk of experiencing problems like error code 0x8007007e. See the following suggestions below:

  • Ensure proper system maintenance by regularly using your automated tool. This will ensure your system is in good shape and error-free. It will also clean your system regularly leading to a boost in PC performance
  • Keep antivirus software up-to-date. Antivirus software if crucial for the proper functioning of your computer. Keeping your antivirus updated is one of the best ways you can avoid problems with your PC.

Further Information and Manual Repair

Method One: System File Checker

System File Checker is a Windows tool that allows users to check their system for corrupt or bad system files. The utility scans for corrupt files and repairs them as well as files that may have gone missing.

Depending on the type of Windows operating system on your computer, you may need to follow varying instructions. However, note that Windows operating systems including Windows 10 and Windows 8 or 8.1 and Windows Vista all provide access to System File Checker via Command Prompt.

Once you run System File Checker, the tool should be able to repair and replace corrupted files. However, in cases where the repair process does not take place, you can attempt a manual repair by replacing the corrupt file the tool identifies with a good file. The process may require technical knowledge of Command Prompt so consider help from a Windows repair technician or consider contacting Windows for instructions based on your computer’s operating system.

Method Two: Run System Restore Tool

The System Recovery Options menu in Windows contains many tools which can enable users to resolve serious errors. In the case of Error Code 0x8007007e, one of the best tools in this menu is System Restore.

When an error occurs which inhibits users from accessing key functions on their system, System Restore enables the user to restores the computer to an earlier period without causing harm to files, photos, or documents.

However, once you run this tool, you will only be able to access files available within the period to which your computer is restored. For this reason, carefully consider which period is best suited to your purposes. Also, ensure you restore the system to a time when error code 0x8007007e was not present on your machine.

If System Restore does not resolve the error, you may undo the restoration changes. Ensure you have sufficient free space on your machine hard disk before you proceed (300 MB at least for hard drives above 500MB or at least 50 MB for smaller sized disks).

Method Three: Download Automated Software

When it comes to resolving error codes, it can often be a frustrating and tricky venture, especially when you are attempting to fix the problem manually. The Internet is awash with bits and pieces of instruction, some misleading at best with uncertain success rates.

But what if there was a one-stop-shop or better yet a tool that offered solutions for error codes including 0x8007007e?  Download a powerful automated tool that offers easy and effective, user-friendly solutions for users with varying error code problems.

Read More
Fix Partner did not connect to router Error
One of the great remote assistance software that helps you remotely access and control computers is TeamViewer. However, despite how efficient it is, there are still times when it throws up some errors and one of them is when TeamViewer is not able to connect and throws an error that says, “No connection to partner, Partner did not connect to router, Error Code WaitforConnectFailed”. This kind of error in TeamViewer mostly occurs when the Partner computer is not connected to a network. On the other hand, it could also occur when they are connected to a network so there are various causes for this issue. It could also be that the installation of the program itself was at fault or there is an incompatibility between the TeamViewer versions installed on both the computers and so on. Although there are several causes for this error, the potential fixes are still the same. You can try to restart the network or allow Full Access Control to TeamViewer or flush the DNS cache. For more information, refer to the following options but before you proceed, make sure that both your Windows 10 computer and TeamViewer program are updated to their latest stable versions.

Option 1 – Reboot your router

The first thing you can try to do to fix the error is to simply restart your router. All you need to do is reboot the router from its Admin panel or you can also turn it off manually and turn it back on after a couple of seconds so that it can completely reboot. Once you’re done, try accessing your server again and see if the error is now fixed.

Option 2 – Allow Full Access Control to TeamViewer

  • First, open TeamViewer, and then from the Menu bar, click on Extras.
  • After that, click on Options and select Advanced from the left side navigation panel.
  • Next, click on the “Show advanced options” button located on the right-hand side.
  • Then select Full Access from the drop-down menu of the Access Control option under the “Advanced settings for connection to this computer section”.
  • Now click OK and check if the error is now fixed or not.

Option 3 – Try to flush the DNS configuration

You could also try to flush the DNS configuration in your computer to fix the error. How? Refer to these steps:
  • Tap the Win + X key combination and click on the Command Prompt (Admin) option or you could also search “cmd” in the Cortana search box and right-click on Command Prompt from the search results and select the “Run as administrator” option.
  • After opening Command Prompt with admin privileges, enter each one of the commands given below sequentially in order to flush the DNS cache.
    • ipconfig/release
    • ipconfig/renew
    • ipconfig/flushdns
  • Now type the exit command to close Command Prompt and then restart your computer and see if the problem is fixed.
On the other hand, you could also try to reset Winsock as well as the TCP/IP.

Option 4 – Run the Network Adapter troubleshooter

To run the Network Troubleshooter, refer to these steps:
  • Open the Search bar on your computer and type in “troubleshoot” to open the Troubleshoot settings.
  • Next, scroll down and select the “Network Adapter” option from the right pane.
  • Then click on the Run Troubleshooter” button.
  • After that, your computer will check for any possible errors and will pinpoint the root cause of the problem if possible.
  • Restart your computer.

Option 5 – Try to perform Network Reset

You might perform a Network Reset to resolve the problem if none of the four given options worked. This will reset the entire network configuration including your IP address. To perform Network Reset, follow these steps:
  • Tap the Win + I keys to open Settings.
  • From there, go to the Network and Internet section.
  • Next, scroll down and look for “Network Reset” under the status pane.
  • After that, click on Network Reset and then on Reset now to start resetting the network configuration. Once done, check if it is able to fix the error or not.
Read More
A Guide to Fixing Error Code 80070490

A guide to fixing Error Code 80070490

Error Code 80070490 - What is it?

This error 80070490 code may occur when you try to update your PC either through the Microsoft Update website or with a Windows update. The error message is displayed in the following format:
Error 80070490 (Element not found)

Solution

Restoro box imageError Causes

Error Code 80070490 is triggered because of a couple of reasons. It indicates the file CBS Manifest that is needed to install Windows update is corrupt or damaged. CBS (Component Based Servicing) Manifest is the file that is used to help your computer recognize various components inside your PC. Another reason for error occurrence is registry corruption. If the registry that stores all the information and activities performed is not cleaned frequently, the obsolete files saved in the registry like the junk files, bad entries and cookies eventually accumulate and corrupt it thereby generating such error codes.

Further Information and Manual Repair

Here are some effective and proven methods that you can try by yourself to resolve error code 80070490 on your PC.

Method 1 - Use the System Update Readiness Tool

Download the System Update Readiness Tool from the Windows website and run it on your PC. This tool is designed to detect and scan for abnormalities and inconsistencies that could be preventing and causing problems during the system update. Once you have downloaded and scanned your PC, try to install the updates again. If the error still persists, try other methods illustrated below.

Method 2 - Repair Windows

Here are the steps that you need to follow to repair Windows:
  • First, close all programs and then reboot your PC. Insert the Windows DVD into the computer’s disk drive and wait for the setup to begin.
  • If for any reason, the setup doesn’t start automatically, then don’t worry simply click start, then type Drive: setup.exe in the search box. Please note, in the drive insert the letter of your computer’s DVD drive for example D:setup.exe.
  • Now in the programs list, click setup.exe  And then click install now.
  • After that click ‘go online to obtain the latest updates for installation’, if you are asked for the Windows Product Key, then simply type it to proceed.
  • In the ‘Which kind of Installation do you want?’ option, click Upgrade.
When the Windows installation is complete, restart your PC and then run Windows update.

Method 3 - Clean the Registry

If the cause of error code 80070490 on your PC is related to registry corruption, then it is advisable to download Restoro. This is an advanced and easy-to-use PC Repair Tool embedded with a registry cleaner. The registry cleaner scans your entire PC, removes all obsolete and unnecessary files corrupting the registry, and cleans it right away. Click here to download Restoro to repair error code 80070490
Read More
How to Fix Windows 10 Error Code 0xc004fc03

Error Code 0xc004fc03 – What is it?

Error code 0xc004fc03 occurs when Windows users fail to activate their Windows operating system due to a networking problem. The error code’s common symptoms include the following:

  • Inability to activate Windows 10 operating system
  • Message box with error code 0xc004fc03

Solution

Restoro box imageError Causes

Error code 0xc004fc03 in Windows 10 usually occurs due to issues related to a Windows user’s network. Your computer may be having problems connecting to the Internet or your firewall may be blocking or interrupting your device’s ability to activate Windows 10. In some cases, users may simply need to wait a day or two to reattempt to activate their system using a valid product key, as there may be an issue with the Windows activation servers.  Failure to promptly fix this error code might result in other Windows 10 error messages, such as error code 0xc004f034.

Further Information and Manual Repair

To rectify the error code, Windows 10 users will need to perform manual repair procedures that fix the underlying problems causing error code 0xc004fc03. These procedures may include reconnecting to one’s network, checking your firewall settings, or activating your Windows operating system via phone. The manual repair methods are simple and do not require technical knowledge of the Windows operating system. If your attempts at manually repairing this error code fail, however, you may need to try a few other procedures.

Method One: Verify Internet Connection

To check your Internet connection, you’ll need to access the Network & Internet tab in Windows 10. Follow the instructions below to access this tab and fix Internet connectivity issues if they are preventing you from activating Windows on your machine.

  • Step one: Click the Start button and select Settings
  • Step two: Select Network & Internet
  • Step three: Click the Status section of the Network & Internet tab

If your status shows that you are not connected to a network, you will need to fix your connection. Simply use the Network Troubleshooter to troubleshoot your connection. You will be able to activate your copy of Windows once your connectivity issues are resolved.

If, however, the problem persists and error code 0xc004fc03 occurs during the activation process, this simply means that the existence of the error code is not due to connectivity or networking problems. In such a case, move to the next manual repair method listed below and follow the exact instructions given.

Method Two: Check Firewall Settings

Windows Firewall protects your PC from hackers, worms, and other malicious programs. However, in some cases, it may result in error codes like error code 0xc004fc03. If your firewall is interfering with the Windows 10 activation, you’ll be able to rectify the problem by simply adjusting your settings. Follow the steps below to check – and adjust if necessary – your Windows Firewall settings.

  • Step one: Click search bar and type firewall
  • Step two: Select Windows Firewall
  • Step three: Select Turn Windows Firewall on or off

In some cases, Windows users may not be able to adjust settings within the Windows Firewall tab, as your firewall settings may be controlled by a third party antivirus software. If this is the case, open the antivirus software and turn off the firewall if the software does not prevent you from making such changes to its settings.

Note, however, that you will need to readjust the settings as soon as you activate your version of Windows 10. This is due to the fact that turning off your firewall settings permanently may lead to exposure to worms and other malicious programs.

Method Three: Activate Windows by Phone

Activation of Windows via phone is another option for individuals experiencing error code 0xc004fc03. The activate by phone option in the Update & Security tab will be available once you fail to activate Windows 10. To complete this manual repair method, follow the steps below.

  • Step one: Select Settings
  • Step two: Click Update & security
  • Step three: Select Activate by phone
  • Step four: Follow the instructions provided thereafter.

This is one of the most effective ways to fix error code 0xc004fc03. If the issue persists, however, you can proceed to the last resort.

Method Four: Download an Automated Tool

If you wish to always have at your disposal a utility tool to fix these Windows 8 and other related issues when they do arise, download and install a powerful automated tool.

Read More
A Guide to Fixing Magcore.dll Error on Your PC

Magcore.dll Error Fix Guide

Magcore.dll Error - What is it?

Magcore.dll is a type of Dynamic Link Library. This file is associated with software developed by ArcSoft, a renowned multimedia application developer. Magcore.dll consists of small programs that help load and run software developed by ArcSoft on your system smoothly. This file virtually comes into function when you use certain audio and video features incorporated in ArcSoft programs for example ArcSoft Media converter. However, you may experience Magcore.dll error code on when this DLL file fails to run and load programs. The error may hamper your ability to access ArcSoft programs on your system and cause you a great deal of inconvenience. Magcore.dll error is often displayed in any one of the following formats:
“The file magcore.dll is missing” “MagCore.dll cannot be found” "Cannot find [PATH]magcore.dll" “This application has failed to start because MagCore.dll was not found. Reinstalling the application may fix the error.”

Solution

Restoro box imageError Causes

This DLL file is known to be prone to errors. MagCore.dll error occurs due to several reasons such as:
  • Missing or damaged MagCore.dll file
  • Hardware failure
  • Viral infection
  • Registry issues
If you experience MagCore.dll error on your system, it is advisable to fix it right away. Though it is not fatal, but if you don’t repair it, you may not be able to access practically all ArcSoft programs on your PC.

Further Information and Manual Repair

Here are some of the efficient and easy manual methods to resolve error MagCore.dll on your PC:

Method 1 - Scan and Remove Malware

MagCore.dll error can be triggered by viral or other malware infection. Malware can easily damage DLL files and masquerade as the MagCore.dll file. To resolve, simply download a powerful antivirus on your system. Run it to scan your entire PC for viruses and remove them right away.

Method 2 - Update the Drivers for Hardware Devices

As we mentioned above the error may be related to hardware failure too. In times like these, it is advisable to update the drivers for hardware devices. For example if you try to play a 3D video game and it fails to run showing you MagCore.dll error message, then simply try updating the drivers for your video card. Drivers can be updated in Windows by using a driver update wizard from within Device Manager.

Method 3 - Use System Restore to Undo Recent System Changes

After trying method 1 and 2, if the error code still persists, then it is opt for method 3. Use Windows System Restore utility to undo recent system changes and bring your PC to its normal previous condition before the error occurred. To restore, simply go to the start menu, type System Restore. Now click on System Restore and just pick a point in the past called a restore point to return important Windows files and settings.

Method 4 - Repair the Registry

If the underlying cause of the MagCore.dll error code is related to registry issues, then simply repair the registry. You can fix it manually but it is a little complicated and time-consuming. You may find it difficult if you are not a technical whiz. Nonetheless to resolve and repair it in seconds, download Restoro. This is a powerful and a user-friendly PC Fixer embedded with a registry cleaner and several other highly functional scanners. Run it to scan your entire PC for registry problems. The registry cleaner utility removes all bad and invalid entries, cleans up the registry space, and repairs the damaged files. Click here to download Restoro and repair MagCore.dll error code on your PC.
Read More
Creating a new Windows 10 user account
When we purchase a computer, usually it is meant to be used by one person. Sometimes we would like to share our computer with other people, with friends and family members but we would also like to keep some privacy for ourselves in the process. Lucky for us Windows 10 will let us create multiple user accounts which then can be used by other persons with their own settings, documents, etc. The only requirement is to already have one user account which is automatically created when Windows is installed. This guide will lead you step by step in the creation of a new user account within Windows 10, so grab your favorite drink, and let's begin.

Creating new account

First thing is to click on the windows icon on the bottom left and open start menu, from start menu click once on settings. Windows 10 Star menu with marked settings iconWhen the settings window opens, choose ACCOUNTS on it. Windows settings accounts section selectedWindows will then go to the accounts settings page. Within that page, click on the Family & other users to open the setting for the chosen section on right. On the right settings, screen navigate to the lower section and click once with the left button on add someone else to this PC When add someone else to this PC is clicked, pop up window will appear which will ask you to provide the persons email address and later on the password of his/her Microsoft account, after the required information is provided you are done, a new user has been added and he can use his Microsoft credentials on the login screen to use this computer.

Setting up a user without Microsoft ID

However, if you do not wish to add a new user via his Microsoft login credentials or the person does not have them, on the pop-up window click on I don't have this person's sign-in information. User account no informationThis will open yet another pop-up giving you the option to create a Microsoft account for this person, to use a phone number instead of a Microsoft account, or to create a new email address for the user. Any of these options will create a new user for this computer with provided credentials but there is the last option at bottom of the pop-up which will allow you to create a local user only without a Microsoft account. This user will be able to use this computer, will not be able to transfer his document through various devices like he/she would if using a valid Microsoft account but it could use the computer and personalize it fully to his/her liking. user account new account without ms idOnce the link is clicked, you will be presented with a floating window requiring you to input needed information in order for the account to be created. You will need to provide username, password, and answers to 3 security questions. user account create an accountOnce all information has been provided, click on next and your new non-Microsoft local user has been created. Now when you click on Family & other users you will see that Windows has added a new user with the provided name to this computer. If you wish, you can add another user in the same manner, following the previous steps. Microsoft Windows does not have a limit for how many users can be on one computer so feel free to create as many as you like.

User account options

Now, clicking on the existing created user will open user options. From there you will have options to remove the user, therefore removing him/her from this computer, note that removing the local user will remove permanently his/her settings and they would not be able to be restored, or you can change the user account type. User account new accountClick on Change account type. User account account typeUnder account type, you will have the option to promote this user to an administrator if you wish or you can leave it as a standard user.
Read More
Best VR headsets in 2021 so far
Virtual Reality is slowly becoming standard in gaming. More and more affordable headsets are coming out lowering entry prices and making them affordable for all. But in a sea of new VR headsets, it is important to at least purchase a decent one that will perform nicely and hopefully last longer. Therefore in today’s article, we will address some of the best options currently available on the market,

Oculus Quest 2

occulus quest 2 VR
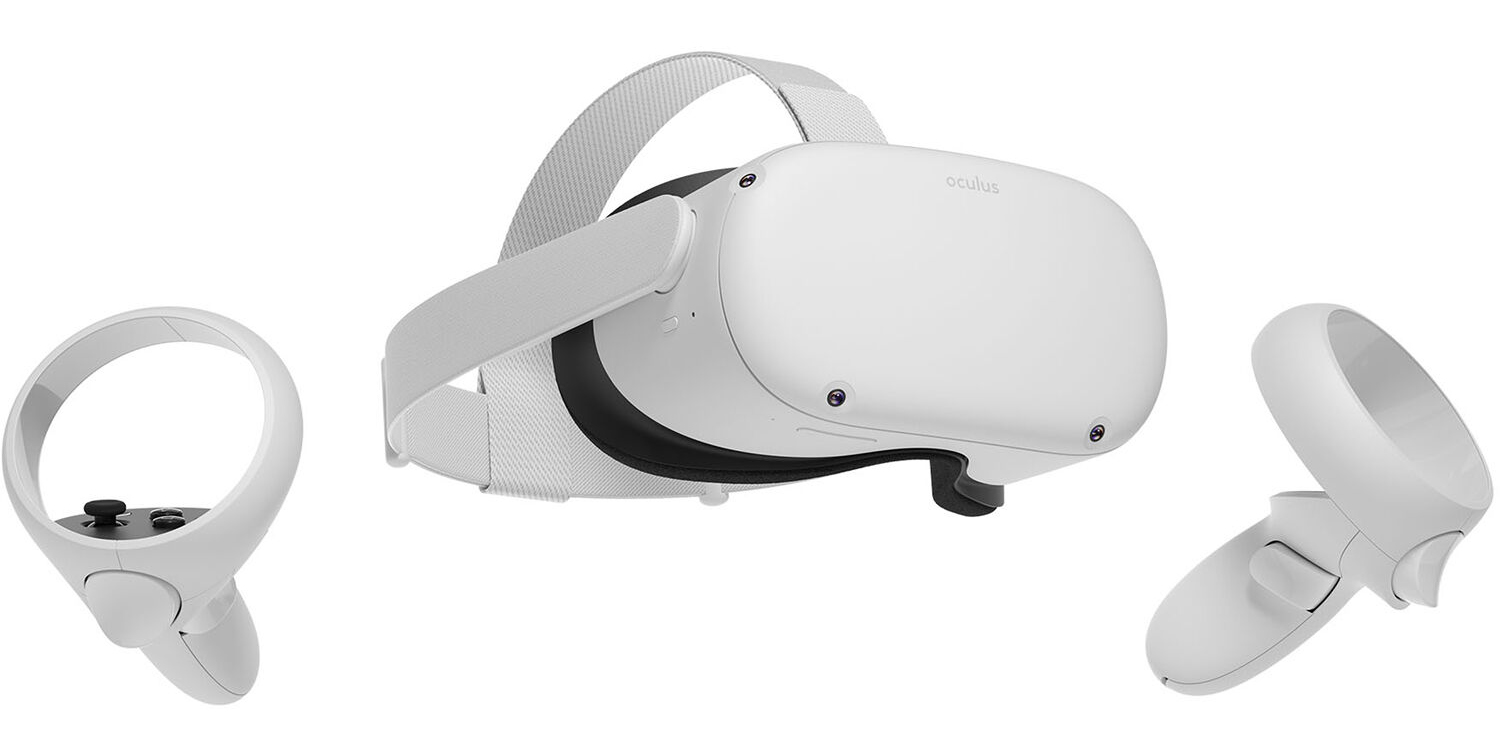
With its Rift model, Oculus set itself as a big player in VR. Now the company is slowly bowing out of the dedicated, tethered VR headset with its latest Quest 2 designed to primarily be a standalone headset. In case you do not know, tethered headset means that the headset itself is connected to your PC and is using its power to drive your VR experience. Now technical specifications of Quest 2 are pretty OK and it can drive stuff pretty decently and if you want you can purchase the dedicated cable to connect it to your PC for the full experience of games requiring more capable hardware. Oculus Quest 2 is the cheapest headset on this list and with its stable performance, is highly recommended.

Valve Index VR

valve index vr
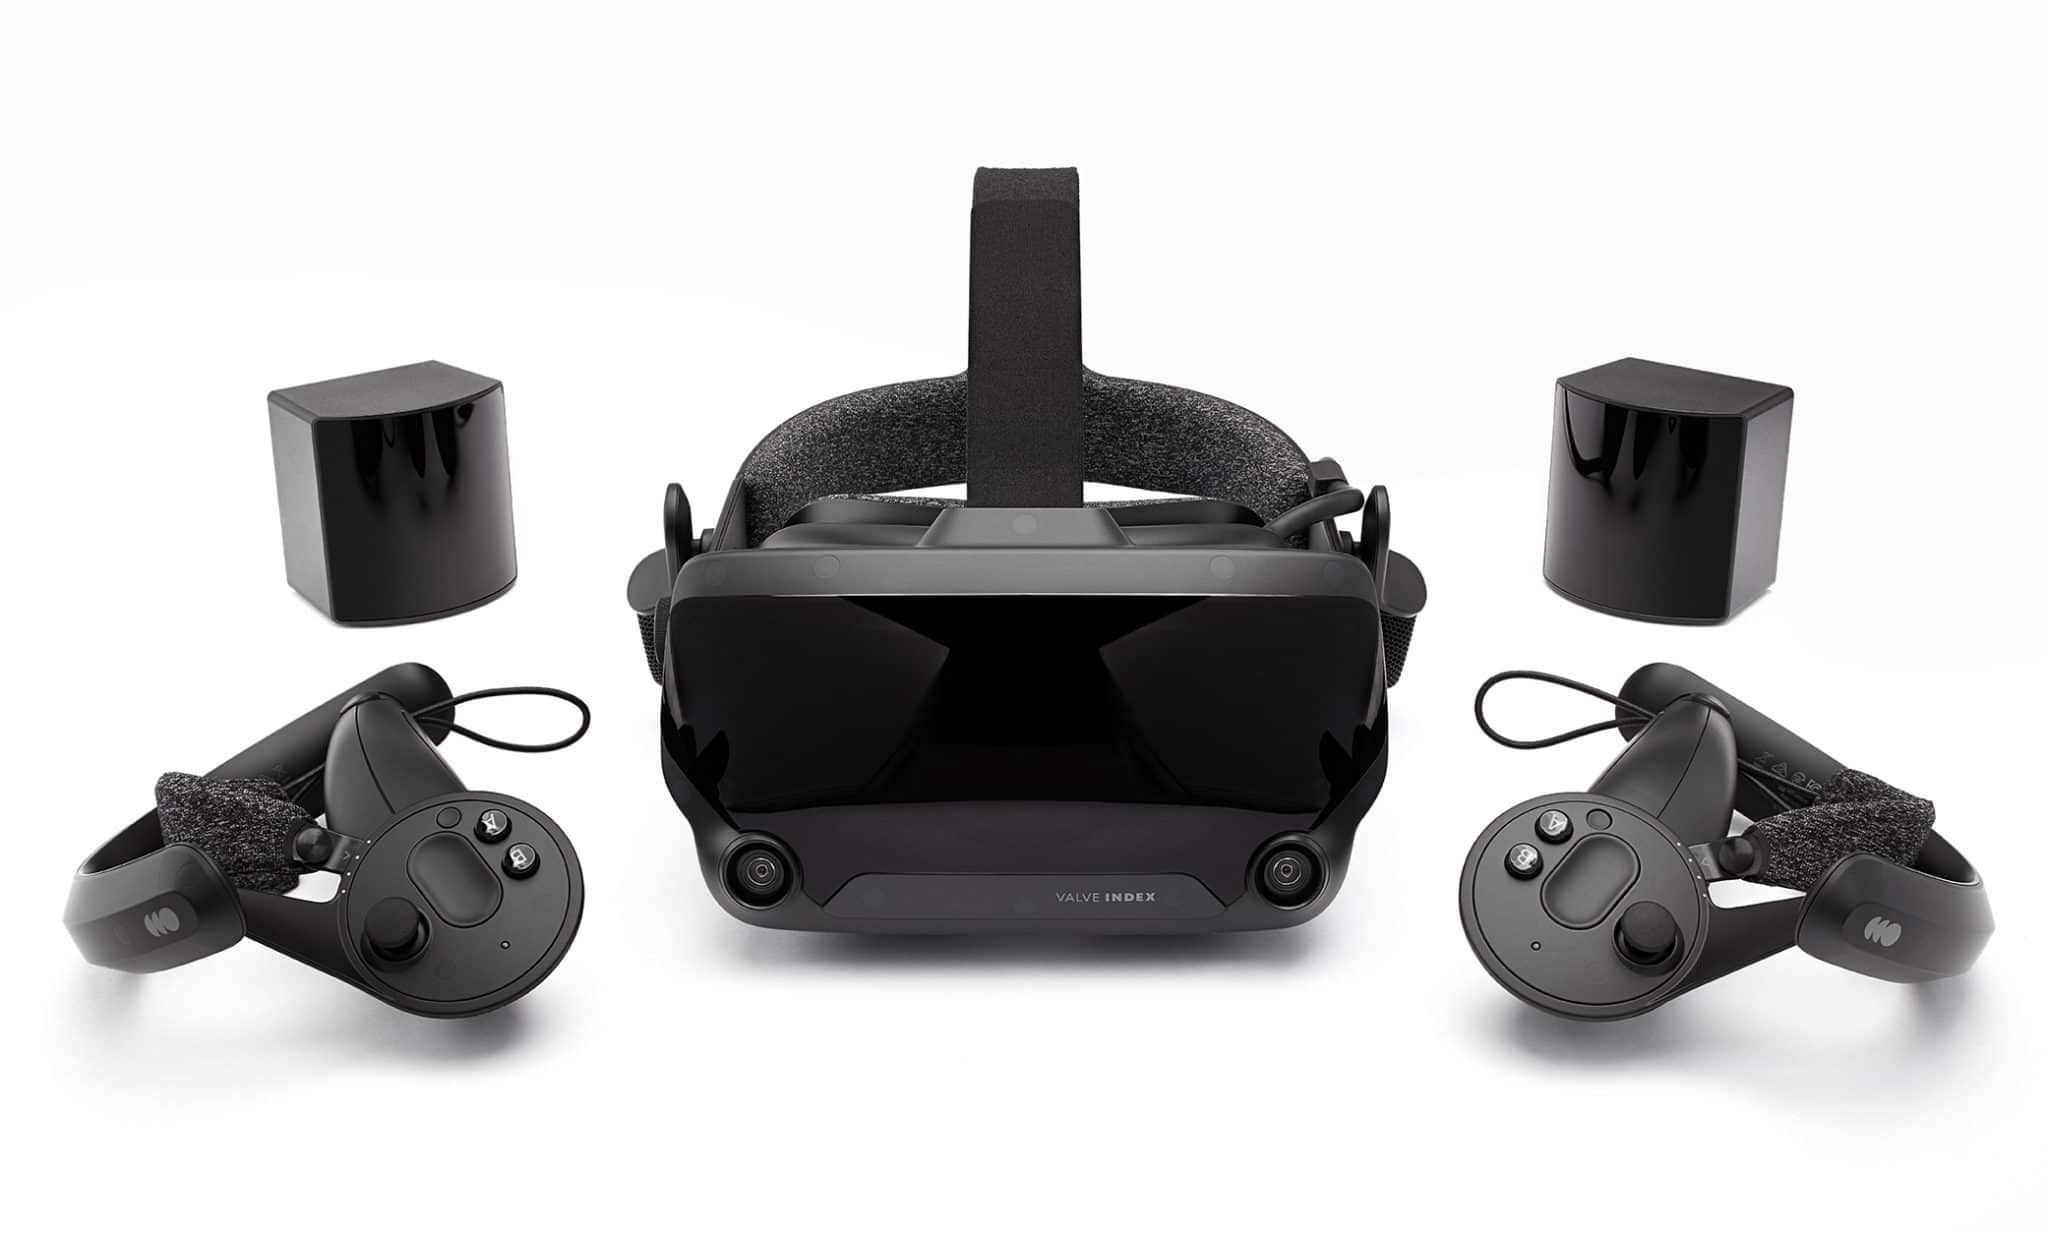
Although the headset itself is nothing revolutionary or special its controllers are. They can track individual finger movements, making games (that take advantage of them) much more immersive than the standard trigger grips on other controllers. The Index's higher refresh rate makes for smoother action, as well, which is another nice bonus. If you already have an HTC Vive or Vive Cosmos Elite, and their base stations (not the regular Cosmos), you can buy only the controllers.

Sony PlayStation VR

playstation vr
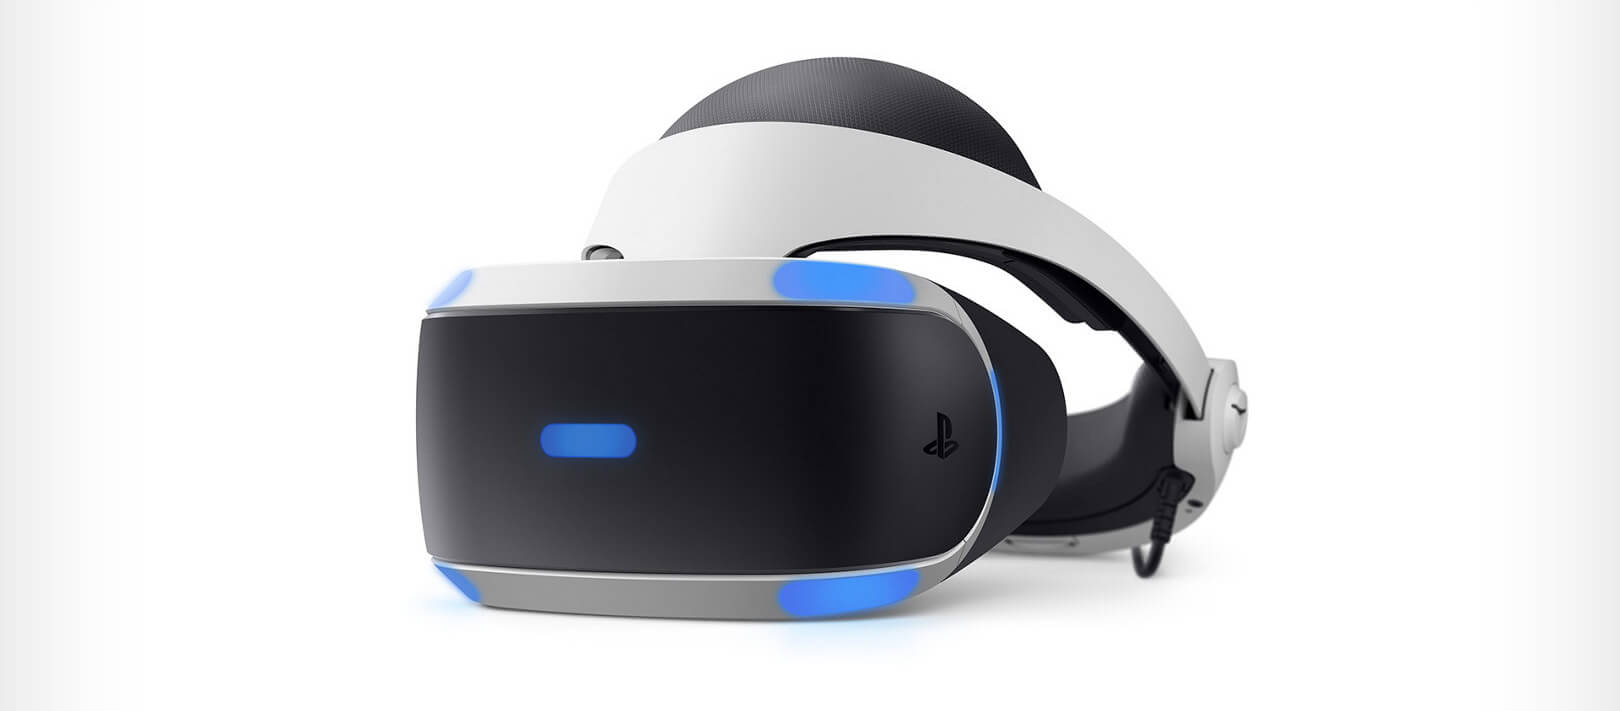
The PlayStation VR is compelling thanks to Sony backing its development, plus the PlayStation 4's affordability and availability compared with gaming PCs. All you need is the headset, a PlayStation 4, and a PlayStation Camera (now included with most PlayStation VR bundles). Not really the best of the bunch but still one of the top ones for console gaming. Sony is working on a new PlayStation VR system for the PlayStation 5, with redesigned controllers. The new headset hasn't been revealed yet, but the company has released a preview of the new controllers.

HP Reverb G2 VR

HP Reverb G2
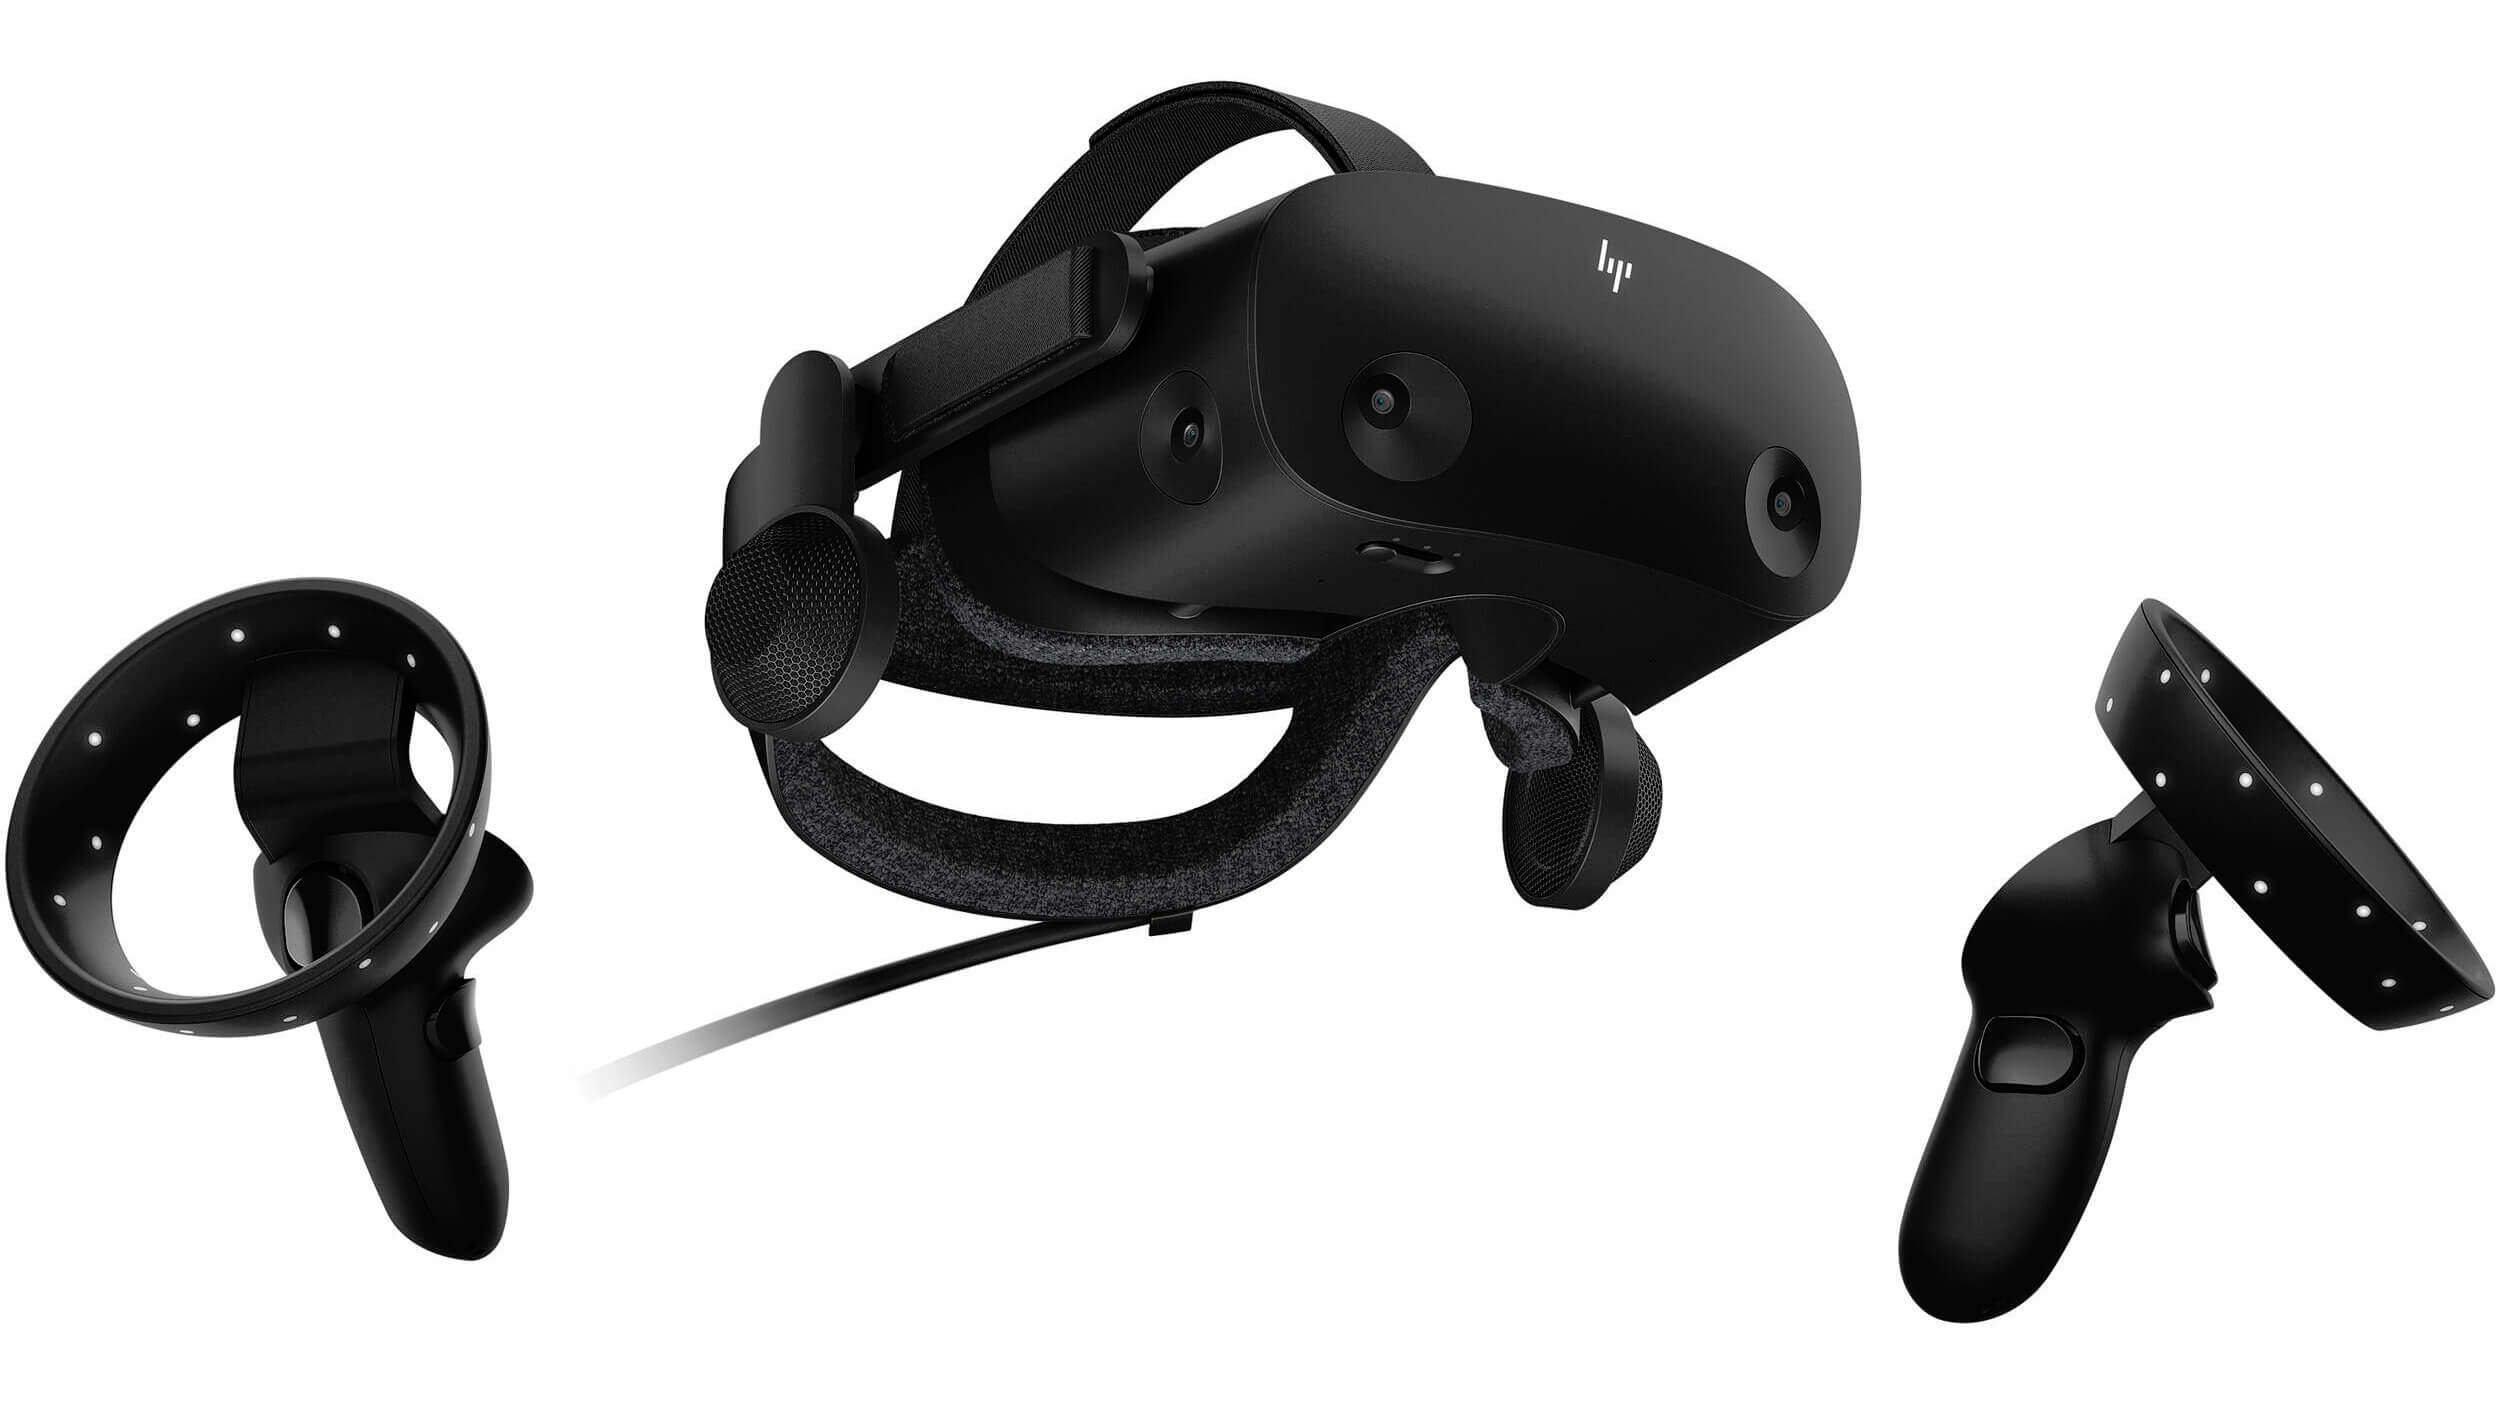
HP headset is one which you get if you want the best image quality in VR headset, sadly controllers did not follow the same quality of headset itself. But this is still a pretty decent headset overall and worth the purchase.

HTC Vive Cosmos

HTC Vive Cosmos
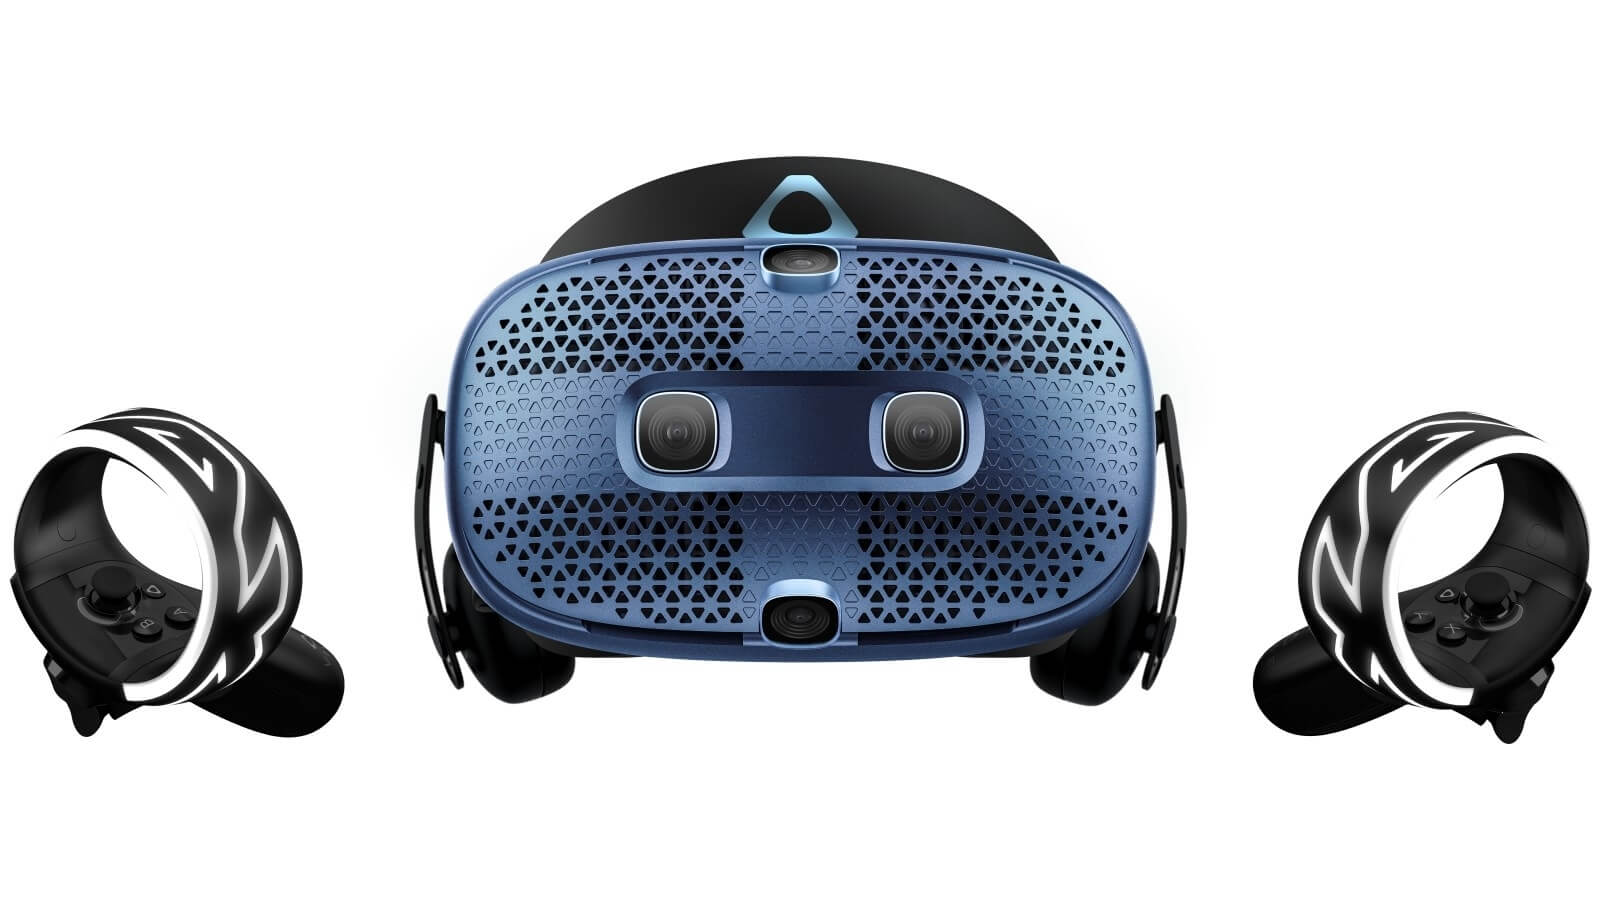
HTC's Vive Cosmos is the upgraded version of the Vive. It features a higher resolution and replaces the external base stations with outward-facing cameras for motion tracking. It's a comprehensive package for whole-room VR. HTC recently released the Vive Pro 2, a high-end VR headset targeting both enterprise users and consumers. This new headset features a 2,448-by-2,448 resolution display for each eye, making it the highest-resolution headset currently available. It's also more expensive than the Cosmos Elite. Sadly one thing that is bringing this headset down is the price.
Read More
Repair Windows 10 Error 0xC1900101, 0x4000D

Error Code 0xC1900101, 0x4000D - What Is It?

Error Code 0xC1900101, 0x4000D is not very common among the many error codes emerging when updating to Windows 10. It is specific to Windows 7 users who try to upgrade to Windows 10 system.

This error hinders Windows 7 users to install the Windows 10 update. Once the update is launched, the process will go smoothly until a certain percentage (normally upon hitting 70% or more) and then it gets stuck. The user will then see a notification stating: “The installation failed in the SECOND_BOOT phase with an error during MIGRATE_DATA operation.”

You’ll be able to get past the error after a while. The error message will disappear and continue with the configuration process. But, not for long as it will reoccur at around 90% of installation with another error message saying: “The installation failed in the SECOND_BOOT phase with an error during PRE_OOBE operation.”

Solution

Restoro box imageError Causes

You’re most likely to encounter Error Code 0xC1900101 – 0x4000D when you upgrade to Windows 10 using a USB drive. There are several reasons why this update-related error happens such as wrong update, incompatibility with an antivirus program, or incompatibilities with some software.

Further Information and Manual Repair

In attempting to fix error code-related problems, it is best to do manual repair methods. Employing repair methods manually can help users pinpoint the root causes of the issues they are encountering and apply permanent solutions to fix the problem.

While every Windows user can do most manual repair methods, there are certain cases where help from a Windows expert is needed. If you’re not confident in employing the manual repair methods yourself, you can always consider seeking help from a professional Windows technician who is equipped with enough knowledge to address any issues you are facing or you can just simply use a powerful automated tool.

In fixing Error Code 0xC1900101 – 0x4000D, you can try doing any of the following manual repair methods:

Method One: Disable Background Applications

Error Code 0xC1900101-0x4000D probably occurs when there are programs running in the background of the system as you are in the process of updating. On that note, you must ensure that any programs running in the background must be disabled through Task Manager.

  1. Press Ctrl+Alt+Del then choose Task Manager.
  2. Right-click on all background applications then chooses End Task to close the apps.

NOTE: If there are any processes you are unfamiliar with, you can always right-click that process then “search online.” Be careful not to end “Windows process” tasks under the “Type” column as it might cause further problems.

  1. Restart your device then proceed to Windows 10 system upgrading.

Method Two: Uninstall Anti-Malware Tools

Anti-malware tools normally trigger problems since they consist of files that are possibly incompatible with some software. If Error Code 0xc1900101-0x4000d is caused by incompatibility with an antivirus program, follow the following steps:

  1. Open the Control Panel then choose System and Security.
  2. Select Windows Solution Center.
  3. Click Security to locate your antivirus.
  4. Once you’ve located your antivirus, click on it then choose
  5. Restart your device then check if it eliminates the problem.

Method Three: Install System Updates

  1. Click on the Start menu then select System and Security – Windows Updates.
  2. Choose Check for updates.
  3. If there are any required updates detected by the system, select them all then choose Install Updates.
  4. Restart your device.

Method Four: Check System For Any Incompatibilities

In doing this method, you need to use the System Readiness tool.

  1. Download System Update Readiness Tool for Windows 7 for x64-based Systems (KB947821).
  2. Once the download is finished, open Windows 6.1-KB947821-v34-x64.msu
  3. Run the program to check for any incompatibilities in your system.

NOTE: The process might take a while depending on the speed of your device.

  1. If there are no results found, you can now try updating again to Windows 10. However, if there are any issues found, you need to have them fixed first.

Method Five: Download A Powerful Automated Tool

Can’t seem to put up with the long and technical manual repair process? You can still fix this error by downloading and installing a powerful automated tool that will surely get the job done in a jiffy!

Read More
Task Manager is blank & not showing processes
If the Task Manager is either blank or is not showing processes on your Windows 10 computer, then here are a few things you can do to resolve this issue. This kind of problem can occur due to some system file corruption or some malware infection in the system. Here are some suggestions you can try to resolve the problem with the Task Manager on your Windows 10 PC.

Option 1 – Try restarting your computer

The most common and most of the time effective way to resolve this kind of issue is to simply restart your computer. Thus, you have to restart your computer and see if it helps in fixing the Task Manager issue or not. If not, you can try the next given options below.

Option 2 – Run the DISM tool

If the first option didn’t work, then running the Deployment Imaging and Servicing Management tool can help you resolve the issue with the Task Manager as it will repair the Windows System Image as well as the Windows Component Store in Windows 10.
  • After you access the Advanced Startup options, select Command Prompt by using the arrow keys on your keyboard.
  • Next, type in this command: DISM /Online /Cleanup-Image /RestoreHealth
  • Do not close the window if the process takes a while as it will probably take a few minutes to finish.

Option 3 – Make sure that the display columns are selected in the Task Manager

You have to make sure that you have checked or selected the display columns you want to be displayed. So if none of them are selected, you might not see any details at all. Thus, you need to right-click on the space near Name and select the columns.

Option 4 – Run the System File Checker Scan

System File Checker or SFC is a built-in command utility that helps in restoring corrupted files as well as missing files. It replaces bad and corrupted system files with good system files that might be the reason why the Task Manager is blank or is not showing processes. To run the SFC command, follow the steps given below.
  • Tap Win + R to launch Run.
  • Type in cmd in the field and tap Enter.
  • After opening Command Prompt, type in sfc /scannow
The command will start a system scan which will take a few whiles before it finishes. Once it’s done, you could get the following results:
  1. Windows Resource Protection did not find any integrity violations.
  2. Windows Resource Protection found corrupt files and successfully repaired them.
  3. Windows Resource Protection found corrupt files but was unable to fix some of them.
  • Restart your computer.

Option 5 – Troubleshot the problem in a Clean Boot State

There are some instances that some conflicting programs installed in your computer might be the one that’s causing the Task Manager issue. To identify which program is causing the problem, you need to put your computer in a Clean Boot State. To do so, follow the steps below.
  • Log onto your PC as an administrator.
  • Type in MSConfig in the Start Search to open the System Configuration utility.
  • From there, go to the General tab and click “Selective startup”.
  • Clear the “Load Startup items” check box and make sure that the “Load System Services” and “Use Original boot configuration” options are checked.
  • Next, click the Services tab and select the “Hide All Microsoft Services” check box.
  • Click Disable all.
  • Click on Apply/OK and restart your PC. (This will put your PC into a Clean Boot State. And configure Windows to use the usual startup, just simply undo the changes.)
  • From there, start to isolate the problem by checking which one of the programs you installed recently is the root cause of the problem.

Option 6 – Try scanning your computer using Windows Defender

As mentioned, the Task Manager issue might be caused by some malware in the system and so to eliminate the malware, you have to scan your computer using security programs like Windows Defender.
  • Tap the Win + I keys to open Update & Security.
  • Then click on the Windows Security option and open Windows Defender Security Center.
  • Next, click on Virus & threat protection > Run a new advanced scan.
  • Now make sure that Full Scan is selected from the menu and then click the Scan Now button to get started.
Read More
The server did not register with DCOM
There are times when after you upgrade your Windows operating system, the System Logs under the Event Viewer will display an error message saying, “Event ID 10010 error – The server did not register with DCOM within the required timeout”. What is DCOM? DCOM stands for “Distributed Component Object Model”. It is a proprietary Microsoft technology that allows the Component Object Model or COM software to communicate across a network. You can consider it as an extension of COM which is equipped with the capability of solving a couple of inherent problems related to the COM model to the better use over a network. COM is a tool that’s used for advanced configuration and troubleshooting in Windows 10. Developers usually use it to configure routine components and application behavior like participation in transactions and object pooling and so on. The Component Services needs the DCOM wire protocol in order to communicate with the Component Object Model components on other computers. By default, in a Windows-based system, the network computers are configured initially to enable DCOM. There are also some components in Windows that might require registering themselves with DCOM. However, if they fail to do so, you will encounter the “The server did not register with DCOM within the required timeout” error. To fix this, here are some suggestions you can check out.

Option 1 – Try to use the Component Services

  • Tap the Win + R keys to open the Run dialog box.
  • Then type “dcomcnfg” in the field and tap Enter to pull up Component Services.
  • Next, double click on the Computers folder located in the right pane and right-click on My Computer, and select the Properties option.
  • After that, switch to the COM Security tab under My Computer Properties and then go to the Access Permissions section.
  • From there, click the Edit Default button and in the new window that appears, apply the correct permission to objects under the Group or user names section.
  • Once you’re done, click OK and exit. This should fix the error.

Option 2 – Make sure that Function Discovery Resource Publication Properties Services is running

  • In the Cortana search box, type “services” and click on the Services icon to open the Services Manager. Alternatively, you can also tap the Win + R keys to launch the Run prompt and then type “services.msc” in the field and hit Enter to open the Services Manager.
  • Next, scroll down and look for the “Function Discovery Resource Publication” entry and double click on it.
  • Then switch to the General tab and from there, make sure that the Startup Type is set to “Manual (Triggered).
  • You also have to make sure that the service is running so if it’s not, just click on the Start button to start the service.
  • Now click on Apply to save the changes made.

Option 3 – Try resetting the default DCOM permissions

  • Tap the Win + R keys to open the Run dialog box.
  • Then type “dcomcnfg” in the field and tap Enter to pull up Component Services.
  • After that, expand Component Services > Computers and right-click on My Computer, and then select Properties.
  • Next, go to the Default Properties tab, and in the Default Distributed COM Communication Properties section, make sure that:
    • Default Authentication Level is set to Connect
    • Default Impersonation Level is set to Identify.
Read More
1 2 3 162
Logo
Copyright © 2022, ErrorTools. All Rights Reserved
Trademarks: Microsoft Windows logos are registered trademarks of Microsoft. Disclaimer: ErrorTools.com is not affiliated with Microsoft, nor claim direct affiliation.
The information on this page is provided for information purposes only.
DMCA.com Protection Status