Fix Error 1061 The service cannot accept control messages at this time Error in Windows 10

If you are trying to run or starting a program on your Windows 10 computer and you suddenly get an error message saying, “Error 1061 The service cannot accept control messages at this time”, read on as this post will show you what you can do to fix the problem.

This kind of error pops up since the Application Information Service does not respond to the requests to raise applications to Administrator in Windows 10 like the Task Manager, Service updates, and so on. Thus, you won’t be able to run or open apps and will only get stuck with this error.

The “Error 1061 The service cannot accept control messages at this time” message is a type of network error that typically occurs when there is a temporary mismatch between the requested control and the state of the service to be controlled. It’s most likely that the service is in a state of start-pending, stop-pending, stopped or it may already be used by another user which explains why this error message suddenly appears.

You can encounter this error message on any Windows operation. Here are some of the most common occurrences:

  • Debugging a Windows service
  • Starting Task Manager
  • Starting Registry Editor
  • Starting Firewall
  • Starting services.msc
  • Starting dsm.exe
  • Updating services
  • Asking for file permissions, etc.

According to Microsoft MSDN, the error occurs because:

“There is a temporary mismatch between the requested control and the state of the service to be controlled. The service may be in a state of start-pending, stop-pending, or stopped. Wait a few minutes, then retry your operation.”

If after a few minutes, the error still appears, then you may have to follow the options prepared below.

Option 1 – Try to restart the Credential Manager Service

  • Go to the Start menu.
  • Then type in “services” in the search box.
  • From the search results, right-click on “Services” and select the “Run as Administrator” option.
  • Next, look for the Credential Manager Service in the Services window.
  • Once you found it, double-click on it to open its Properties. From there, you need to click on the Stop button.
  • After that, set the Credential Manager Service to “Automatic” and click on the Start button to restart it.

Option 2 – Try to start the Application Information Service

You can also try starting the Application Information Service to fix the “Error 1061 The service cannot accept control messages at this time”. Just open the Windows Services Manager and make sure that Application Information Service is Started. And if you find that it’s already started, you need to restart it.

Option 3 – Try killing the IIS Worker Process via Task Manager

  • Tap the Ctrl + Alt + Del keys and select the Task Manager.
  • Next, click on More details to expand the Task Manager and then look for the IIS Worker Process entry which should be displayed in the list under the Processes tab. From there, you can see it in the Background processes. Once you find it, kill its process.
  • You can also try to look for the “w3wp.exe” entries and end its process. if you find many entries, right-click on some of them and select the End task option from the context menu.
  • Now restart your PC. That should fix the problem.
If you like to learn and find out more about various Windows errors, and how to repair them go to our vast archive or use search to find articles that will explain and help you in solving your issue.
However, if you prefer to do things fast and with automatization then we are proposing to use an automated solution for your issues. The application that we are recommending is Advanced System Repair Pro
Advanced System Repair utilizes multiple tools all in one to give you a quick, simple, reliable, and very thorough diagnosis of your PC. It brings you all the tools you need in one program to clean, fix, protect, optimize and boost your PC!
1-Click Maintenance
All the tools to make it simple and easy! It's like having a professional technician at the click of a mouse.

Junk Cleaner
Keeping your computer free from unnecessary clutter also helps make your computer last longer. Like any other machine, if you keep it clean and take care of it, it will serve you better for longer!

Optimize background apps
Optimize applications background activity with the built-in Application Optimizer feature.

Disk Defrag
With a simple 1-click, Advanced System Repair speeds up your PC by assembling fragmented files on your machine and organizing them more efficiently.

Malware Removal
Finds and removes all types of harmful malware including trojans, worms, bots, adware, spyware, PUPs, and more!

Privacy Cleaner
The all-in-one privacy suite to Clean Your Tracks & Protect Your Privacy! Make your computer safe, secure, and more efficient!

System Tweak/Optimizer
ASR will analyze your complete system and settings to adjust your PC to function at its maximum performance.

Registry Cleaner
Over time, as you install and uninstall applications, the registry can become cluttered with old entries and broken settings which can result in program crashes, and annoying messages and slow the computer down.
Visit our Advanced System Repair Pro Download page to inform yourself about all the benefits of this software and get a free trial copy of it.
advanced system repair pro

Advanced System Repair Pro

One-click automated PC repair solution
ASR logo
With Advanced System Repair Pro you can easily
Replace damaged files
Restore performance
Free disk space
Remove Malware
Protects WEB browser
Remove Viruses
Stop PC freezing
DOWNLOAD
Privacy Policy | Terms of Use | Uinstall
Advanced System Repair Pro is compatible with all versions of Microsoft Windows including Windows 11

Share this article:

You might also like

Fix Windows Update Error 0x8007025D-0x2000C
Recently, a number of users reported getting an error code 0x8007025D-0x2000C while updating their Windows 10 computers using an ISO or the Media Creation tool. You will also see a detailed error message saying, “The installation failed in the SAFE_OS phase with an error during APPLY_IMAGE operation” together with the error code 0x8007025D-0x2000C. This kind of issue usually occurs when there is some problem with the installation files and when Windows Update fails to apply upgrade using the Media Creation Tool or ISO. To resolve this issue, you can use the troubleshooting options given below as a reference.

Option 1 – Try recreating the Windows 10 installation USB

Recreating the Windows 10 installation USB might help in fixing the problem. You can use a USB drive to do so but make sure that it has a great read-write speed. Follow the steps below to recreate Windows 10 installation USB”
  • Click this link and then click the Download Tool Now button.
  • Next, click the “Use the tool to create installation media (USB flash drive, DVD, or ISO file)…” option and follow the next given instructions on the screen.
  • Now select the ISO file option in step 5.
  • After that, you should now have an ISO file.
  • Next, go to the location where you’ve downloaded the ISO file.
  • Then right-click on the Windows 10 ISO file and select the Open with option and then select File Explorer.
  • Now click on “setup.exe” and follow the next instructions that appear on the screen. When asked, you have to select either Nothing (clean install) or Keep personal files only option. Take note that you must not select the “Keep personal files, apps, and Windows settings since it doesn’t really work.

Option 2 – Try running the Windows Update troubleshooter

You might also want to run the Windows Update Troubleshooter as it could also help in fixing Windows Update error code 0x8007025D-0x2000C. To run it, go to Settings and then select Troubleshoot from the options. From there, click on Windows Update and then click the “Run the troubleshooter” button. After that, follow the next on-screen instructions and you should be good to go.

Option 3 – Update the BIOS

Take note that you have to be careful when modifying something in the BIOS. So if you don’t know much about it, it’s best if you skip on this option and try the other ones instead. However, if you are well-versed in navigating the BIOS, then follow the steps below.
  • Tap the Win + R keys to open the Run dialog box.
  • Next, type “msinfo32” in the field and press Enter to open System Information.
  • From there, you should find a search field on the bottom where you have to search for the BIOS version and then press Enter.
  • After that, you should see the developer and version of the BIOS installed on your PC.
  • Go to your manufacturer’s website and then download the latest version of BIOS on your computer.
  • If you are using a laptop, make sure that you keep it plugged in until you have updated the BIOS.
  • Now double click on the downloaded file and install the new BIOS version on your computer.
  • Now restart your computer to apply the changes made.

Option 4 – Try restarting the Background Intelligent Transfer Service

The Background Intelligent Transfer Service or BITS is a part of the Windows Update service and is the one that manages the background download of Windows Update, as well as scans for new updates and so on. And if Windows Update is experiencing some problems, you can try restarting BITS but make sure that you have admin privileges to do so.
  • Tap the Win + R keys to open the Run dialog box.
  • Next, type “services.msc” in the field and hit Enter to open Windows Services.
  • From the list of Services, look for the Background Intelligent Transfer Service and double-click on it to open Properties.
  • After that, you need to set the Startup type to “Automatic (Delayed Start) and click on Apply.
  • Now click the Stop button to stop BITS and then click the Start button to restart the service.
  • Click OK to save the changes made and then restart your PC.

Option 5 – Try to update Windows after a couple of minutes or an hour

There are times when the issue is from Microsoft’s end. It could be that there’s some issue with Microsoft’s server so it would be better if you give it a couple of minutes or an hour or so before trying to run Windows Update again.
Read More
Windows Updates failed to install, 0x80073701
Recently, a number of users reported an error while trying to update their computers. This particular Windows Update error has an error code of 0x80073701. If you are one of the users who encounter this error, then read on as this post will guide you on how exactly you can fix it. Here’s the exact context of the error:
“Updates failed. There were problems installing some updates, but we’ll try again later. 2019-07 Cumulative Update for Windows 10 Version 1903 for x86-based Systems (KB4507453) – Error 0x80073701”
The Windows Update Error 0x80073701 also comes with a code “ERROR_SXS_ASSEMBLY_MISSING” which indicates that some system files are missing on your computer that caused the update installation failure error. Although this Windows Update error does not cause any severe issues, it is still being reported in the section of Windows Update where it is marked as “Update failed”. There are several potential solutions you can check out to resolve this error. You can try to run the DISM tool or the SFC or System File Checker scan. You could also try to run the Windows Update troubleshooter. For more information, make sure to follow the options given below.

Option 1 – Restart your computer and try installing the Updates again

Restarting your computer can also help in fixing the Windows Update failed to install error 0x80073701. There are cases where the issue resolves on its own as it could just be some simple network or PC error.

Option 2 – Try to run the DISM tool

Running the DISM Tool helps in repairing the Windows System Image as well as the Windows Component Store in Windows 10. Using this built-in tool, you have various options such as the “/ScanHealth”, “/CheckHealth”, and “/RestoreHealth”.
  • Open the Command Prompt as admin.
  • Then type in this command: exe /Online /Cleanup-image /Restorehealth
  • Do not close the window if the process takes a while as it will probably take a few minutes to finish.
After you run this tool, a log file is created at C:WindowsLogsCBSCBS.log. On the other hand, if the Windows Update client is already broken, you will be prompted to use a running Windows installation as the repair source or use a Windows side-by-side folder from a network share, as the source of the files. Although the chances of this happening is less, if it turns out to be the case, you need to run an advanced command in the DISM tool to repair a broken Windows Update. Just repeat the process above but use the following command instead:
DISM.exe /Online /Cleanup-Image /RestoreHealth /Source:C:RepairSourceWindows /LimitAccess

Option 3 – Try to run the System File Checker

System File Checker or SFC is a built-in command utility that helps in restoring corrupted files as well as missing files. It replaces bad and corrupted system files to good system files that might be causing the error 0x80073701. To run the SFC command, follow the steps given below.
  • Tap Win + R to launch Run.
  • Type in cmd in the field and tap Enter.
  • After opening Command Prompt, type in sfc /scannow
  • The command will start a system scan which will take a few whiles before it finishes. Once it’s done, you could get the following results:
  1. Windows Resource Protection did not find any integrity violations.
  2. Windows Resource Protection found corrupt files and successfully repaired them.
  3. Windows Resource Protection found corrupt files but was unable to fix some of them.
  • Restart your computer.

Option 4 – Try running the Windows Update Troubleshooter

Running the built-in Windows Update troubleshooter could also help you resolve the Windows Update error 0x80073701. To run it, go to Settings and then select Troubleshoot from the options. From there, click on Windows Update and then click the “Run the troubleshooter” button. After that, follow the next on-screen instructions and you should be good to go.
Read More
Enable or disable Console Mode Sign-in
Microsoft has been bringing new lock-screen features with every iterative feature release of Windows 10 in order to improve user experience. However, Windows 10 users have different opinions regarding it. Some users are pleased with it while some users simply do not like it. So if you are one of the users who seem to not approve of this feature, read on as this post will be about enabling or disabling the Console Mode sign-in feature in Windows 10. Before you proceed, take note that you will not be able to use your mouse pointer in this Consol Mode login screen and you can only use your keyboard to navigate around various options. You might also want to create a System Restore point just in case. To enable or disable the Console Mode sign-in in your Windows 10 computer, refer to the given steps below. Step 1: Tap the Win + R keys to open the Run dialog box. Step 2: Then type in “Regedit” in the field and tap Enter to open the Registry Editor. Step 3: Next, navigate to the following registry path:
ComputerHKEY_LOCAL_MACHINESOFTWAREMicrosoftWindowsCurrentVersionAuthenticationLogonUITestHooks
Step 4: From there, look for a DWORD named “ConsoleMode”. If you don’t see this DWORD, you can just create a new DWORD and name it as “ConsoleMode” and make sure that its base is set to Hexadecimal. Step 5: After that, double click on ConsoleMode and change its value to “0” to disable it and “1” to enable it. Step 6: Now restart your computer to apply the changes made. Like pointed out, you can only use your keyboard when you’re in the Console Mode login window or screen. You can just use the ESC button to go back to the menu while you can utilize the arrow keys so you can go through the options that are mostly vertically arranged and the Enter key to select an option. In the Console Mode, sign-in using the Passwords and PINs worked efficiently.
Read More
Fix NVIDIA Control Panel Access denied
As you know, the NVIDIA Control Panel is the central control panel for all devices that run the graphics drivers manufactured by NVIDIA. This control panel comes bundled with the drive package itself which is why there is no need for users to download it or update it separately. However, recently, some users reported that when they tried to make changes to the configuration in the NVIDIA Control Panel, they were unable to do so and encountered an error message instead saying, “Access denied. Failed to apply selected settings to your system”. If you also got the same error message, then you’ve come to the right place as this post will walk you through fixing this error in the NVIDIA Control Panel. There are several suggestions given in this article to fix the error. You can try to run the file named “nvcplui.exe” as an administrator or restore the most recent version of the folder where the aforementioned file is located. You could also try to restart NVIDIA’s process or restart the NVIDIA Display driver service or update the NVIDIA drivers in your computer. For more details, refer to each one of the options given below.

Option 1 – Try running the nvcplui.exe file as an administrator

  • Tap the Win + E keys to open File Explorer and navigate to this path: C:/Program Files/NVIDIA Corporation/Control Panel/Client
  • After that, look for the exe file and right-click on it, and then select the Run as administrator option.
  • Next, select Yes if a User Account Control or UAC prompt appears.

Option 2 – Try to restore the most recent version of the folder

The next thing you can do to fix the error is to restore the most recent version of the folder where the nvcplui.exe file is located. Keep in mind that this option is tricky so you have to be careful.
  • Tap the Win + E keys to open File Explorer.
  • Next, navigate to this path: C:/ProgramData/NVIDIA DRS
  • From there, right-click on the DRS folder and select Properties.
  • After that, go to the Previous Versions, System Protection, or System Restore tab in the Properties window.
  • Now restore the most recent version of the contents inside that folder. This will revert the old working configuration of DRS.

Option 3: Restart the process of the NVIDIA Control Panel

  • Tap the Ctrl + Shift + Esc keys to open the Task Manager.
  • After opening the Task Manager, look for the process named NVIDIA Control Panel Application.
  • Once you found it, expand it and right-click on the NVIDIA Control Panel sub-process, and click on End Task.
  • Now try opening the NVIDIA Control Panel from the Start Menu and see if it now works fine or not.

Option 4: Restart the NVIDIA Display Driver Service

  • Tap the Win + R keys to open the Run dialog box.
  • Then type “services.msc” in the field and hit Enter to open the Windows Services Manager.
  • After opening the Services window, you will see a list of services. From there, look for services named “NVIDIA Display Container LS” and double click on it to open its Properties.
  • Now make sure that the service is Started. If it isn’t, you need to start it, otherwise, you need to Stop it and Start It again. You also have to make sure that the Startup Type is set to Automatic.
  • Do the same for the NVIDIA LocalSystem Container service.
  • Restart your computer and check if the problem’s fixed.

Option 5– Try updating the drivers from the official site of NVIDIA

If both the first and second given options didn’t work, you can also try updating the drivers from the official NVIDIA website. And in case you don’t know the type of Nvidia graphics card that your computer is on, follow the steps below:
  • Tap the Win + R keys to open the Run dialog box.
  • Next type in “dxdiag” in the field and click OK or hit Enter to open the DirectX Diagnostic Tool.
  • From there, you can see what type of Nvidia graphics card that your system is on.
  • Take note of your graphics card information and then look for the best drivers for your operating system. Once you’ve downloaded and installed the file, restart your PC.
Read More
Configuring Groove Music Equalizer in Windows
In case you don’t know, Groove Music is due to retire its OneDrive streaming service this month. Despite that being the case, there is actually a workaround you can try to still continue enjoying music streaming. The app also allows you to play your own local files and if required, you can also modify or tailor the experience with new features – for instance, Groove Music brings an Equalizer to the settings of the app. As the name suggests, the equalizer allows you to tweak frequency responses to your liking. On top of being able to tweak individual bands, the equalizer supports few pre-set settings to enable quick changes. This post will guide you on the process of accessing and using the equalizer in the Groove Music app. To get started, refer to the instructions provided below. Step 1: You need to make sure that you are running the latest version of the Groove Music app or version 10.18011.1211.0 or higher in order to use the equalizer in Groove Music. If needed, you can check the version number from Windows Store. Step 2: Open Windows Store and then click on the ellipses icon and select the Downloads and Updates option. Step 3: Next, search for Groove Music and check its version number. Step 4: Now that you’ve verified the version number of Groove Music, you need to open the equalizer setting. It is enabled by default and to access it, click on the gear icon for Settings and select equalizer under the Playback settings. Step 5: After that, the Equalizer window will pop up. It is where you can configure the equalizer settings using the drop-down menu. Here are the following presets you can choose from:
  • Flat
  • Treble Boost
  • Bass Boost
  • Headphones
  • Laptop
  • Portable speakers
  • Home Stereo
  • TV
  • Car
  • Custom
Step 6: Drag the dots upwards or downwards to set your own preferences, as needed. Note: The only downside to this setting is that there is no shortcut available for quick access as you have to navigate through the Settings section manually to access it and change the preset configurations. In addition, the Groove Music app also works on the mobile version of Windows 10.
Read More
Fix 0xd00000e5, 0x8007139f, 0x80090030 PIN
The quickest and easiest way to log into your computer is when you use the PIN feature in Windows 10. Even though it is a bit slower compared to biometric logins such as Fingerprint and Iris scanning that comes under Windows Hello, the PIN feature is definitely less complicated. However, just like any other module of the software, it is also prone to some errors. In this post, you will be guided in fixing several PIN errors such as 0xd00000e5, 0x8007139f, and 0x8009003. These errors could be caused at different points in time like when you change or create a PIN or when you log into your computer. To fix the 0xd00000e5, 0x8007139f and 0x8009003 PIN errors, there are various solutions you can try. You may empty the contents of the NGC folder or remove and change the PIN or the password. You could also use the Group Policy Editor or reset the ACLs in the NGC folder as well as run built-in tools like System File Checker and the DISM tool.

Option 1 – Take ownership of the NGC folder and delete its contents

  • Boot your computer first into Safe Mode.
  • Next, you need to take ownership of the Ngc folder first and you can do that using Command Prompt.
  • Type “command prompt” in the Windows Search bar and then right-click on the relevant search result and select “Run as administrator”.
  • After that, if a User Account Control or UAC prompt appears, just click on Yes to proceed.
  • Next, type and enter this command: TAKEOWN /F C:WindowsServiceProfilesLocalServiceAppDataLocalMicrosoftNgc
  • Note that the <path> is the location of the folder or file in File Explorer.
  • Now type and enter this second command: ICACLS C:WindowsServiceProfilesLocalServiceAppDataLocalMicrosoftNgc /grant administrators:F
  • Finally, once the command has been executed, restart your computer.
  • Once your computer has restarted, delete all the contents in the Ngc folder and check if the error is now fixed.

Option 2 – Try to remove and change the PIN or password

The 0xd00000e5, 0x8007139f, and 0x8009003 PIN errors could be caused by some conflicting issues with the PIN or password you have set for the User Account of your computer. Thus, you have to remove or change the PIN or password to fix these PIN errors.
  • Remove the PIN by going to Settings > Accounts > Sign-in options.
  • From there, go to the PIN section and click on the Remove button.
  • You will be asked to verify your account to proceed in removing the PIN, enter your credentials.
  • Restart your computer and then set up a new PIN.
  • Once you’re done, restart your computer and check if the error is gone now.

Option 3 – Try to use the Group Policy Editor

  • Tap the Win + R keys to open the Run utility and type “gpedit.msc” in the field and tap Enter to open the Group Policy Editor.
  • Next, navigate to this policy setting: Computer Configuration > Administrative Templates > System > Logon
  • After that, double click on the “Turn on convenience PIN Sign-in” option located on the right-side panel.
  • Then set its radio button to Enabled. You will see the following description when you do so:
“This policy setting allows you to control whether a domain user can sign in using a convenience PIN. If you enable this policy setting, a domain user can set up and sign in with a convenience PIN. If you disable or don’t configure this policy setting, a domain user can’t set up and use a convenience PIN. Note: The user’s domain password will be cached in the system vault when using this feature. To configure Windows Hello for Business, use the Administrative Template policies under Windows Hello for Business.”
  • After setting the radio button to Enabled, it will turn on the Logins in your computer using the PIN.
  • Close the Group Policy Editor and restart your computer for the changes to take effect.

Option 4 – Try to reset the ACLs in the Ngc folder

  • Type “command prompt” in the Windows Search bar and then right-click on the relevant search result and select “Run as administrator”.
  • After opening Command Prompt with admin privileges, execute this command: C:/Windows/Service/Profiles/Local/Service/AppData/Local/MicrosoftNgc /T /Q /C /RESET
  • The command you entered will start checking for errors and fix them automatically.

Option 5 – Run the System File Checker scan and the DISM tool

System File Checker:

  • Tap Win + R to launch Run.
  • Type in cmd in the field and tap Enter.
  • After opening Command Prompt, type in sfc /scannow
The command will start a system scan which will take a few whiles before it finishes. Once it’s done, you could get the following results:
  1. Windows Resource Protection did not find any integrity violations.
  2. Windows Resource Protection found corrupt files and successfully repaired them.
  3. Windows Resource Protection found corrupt files but was unable to fix some of them.
  • Now restart your computer.

DISM tool:

  • Open Command Prompt.
  • Then type in the following commands and make sure to hit Enter right after you type each one of them:
    • Dism /Online /Cleanup-Image /CheckHealth
    • Dism /Online /Cleanup-Image /ScanHealth
    • Dism /Online /Cleanup-image /Restorehealth
  • After that, wait until the process is finished and do not close the window as the process will probably take a couple of minutes.
  • Once it’s done, restart your computer.
Read More
Alt-tab that is broken with KB5005033 update
Alt-tab
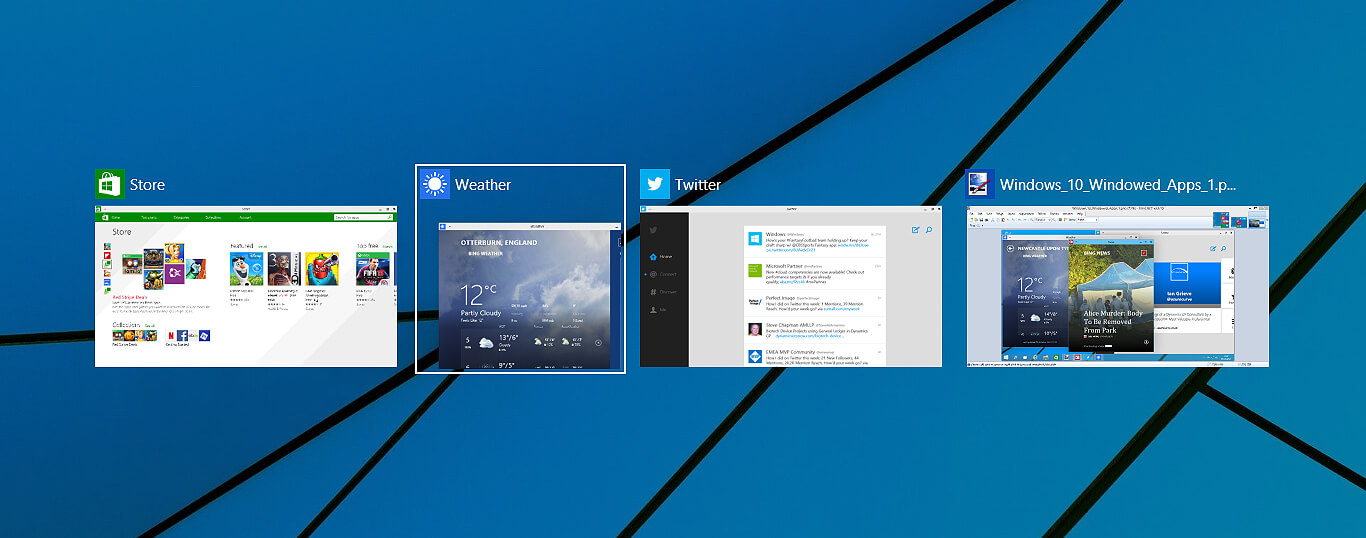
Lately, Microsoft has trying to fix Print Nightmare with various methods and patches. The last patch has seemingly fixed Print Nightmare but it has broken the Alt-tab key combination. It has been reported that the latest patch has broken famous key combinations for quickly switching from window to window. It seems that combination is not working or it is switching to desktop, even going to blank screen if switching from the full-screen game.

Fixing the issue

Luckily this issue is easily fixable. The first and easier fix for this issue is surprising to turn off the news and info widget, right-click on it and choose News and interests and then click on turn off. The second solution would be to uninstall the update. Go to Settings, then to Update & Security, and from there view Update History and remove the update.
Read More
Merge or Delete an OEM Partition in Windows
OEM Partition, also known as System Reserved Partition, is placed by the OEM to help users recover their computers or bring back the original state of the computer when it was bought. If you’ve observed that a part of your hard drive says “Healthy (OEM partition)” in the Disk Management and it occupies space in GBs, then this means that it’s normal and there’s nothing to worry about except that part of the storage space is not available and even when you right-click on it, the only thing it displays is the Help menu. Thus, in this guide, you will be guided on how you can merge as well as delete an OEM partition in your Windows 10 computer. Since the Disk Management tool in Windows won’t let you merge or delete the OEM partition, you can just use the built-in command-line tool known as Diskpart. Note that you have to be extra careful when you run the commands as it could mess your computer up and before you proceed with the instructions provided below, make sure that you create a System Restore point first. Once you have that covered, follow the instructions below. Step 1: Tap the Win + R keys to open the Run dialog box and type “cmd” in the field and tap Enter to open the Command Prompt. Step 2: Next, execute this command to launch the Diskpart tool: diskpart Step 3: Execute this second command to view the list of the disks in your computer: list disk Step 4: Now select the disk you want to manage by executing this command: select disk x Note: In the command above, replace “x” with the letter of your disk. Step 5: After that, execute this command to display all the volumes or partitions: list partition Step 6: Now execute this command to select the partition you want to delete: select partition x Note: You have to replace “x” with the partition you want to delete. Step 7: Once done, execute this command to delete the selected partition: delete partition override Step 8: Afterwards, execute this command to merge the OEM partition with the adjoining value: Extend Note: if you only want to merge part of the partition, you need to use this command “extend [size=<size>]”. For instance, you want to extend its size by 5GB, then you need to type “Extend size=5000”. The size you set is the size you select from the OEM partition. This will extend the selected volume by size in MB or megabytes.
Read More
Fix 0xC03A0005 error in Windows 10
When performing a Windows Backup to the NAS device (backup to a network share) that is running Samba, fails with an error message The backup failed, The version does not support this version of the file format (0xC03A0005). The problem occurs because of a conflict with the VHD file that is created by Windows Backup and is mounted during the process. There are three types of VHD files:
  1. Fixed,
  2. Expandable
  3. Differencing
If the VHD file is a sparse file that is not supported by the native VHD driver, the mounting will fail, and you will get this error. An example VHD file is one that keeps expanding depending on the backup size. The problem occurs only in the case of  File Level backup (file/folders in a volume) but not on the block level backup as the vhd file is never mounted. However, in the case of File Level Backup, the vhd is mounted, created by Windows Backup, which does not support the mounting of sparse files.

The solution is to use Strict Allocate: option in the smb.conf file

Login to SMB using SSH. Open the configuration file using the VI editor located at /etc/samba/smb.conf. If the option is not there, you can manually add strict allocate = yes which will make sure there are no sparse file that is created.
Read More
New Windows 11 keyboard shortcuts
New Windows brings new keyboard shortcuts, most of them are tied to new features and we are presenting you some new ones that are worth remembering. keyboad shortcuts⊞ WINDOWS + N - notification panel ⊞ WINDOWS + W - News and Interests feed With the News and Interests feed, Windows 11 offers users the ability to check the latest news, the weather, and more without opening a browser window. ⊞ WINDOWS + Z - Snap Layout Instead of the usual two windows snapping capability, Windows 11 allow users to snap their windows in a three-column layout. Users can access this by pressing Windows Key and Z to access the Snap layout. ⊞ WINDOWS + PRT SCN - taking screenshots This one isn’t exactly new, but pressing the Windows Key and Print Screen will automatically capture the entire screen and save a copy of the image on your PC. Once the screen flashes, you will know that the screenshot has been taken, after which you can find the file saved under your Pictures folder in a subfolder called Screenshot. ⊞ WINDOWS + C - Microsoft Teams chat Microsoft Teams app, the service allows anyone with a Microsoft account to quickly start a chat using the Windows + C shortcut.
Read More
1 2 3 162
Logo
Copyright © 2022, ErrorTools. All Rights Reserved
Trademarks: Microsoft Windows logos are registered trademarks of Microsoft. Disclaimer: ErrorTools.com is not affiliated with Microsoft, nor claim direct affiliation.
The information on this page is provided for information purposes only.
DMCA.com Protection Status