Guide to Quick Fix Error 0x0000007B,0xF78524

[vc_row][vc_column][vc_column_text]

Error 0X0000007B (0xF78d2524) Repair

0X0000007B (0xF78d2524) - What is it?

If you are a laptop or a notebook user and you are trying to install Windows XP on it, you might come across 0x0000007B (0xF78524) error message. This error is a popular blue screen of death error and very similar to the error 0x0000007B.

Solution

Restoro box imageError Causes

The common causes of 0x0000007B (0xF78524) error code on your laptop might be:

  • File Corruption
  • Device Configuration Issues
  • Adware/spyware invasion
  • Incomplete Installations
  • Problem with your computer’s hard drive controller

Further Information and Manual Repair

Many people panic when they experience 0x0000007B (0xF78524) error on their laptops and notebooks simply because it is a blue screen of death error. The BSoD has this whole persona of being deadly computer errors that can almost cripple systems.

If you have also experienced this error on your laptop, remain calm and follow the solutions given below to ensure you fix the error quickly without any hassle.

Here are various ways to fix and resolve the BSOD error code 0x0000007B (0xF78524):

  1. Whether you have Lenovo IdeaPad Y550 or Dell Latitude E4300 or any other laptop for that matter, if device driver configuration is the cause of the error 0x0000007B (0xF78524), then all you need to do is start up your laptop and press F2 to enter BIOS. Now expand the ‘Drives’ section. After doing so, go to ‘SATA Operation’. SATA is the abbreviation for Serial Advanced Technology Attachment which enables mass storage devices like hard drives and optical drives to communicate with the motherboard by using a high-speed serial cable. For successful communication between devices, you need to configure SATA controller mode. Once you go to the ‘SATA Operation’ mode, change this from RAID AHCI to RAID ATA. Save changes and exit BIOS. This helps resolve the error 0x0000007B (0xF78524) in no time.
  2. Another way to fix this error is to download and install the 0x0000007B (0xF78524) repair tool. Once this tool is installed on your laptop, click the scan button. Once the scan is complete, you will see a list of errors; click the ‘Repair’ button to fix the errors found and then restart.
  3. The 0x0000007B (0xF78524) error may also occur due to the boot volume corruption. In such an event, it is advisable to run chkdsk command on the hard drive. This is recovery console command is used to check the hard drive, repair and recover data on the drive successfully.

[/vc_column_text][/vc_column][/vc_row]

If you like to learn and find out more about various Windows errors, and how to repair them go to our vast archive or use search to find articles that will explain and help you in solving your issue.
However, if you prefer to do things fast and with automatization then we are proposing to use an automated solution for your issues. The application that we are recommending is Advanced System Repair Pro
Advanced System Repair utilizes multiple tools all in one to give you a quick, simple, reliable, and very thorough diagnosis of your PC. It brings you all the tools you need in one program to clean, fix, protect, optimize and boost your PC!
1-Click Maintenance
All the tools to make it simple and easy! It's like having a professional technician at the click of a mouse.

Junk Cleaner
Keeping your computer free from unnecessary clutter also helps make your computer last longer. Like any other machine, if you keep it clean and take care of it, it will serve you better for longer!

Optimize background apps
Optimize applications background activity with the built-in Application Optimizer feature.

Disk Defrag
With a simple 1-click, Advanced System Repair speeds up your PC by assembling fragmented files on your machine and organizing them more efficiently.

Malware Removal
Finds and removes all types of harmful malware including trojans, worms, bots, adware, spyware, PUPs, and more!

Privacy Cleaner
The all-in-one privacy suite to Clean Your Tracks & Protect Your Privacy! Make your computer safe, secure, and more efficient!

System Tweak/Optimizer
ASR will analyze your complete system and settings to adjust your PC to function at its maximum performance.

Registry Cleaner
Over time, as you install and uninstall applications, the registry can become cluttered with old entries and broken settings which can result in program crashes, and annoying messages and slow the computer down.
Visit our Advanced System Repair Pro Download page to inform yourself about all the benefits of this software and get a free trial copy of it.
advanced system repair pro

Advanced System Repair Pro

One-click automated PC repair solution
ASR logo
With Advanced System Repair Pro you can easily
Replace damaged files
Restore performance
Free disk space
Remove Malware
Protects WEB browser
Remove Viruses
Stop PC freezing
DOWNLOAD
Privacy Policy | Terms of Use | Uinstall
Advanced System Repair Pro is compatible with all versions of Microsoft Windows including Windows 11

Share this article:

You might also like

Diablo 2 Resurrected facing server issues
It has been some time since the release of Diablo 2 resurrected and overall reception was pretty good. People are enjoying the old classic game in hi-def. resolution and with new and improved visuals. Sadly some server issues are present still until this day and somewhat spoil the experience for players. diablo 2 server status
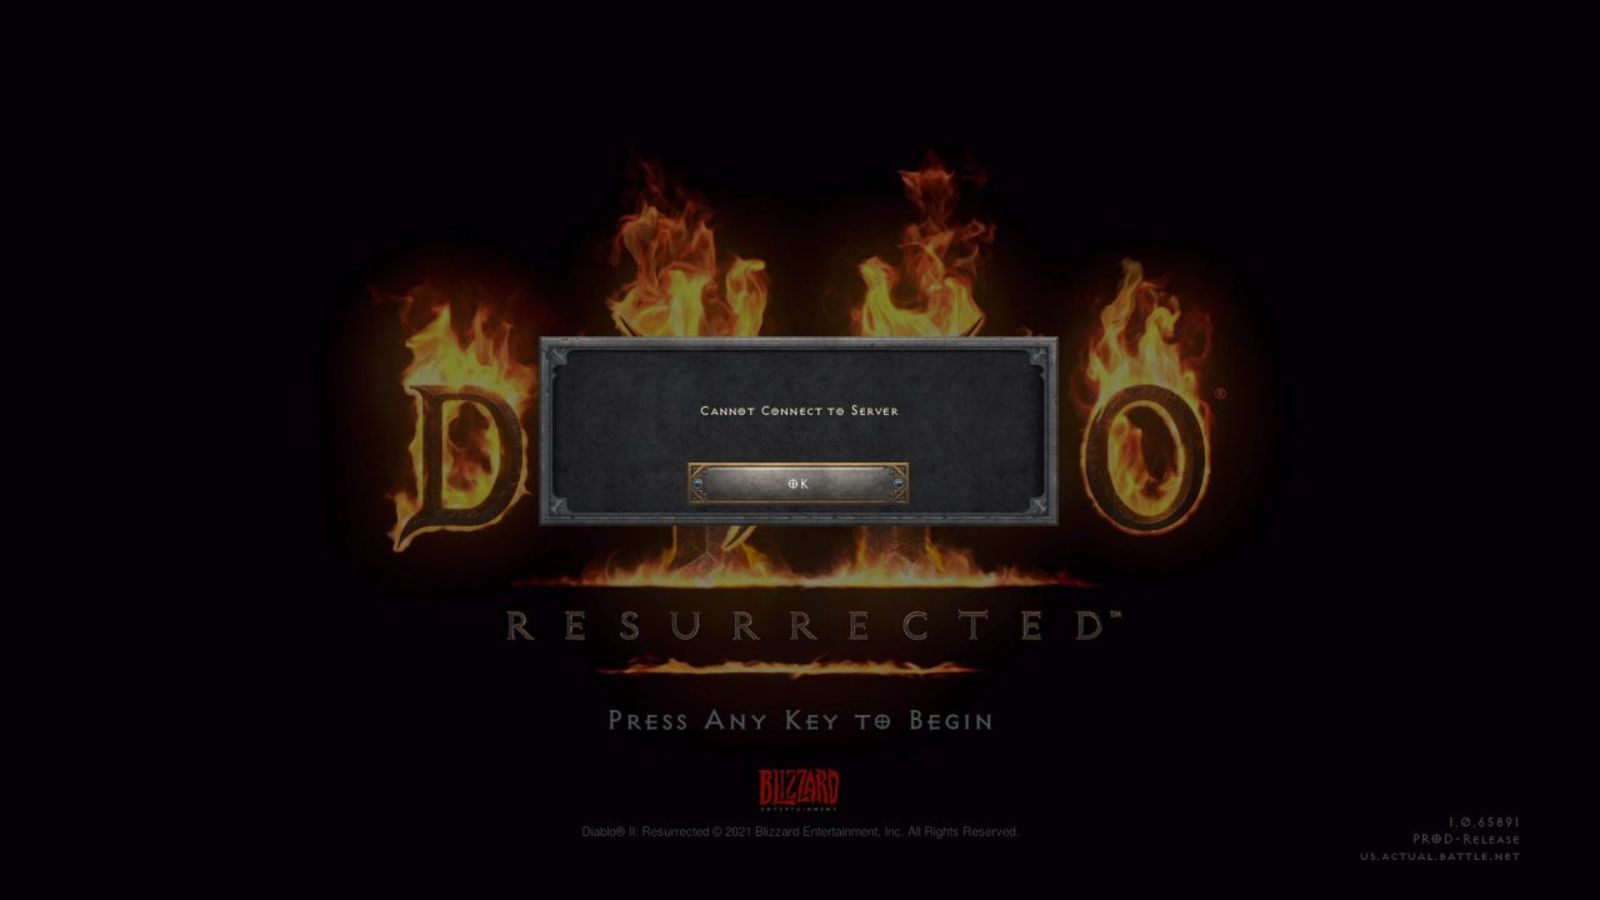
The greatest lag and server crashes are pinpointed to game-creating events. When a player creates a new online game, the server needs to pull a lot of details from the database and make a game, due to some legacy code present this process takes some time and it is demanding a bit on the server-side, and although code was optimized to cater to more modern approach some legacy code still remains. Another thing that was spotted to affect performance itself is player behavior, to be more specific, modern gamer behavior. Where players find good builds and runs on the internet and then go to farm-specific areas or bosses for loot or experience points, which in return boils down to making plenty and short runs that are made by creating games and after run eliminating them. Now pair that with the previous statement about legacy server and database code and you can add 1 and 1 and see how this might be an issue. A lot of short games over legacy code are placing games in a state it was not designed for back in 2001 and therefore we have issues. Sadly solutions without completely rewriting the whole code are not very promising and they include rate limiting, which will prevent players to create many games in succession in a short period of time and maybe even login queues to drop a load on servers. Blizzard reached to people in the whole company, even old diablo 2 developers to ask for advice and they say that they are working on solutions so they could lift limitations and have everything running fine.
Read More
Troubleshooting Fortnite Connection Issues
It is no secret that Fortnite is one of the most played games in the world. Epic has done a great job offering it to plenty of other platforms with cross-play feature meaning that you can play with your friends no matter on what platform they are on. But how Fortnite is a piece of software which is constantly updated and maintained it is pretty normal to have some bugs or issues from time to time. One of the before-mentioned issues is a connection issue or unable to connect to game servers. In our article, we will go through common fixes and solutions in order to get you back in-game as fast as possible. Keep on reading.

fortnite cannot connectCheck the Epic Games Status page

Check the Epic Games Server Status page to make sure all systems are operational. If the issue you’re experiencing is related to an outage or system-wide issue, you won’t be able to connect to the Epic Games Launcher or Fortnite until it's resolved.

Use a wired connection

Wireless connections are not as stable as wired connections. This means that the signal can be unreliable and result in packet loss, connection problems, or higher latency or ping. Connect directly to your modem or router with an Ethernet cable to eliminate this possibility and have the fastest connection possible.

Disable your firewalls

Often the quickest way to fix connection problems due to firewalls is to temporarily uninstall and/or disable it.

Windows Firewall disable guide:

  1. Click on Start.
  2. Click on Control Panel.
  3. Click on System and Security.
  4. Click on Windows Firewall.
  5. Click on Turn Windows Firewall on or off (You might need to provide the Administrator password at this step)
  6. Under each Network location, select the Turn off Windows Firewall option

Uninstall any other firewalls

Using a third-party firewall may prevent you from being able to connect to the Epic Games Launcher, Fortnite, or another Epic Games product. We recommend removing any third party firewalls temporarily to see if this resolves your issue. If it does resolve the problem, make sure to add the following executables as exceptions to your firewall:

Epic Games Launcher

  • C:\Program Files (x86)\Epic Games\Launcher\Engine\Binaries\Win64\EpicGamesLauncher.exe
  • C:\Program Files (x86)\Epic Games\Launcher\Engine\Binaries\Win32\EpicGamesLauncher.exe

Fortnite

  • C:\Program Files\Epic Games\Fortnite\FortniteGame\Binaries\Win64\FortniteClient-Win64-Shipping.exe
  • C:\Program Files\Epic Games\Fortnite\FortniteGame\Binaries\Win64\FortniteClient-Win64-Shipping_BE.exe
  • C:\Program Files\Epic Games\Fortnite\FortniteGame\Binaries\Win64\FortniteClient-Win64-Shipping_EAC.exe
  • C:\Program Files\Epic Games\Fortnite\FortniteGame\Binaries\Win64\FortniteLauncher.exe
Contact your firewall manufacturer for instructions on how to add these as exceptions to it as this varies between them.

Unblock your network ports

Network ports allow certain types of data to be successfully sent over a network that is used by our services. If you have any of these blocked, it may result in you being unable to connect to our games or use our services properly. To unblock your ports on your router do the following:

Windows

First, you will need to get your default gateway and internal IP address:

  1. Click on Start.
  2. Type cmd and press Enter.
  3. Type ipconfig and press Enter.
  4. Take note of your Default Gateway and IPv4.

Configuring your router to unblock the ports

  1. Open your web browser.
  2. Type your Default Gateway into the address bar and press Enter. (A common Default Gateway is 192.168.1.1)
  3. You may be asked for a username and password. This varies for each router. Before entering anything, try just hitting OK. If that doesn't work, try the common default username and password below: Username: admin Password: password If these don't work, you can check this website for a list of usernames and passwords based on your router model.
  4. Locate the Port Forwarding page in the administration tool and click on it.
  5. Make sure you have Port Forwarding selected and not Port Triggering as this is completely different.
  6. On this screen, you will need to enter the ports and port ranges below with the correct protocol and local IP of which you took note of above: 80 (TCP/UDP), 433 (TCP), 443 (TCP), 3478 (TCP/UDP), 3479 (TCP/UDP), 5060 (TCP/UDP), 5062 (TCP/UDP), 5222 (TCP), 6250 (TCP/UDP), and12000-65000 (TCP/UDP).
If you have any trouble doing the above on your router, make sure to check out the router manufacturer's support site for additional instructions as these will vary from router to router.

VPN and Proxy Servers

Do NOT use VPN or Proxy Servers. These cause issues that can't be resolved by us without having you disable them. Check out this article for information on how to disable your proxy server.

Switch Domain Name Systems (DNS)

Switching your DNS can result in better connectivity and performance for your internet connection. There are two different DNS services we recommend to have you try if you are having issues with your connection. Below are the followings links with instructions on how to change your DNS:

Epic Games Launcher: Edit your Engine.ini file (Windows only)

Editing these settings can result in better download speeds using the Epic Games Launcher:
  1. Click on Start.
  2. Type %localappdata% and press Enter.
  3. Open the EpicGamesLauncher
  4. Open the Saved
  5. Open the Config
  6. Open the Windows
  7. Open ini and add the following lines to it: [HTTP] HttpTimeout=10 HttpConnectionTimeout=10 HttpReceiveTimeout=10 HttpSendTimeout=10[Portal.BuildPatch] ChunkDownloads=3 ChunkRetries=20 RetryTime=0.5
  8. Save the file and open the Epic Games Launcher.
fortnite gameplay
Read More
Fix W11 Installation assistant is not working
Windows 11 is getting adopted more and more each day, and how more and more users are installing it some smaller bugs show up. One of the things that have manifested lately is that in some cases installation assistant is not working throwing error 0x8007007f at you while you try to finish the update of Windows. Win not working thumb If you are one of the users that are experiencing this kind of annoyance, we have a solution for you. Follow this guide as presented and repair this annoying error.

Run installation assistant as administrator

This is the most simple solution that can solve problems right away and it is advised to be tried first.
  1. Download standalone Installation assistant installer from Microsoft website here
  2. Go to the location where you had the file downloaded
  3. Right-click on file
  4. Click on Run as administrator
  5. On the permission box, click YES

Disable antivirus and/or firewall software

Antivirus or firewall software can sometimes interfere with Windows’s update and prevent for any reason download or installation of files they consider not safe. If the first solution has not provided success turn off your antivirus or firewall software and try again to install updates by running them as administrator. Now, how many different antivirus or firewall applications are unique pieces of software it would take too much time to cover all of them but usually and most commonly if you right-click on the taskbar icon of security app most of the time you will have either option to open it and close it or simply just to snooze it for some time.

Set the compatibility

If you are still having issues with installing updates try setting compatibility mode for the installer.
  1. Download standalone Installation assistant installer from Microsoft website here
  2. Go to the location where you had the file downloaded
  3. Right-click on file
  4. Click on properties
  5. Go to the Compatibility tab
  6. Click on Run this program in compatibility mode for:
  7. Choose Windows 7
  8. Click on APPLY
  9. Run installer

Run SFC scan

If you are still facing installation issues there is a high chance there is something wrong with Windows system files. Luckily Windows itself has a built-in tool to address these issues and fix them.
  1. Open command prompt as administrator by pressing Start and searching for the command prompt and then on right-clicking on run as administrator
  2. Once the command prompt opens type in SFC / SCANNOW and press ENTER
  3. Wait for the whole process to complete and then restart your system
Read More
What to do if Windows is stuck in Tablet Mode
To make the Windows 10 operating system a lot more user-friendly, Microsoft introduced the Tablet Mode for Windows 10 devices, especially the 2-in-1 devices like Surface Pro and Surface Book. Despite the Tablet Mode’s efficiency, it also encounters some errors from time to time. One of the issues users reported about tablet mode is that they can’t turn off or exit tablet mode. If you are one of these users, read on as this post will guide you in what you can do to fix the issue. To fix the problem with Tablet Mode, there are several suggestions you can check out. You can try to check the full-screen setting, or perform a full shutdown or perform two buttons to restart the Surface devices. You could also disable Tablet Mode via Registry Editor or perform System Restore or change the settings in the System tab or the Action Center.

Option 1 – Try to check the full-screen setting

  • Tap the Win + I keys to open the Windows Settings app.
  • Then navigate to this path, Personalization > Start.
  • Next, scroll down to toggle off the “Use Start Full Screen” option.
  • After that, restart your computer and see if the problem is fixed.

Option 2 – Perform a full shutdown

  • Open Command Prompt with admin privileges first.
  • Next, execute this command to perform a full shutdown: shutdown /s /f /t 0
  • The command you entered will shut down your computer and once it’s turned off, wait for a couple of minutes and then turn it back on.

Option 3 – Try to perform a two-button restart on your Surface device

  • Tap and hold the power button for about 30 seconds.
  • Then release them after 30 seconds.
  • After that, tap and hold the volume up + the power button for 20 seconds. This will cause the display to flash a few times but you have to keep those buttons pressed until your Surface device is turned off.
  • Wait for a couple of minutes and your Surface will turn back on. This should resolve the problem.

Option 4 – Try to disable the Tablet Mode via Registry Editor

  • In the Start Search, type “registry editor” and right-click on the Registry Editor from the results, and then select the Run as administrator option. This will open the Registry Editor with admin privileges.
  • Next, navigate to this registry key: ComputerHKEY_CURRENT_USERSoftwareMicrosoftWindowsCurrentVersionImmersiveShell
  • From there, look for the DWORD named “SignInMode” and double click on it.
  • Set its value to “1” and its base as hexadecimal.
  • After that, click on OK to save the changes made. This will make sure that you are signed in to the desktop mode when you log into your account.
  • Now look for the DWORD named “TabletMode” and double click on it and set its value data to “0” and it's base as hexadecimal.
  • Click on OK to save the changes made and then restart your computer.

Option 5 – Run System Restore

  • Tap the Win + R keys to open the Run dialog box.
  • After that, type in “sysdm.cpl” in the field and tap Enter.
  • Next, go to the System Protection tab then click the System Restore button. This will open a new window where you have to select your preferred System Restore point.
  • After that, follow the on-screen instructions to finish the process and then restart your computer and check if the problem is fixed or not.

Option 6 – Try changing the settings in the System tab or the Action Center

  • Go to Settings and navigate to System > Tablet Mode.
  • After that, scroll down to set the “Use desktop mode” from the drop-down menu under the “When I sign in” section.
  • Now restart your computer and see if the issue is fixed.
Read More
Fix Something went wrong with the projection
As you know, Windows 10 is created with the goal of developing an operating system that caters to users’ needs and enhances productivity. That’s why modern computers that are running the Windows 10 OS have the capabilities to project their screen to an external display wirelessly. That said, Microsoft has a dedicated and pre-installed app called Connect which helps another device to project their screen on the computer. However, this feature is kind of delicate and won’t work unless it’s properly configured. So if some configuration does not work out well, it will throw an error message that says
“Something went wrong with the projection”.
This kind of error is caused by some issues with the Display driver, hardware, corrupted or damaged system files, and so on. And to fix it, there are several methods you can check out. You can try to update, roll back or reinstall the Display drivers. You could also run the Network Adapter troubleshooter or the Video Playback troubleshooter as well as run System Restore to undo any recent changes that might have triggered the error or reset your Windows 10 computer without deleting any files. For more details, refer to each one of the options provided below.

Option 1 – Try to update or rollback the Graphics driver

You can try to update your Graphics card driver using the Device Manager in your computer to resolve the blank dialog boxes problem or you can also go directly to the website of your graphics card manufacturers like NVIDIA, Intel, or AMD and go to the section called Drivers then check if there’s a new available update – if there is, download and install it. To update your Graphics driver via Device Manager, refer to these steps:
  • First, boot your computer into Safe Mode.
  • After that, tap the Win + R keys to launch Run.
  • Type in MSC into the box and tap Enter or click OK to open the Device Manager.
  • After that, a list of device drivers will be displayed. From there, look for the Display Adapters and click on them.
  • After that, right-click on each entry under the Display Adapters and select the “Uninstall Device” option from the menu.
  • Now restart your computer.
  • After restarting your computer, go to the Settings app and Check for Updates in the Windows Update section.
Note: If updating the Graphics driver didn’t fix the problem, you can also try to roll back to its previous version and see if that helps or you could also try to roll back, update or reinstall the Network Adapter drivers.

Option 2 – Try to run the Network Adapter troubleshooter

To run the Network Troubleshooter, refer to these steps:
  • Open the Search bar on your computer and type in “troubleshoot” to open the Troubleshoot settings.
  • Next, scroll down and select the “Network Adapter” option from the right pane.
  • Then click on the Run Troubleshooter” button.
  • After that, your computer will check for any possible errors and will pinpoint the root cause of the problem if possible.
  • Restart your computer.

Option 3 – Try to run the Video Playback troubleshooter

If the Network Adapter troubleshooter didn’t work in fixing the problem, you can try to run the Video Playback troubleshooter instead. To run it, simply go to Settings > Update & security > Troubleshoot. From there, scroll down until you see the Video Playback option and then click on the “Run the troubleshooter” button to get started. This troubleshooter will detect and automatically fix any problems related to video playback so it should help fix the error.

Option 4 – Try performing a System Restore

You might also want to perform a System Restore that might help you in fixing the error. You can do this option either by booting into Safe Mode or in System Restore. If you are already in the Advanced Startup Options, just directly select System Restore and proceed with the next steps. And if you have just booted your PC into Safe Mode, refer to the steps below.
  • Tap the Win + R keys to open the Run dialog box.
  • After that, type in “sysdm.cpl” in the field and tap Enter.
  • Next, go to the System Protection tab then click the System Restore button. This will open a new window where you have to select your preferred System Restore point.
  • After that, follow the on-screen instructions to finish the process and then restart your computer and check if the problem is fixed or not.

Option 5 – Reset your computer

  • Tap the Win key or click on the Start button located in the Taskbar.
  • Then click on the Power button at the bottom right portion of the screen.
  • Next, press and hold the Shift key on your keyboard and then click on Restart. This will restart your Pc into the Advanced Startup options.
Note: Once you have access to the Advanced Startup options, you have to go to the setting which allows you to Reset your Windows 10 PC. All you have to do is select Troubleshoot > Reset this PC to reach the following screen Afterward, select either the “Keep my files” option and then proceed to the next on-screen instructions that follow to reset your Windows 10 computer without losing your files.
Read More
Guide to Patching Error Code 34

Guide to Fixing Error Code 34

Code 34 - What is it?

Code 34 is one of the several Device Manager error codes. This error code indicates that a hardware device on your PC is not properly configured.

This usually occurs when the device installed on your system is a non-plug and play. Non-plug and play devices don’t configure automatically and require manual configuration from the users end.

Error code 34 is usually displayed in the following format:

“Windows cannot determine the settings for this device. Code 34”

Solution

driverfix boxError Causes

Error code 34 may be triggered due to several reasons like:

  • Improper device configuration
  • Missing or outdated drivers

Device Manager error codes like code 34 are easy to fix. These error codes don’t indicate any serious PC problem, nor are they fatal like blue screen of death error codes.

Nonetheless fixing it immediately is advisable to ensure the proper functioning of the plugged-in hardware device. If you don’t resolve it, you may not be able to use the device.

Further Information and Manual Repair

When PC users experience error codes like code 34, they instantly think of hiring a professional for repair especially if they lack technical understanding.

If you are not a technical whiz and you are also thinking of hiring a professional for the repair job, then don’t! Here’s why, to begin with, Device Manager error codes can be resolved easily, better yet you can fix it by yourself without spending a dime even if you are not technically sound.

To help you, below is a list of easy and effective repair solutions for error code 34. Try them to resolve the issue.

Method 1 - Configure the Device by Using Device Manager

This is one of the best ways to resolve error code 34 on your system. The procedure will take 5 to 7 minutes. Simply follow the steps illustrated below to configure the problematic device on your PC.

  1. First off, go to the start menu
  2. Now type Device Manager in the search bar and press enter to continue
  3. Now in the Device Manager locate the problematic device and click on it
  4. Click on the resources tab to change the resource settings
  5. Now click on the Use Automatic Settings check box
  6. After that click on the Settings based on the tab and then click on the hardware configuration of the device you want to change
  7. Press resource type in the resource settings box to make further changes
  8. Once that is done, click change settings and type a new value for the resource type

Method 2 - Consult the Hardware Manufacturer for Resource Settings

You may not be able to configure resource settings for some devices in such an event it is advisable to consult your hardware manufacturer. Your hardware manufacturer can provide you with specific resource settings. Follow the manufacturer’s instructions to repair error code 34.

If the error continues to persist even after device configuration, then the problem may be linked to driver corruption. In that case, try method 3.

Method 3 - Download DriverFIX to Update Drivers Automatically

Whether code 34 is caused by outdated or corrupted drivers, simply download DriverFIX to resolve. DriverFIX is an advanced and user-friendly software program deployed with an intelligent programming system.

The software scans your PC to detect all problematic drivers. It finds and matches the latest and compatible versions and then updates the drivers accordingly that too automatically and on a regular basis.

Click here to download DriverFIX to repair Device Manager error code 34 on your PC automatically.

Read More
Driver Power State Failure Error in Windows
Driver state power failure error can be linked to three things happening in your computer. Incorrect power settings, driver issues, or incompatible hardware. Sadly when this error happens you only receive a blue screen of death with this message: Blue screen of death driver power state failureSadly receiving this blue screen does not really explain which of the three cases is the correct one and causing the unwanted issue. That being said, this article will not offer you a direct solution this time, it will be more like a guide on what to check and to do in order to remove this error, reason for this is the nature of the error itself. If your computer is booting properly and you can enter Windows without issues the first thing you can try is going into power options and set it to high performance, if you are on a laptop set high performance both ways, when plugged and when on battery. Power performance settings can reflect on some hardware and can cause mayhem. After setting reboot the computer and see if the error repeats itself. If the error persists go to the device manager and see if there is hardware that has any kind of warning beside it. If there is, update the driver or remove the driver of the device to see if this fixes the issue. If all of the previous two things fail there is another thing you could try. Turn off your computer and disconnect all hardware except the most basic one. Now, this may take a long period of time but boot your computer and then repeat this process but each time add a new piece of hardware to eliminate and find which one is causing the issue. When found try to see if it is repairable through driver updates or get a new device.
Read More
Removing old drivers from Windows 10
So you have just got home from that new computer store with your fancy and all-new mouse, screen, keyboard, etc. You plugged in your new component, Windows detected it, installed drivers for it and it is working like a charm. A few months later down the road and the computer starts little by little to slow down. Plug and play is a great concept, and automatic detection is even greater but how time passes old unused stuff piles in your hard drive and in Windows itself thus slowing down your computer and taxing it more and more as new components and software are added. Old drivers from old components sadly are not removed from Windows itself and over some larger period of time they can pile up and slow down your daily operations on the computer or even cause some problems in it. This guide will teach you how to manually remove old unused device drivers from your Windows so it is fresh and like new again.

Making old devices visible

In order for us to remove old drivers, the first thing we must do is make them visible in our device manager, old drivers are hidden and will not show up, we must make this happen. We do this by pressing WINDOWS + X keys on your keyboard to bring up a hidden menu in Windows. keyboard with windows and x markedOnce the menu appears, click on Command Prompt (admin) Windows menu command prompt adminOnce the command prompt with administrator privileges comes on-screen type in it following string: The device manager will open, go to view > snow hidden devices in order to show unused devices. device manager show hidden devices

Removing old device

Open any category and if there is a device that was once used and still has its drivers in the system it will be shown as faded out. device manager hidden device shownRight-click on the device and click on uninstall device to remove it completely from your system. device manager uninstall device driverPlease always be careful when removing devices so you do not remove the device which is being used by mistake and always double-check that you are removing something that you used to have on your system. This method will show all hidden devices even ones that are hidden but crucial to the system working properly.
Read More
Fix Boot Device Not Found Error in Windows
If you encounter an error saying, “Boot Device Not Found” when you turn on your Windows 10 computer, then you’ve come to the right place as this post will guide you on how you can fix this problem. Apart from the error message, you will also see a message that states, “Please install an operating system on your hard disk, Hard Disk<xxx>”. You will then be asked to tap the F2 key to initiate the System Diagnostics. If you install the Windows operating system, it becomes the boot device, and when your computer boots, the UEFI or the BIOS looks for the operating installed on your drive and continues the process. So when you encounter the “Boot Device Not Found” error, this means that the UEFI or the BIOS wasn’t able to locate the drive where it can boot. There are several suggestions you can check out to resolve this error. You can try checking the connection with your boot drive or change the boot order. You can also fix the Boot Record from Recovery and see if the primary partition is active or not. But before you troubleshoot the problem, make sure that you have a bootable Windows USB drive ready since two of the options provided below will require you to boot into the Advanced Recovery mode. Once you have this covered, proceed to each one of the following options.

Option 1 – Try checking the connection with the boot drive

If you have a custom computer that comes with a cabinet, you might want to open it and remove any connected power supply, and then check the wires. As you know, drives are connected with the motherboard using a cable. So all you have to do is check if both ends are connected properly and make sure that the connection is not loose. You could also try to unplug the cable and plug it back in.

Option 2 – Try changing the boot order

You might also want to try changing the boot order of your computer. Each time a computer boots, the BIOS or the UEFI follows a boot order. It is the one that tells where to first look for the boot drive and if for some reason, a USB is connected to your computer and the first boot device found in the USB, then you have resolved the problem. All you have to do is to remove the USB device and boot or go into the BIOS and change the boot order yourself.

Option 3 – Try to rebuild the BCD files

The next thing you can do to resolve the issue is to Rebuild Boot Configuration Data or BCD files.
  • You can start by booting into the installation environment for Windows 10 from an installation media.
  • After that, click on Repair your computer and on the blue screen, select Troubleshoot and then select the Advanced options menu.
  • From there, select Command Prompt and once you open it, enter each one of the commands given below by sequence.
    • bootrec /FixMbr
    • bootrec /FixBoot
    • bootrec /ScanOS
    • bootrec /RebuildBcd
  • Once you’re done executing the commands given above, type “exit” to close the Command Prompt window and then restart your computer and see if it fixed the “Boot Device Not Found” error.

Option 4 – Try setting the System Partition to Active

Like the first given option, you also have to make sure that you have a bootable Windows 10 USB drive before you proceed to set the System Partition to Active. Once you have it covered, refer to these steps:
  • Boot your computer using the bootable Windows 10 USB drive.
  • Next, click Next when you get to the Welcome Screen.
  • Then click on Repair your computer located at the bottom left part of the window and select Troubleshoot > Advanced Options > Command Prompt.
  • After opening Command Prompt, type the following command and hit Enter to start the Diskpart utility. It is a command line-based utility just like Command Prompt but has a UAC prompt once you provoke it. So if you encounter a UAC prompt, just click on Yes to proceed.
diskpart
  • Now type the following command:
list disk
  • From there, select your primary disk by typing the following command:
select disk number
  • After that, list all the partitions on the selected disk by entering the following command:
list partition
  • The command you just entered will list all the partitions created on your PC including both types of partitions that are visible to a normal user in the File Explorer as well as the ones created by Windows 10 by default which helps it in storing the boot files and other important system files.
  • Now type the following command to select the partition that is usually around 100 MB in size:
select partition number
  • Finally, type the following command to mark the partition active:
active
  • Then type the “exit” command to exit the disk part utility.
Once it’s done, the primary drive should now be active and you should now be able to boot into your computer without the “Boot Device Not Found” error.
Read More
Fix 0x800f0982, PSFX E MATCHING COMPONENT
If you encounter an error saying, “0x800f0982 – PSFX_E_MATCHING_COMPONENT_NOT_FOUND”, when you try to install a Windows 10 cumulative update, then you’ve come to the right place as this post will help you sort this problem out. According to the reports, computers with Asian language packs installed are the ones that are mostly affected by this error. In fact, the same error code was also found with two KB4493509, KB4495667 and KB4501835. These cumulative updates are released as part of Patch Tuesday. However, it appears that it brought on issues. Thus, to fix the error, you can try to uninstall and reinstall any language packs you’ve added recently. You can also try to uninstall older KB updates or delay Windows Update, as well as reset Windows 10.

Option 1 – Try to uninstall and reinstall the language packs you’ve recently added

If you have installed a language pack recently, you have to uninstall it, restart your computer, and then reinstall it.
  • Go to the Settings app and select Time & Language.
  • Next, click on the Language option and select the language you have to uninstall.
  • After selecting the language, it will enable two-button namely the Options and Remove buttons.
  • Click on the Remove button and then reboot your PC.
  • Once your computer has restarted, install the language pack again.

Option 2 – Try to uninstall the KB updates

Microsoft has actually offered a solution, an odd one which is to install the April 2019 cumulative update. You have to uninstall the older KB4495667 and KB4501835 update from your Windows 10 computer. And after you’ve uninstalled them, click on the Update button and then install the April 2019 cumulative update.
  • Go to Settings and select Update and Security > Windows Update.
  • From there, click on the “View update history” option and then click on the “Uninstall Updates” option.
  • This will open a new window that contains the list of installed Windows Updates.
  • Now right click on the Windows Update you wish to uninstall and click Uninstall.
  • Once you’ve uninstalled the update, click the Update button and install the April 2019 cumulative update.

Option 3 – Try to delay Windows Update

If you have not installed the Windows 10 cumulative update KB4493509 yet and the Asian language is a must for you, then you have to delay or pause the Windows Update for at least a couple of days.

Option 4 – Reset your computer

  • Tap the Win key or click on the Start button located in the Taskbar.
  • Then click on the Power button at the bottom right portion of the screen.
  • Next, press and hold the Shift key on your keyboard and then click on Restart. This will restart your Pc into the Advanced Startup options.
Note: Once you have access to the Advanced Startup options, you have to go to the setting which allows you to Reset your Windows 10 PC. All you have to do is select Troubleshoot > Reset this PC to reach the following screen
  • Afterward, select either the “Keep my files” option and then proceed to the next on-screen instructions that follow to reset your Windows 10 computer without losing your files.
Read More
1 2 3 162
Logo
Copyright © 2022, ErrorTools. All Rights Reserved
Trademarks: Microsoft Windows logos are registered trademarks of Microsoft. Disclaimer: ErrorTools.com is not affiliated with Microsoft, nor claim direct affiliation.
The information on this page is provided for information purposes only.
DMCA.com Protection Status