How to Fix the EhRecvr.exe Error on Your PC

Repair EhRecvr.exe Error

EhRecvr.exe Error Code - What is it?

EhRecvr.exe is an executable file located in a subfolder of C:\Windows (usually C:\WINDOWS). An executable file is denoted by the filename extension .exe.

You should only run executable files from the publisher you trust because .exe files are prone to errors. Executable files can potentially change your computer settings and harm your computer.  These files can easily get corrupted.

Similarly, when the EhRecvr.exe fails to run on the computer and gets corrupt, you experience an EhRecvr.exe error on your system. This error code may pop up while playing games on the PC or using any other program.

EhRecvr.exe error may be displayed in any one of the following formats:

  • “ehRecvr.exe cannot be found."
  • “There was a problem starting [path]ehRecvr.exe. The specified module could not be found."
  • "Runtime Error. ehRecvr.exe pure virtual function call."
  • "This program can't start because ehRecvr.exe is missing from your computer."
  • "Unable to launch the software located at path: [path]ehRecvr.exe"
  • "This application requires the file ehRecvr.exe, which was not found on this system."
  • "ehRecvr.exe is missing."
  • "Access Violation File [path]ehRecvr.exe"

Solution

Restoro box imageError Causes

There are plenty of reasons why this error may occur these include:

  • EhRecvr.exe file is mistakenly deleted
  • EhRecvr.exe file is corrupted and damaged
  • Viral/Malware infection
  • Bad registry entries
  • Outdated drivers

Though this error code is not fatal but nonetheless it is advisable to fix it immediately because EhRecvr.exe error not just hampers your ability to run and access different programs on your system but it also triggers issues like viral infection and registry problems which if not resolved can put your big at greater risk like system failure, freeze, and crash.

Further Information and Manual Repair

To resolve the EhRecvr.exe error on your system, you don’t have to hire a professional and spend hundreds of dollars in repair. Here are the best and easy DIY methods that you can try to fix this error.

To work around these methods you don’t need to be a technical whiz.

Let’s get started:

Method 1 - Restore EhRecvr.exe from Recycle Bin

In the case of EhRecvr.exe file deletion, it is advisable to check the recycle bin. Search through the bin for the file. If you find it, then simply restore it, if not then if you have access to the internet, then download it from a trusted website.

Method 2 - Reinstall the Associated Software That Uses EhRecvr.exe File

If you receive this error when you want to use certain software on your PC, then try reinstalling that software again on your PC.

This will be very helpful to obtain the EhRecvr.exe file that is not provided by Microsoft. To re-install, first, uninstall the program. Go to Add/Program in the control panel and find the program and then uninstall it.

Once uninstalled, simply follow the same steps but this time round install the software. This will hopefully help resolve the EhRecvr.exe error code.

Method 3 - Update Drivers for Hardware Devices

Sometimes the error may pop up due to outdated drivers. If this is the cause then the best way to resolve the issue would be to update the driver. Use the wizard within the Device Manager to update the outdated drivers.

Method 4 - Scan for Viruses

Viruses and malware can disguise as executable files. These usually enter your PC through downloads from unreliable websites and phishing emails. In such an event, it is recommended to install a powerful antivirus. Scan your entire PC and remove all viruses to repair the issue.

Method  5 - Clean and Repair the Registry

Another method is to clean and repair the registry. If you don’t clean the registry regularly it may get accumulated with obsolete files and get corrupt. This may generate EhRecvr.exe error codes.

To resolve, simply download Restoro. This is a user-friendly PC Fixer with a powerful registry cleaner. It scans for all registry errors, wipes out all the invalid entries and obsolete files and repairs corrupted DLL and .exe files in minutes.

Click here to download Restoro and resolve the EhRecvr.exe error now!

If you like to learn and find out more about various Windows errors, and how to repair them go to our vast archive or use search to find articles that will explain and help you in solving your issue.
However, if you prefer to do things fast and with automatization then we are proposing to use an automated solution for your issues. The application that we are recommending is Advanced System Repair Pro
Advanced System Repair utilizes multiple tools all in one to give you a quick, simple, reliable, and very thorough diagnosis of your PC. It brings you all the tools you need in one program to clean, fix, protect, optimize and boost your PC!
1-Click Maintenance
All the tools to make it simple and easy! It's like having a professional technician at the click of a mouse.

Junk Cleaner
Keeping your computer free from unnecessary clutter also helps make your computer last longer. Like any other machine, if you keep it clean and take care of it, it will serve you better for longer!

Optimize background apps
Optimize applications background activity with the built-in Application Optimizer feature.

Disk Defrag
With a simple 1-click, Advanced System Repair speeds up your PC by assembling fragmented files on your machine and organizing them more efficiently.

Malware Removal
Finds and removes all types of harmful malware including trojans, worms, bots, adware, spyware, PUPs, and more!

Privacy Cleaner
The all-in-one privacy suite to Clean Your Tracks & Protect Your Privacy! Make your computer safe, secure, and more efficient!

System Tweak/Optimizer
ASR will analyze your complete system and settings to adjust your PC to function at its maximum performance.

Registry Cleaner
Over time, as you install and uninstall applications, the registry can become cluttered with old entries and broken settings which can result in program crashes, and annoying messages and slow the computer down.
Visit our Advanced System Repair Pro Download page to inform yourself about all the benefits of this software and get a free trial copy of it.
advanced system repair pro

Advanced System Repair Pro

One-click automated PC repair solution
ASR logo
With Advanced System Repair Pro you can easily
Replace damaged files
Restore performance
Free disk space
Remove Malware
Protects WEB browser
Remove Viruses
Stop PC freezing
DOWNLOAD
Privacy Policy | Terms of Use | Uinstall
Advanced System Repair Pro is compatible with all versions of Microsoft Windows including Windows 11

Share this article:

You might also like

MS will release single office apps in MS Store
It seems that Microsoft is going to offer subscription and sales of individual office applications in the Windows Store. The office package will still be available as a package but for the first time, we will get single applications as standalone ones available for purchase. ms officeThis is a very interesting decision by Microsoft and I fully support it, this time users will be able to pay less and to choose only applications that they need instead of paying for the whole package and not using it.
Read More
An Easy Guide to Resolving Error 0x80040600

Fixing Error 0x80040600

0x80040600 - What is it?

This is a typical MS Outlook error code. This error message may prevent you from sending and receiving emails via your Outlook account. The error message is displayed in the following format:
"An unknown error has occurred. 0x80040600"
If this is the primary source of your communication in the office, then this error can cause you a great deal of inconvenience as it may prevent you from running important business errands via your Outlook account efficiently. Therefore, when you experience the 0x80040600 error on your PC, it is advisable to fix it immediately.

Solution

Restoro box imageError Causes

This error code is triggered due to multiple reasons. These include but are not limited to:
  • PST (Personal Storage Table) file reaches its file size limit
  • PST file corruption
  • Viral infection
  • Incorrect Windows registry settings
  • Improper shutdown of Outlook
This error code can lower your office productivity as you may be unable to send and receive emails on your Outlook account. Also, you may get locked out of your account and be unable to view your calendar entries and open email attachments saved previously in your account.

Further Information and Manual Repair

To resolve the error on your PC, you don’t have to wait for the network personnel to fix it or be a computer expert. Here is a list of easy and effective DIY methods to help you fix this error code right away.

Method 1: Download a PST File Repair

If the error occurs because your PST file has reached it maximum limit which is normally 2 GB or because of PST file corruption, then it is advisable to download a PST file repair tool. After downloading it, simply run it on your PC. This tool will immediately fix the damaged PST file and file the issue.

Method 2: Download an Antivirus

Deadly viruses like Trojans and spyware can penetrate into your PC if through downloads and opening phishing emails. Therefore, to remove such viruses it is important to install an antivirus and scan your entire PC.

Method 3: Install Restoro.

If the problem is associated with incorrect Windows registry settings or viral infection, it is advisable to download Restoro. This software is multi-functional deployed with 6 different and powerful utilities including an antivirus, a registry cleaner, and a system optimizer to name a few. The registry cleaner repairs the registry corrects the settings and fixes the damaged files. The antivirus on the other hand simultaneously removes all types of viruses including Trojans, spyware, malware, and adware on the system. While the system optimizer feature ensures the PC performance and speed are not compromised during the scanning and cleanup process. This software is safe, efficient, and compatible with all Windows versions. It has a user-friendly interface and simple navigations which makes it quite easy for all levels of users including novice and intermediate to operate. Click here to download Restoro and resolve the 0x80040600 error code on your PC today!
Read More
Quick Fix Guide for Error 0xe06d7363

How To Fix Error 0xe06d7363

What is Error 0xe06d7363?

Error 0xe06d7363 is displayed when a process or an operation is not launched, or completed by an application.

This error can prevent the user from performing some operations. It might close the application unconditionally. Sometimes a ‘GetLastError()’, a ‘GetExceptionCode()’, or a ‘GetExceptionInformation()’ is displayed with this error.

Error Causes

Error 0xe06d7363 can occur for a number of reasons. Damaged, corrupted, or missing files in the registry database are the main reasons why the error might occur. Another reason is when the system files are not configured correctly, thus they corrupt system files in applications. They can also affect the hardware devices.

All code-generated exceptions in the Microsoft Visual C + + compiler will contain this error. As this error is compiler-generated, the code will not be listed in Win32 API header files. This code is a cryptic device, with ‘e’ for exception while the final 3 bytes represent ‘msc’ ASCII values.

Further Information and Manual Repair

To resolve this error, you will have to debug an application. While using Microsoft Visual Studio, you can stop the program when the error 0xe06d7363 occurs. To start debugging, follow these steps:

  • Start debugging application
  • From Debug menu, click on Exceptions
  • In the Exceptions window, select error 0xe06d7363
  • In Action, Change to Stop always from Stop if not handled

Another fix for this issue is reverting back to an earlier copy or the last update of the same Windows. Error 0xe06d7363 can occur is when you try running a client application using Microsoft.SqlServer.Types.dll component on your computer that has Microsoft SQL Server 2008 Server Pack 2 installed. With the error, the following text can be seen:

“unable to load DLL ‘SqlServerSpatial.dll’ Exception from HRESULT 0xe06d7363".

A Cumulative Update 7 was initially released for SQL Server 2008 Service Pack 2 in order to fix this issue. Since the builds are cumulative, every new fix released contains hotfixes and all security fixes which were also included in the previous SQL Server 2008 fix release. This error can be found in all Microsoft products that are listed in the Applies to Category.

Microsoft SQL Server 2008 hotfixes are created to resolve errors like 0xe06d7363 on specific SQL Server service packs. This error is by design and has commonly occurred in the previous versions of Windows before Windows 7.

Congratulations, you have just fixed Error 0xe06d7363 in Windows 10 all by yourself. If you would like to read more helpful articles and tips about various software and hardware visit errortools.com daily. Now that’s how you fix Error 0xe06d7363 in Windows 10 on a computer. On the other hand, if your computer is going through some system-related issues that have to get fixed, there is a one-click solution known as Restoro you could check out to resolve them. This program is a useful tool that could repair corrupted registries and optimize your PC’s overall performance. Aside from that, it also cleans out your computer for any junk or corrupted files that help you eliminate any unwanted files from your system. This is basically a solution that’s within your grasp with just a click. It’s easy to use as it is user-friendly. For a complete set of instructions in downloading and using it, refer to the steps below Perform a full system scan using Restoro. To do so, follow the instructions below.
      1. Download and install Restoro from the official site.
      2. Once the installation process is completed, run Restoro to perform a full system scan. restoro application screen
      3. After the scan is completed click the “Start Repair” button. restoro application screen
Read More
Remove Polimva from your PC

Polimva is a Browser Extension for Google Chrome. This extension offers users the ability to search for any recipe on the web.

From the Author:

Polimva will help you discover new content! You will be exposed to cool and fun content every day! You can search and find new articles, videos, and reviews on daily basis.

-Amazing search experience. -Access to new interesting articles and videos every hour. -Polimva Changes the default search. -Updated content every day. -Follow any channel and topic that you like. -Choose the interface and the design of the results you get every time.
This extension changes your default search engine to Yahoo, and while active it changes the displayed ads on your browser, allowing it to make revenue on every ad you click. While this is not malicious, the extension redirects your search to its servers first before forwarding it to yahoo and displaying search results. The information that is sent back to the servers contains your browsing data & visited web pages. As a result, Polimva is considered a potentially unwanted browser hijacker and if flagged for optional removal.

About Browser Hijackers

Browser hijackers (also known as hijackware) are a kind of malware that modifies internet browser settings without the computer owner’s knowledge or approval. These kinds of hijacks appear to be rising at an astonishing rate worldwide, and they could be truly nefarious and often harmful too. They are designed to disrupt browser functions for many different reasons. It redirects you to the sponsored websites and injects adverts on the browser which helps its developer generate ad revenue. Even though it might seem naive, all browser hijackers are damaging and therefore always regarded as security threats. What’s more, hijackers could make the entire infected system vulnerable – other destructive malware and viruses will grab these opportunities to get into your computer system effortlessly.

Indications of browser hijack

Here are some signs that suggest you’ve been hijacked: 1. your browser’s home page is reset to some unfamiliar webpage 2. bookmark and the new tab are also modified 3. the default web browser configurations have been changed and/or your default web engine is altered 4. you see multiple toolbars on your web browser 5. your internet browser displays endless pop-up windows 6. your internet browser starts running slowly or displays frequent errors 7. you’re disallowed access to certain websites, for example, the website of an antimalware software manufacturer like SafeBytes.

Exactly how browser hijacker infects PCs

Browser hijackers can enter a PC in some way or other, including via downloads, file sharing, and email also. They can also come from any BHO, extension, add-on, toolbar, or plug-in with malicious purpose. Some internet browser hijackers spread in user’s PC by using a deceptive software distribution method called “bundling” (generally through freeware and shareware). Some of the popular hijackers are Polimva, Conduit Search, Babylon Toolbar, OneWebSearch, Sweet Page, and CoolWebSearch.

The best ways to remove a browser hijacker

Some browser hijacking could be simply corrected by finding and removing the corresponding malware software from your control panel. Unluckily, many of the software applications used to hijack an internet browser are deliberately built to be difficult to remove or detect. You should think of doing manual fixes only if you’re a tech-savvy person since there are possible risks associated with tinkering around with the computer registry and HOSTS file. You can opt for automatic browser hijacker removal methods by simply installing and running an efficient anti-malware program. If you need to get rid of persistent hijackers effectively, install the top-rated, award-winning anti-malware software Safebytes Anti-Malware.

Malware Blocking Internet And All Anti-Malware Software? Do This!

Malware could cause many different types of damage to computer systems, networks, and data. Some malware variants alter browser settings by adding a proxy server or modify the PC’s DNS settings. In such cases, you will be unable to visit certain or all of the websites, and thus unable to download or install the required security software to eliminate the malware. So what to do when malicious software prevents you from downloading or installing Safebytes Anti-Malware? There are a few steps you can take to circumvent this issue.

Use Safe Mode to fix the issue

Safe Mode is a special, simplified version of Microsoft Windows where just bare minimum services are loaded to counteract viruses and also other troublesome applications from loading. In case the malware is set to load immediately when the computer starts, shifting into this mode may well prevent it from doing so. In order to get into Safe Mode or Safe Mode with Networking, press F8 while the computer is starting up or run MSConfig and find the “Safe Boot” options in the “Boot” tab. Once you are in safe mode, you can attempt to install your anti-malware software application without the hindrance of the malicious software. Now, you could run the anti-virus scan to eliminate viruses and malware without any interference from another application.

Switch over to a different browser

Certain malware might target vulnerabilities of a specific web browser that block the downloading process. In case you suspect that your Internet Explorer has been hijacked by a trojan or otherwise compromised by cybercriminals, the ideal thing to do would be to switch to an alternate browser such as Mozilla Firefox, Google Chrome, or Apple Safari to download your chosen computer security software – Safebytes Anti-Malware.

Install security software on a thumb drive

To successfully eliminate the malware, you might want to approach the issue of running an anti-malware software program on the affected computer system from a different angle. Follow these steps to run the anti-malware on the infected computer. 1) Download the anti-malware on a virus-free PC. 2) Plug in the pen drive to a USB slot on the clean computer. 3) Run the setup program by double-clicking the executable file of the downloaded software, with a .exe file format. 4) Choose a USB flash drive as the location when the wizard asks you exactly where you want to install the program. Follow the instructions on the computer screen to finish off the installation process. 5) Now, plug the pen drive into the corrupted computer. 6) Double-click the EXE file to run the Safebytes software from the thumb drive. 7) Click on “Scan Now” to run a scan on the infected computer for viruses.

A Look at the Best Anti-Malware Program

Want to install the very best anti-malware software for your desktop? There are numerous applications on the market that comes in free and paid versions for Microsoft Windows computers. Some of them are good, some are ok types, and some will destroy your computer themselves! You must be very careful not to choose the wrong product, particularly if you purchase a paid program. On the list of recommended software by industry experts is SafeBytes Anti-Malware, well-known security software for Windows computers. SafeBytes anti-malware is really a powerful, highly effective protection application created to assist end-users of all levels of IT literacy in identifying and removing malicious threats out of their PC. With its outstanding protection system, this software will automatically detect and eliminate most of the security threats, including adware, viruses, browser hijackers, ransomware, trojans, worms, and PUPs. There are plenty of wonderful features you will get with this particular security product. Listed below are a few of the great ones: Robust, Anti-malware Protection: By using a critically acclaimed malware engine, SafeBytes gives multilayered protection that is made to catch and remove viruses and malware that are hidden deep inside your PC. Live Protection: SafeBytes gives you round-the-clock protection for your personal computer limiting malware intrusions instantly. This software will constantly monitor your computer for suspicious activity and updates itself continuously to keep current with the constantly changing threat scenarios. Safe Web Browsing: Through its unique safety rating, SafeBytes tells you whether a website is safe or not to visit it. This will assure that you’re always certain of your safety when browsing the internet. Lightweight Tool: SafeBytes is a lightweight and easy-of-use anti-virus and anti-malware solution. As it utilizes very little computer resources, this application leaves the computer power exactly where it belongs to: with you. 24/7 Support: Expert technicians are at your disposal 24/7! They will quickly fix any technical issues you may be experiencing with your security software. Put simply, SafeBytes has formulated a meaningful anti-malware solution that is aimed to protect your computer against various malware. Malware problems can become a thing of the past when you put this application to use. So if you’re searching for the very best malware removal application out there, and when you don’t mind shelling out a few bucks for it, opt for SafeBytes Anti-Malware.

Technical Details and Manual Removal (Advanced Users)

To get rid of Polimva manually, navigate to the Add or Remove programs list in the Control Panel and choose the program you want to get rid of. For browser plug-ins, go to your browser’s Addon/Extension manager and select the plug-in you intend to disable or remove. You might even want to reset your home page and search engine providers, and also delete browsing history, temporary files, and internet cookies. If you choose to manually delete the system files and Windows registry entries, use the following checklist to make sure you know exactly what files to remove before undertaking any actions. However, this can be a complicated task and only computer experts can accomplish it safely. Furthermore, certain malware keeps replicating which makes it tough to eliminate. You are advised to do this process in Windows Safe Mode.
Files: %UserProfile%\Local Settings\Application Data\Google\Chrome\User Data\Default\Extensions\epngjnkooalbmphkdlahcdhnfondeicc Registry: HKEY_CURRENT_USER\Software\Microsoft\Windows\CurrentVersion\Run HKEY_LOCAL_MACHINE\SOFTWARE\Microsoft\Windows\CurrentVersion\Run HKEY_LOCAL_MACHINE\SOFTWARE\Wow6432Node\Microsoft\Windows\CurrentVersion\Run
Read More
Check if your data has been stolen for free

Website breaches and stealing user data is nothing new in the world of the internet. Although a very unpleasant experience it still happens even on some high-quality websites. In this article, we will not focus on how can you not be the target of this kind of attack, because you really cannot. Weel you can kind of if you decide not to have your data on websites at all, but let's just say that is not something you are willing to do.

stolenSo, in this case, you have some social, forum, or gaming accounts but you heard that service has been breached and that your email or password might be stolen. Well in this case all you need to do is of course to login into the service and change your password. But, what happens if you are not aware at all that service has been compromised?

Mozilla foundation has asked themselves this same question it seems and they have decided to help us out. They have placed a free online service where you can just by typing in your email address find out if your email or data has been compromised in any way.

Go to https://monitor.firefox.com/ and check it out, if you find out that there is some website that you did not know was breached, change your password right away, and if you have used the same password for anything else (I hope not), change them as well.

Read More
Fix ntkrnlmp.exe Blue Screen in Windows
The ntkrnlmp.exe file is a file associated with the Windows operating system’s NT Kernel and other system processes. It is also related to the “CRITICAL PROCESS DIED” error. So if you encounter a Blue Screen of Death error that’s related to this file, then you’ve come to the right place as this post will guide you in fixing the ntkrnlmp.exe Blue Screen error. This kind of Blue Screen error might be caused by the file getting corrupted or infected with some malware. Aside from these causes, the error might also be due to the corruption and malfunction of the graphics card drivers. Before you troubleshoot the problem, you might want to try performing System Restore especially if you tend to create a System Restore point every now and then. Performing System Restore could help you resolve the ntkrnlmp.exe Stop error. You can do this option either by booting into Safe Mode or in System Restore. If you are already in the Advanced Startup Options, just directly select System Restore and proceed with the next steps. And if you have just booted your PC into Safe Mode, refer to the steps below.
  • Tap the Win + R keys to open the Run dialog box.
  • After that, type in “sysdm.cpl” in the field and tap Enter.
  • Next, go to the System Protection tab then click the System Restore button. This will open a new window where you have to select your preferred System Restore point.
  • After that, follow the on-screen instructions to finish the process and then restart your computer and check if the problem is fixed or not.
If System Restore didn’t help, then proceed to the given options below.

Option 1 – Disable the C-states and EIST in the BIOS

The first thing you can do is try to disable the C-states and EIST in the BIOS. To do that, refer to the steps given below.
  • Go to the BIOS and from there look for an option named CPU Configuration which can usually be found under the Advanced menu.
  • Next, look for CPU Power Management and under that section, disable both the “Intel EIST” and “Intel C-state” options.
  • After you disable them, save the changes you’ve made and exit the BIOS.
  • Now restart your computer and check if the ntkrnlmp.exe BSOD error is now fixed.

Option 2 – Try to update, rollback or disable drivers

If the first option didn’t help in fixing the ntkrnlmp.exe Blue Screen error the next thing you can do is to roll back, or update, or disable device drivers in your computer. It is most likely that after you updated your Windows computer that your driver also needs a refresh. On the other hand, if you have just updated your device drivers then you need to roll back the drivers to their previous versions. Whichever applies to you, refer to the steps below.
  • Open the Devices Manager from the Win X Menu.
  • Then locate the device drivers and right-click on them to open the Properties.
  • After that, switch to the Driver tab and click on the Uninstall Device button.
  • Follow the screen option to completely uninstall it.
  • Finally, restart your computer. It will just reinstall the device drivers automatically.
Note: You can install a dedicated driver on your computer in case you have it or you could also look for it directly from the website of the manufacturer.

Option 3 – Configure the Driver Verifier Manager

The Driver Verifier Manager is another tool in Windows that could help you fix driver-related issues. And so if you want to fix the ntkrnlmp.exe Blue Screen error you need to use the Driver Verifier Manager:
  • Type in the keyword “Verifier” in the Cortana search box to search for Verifier in Windows 10.
  • After that, select the option “Create custom settings”.
  • Make sure that you have checked everything except the options “DDI compliance checking” and “Randomized low resources simulation”.
  • Next, select the option “Select driver names from a list” option.
  • Afterward, you have to select all the drivers from any unofficial or third-party provider. To simply put it, you have to select all the drivers that are not supplied by Microsoft.
  • Then click on the Finish button.
  • Open Command Prompt as administrator and execute this command – verifier /querysettings
  • The command you just executed will display the Driver Verifier settings so if you see any of the flags enabled boot your Windows 10 PC into Safe Mode.
  • Open the Command Prompt as admin again and run this command – verifier /reset
  • The command will reset the Driver Verifier. Once the process is done, restart your PC and check.

Option 4 – Run the Blue Screen Troubleshooter

The Blue Screen troubleshooter is a built-in tool in Windows 10 that helps users in fixing BSOD errors like ntkrnlmp.exe. It can be found on the Settings Troubleshooters page. To use it, refer to these steps:
  • Tap the Win + I keys to open the Settings panel.
  • Then go to Update & Security > Troubleshoot.
  • From there, look for the option called “Blue Screen” on your right-hand side and then click the “Run the troubleshooter” button to run the Blue Screen Troubleshooter and then follow the next on-screen options. Note that you might have to boot your PC into Safe Mode.
Read More
Fix Black background behind Folder icons
The File Explorer in Windows 10 provides several ways to organize the contents of folders and files in the system. Windows users can utilize some efficient styles to view the contents of the file system as per the user’s requirement. A user may opt to display the file picture in large size thumbnails while the other one could opt to set the icons of folder and files in a small or medium size list. On the other hand, while setting up several styles for the folder and file icons, some Windows 10 users have experienced some unusual issues where there is the Black background showing up behind folder icons. They tried refreshing the File Explorer a couple of times but it didn’t help in fixing the problem and the black squares are still visible on some folder icons. The black squares behind the folder icons might look disturbing though it’s not really a big problem and is merely a graphical glitch that does not cause any damage or whatsoever to the content of the folder and files. The most likely cause of this glitch might have something to do with the corrupted system files or it could also be caused by outdated thumbnail caches. In addition, graphical glitches like this one could also occur if you are using out outdated graphics drivers. To fix this problem, you need to follow the options laid out below.

Option 1 – Try using the Disk Cleanup to remove Thumbnail files

The Disk Cleanup tool is one of the options you can try to fix the black squares behind the folder icons. Through this tool, you can delete all the Thumbnail files on your disk. To use it, refer to these steps:
  • Open the Search bar and type “disk cleanup” in the field.
  • After opening Disk Cleanup from the search results, then from the drop-down menu select the C: drive to clean up and click OK.
  • Wait for the scanning process to complete. Once it’s done, select the files you want to delete.
  • Ensure that you select the box labeled “Thumbnails” under the Files to Delete section then click on OK.
  • After that, a confirmation box will appear, just click on Delete files to delete the files permanently.
  • Restart your PC.

Option 2 – Try resetting the Thumbnail cache

You have the option to manually delete the Thumbnail Cache to resolve the black square background behind the folder icons issue. Follow the steps given below to reset the Thumbnail cache.
  • Open the File Explorer.
  • Next, navigate to the View tab and select the option with Hidden items to display all the hidden folders and files.
  • Next, go to this path: C:Users<username>AppDataLocal
  • In the given path, make sure that you put your actual username in the username field. Then look for a file named “IconCache.db”. Right-click on this file and click on Delete.
  • After that, go to this path: C:Users<username>AppDataLocalMicrosoftWindowsExplorer
  • From there, select all the files and delete them.
Note: If a prompt appears saying, “The files are in use and cannot be deleted”, simply select the “Do this for all current items” option and then click on Try Again. If you get an error message, click on Cancel to close the window and restart your computer.

Option 3 – Try updating or reinstalling the Graphics driver

  • Tap the Win + R keys to open the Run dialog box and then type in devmgmt.msc and tap Enter or click OK to open the Device Manager.
  • Expand the section for the outdated device drivers.
  • And then select the outdated driver(s) and right-click on it/them.
  • From the drop-down menu, select the Update Driver option if you wish to update the driver or select the Uninstall device if you want to uninstall the driver and then follow the on-screen instructions to install the latest version of the driver.
  • Restart your PC after the installation to allow the system to reinstall the driver.
Read More
Installing Windows 11 on Raspberry Pi 4
A lot of controversies and mixed emotions have come from statements about Windows 11 minimum system requirements, especially ones linked to TPM. Naturally, each time some software company giant announces how things are must have there are people who go out and prove them wrong. This time Raspberry Pi community was one which demonstrated that not only Raspberry Pi does not have a TPM module, it can run the full desktop version of Windows 11

Windows 11 on Raspberry Pi 4
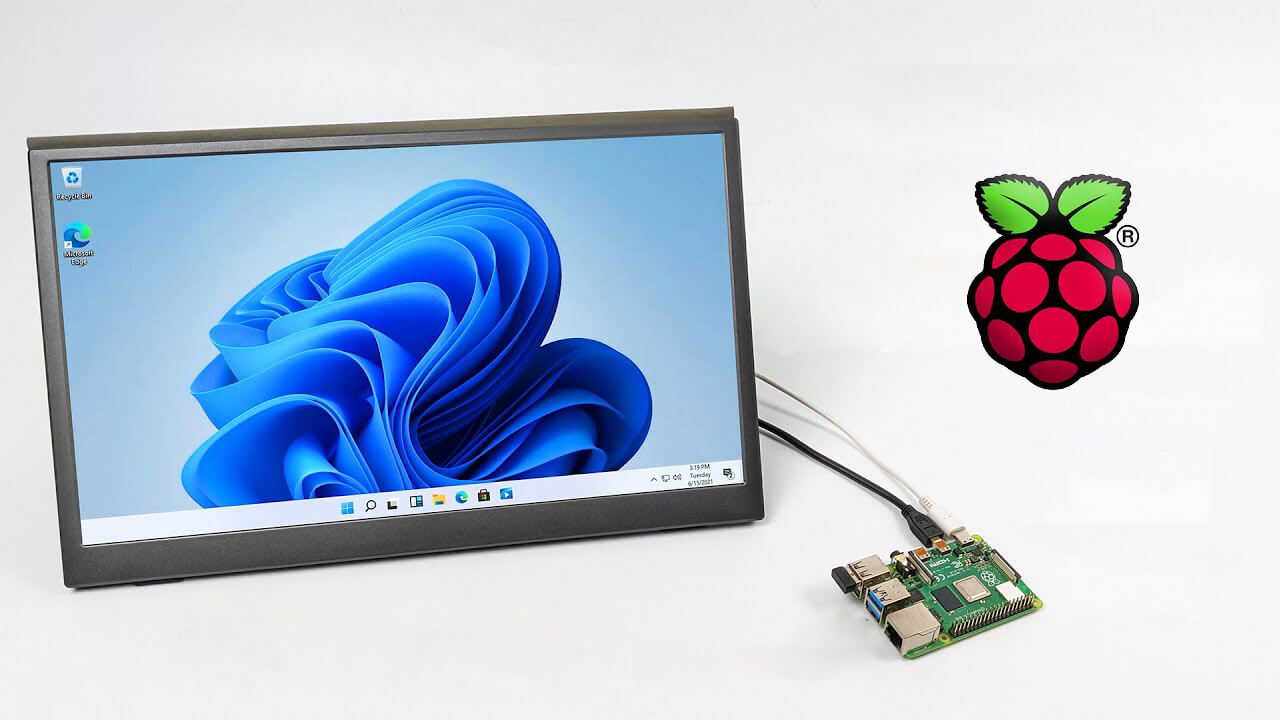
Raspberry Pi 4 and things you need for Windows 11 installation

In order to actually install Windows 11 on your Pi, there are certain things that you will need. Check out the below list and prepare everything.
  • Raspberry Pi 4 4GB or 8GB
  • A 32GB or larger SSD via a USB 3 caddy. Best for performance or 16GB or larger microSD card
  • USB boot enabled, see below.
  • A micro SD card with the latest Raspberry Pi OS
  • Windows 10 PC
  • USB to Ethernet or WiFi dongle
  • Bluetooth dongle (if you want Bluetooth)
  • Keyboard, mouse, HDMI, and power for your Raspberry Pi

Configuring Pi to boot from SSD

In order to boot from SSD be sure that firmware and bootloader are up to date on the latest version and upgrade if needed. Be aware that this firmware update can only be performed using the official Raspberry Pi OS. Also if you are eager and want to use a standard microSSD card instead of an SSD to run Windows 11 feel free to skip this entire section.
  1. Boot from microSSD with the latest Raspberry Pi OS on it.
  2. Update firmware and OS using the terminal by typing sudo apt update sudo apt full-upgrade sudo rpi-update
  3. Reboot your Pi
  4. Install the latest version of bootloader again using the terminal with the command sudo rpi-eeprom-update -d – a
  5. Reboot Pi
  6. Launch raspi-config on your Pi via terminal with sudo raspi-config
  7. Select option 3 (Boot options – Configure options for start-up) from boot options
  8. Select Boot ROM version and press ENTER
  9. Select latest and then OK
  10. Select NO when prompted to reset boot ROM to defaults on the latest version boot ROM selected screen. Press OK
  11. Select Boot order and press ENTER
  12. Select USB Boot and click on OK and remove microSD card from Pi
  13. Select Finish and click on NO when prompted to reboot

Creating Windows 11 installation image for Pi 4

In order to install Windows 11 on our Pi, we must create an installation image, follow the steps below explaining the process.
  1. Go to https://uupdump.net/
  2. Search for Windows 11 Arm
  3. Select the latest build for arm64
  4. Select Language on which you would like installer and Windows
  5. Pick Windows edition you would like
  6. Set download method to Download and convert to ISO and click on Create download package
  7. Extract downloaded content into win11 folder and go into it
  8. Double click on uup_download_windows.cmd
  9. On the security warning screen click on More info and then on Run anyway
  10. Wait for the process to finish completely
  11. Once the process is finished, press 0 to close the prompt

Installing image on microSSD or SSD

If previous steps of instruction were follower precisely you now have an ISO image that can be installed onto microSSD or SSD
  1. Connect SSD or insert microSSD card into your PC
  2. Go to https://www.worproject.ml/downloads
  3. Download Windows on Raspberry imager and extract it into the win11 folder
  4. Open Imager and allow it to make changes to your computer, set your language, and click on next
  5. Select storage drive where you would like to install Windows
  6. Set device type and click on next
  7. Select our Windows 11 ISO image we created and click on next
  8. On the drivers screen select Use the latest driver package available on the server
  9. On UEFI firmware select screen choose Use the latest firmware available on the server
  10. On configuration screen click on next
  11. Check your setting on the installation overview and if everything is ok click on install
  12. Wait for the whole process to be finished
  13. Once the process is completed, close Windows on Raspberry imager, take out SSD or microSSD card from PC and connect it on your Pi along with Pi peripherals.

Setting Windows 11 on Pi

In order to actually use Windows 11 on our Raspberry Pi we now have to set up the Windows 11 install using the standard post-installation setup sequence.
  1. Power up Pi and press ESC when prompted
  2. Go to Device manager and press ENTER
  3. Select Raspberry Pi Configuration
  4. Select Advanced configuration
  5. Set Limit RAM to 3GB to a disabled state, press F10 to save, and ESC to exit.
  6. Select Display configuration
  7. Set the resolution to desired option and press ENTER, F10 to save, and ESC to exit
  8. Go to CPU configuration
  9. Check if the CPU clock is set to default, if not set it
  10. Press ESC to go back all the way to the main menu
  11. Select Continue to exit BIOS and boot your Raspberry Pi with Windows 11 on it
And there you have it, fully working Windows 11 OS on Raspberry Pi despite what Microsoft says Note that due to lack of some drivers performance can be less than optimal, for example, full HD videos will not work since there are no compatible graphic drivers for Pi and some other stuff like Wi-Fi will also cause some issues but overall Windows 11 is working pretty well.
Read More
The executable program that ...
If you are trying to start a service using the Windows Services Manager but you got an error message stating, “The executable program that this service is configured to run in does not implement the service”, then you’ve come to the right place as this post will provide you instructions on how you can fix this error. Since almost all program requires service to run on your computer, if the service is not listed in the corresponding registry key, then you will most likely encounter this error on your Windows 10 computer. Here’s the entire content of the error message:
“Windows could not start the service on Local Computer. Error 1083: The executable program that this service is configured to run in does not implement the service.”
To fix this error, you have to add the service name in the respective host in the Registry Editor, and to do that, here are some steps you need to take on. Step 1: The first thing you have to do is to take note of the service name that’s given in the error message. For instance, you get the “Windows Management Service. Step 2: Next, you need to open the Services Manager by tapping the Win + R keys and typing “services.msc” in the Run dialog box, and then tapping Enter. Step 3: After opening the Services Manager, look for the Windows Management Service and once you see it, double click on it. This will open a new mini window. Step 4: From the newly opened window, copy the Service name and the Path to executable under the General tab. If the path to the executable is displayed as “C:/Windows/system32/svchost.exe -k netsvcs –p”, you need the “netsvcs” part only. Note that it can be different for different services and you need the part that comes after “-k”. Step 5: Now tap the Win + R keys again to open Run utility and type “Regedit” in the field and click OK to open the Registry Editor. Step 6: After that, navigate to the following registry path:
ComputerHKEY_LOCAL_MACHINESOFTWAREMicrosoftWindows NTCurrentVersionSvchost
Step 7: From the given registry path, look for a key named “REG_MULTI_SZ” located on your right-hand side. This key is named after the “Path to executable” part. For instance, you should see “netsvcs”. Step 8: Double click on the REG_MULTI_SZ key and enter the Service name that you’ve copied earlier and then write it down at the end of the preset list. Step 9: Now save the changes you’ve made and try to open the program or run the service again.
Read More
Moving Start Menu to the Second Monitor
One of the most important User Interface elements in a Windows 10 operating system is the Start Menu. Not too long ago, Microsoft has added some new features and redesigned the Start Menu a couple of times as well. Thus, it is not uncommon for Windows 10 users to use several monitors. That’s why in this post, you will be guided on how you can move the Start Menu to your second monitor in Windows 10. There are a lot of advantages in using more than one monitor like a better and widescreen as well as help in improving and increasing productivity. Usually, the Start Menu and the taskbar is present in the original monitor only. In most cases, it helps users in moving the Start Menu to the second monitor and helps users in segregating tasks, and uses separate monitors for each kind of task. There are two simple steps to move the Start Menu to the second monitor. You have the option to unlock and drag the taskbar, as well as make adjustments in the settings. To get started, refer to each one of the following options to move the Start Menu to the second monitor.

Option 1 – Move the second monitor by unlocking and dragging the taskbar

The first option you can try to move the Start Menu to the second display is to simply unlock and then drag the taskbar. To do so, follow these steps:
  • First, click on the Taskbar and unlock it.
  • Next, uncheck the Lock the taskbar feature in the menu of the Taskbar Settings. This will free the taskbar so you can move or drag it around.
  • After that, push the Start Menu to the furthermost corner of the screen and then transfer it to the second monitor.

Option 2 – Move the second monitor using the keyboard

  • The first thing you have to do is to tap the Windows key to open the Start Menu.
  • Next, close the Start Menu by tapping the Esc key.
  • After that, the controls will shift back to the taskbar.
  • Now open the context menu of the taskbar by tapping the Alt + space bar together. This will move the Start Menu to the second monitor.

Option 3 – Move the Start Menu to the second monitor via Settings

If you find that the Taskbar is moving to the wrong monitor automatically or if the program does not start on the same monitor as the taskbar, then you can try this option.
  • Click on Start first and click Run.
  • Then type “desk.cpl” in the field and click OK.
  • Alternatively, you could also right-click on the desktop and select the Screen Resolution option from the drop-down menu.
  • After that, click on the monitor that you want to use as the primary monitor and select the checkbox labeled “Make this my main display”.
  • Once done, you have to choose the “Show desktop” on only 1 from the drop-down menu of Multiple displays.
  • Now click the Keep Changes option and select the Extend these displays from the Multiple displays drop-down menu and then click on the Apply button to save the changes made.
  • Afterward, click the Keep changes option once the dialog box pops up.
Read More
1 2 3 162
Logo
Copyright © 2022, ErrorTools. All Rights Reserved
Trademarks: Microsoft Windows logos are registered trademarks of Microsoft. Disclaimer: ErrorTools.com is not affiliated with Microsoft, nor claim direct affiliation.
The information on this page is provided for information purposes only.
DMCA.com Protection Status