How to Fix the EhRecvr.exe Error on Your PC

Repair EhRecvr.exe Error

EhRecvr.exe Error Code - What is it?

EhRecvr.exe is an executable file located in a subfolder of C:\Windows (usually C:\WINDOWS). An executable file is denoted by the filename extension .exe.

You should only run executable files from the publisher you trust because .exe files are prone to errors. Executable files can potentially change your computer settings and harm your computer.  These files can easily get corrupted.

Similarly, when the EhRecvr.exe fails to run on the computer and gets corrupt, you experience an EhRecvr.exe error on your system. This error code may pop up while playing games on the PC or using any other program.

EhRecvr.exe error may be displayed in any one of the following formats:

  • “ehRecvr.exe cannot be found."
  • “There was a problem starting [path]ehRecvr.exe. The specified module could not be found."
  • "Runtime Error. ehRecvr.exe pure virtual function call."
  • "This program can't start because ehRecvr.exe is missing from your computer."
  • "Unable to launch the software located at path: [path]ehRecvr.exe"
  • "This application requires the file ehRecvr.exe, which was not found on this system."
  • "ehRecvr.exe is missing."
  • "Access Violation File [path]ehRecvr.exe"

Solution

Restoro box imageError Causes

There are plenty of reasons why this error may occur these include:

  • EhRecvr.exe file is mistakenly deleted
  • EhRecvr.exe file is corrupted and damaged
  • Viral/Malware infection
  • Bad registry entries
  • Outdated drivers

Though this error code is not fatal but nonetheless it is advisable to fix it immediately because EhRecvr.exe error not just hampers your ability to run and access different programs on your system but it also triggers issues like viral infection and registry problems which if not resolved can put your big at greater risk like system failure, freeze, and crash.

Further Information and Manual Repair

To resolve the EhRecvr.exe error on your system, you don’t have to hire a professional and spend hundreds of dollars in repair. Here are the best and easy DIY methods that you can try to fix this error.

To work around these methods you don’t need to be a technical whiz.

Let’s get started:

Method 1 - Restore EhRecvr.exe from Recycle Bin

In the case of EhRecvr.exe file deletion, it is advisable to check the recycle bin. Search through the bin for the file. If you find it, then simply restore it, if not then if you have access to the internet, then download it from a trusted website.

Method 2 - Reinstall the Associated Software That Uses EhRecvr.exe File

If you receive this error when you want to use certain software on your PC, then try reinstalling that software again on your PC.

This will be very helpful to obtain the EhRecvr.exe file that is not provided by Microsoft. To re-install, first, uninstall the program. Go to Add/Program in the control panel and find the program and then uninstall it.

Once uninstalled, simply follow the same steps but this time round install the software. This will hopefully help resolve the EhRecvr.exe error code.

Method 3 - Update Drivers for Hardware Devices

Sometimes the error may pop up due to outdated drivers. If this is the cause then the best way to resolve the issue would be to update the driver. Use the wizard within the Device Manager to update the outdated drivers.

Method 4 - Scan for Viruses

Viruses and malware can disguise as executable files. These usually enter your PC through downloads from unreliable websites and phishing emails. In such an event, it is recommended to install a powerful antivirus. Scan your entire PC and remove all viruses to repair the issue.

Method  5 - Clean and Repair the Registry

Another method is to clean and repair the registry. If you don’t clean the registry regularly it may get accumulated with obsolete files and get corrupt. This may generate EhRecvr.exe error codes.

To resolve, simply download Restoro. This is a user-friendly PC Fixer with a powerful registry cleaner. It scans for all registry errors, wipes out all the invalid entries and obsolete files and repairs corrupted DLL and .exe files in minutes.

Click here to download Restoro and resolve the EhRecvr.exe error now!

If you like to learn and find out more about various Windows errors, and how to repair them go to our vast archive or use search to find articles that will explain and help you in solving your issue.
However, if you prefer to do things fast and with automatization then we are proposing to use an automated solution for your issues. The application that we are recommending is Advanced System Repair Pro
Advanced System Repair utilizes multiple tools all in one to give you a quick, simple, reliable, and very thorough diagnosis of your PC. It brings you all the tools you need in one program to clean, fix, protect, optimize and boost your PC!
1-Click Maintenance
All the tools to make it simple and easy! It's like having a professional technician at the click of a mouse.

Junk Cleaner
Keeping your computer free from unnecessary clutter also helps make your computer last longer. Like any other machine, if you keep it clean and take care of it, it will serve you better for longer!

Optimize background apps
Optimize applications background activity with the built-in Application Optimizer feature.

Disk Defrag
With a simple 1-click, Advanced System Repair speeds up your PC by assembling fragmented files on your machine and organizing them more efficiently.

Malware Removal
Finds and removes all types of harmful malware including trojans, worms, bots, adware, spyware, PUPs, and more!

Privacy Cleaner
The all-in-one privacy suite to Clean Your Tracks & Protect Your Privacy! Make your computer safe, secure, and more efficient!

System Tweak/Optimizer
ASR will analyze your complete system and settings to adjust your PC to function at its maximum performance.

Registry Cleaner
Over time, as you install and uninstall applications, the registry can become cluttered with old entries and broken settings which can result in program crashes, and annoying messages and slow the computer down.
Visit our Advanced System Repair Pro Download page to inform yourself about all the benefits of this software and get a free trial copy of it.
advanced system repair pro

Advanced System Repair Pro

One-click automated PC repair solution
ASR logo
With Advanced System Repair Pro you can easily
Replace damaged files
Restore performance
Free disk space
Remove Malware
Protects WEB browser
Remove Viruses
Stop PC freezing
DOWNLOAD
Privacy Policy | Terms of Use | Uinstall
Advanced System Repair Pro is compatible with all versions of Microsoft Windows including Windows 11

Share this article:

You might also like

Increase or decrease notification display time
As you know, the Windows 10 Action Center has a stack of all the notifications that come from different applications on your computer. So each time an app displays notifications, it will be displayed for about 5 seconds and then it disappears right away. Although the allotted time for the notifications to be displayed is quite enough to catch your attention and help you get a glance at the message, there are times when you might miss it and you hoped it could’ve been displayed a lot longer. So in this post, you will be guided on how you can increase or decrease the display time of the notification in Windows 10. The best way you can view the missed notification is to click on the Action Center. From there, you will see all the notifications that are grouped by the applications. This means that if you have a lot of notifications, it would be hard for you to find what you are looking for. Thus, in such cases, the best way you can do is to increase the display time for which notification to stay on the screen.

To get started, refer to the instructions given below.

Step 1: Tap the Win + I keys to open Settings. Step 2: Next, navigate to Home > Ease of Access > Display. Step 3: After that, scroll down to the end until you see the dropdown to change the notifications where you should see the “Show notifications for”. Step 4: Then you can change the time from the default 5 seconds to 7, 15, 30, and so on. Step 5: Once done, the display time of the notifications should stay longer but keep in mind that you must choose the length wisely so if you have notifications from a lot of apps, then the screen will also be filled with multiple notification cards.
Read More
How to remove Nectar Toolbar from your Windows PC

Nectar Toolbar is a Browser addon for Internet Explorer developed by AIMIA Coalition Loyalty. This addon changed your default search provider to Yahoo UK. While installed, you might see additional unwanted ads and sponsored links injected in the search results.

From the Author: We all search the web every day for information from handy how-to’s, must know news about shopping. So wouldn’t it be great if you could collect extra Nectar points just for doing something you do already? Like to shop online? Nectar Search will also tell you when you’re on a shopping website (like Argos, Debenhams, Next, Play.com, and Apple) where you can collect points too.

Several anti-virus scanners have marked this addon as a Browser Hijacker and are therefore not recommended to keep on your computer.

About Browser Hijackers

Browser hijacking means a malicious program code has power over and modified the settings of your browser, without your permission. Browser hijackers could do more than just changing home pages. In general, hijackers are developed for the benefit of online hackers often through income generation that comes from forced ad mouse clicks and website visits. Nonetheless, it isn’t that harmless. Your web safety is compromised and it is also really annoying. In a much worst case, your browser could be hijacked to download malicious software that will do a great deal of damage to your computer.

Key symptoms that your browser has been hijacked

When your browser is hi-jacked, the following can happen: you notice unauthorized changes to your internet browser’s homepage; you observe new unwanted favorites or bookmarks added, usually directed to advertisement-filled or porn websites; the default browser configurations have been changed and/or your default web engine is altered; unwanted new toolbars are added to your internet browser; you might notice numerous pop-up adverts on your computer screen; your browser has instability issues or exhibits frequent errors; You can’t access particular websites, especially anti-malware websites.

Exactly how they invade computers

A browser hijacker can be installed on your computer or laptop when you go to an infected site, click on an e-mail attachment, or download something from a file-sharing site. Many internet browser hijackings originate from add-on programs, i.e., browser helper objects (BHO), toolbars, or plug-ins added to browsers to provide them additional features. Other times you might have accidentally accepted a browser hijacker as part of a software bundle (generally freeware or shareware). Popular examples of browser hijackers include CoolWebSearch, Conduit, OneWebSearch, Coupon Server, RocketTab, Delta Search, Searchult.com, and Snap.do. Browser hijacking can bring about serious privacy problems and even identity theft, affect your web browsing experience by taking control over outgoing traffic, drastically slows down your computer or laptop by depleting lots of resources, and lead to system instability also.

Browser hijacker removal methods

Some browser hijacking can be easily stopped by identifying and eliminating the corresponding malware software from your control panel. However, most hijackers are quite tenacious and require specialized applications to get rid of them. Moreover, browser hijackers could modify the Windows registry so it can be extremely tough to fix manually, particularly when you are not a tech-savvy person. Browser hijackers can be effectively removed by installing and running an anti-malware application on the affected computer. To get rid of any browser hijacker out of your computer, you could download this particular top-notch malware removal application – SafeBytes Anti-Malware. Together with anti-malware, a PC optimizer software, similar to Total System Care, could help you correct Windows registry errors, remove unwanted toolbars, secure your internet privacy, and stabilize programs installed on your computer.

Find Out How To Install Safebytes Anti-Malware On An Infected Computer system

All malware is bad and the consequences of the damage will vary based on the specific type of malicious software. Certain malware goes to great lengths to stop you from downloading or installing anything on your computer system, particularly anti-virus programs. If you are reading this, you probably have infected by a virus that stops you from installing a security program like Safebytes Anti-Malware. Follow the instructions below to remove malware through alternative methods.

Install in Safe Mode with Networking

Safe Mode is a unique, simplified version of Windows where just essential services are loaded to counteract malware and other problematic programs from loading. In case the malicious software is set to load immediately when the PC boots, switching to this mode could prevent it from doing so. To boot into Safe Mode, hit “F8” key on the keyboard right before Windows logo screen appears; Or right after normal Windows boot up, run MSCONFIG, look over Safe Boot under Boot tab, and then click Apply. Once you are in Safe Mode, you can try to install your anti-malware application without the hindrance of the malware. After installation, run the malware scanner to eliminate standard infections.

Download the anti-malware program in a different internet browser

Some malware only targets particular internet browsers. If this is your case, employ another browser as it might circumvent the computer virus. In case you suspect that your Internet Explorer happens to be hijacked by a computer virus or otherwise compromised by online hackers, the most effective course of action is to switch over to a different web browser such as Mozilla Firefox, Google Chrome, or Apple Safari to download your favorite security application – Safebytes Anti-Malware.

Make a bootable USB anti-virus drive

Another solution is to save and run an anti-malware software program entirely from a Thumb drive. To run antivirus from a thumb drive, follow these simple steps: 1) On a clean computer, install Safebytes Anti-Malware. 2) Plug the USB drive into the clean computer. 3) Double-click the Setup icon of the anti-malware software to run the Installation Wizard. 4) Select the drive letter of the pen drive as the location when the wizard asks you where you would like to install the anti-virus. Follow the onscreen instructions to finish the installation. 5) Now, insert the USB drive into the corrupted PC. 6) Run the Safebytes Anti-malware directly from the pen drive by double-clicking the icon. 7) Simply click “Scan Now” to run a complete scan on the affected computer for malware.

SafeBytes Anti-Malware Features

To protect your laptop or computer from various internet-based threats, it’s important to install anti-malware software on your personal computer. However, with countless numbers antimalware companies out there, these days it is hard to decide which one you should buy for your laptop. Some of them do a great job in eliminating malware threats while some will damage your PC by themselves. You must be careful not to pick the wrong product, especially if you buy a paid application. On the list of strongly recommended software by industry leaders is SafeBytes Anti-Malware, the most dependable program for Microsoft Windows. SafeBytes anti-malware is a trustworthy tool that not only secures your PC permanently but is also quite user-friendly for people of all skill levels. Once you’ve got installed this application, SafeByte's sophisticated protection system will ensure that no viruses or malware can seep through your PC.

SafeBytes anti-malware provides an array of enhanced features that sets it aside from all others. Some of them are listed as below:

Real-Time Protection: SafeBytes gives you round-the-clock protection for your PC limiting malware intrusions in real-time. This utility will constantly monitor your computer for suspicious activity and updates itself continuously to keep abreast of the constantly changing threat landscape. Most effective AntiMalware Protection: Built on a greatly acclaimed anti-virus engine, this malware removal application can find and get rid of numerous stubborn malware threats such as browser hijackers, potentially unwanted programs, and ransomware that other common anti-virus applications will miss. Website Filtering: Safebytes allots all websites a unique safety score that helps you to have an idea of whether the webpage you’re just about to visit is safe to browse or known to be a phishing site. Fast Multi-threaded Scanning: Safebytes Anti-Malware, with its advanced scanning engine, offers extremely fast scanning which can promptly target any active online threat. Low CPU/Memory Usage: SafeBytes is well known for its low influence on processing power and great detection rate of various threats. It operates silently and efficiently in the background so you’re free to utilize your PC at full power all of the time. 24/7 Customer Service: For any technical concerns or product assistance, you could get 24/7 professional assistance through chat and email. Put simply, SafeBytes has created a meaningful anti-malware solution that is aimed to protect you against all manner of malware. You now may understand that this particular software does more than just scan and eliminate threats from your PC. So if you’re searching for the absolute best malware removal application out there, and when you don’t mind shelling out a few bucks for it, opt for SafeBytes Anti-Malware.

Technical Details and Manual Removal (Advanced Users)

To eliminate Nectar Toolbar manually, go to the Add or Remove programs list in the Windows Control Panel and choose the program you want to remove. For browser extensions, go to your web browser’s Addon/Extension manager and select the add-on you want to remove or disable. You’ll probably also want to reset your internet browser to its default settings. Finally, check your hard disk for all of the following and clean your computer registry manually to get rid of leftover application entries after uninstallation. But bear in mind, this can be a tough task and only computer professionals can perform safely. In addition, certain malicious programs have the capability to defend against its removal. Completing this task in Safe Mode is suggested.
Files: C:\Program Files (x86)\Nectar Toolbar C:\Program Files (x86)\Nectar Toolbar\tbunsg7A.tmp\AimiaPoints.png C:\Program Files (x86)\Nectar Toolbar\tbunsg7A.tmp\AimiaPointsAct.png C:\Program Files (x86)\Nectar Toolbar\tbunsg7A.tmp\AimiaToolbar.css C:\Program Files (x86)\Nectar Toolbar\tbunsg7A.tmp\ArrowDown.png C:\Program Files (x86)\Nectar Toolbar\tbunsg7A.tmp\ArrowRight.png C:\Program Files (x86)\Nectar Toolbar\tbunsg7A.tmp\ArrowUp.png C:\Program Files (x86)\Nectar Toolbar\tbunsg7A.tmp\arrow_refresh.png C:\Program Files (x86)\Nectar Toolbar\tbunsg7A.tmp\background.html C:\Program Files (x86)\Nectar Toolbar\tbunsg7A.tmp\background.js C:\Program Files (x86)\Nectar Toolbar\tbunsg7A.tmp\basis.xml C:\Program Files (x86)\Nectar Toolbar\tbunsg7A.tmp\BrowserTweak.css C:\Program Files (x86)\Nectar Toolbar\tbunsg7A.tmp\btn-background-grey.png C:\Program Files (x86)\Nectar Toolbar\tbunsg7A.tmp\CanCollect.png C:\Program Files (x86)\Nectar Toolbar\tbunsg7A.tmp\CanCollectAct.png C:\Program Files (x86)\Nectar Toolbar\tbunsg7A.tmp\closeIcon.png C:\Program Files (x86)\Nectar Toolbar\tbunsg7A.tmp\cog.png C:\Program Files (x86)\Nectar Toolbar\tbunsg7A.tmp\Collecting.png C:\Program Files (x86)\Nectar Toolbar\tbunsg7A.tmp\CollectingAct.png C:\Program Files (x86)\Nectar Toolbar\tbunsg7A.tmp\computer_delete.png C:\Program Files (x86)\Nectar Toolbar\tbunsg7A.tmp\eShopsMenu.html C:\Program Files (x86)\Nectar Toolbar\tbunsg7A.tmp\eShopsMenu.js C:\Program Files (x86)\Nectar Toolbar\tbunsg7A.tmp\help.png C:\Program Files (x86)\Nectar Toolbar\tbunsg7A.tmp\HelpMenu.html C:\Program Files (x86)\Nectar Toolbar\tbunsg7A.tmp\HelpMenu.js C:\Program Files (x86)\Nectar Toolbar\tbunsg7A.tmp\icon-128.png C:\Program Files (x86)\Nectar Toolbar\tbunsg7A.tmp\icon-16.png C:\Program Files (x86)\Nectar Toolbar\tbunsg7A.tmp\icon-48.png C:\Program Files (x86)\Nectar Toolbar\tbunsg7A.tmp\icons.bmp C:\Program Files (x86)\Nectar Toolbar\tbunsg7A.tmp\icons.png C:\Program Files (x86)\Nectar Toolbar\tbunsg7A.tmp\ie7vista.png C:\Program Files (x86)\Nectar Toolbar\tbunsg7A.tmp\ie7xp.png C:\Program Files (x86)\Nectar Toolbar\tbunsg7A.tmp\ie8bg.png C:\Program Files (x86)\Nectar Toolbar\tbunsg7A.tmp\IE8GuardWorkaround.exe C:\Program Files (x86)\Nectar Toolbar\tbunsg7A.tmp\info.txt C:\Program Files (x86)\Nectar Toolbar\tbunsg7A.tmp\InstIcon.ico C:\Program Files (x86)\Nectar Toolbar\tbunsg7A.tmp\jquery-1.7.2.min.js C:\Program Files (x86)\Nectar Toolbar\tbunsg7A.tmp\jquery.placeholder.min.js C:\Program Files (x86)\Nectar Toolbar\tbunsg7A.tmp\JSON.js C:\Program Files (x86)\Nectar Toolbar\tbunsg7A.tmp\main.js C:\Program Files (x86)\Nectar Toolbar\tbunsg7A.tmp\menu.js C:\Program Files (x86)\Nectar Toolbar\tbunsg7A.tmp\nectar-icon-32×32.png C:\Program Files (x86)\Nectar Toolbar\tbunsg7A.tmp\PIE.htc C:\Program Files (x86)\Nectar Toolbar\tbunsg7A.tmp\PIE.js C:\Program Files (x86)\Nectar Toolbar\tbunsg7A.tmp\SearchHist.html C:\Program Files (x86)\Nectar Toolbar\tbunsg7A.tmp\SearchHist.js C:\Program Files (x86)\Nectar Toolbar\tbunsg7A.tmp\search_glass.png C:\Program Files (x86)\Nectar Toolbar\tbunsg7A.tmp\separator.png C:\Program Files (x86)\Nectar Toolbar\tbunsg7A.tmp\separator_arrows.png C:\Program Files (x86)\Nectar Toolbar\tbunsg7A.tmp\TbCommonUtils.dll C:\Program Files (x86)\Nectar Toolbar\tbunsg7A.tmp\tbcore3.dll C:\Program Files (x86)\Nectar Toolbar\tbunsg7A.tmp\TbHelper2.exe C:\Program Files (x86)\Nectar Toolbar\tbunsg7A.tmp\tbhelperU.dll C:\Program Files (x86)\Nectar Toolbar\tbunsg7A.tmp\uninstall.exe C:\Program Files (x86)\Nectar Toolbar\tbunsg7A.tmp\UninstIcon.ico C:\Program Files (x86)\Nectar Toolbar\tbunsg7A.tmp\update.exe C:\Program Files (x86)\Nectar Toolbar\tbunsg7A.tmp\version.txt C:\Program Files (x86)\Nectar Toolbar\tbunsg7A.tmp\Yahoo.ico C:\Program Files (x86)\Nectar Toolbar\tbunsg7A.tmp\yahoo.png C:\Program Files (x86)\Nectar Toolbar\tbunsg7A.tmp\your_logo.png Registry: HKEY_CURRENT_USER\Software376694984709702142491016734454 HKEY_CURRENT_USER\Software\Microsoft\Windows\CurrentVersion\Run 13376694984709702142491016734454
Read More
SettingSyncHost.exe High CPU usage
One of the important processes in the Windows operating system is the Setting Synchronization or SettingSyncHost.exe. This process is the one responsible for synchronizing the settings of your computer with other devices. It is the one that replicates settings like OneDrive, Internet Explorer, wallpapers, and so on, to other systems. However, it has been known to cause high CPU usage in Windows 10 and there are times when it causes the system to freeze or system lags. So if you notice that the SettingSyncHost.exe process is causing high CPU usage in your computer, worry not for this post will guide you in fixing them. You have to be cautious when you notice high CPU usages caused by system processes since cybercriminals mostly set the names of viruses in a way that the system or the user won’t be able to identify them. Cyber crooks could name the virus and malware the same as one of the system processes like SettingSyncHost.exe to make it seem like it’s a legitimate process. Thus, you need to keep in mind that original system processes like the SettingSyncHost.exe file are located in the System32 folder. The original SettingSyncHost.exe file is located in the System32 folder. To check for the same, right-click on the troublesome process in the Task Manager and select Open file location. If the place is any other than the System32 folder, run a full system anti-virus scan on the system. The SettingSyncHost.exe causes high CPU usage when it gets stuck in the sync process and is not able to come out of the loop. To fix this problem, you need to follow the solutions offered below but before you proceed, make sure that you create a System Restore point first.

Option 1 – Apply some registry tweak

The first thing you can do is to apply some tweaks to the Windows Registry. To get started, follow these steps:
  • Tap the Win + R keys to open the Run utility and type “Regedit” in the field and then tap Enter to open the Registry Editor.
  • Next, navigate to this registry path: HKEY_CURRENT_USERSoftwareMicrosoftInputPersonalizationTrainedDataStore
  • From there, right-click on the key and select Permissions.
  • After that, check the box next to “Allow” for Full Permission for every user group.
  • Now click on the Apply and OK buttons to save the changes made.
  • Then restart your computer.

Option 2 – Close the Host process for setting synchronization

If the registry tweak didn’t work, you can try to close the host process for setting synchronization, especially if this process continues to hog resources. You can terminate this process by opening the Task Manager. From there, end the process or task of the host process. On the other hand, you can also turn off the Host process for synchronization by opening Settings > Accounts > Sync settings located in the left pane. After that, turn off the Sync setting.

Option 3 – Run the Hardware and Devices Troubleshooter or the Performance Troubleshooter

Hardware and Devices Troubleshooter:

  • The first thing you need to do is click on Start and then on the gear-like icon to pull up the window for Settings.
  • After opening Settings, look for the Update and Security option and select it.
  • From there, go to the Troubleshoot option located on the left-hand side of the list.
  • Next, select Hardware and Devices from the list and open the Troubleshooter and run it. Once it is doing its job, wait for it to complete the process and then restart the system.
  • After the system restarts, check if the problem’s now fixed. If not, refer to the next option given below.

Performance Troubleshooter:

  • Tap the Win + R keys to open the Run dialog box.
  • Type “exe /id PerformanceDiagnostic” in the field and hit Enter to open the Performance troubleshooter.
  • Then click on Next to get started. Wait until the process is completed.

Option 4 – Try scanning your computer using Windows Defender

As mentioned, it is possible that the SettingSyncHost.exe could be infected with a virus or malware. To eliminate it, you have to scan your computer using security programs like Windows Defender.
  • Tap the Win + I keys to open Update & Security.
  • Then click on the Windows Security option and open Windows Defender Security Center.
  • Next, click on Virus & threat protection > Run a new advanced scan.
  • Now make sure that Full Scan is selected from the menu and then click the Scan Now button to get started.
Read More
Headphones are not visible in playback devices
If you connected headphones to your Windows 10 computer to listen to audio but when you check it in the playback devices, you’re not able to find it, read on as this post will guide you in what you can do to figure out what exactly caused this kind of problem and how you can resolve it. This kind of issue could simply be with the headphone itself or the headphone port or your operating system. So if it turns out that the problem is with the hardware, you might have to replace the components. However, it is recommended that you troubleshoot the problem first before doing that. The most basic thing you can do is to try changing the headphone port, although this can be quite difficult since most computers don’t have any extra port for headphones if your computer has one, then give it a go. If it still didn’t work, follow each one of the options provided below.

Option 1 – Try to run the Playing Audio troubleshooter

Since the Windows 10 operating system has the Playing Audio Troubleshooter, you can use this troubleshooter to try and fix the problem with the “No Audio Output Device is installed” error. You can access this tool in the Control Panel or in the Taskbar Search and even on the Troubleshooters page of Windows 10. Run this troubleshooter and see if it can fix the issue or not.

Option 2 – Try to update the Audio driver

If the error has something to do with software, chances are it might be related to the audio driver – it could be that the newest version of your Windows 10 does not work well with the old version of the driver. This is why you have to update your audio driver to the newest available version.
  • Tap the Win + R keys to open the Run dialog box and then type in MSC and tap Enter or click OK to open the Device Manager.
  • Expand the section of the Audio inputs and outputs.
  • And then from the drop-down menu, select the Update Driver option and follow the on-screen instructions to install the latest version of the driver.
  • Then also click on the option, “Search automatically for updated driver software.
  • Restart your PC after the installation.
Note: If updating the Audio driver didn’t work, you can go to the website of your PC manufacturer and look for the support section where you can download the drivers for your computer. You just need to take note of your PC’s correct model and model number so you can find the appropriate driver.

Option 3 – Try enabling the headphones from the playback devices

  • Tap the Win + R keys to open the Run dialog box and type the “CPL” command.
  • Tap Enter to open the Playback devices.
  • Next, right-click on any open space section and check the boxes for the “Show Disconnected Devices” and “Show Disabled Devices” options.
  • After that, this should help in displaying the headphones in the section of Playback devices.
  • And if they are disabled, you can just right-click them to have them enabled.
Read More
Bluetooth flaw, Android and Windows in danger
bluetoothResearchers have discovered 16 vulnerabilities in Bluetooth connections that could be exploited and make from minor to some serious damage to your device. The flaw can be used on chips manufactured by Intel, Qualcomm, and Texas Instruments while connecting to external devices like speakers, headphones, keyboards, mice, etc.

Who is affected?

Mentioned chips are used by many in a vast range of devices including big players with their products like Microsoft Surface laptops, Dell desktops, Samsung Phones, Google Pixel, and OnePlus handsets. The Bluetooth bug affects a wide range of devices, including smartphones, laptops as well as smart home gadgets. In total, more than one billion devices that rely on Bluetooth are believed to be impacted.

What is the damage?

The amount of damage possible with this flaw depends on the type of device with the chipset. Some devices can only be crashed after a specially crafted packet is sent to the flawed chip. If that's the case with your gadget, it can be easily resolved with a simple restart. With other devices, hackers can take advantage of the Bluetooth Classic flaw to remotely run malicious code. That could allow malware to be installed remotely. Researchers say vendors were informed about these issues months ago before the findings were published. The good news is this should have given plenty of time for the relevant patches to be pushed out that remedy the flaws. However, you'll need to make sure that you're running the latest version of the operating system to be protected by the patch crafted by the manufacturers.

Android Bluetooth threat

The researchers emphasize the lack of basic tests in Bluetooth certification to validate the security of Bluetooth Low Energy (BLE) devices. The BrakTooth family of vulnerabilities revisits and reasserts this issue in the case of the older, but yet heavily used Bluetooth classic (BR/EDR) protocol implementations. We would also advise users to disable Bluetooth on devices that do not need it. This way you can prevent attackers from sending you malformed LMP packets. Since BrakTooth is based on the Bluetooth Classic protocol, an adversary would have to be in the radio range of the target to execute the attacks. So, in a safe environment Bluetooth can be enabled.
Read More
The PrintNightmare vulnerability finally fixed
PrintNightmare vulnerability has been a struggling issue for Microsoft in the past weeks, each time it seems to be addressed and fixed something new popped up and it still had issues. Microsoft finally addressed the issue but with a price. The default behavior of Point and Print is changed. From this fix onward, the Point and Print driver installation and update behavior will require administrator privileges, which should prevent the exploit to the Windows Print Spooler that could be used by malicious individuals to gain administrative privileges in Windows. The drawback of this fix from Microsoft is that non-elevated users may have difficulty adding or updating printers. Microsoft feels that the security risks caused by PrintNightmare are worth the tradeoff, though. If you really want to let non-elevated users add printers, you can follow the instructions in this Microsoft Support article to disable this mitigation with a registry key. However, doing so will expose you to this known vulnerability and isn’t recommend.
Read More
Fix intelppm.sys error in Windows 10
intelppm.sys blue screen of death is linked to an outdated driver, if you received this error do not sweat we have simple solutions for you. Please keep on reading in order to find out what can you do to fix this error.
  1. Update driver Go to the device manager and manually update old-dated drivers. Note that this will take some time because you will need to update each device manually through the device manager but in the end, it will fix the issue.
  2. Use automated application Instead of going through each device one by one manually get a dedicated driver fixing device like DRIVERFIX and update all drivers automatically.
Read More
Microsoft removed password as a requirement
ms password gone
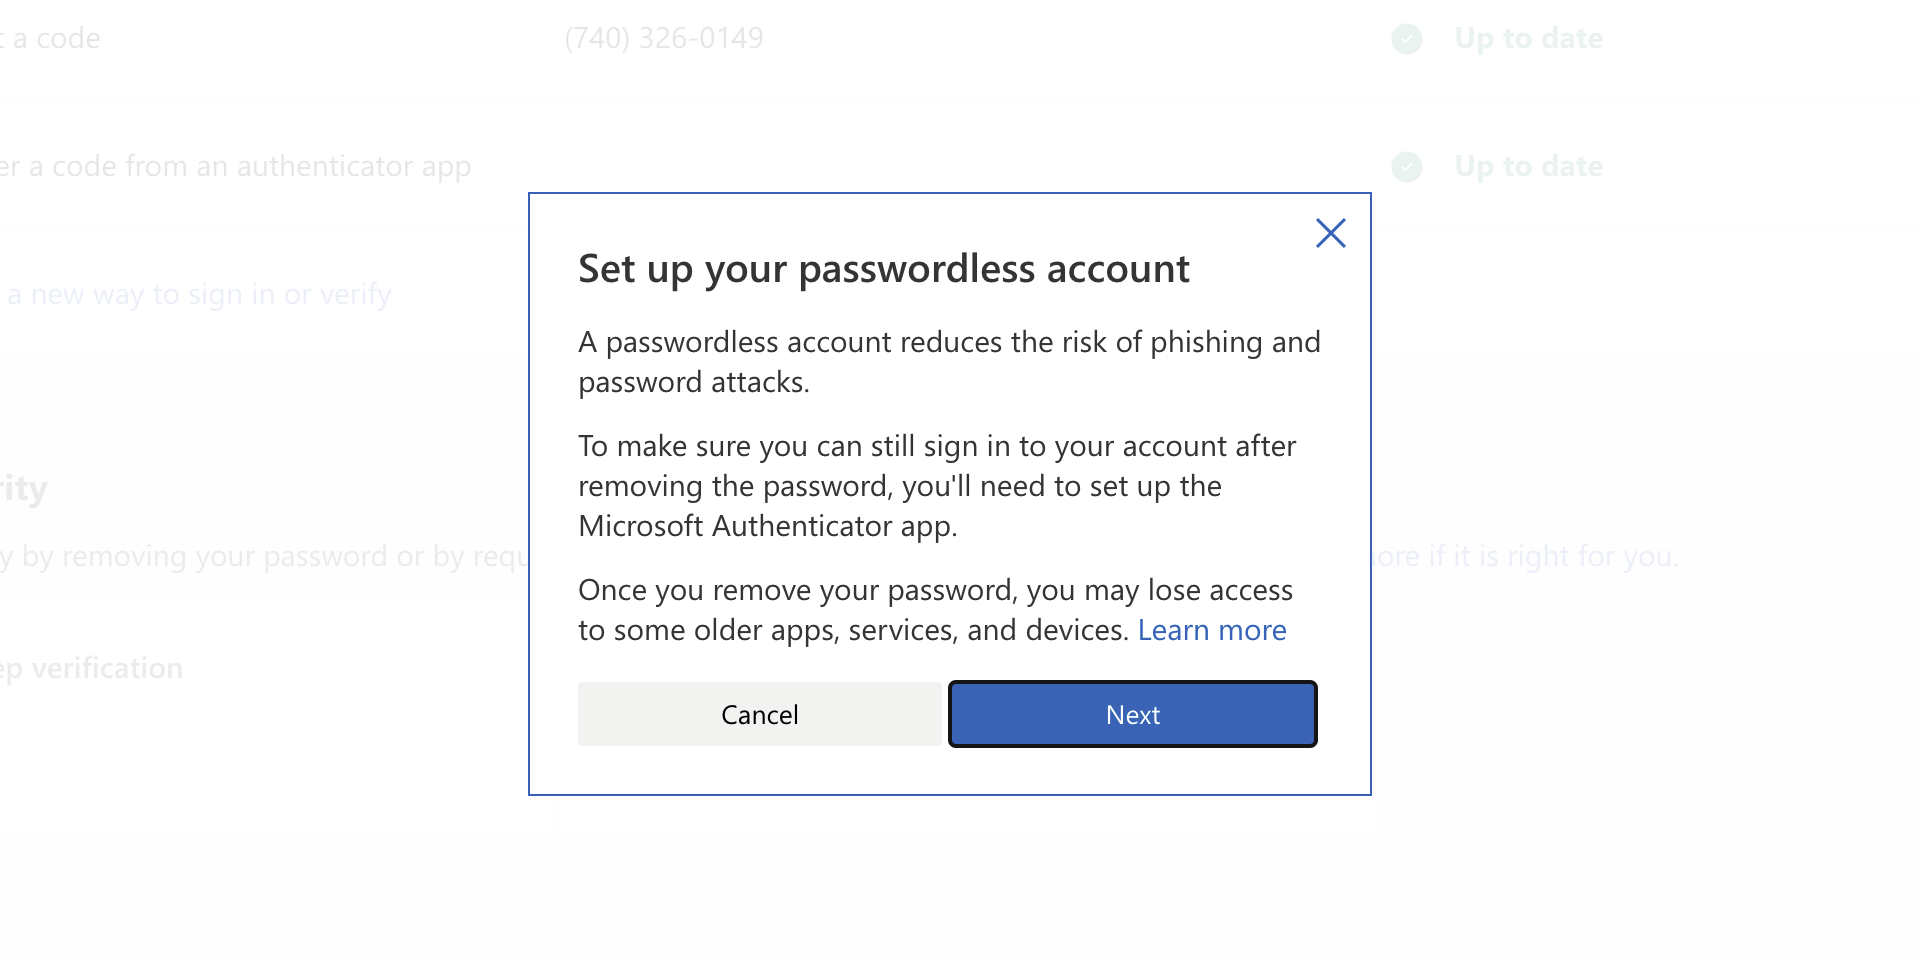
As of the time of writing this article you no longer need or are required to have a password if you plan to log in to your Microsoft account. Microsoft explored various options for account security and came to the conclusion that passwords are obsolete. Microsoft is letting you access your account through the Microsoft Authenticator app, Windows Hello, a security key, SMS verification, or email verification code. All of these methods are way better in terms of security than passwords.

How to turn these features on?

To get rid of your Microsoft password, the process is simple. You simply need to go to your Microsoft account, click “advanced security options,” then “enable passwordless accounts” under the Additional security section.
Read More
STOP 0x00000050 - An Easy Fix Guide

Stop 0x00000050 is an error code that is popularly known as the Blue Screen of Death (BSoD) error. This error occurs when Windows crashes on your system. Stop 0x00000050 error is displayed in a blue screen which is why it is called the BSoD error.

The error message appears in the following form:

Stop 0X00000050 (parameter1, 0, parameter3, parameter4)

PAGE_FAULT_IN_NONPAGED_AREA”

However, the parameters within the Stop 0x0000005 error message sometimes vary depending on your PC configuration.

Solution

Restoro box imageError Causes

The most common causes of the Stop 0x0000005 error are:

  • Hardware malfunctioning
  • Overheating of the components
  • Installation of a faulty device driver
  • Incompatible DLL files
  • Corrupt Registry
  • Spyware and Virus Infection

Whatever the cause may be, the Stop 0x00000050 error message is alarming and should be fixed at the earliest as it indicates major system stability problems that can often lead to data loss and system corruption.

Further Information and Manual Repair

To fix and repair the Stop 0x0000005 error you don’t always have to hire an IT professional. In fact, fixing this error is quite easy and you can do it yourself regardless of whether you have a good know-how of computers or not.

So, let’s get started! Here are some the easy DIY solutions to fix the Stop 0x0000005 error:

Sometimes this error may occur due to a temporary issue like overheating of the computer components. When this happens all you need to do is switch off the computer and allow the components to cool down. Try starting up your computer after a couple of hours. If the blue screen of death does not occur again, then this means there is nothing to worry about and the problem is resolved.

However, if the error appears again on your screen, then you need to try something else to solve and fix this error on your PC. If the cause of the error is a faulty device driver, then it is advisable to disable and remove it. Try updating the latest version of the faulty device driver. Using updated software helps ensure your PC keeps running smoothly.

If the cause of the Stop 0x0000005 error code is your system's exposure to viruses and spyware, then you must immediately download a powerful antivirus program. After you download it, scan for viruses on your system. Once the scanning is complete, you will see a scan report showing viruses on your PC. Delete all of them and click on repair.

Furthermore, you can also add more RAM to prevent and fix the Stop 0x0000005 error message on your computer. This solution is suitable when you try to run a program on your PC and you get this error message.

Read More
A Quick Guide to Fixing Error Code 17

Troubleshoot Error Code 17

Error Code 17 - What is it?

Code 17 is a typical Spotify error code. Spotify is a music streaming service. Through this software, PC users can browse songs and search by artist, album, and playlist. Simply put, it is an audio player available for BlackBerry, iOS, and Microsoft Windows desktop. You may experience error code 17 if the process fails when downloading Spotify from the internet. The error message is displayed in any one of the following formats:
Error 17: Spotify has encountered a problem and needs to close. We are sorry for the inconvenience. Spotify could not be started (Error code 17)
Some of the symptoms of this error code are program crash, slow Windows performance, and periodic system freeze.

Solution

Restoro box imageError Causes

Error 17 may be triggered by several reasons such as:
  • Viral infection
  • Incomplete installation of Spotify software
  • Corrupt download
  • Registry corruption
  • Windows Installer service terminated
To use the audio player Spotify successfully on your PC, it is advisable to fix error 17 right away on your system. Delay may cause inconvenience and limit your access to your desired program.

Further Information and Manual Repair

To repair this error code on your PC, you don’t have to hire a professional or be a technical whiz yourself. The good news is that this error is quite easy to fix. You don’t need to be technically sound to resolve it. Here are some proven methods for you to fix error code 17 on your system. So let’s get started:

Method 1 - Make sure that the Windows Installer is running

Sometimes Spotify error 17 may occur if the Windows Installer service is terminated. Therefore before you download, make sure the Windows Installer is running. This is a good way to ensure the error code 17 messages don’t pop up on your PC again. For this here’s what you need to do, first quit all programs. Now go to the start menu and in the search box type RUN, and press enter. In the Open Box, type msiexec /unregister and then press OK to confirm. After that, perform the same steps again, and now in the Open Box type msiexec /regserver and press OK to save. Reboot your PC and try downloading Spotify again. If the program successfully downloads on your system, then this means error 17 is resolved. However, if the error code still persists, then try other methods given below.

Method 2 - Use System Restore to Undo Recent Changes

Another reason for the cause of error 17 is the improper or incomplete installation of Spotify. Improper installations can configure settings and also leave bad entries in the registries. To resolve, use System Restore utility built-in Windows. By using this system tool, you can undo recent changes and resume your computer to its previous condition as it was before the proper installation was attempted. To do this, go to the start menu, then in the search box type System Restore and press enter. Go to System Restore and choose a restore point. Once you’ve selected the point, reboot your PC to activate changes.

Method 3 - Remove Viruses

Viruses can enter and damage your PC if you download software programs from unknown websites. These not only damage your PC but also hinder your ability to install desired programs successfully in this case audio player Spotify. In such an event, simply use an antivirus to remove all viruses infecting your system. After they are removed, make sure you download and install Spotify software from a trusted website.

Method 4 - Repair the Registry

Another cause of error 17 is registry corruption. This occurs due to bad entries, invalid and junk files saved in the registry. To fix the corrupt registry simply download Restoro. This is a user-friendly PC Fixer embedded with a powerful registry cleaner. This software is compatible with all Windows versions. The registry cleaner detects all registry issues, removes all file corrupting the registry, and cleans it immediately in just a few clicks. Click here to download Restoro on your PC and resolve Error 17.
Read More
1 2 3 162
Logo
Copyright © 2022, ErrorTools. All Rights Reserved
Trademarks: Microsoft Windows logos are registered trademarks of Microsoft. Disclaimer: ErrorTools.com is not affiliated with Microsoft, nor claim direct affiliation.
The information on this page is provided for information purposes only.
DMCA.com Protection Status