How to Fix CoreFoundation dll Error

Troubleshoot CoreFoundation dll Error

CoreFoundation dll Error – What is it?

The CoreFoundation dll error is a common error associated with Apple Software products. Most of the Apple Software products rely on this dll file to load and run. This dll file is Apple’s proprietary.

The error message is prompted in the following format:

“CoreFoundation.dll was not found”

or

“Apple Application Support is missing’.

Solution

Restoro box imageError Causes

The CoreFoundation.dll error message is triggered because of several reasons. These include:

  • Deleted CoreFoundation dll file
  • The CoreFoundation dll file has been overwritten
  • Poor installation of the Apple software
  • Corrupt software due to viral infection
  • Registry problems

Further Information and Manual Repair

It is advisable to fix CoreFoundation dll error code right away to avoid inconvenience. This error may stop you from accessing and running your desired Apple application.

Here are some of the best ways to resolve this error on your system:

1. Restore the Deleted CoreFoundation dll File

Since Dynamic Link Library is a shared program, if you happen to delete an Apple program on your PC, chances are you might have deleted that file too in the process.

Therefore, the easiest way to recover and restore the CoreFoundation dll file and resolve the error is to look for the file in the recycle bin. If you can’t locate it, then another way to restore the missing CoreFoundation dll file is to download the files from the internet.

2. Reinstall  Apple Software

If the error still persists then it is advisable to re-install Apple software via iTunes or any other Apple Software that you have on your PC.

For example, if you have iTunes, then to reinstall it first go to the start menu and then the control panel. Now click on Add/Remove programs and locate iTunes software. Click the Uninstall button next to iTunes. Wait for a while until the program is completely uninstalled.

After the installation is complete, restart your PC and then download the latest version on iTunes and install it. Now try running the software again. Hopefully, this will resolve the issue.

3. Scan for Viruses

Another way to resolve CoreFoundation dll error on your system is to scan for viruses. Run an antivirus to detect viruses and remove them from your PC.

4. Clean Your Registry

Remember DLL file errors also indicate a corrupt registry. When you don’t clean the registry it overloads with unnecessary and obsolete files like junk files, cookies, temporary internet history, and bad /invalid registry entries.

When these files accumulate, they damage the registry, dll, and system files too. It also causes disk fragmentation. To repair the registry and fix dll files again, download a registry cleaner.

Whether you want to scan for viruses or clean the registry, it is advisable to download Restoro.

This is a multi-functional and advanced PC Fixer deployed with an intuitive algorithm and multiple powerful utilities. These include an antivirus, a registry cleaner, Active X controls, and class scanner, and a system optimizer.

The registry cleaner detects all registry issues and resolves them instantly. It wipes out the unnecessary files cluttering and damaging the registry. It fixes and restores the damaged dll files including CoreFoundation dll file thereby resolving the error. It takes a few clicks to resolve this error.

The antivirus feature scans your entire PC and removes all kinds of malicious software including spyware, malware, viruses, and Trojans.

To ensure the antivirus does not slow down the speed of your PC, Restoro also features a system optimizer that boosts the performance of your computer significantly.

It is powerful and bug-free software with a user-friendly interface that makes it quite easy to operate. You can download it on any Windows version as it is compatible with all.

Click here to download Restoro and resolve CoreFoundation dll error now!

If you like to learn and find out more about various Windows errors, and how to repair them go to our vast archive or use search to find articles that will explain and help you in solving your issue.
However, if you prefer to do things fast and with automatization then we are proposing to use an automated solution for your issues. The application that we are recommending is Advanced System Repair Pro
Advanced System Repair utilizes multiple tools all in one to give you a quick, simple, reliable, and very thorough diagnosis of your PC. It brings you all the tools you need in one program to clean, fix, protect, optimize and boost your PC!
1-Click Maintenance
All the tools to make it simple and easy! It's like having a professional technician at the click of a mouse.

Junk Cleaner
Keeping your computer free from unnecessary clutter also helps make your computer last longer. Like any other machine, if you keep it clean and take care of it, it will serve you better for longer!

Optimize background apps
Optimize applications background activity with the built-in Application Optimizer feature.

Disk Defrag
With a simple 1-click, Advanced System Repair speeds up your PC by assembling fragmented files on your machine and organizing them more efficiently.

Malware Removal
Finds and removes all types of harmful malware including trojans, worms, bots, adware, spyware, PUPs, and more!

Privacy Cleaner
The all-in-one privacy suite to Clean Your Tracks & Protect Your Privacy! Make your computer safe, secure, and more efficient!

System Tweak/Optimizer
ASR will analyze your complete system and settings to adjust your PC to function at its maximum performance.

Registry Cleaner
Over time, as you install and uninstall applications, the registry can become cluttered with old entries and broken settings which can result in program crashes, and annoying messages and slow the computer down.
Visit our Advanced System Repair Pro Download page to inform yourself about all the benefits of this software and get a free trial copy of it.
advanced system repair pro

Advanced System Repair Pro

One-click automated PC repair solution
ASR logo
With Advanced System Repair Pro you can easily
Replace damaged files
Restore performance
Free disk space
Remove Malware
Protects WEB browser
Remove Viruses
Stop PC freezing
DOWNLOAD
Privacy Policy | Terms of Use | Uinstall
Advanced System Repair Pro is compatible with all versions of Microsoft Windows including Windows 11

Share this article:

You might also like

Setup has failed to determine install choices
Running the Windows Setup does not always go smoothly as you could encounter some errors along the way. One of these errors is the “Something happened, Setup has failed to determine supported install choices” error. The only given option in such cases is to click the Close button and exit the setup. This kind of error in Windows setup can occur when you try to downgrade to the previous version of Windows using the built-in mechanism. This error could be caused by a corrupted image or it is also possible that the set of files are incomplete. Aside from that, it could also be due to compatibility issues or that the module used to downgrade the Windows operating system is not configured properly. To fix this error, you have to run the Windows Setup program in compatibility mode so that you can downgrade Windows. You could also use the image for the lower version of Windows that’s available on the official site of Microsoft. But before you do any of these, make sure that you’re logged in as an administrator. To fix the “Something happened, Setup has failed to determine supported install choices” error, follow the given options below sequentially.

Option 1 – Try to run the Installer of the downgraded version in Compatibility Mode

This is the first thing you can try to resolve the issue instead of going right ahead on making a bootable device. So if you are downgrading Windows, you can try to run the installer in the compatibility mode for that specific Windows version.
  • Look for the setup file.
  • Once you find it, right-click on it and select Properties from the context menu.
  • After that, go to the Compatibility tab and mark the checkbox for “Run this program in compatibility mode for:” and from the drop-down list, select either Windows 7 or Windows 8.
  • You also have to check the “Run as administrator” option.
  • Now click the Apply button and then click OK to save the changes made and check if it has resolved the issue or not.

Option 2 – Try to troubleshoot compatibility

This option is almost the same as the first one except it is an alternative way of fixing the “Setup has failed to determine supported install choices” error in case the first one didn’t work. In this option, you will troubleshoot the compatibility issue.
  • Look for the setup file.
  • Then right-click on it and select the “Troubleshoot compatibility” from the context menu.
  • After that, click on the “Try recommended setting” option. Once the process is done, the error message should be gone.

Option 3 – Run the DISM tool

You can run the DISM tool as well to help fix the error code 0x80244022 during Windows Update. Using this built-in tool, you have various options such as the “/ScanHealth”, “/CheckHealth”, and “/RestoreHealth”.
  • Open the Command Prompt with admin privileges.
  • Then type in the following commands and make sure to hit Enter right after you type each one of them:
    • Dism /Online /Cleanup-Image /CheckHealth
    • Dism /Online /Cleanup-Image /ScanHealth
    • exe /Online /Cleanup-image /Restorehealth
  • Do not close the window if the process takes a while as it will probably take a few minutes to finish.

Option 4 – Try using the image from the official site of Microsoft

If none of the options given above worked, you can try to use the image from Microsoft’s official site. This would help, especially if the error is caused by a corrupted image or image folder with incomplete files.
Read More
Microsoft removed password as a requirement
ms password gone
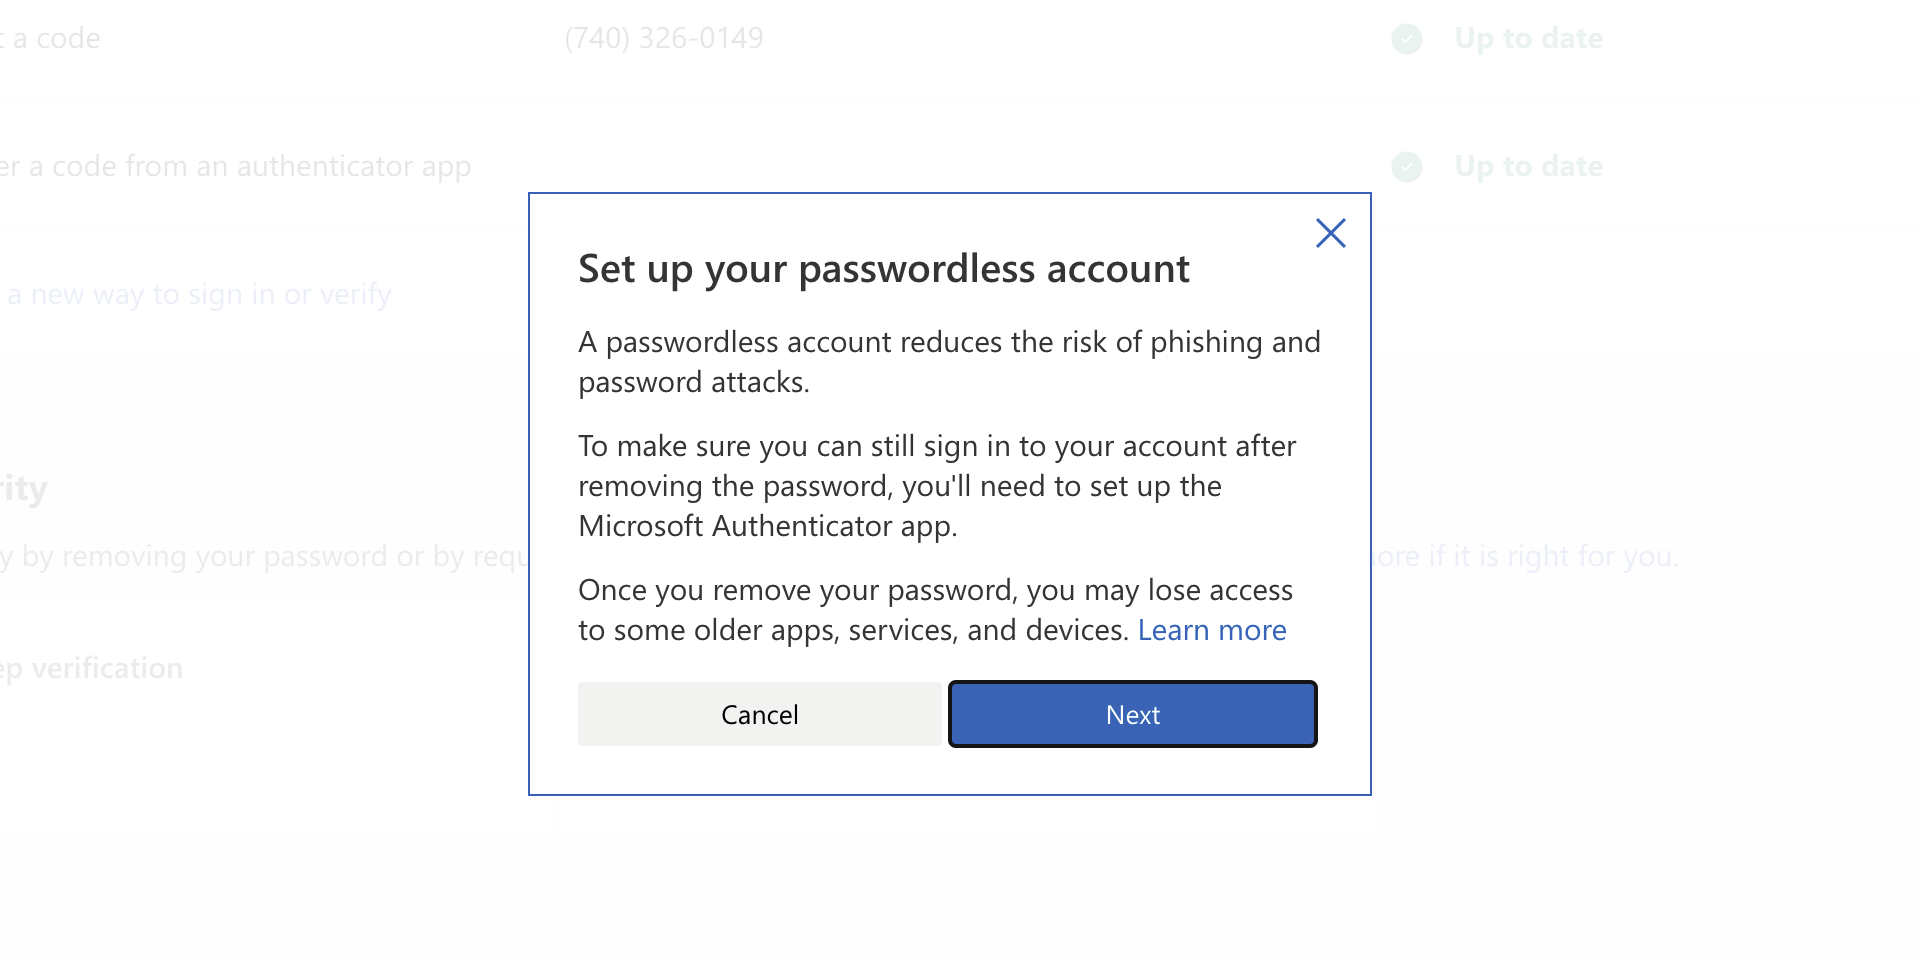
As of the time of writing this article you no longer need or are required to have a password if you plan to log in to your Microsoft account. Microsoft explored various options for account security and came to the conclusion that passwords are obsolete. Microsoft is letting you access your account through the Microsoft Authenticator app, Windows Hello, a security key, SMS verification, or email verification code. All of these methods are way better in terms of security than passwords.

How to turn these features on?

To get rid of your Microsoft password, the process is simple. You simply need to go to your Microsoft account, click “advanced security options,” then “enable passwordless accounts” under the Additional security section.
Read More
Fix update failed to install error 0xca00a000
This post will show you how to fix the Windows update error 0xca00a000 which you can encounter during the installation of Windows updates. Here’s the full error message of this Windows Update error:
“Updates failed There were problems installing some updates, but we’ll try again later. If you keep seeing this and want to search the web or contact support for information, this may help: 2018-07 Cumulative Update for Windows 10 Version 1803 for x64-based Systems (KB4345421) – Error 0xca00a000”
This kind of Windows Update error pops up when Windows has missed installing one of the cumulative updates needed or when there is some problem with the driver that won’t let the installation of the updates push through. There are also instances when the system files are modified with incorrect permission that may result in the Windows update error 0xca00a000. Thus, you need to fix the trusted installer permission as well as resolve the issue with the driver. To do these things, you need to follow the options laid out below.

Option 1 – Run the Windows Module Installer

The Windows Module Installer is a built-in service in the Windows operating system that could help you resolve the Windows update error 0xca00a000. You need to make sure that this service is Started and that its Startup type is set to Automatic – you can do this via Services Manager or by executing the command given below in an elevated Command Prompt.
  • Tap the Win + R keys to open the Run dialog box.
  • Then type “command prompt” in the field and hit Enter to open Command Prompt.
  • And in the elevated Command Prompt type in the following command and hit Enter:
SC config trustedinstaller start=auto
  • After executing the command successfully, you should see the “[SC] ChangeServiceConfig SUCCESS” message on the Command Prompt window.

Option 2 – Try manually installing the updates

As mentioned, the error might be because Windows missed installing a particular update which is why you are not able to proceed with the current update. So to resolve the issue, you need to install the update that wasn’t installed by downloading it from the Microsoft Update Catalog website. You also have to make sure that you didn’t turn off the Windows update or have it delayed.

Option 3 – Delete the files from the Software Distribution folder

The Software Distribution folder in the Windows operating system is a folder that can be found in the Windows directory and is used to store files temporarily which might be required to install the Windows Update on your PC. Thus, it is required by the Windows Update and maintained by WUAgent. A lot of users tried deleting the files in this folder to fix the problem and so far it has worked. Like them, you can try clearing the Windows Update cache by simply deleting the contents of the folder named “SoftwareDistribution” since Windows apparently can’t clear and re-download the update contents once they are corrupted. Thus, deleting the contents of this folder will make Windows download the contents again which will fix the problem. To do that, follow the steps below.
  • Open the WinX Menu.
  • From there, open Command Prompt as admin.
  • Then type in the following command – don’t forget to hit Enter right after typing each one of them.
net stop wuauserv net stop bits
  • After entering these commands, it will stop the Windows Update Service and the Background Intelligent Transfer Service.
  • Next, go to the C:/Windows/SoftwareDistribution folder and get rid of all the folders and files thereby tapping the Ctrl + A keys to select them all and then click on Delete. Note that if the files are in use, you won’t be able to delete them.
  • Once all the contents in the Software Distribution folder are deleted, restart your PC and then go back to Command Prompt and input the following commands again.
net start wuauserv net start bits
Since the folder has already been flushed, it will be populated afresh the instant your restart your computer and open Windows Update.
  • Now Open Settings and check for Windows Updates. Windows 10 should begin the download right away.

Option 4 – Install the updates in a Clean Boot State

You might want to try putting your computer in a Clean Boot state and then install Windows Updates again without any trouble. During this state, you can start the system with a minimum number of drivers and startup programs that will surely help you in isolating the root cause of the issue.
  • Log onto your PC as an administrator.
  • Type in MSConfig in the Start Search to open the System Configuration utility.
  • From there, go to the General tab and click “Selective startup”.
  • Clear the “Load Startup items” checkbox and make sure that the “Load System Services” and “Use Original boot configuration” options are checked.
  • Next, click the Services tab and select the “Hide All Microsoft Services” checkbox.
  • Click Disable all.
  • Click on Apply/OK and restart your PC. (This will put your PC into a Clean Boot State. And configure Windows to use the usual startup, just simply undo the changes.)
  • After that, try to install the Windows Updates or upgrade again.

Option 5 – Run the Windows Update Troubleshooter

Running the built-in Windows Update troubleshooter could also help you resolve the Windows update error 0xca00a000. To run it, go to Settings and then select Troubleshoot from the options. From there, click on Windows Update and then click the “Run the troubleshooter” button. After that, follow the next on-screen instructions and you should be good to go.

Option 6 – Run Microsoft’s online troubleshooter

Running Microsoft’s online troubleshooter might also help you fix the Windows update error 0xca00a000. This online troubleshooter is known to help in fixing Windows Update errors, it scans your computer for issues that might be causing the problem and then fixes them automatically.
Read More
A Guide to Fixing Corefoundation.dll Error on Your PC

Fix Corefoundation.dll Error

Corefoundation.dll Error - What is it?

Corefoundation.dll error is a DLL error code associated with Apple software such as iTunes, MobileMe, QuickTime and etc. To understand this error better, first you need to understand what corefoundation.dll file is. Corefoundation.dll is a Dynamic Link Library file that is used by Apple software products. This file is created by Apple computer Inc and is designed to help open up some of the media files that you might have on your PC. DLLs help promote modularization of code, efficient memory usage, code reuse and reduced disk space allowing the operating system and the programs to load and run faster and take less disk space on the computer.

Error Messages

This error pops on the screen when there is an issue related to Apple software products on your system. Corefoundation.dll error is displayed on the computer screen in any one of the following formats:
“The program can not start because corefoundation.dll is missing from your computer. Try reinstalling the program to fix this problem”. "This application has failed to start because CoreFoundation.dll was not found. Re-installing the application may fix this problem." “The procedure entry point_CFBundleCopyFileTypeForFileData could not be located in the dynamic link library corefoundation.dll.” "MobileMe Control Panel cannot continue as Apple Application Support is missing or outdated. Please uninstall and reinstall the latest version of iTunes and MobileMe Control Panel to fix this issue.”
Though this error code is not fatal but if it is not fixed immediately it will hamper your ability to load and run Apple programs on your system.

Solution

Restoro box imageError Causes

Corefoundation.dll error can be triggered due to several reasons. Here are some of the most common corefoundation.dll error causes:
  • Outdated PC drivers
  • Viral infection
  • Damaged Windows registry files
  • Corrupted corefoundation.dll file
  • Missing corefoundation.dll file
  • Incorrectly installed third-party software

Further Information and Manual Repair

To fix this issue on your computer here are some of the best, easy and quick do it yourself methods that you can try:

Method 1: Download the Original Corefoundation.dll File

If the underlying reason for corefoundation.dll error is file corruption or it goes missing, then the best way to resolve is to download the original corefoundation.dll file. Once you download it, paste it to its exact location. DLL files are normally located in the following location C:\Windows\System32. Once you paste it, register the file by typing ‘regsvr corefoundation.dll’ at the command prompt. When the process is complete, restart your PC to activate changes. Alternatively, you can uninstall and re-install any Apple Software you may have on your Windows Computer. To do that, Open the Control Panel, navigate to "Install/Uninstall a Program", search for Apple software, and uninstall them.

Method 2: Update Window Drivers

If the error code is related to outdated drivers, then it is recommended that you update them promptly to resolve the corefoundation.dll error on your PC. This can be done by using a driver update wizard from within Device Manager. The driver update wizard walks you through the entire drive update process, making updating a hassle-free process.

Method 3: Download Restoro

If the error still persists, then try method 3. Sometimes the cause of corefoundation.dll can be viral infection or registry issues.  Viruses may enter your PC unknowingly through phishing emails and downloads which can corrupt and damage your dll files. Also, if you don’t clean your registry frequently, unnecessary and obsolete files may accumulate in the registry like cookies, junk files, internet history and temporary files. These files take up a lot of disk space corrupt DLL files and lead to disk fragmentation. Regardless of what the issue is, Restoro is your one-stop PC Fixer. It is a multi-functional and user-friendly repair tool embedded with 6 different scanners including a registry cleaner and an antivirus. It scans and removes all types of viruses and cleans and restores the registry too. Click here to download Restoro and resolve the corefoundation.dll error today!
Read More
Guide to Resolving the Msvcr71.dll Error Code

Fix Msvcr71.dll Error Code

Msvcr71.dll Error - What is it?

Msvcr71.dll is a dynamic library link that belongs to the Microsoft Visual C Runtime library. This file is a core Windows component used by numerous Windows applications like Microsoft Office version 2002 and 2003, Windows XP Media Center, and Windows XP Tablet PC Edition. The Msvcr71.dll error commonly occurs when two applications share the same DLL file. When an application is deleted sometimes the Msvcr71.dll file is also deleted which is associated with two applications on your PC. So, when you try to run the other application you come across the Msvcr71.dll error on your system. The error also occurs when you try to install new programs or update the old program versions. This also misconfigures the DLL files and results in the Msvcr71.dll error. Msvcr71.dll error messages are often displayed as the following:
  • “This application has failed to start because Msvcr71.dll was not found.”
  • “Mscvr71.dll is a bad windows image. Please check against your installation diskette.”
  • “Cannot find [PATH]msvcr71.dll"
  • "The file msvcr71.dll is missing."

Solution

Restoro box imageError Causes

Deletion of the Msvcr71.dll file is one cause for the Msvcr71.dll file error. However, this error can also be generated due to other causes such as:
  • Corrupt, missing, or misconfigured msvcr71.dll file
  • Damaged and missing .dll files
  • Corrupt runtime code library
  • Registry issues
  • Malware attack and viral infection
  • Msvcr71.dll error codes usually occur on Windows versions XP and Vista.

Further Information and Manual Repair

Here are different ways to resolve the Msvcr71.dll error code on your system:

1. Reinstall the program/application that is causing the Error to Pop up on the Screen

When this error code occurs due to misconfigured or missing the Msvcr71.dll file, try reinstalling the program/application that is causing the error to pop up on your screen. When doing this, make sure there is no problem with the setup files from the disk you are performing the installation on your PC.

2. Check the Recycle Bin and Restore the Deleted File

If the Msvcr.dll file was deleted accidentally when you uninstalled a program on your PC, then the deleted file is most likely to be in the recycle bin. Check it and if you find it, restore it. Once the file is restored try running the application again.

3. Scan for Malware and Viruses

Install an antivirus and scan for malware and viruses. This software can also corrupt DLL files and runtime code libraries. However, this is not the best solution especially if you already have too many programs installed on your PC. New program installations cause more complications and besides antivirus are infamous for slowing down PC speed.

4. Repair the Corrupt Registry

If the three methods discussed above don’t help you resolve the Msvcr71.dll error code on your system, then this means the cause of the error is more critical than you think. The error is triggered by a corrupt and damaged registry. If this issue is not addressed timely, it can result in system failure and a fatal crash. To resolve the error code Msvcr71.dll, you need to repair the corrupt registry. And the best way to go about it is to download Restoro Restoro is a user-friendly, highly functional, and multi-functional repair tool integrated with high speed and powerful utilities such as a registry cleaner, system stability scanner, Active X and class error module, and an antivirus. It also functions as a system optimizer. It is the answer to your entire PC-related errors and issues. The automated and intuitive algorithm deployed inside this tool enables it to detect all registry errors and issues generating Msvcr71.dll error. DLL files often get damaged due to data overload, disk fragmentation, and malicious files saved in the registry. The registry cleaner removes all the unnecessary and obsolete files from the registry, clears up disk space, and repairs defragmented, damaged, and misconfigured disks. DLL files including Msvcr71.dll and also fixes the registry. It’s an in-built antivirus scan and removes viruses and the system optimizer feature ensures that your PC runs at its optimum speed. It is safe, bug-free, efficient, and easy to use.  It runs smoothly on all Windows versions. Click here to download Restoro and resolve the Msvcr71.dll error on your PC.
Read More
Blizzard caught destroying evidence
Blizzard employeesCalifornia's Department of Fair Employment & Housing has widened its anti-discrimination lawsuit against Activision Blizzard and claims the publisher has been shredding vital documents relevant to the ongoing investigation. A recent report from Kotaku described the department as offering poorly paid, highly insecure positions, with a culture of hostility towards LGBTQ+ testers. The DFEH's rewording of "employees" to "workers" now hopes to take these contractors' experiences into account. "As a contract employee, I feel there's a lot of pressure to excel, impress, and move through the ranks as fast as you can before your contract ends and you're forced to go 3 months without income or find another job," Axios reports one worker saying. "I take pride in what I do, but it feels like it's never enough." Activision's contentious hiring of union-busting third-party law firm WilmerHale "directly interferes" with its own investigation, it says. By going to WilmerHale, Activision appears to be claiming that all work related to the investigation is privileged and can't be shared with DFEH. The suit also claims that Activision HR shredded documents related to "investigations and complaints", against its legal obligation to retain them during the investigation. The relevant parts of the updated lawsuit were shared by Axios reporters Stephen Totilo and Megan Farokhmanesh, the former also noting that the DFEH "fixed their misspelling of Bill Cosby's name". "DFEH is also informed and aware that documents and records have not been maintained as required by law or by the DFEH's Document Retention Notice," the complaint reads, "including but not limited to documents related to investigations and complaints were shredded by human resource personnel and emails are deleted thirty days after an employees separation."

Speculation and answer from Activision Blizzard

Blizzard employee Jessica Gonzalez suspects that the costs of fines associated with destroying these documents may have been an easier blow for Blizzard to take than any penalties drawn from their existence in helping the lawsuit go through. In an email to Kotaku, Activision denied the shredding allegations and issued a statement outlining steps it had taken to improve company culture—including the ousting of high-level executives like Blizzard president J. Allen Brack. The full statement reads: "Throughout our engagement with the DFEH, we have complied with every proper request in support of its review even as we had been implementing reforms to ensure our workplaces are welcoming and safe for every employee. Those changes continue today, and include:
  •     Several high-level personnel changes
  •     Revamped hiring and recruiting practices requiring diverse interview panels
  •     Greater transparency on pay equity
  •     Expanded and improved training and investigative capabilities for human resource and compliance staff
  •     Created investigation teams outside of business units to support greater independence
  •     Restructured divisions to support greater accountability
  •     Enhanced review processes to include evaluation of managers by employees
  •     Clear boundaries on workplace behavior with a zero-tolerance approach to harassment and other actions that diminish or marginalize.
"We strive to be a company that recognizes and celebrates the diverse talents and perspectives that lead to the creation of great, globally appealing entertainment. We have provided the DFEH with clear evidence that we do not have gender pay or promotion disparities. Our senior leadership is increasingly diverse, with a growing number of women in key leadership roles across the company. "We share DFEH’s goal of a safe, inclusive workplace that rewards employees equitably and is committed to setting an example that others can follow."

California and RIOT

Beyond Activision Blizzard, California's DFEH has also probed into League of Legends creator Riot Games, accusing the studio of dragging its heels over sexual harassment allegations dating back to 2019. Riot denied the allegations, telling us that it "will never retaliate against anyone for talking to any government agency".
Read More
Win Firewall and third party Firewall are off
As you know, the Windows 10 operating system, as well as other Windows versions, comes with the Windows Firewall. In Windows 10, the firewall allows users to install and run a third-party firewall. This kind of firewall works independently to block any suspicious activity on your computer. However, recently, some users reported that they are getting a notification on the Startup saying,
“Windows Firewall and <Third party firewall name> Firewall are both turned off; tap or click to see available options”.
This particular error could be caused by a lot of factors but when you manually check the firewall, you’ll find that there really is nothing wrong with both the Windows Firewall and the third party firewall. So if both the Windows Firewall and third-party firewalls like McAfee, Comodo, and many others are both turned off in Windows 10, then you need to do several things to resolve the problem – you need to check the supporting services that are required and uninstall and then reinstall the third party firewall on your computer. For more instructions, refer to the options provided below.

Option 1 – Try enabling all the supporting services for the firewall

The first thing you can do to resolve the error with the firewall is to check all of its supporting services by following these steps:
  • Tap the Win + R keys to open the Run utility and type “services.msc” in the field and then hit Enter to open the Windows Services Manager.
  • Next, look for the Windows Defender Firewall service among the given list of services.
  • Once you found it, make sure that its Startup Type is set to Automatic and that the status of the service is Running. So if it’s not running, just click on the Start button.
  • In addition, you also have to make sure that the following services’ status is set as follows:
    • Xbox Live Networking Service: Manual
    • Base Filtering Engine: Automatic
  • Once done, start the firewall again and check if the error is now fixed or not.

Option 2 – Try to uninstall and reinstall the third-party firewall

It is possible that the firewall error might be due to an error with the compatibility of the installation in Windows 10 and the third-party firewall. Thus, the next thing you can do is to uninstall the third-party firewall and then reinstall it again. Once you have uninstalled the third-party firewall, you can download its latest version from its official website and install it again. This should fix the error with the firewall.
Read More
Connecting a Wireless Printer to a Windows PC
Although it’s easy to set up wired printers in most cases and they have their charm, you don’t have to be around the printer if you are connected to the same network. So in this post, you will be guided on how you can install and set up a wireless printer on your Windows 10 computer. The idea here is to ensure that your Wi-Fi printer and your Windows 10 computer are connected on the same network and to do that, you need to carry out the following steps:
  • You have to connect the printer to the Wi-Fi network.
  • You have to add the printer or scanner to Windows 10.
  • You have to install the printer software.
  • You have to change the default printer.
  • And troubleshoot the printer.

For more details, follow the instructions below.

Step 1: Connect your printer to the Wi-Fi network. In this step, you need to turn on your printer and look for the option to connect to a Wi-Fi network. Note that the step to connect to the Wi-Fi network depends on what kind of printer you use as well as its OEM since there will be a user interface or a Wi-Fi button that will get the job done for you. Once your printer is connected to the Wi-Fi network, you need to keep it turned on until the setup is completed. Step 2: Next, add a printer or scanner to Windows 10
  • Since you’re already connected to the Wi-Fi network, you now have to go to Settings > Devices > Printers & scanners.
  • From there, click on the Add a printer or scanner option.
  • After that, the scanning process will begin as Windows 10 looks for the printer and once it finds it, it will display the printer in the result.
  • Choose the Wi-Fi printer from the results and click on the Add device option. Once you click this option, Windows will install the drivers via Windows 10 update. Note that this process will apply to all the printers – connected, wireless, and so on.
Step 3: You have to install a printer software In this step, you need to use the driver software from the OEM even though the default printer software works since in most cases, the driver software from OEM works better compared to the default ones and offers much better functionality like ink-saving modes, and many more. Step 4: You now have to change the default printer After installing the printer software, you now have to set or change the default printer in your computer. If you have not installed any printer, the default printer in Windows is the one that saves the files. Now since you have already installed your printer, all that’s left for you to do is to change the default printer of Windows 10 to the one you installed earlier. To do that, follow these sub-steps:
  • Go to Settings and navigate to Devices > Printers & scanners.
  • From there, check the checkbox labeled, “Let Windows manage my default printer” if there are many printers. This will recommend you to use the most used printer. But if you don’t want to switch to the most used printer, then uncheck the checkbox.
  • Once done, click on the printer you want to set as the default one and go to Manage, and then click on the Set as default button.
Step 5: If you have any issues with your newly installed printer, then you need to troubleshoot it One of the first basic troubleshooting you can perform to resolve the printer issue is running the Printer Troubleshooter. This built-in troubleshooter can detect and automatically fix the problem for you. To use it, follow these steps:
  • Tap the Win + R keys to open the Run dialog box.
  • Next, type “exe /id PrinterDiagnostic” in the field and click OK or hit Enter to open the Printer Troubleshooter.
  • Then click the Next button and follow the next on-screen instructions to fix the issue with the printer.
Read More
One or more Network Protocols are missing
Windows 10 users a set of rules or standards called Network Protocols in communicating over the internet. These protocols are the ones that made sure that the data is correctly sent between computers. However, if any of the Network Protocol is missing in your Windows 10 computer, then you will most likely encounter a problem like not being able to browse the internet, or share files. For this, you can try to run the Incoming Connections troubleshooter: As you were not able to connect to your internet connection using your PC, you can try to run the Incoming Connections troubleshooter as it might resolve the problem. Refer to the following steps to run this troubleshooter:
  • Tap the Win + I keys to open Settings.
  • After opening Settings, go to Update and Security.
  • Next, navigate to the Troubleshoot pane and select the Incoming Connections section and click the Run Troubleshooter button to get started.
  • Wait until the troubleshooter is finished doing its job and then try connecting to your network again.
If after running the Incoming Connections troubleshooter you receive an error message instead that says, “Network Protocol is missing”, then here are some suggestions you need to check out to fix it. Take note that you must have admin privileges before you start troubleshooting the problem.

Option 1 – Try to update or rollback or uninstall the Network drivers

You might also want to update, roll back, or disable your Network drivers to fix the “This operation failed as no adapter is in the state permissible for this operation” error.
  • Tap the Win + R keys to launch the Run window and then type in the “devmgmt.msc” command and hit Enter to open the Device Manager window.
  • Under the Device Manager, you will see a list of drivers. From there, look for the Network Adapters and expand it.
  • Then right-click on each one of the Network drivers and depending on your preference, you can either select “Update driver”, “Disable device” or “Uninstall device”.
  • After that, restart your PC and see if it helped in fixing the netio.sys Blue Screen error.

Option 2 – Try to reset Winsock, TCP/IP & Flush DNS

You might also want to try resetting Winsock, TCP/IP, and flushing DNS might help you resolve errors. To do so, follow these steps:
  • Right-click on the Start button and click on Command Prompt (administrator) so you can pull up an elevated Command Prompt.
  • After that, execute each one of the commands listed below. And after you typed in one after the other, you have to hit Enter.
  1. netsh winsock reset – type in this command to reset Winsock
  2. netsh int ip reset resettcpip.txt – type in this command to reset TCP/IP
  3. ipconfig /flushdns – type in this command to flush the DNS cache
  • Next, restart your PC and check if the problem’s fixed.

Option 3 – Diagnose the Network Adapter

To diagnose the Network Adapter, go to Control Panel > All Control Panel Items > Network Connections, and from there, look for the network adapter that could be causing the error. Note that if you are using a Wi-Fi connection, then it’s probably your Wi-Fi adapter, otherwise it has something to do with your Ethernet adapter. Just right-click on the problematic network adapter and select diagnose to troubleshoot.

Option 4 – Try to perform Network Reset

You can also try to perform a Network Reset to resolve the problem. This will reset the entire network configuration including your IP address. To perform Network Reset, follow these steps:
  • Tap the Win + I keys to open Settings.
  • From there, go to the Network and Internet section.
  • Next, scroll down and look for “Network Reset” under the status pane.
  • After that, click on Network Reset and then on Reset now to start resetting the network configuration. Once done, check if it is able to fix the error or not.

Option 5 – Try importing Winsock settings from another computer

If resetting Winsock or the Network didn’t fix the problem, then you can try to import settings from a computer that’s in good condition. You need to have access to the registry to get this done and then export and import a couple of settings. Refer to these steps to get started:
  • Tap the Win + R keys to open the Run dialog box and type “Regedit” in the field and hit Enter to open the Registry Editor.
  • After that, go to this registry path: HKEY_LOCAL_MACHINESYSTEMCurrentControlSetServices
  • Next, look for two registry keys named “Winsock” and “Winsock2” and then right-click on each one of them and select the Export option.
  • Now copy the registry keys to a USB drive and then copy the keys on the PC in excellent condition.
  • Then double click on each one of them and it will install the WINSOCK keys.
Read More
Choose what application will load on startup
Hello everyone and welcome to another great tutorial from errortools.com I hope everyone is feeling great and that you are prepared to boost the performance of your computer. This time we will speed up Windows startup time and overall performance by eliminating startup programs that we don't need and do not use. Microsoft itself and some application developers tend to have some applications or some services always active and set to be loaded on Windows startup. If you want to change which of these applications are starting up with your Windows and change them, follow this easy guide and you will be speeding up your Windows in no time. First thing is to open a task manager, fastest and most direct way of doing this is with a keyboard combination of CTRL + SHIFT + ESC keyboard with ctrl shift and esc markedWhen Task Manager opens, click on the startup tab on top. task manager startup tabOnce you click on startup you will get a list of applications that are set to be started when Windows is booted. startup applicationsYou can now click on the application and then click on disable on the bottom button, the application status will update in task manager to disabled and it will not be booted anymore when Windows starts. In this same manner, you can enable back some applications if you changed your mind about them. Please note that some applications are using some services and must have them running or they will not work properly. The best practice is to disable applications you are positive you will not use or use rarely so you do not want them to slow down Windows.
Read More
1 2 3 162
Logo
Copyright © 2022, ErrorTools. All Rights Reserved
Trademarks: Microsoft Windows logos are registered trademarks of Microsoft. Disclaimer: ErrorTools.com is not affiliated with Microsoft, nor claim direct affiliation.
The information on this page is provided for information purposes only.
DMCA.com Protection Status