Fake Windows 11 installers come with malware

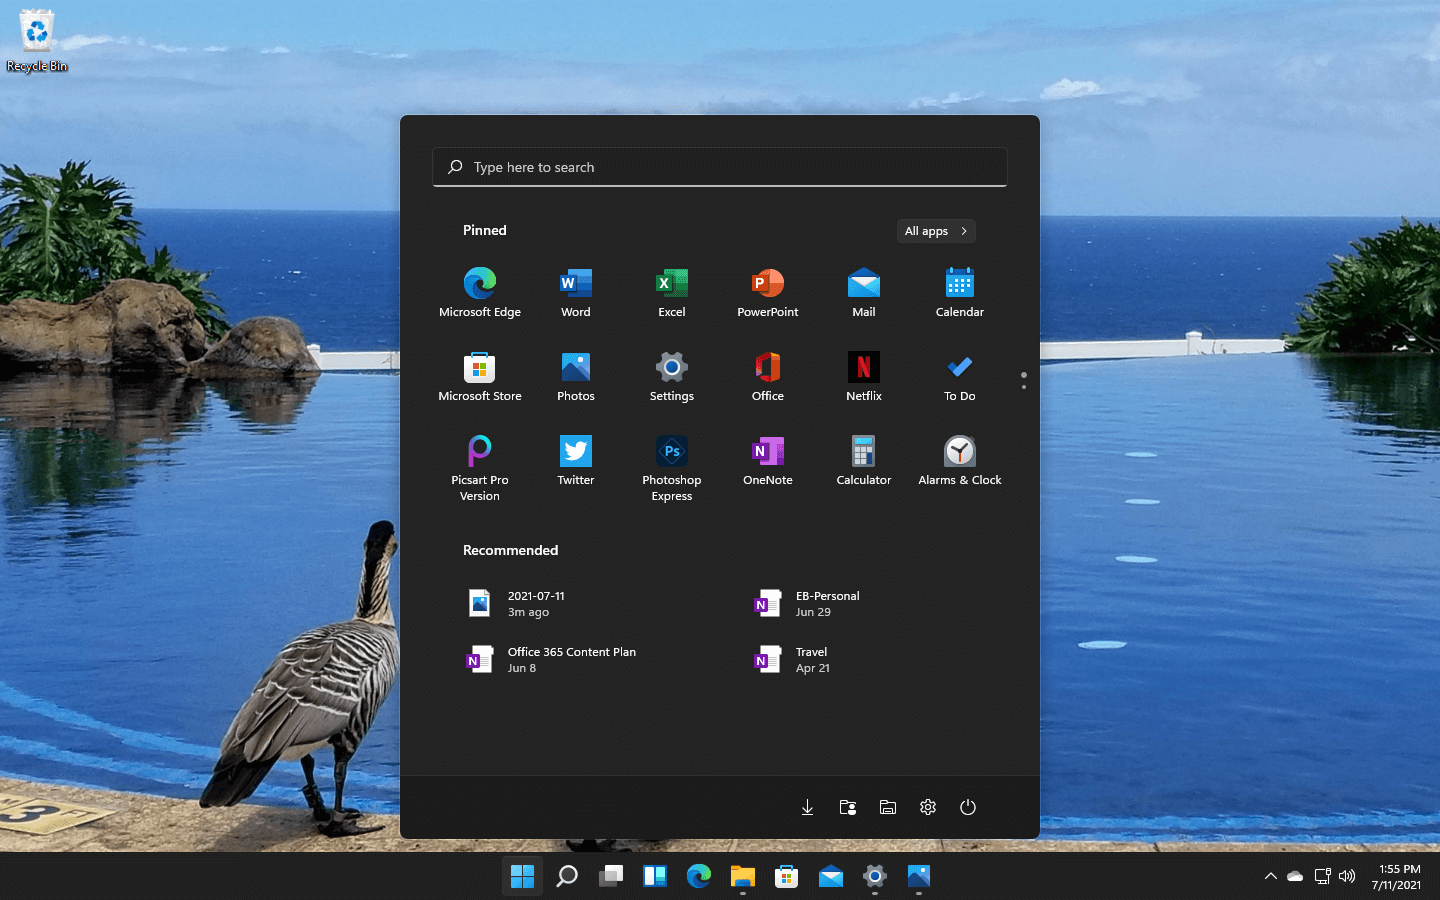
Being in the Microsoft Windows insider program will let you get a hands-on new Windows 11, but some people just want Windows 11 without being in the insider program.

Well, people beware! It was detected that some groups have been releasing fake Windows 11 installers with malware into them.

There’s one malicious file called 86307_windows 11 builds 21996.1 x64 + activator.exe. Based on the filename, one might guess that it includes Windows 11 build 21996.1, and on top of that, there’s something in it that will automatically activate Windows for you. It comes in at 1.75GB, so for some people, that might seem reasonable. It starts out looking like a normal installer, and then there’s a second installer that calls itself a download manager. If you accept the nonsense agreement that’s included, you get a bunch of malware.

This is just one example of malicious installers running amok internet, but there are more of them with different software placed inside. Malware can be anything from adware to a Trojan virus. The adware usually isn’t super dangerous. It’s just malware that’s meant to inject your PC with advertisements. Viruses can be more of an issue, and they can be harder to get rid of if your machine is infected.

Windows Defender does a good job of getting rid of this stuff. The only problem is that if you’re downloading Windows 11 from shady sources, you’re probably already set to click through the dozen or so warnings that pop up telling you not to install it.

The solution will be to get Windows from a trusted source of roll inside the insider program and get it from Microsoft directly.

If you like to learn and find out more about various Windows errors, and how to repair them go to our vast archive or use search to find articles that will explain and help you in solving your issue.
However, if you prefer to do things fast and with automatization then we are proposing to use an automated solution for your issues. The application that we are recommending is Advanced System Repair Pro
Advanced System Repair utilizes multiple tools all in one to give you a quick, simple, reliable, and very thorough diagnosis of your PC. It brings you all the tools you need in one program to clean, fix, protect, optimize and boost your PC!
1-Click Maintenance
All the tools to make it simple and easy! It's like having a professional technician at the click of a mouse.

Junk Cleaner
Keeping your computer free from unnecessary clutter also helps make your computer last longer. Like any other machine, if you keep it clean and take care of it, it will serve you better for longer!

Optimize background apps
Optimize applications background activity with the built-in Application Optimizer feature.

Disk Defrag
With a simple 1-click, Advanced System Repair speeds up your PC by assembling fragmented files on your machine and organizing them more efficiently.

Malware Removal
Finds and removes all types of harmful malware including trojans, worms, bots, adware, spyware, PUPs, and more!

Privacy Cleaner
The all-in-one privacy suite to Clean Your Tracks & Protect Your Privacy! Make your computer safe, secure, and more efficient!

System Tweak/Optimizer
ASR will analyze your complete system and settings to adjust your PC to function at its maximum performance.

Registry Cleaner
Over time, as you install and uninstall applications, the registry can become cluttered with old entries and broken settings which can result in program crashes, and annoying messages and slow the computer down.
Visit our Advanced System Repair Pro Download page to inform yourself about all the benefits of this software and get a free trial copy of it.
advanced system repair pro

Advanced System Repair Pro

One-click automated PC repair solution
ASR logo
With Advanced System Repair Pro you can easily
Replace damaged files
Restore performance
Free disk space
Remove Malware
Protects WEB browser
Remove Viruses
Stop PC freezing
DOWNLOAD
Privacy Policy | Terms of Use | Uinstall
Advanced System Repair Pro is compatible with all versions of Microsoft Windows including Windows 11

Share this article:

You might also like

Merge or Delete an OEM Partition in Windows
OEM Partition, also known as System Reserved Partition, is placed by the OEM to help users recover their computers or bring back the original state of the computer when it was bought. If you’ve observed that a part of your hard drive says “Healthy (OEM partition)” in the Disk Management and it occupies space in GBs, then this means that it’s normal and there’s nothing to worry about except that part of the storage space is not available and even when you right-click on it, the only thing it displays is the Help menu. Thus, in this guide, you will be guided on how you can merge as well as delete an OEM partition in your Windows 10 computer. Since the Disk Management tool in Windows won’t let you merge or delete the OEM partition, you can just use the built-in command-line tool known as Diskpart. Note that you have to be extra careful when you run the commands as it could mess your computer up and before you proceed with the instructions provided below, make sure that you create a System Restore point first. Once you have that covered, follow the instructions below. Step 1: Tap the Win + R keys to open the Run dialog box and type “cmd” in the field and tap Enter to open the Command Prompt. Step 2: Next, execute this command to launch the Diskpart tool: diskpart Step 3: Execute this second command to view the list of the disks in your computer: list disk Step 4: Now select the disk you want to manage by executing this command: select disk x Note: In the command above, replace “x” with the letter of your disk. Step 5: After that, execute this command to display all the volumes or partitions: list partition Step 6: Now execute this command to select the partition you want to delete: select partition x Note: You have to replace “x” with the partition you want to delete. Step 7: Once done, execute this command to delete the selected partition: delete partition override Step 8: Afterwards, execute this command to merge the OEM partition with the adjoining value: Extend Note: if you only want to merge part of the partition, you need to use this command “extend [size=<size>]”. For instance, you want to extend its size by 5GB, then you need to type “Extend size=5000”. The size you set is the size you select from the OEM partition. This will extend the selected volume by size in MB or megabytes.
Read More
Easy Remove PCPerformer From Windows

PC Performer is a registry cleaner made by PerformerSoft. The purpose of this program is to remove redundant items from the Windows registry. Registry cleaners remove broken links, missing references within the Windows registry. PC performer is designed to automatically optimize your registry and clean it up.

PC Performer adds registry entries for the current user that allow it to run automatically each time the system is rebooted. It adds a scheduled task to Windows Task Scheduler in order to run at various times. The software connects to the internet, therefore it creates a Windows Firewall exception that allows it to connect without interference. Multiple anti-virus programs detected this software as Malware, it typically comes bundled with other software or is distributed through a pay-per-install bundle.

About Potentially Unwanted Applications

People have encountered it – you download and install a piece of free software application, you then see some unwanted applications on your computer or discover a strange toolbar has been added to your browser. You didn’t install them, so how did they turn up? These unwanted programs, technically known as Potentially Unwanted Programs (PUPs), often come bundled along with other software and install themselves on user’s PC without their knowledge. They perhaps might not look like viruses to some individuals, but they can produce major annoyances and bring about serious trouble for users. The idea of PUP was coined to define this downloadable crapware as something other than malicious software. Much like malware, PUPs create problems when downloaded and placed on your computer, but what makes a PUP different is that you provide consent to download it – the fact is vastly different – the software installation bundle actually tricks you into agreeing to the installation. Still, there isn’t any doubt that PUPs are still bad news for computer users as they can be incredibly damaging to your computer in lots of ways.

What do PUPs look like?

The unwanted software programs after installation display loads of annoying pop-up adverts, create fake alerts, and quite often it even pushes the user to buy the software. Likewise, the majority of free software applications these days come with quite a few unwanted add-ons; in most cases a web browser toolbar or browser modification such as a homepage hijacker. Not only they needlessly use up space on your screen, but toolbars can also manipulate search engine results, watch your browsing activities, decrease your web browser’s performance, and decelerate your net connection to a crawl. PUPs employ aggressive distribution techniques to get in your computer. Some might include information gathering program code that could collect and send your private information back to third parties. Due to this unwanted program, your application may freeze, your security protections may get disabled that might leave the computer susceptible, your system may get ruined, and the list goes on and on.

Tips on how to prevent ‘crapware’

• Read cautiously before agreeing to the license agreement as it may have a clause about PUPs. • Usually, when setting up a program you will get two options, ‘Standard Installation (recommended)’ and ‘Custom Installation’. Don’t select ‘Standard’ as PUPs could be installed that way! • Use good anti-malware software. Try Safebytes Anti-Malware which will find PUPs and handle them as malware by flagging them for removal. • Be alert when you install freeware, open-source software, or shareware. Avoid downloading browser extensions and programs you are not familiar with. • Only download applications from the original providers’ sites. Avoid download portals as they use their own download manager to pack additional programs with the initial download.

What you can do if Virus Stops You From Downloading Or Installing Anything?

Malware could potentially cause several kinds of damage to computer systems, networks, and data. Certain malware goes to great lengths to stop you from installing anything on your PC, especially antivirus applications. If you’re reading this right now, you have perhaps recognized that a malware infection is a reason for your blocked web traffic. So what to do if you need to install an antivirus program like Safebytes? There are a few actions you can take to get around this problem.

Eliminate malware in Safe Mode

If the virus is set to load automatically when Microsoft Windows starts, getting into Safe Mode could very well block the attempt. Since just the bare minimum programs and services start-up in safe mode, there are hardly any reasons for issues to happen. The following are the steps you should follow to remove malware in Safemode. 1) At power on/start-up, hit the F8 key in 1-second intervals. This will bring up the Advanced Boot Options menu. 2) Select Safe Mode with Networking using arrow keys and hit ENTER. 3) Once you get into this mode, you should have an internet connection again. Now, obtain the malware removal application you need by using the browser. To install the software, follow the directions in the installation wizard. 4) After installation, do a complete scan and let the software delete the threats it detects.

Switch to an alternate browser

Web-based viruses can be environment-specific, targeting a particular web browser or attacking particular versions of the browser. The best solution to overcome this issue is to opt for a browser that is well known for its security features. Firefox contains built-in Phishing and Malware Protection to keep you safe online.

Install and run anti-virus from a USB drive

To successfully eliminate the malware, you will need to approach the issue of installing an anti-virus program on the infected PC from a different angle. Adopt these measures to employ a USB flash drive to fix your corrupted computer. 1) Use another virus-free computer to download Safebytes Anti-Malware. 2) Insert the pen drive into the clean computer. 3) Double-click the Setup icon of the antivirus program to run the Installation Wizard. 4) When asked, choose the location of the pen drive as the place where you would like to put the software files. Follow the on-screen instructions to complete the installation process. 5) Now, insert the pen drive into the infected computer. 6) Double-click the EXE file to open the Safebytes program right from the flash drive. 7) Click “Scan Now” to run a scan on the infected computer for malware.

Highlights of SafeBytes Anti-Malware

Do you want to install the best anti-malware software program for your computer system? There are various applications in the market that comes in paid and free versions for Microsoft Windows systems. A few of them are great and some are scamware applications that pretend as legit anti-malware software waiting around to wreak havoc on your computer. While looking for anti-malware software, select one which gives dependable, efficient, and full protection against all known computer viruses and malware. On the list of recommended software is SafeBytes Anti-Malware. SafeBytes carries a really good track record of top-quality service, and clients are happy with it. SafeBytes anti-malware is a highly effective and easy-to-use protection tool that is suitable for users of all levels of computer literacy. With its cutting-edge technology, this application will let you remove multiples types of malware which include viruses, worms, PUPs, trojans, ransomware, adware, and browser hijackers. SafeBytes anti-malware provides an array of advanced features which sets it apart from all others. Listed here are a few of the great ones: Anti-Malware Protection: Built on a highly acclaimed anti-virus engine, this malware removal tool is able to detect and remove many obstinate malware threats such as browser hijackers, potentially unwanted programs, and ransomware that other typical anti-virus programs will miss. Real-time Active Protection: SafeBytes offers an entirely hands-free real-time protection that is set to check, prevent and remove all threats at its first encounter. It’ll check your PC for suspicious activity continuously and shields your PC from unauthorized access. Faster Scan: SafeBytes’s virus scan engine is one of the quickest and most efficient in the industry. Its targeted scanning seriously increases the catch rate for malware that is embedded in various computer files. Safe Browsing: Safebytes assigns all sites a unique safety ranking that helps you to have an idea of whether the webpage you’re going to visit is safe to view or known to be a phishing site. Low CPU Usage: SafeBytes is renowned for its minimal influence on processing power and great detection rate of countless threats. It runs silently and efficiently in the background so you’re free to use your computer at full power all the time. 24/7 Customer Support: SafeBytes provides 24/7 technical support, automatic maintenance, and software upgrades for the best user experience.

Technical Details and Manual Removal (Advanced Users)

If you wish to manually remove PCPerformer without the use of an automated tool, it may be possible to do so by removing the program from the Windows Add/Remove Programs menu, or in cases of browser extensions, going to the browsers AddOn/Extension manager and removing it. You will likely also want to reset your browser. To ensure the complete removal, manually check your hard drive and registry for all of the following and remove or reset the values accordingly. Please note that this is for advanced users only and may be difficult, with incorrect file removal causing additional PC errors. In addition, some malware is capable of replicating or preventing deletion. Doing this in Safe Mode is advised.

The following files, folders, and registry entries are created or modified by PCPerformer

Files: File at LOCALAPPDATAPCPerformerSetupPCPerformerSetup.exe. File at PROGRAMFILESPC PerformerPCPerformer.exe. File at PROGRAMFILESPC PerformerPSCheckUp.exe. File at PROGRAMFILESPC PerformerRegistryDefrag.exe. File at WINDIRTasksPC Performer Daily Check.job. File at WINDIRTasksPC Performer Scheduled Scan.job. Registry: Key PC Performer at HKEY_CURRENT_USERSoftwarePerformerSoft. Key PC Performer at HKEY_LOCAL_MACHINESOFTWAREPerformerSoft. Key PCPerformer_is1 at HKEY_LOCAL_MACHINESoftwareMicrosoftWindowsCurrentVersionUninstall.
Read More
Disable Windows 11 animations for fast work
windows 11 animationsWindows 11 has some cool animations including fading effects which make working in it feels nice and futuristic but the cost of this is that there is a slight delay to certain actions performed. If you want the snap fast feature in Windows 11 and do not care about this eye candy there is an easy way to turn animations off inside it.
  • First, open Windows Settings by pressing ⊞ Windows + I on your keyboard
  • Alternatively, click on Start, search for Settings, and then click its icon.
  • When Settings appears, look in the sidebar and select Accessibility.
  • In Accessibility settings, click on Visual Effects.
  • In Visual Effects, switch Animation Effects to Off.
That’s it, changes will be applied automatically, you can close settings and continue working inside Windows 11 without animations and fades. You can always switch animations back On via settings if you change your mind.
Read More
Can’t download anything on your Windows PC
Recently, a number of users reported that they weren’t able to download anything from the internet after they’ve updated their Windows 10 computers. This kind of problem occurs because of some Internet options settings located in the Control Panel. Based on the reports, this issue has been known to occur in all kinds of browsers and not only on Microsoft Edge. Not being able to download anything from the internet is a huge problem since almost everything is wrapped around the internet. To resolve this problem, here are some suggestions that you can try.

Option 1 – Temporarily disable Firewall and third-party antivirus

Firewall and antivirus programs are known to block files the instant it detects a threat to the system. However, there are some cases when it can also block a file even when it’s a safe one. Thus, your antivirus or firewall programs might be the reason why you can’t download anything on your Windows 10 computer. To isolate the issue, you need to temporarily disable both the Firewall and antivirus programs and then check if you can now download anything from the internet. Do not forget to enable them again as disabling them can leave your computer vulnerable to cyber threats.

Option 2 – Try changing the Internet Options settings

According to users, changing the Internet Options settings helped them resolve the problem. There are times when the drive location in your Internet Options settings is not the system drive, chances are, it will cause the error to pop up which is why you need to make sure that it’s correct.
  • Go to Control Panel and search for Internet Options and open it.
  • Next, go to the General tab and click on Settings.
  • From there, check if the drive location is “C:”. If it is, close the window, otherwise, click on the “Move folder…” option, and then select your preferred folder under drive C: and click OK.
  • Now restart your computer and check if changing the Internet Options settings helped in fixing the problem.

Option 3 – Try clearing browser data

There are instances when browser data can cause issues in downloading files online. And so you can try to clear your browser’s data. This might be a very basic solution but oftentimes it works in fixing this kind of error. Follow the steps below to clear the data in your browser.
  • Open your Google Chrome browser.
  • After that, tap the Ctrl + H keys. Doing so will open a new panel that allows you to delete the browsing history and other data in your browser.
  • Now select every checkbox that you see and click on the Clear browsing data button.
  • Then restart your Chrome browser and check if you can now open any website or not.

Option 4 – Get rid of any conflicting browser extensions

  • Open Chrome and press Alt + F keys.
  • Go to More tools and click Extensions to look for any suspicious browser extensions or toolbars.
  • Click the Recycle bin and select Remove.
  • Restart Chrome and press Alt + F keys again.
  • Proceed to On Startup and mark Open a specific page or set of pages.
  • To check if the browser hijacker is still active, click Set pages, if it is active, overwrite the URL.

Option 5 – Try to remove Proxy

Removing the Proxy might also help you in fixing the connection issue in Cortana. Here’s how you can do it:
  • Tap the Win + R keys to open the Run dialog box.
  • Then type “inetcpl.cpl” in the field and hit Enter to pull up the Internet Properties.
  • After that, go to the Connections tab and select the LAN settings.
  • From there. Uncheck the “Use a Proxy Server” option for your LAN and then make sure that the “Automatically detect settings” option is checked.
  • Now click the OK and the Apply buttons.
  • Restart your PC.
Note: If you are using a third-party proxy service, you have to disable it.

Option 6 – Try reinstalling your browser

If none of the options given above worked in fixing the problem, you can try to reinstall your browser. There are times when the browser wasn’t installed properly which can cause several issues like not being able to download anything from the web. Thus, reinstall your browser and see if that helps.
Read More
Advice when you have broken key on a keyboard
Having any kind of hardware malfunction is not a pleasant place to be. Even a minor malfunction like a broken key on a keyword can introduce certain bad feelings, frustration, and difficulty in working. So, what are your options when the dreaded key on the keyboard breaks? From my point of view, there are three options that could be accomplished in order to continue working.
  1. Replace broken keyboard with the new one

    Yes, the best and most expensive solution, just bite the bullet and buy a new working one.
  2. Replace key with another key

    So you broke some key, if you can replace it with another key which you do not use, this option will work only tho if the broken key is not Space bar, enter or similar with specific shape and size.
  3. Remap key

    use Windows power tools to remap key function to another working key
There you go, three options to continue working with a broken key on the keyboard.
Read More
Fix 0xC000007B STATUS INVALID IMAGE FORMAT
If you are trying to open a program or a game but you suddenly see a dialog box with a message stating that the application was unable to start correctly along with the Error Code 0xC000007B , STATUS INVALID IMAGE FORMAT then this indicates that the application is not compatible with the architecture of your Windows 10 computer or is missing dependencies. Although error code 0xC000007B can also occur with other various programs, the STATUS_INVALID_IMAGE_FORMAT error code also means that when you try to run an application that’s designed to run on a 64-bit system and hence gets into a termination state. In addition, if you are also pointed to the NTStatus.h file then it means that the error might be caused by some file corruption. Here’s the full context of the error message:
“0xC000007B | STATUS_INVALID_IMAGE_FORMAT | {Bad Image} %hs is either not designed to run on Windows or it contains an error. Try installing the program again using the original installation media or contact your system administrator or the software vendor for support.”
When you see this error message, the first thing you can do is to click on OK to close the application and then try installing the media again to see if it fixes the issue. If not, then you can check out the suggestions given below.

Option 1 – Try installing the application with admin privileges

The first thing you can do to fix the error is to restart your Windows 10 computer and then try installing the application again and this time with admin privileges. Just right-click on the application and select the “Run as Administrator” option. And if your account is a regular one, you need to make sure to ask an admin to help you in installing the application by entering the password when you are prompted to do so.

Option 2 – Install and update Dependencies

There are times when programs and applications need to have drivers and supporting software installed for them to properly work. Although the installation usually takes care of it, it’s time for you to do some manual checks especially if you are getting this issue of abnormal program termination.

1. Install some qualified drivers

A number of high-end games and applications need to have correct and valid drivers for them to work. They just don’t work with general drivers though. Microsoft has this Windows Hardware Quality Labs testing also known as WHQL testing which makes sure that drivers meet the correct experience and pass through the proper testing before certification. Thus, when installing drivers, you need to ensure that they are qualified drivers for your Windows 10 PC.

2. Download and install or update DirectX

As you know, Microsoft DirectX is a suite of technologies developed by Microsoft to provide hardware acceleration for heavy multimedia applications like HD videos and 3D games. Since you are using Windows 10, you have the DirectX 12 version while the earlier Windows versions use the DirectX 11 version.

3. Install the Microsoft DirectX End-user runtime

The Microsoft DirectX end-user runtime gives updates to version 9.0c as well as previous versions of DirectX. To install it, click on this link and download it.

4. Update or install the .NET framework

The .NET framework is used by games and applications during development which means that without the runtime files that are installed in your computer, it definitely won’t work. Thus, you need to install or update this framework. You can also use the .NET setup verification tool to verify it.

Option 3 – Try running the System File Checker Scan

The SFC or System File Checker scan could detect and automatically repair damaged system files that could be causing the Error Code 0xC000007B , STATUS INVALID IMAGE FORMAT error. SFC is a built-in command utility that helps in restoring corrupted files as well as missing files. It replaces bad and corrupted system files with good system files. To run the SFC command, follow the steps given below.
  • Tap Win + R to launch Run.
  • Type in cmd in the field and tap Enter.
  • After opening Command Prompt, type in sfc /scannow
The command will start a system scan which will take a few whiles before it finishes. Once it’s done, you could get the following results:
  1. Windows Resource Protection did not find any integrity violations.
  2. Windows Resource Protection found corrupt files and successfully repaired them.
  3. Windows Resource Protection found corrupt files but was unable to fix some of them.
Read More
Setting default applications in Windows 11
Setting default applications in Windows 11
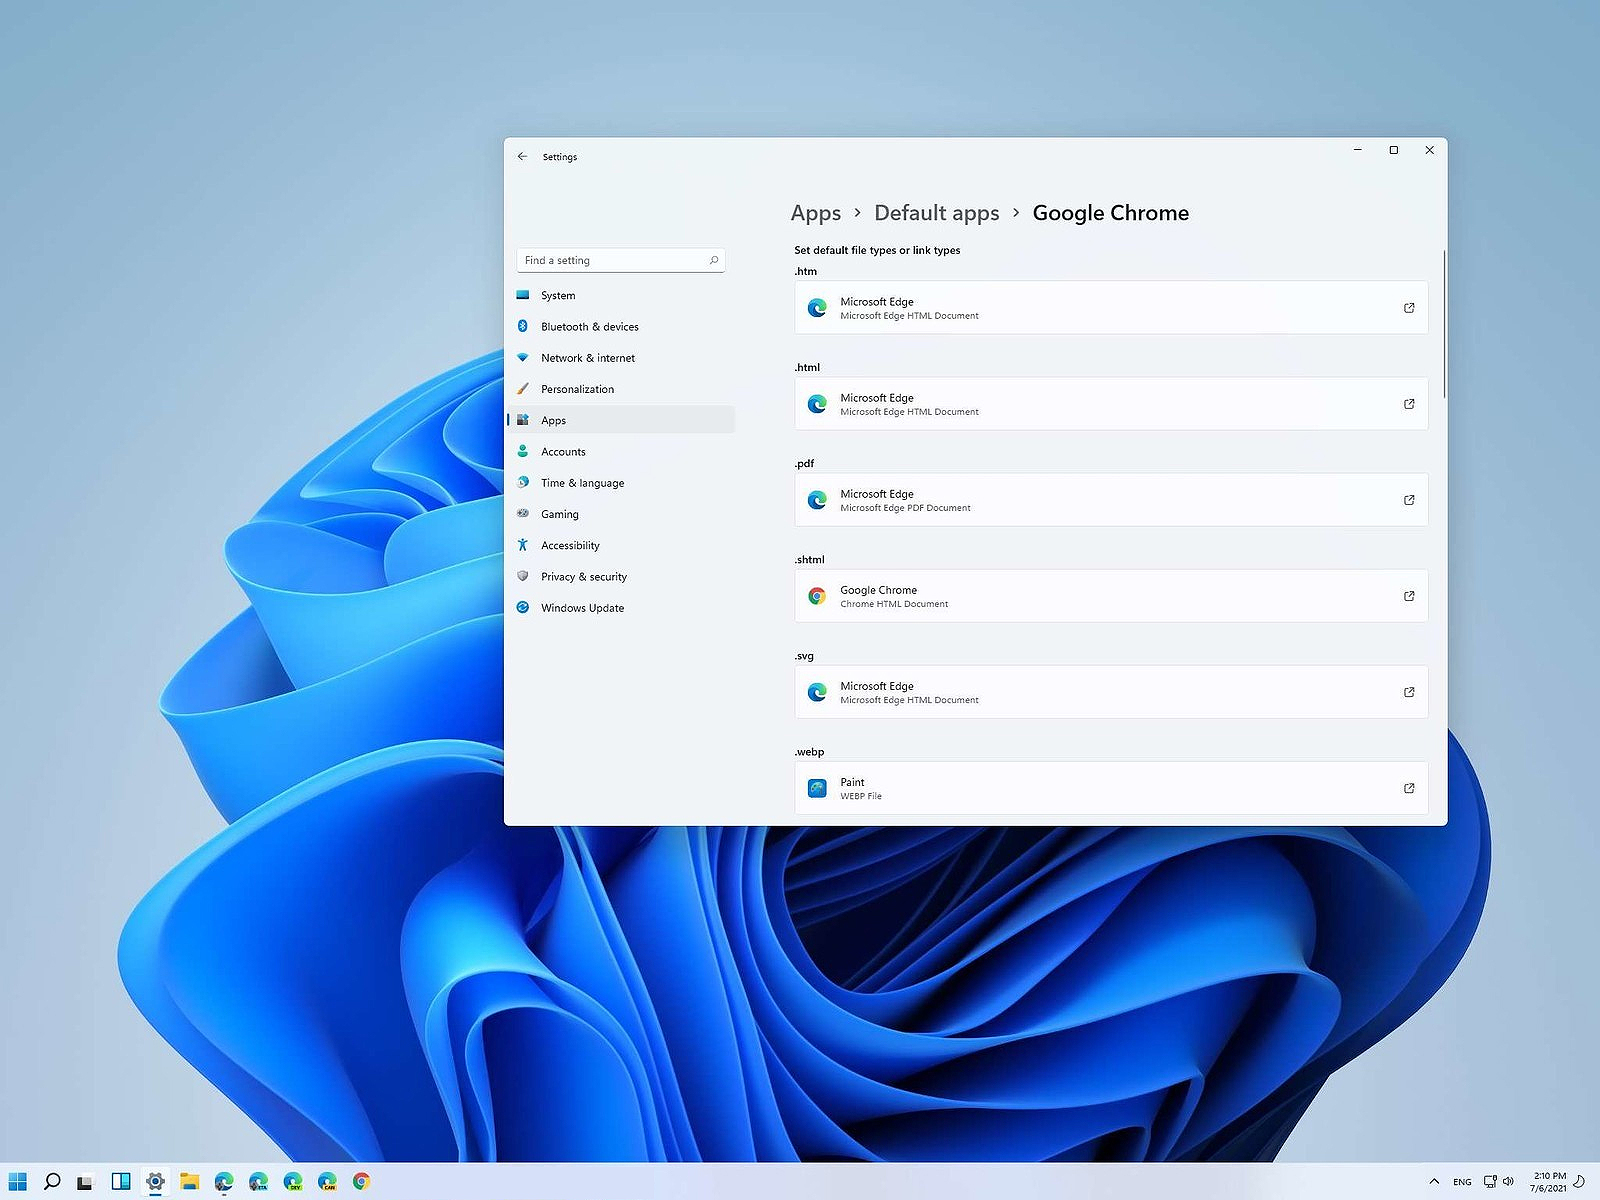
Same as in previous Windows versions, Windows 11 will also use certain applications as default ones for opening certain file types and file extensions. And yes, same as in previous versions it will come preconfigured for certain file types and associated applications like for example photos for pictures. Of course, users usually have their own favorite applications for certain file types and much more prefer to open them inside the application of their choice instead of the default one. We can change the default application like in previous Windows versions but this time there are two ways and overall more control of this process. Windows 11 has settings for choosing default file type applications and default file extension applications giving you more control of this process.

The opening setting for apps

Whatever you wish to change default application or default extension application you will need to open settings for default application. Follow steps to quickly go into it.
  1. Press ⊞ WINDOWS + I to open settings
  2. Select Apps on left
  3. On the right part select Default Apps
Now you are in settings for choosing default applications

Choosing default application by file type extension

This is considering by Microsoft as a typical way to set default applications inside Windows 11. Once you are inside the settings app there is a box labeled Enter a file type or link type. Inside the search box, type in file extension that you wish to associate the application with like .JPG, .TXT, or other. If the file extension is not associated with any application you will be presented with a Choose a Default button, if however, the file extension is already associated with the app, you will need to click on the app box itself. In any case, a pop-up will appear and ask How do you want to open YOUR FILE EXTENSION files from now on? Choose Application from the list of presented ones and click on OK.

Choosing default file type

Another method is to select the default application by file type selecting application for it. In the settings screen, under the search box, you will have a list of installed applications. Choose the application that you would like to associate a file type with and click on it. On the next details screen scroll down and select the file type that you want to associate with the selected application and click on OK.

Other/third method

There is also the third method for choosing the default application for file type but it includes some surfing on your hard drive and it can be more time-consuming for first-time settings. But it is fairly quick when you need to only use it once on some new file type (for example you have a new application installed and want to switch just one file type extension to that application). Locate the file that you want to associate with the application and right-click on it. Select Open With from the menu and then Choose Another App. Pop up will appear, select the application that you would like to use, and check the box beside Always use this app to open CHOOSEN EXTENSION files followed by clicking on the OK button.
Read More
How to Repair Windows 10 Upgrade Error Code 0x80070070 – 0x50011

Repair Windows 10 Upgrade Error Code 0x80070070 – 0x50011

Code 0x80070070 – 0x50011 – What is it?

If you’ve recently tried installing Windows 10, you might have encountered error code 0x80070070 – 0x50011 or its alternatives (error code 0x80070070 – 0x50012 and 0x80070070 – 0x60000). Whatever formats this error code presents itself in, it's usually accompanied by a barrage of other errors, as underscored on Microsoft’s official site. If you’ve encountered this error code, it simply means that your computer system might not have the required or required space to install the upgrade.

Likely, if you’ve experienced error code 0x80070070 – 0x50011, it’ll likely appear in the formats highlighted below:

  • 0x80070070 – 0x50011
  • 0x80070070 – 0x50012
  • 0x80070070 – 0x60000

Solution

Restoro box imageError Causes

At present, this Windows 10 upgrade error is triggered or caused by various factors:

  • Lack of computer resources or space
  • Virus/malware infestation
  • A clogged registry

Further Information and Manual Repair

Whilst new, not much information has been propagated regarding this error. However, there are some manual / practical steps you can take to have your Windows 10 upgrade up and running. Since the primary aspect of solving this problem is to make space on your computer system, here are some ways in which you can do so manually.

Method 1: Get more space

  • Check the current space on your computer  

Before making attempts to create space on your computer, it’s vital that you check to decipher how much free space you have available.

  • Make use of Disk Clean-up 

Since there’s a free service available on your computer to create space, why not use it and save time? If the Disk Cleanup tool is employed regularly, this will free up hard drive space and optimize your computer to work better.

  • Remove unwanted desktop apps 

There are several apps lying around on your computer that you simply don’t use, uninstall those and make space to elude error code 0x80070070 – 0x50011 or its alternatives (Code 0x80070070 – 0x50012, Code 0x80070070 – 0x60000)

  • Remove or archive files  

If you have lots of photos, media, documents (files), videos, etc, that you don’t use or will only need in the future, try cloud storage. You’ll still have those files within your possession but just not in a physical location. However, they’re still accessible. Another suggestion: If you use programs such as One Drive or Google Drive for desktop, limit your use to only the online application.

  • Add more storage

If you’re not able to implement the above steps to clear some space to accommodate your Windows 10 upgrade due to error code 0x80070070 – 0x50011, acquire more storage. This can be expanded by incorporating storage devices such as USB flash drives, CDs, cloud storage, and SD Cards.

Method 2: Scan your computer for virus/malware

If you regularly download stuff, especially software on the Internet from ‘not so secured’ sites, you might have picked up something. You might have downloaded malware or virus (along with other legit programs).

To resolve this issue, it’s advised and very important that you download a powerful antivirus and perform a complete scan of your computer system. After you’ve detected and removed the suspected malware/virus, you’ll then be able to eliminate error code 0x80070070 – 0x50011 and resume with your Windows 10 upgrade.

Method 3: Clean up your computer’s registry

If you do not clean your computer’s registry often, it could become congested or clogged by .XML files, junk files, and cookies. To resolve this problem, clean your registry by using a powerful and user-friendly tool to clean up the problem.

Click here to download Restoro.

Read More
Fix Error 1310, Error writing to file
If you were trying to install a program on your Windows 10 computer but encounter an error instead that says, “Error 1310, Error writing to file: <PATH>, Verify that you have access to that directory” then read on as this post will guide you on how you can fix it. This kind is a fairly common type of error encountered by many Windows users. You can get this error when you try to install certain programs like Excel, AutoCAD, Adobe Photoshop, and some other Adobe products on Windows. One of the most likely causes for this error is that the required files or location is already used by some other software which means that Windows finds that you are trying to overwrite a software that is already installed. Aside from that, it could also occur if the program installer does not have access to write to that directory. To fix Error 1310, here are some potential fixes that could help.

Option 1 – Clear up temporary or junk files

The error could be caused by some temporary or junk files in your computer and so you need to clear them up to fix the problem. You can achieve that using the Storage Sense feature.
  • Open Setting > System > Storage from the WinX Menu.
  • From there, you will see a list of all the local and connected storage devices along with the details on the free space. Make sure that Storage Sense is on.
  • Next, find a link that says “Free Up Space” and click it to open.
  • After that, a screen which is the built-in program in Windows 10 will appear and will scan your computer for the following junk files so you can free up disk space:
    • Windows Upgrade Log Files
    • The system created Windows Error Reporting Files
    • Thumbnails
    • Temporary Internet Files
    • Previous Windows Installation Files
    • Delivery Optimisation Files
    • DirectX Shader Cache
  • Choose the files you want to get rid of and then click on the remove files option. Note that you’ll have an idea of the total size as you select any of the junk files listed above.
  • Now go to the “Free Up Space Now” section and click the Clean Now button. This will get rid of all the temporary or junk files in your computer and should hopefully fix Error 1310.

Option 2 – Reinstall the program in a Clean Boot State

You can also troubleshoot Error 1310 in a Clean Boot state. It could be that there are some third-party applications in your computer that's preventing the program from getting installed and to isolate this possibility, you need to boot your computer in a Clean Boot State and then try installing the program again. Putting your computer in this state can help you identify which program is the culprit and thus isolates the problem. In a Clean Boot state, your computer will start using only the pre-selected minimal set of drivers and startup programs. Note that you have to disable and enable one process at a time.
  • Log onto your PC as an administrator.
  • Type in MSConfig in the Start Search to open the System Configuration utility.
  • From there, go to the General tab and click “Selective startup”.
  • Clear the “Load Startup items” check box and make sure that the “Load System Services” and “Use Original boot configuration” options are checked.
  • Next, click the Services tab and select the “Hide All Microsoft Services” check box.
  • Click Disable all.
  • Click on Apply/OK and restart your PC. (This will put your PC into a Clean Boot State. And configure Windows to use the usual startup, just simply undo the changes.)
  • After you’ve set your computer into a Clean Boot State, make sure that you’re signed in as administrator and then try to install the program again.

Option 3 – Try to unregister and re-register the Windows Installer Module

  • Tap the Win + R keys to open the Run dialog box.
  • Then type the “msiexec /unregister” command and hit Enter to unregister the Windows Installer Module.
  • Next, type the “msiexec /regserver” command and hit Enter to re-register the Windows Installer Module.
  • Now restart your computer and see if un-registering and re-registering the Windows Installer Module fixed the problem or not.

Option 4 – Take ownership of the location where you want to install the app

The next thing you can try to do is to take ownership of the particular folder as this worked for some users who experienced the same problem. But before you do that, you have to create a System Restore Point first, once that’s done, proceed to the given steps below.
  • First, locate the concerned folder and right-click on it then select Properties.
  • Next, click on the Edit button in the Properties window and click OK to confirm if you got a User Account Control elevation request.
  • After that, select user/group from the permission windows or click on the Add button to add another user or group. It would be best if you add “Everyone” to give permission.
  • Then check “Full Control” under the “Allow” column to assign full access rights control permissions.
  • Now edit the permission to Full Control for “Everyone”.
  • Click OK to save the changes made and then exit.
  • Finally, try to install the application again.
Read More
Disable widgets menu inside Windows 11
windows 11 widgets menu
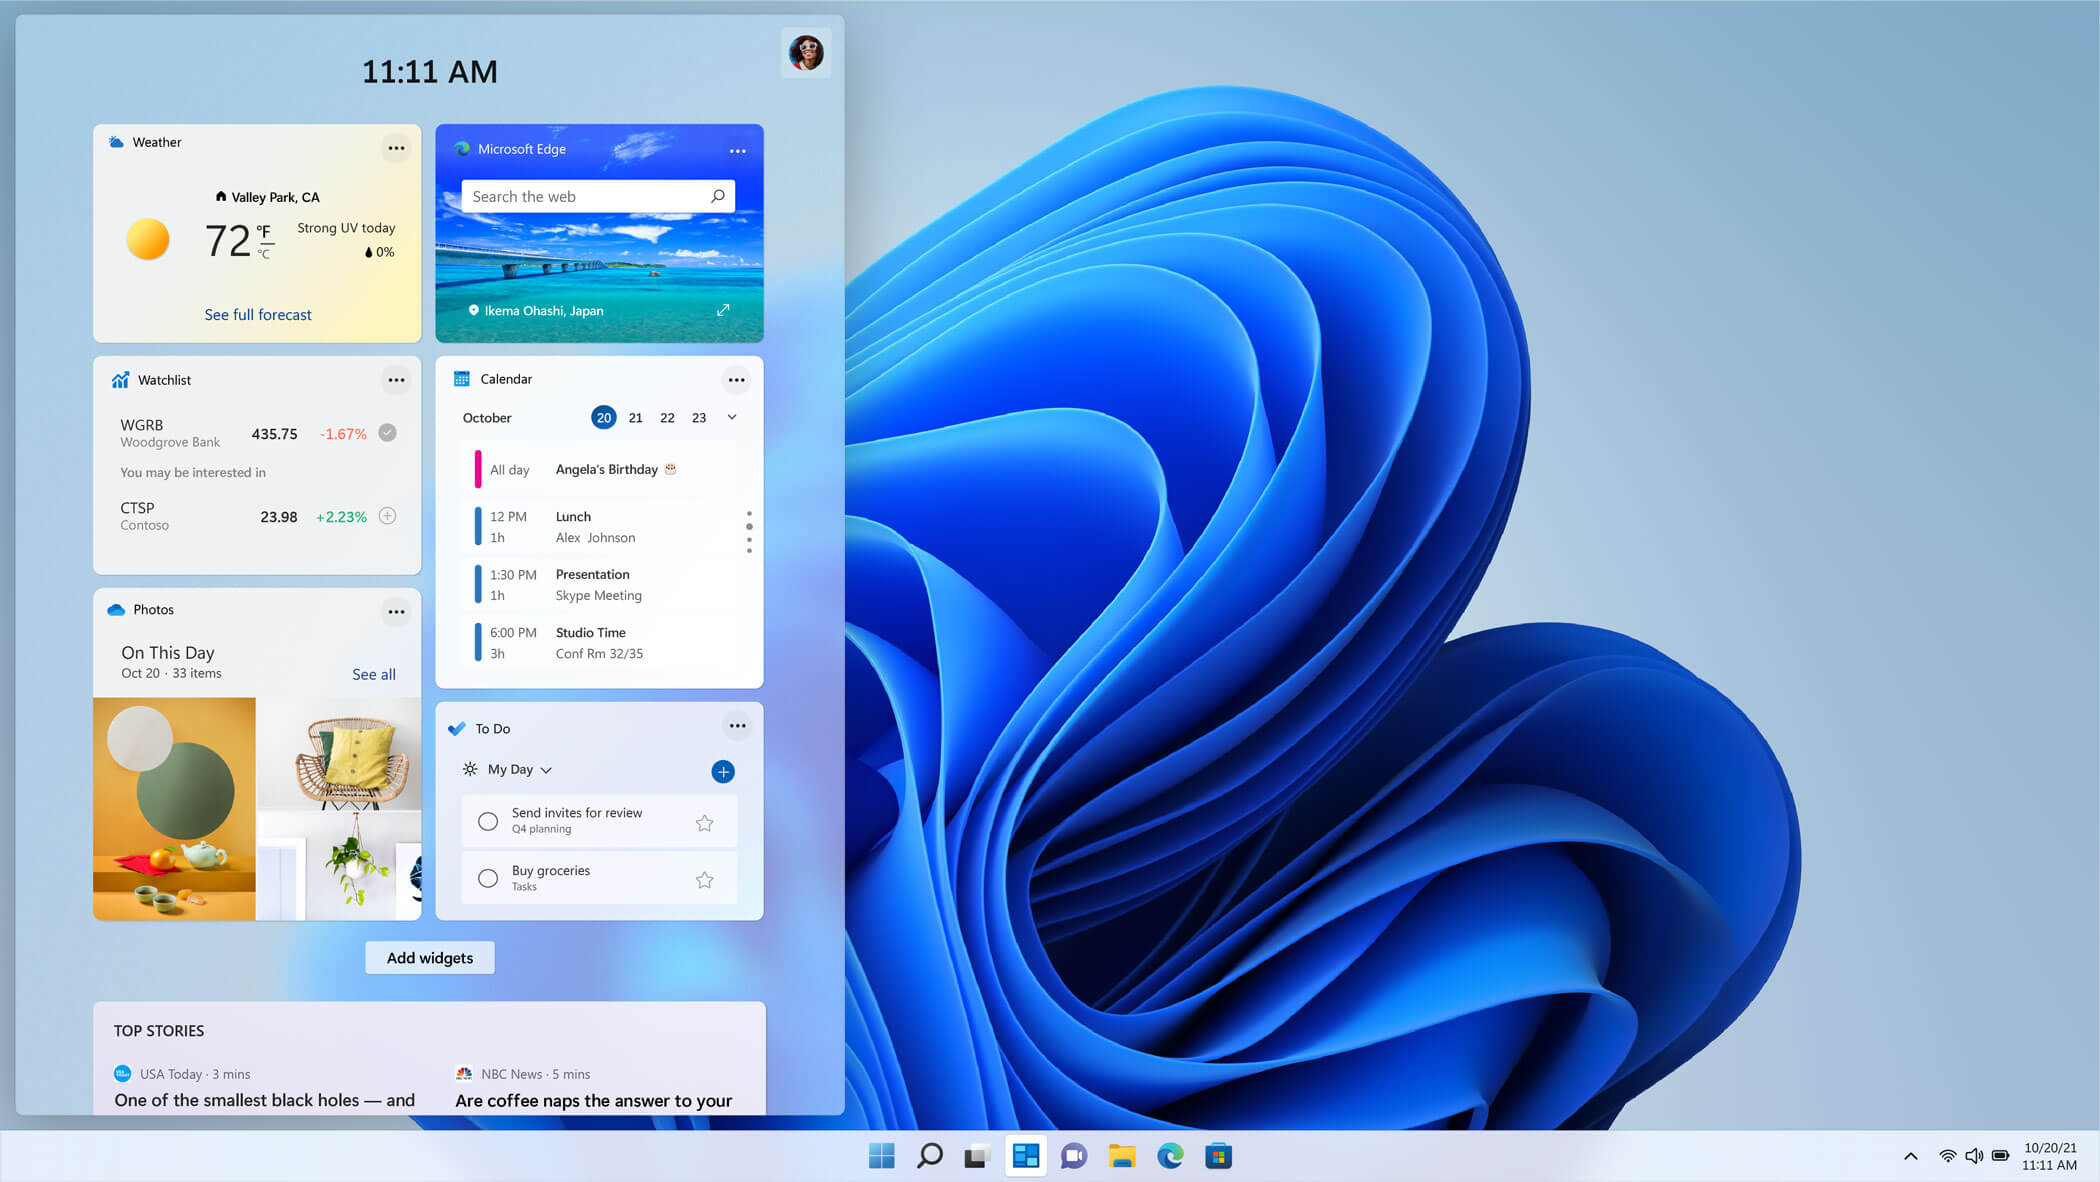
The new widget's menu inside Windows 11 is generally met with a positive attitude but there are still users which prefer not to have it. Luckily for them, Microsoft included a very easy way to turn the widgets menu on or off. Follow this easy guide to see how. Right-click on the widget button in the taskbar and click on Hide from Taskbar and that’s it Alternatively, you can also turn it off via the setting app. Go to the settings app and navigate to Personalization > Taskbar > Taskbar Items and flipping the switch beside Widgets to Off. Please note that both methods will only hide the button to toggle widgets menu, at the current state there is no really a way to actually turn it off, only hide it and make it not available to bring it up.
Read More
1 2 3 162
Logo
Copyright © 2022, ErrorTools. All Rights Reserved
Trademarks: Microsoft Windows logos are registered trademarks of Microsoft. Disclaimer: ErrorTools.com is not affiliated with Microsoft, nor claim direct affiliation.
The information on this page is provided for information purposes only.
DMCA.com Protection Status