Repair Windows 10 Error Code C19000101 - 2000B

Error Code C19000101 - 2000B on Windows 10– What is it?

Error Code C19000101 - 2000B is a Blue Screen of Death (BSOD) error encountered by Windows users in an attempt to upgrade their operating system from Windows 7 or Windows 8/8.1 to Windows 10. The system upgrade does not successfully finish and when the installation is resurrected, it fails then reverts back to the original operating system. More and more Windows users come across this error that may have been triggered by a few reasons to be discussed in this article.

Solution

Restoro box imageError Causes

Microsoft users can experience the BSOD error C19000101-2000B due to the following reasons:

  • There’s an incompatibility with the drivers
  • Antivirus software

Further Information and Manual Repair

In fixing error code C19000101-2000B, you can try doing it manually. Manual repair methods can offer users solutions effectively and efficiently, having to address the root causes and issues in relation to a number of Windows error codes. If properly implemented, these manual repair methods can help Windows users resolve problems at hand immediately. However, there are cases where the help of a Windows professional is necessary. In such instances, it would be best to consult a certified Windows expert or you can also try using a powerful automated tool whenever needed.

To be able to fix error code C19000101-2000B, implement the first method used in resolving error code 0xc000021a, then you can proceed with this first method:

Method One: Perform Clean-Boot

  1. Prior to performing an upgrade, you need to disable your antivirus. Or, better yet, uninstall it.
  2. Ensure that your PC name is simple without hyphens, periods, or dashes.
  3. Restart your device several times, then try again.
  4. Disable all USB devices such as a smart card reader.
  5. If you are using a SCSI hard disk, be sure to have the drivers ready and available for a storage device like a thumb drive to be connected. While on the Windows 10 setup, select the Custom Advanced Option then use the Load Driver command to load the right driver for the SCSI drive. If the setup still fails, try switching to an IDE-based hard disk.
  6. Launch a clean boot, restart your device, then try again.
  7. If you are upgrading to Windows 10 using the .ISO file, make sure to disconnect from your internet connection during setup. If your device is connected by Wi-Fi or through LAN, you need to disable both before attempting to run a  system upgrade again.
  8. Switch to a local account if you are connected to a domain.
  9. Ensure that all external devices such as USB keys, external hard drives, gaming controllers, or printers are not attached to your device.

If you are upgrading to Windows 10 using Windows Update, you can perform a manual repair using the next method.

Method Two: Upgrading Via Windows Update

  1. Make sure to disconnect from the Wi-Fi or LAN once the download reaches 100% before you proceed with the system upgrade.
  2. Press Windows + X to open the command prompt window as an administrator.
  3. Stop the Windows Update service, BITS, MSI Installer, and Cryptographic by inputting the following commands one by one, hitting Enter after every command:

Net stop wuauserv

Net stop bits

Net stop msiserver

Net stop cryptSvc

  1. Restart both Software Distribution and Catroot2 folders. You can do this by typing Ren C: WindowsSoftwareDistribution SoftwareDistribution.old and Ren C: WindowsSystem32catroot2 Catroot2.old in the command prompt to change the names of both Software Distribution and Catroot2 files.
  2. Restart the Windows Update service, BITS, MSI Installer, and Cryptographic by inputting the following commands one by one, hitting Enter after every command:

Net start wuauserv

Net start bits

Net start msiserver

Net start cryptSvc

  1. Exit the command prompt then restart your device. You can now try to proceed with the system upgrade again.

Method Three: Disable or Uninstall Antivirus

  1. If you opt to just disable your antivirus, you just have to right-click on the antivirus’ icon from your toolbar then choose Disable.
  2. Press Ctrl + Alt + Del to open the Task Manager.
  3. Check if all the files or services linking to your antivirus are turned off.
  4. If you choose to uninstall your antivirus (which is recommended), open Control Panel.
  5. Once the Control Panel window is open, select Programs then Uninstall a Program.
  6. Look for your antivirus on the list, right-click it then choose Uninstall.
If you like to learn and find out more about various Windows errors, and how to repair them go to our vast archive or use search to find articles that will explain and help you in solving your issue.
However, if you prefer to do things fast and with automatization then we are proposing to use an automated solution for your issues. The application that we are recommending is Advanced System Repair Pro
Advanced System Repair utilizes multiple tools all in one to give you a quick, simple, reliable, and very thorough diagnosis of your PC. It brings you all the tools you need in one program to clean, fix, protect, optimize and boost your PC!
1-Click Maintenance
All the tools to make it simple and easy! It's like having a professional technician at the click of a mouse.

Junk Cleaner
Keeping your computer free from unnecessary clutter also helps make your computer last longer. Like any other machine, if you keep it clean and take care of it, it will serve you better for longer!

Optimize background apps
Optimize applications background activity with the built-in Application Optimizer feature.

Disk Defrag
With a simple 1-click, Advanced System Repair speeds up your PC by assembling fragmented files on your machine and organizing them more efficiently.

Malware Removal
Finds and removes all types of harmful malware including trojans, worms, bots, adware, spyware, PUPs, and more!

Privacy Cleaner
The all-in-one privacy suite to Clean Your Tracks & Protect Your Privacy! Make your computer safe, secure, and more efficient!

System Tweak/Optimizer
ASR will analyze your complete system and settings to adjust your PC to function at its maximum performance.

Registry Cleaner
Over time, as you install and uninstall applications, the registry can become cluttered with old entries and broken settings which can result in program crashes, and annoying messages and slow the computer down.
Visit our Advanced System Repair Pro Download page to inform yourself about all the benefits of this software and get a free trial copy of it.
advanced system repair pro

Advanced System Repair Pro

One-click automated PC repair solution
ASR logo
With Advanced System Repair Pro you can easily
Replace damaged files
Restore performance
Free disk space
Remove Malware
Protects WEB browser
Remove Viruses
Stop PC freezing
DOWNLOAD
Privacy Policy | Terms of Use | Uinstall
Advanced System Repair Pro is compatible with all versions of Microsoft Windows including Windows 11

Share this article:

You might also like

How to get rid of Chedot

Chedot is a Chromium-based Browser that replaces your default System Internet Browser. This browser offers users tools for downloading videos, faster browsing, and custom searches. From the publisher: A feature of our browser is a high speed on slow computers, high speed download on a poor internet, support resuming file download when connection is broken and the download in multiple threads, the ability to go on blocked websites and downloading videos from video sites.

While this may seem interesting and good at start, this browser has been marked as a Potentially Unwanted Program. It monitors user activity, collects web traffic data, and user information. While using Chedot you may see additional ads throughout your browsing sessions.

About Potentially Unwanted Applications

Exactly what is a Potentially Unwanted Program (PUP)?

People have encountered it – you download a free software, you then discover some unwanted applications on your computer system or discover a strange toolbar has been included with your browser. You didn’t have them installed, so how did they appear? These unwanted applications, which are called Potentially Unwanted Programs, or PUP in short, usually tag along as a software bundle when downloading the application and could cause serious problems for computer users. PUP does not involve malware in the traditional sense. What normally makes a PUP different from malicious software is the fact that when you download one, you’re doing it with your consent – although in most cases unintentionally and reluctantly. But, there is no doubt that PUPs remain bad news for computer users as it can be incredibly damaging to the PC in many ways.

How do unwanted programs affect you?

Unwanted programs come in many forms. More commonly, they will be found in adware bundlers which are known to utilize aggressive and misleading advertising. The majority of bundlers install many adware applications from a number of vendors, each of which features its own EULA policy. Safebytes Anti-malware completely removes this threat and safeguards your PC against PUP or malware infection. PUPS also appear in the form of undesirable toolbars or internet browser plug-ins. Not just they needlessly use up space on your screen, toolbars can also manipulate search results, track your web browsing activities, decrease your internet browser’s performance, and slow down your web connection to a crawl. They could seem harmless but PUPs are generally spyware. They may include dialers, keyloggers, and also other software built inside them that could monitor you or send out your sensitive information to 3rd parties. Because of this unwanted program, your application may freeze, your security protections can get disabled that could leave your computer susceptible, your system could get ruined, and this list goes on and on.

Tips for preventing PUPs

• Study cautiously prior to agreeing to the license agreement as it could have a clause about PUPs. • Always opt for the custom if you are given an option between Recommended and Custom Installations – never click Next, Next, Next thoughtlessly. • Install an advert blocker/pop-up blocker; Deploy anti-malware products such as Safebytes Anti-malware. These software programs will establish a wall between the computer and online criminals. • Be alert when you download and install freeware, open-source software, or shareware. Avoid downloading and installing browser extensions and applications you are not knowledgeable about. • Always download software from reliable sources like official sites as opposed to untrustworthy sharing space. Avoid torrents and peer-to-peer clients.

What To Do If You Cannot Download Safebytes Anti-Malware?

All malware is bad, but certain types of malware do much more damage to your PC than others. Some malware sits in between your computer and the net connection and blocks some or all internet sites that you really want to check out. It will also block you from installing anything on your PC, especially anti-malware applications. So what to do when malicious software keeps you from downloading or installing Safebytes Anti-Malware? Although this type of issue will be tougher to get around, there are some actions you can take.

Install the antivirus in Safe Mode

In Safe Mode, you can adjust Windows settings, un-install or install some software, and get rid of hard-to-delete viruses. In the event the virus is set to load immediately when PC starts, shifting into this mode may well prevent it from doing so. In order to get into Safe Mode or Safe Mode with Networking, press the F8 key while the PC is booting up or run MSConfig and look for the “Safe Boot” options under the “Boot” tab. Once you’re in Safe Mode, you can try to install your antivirus program without the hindrance of the virus. Now, you can run the anti-malware scan to eliminate computer viruses and malware without any hindrance from another malicious application.

Download the antivirus software using a different browser

Some viruses might target vulnerabilities of a specific browser that block the downloading process. If you suspect that your Internet Explorer happens to be hijacked by a virus or otherwise compromised by cybercriminals, the best approach is to switch over to an alternate web browser like Chrome, Firefox, or Safari to download your chosen security software – Safebytes Anti-Malware.

Make a bootable USB anti-virus drive

Here’s another solution which is creating a portable USB anti-virus software that can scan your system for malware without the need for installation. Follow these steps to run the anti-virus on the affected PC. 1) Download Safebytes Anti-Malware or Windows Defender Offline onto a clean computer. 2) Plug the USB drive into the uninfected PC. 3) Double-click on the downloaded file to open the installation wizard. 4) Choose the drive letter of the flash drive as the place when the wizard asks you exactly where you would like to install the anti-virus. Follow the on-screen instructions to complete the installation process. 5) Now, transfer the pen drive to the infected PC. 6) Double-click the EXE file to run the Safebytes tool from the flash drive. 7) Press the “Scan Now” button to start the virus scan.

SafeBytes Anti-Malware - More Protection For You

These days, an anti-malware tool can protect the computer from different forms of online threats. But wait, how to choose the right one amongst various malware protection software that is available on the market? Perhaps you might be aware, there are lots of anti-malware companies and products for you to consider. Some of them are good, some are decent, while some will affect your computer themselves! You must be careful not to pick the wrong product, especially if you purchase premium software. When it comes to commercial anti-malware software options, many people opt for popular brands, like SafeBytes, and they are very happy with it. Safebytes is among the well-established computer solutions firms, which provide this all-inclusive anti-malware software. Using its cutting edge technology, this application can help you eradicate multiples types of malware which includes computer viruses, worms, PUPs, trojans, adware, ransomware and browser hijackers. SafeBytes has outstanding features when compared with various other anti-malware programs. Below are a few of the great ones: Real-time Protection: Malware programs aiming to enter the computer are discovered and stopped as and when detected by the SafeBytes active protection shields. It’ll examine your computer system for suspicious activity regularly and shields your personal computer from unauthorized access. Optimum AntiMalware Protection: Safebytes is built on the best virus engine within the industry. These engines can find and remove threats even during the initial stages of a malware outbreak. “Fast Scan” Features: SafeBytes’s high speed malware scanning engine lessens scan times and extends battery life. Simultaneously, it’ll effectively identify and remove infected files or any online threat. Web Filtering: SafeBytes provides instant safety rating to the webpages you are about to check out, automatically blocking harmful sites and to ensure that you’re certain of your online safety while browsing the internet. Lightweight: SafeBytes is really a lightweight tool. It use up an extremely small amount of processing power as it operates in the background therefore you will not observe any system performance difficulties. Premium Support: For any technical concerns or product support, you can obtain 24/7 professional assistance via chat and e-mail.

Technical Details and Manual Removal (Advanced Users)

If you don’t wish to use malware removal software and prefer to get rid of Chedot manually, you could possibly do so by going to the Windows Add/Remove Programs menu in the Control Panel and deleting the offending program; in cases of browser extensions, you may uninstall it by visiting the browsers Add-on/Extension manager. It’s also highly recommended to factory reset your browser to its default state to fix corrupt settings. To make sure of complete removal, find the following registry entries on your computer and delete it or reset the values accordingly. Please keep in mind that only advanced users should try to manually edit the system files mainly because deleting any single critical registry entry results in a major problem or even a system crash. Furthermore, certain malware keeps replicating which makes it tough to get rid of. You’re encouraged to do this procedure in Safe Mode.
Files: %APPDATA%\Microsoft\Windows\Start Menu\Programs\Chedot %PROGRAMFILES%\Chedot %USERPROFILE%\Documents\chedot.reg Registry: HKEY_LOCAL_MACHINE\ HKEY_LOCAL_MACHINE\SOFTWARE\Wow6432Node\Microsoft\Windows\CurrentVersion\App Paths\chedot.exe HKEY_LOCAL_MACHINE\SOFTWARE\Wow6432Node\Microsoft\Windows\CurrentVersion\Run value: Chedot HKEY_LOCAL_MACHINE\SOFTWARE\Microsoft\Windows\CurrentVersion\Run value: Chedot HKEY_LOCAL_MACHINE\SOFTWARE\Wow6432Node\RegisteredApplications value: Chedot.NSJA6BHDA3NCFCFMXW3QSCUYUQ HKEY_LOCAL_MACHINE\Software\Chedot HKEY_LOCAL_MACHINE\SOFTWARE\Classes\.htm\OpenWithProgIds value: ChedotHTML.NSJA6BHDA3NCFCFMXW3QSCUYUQ HKEY_LOCAL_MACHINE\SOFTWARE\Classes\.html\OpenWithProgIds value: ChedotHTML.NSJA6BHDA3NCFCFMXW3QSCUYUQ HKEY_LOCAL_MACHINE\SOFTWARE\Classes\.xhtml\OpenWithProgIds value: ChedotHTML.NSJA6BHDA3NCFCFMXW3QSCUYUQ HKEY_LOCAL_MACHINE\SOFTWARE\Classes\ChedotHTML.NSJA6BHDA3NCFCFMXW3QSCUYUQ HKEY_LOCAL_MACHINE\SOFTWARE\Clients\StartMenuInternet\Chedot.NSJA6BHDA3NCFCFMXW3QSCUYUQ HKEY_LOCAL_MACHINE\SOFTWARE\Microsoft\Windows\CurrentVersion\App Paths\chedot.exe HKEY_LOCAL_MACHINE\SOFTWARE\RegisteredApplications value: Chedot.NSJA6BHDA3NCFCFMXW3QSCUYUQ HKEY_CURRENT_USER\Software\Microsoft\Windows\CurrentVersion\Explorer\FileExts\.html\OpenWithProgids value: ChedotHTML.NSJA6BHDA3NCFCFMXW3QSCUYUQ HKEY_CURRENT_USER\Software\Microsoft\Windows\CurrentVersion\Explorer\FileExts\.htm\OpenWithProgids value: ChedotHTML.NSJA6BHDA3NCFCFMXW3QSCUYUQ HKEY_LOCAL_MACHINE\SOFTWARE\Wow6432Node\Chedot HKEY_LOCAL_MACHINE\SOFTWARE\Microsoft\MediaPlayer\ShimInclusionList\chedot.exe HKEY_LOCAL_MACHINE\Software\Chedot\Microsoft\Windows\CurrentVersion\Uninstall..Uninstaller Chedot
Read More
Fix Call of Duty 4 crashes in Windows 10
Call of Duty is a fun and good game, a great time killer with a squad of friends, however sometimes the game crashes, and fun is interrupted. In this guide, we will address and solve this unpleasant issue.
  1. Scan game files

    inside launcher choose options and under them, choose scan and repair game files This process can take 5-30 minutes, as the game is 60GB large. This will look through all your game files and make sure they’re all valid and that none are corrupted, which may cause crashes. When it’s complete, you’ll get a notification that the game is now playable. Try again and see if your crashes continue.
  2. Update drivers

    Keeping drivers updated is crucial for the game to run smoothly, GPU drivers are possibly important. Go to your GPU manufacturer's website and get the latest drivers.
  3. Lower graphic settings

    Intensive graphic requirements can overload GPU and cause crashes, try lowering details in-game and see if this will fix the issue.
  4. Disable overlays

    If you’re using a program like Discordthat has an overlay, you’ll want to disable it as it may be causing the graphic error
Read More
Fix 0x80071AC3, Volume is dirty error message
If you are trying to copy a folder or a file but encountered an error that says, “An unexpected error is keeping you from copying the folder. If you continue to receive this error, you can use the error code to search for help with this problem”, read on as this post will guide you on how you can fix this error. This kind of error is a CHKDSK error. It is the “Volume is dirty” error message with error code 0x80071AC3 which indicates that the CHKDSK operation on your computer did not go through due to some corrupted sector of your hard drive, data corruption, corrupted system files, malware infection, as well as improper installation of an application that left some residual folders and files and many more. To fix the Error 0x80071AC3, here are some potential fixes you can check out to resolve it:

Option 1 – Run the Check Disk utility

You can also run the Check Disk utility to fix the error when you connect your USB or external device.
  • In the Windows Search box, type “command prompt” and from the search results, right-click on Command Prompt and select “Run as administrator”.
  • After opening Command Prompt, type this command and tap Enter: chkdsk /r /f <PARTITION LETTER>
  • The command you entered will start to check for errors and fix them automatically. Else, it will throw an error message saying, “Chkdsk cannot run because the volume is in use by another process. Would you like the schedule this volume to be checked the next time the system restarts? (Y/N)”.
  • Tap the Y key to schedule Disk Check the next time your computer restarts.

Option 2 – Try to check if a particular volume is dirty and exclude it

The next thing you can do to fix the problem is to check if the particular volume is dirty and exclude it. To do so, follow these steps:
  • In the Start Search, type “command prompt” in the field and right-click on Command Prompt from the search results, and then select the “Run as administrator” option.
  • After opening Command Prompt with admin privileges, execute this command: fsutil dirty query <PARTITION LETTER>
  • After that, you will see either of the following results of the command you just executed:
    • “Volume <PARTITION LETTER> is dirty”
    • “Volume <PARTITION LETTER> is not dirty”
  • If you see the “Volume <PARTITION LETTER> is dirty” message, then you can just skip checking the drive for errors by executing this command: CHKNTFS /X <PARTITION LETTER>

Option 3 – Try to format the destination drive

If the first two options above didn’t work, then you might want to try formatting the drive can also help you resolve the error. To format it, follow these steps:
  • To get started formatting your drive, tap the Win + E keys and then go to the access page of the drive.
  • Next, right-click on the drive and select Format.
  • After that, uncheck the “Quick Format” option and then format your drive properly.
  • Now once the formatting process is finished, unplug the drive and plug it back in afterward.
  • Check if the error is already fixed. If the drive is not initialized, tap the Win + R keys and hit Enter.
  • After opening the Run dialog box, type “diskmgmt.msc” and hit Enter to open Disk Management.
  • From there, right-click on the drive volume and select initialize disk.
  • Next, select the correct partition type and proceed.
Read More
Prompted For A Product Key On Windows 10 - How to Fix It

Prompted For A Product Key – What Is It?

Some Windows 7 or Windows 8/8.1 users are having a hard time upgrading to Windows 10 as they are being prompted for a product key. By default, the Windows 10 operating system does not require a product key and users should not be prompted for one, given you upgraded your computer from an activated Windows 7 or Windows 8/8.1 license or from the Windows 10 Preview build. However, there are some users encountering this problem and there are several reasons for this.

Solution

Restoro box imageError Causes

There are a few reasons why some users are being prompted for a product key when upgrading to Windows 10:

  • Windows 7 or Windows 8/8.1 license is not activated.
  • You’re upgrading to Windows 10 final release from a preview build.
  • There are broken operating system files.
  • Activation servers get overwhelmed due to the high volume of upgrades.
  • The Windows 10 copy you downloaded does not correspond with the current Windows system you are upgrading from.

Further Information and Manual Repair

Before you can fix this problem, you need to know why you’re being prompted for a product key. Some things you should know about Windows 10 product key activation are the following:

  • You cannot activate Windows 10 using your Windows 7 or Windows 8/8.1 product key. Windows 10 has a unique product key.
  • Error codes such as 0x8007232b, 0XC004E003, 0x8007007B, or 0x8007000D might pop up during system upgrade especially when the activation servers get overwhelmed with the high volume of upgrades.
  • You don’t really need to know your Windows 10 product key.

Now, if ever you’re prompted for a product key when you’re upgrading to Windows 10, you can apply the following methods:

Method One: Give It A Few Days

If you’ve been prompted for a product key upon upgrading to Windows 10, you should click on the “Do this later” option. Wait for a few days then Windows 10 will get activated automatically.

Method Two: Download A Copy of Windows 10 Corresponding Your Current System

One of the reasons Windows users are being prompted for a product key when upgrading to Windows 10 is that they have downloaded a wrong edition of Windows 10 and do not correspond with your current system.

  • Users of Home Basic, Home Premium, Windows 7 Starter, Windows 8.0 Core, and Windows 8.1 Core should download Windows 10 Home ISO.
  • Users of Windows 7 Ultimate, Windows 7 Professional, Windows 8.0 Pro, and Windows 8.1 Pro should download Windows 10 Pro ISO.

NOTE: Users of Windows 7 Enterprise, Windows 8.0 Enterprise, and Windows 8.1 Enterprise are not eligible for the free upgrade offer.

Method Three: Ensure Windows Is Activated

If your Windows 7 or Windows 8/8.1 is not genuine or activated, you will get prompted for a product key. You need to make sure first your current system is activated.

  1. Click on Start then right-click Computer. For Windows 8 and up users, you can simply press on Windows key + X then select Choose Properties.
  2. When the Properties window appears, check if the Windows you’re running is activated.

Method Three: Reset License Status

  1. Press on Windows key + X.
  2. Select Command Prompt (Admin).
  3. Once the command prompt window appears, type vbs –rearm then press Enter.
  4. Exit Command Prompt then restart your PC.
  5. Input the product key by following the instructions given.

Method Four: Force Activation

  1. Press on Windows key + X
  2. Select Command Prompt (Admin).
  3. Once the command prompt window appears, type vbs –ato then press Enter.
  4. Exit Command Prompt then restart your PC.

Method Five: Run System File Checker

Another thing you can try doing is to run the system file checker utility to scan if there are any broken operating system files. In doing so, you’ll be able to detect problems that might be preventing the product activation of your Windows 10 upgrade.

Method Six: Contact Microsoft Activation Center

If in case you’ve exhausted all your resources and you are still being prompted for a product key when upgrading to Windows 10, you can try contacting the Microsoft Activation Center for further details. Check here for the appropriate telephone numbers to contact.

Method Seven: Download An Automated Tool

If you still experience the error after doing the methods above, you might want to try a powerful and trusted automated tool to fix the job.

Read More
How to Fix Windows 10 Error Code 0x803f7001

How to Fix Windows 10 Error Code 0x803f7001

Error Code 0x803f7001 – What is it?

Error code 0x803f7001 occurs when there is a failure to update your Windows operating system to Windows 10. Usually, a message box pops up with the following statement, “Windows is not activated as your previous version of Windows on this device was not activated prior to upgrade to Windows 10.” When this occurs, common symptoms of the error code will manifest themselves:

  • Inability to upgrade your Windows operating system to Windows 10
  • Message box with error code 0x803f7001

Solution

Restoro box imageError Causes

The cause for error code 0x803f7001 varies. Usually, it occurs for two reasons: 1) when during the process of upgrading to Windows 10, no valid Windows license or product key is found for your device or 2) when a user performs a clean installation of Windows 10. During a clean installation, a new license is usually required to allow you to activate your copy of Windows.

Further Information and Manual Repair

There are two main options available to fix error code 0x803f7001. Usually, the use of a valid product key can help users rectify error code 0x803f7001. You may also try an automated tool to access the best solutions.

Method One: Use a Valid Product Key

A product key is a code containing 25 characters that enable users to activate Windows. You will need to enter the product key in the exact order it appears in order to install your Windows operating system. All users will be able to access this code in an email or on a card within the Windows DVD package they receive upon purchasing a version of the Windows operating system.

To solve error code 0x803f7001, complete the following steps.

  • Step one: Click the Start button then select Settings
  • Step two: Select Update and Security then Activation
  • Step three: Click the Change product key
  • Step four: Type in your valid product key. (To do this ensure the 25 characters are accounted for and in the correct order.)

If the issue causing error code 0x803f7001 relates to your product key, then the instructions within method one will rectify the issue. You will be able to install and activate Windows 10. However, if while attempting to update your Windows operating system, the error occurs once more, you will need to follow the instructions in the manual repair below.

You may also consider contacting a Windows repair technician if you are uncertain of your ability to perform the tasks required to fix error code 0x803f7001. This IT professional will be able to use his or her technical knowledge to perform complex manual repair tasks if the need arises.

Method Two: Install an Automated Tool

Automated tools help PC users eliminate common issues such as Windows error codes. To address or rectify error codes like error code 0x8007007b download a powerful automated tool on your machine. This tool enables users to access quick solutions. It also scans for and corrects issues that may result in error codes or poor PC performance.

Read More
How to switch to Dark mode in Windows 11
Dark mode
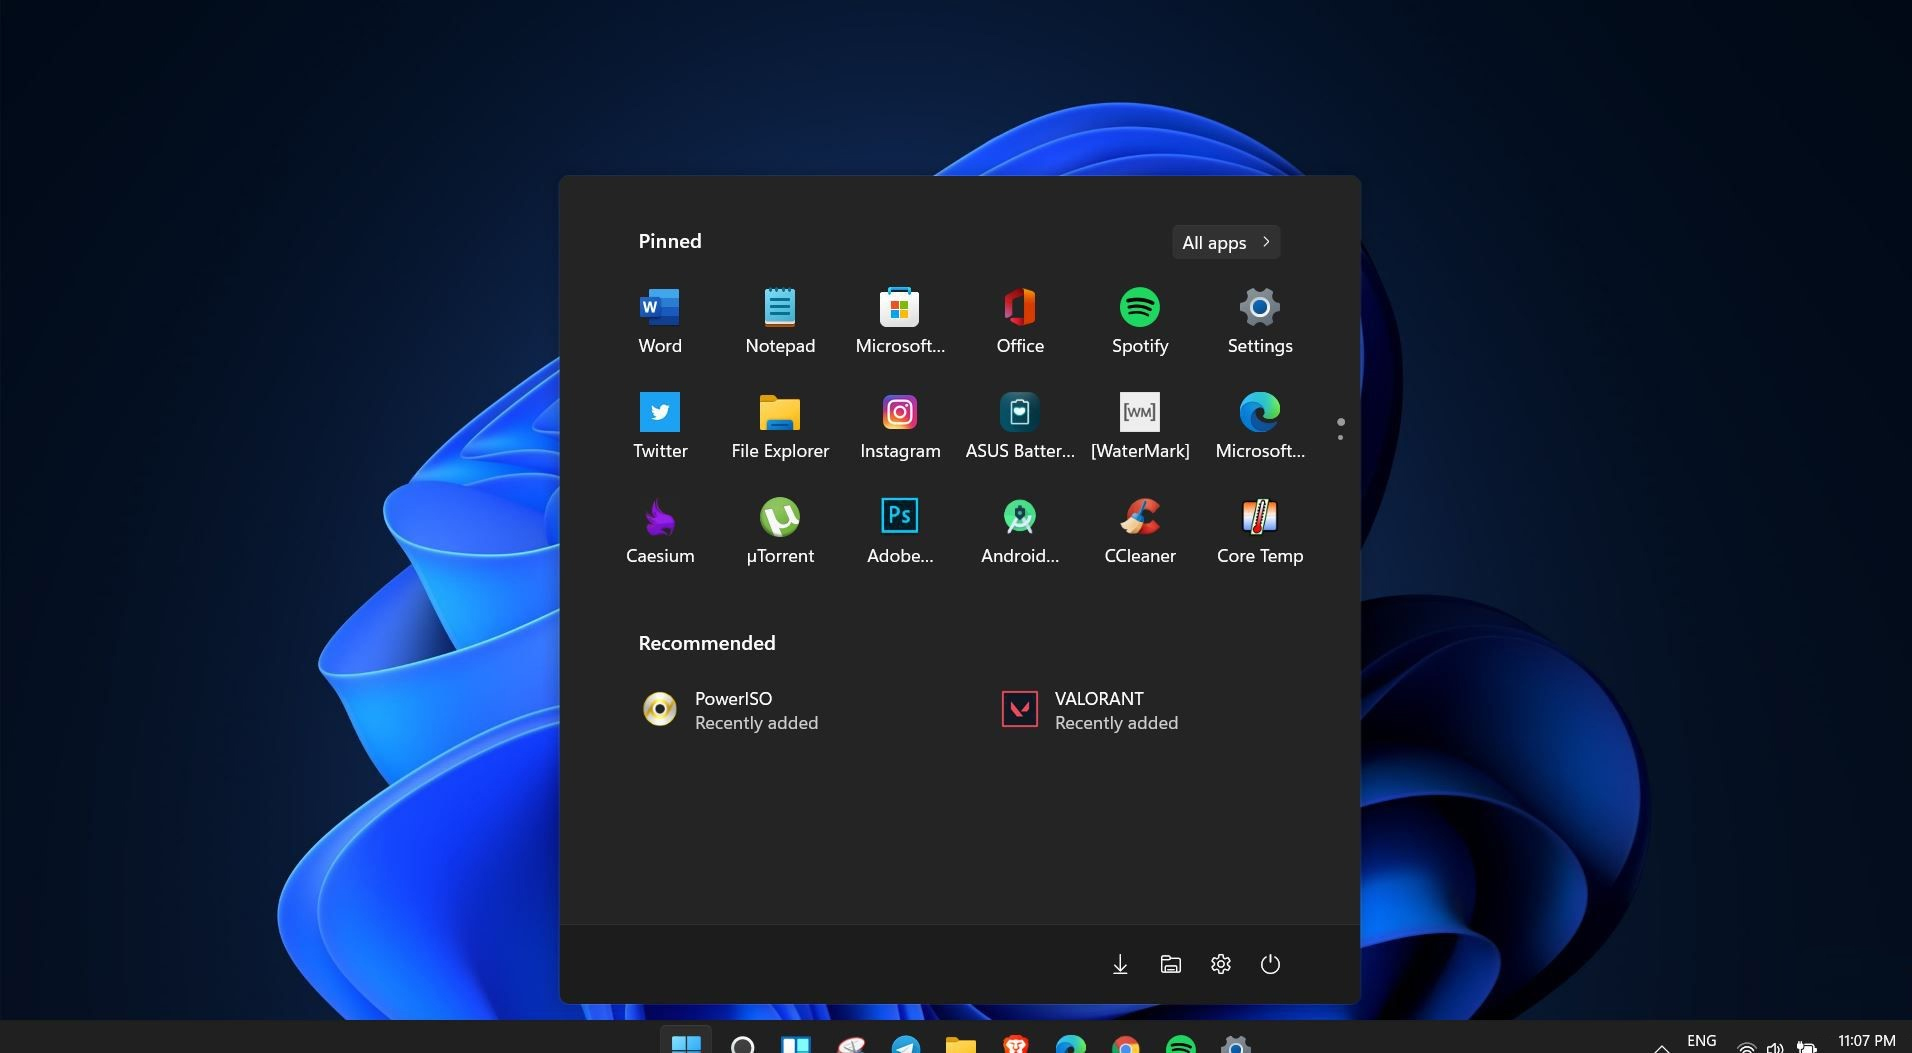
Windows 11 is coming soon, from its typical view and color scheme, Windows 11 will natively support dark mode. The dark mode is very popular in many applications today, some large companies like Adobe, Autodesk, and many more have already adopted a dark color scheme for their software so it is logical for others to follow and Microsoft is aboard for it. The dark mode itself has its benefits, for people who work on computer for longer period of time dark mode inside applications will throw less white and blue light on their eyes making workhours easier and pleasant on them. As a person who does indeed spend a lot of time in front of the screen, I would advise you to switch to dark mode regardless of the time that you spend with a computer, your eyes will be grateful.

Switching to Dark mode in Windows 11

  1. Open Windows 11 Settings by pressing ⊞ WINDOWS + I
  2. Click on Personalization on the left sidebar
  3. On the right side click on Color
  4. In color options click on the drop-down menu right next to Choose your color
  5. Select Dark
Your choice will be applied right away and you can safely close settings.
Read More
Remove HowToSimplified PUP Removal Tutorial

HowToSimplified is a browser extension developed by MindSpark inc. This extension offers users easy access to DIY tutorials, guides, and websites just a few clicks away. There is also a top video selection with the most popular DIY videos at the moment.

This extension, though it may look useful in the beginning, hijacks your browser's default search provider, it changes your default home page to HowToSimplified, powered by the MyWay search engine. During your browsing sessions, it will record your website visits, collect information, clicks, and sometimes even personal data. This information is later used to deliver ads that are injected into your browser search results. Aside from sponsored links, and additional unwanted ads that this extension displays, it also may from time to time display pop-up ads during your browsing sessions.

Multiple anti-virus scanners have detected HowToSimplified as a Browser Hijacker and are therefore not recommended to keep on your computer for security and privacy reasons.

About Browser Hijackers

Browser hijacking means that a malicious program code has control over and altered the settings of your internet browser, without your approval. Almost all browser hijackers are made for marketing or advertising purposes. In most cases, browser hijacking is used for earning ad revenue that comes from forced advert clicks and site visits. It could seem naive, but most of such sites aren’t legitimate and could pose a severe threat to your online safety. In a much worst case, your browser can be hijacked to download malware that can do a lot of damage to your computer system.

How you can recognize a browser hijack

There are many symptoms that indicate your browser has been highjacked: home page is changed; bookmark and the new tab are also changed; the default web engine is changed and your browser security settings have been cut down without your knowledge; find new toolbars that you simply didn’t add; unstoppable flurries of popup advertisements show up on your personal computer screen; your internet browser has become unstable or starts running sluggishly; you can’t navigate to certain internet pages, like computer security software related websites.

How they invade PCs

Browser hijackers infect computer systems through malicious email attachments, downloaded infected documents, or by visiting infected websites. They can also be deployed via the installation of a web browser toolbar, add-on, or extension. Other times you may have accidentally accepted a browser hijacker as part of an application bundle (generally freeware or shareware). An example of some notorious browser hijacker includes Babylon, Anyprotect, Conduit, DefaultTab, SweetPage, Delta Search, and RocketTab, but the names are regularly changing. Browser hijacking can lead to severe privacy issues and even identity theft, disrupt your browsing experience by taking command over outbound traffic, drastically slows down your personal computer by consuming a lot of resources, and cause system instability as well.

Browser Hijacker Malware – Removal

The one thing you can try to get rid of a browser hijacker is to find the malware inside the “Add or Remove Programs” list of the Windows Control Panel. It might or might not be there. When it is, uninstall it. However, many hijackers are harder to track down or remove since they might get themselves associated with some critical computer files that enable it to operate as a necessary operating-system process. Amateur computer users shouldn’t ever attempt the manual form of removal methods, since it requires detailed system knowledge to carry out repairs on the computer registry and HOSTS file.

How One Can Eliminate a Virus that is Blocking Websites or Preventing Downloads

Practically all malware is detrimental and the extent of the damage will vary greatly depending on the type of malware. Some malware is meant to hinder or block things that you want to do on your computer. It may well not let you download anything from the web or it will prevent you from accessing a few or all internet sites, especially the anti-malware websites. If you are reading this article right now, you may have perhaps realized that a malware infection is the cause of your blocked internet connectivity. So how to proceed if you need to install an anti-malware program like Safebytes? There are a few actions you can take to get around this problem.

Install the anti-malware in Safe Mode

The Windows operating system comes with a special mode referred to as “Safe Mode” where just the minimum required applications and services are loaded. If the malware is obstructing the internet connection and affecting your PC, starting it in Safe Mode allows you to download anti-malware and run a diagnostic scan while limiting potential damage. To enter into Safe Mode or Safe Mode with Networking, press the F8 key while the PC is starting up or run MSCONFIG and look for the “Safe Boot” options under the “Boot” tab. Once you’re in Safe Mode, you can attempt to install your anti-malware software application without the hindrance of the malicious software. At this point, you can actually run the antivirus scan to get rid of viruses and malware without interference from another malicious application.

Obtain the anti-malware program using an alternate web browser

Web-based viruses can be environment-specific, targeting a particular internet browser or attacking specific versions of the web browser. If you seem to have a trojan attached to Internet Explorer, then switch to a different browser with built-in security features, such as Firefox or Chrome, to download your favorite anti-malware program – Safebytes.

Install and run anti-malware from the USB drive

Another solution is to create a portable anti-malware program on your USB thumb drive. Try these simple measures to clear up your infected PC using portable anti-malware. 1) Download the anti-malware on a virus-free computer. 2) Plug the Thumb drive into the uninfected computer. 3) Double-click the Setup icon of the antivirus program to run the Installation Wizard. 4) Choose a thumb drive as the place when the wizard asks you where you want to install the application. Follow the on-screen instructions to complete the installation. 5) Transfer the USB drive from the uninfected PC to the infected PC. 6) Double-click the EXE file to run the Safebytes software right from the thumb drive. 7) Click on “Scan Now” to run a complete scan on the affected computer for viruses. If, after all of these methods, you are still having troubles with the possible infection, feel free to write to us with your question, through chat or email. If you are unsure which method to employ, simply call our toll-free number 1-844-377-4107 to speak to our technical support team. Our experts can walk you through the virus removal process on the phone and fix the computer remotely.

Protect Your Personal Computer From Viruses and Malware With SafeBytes Security Suite

Nowadays, an anti-malware tool can protect your laptop or computer from various kinds of internet threats. But exactly how to choose the best one amongst the many malware protection software that is available on the market? Perhaps you might be aware, there are several anti-malware companies and products for you to consider. A few of them are great but there are lots of scamware applications that pretend as authentic anti-malware software waiting to wreak havoc on the computer. You must be careful not to choose the wrong product, especially if you purchase a paid application. When thinking about trustworthy programs, Safebytes AntiMalware is certainly the highly recommended one. SafeBytes anti-malware is a powerful, highly effective protection tool designed to assist users of all levels of IT literacy in detecting and eliminating malicious threats from their PC. This tool can easily detect, eliminate, and protect your PC from the most advanced malware intrusions including spyware, adware, trojan horses, ransomware, parasites, worms, PUPs, as well as other possibly damaging software programs. SafeBytes has great features when compared to other anti-malware programs. A few of them are listed as below: Best AntiMalware Protection: Built on a highly acclaimed anti-virus engine, this malware removal application has the capacity to identify and remove various obstinate malware threats such as browser hijackers, potentially unwanted programs, and ransomware that other common anti-virus software will miss. Live Protection: SafeBytes provides real-time active monitoring service and protection against all known computer viruses and malware. It’ll constantly monitor your computer for hacker activity and also gives users superior firewall protection. Web Protection: Safebytes allots all websites a unique safety score that helps you to have an idea of whether the webpage you’re about to visit is safe to view or known to be a phishing site. “Fast Scan” Features: SafeBytes Anti-Malware possesses a multi-thread scan algorithm that works up to five times faster than any other protection software. Very Low CPU and RAM Usage: SafeBytes is a lightweight application. It uses up a really small amount of processing power as it works in the background therefore you won’t notice any computer performance difficulties. 24/7 Customer Support: You will get 24/7 technical support to quickly resolve any concern with your security tool.

Technical Details and Manual Removal (Advanced Users)

If you wish to manually remove HowToSimplified without the use of an automated tool, it may be possible to do so by removing the program from the Windows Add/Remove Programs menu, or in cases of browser extensions, going to the browsers AddOn/Extension manager and removing it. You will likely also want to reset your browser. To ensure the complete removal, manually check your hard drive and registry for all of the following and remove or reset the values accordingly. Please note that this is for advanced users only and may be difficult, with incorrect file removal causing additional PC errors. In addition, some malware is capable of replicating or preventing deletion. Doing this in Safe Mode is advised.

The following files, folders, and registry entries are created or modified by HowToSimplified

Files: C:DOCUME1USER1LOCALS1Tempnsu1.tmp C:76681c9c0f70e45328483cc27310678c28751a66f9849aa13f34d2e7f8c650 C:DOCUME1USER1LOCALS1Tempnsf2.tmp C:DOCUME1USER1LOCALS1Tempnsf2.tmpnsDialogs.dll C:DOCUME1USER1LOCALS1Tempnsf2.tmpSystem.dll C:DOCUME1USER1LOCALS1Tempnsf2.tmpnsDialogs.dll C:DOCUME1USER1LOCALS1Tempnsf2.tmpSystem.dll C:Program FilesHowToSimplified_8e Registry: Key: HKCUSOFTWAREMicrosoftWindowsCurrentVersionExplorerBrowser Helper ObjectsValue: Verizon Broadband Toolbar Data: A057A204-BACC-4D26-8398-26FADCF27386 Key: HKEY_CURRENT_USERSoftwareMicrosoftWindowsCurrentVersionRun Value: Hoolapp Android Data: C:usersuserappdataRoamingHOOLAP~1Hoolapp.exe Key: HKEY_CURRENT_USERSoftwareMicrosoftWindowsCurrentVersionRun Value: ctfmon.exe Data: C:Program Files3rundll32.exe C:Program Files3lni28.dat,FG00
Read More
Windows can’t stop your Generic volume device
One of the issues with external storage devices is that unplugging them right away without using the “Safely Remove Hardware” feature is not safe and doing so could lead to data corruption and data loss. However, in some cases, even when you use the “Safely Remove Hardware” feature, you could get an error that says:
“Windows can’t stop your ‘Generic volume’ device because a program is still using it. Close any programs that might be using the device, and then try again later.”
It is possible that the system is still using the external device – for instance, a copy operation might still be in progress, or Windows is still indexing the contents of the drive in the background or it could also be that the drive is not configured to be quickly removed. To fix this error, there are a couple of suggestions you can try. You can try to close all the open programs and file explorer windows, or you could also configure the Device Removal Policy or change its file system to FAT32. In addition, you can also try to change its drive letter or use the DISKPART utility to get the drive to be offline or simply manage the hogging process that prevents it from being safely removed. Follow each one of the given potential fixes below to resolve the error when using the Safely Remove Hardware feature.

Option 1 – Close all the open programs and File Explorer windows

The first thing you have to do to resolve the error is to close any open programs as well as File Explorer windows. This is because there are some programs and File Explorer instances that could be using the external device in the background which explains why you’re getting the error when you try to safely remove your device.

Option 2 – Try to configure the Device Removal Policy

The next thing you can do is to configure the Device Removal Policy. How? Refer to these steps:
  • Open File Explorer and right-click on the drive where you encountered the error.
  • Next, select Properties from the context menu.
  • After that, navigate to the Hardware tab and select the disk drive where you got the error under the “All disk drives” section.
  • Then select Properties under the Device Properties section. This will open a new mini window and from there, select Change Settings on the bottom portion of the window.
  • Now navigate to the Policies tab and select the “Quick Removal (default)” option under the Removal Policy section.
  • Click on the OK and Apply buttons to save the changes made and then see if the error is now fixed.

Option 3 – Try to manage the hogging process

You could also try managing the hogging process to get rid of the error.
  • Tap the Ctrl + Shift + Esc key combination to open the Task Manager.
  • Then look for the running processes and programs that are hogging your USB storage device. If there is a program that’s using your device, it will hog on some Disk or CPU while transferring data and interacting with the device which is why you’re getting an error when you safely remove the device.
  • Next, select the concerned processed and right-click on each one of them, and then select the End Task or End Process option. You can also restart the Explorer.exe process and see if that helps.

Option 4 – Try to change the drive letters

  • Tap the Win + R keys to open the Run utility and then type “diskmgmt.msc” in the field and click OK or tap Enter to open Disk Management.
  • Next, look for your USB storage device using the drive letter that’s assigned to it. Right-click on your device and select the “Change Drive Letter and Paths…” option.
  • This will open a mini window and from there select the drive letter you want to change and click on the Change button.
  • After that, another smaller window will appear where you’ll have to select the new drive letter from the drop-down menu.
  • Click OK and if you got a warning prompt, just click on Yes.
  • Now restart your computer.

Option 5 – Try using DISKPART utility to get the drive to be offline

The next thing you can try to resolve the issue is to use DISKPART. Refer to the given steps below to do so.
  • Tap the Win + R keys to launch Run and then type “cmd” in the field and tap Enter or click OK to open an elevated Command Prompt.
  • Next, type and enter this command to execute it: diskpart
  • The command you entered will initiate the DISKPART utility. After that, type and enter this second command: list disk
  • Next, type and enter this third command: list volume
  • The commands you just executed will help you in either listing all the Disk connects or all the partitions on those disks formed and from there, you need to select one command depending on the “list” command you entered. You can execute either of the two following commands:
    • select disk #
    • select volume #
  • After that, it will select the Disk or Partition you want to select.
  • Now type either one of the following commands:
    • offline disk #offline volume #
  • The command you entered will mark the selected disk is Offline. Afterward, try to safely remove your USB Storage device. Just remember that when you plug it back in again, you have to carry out the same method except for the last given command as this time you will have to enter either of these commands in order to get your USB storage device back online:
    • online disk #
    • online volume #

Option 6 – Try to change the file system to FAT32

If you keep getting this error on a particular USB device, you might have to format the disk and change its file system to FAT32. Make sure that you copy its contents safely into another location before you format the disk. Keep in mind that formatting the disk will remove all the contents of your drive.
  • Open File Explorer and right-click on the drive where you got the error and then select Format from the context menu.
  • Next, in the newly opened mini window, select the FAT32 (Default) option from the drop-down menu under File System.
  • Now check the Quick Format checkbox and then click on the Start button to start formatting your drive.
Read More
Repair Error Code 0x80070715 in 3 Simple Steps

How To Repair Error 0x80070715

What is Error Code 0x80070715?

Seeing obscure error codes like 0x80070715 on the screen again and again can be annoying simply because you have no idea why it keeps popping up? What does it mean? Well, for beginners you don’t have to decode it, we’ll make it simple for you. This error code indicates missing .dll files in the system or a corrupt registry. Due to this, you get locked from accessing and running applications on your system.

Solution

Restoro box imageError Causes

This error occurs largely because of two reasons:
  1. Disk damage due to cluttered registry
  2. The system gets infected by malware or a virus(es)
The error code 0x80070715 creates hurdles in the functioning of the applications. If this error is not repaired immediately it can result in serious damages like system crash and failure.

Further Information and Manual Repair

Many people pay hundreds of dollars to technicians to resolve this issue on their systems. Is it worth it? Not exactly!

How about we tell you a time and a money-saving way to fix the error code 0x80070715 on your PC?

The best way to resolve this issue on your system in seconds and also for free is to install Restoro. This is an advanced, powerful, and multi-functional system repair and a PC optimizer tool. It is smoothly integrated with numerous performance-driven utilities like registry cleaner, privacy error detector (anti-virus), Active X and Class error, and system stability detector. With this helper, you can resolve not only the error code 0x80070715 but also other types of PC-related errors. Whether the cause of the error code 0x80070715 on your PC is malware or cluttering cluttered disk, Restoro can be used to resolve them all. Its powerful and intuitive registry cleaner scans the registry and repairs it successfully. It removes junk files, internet history, temporary internet files, invalid entries, and also the files from the uninstalled programs still saved in the system’s registry. It wipes out all the clutter on your hard disk and cleans it in seconds freeing up plenty of space. It repairs the registry resolving the error 0x80070715 quickly. Nonetheless, if the error 0x80070715 is triggered due to viral infection or malware it removes them too. By downloading unknown files, accessing malicious websites, and opening phishing emails viruses can enter your PC. You may not be aware of these until error code 0x80070715 pops on your screen. It is wise to remove viruses right away because these give hackers access to your system which often results in data breaches and exposes users to system security threats. Restoro also works as a powerful antivirus. All malware, spyware, and viruses affecting your PC are scanned with the help of the advanced built-in privacy error detector utility. This utility embedded in the system detects viruses and malware in your system and removes them from your system successfully. Restoro is an easy-to-use repair tool. It has a simple layout and a user-friendly interface. It is easy to navigate through the repair tool, scan for errors and repair them without any hassle. Users of all levels, novice and experienced can use this tool with ease. You don’t need to be technically sound to work around this tool. Here's how to Install and run Restoro PC Fixer: In addition to this, you can run it on any Windows version. It is compatible with practically all versions. No matter what the cause for error code 0x80070715 maybe, you don’t need to get into the nitty-gritty of it and find a specific tool to resolve the issue. All you have to do is install this multi-functional Restoro on your system. Here are the 3 simple steps that you need to follow for successful repair:
  1. Click here to install Restoro.
  2. Scan your PC
  3. Press the Repair Tab to fix the issue right away
To ensure your PC is error-free, registry clean and your system runs at its optimum speed, scan your PC with Restoro regularly.
Read More
Domain Users Sign in using Biometrics
The use of Biometrics is supported by Windows 10. Aside from that, it also supports PIN, password, picture password on all computers and if your computer has the proper hardware, Windows 10 also supports facial scanning, iris scanning, and even fingerprint scanning. You can see all these exciting features inside Settings > Accounts > Sign In Options. On the other hand, you can’t really expect to make use of all the above-mentioned features since it depends if the hardware is available to support them. One of the most interesting features is the use of Biometrics which is really useful in workplaces and so this post will show you how you can enable or disable the Domain Users Sign In on Windows 10 using Biometrics via Registry Editor or Group Policy Editor. But before you go on, you need to create a System Restore Point first since the modifications you’re about to do might affect the functioning of your computer. So in case something went wrong, you can always undo the changes you’ve made.

Option 1 – via Registry Editor

  • Tap the Win + R keys to open the Run dialog box.
  • Next, type “Regedit” in the field and hit Enter to open the Registry Editor.
  • After that, navigate to the following registry path:
HKEY_LOCAL_MACHINESOFTWAREPoliciesMicrosoftBiometricsCredential Provider
  • From there, right-click on the right-side panel and click on New > DWORD (32-bit) Value.
  • And then set the name of the newly created DWORD as “Domain Accounts”.
  • Afterward, click on “Domain Accounts” and set its value to “1”. This will allow the domain users to sign in to Windows 10 using Biometrics. While the value of 0 will disable the domain users sign in to Windows 10 using Biometrics.
  • Exit the Registry Editor and restart your computer for the changes to take effect.

Option 2 – via Group Policy Editor

  • Tap the Win + R keys to open the Run dialog box.
  • Next, type “gpedit.msc” in the field and hit Enter to open the Group Policy Editor.
  • After that, navigate to the following setting:
Computer Configuration > Administrative Templates > Windows Components > Biometrics
  • Then double click on the following entries located on the right-side panel and set the radio button to Enabled on all of them.
    • Allow the use of Biometrics.
    • Allow users to log on using Biometrics.
    • Allow domain users to log on using biometrics.
  • Now exit the Group Policy Editor and restart your computer to apply the changes made properly.
Read More
1 2 3 162
Logo
Copyright © 2022, ErrorTools. All Rights Reserved
Trademarks: Microsoft Windows logos are registered trademarks of Microsoft. Disclaimer: ErrorTools.com is not affiliated with Microsoft, nor claim direct affiliation.
The information on this page is provided for information purposes only.
DMCA.com Protection Status