Error 1753 Demystified & The Quickest Fix Ever!

Repair the Error 1753 in Seconds

Error 1753 - What is it?

Error 1753 is an RPC endpoint mapper error code. This code is typically displayed as "EPT_S_NOT_REGISTERED" or sometimes as the hexadecimal value 0x6D9.  Error 1735 indicates that there are no more endpoints available from the endpoint mapper.

To understand this better, basically, RPC is an inter-process communication (IPC) method.

This is used by clients and servers for communication purposes. RPC is used by programs to execute programs on a server computer. The perfect example of this is Microsoft Outlook. You communicate with Microsoft Exchange Server using RPC.

This enables you to send and receive emails. When you use Microsoft Outlook to send emails, your computer sends a message to the server computer in an obscure coding.

The server responds to your computer with another message that contains the results of the executed program. This is all being carried at the backend of the running program.

Integral to this is the endpoint. The endpoint includes the name, port, or a group of ports on a computer that is monitored by the server for incoming client requests. This is a network-specific address to be precise.

The endpoint mapper is the part of the RPC subsystem that is responsible for dynamically assigning endpoints to the server. When this function fails it leads to error 1753 message display. It shows that RPC service is not available.

Solution

Restoro box imageError Causes

The error code 1753 indicating RPC endpoint mapper service failure is triggered due to multiple reasons. These include:

  • Windows registry damage and corruption
  • Malfunctioning of the hardware
  • Spyware intrusion or viral infections
  • Device driver conflicts

Further Information and Manual Repair

This error code may cause a great deal of inconvenience to execute programs that are dependent on the server. It can lower your productivity and performance. To avoid the hassle, it is advisable to repair the error 1753 immediately.

The best way to resolve this error 1753 in seconds is to download Restoro. By using this repair tool, you can fix the error right away for free without paying hundreds of dollars to a professional expert.

Restoro is a new and innovative PC fixer integrated with an automated algorithm and intuitive technology that enables users to sit back and relax while Restoro runs on the system and detects all PC-related issues in the shortest time.

In just a few clicks you can resolve even the mightiest PC issues like the error code 1753 RPC endpoint mapper problem and resume back to the program in no time.

Why Restoro

It is efficient and user-friendly. Restoro can be used by users of all levels so even if this is your first experience using a repair tool, you don’t have to worry. To operate it, you don’t have to be a computer programmer or have sound technical expertise.

It is simple and very easy to use. The layout is simple and neat complimented nicely with easy navigation and a sophisticated user interface.

Restoro is a high and multi-functional error tool embedded with powerful, performance-driven, and value-adding utilities, all in one.

So, whether the error code 1753 is triggered due to a viral infection on your system or registry corruption, you don’t have to look for different tools to resolve the error, simply run Restoro to fix the issue right away.

Restoro includes a dynamic registry cleaner that detects all registry issues and wipes out the clutter from the hard disk like junk files, internet history, and invalid entries which is by the way the number cause for registry corruption leading to error 1753.

It clears up disk space and RAM and repairs the misconfigured system files and corrupt registry in seconds thus resolving error 1753.

Restoro also functions as a system optimizer thus boosting the speed and performance of your PC massively and reducing boot time.

In addition to this, it also has a backup feature.  This tool is embedded for safety purposes. This feature enables you to create backup files on your PC before you start system repair. This helps you recover data in the event of data loss during system repair.

To get started:

  • Click here to download and install Restoro on your system
  • After installation, run it to scan for errors like 1753
  • Now press the repair tab to resolve
If you like to learn and find out more about various Windows errors, and how to repair them go to our vast archive or use search to find articles that will explain and help you in solving your issue.
However, if you prefer to do things fast and with automatization then we are proposing to use an automated solution for your issues. The application that we are recommending is Advanced System Repair Pro
Advanced System Repair utilizes multiple tools all in one to give you a quick, simple, reliable, and very thorough diagnosis of your PC. It brings you all the tools you need in one program to clean, fix, protect, optimize and boost your PC!
1-Click Maintenance
All the tools to make it simple and easy! It's like having a professional technician at the click of a mouse.

Junk Cleaner
Keeping your computer free from unnecessary clutter also helps make your computer last longer. Like any other machine, if you keep it clean and take care of it, it will serve you better for longer!

Optimize background apps
Optimize applications background activity with the built-in Application Optimizer feature.

Disk Defrag
With a simple 1-click, Advanced System Repair speeds up your PC by assembling fragmented files on your machine and organizing them more efficiently.

Malware Removal
Finds and removes all types of harmful malware including trojans, worms, bots, adware, spyware, PUPs, and more!

Privacy Cleaner
The all-in-one privacy suite to Clean Your Tracks & Protect Your Privacy! Make your computer safe, secure, and more efficient!

System Tweak/Optimizer
ASR will analyze your complete system and settings to adjust your PC to function at its maximum performance.

Registry Cleaner
Over time, as you install and uninstall applications, the registry can become cluttered with old entries and broken settings which can result in program crashes, and annoying messages and slow the computer down.
Visit our Advanced System Repair Pro Download page to inform yourself about all the benefits of this software and get a free trial copy of it.
advanced system repair pro

Advanced System Repair Pro

One-click automated PC repair solution
ASR logo
With Advanced System Repair Pro you can easily
Replace damaged files
Restore performance
Free disk space
Remove Malware
Protects WEB browser
Remove Viruses
Stop PC freezing
DOWNLOAD
Privacy Policy | Terms of Use | Uinstall
Advanced System Repair Pro is compatible with all versions of Microsoft Windows including Windows 11

Share this article:

You might also like

File is Too Large for the Destination Error
The file is too large for the destination file system is the error when you try to copy a file larger than 4GB on a drive formatted in the FAT32 file system. FAT32 is the old file system used in previous Windows versions and it was replaced by superior NTFS, altho FAT32 is still used because of its compatibility fact that it could be accessed in various operating systems its disadvantage among others is that it can not hold files larger than 4GB in size. This refers to the size of a single file, so if you have a file that is this large and when you try to copy or move it on a drive formatted in FAT32 you will get this message, and the operation will not be able to complete.

Format drive

In order to actually transfer the file in its glorious size, I am afraid that you will need to format destination drive in NTFS or if you have data on drive which you do not want to lose with formatting, use third-party software to convert file system from FAT32 to NTFS without losing data. I would recommend AOMEI partition assistant, it is a free and proven application letting you both manage your partitions and convert any one of them into another file system without data loss. You can get AOMEI here.

Split file

Another option if you are not keen on installing third-party tools or formating is to divide large files into smaller ones that are less than 4GB in size. You can use any archiving application since built-in Windows ZIP support will not let you split file into various different sizes. The best tool in my humble opinion is WinRAR, but you can choose any proven one. When file is split into parts less than 4GB in size, you will have no issues copying or move the file to the destination drive.
Read More
How to remove Aro 2012 from your Computer.

Aro2012 is a PC Optimizer Software that typically comes bundled with other software. Even though Aro2012 poses no threat itself, the programs that it comes bundled with may pose a problem to your computer.

From the Author: ARO is an advanced repair and optimization utility designed to help improve and maintain computers running the Windows operating system (both 32- and 64-bit). ARO focuses on finding errors that hide out in the Windows registry, identifying PC and web browser clutter that may be hindering PC performance, and ensuring computers have adequate security solutions installed and up to date. With its advanced scanning engine, ARO provides deep scanning capabilities to identify and repair registry errors. ARO also searches for and removes “junk” files that accumulate over time and can put a damper on PC performance.

When installed Aro2012 creates a startup entry that allows it to run each time the computer is started. It also adds a task scheduler that allows it to run at various times.

About Potentially Unwanted Applications

Have you ever found an unwanted program on your computer system and pondered how it got there since you are sure you didn’t purposefully download and never gave authorization to be installed? A PUA / PUP (potentially unwanted application / potentially unwanted program) is a piece of software that comes bundled with freeware/shareware and you agree to install on your computer. These are programs you definitely don’t want on your PC since it doesn’t give any beneficial service. The term PUP was first coined to outline this downloadable crapware as something other than malicious software. The reason is, most PUPs get into a PC not because they slip via the security holes, for instance, but because the users have installed them by themselves – 100 % unintentionally needless to say. PUPs might not be malware but nevertheless, they are dangerous programs for your laptop or computer. At best, these types of unwanted programs provide hardly any benefit, and at worst, they can be quite harmful to your computer.

What do PUPs do on your PC, precisely?

Most Potentially Unwanted Programs comes in the form of adware, which typically aims to exhibit lots of annoying pop-up ads, banners, coupons, and bargains on web pages you explore. PUPS also comes in the form of unwanted toolbars or browser plug-ins. Not only they entirely take up space on your computer screen, but toolbars could also manipulate search engine results, track your surfing activities, decrease your internet browser’s overall performance, and slow down your internet connection to a crawl. They could appear innocent but PUPs tend to be spyware. And in the large majority of the cases, end-users will not be aware that they’re installing an unwanted program. These are software programs that don’t do anything useful to you; in addition to taking up space on your hard disk drive, they will also slow down your computer, often modify settings without your permission, and the list of frustrating features goes on and on.

How can you avoid ‘crapware’

• Read the fine print so that the end-user license agreement (EULA) you’re accepting is only for the program you actually intend to download. • Always choose “Custom” or “Advanced” installation and never blindly click the Next button, which should let you uncheck any “foistware” software programs you do not want. • Have a solid anti-virus program such as Safebytes Anti-malware that can protect your computer from PUPs. As soon as you install this software, protection from malware and PUPs is already turned on. • Avoid installing a freeware application you will not use. Nowadays ‘freeware’ isn’t actually freeware – but “crapware” bundling nonsense. • Don’t download software programs from pop-ups, online advertisements, file sharing websites, as well as other unreliable sources; look out for any preset, unwanted options when downloading the program. Avoid visiting blogs and sites that support pirated programs.

What To Do When You Cannot Install Any Anti-Malware?

Practically all malware is inherently unsafe, but certain kinds of malicious software do a lot more damage to your computer than others. Some malware is designed to interfere with or prevent things that you’d like to do on your computer. It may well not permit you to download anything from the net or it will prevent you from accessing some or all of the websites, especially the antivirus sites. If you’re reading this, odds are you’re stuck with a malware infection that is preventing you to download and install the Safebytes Anti-Malware program on your computer. Although this type of issue will be harder to get around, there are some actions you can take.

Install in Safe Mode

If the malware is set to load at Windows startup, then booting in safe mode should avoid it. Only minimal required applications and services are loaded when you start your computer into Safe Mode. To launch your Windows XP, Vista, or 7 computers in Safe Mode with Networking, follow the instructions below. 1) At power-on/startup, hit the F8 key in 1-second intervals. This should bring up the Advanced Boot Options menu. 2) Use the arrow keys to select Safe Mode with Networking and hit ENTER. 3) Once this mode loads, you should have internet access. Now, get the virus removal application you need by using the internet browser. To install the program, follow the guidelines within the setup wizard. 4) Immediately after installation, do a complete scan and let the software get rid of the threats it detects.

Download the antivirus program in a different internet browser

Web-based viruses could be environment-specific, aiming for a particular internet browser or attacking specific versions of the browser. If you seem to have a trojan attached to Internet Explorer, then switch over to a different internet browser with built-in security features, such as Chrome or Firefox, to download your favorite antivirus program – Safebytes.

Install and run anti-malware from a Thumb drive

Another option is to create a portable antivirus program on your USB flash drive. Adopt these measures to use a thumb drive to clean your corrupted system. 1) Make use of another virus-free computer to download Safebytes Anti-Malware. 2) Insert the USB drive on the same computer. 3) Double-click the Setup icon of the antivirus software to run the Installation Wizard. 4) Select the USB flash drive as the destination for saving the software file. Follow the on-screen instructions to finish the installation process. 5) Now, insert the pen drive into the corrupted PC. 6) Run the Safebytes Anti-malware directly from the flash drive by double-clicking the icon. 7) Simply click “Scan Now” to run a scan on the affected computer for viruses.

SafeBytes Anti-Malware: Lightweight Malware Protection for Windows PC

Want to install the very best anti-malware software for your laptop or computer? There are plenty of applications available that come in paid and free versions for Windows systems. Some of them are excellent, some are ok types, and some will ruin your PC themselves! You need to pick out a product that has obtained a good reputation and detects not only viruses but other kinds of malware also. On the list of strongly recommended applications by industry experts is SafeBytes Anti-Malware, the most dependable program for Microsoft Windows. SafeBytes can be described as a powerful, real-time antivirus application that is designed to assist the typical computer user in protecting their computer from malicious threats. Using its outstanding protection system, this software will quickly detect and get rid of most of the security threats, including adware, viruses, browser hijackers, ransomware, trojans, worms, and PUPs. SafeBytes has got a plethora of wonderful features that can help you protect your computer from malware attacks and damage. A few of them are given as below: Active Protection: SafeBytes provides round-the-clock protection for your personal computer limiting malware attacks instantly. It’ll continuously monitor your laptop or computer for hacker activity and also gives users superior firewall protection. Most Reliable AntiMalware Protection: With a critically acclaimed malware engine, SafeBytes gives multilayered protection which is designed to catch and remove viruses and malware which are concealed deep in your computer. Extremely Speed Scanning: SafeBytes’s very fast malware scanning engine lessens scanning times and extends battery life. At the same time, it will effectively detect and remove infected computer files or any internet threat. Website Filtering: Through its unique safety ranking, SafeBytes notifies you whether a website is safe or not to access it. This will ensure that you’re always certain of your online safety when browsing the web. Minimal CPU and RAM Usage: This software is lightweight and will run quietly in the background, and will not affect your computer efficiency. Premium Support: Support service is readily available for 24 x 7 x 365 days through email and chats to answer your queries.

Technical Details and Manual Removal (Advanced Users)

To eliminate Aro 2012 manually, go to the Add or Remove programs list in the Control Panel and choose the program you want to get rid of. For web browser plug-ins, go to your web browser’s Addon/Extension manager and select the add-on you intend to disable or remove. It is also advised to reset your web browser to its default state to fix corrupt settings. To ensure complete removal, find the following registry entries on your computer and remove them or reset the values accordingly. Please keep in mind that only professional users should try to manually edit the registry because removing any single critical system file results in a serious issue or perhaps a PC crash. Additionally, some malicious programs have the capability to defend against its deletion. Completing this task in Safe Mode is advised.
Files: Search & Delete ARO2013_tbt.exe CleanSchedule.exe soref.dll AROSS.dll CheckForV4.dll aro.exe Registry: Search and delete: CURRENT_USER / AROReminder
Read More
Run Windows 10 from your USB drive
Windows 10 to goMany Linux users if not all of them can run their distros from a USB drive but did you know you can run Windows 10 from a USB drive as well? Microsoft has introduced all the way back to Windows 8 one feature called Windows To Go and it kept it in Windows 8.1 and in Windows 10 as well. This feature is intended as a convenient way for workers to carry their corporate environments with them, but having your own copy of Windows on a thumb drive could be handy for backup purposes, too, or if you frequently use public machines that lack your preferences/applications or that have a restricted OS.

What you will need?

In order to actually make Windows 10 run from a USB drive you will need the following things:
  1. USB drive with a minimum size of 20GB
  2. Working computer with Windows 10 running on it
  3. Rufus or another ISO to UBS tool, get Rufus here: https://rufus.ie/en_US/
  4. Windows 10 ISO file

Making Windows 10 UBS drive

Install Rufus on your Windows 10 and run it. Stick USB in PC and open Rufus. On the screen that follows choose your Windows 10 ISO image and under Image options choose Windows To Go. Click on ready and you are finished, that’s it. After Rufus finishes you have now fully working Windows 10 bootable drive which you can use on another PC for whatever reason.
Read More
How to create a public VPN Server on Windows
As you know, a Virtual Private Network or VPN is used to access a particular network from another network which is why it is also referred to as a mini-internet. Moreover, you can use it in two ways. One, you can use it to get you access to a closed server which means that you would not be getting access to the internet. Second, you can also use it to access a set of resources while at the same time get access to the internet. However, what if you want to access your resources at home even when you’re away? And what if you want to use the private server at home or at your office even when you’re away? This is where the callout for a VPN server for yourself comes in. And so in this post, you will be guided in how you can create a public VPN server on your Windows 10 computer. Follow each one of the given steps below to get started. Step 1: Find your IP address. This step is rather simple since all you have to do is open Control Panel > Network and Internet > Network and Sharing Center. From there, click on “Local Area Connection” and then click on Details where you’ll see your IP address next to “Autoconfiguration IPv4 Address”. Step 2: Next, set up port forwarding on your router. In this step, you will have to configure port forwarding in your router so that you would be able to connect to the VPN server through a public network like the internet.
  • Log in to the Admin Panel of your router. You have to do this since your router will be the gateway for your access to the network.
  • After you’re logged in, look for the “Port Forwarding” or “Applications and Gaming” or “NAT/QoS” menu tab and other similar names.
  • Now you need to set the port number to 1723 for connections based on Point to Point Tunneling Protocol.
  • Then save the configuration and reboot your router.
Step 3: Set up a VPN server on Windows 10.
  • In the Cortana search box, type “ncpa.cpl” and click on the related entry from the search results.
  • After that, tap the Alt + F keys to bring down the File Menu and then select New Incoming Connection which will open a mini window where you can allow the user accounts on the particular machine to access the VPN connection.
  • On the other hand, you can also click the “Add someone” button so that you can add someone else to the whitelist that can access the connection.
  • Now click on Next and you’ll see an option to select how people will connect to the network. Check the checkbox for the “Through the Internet” option.
  • After that, you will see a page where you have to configure the network. Just select IPv4 and then click on Properties.
  • From there, you will be asked to continue some additional settings like letting users access your Local Area Network or how IP addresses will be allocated to these users. Click on OK to save the changes you’ve made.
  • Click on Allow Access after you configure the network. And if you want to, you have the option to print this information for future reference or for the client machine.
  • Now click on Close to exit the configuration process.
Step 4: Allow the VPN Connections through the firewall In this step, you will have to allow the VPN connections through the firewall.
  • In the Cortana search box, type “Allow an app through Windows Firewall” and click on the related search result to open the intended Windows Firewall settings.
  • Next, click on Change Settings.
  • Then scroll down to check if Routing and Remote Access is Enabled for both the Public and Private networks and click on OK.
Step 5: Set up a VPN connection on Windows 10 Now all that’s left for you to do is to set up a VPN connection on Windows 10.
  • Go to Settings > Network and Internet.
  • From the list of options given, click on VPN located on the left pane to see the related settings.
  • After that, click on the “+” icon to add a VPN connection.
  • Next, select Windows Default under VPN Provider and under the Connection Name, input your VPN’s name, and then enter the IP address you got from the VPN service provider under the Server name or address section.
  • Now select PPTP under VPN type since it is the most commonly used protocol for VPNs.
Read More
How to Fix Entry Point not Found Dll Errors

Entry Point not found dll Errors Repair

What is ‘Entry Point not found dll’ Error?

Entry Point not found dll errors are common in Windows PC. These errors indicate poor PC maintenance. An entry point is basically the memory address inside the dynamic link library. It contains the call being made. A dynamic link library on the other hand is a collection of small programs which use and request this call to run and load programs successfully on your PC. However, when this process is unable to be executed successfully, you come across ‘entry point not found dll’ error messages.

Solution

Restoro box imageError Causes

Generally speaking, some of the typical causes of ‘entry point not found dll’ errors are:
  • Missing, corrupted, and damaged dll files
  • Registry overloaded with invalid entries
  • Disk fragmentation
  • Viral infection
It is advisable to resolve these ‘entry point not found dll’ errors on your PC immediately because dll errors can cause you a great deal of inconvenience as you may be locked out and unable to access your desired programs. Furthermore, if dll errors are left unresolved, such errors can expose your PC to serious threats like system failure, system damage, corruption, and crash.

Further Information and Manual Repair

Though ‘entry point not found dll’ errors are critical errors but the good news is that these can be easily resolved. To fix dll errors on your PC, you don’t always have to hire a professional technician or be a computer programmer yourself. Here are some of the best DIY (do it yourself) ways to resolve ‘entry point not found dll’ errors on your system:

1. Reinstall the Deleted Program

This method to resolve ‘entry point not found dll’ error code is very basic. It is advisable to uninstall and then reinstall the deleted program to retrieve the missing or deleted dll files. Here’s why: dll files are shared files. There are multiple programs on your PC that may be using one type of dll file to load. Now when you uninstall a program that you no more need on your PC, chances are that it may also delete that particular dll file. And when this happens the other programs supported by the deleted dll file are unable to load. Therefore, in such an event the best way to retrieve the missing dll file is to uninstall the program that displays the errors message and then reinstall it. This will help you restore the missing dll file and run the program successfully.

2. Install an Antivirus and a Registry Cleaner

As mentioned above, ‘entry point not found dll’ errors indicate poor PC maintenance. If you don’t maintain your system, the registry overloads with bad and invalid entries, redundant and obsolete files, junk files and cookies. These files acquire a lot of space which damages dll files and the registry. Furthermore, due to data volume overload and less storage space, files are then saved in different places. This is also known as disk fragmentation. When these files are called, it takes a lot of time for the disk to consolidate fragmented data and execute the function successfully. To resolve these issues, you need to clean and restore the registry. Though this can be done manually it may be slightly complicated and time consuming therefore it is advisable to install and run a registry cleaner.

Restoro.

In addition to this, due to poor PC maintenance, viruses and malware can also enter your system unknowingly through file downloads and phishing emails. These can also damage dll files. To remove viruses and malware from your PC it is important to run an anti-virus. Instead of downloading both tools separately on your system, we recommend Restoro. This is a multi-functional and advanced PC fixer embedded with an intuitive algorithm and a user-friendly interface. It includes multiple utilities including a powerful antivirus, a high functional registry cleaner, and Active X controls and class scanner. It also functions as a system optimizer. By running this software on your system, you can easily scan all registry issues and viruses simultaneously. It repairs the damaged registry and dll files, removes unnecessary files and all types of malicious software. It is compatible with all Windows versions. It is easy to use and high on performance. It is a one-stop solution for all ‘entry point not found dll’ errors on your PC. In just a few clicks you can resolve system errors and optimize your PC performance dramatically. Click here to download Restoro and resolve ‘entry point not found dll’ errors.
Read More
NVIDIA Share is not working or responding
NVIDIA is undeniably the market leader as a Graphics Card manufacturer. Recently, NVIDIA came about a feature known as NVIDIA Share. This feature allows users to carry out a number of tasks such as streaming, recording, and sharing their gameplay with other users. NVIDIA Share allows users to take multiple snapshots of the gameplay which brings in capabilities to get the memories of the moments that happen during an awesome game. However, as of late, there were reports that NVIDIA Share is not working or responding. So if you are one of the users who are currently facing this issue, then read on as this post will guide you in resolving it. Make sure to follow the options given below carefully for a successful result.

Option 1 – Try to update the drivers from the official site of NVIDIA

The first thing you can do is to update the drivers from the official site of NVIDIA. And in case you don’t know the type of Nvidia graphics card that your computer is on, follow the steps below:
  • Tap the Win + R keys to open the Run dialog box.
  • Next type in “dxdiag” in the field and click OK or hit Enter to open the DirectX Diagnostic Tool.
  • From there, you can see what type of Nvidia graphics card that your system is on.
  • Take note of your graphics card information and then look for the best drivers for your operating system. Once you’ve downloaded and installed the file, restart your PC.

Option 2 – Try to roll back the driver to the previous version

If the first option didn’t work for you, then it’s time to roll back the device drivers. It is most likely that after you updated your Windows computer that your driver also needs a refresh.
  • Tap the Win + R keys to launch the Run window and then type in the “msc” command and hit Enter to open the Device Manager window.
  • Under the Device Manager, you will see a list of drivers. From there, look for the NVIDIA Drivers and expand them.
  • Next, select the driver entries that are labeled appropriately.
  • Then select each one of them and double click to open a new mini window.
  • After that, make sure that you’re on the Driver tab and if you are not, just navigate to it then click the Roll Back Driver button to switch back to the previous version of the NVIDIA Drivers.
  • Now restart your computer to successfully apply the changes made.

Option 3 – Try disabling NVIDIA Share

If the first two options given above didn’t work then you might want to try disabling NVIDIA Share. In case you didn’t make any modifications to the driver, chances are either your driver is out of date or there are some issues with the installation of the drivers. For you to find out, you need to first check if your NVIDIA drivers are really up to date. Once you’ve confirmed it, you can now disable the NVIDIA Share feature. Just refer to the steps below to do that.
  • Search for the NVIDIA GeForce Experience in the search box and then click on the appropriate result to open it.
  • After you open the NVIDIA GeForce Experience, go to the General tab.
  • Next, scroll down to the NVIDIA Share section and then select the toggle to turn off this feature.
  • Now restart your computer and try to check if there are any updates available for the NVIDIA Graphics card and install them again if there are any.
Read More
How to see your Wi-Fi password in Windows 11
Each time you connect to a Wi-Fi network your PC saves that network password. If for any reason you need to see this password or passwords there are ways you can do it and we are here to show you how. Wi-Fi passwordHello and welcome to error tools where we aim to help you with all of your Windows problems and issues, where we offer our insight on various topics and sometimes go offroad and write something crazy. This time we will offer you a way on how to easily and quickly see how can you find out your memorized Wi-Fi password.

Find your W-Fi password

  1. Make sure that you are connected to the Wi-Fi network you wish to find out the password of
  2. Open Windows Settings app by pressing ⊞ WINDOWS + I
  3. On the left side choose Network & Internet and click on it
  4. Click on Advanced Network Settings
  5. Inside Advanced Network Settings go to Related Settings
  6. Select More Network Adapted Options
  7. Right-click on your adapter and select Status
  8. Click on Wireless Properties
  9. Click on the Security tab
  10. Click on enable on Show Character box beneath Network Security key to reveal Wi-Fi password
Read More
Toggle to turn Bluetooth On or Off is missing
Support for Bluetooth hardware has always been included in the Windows 10 operating system for a long time now. And it just keeps getting better especially now with the support for the latest version of Bluetooth 5.0 LE. However, there are still times when Bluetooth experiences a couple of issues one of which is users were not able to turn on or off Bluetooth on their Windows 10 Pc since the option to turn Bluetooth off or on is missing in the Windows 10 settings app and even in the Action Center. So if you are one of the users who experience the same problem, read on as this post will guide you in resolving the issue. To resolve this Bluetooth issue, here are some suggestions that could help:

Option 1 – Try running the Bluetooth Troubleshooter

As you know, Windows 10 has various troubleshooters with user-friendly interfaces where you can utilize them to fix issues in your PC. And since you’re dealing with some Bluetooth problem, you have to run the Bluetooth Troubleshooter.
  • Open the Windows 10 Settings.
  • Then go to Update & Security > Troubleshoot.
  • You should find the option for Bluetooth on your right-hand side – click on it then click on the “Run the troubleshooter” option.
  • Now follow the next screen options.

Option 2 – Try to reinstall or update the Bluetooth driver

The issue might have something to do with the Bluetooth drivers. It could be that it is outdated and needs to be updated or that you recently updated it and since then you have trouble removing the Bluetooth devices and so to fix the issue, you can update, roll back or uninstall the Bluetooth drivers. How? Follow the steps below.
  • Tap the Win + X keys to open the Device Manager.
  • Next, look for the Bluetooth device and right-click on it.
  • Select the option “Update driver”.
  • After that, a new popup window will appear. In there, select the option, “Search automatically for updated driver software”.
Note: Checking the update may take a few minutes so you’ll have to wait until it finishes. If it is able to find an update, you must install it. And if you want to reinstall the Bluetooth driver, just select the “Uninstall driver” option and follow the next on-screen instructions that follow.

Option 3 – Configure the Bluetooth Services

If the first two options didn’t work, the next thing you can do is configure Bluetooth Services. How? Simply follow these steps:
  • Tap the Win + R key combination to open the Run dialog box.
  • After that, type “services.msc” in the field and hit Enter to open the Windows Services Manager.
  • You will then see a list of services and from there, look for the following services and make sure that their default values are set as follows:
    • Bluetooth Handsfree Service – Manual (Triggered)
    • Bluetooth Audio Gateway Service – Manual (Triggered)
    • Bluetooth Support Service – Manual (Triggered)
    • Bluetooth User Support Service – Manual (Triggered)
  • Now click on the Start button to start all the aforementioned services and then check if you can now see the option to turn Bluetooth on or on.
Read More
Prompted For A Product Key On Windows 10 - How to Fix It

Prompted For A Product Key – What Is It?

Some Windows 7 or Windows 8/8.1 users are having a hard time upgrading to Windows 10 as they are being prompted for a product key. By default, the Windows 10 operating system does not require a product key and users should not be prompted for one, given you upgraded your computer from an activated Windows 7 or Windows 8/8.1 license or from the Windows 10 Preview build. However, there are some users encountering this problem and there are several reasons for this.

Solution

Restoro box imageError Causes

There are a few reasons why some users are being prompted for a product key when upgrading to Windows 10:

  • Windows 7 or Windows 8/8.1 license is not activated.
  • You’re upgrading to Windows 10 final release from a preview build.
  • There are broken operating system files.
  • Activation servers get overwhelmed due to the high volume of upgrades.
  • The Windows 10 copy you downloaded does not correspond with the current Windows system you are upgrading from.

Further Information and Manual Repair

Before you can fix this problem, you need to know why you’re being prompted for a product key. Some things you should know about Windows 10 product key activation are the following:

  • You cannot activate Windows 10 using your Windows 7 or Windows 8/8.1 product key. Windows 10 has a unique product key.
  • Error codes such as 0x8007232b, 0XC004E003, 0x8007007B, or 0x8007000D might pop up during system upgrade especially when the activation servers get overwhelmed with the high volume of upgrades.
  • You don’t really need to know your Windows 10 product key.

Now, if ever you’re prompted for a product key when you’re upgrading to Windows 10, you can apply the following methods:

Method One: Give It A Few Days

If you’ve been prompted for a product key upon upgrading to Windows 10, you should click on the “Do this later” option. Wait for a few days then Windows 10 will get activated automatically.

Method Two: Download A Copy of Windows 10 Corresponding Your Current System

One of the reasons Windows users are being prompted for a product key when upgrading to Windows 10 is that they have downloaded a wrong edition of Windows 10 and do not correspond with your current system.

  • Users of Home Basic, Home Premium, Windows 7 Starter, Windows 8.0 Core, and Windows 8.1 Core should download Windows 10 Home ISO.
  • Users of Windows 7 Ultimate, Windows 7 Professional, Windows 8.0 Pro, and Windows 8.1 Pro should download Windows 10 Pro ISO.

NOTE: Users of Windows 7 Enterprise, Windows 8.0 Enterprise, and Windows 8.1 Enterprise are not eligible for the free upgrade offer.

Method Three: Ensure Windows Is Activated

If your Windows 7 or Windows 8/8.1 is not genuine or activated, you will get prompted for a product key. You need to make sure first your current system is activated.

  1. Click on Start then right-click Computer. For Windows 8 and up users, you can simply press on Windows key + X then select Choose Properties.
  2. When the Properties window appears, check if the Windows you’re running is activated.

Method Three: Reset License Status

  1. Press on Windows key + X.
  2. Select Command Prompt (Admin).
  3. Once the command prompt window appears, type vbs –rearm then press Enter.
  4. Exit Command Prompt then restart your PC.
  5. Input the product key by following the instructions given.

Method Four: Force Activation

  1. Press on Windows key + X
  2. Select Command Prompt (Admin).
  3. Once the command prompt window appears, type vbs –ato then press Enter.
  4. Exit Command Prompt then restart your PC.

Method Five: Run System File Checker

Another thing you can try doing is to run the system file checker utility to scan if there are any broken operating system files. In doing so, you’ll be able to detect problems that might be preventing the product activation of your Windows 10 upgrade.

Method Six: Contact Microsoft Activation Center

If in case you’ve exhausted all your resources and you are still being prompted for a product key when upgrading to Windows 10, you can try contacting the Microsoft Activation Center for further details. Check here for the appropriate telephone numbers to contact.

Method Seven: Download An Automated Tool

If you still experience the error after doing the methods above, you might want to try a powerful and trusted automated tool to fix the job.

Read More
Razer is making only 1337 smartwatches
razer smartwatch
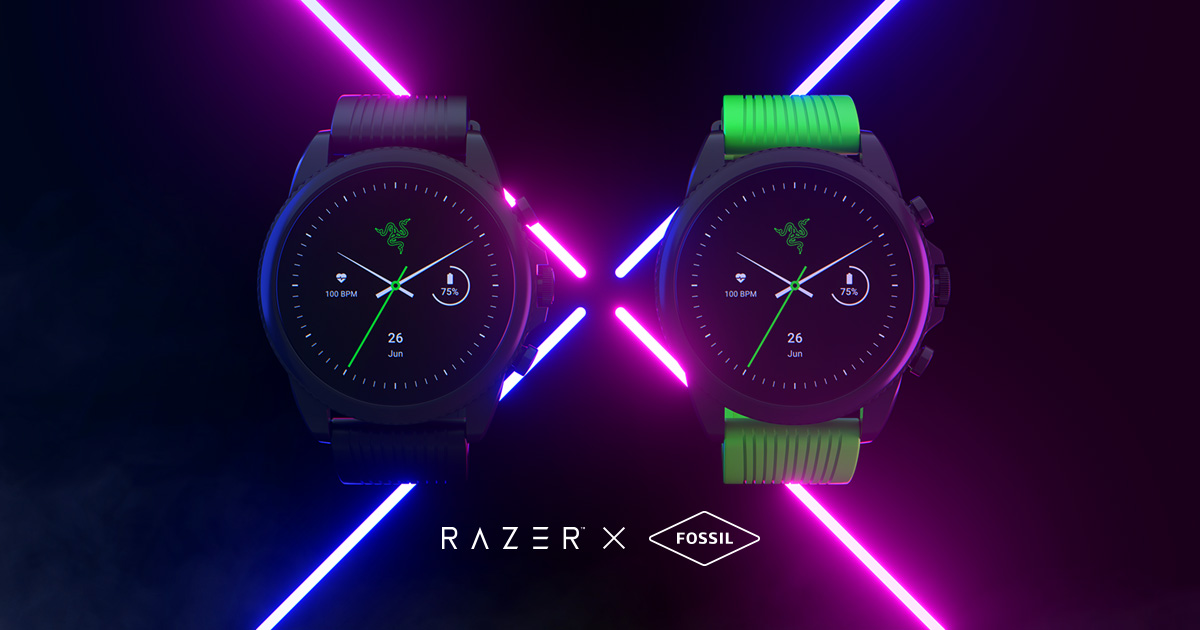
Razer had some strange dives into stuff not really aimed at gamers and the gaming community overall like its Zephir smart mask and now it is venturing into the area of smartwatches teaming up with Fossil. I am not clear if this initiative was set in motion by Razer or Fossil and I really do not know why limited production numbers. Officially named RAZER X FOSSIL GEN 6 SMARTWATCH, this watch comes with the official following text on Razer's page:
Way more. Way faster. Way ahead of the game. Get time on your side with the limited-edition Razer X Fossil Gen 6 Smartwatch—only 1,337 pieces worldwide. Designed for the next generation of gamers, supercharge your style with customizable straps, dials, Razer Chroma™ RGB effects, and more.
Now, I am a fan of Razer and I like their products, mostly keyboards and mouse altho chair is also very good and in top of the product line in that field but I can not really stand behind this product and decision, and the only reason why I can not stand behind it is this 1337 (leet, or elite) a limited number of available pieces that is nothing more than a gimmick to sell watches at a higher price. Watch itself is not really bad, as a matter of fact, it has some solid hardware statistics.

Technical characteristics

Featuring a 1.28-inch AMOLED Display with 3 unique Razer watch faces (Analog, Text, Chroma*), 4 customizable Razer Chroma™ RGB effects, and 2 custom-designed, interchangeable straps, this Razer's baby is packing 44mm, Stainless Steel case with 22mm, straps. It runs on Wear OS by Google as an operating system of a choice and under software, it is packing Qualcomm Snapdragon Wear 4100+ CPU paired with 1GB of RAM and 8GB Storage. The display is running at 416x416 resolution with 326ppi. Watch input is with 2 configurable Push buttons, One rotating Home button, touchscreen, and voice. It has in it a loudspeaker, microphone, and vibration. Connection is via Bluetooth 5.0, GPS, NFC SE, and Wi-Fi. The battery can in their word work for 24 Hr + multi-day Extended Mode **Varies based on usage and after updates install**. USB data cable with magnetic dock snaps to split rings on the watch case back and spins 360 degrees for ease of use. Approximately half an hour to reach 80%. Sensors included in the watch itself are: Accelerometer, Altimeter, Ambient Light, Compass, Gyroscope, Off-body IR, PPG Heart Rate, SPO2. Smartwatch is water-resistant up to 3 ATM & it comes with preloaded apps like: Agenda, Alarm, Battery-Optimized Activity Mode, Calendar, Cardio Level Tracking, Cardiogram, Contacts, Enhanced Phone Dialer App, Google Assistant, Google Fit (Workout, Heart Rate, Goals, Breathe), Google Maps, Google Pay™, Google Play Store, Nike Run Club, Noonlight, Smart Battery Modes, Spotify, Stopwatch, Timer, Translate, Wellness Apps with Sleep Tracking.

Conclusion

Watch is Dropping on 01.10.22, 8 AM PST which is 4 days from now and altho it is an interesting device with solid hardware I can not stand behind it due to its limited edition numbers and with $329 price tag. With the same amount of money, you can get yourself Samsung or Apple watch with more features packing. But of course, that is just my personal preference and if you want to own this limited edition Razer smartwatch, go for it.
Read More
1 2 3 162
Logo
Copyright © 2022, ErrorTools. All Rights Reserved
Trademarks: Microsoft Windows logos are registered trademarks of Microsoft. Disclaimer: ErrorTools.com is not affiliated with Microsoft, nor claim direct affiliation.
The information on this page is provided for information purposes only.
DMCA.com Protection Status