Enable or disable Console Mode Sign-in

Microsoft has been bringing new lock-screen features with every iterative feature release of Windows 10 in order to improve user experience. However, Windows 10 users have different opinions regarding it. Some users are pleased with it while some users simply do not like it. So if you are one of the users who seem to not approve of this feature, read on as this post will be about enabling or disabling the Console Mode sign-in feature in Windows 10.

Before you proceed, take note that you will not be able to use your mouse pointer in this Consol Mode login screen and you can only use your keyboard to navigate around various options. You might also want to create a System Restore point just in case.

To enable or disable the Console Mode sign-in in your Windows 10 computer, refer to the given steps below.

Step 1: Tap the Win + R keys to open the Run dialog box.

Step 2: Then type in “Regedit” in the field and tap Enter to open the Registry Editor.

Step 3: Next, navigate to the following registry path:

ComputerHKEY_LOCAL_MACHINESOFTWAREMicrosoftWindowsCurrentVersionAuthenticationLogonUITestHooks

Step 4: From there, look for a DWORD named “ConsoleMode”. If you don’t see this DWORD, you can just create a new DWORD and name it as “ConsoleMode” and make sure that its base is set to Hexadecimal.

Step 5: After that, double click on ConsoleMode and change its value to “0” to disable it and “1” to enable it.

Step 6: Now restart your computer to apply the changes made.

Like pointed out, you can only use your keyboard when you’re in the Console Mode login window or screen. You can just use the ESC button to go back to the menu while you can utilize the arrow keys so you can go through the options that are mostly vertically arranged and the Enter key to select an option. In the Console Mode, sign-in using the Passwords and PINs worked efficiently.

If you like to learn and find out more about various Windows errors, and how to repair them go to our vast archive or use search to find articles that will explain and help you in solving your issue.
However, if you prefer to do things fast and with automatization then we are proposing to use an automated solution for your issues. The application that we are recommending is Advanced System Repair Pro
Advanced System Repair utilizes multiple tools all in one to give you a quick, simple, reliable, and very thorough diagnosis of your PC. It brings you all the tools you need in one program to clean, fix, protect, optimize and boost your PC!
1-Click Maintenance
All the tools to make it simple and easy! It's like having a professional technician at the click of a mouse.

Junk Cleaner
Keeping your computer free from unnecessary clutter also helps make your computer last longer. Like any other machine, if you keep it clean and take care of it, it will serve you better for longer!

Optimize background apps
Optimize applications background activity with the built-in Application Optimizer feature.

Disk Defrag
With a simple 1-click, Advanced System Repair speeds up your PC by assembling fragmented files on your machine and organizing them more efficiently.

Malware Removal
Finds and removes all types of harmful malware including trojans, worms, bots, adware, spyware, PUPs, and more!

Privacy Cleaner
The all-in-one privacy suite to Clean Your Tracks & Protect Your Privacy! Make your computer safe, secure, and more efficient!

System Tweak/Optimizer
ASR will analyze your complete system and settings to adjust your PC to function at its maximum performance.

Registry Cleaner
Over time, as you install and uninstall applications, the registry can become cluttered with old entries and broken settings which can result in program crashes, and annoying messages and slow the computer down.
Visit our Advanced System Repair Pro Download page to inform yourself about all the benefits of this software and get a free trial copy of it.
advanced system repair pro

Advanced System Repair Pro

One-click automated PC repair solution
ASR logo
With Advanced System Repair Pro you can easily
Replace damaged files
Restore performance
Free disk space
Remove Malware
Protects WEB browser
Remove Viruses
Stop PC freezing
DOWNLOAD
Privacy Policy | Terms of Use | Uinstall
Advanced System Repair Pro is compatible with all versions of Microsoft Windows including Windows 11

Share this article:

You might also like

Chrome update failed error 3, 4, 7, 10, etc
If you find it hard to update Google Chrome to its latest version and each time you try to do so it keeps on failing, worry not for this post will guide you in fixing a list of Google Chrome Update errors. Even though there are a lot of error codes around Chrome, these are only caused by issues with the update. Here are some of the errors you can encounter when updating Google Chrome:
  • Update failed: You can encounter this error when the Updates are disabled by the administrator.
  • Update failed with
    • Error 3 or 11: When Chrome’s inbuilt updater fails to find the Update server to download the latest version.
    • Error 4 or 10: This happens while checking for updates with the message “Update check failed to start”
    • Error 7 or 12: This occurs when the download fails while checking for updates.
  • Windows OS version is not supported.
  • Google Chrome may not be able to keep itself updated.
  • Any other errors that mention that “Update failed”
Since these aforementioned error codes are related to “Update Failure”, then they have common solutions and here they are:

Option 1 – Restart your computer

You need to restart your computer first and then try updating Chrome again. There are times when it’s only a temporary issue that can be fixed by simply restarting your computer.

Option 2 – Try checking antivirus programs, firewall, and parental control settings

If you have antivirus programs, a firewall installed in your computer, as well as parental controls, then any of these could be blocking you to download anything, including the update for Chrome. This is why you have to double-check and make sure that software updates aren’t being blocked by these programs. On the other hand, you can also try running the Network Troubleshooter as it can help you resolve any DNS or connectivity issues. To use it, follow the steps below.
  • Open the Search bar on your computer and type in “troubleshoot” to open the Troubleshoot settings.
  • Next, scroll down and select the “Network Adapter” option from the right pane.
  • Then click on the Run Troubleshooter” button.
  • After that, your computer will check for any possible errors and will pinpoint the root cause of the problem if possible.

Option 3 – Try to remove Proxy

Removing the Proxy might also help you in fixing the Chrome Update errors. Here’s how you can do it:
  • Tap the Win + R keys to open the Run dialog box.
  • Then type “inetcpl.cpl” in the field and hit Enter to pull up the Internet Properties.
  • After that, go to the Connections tab and select the LAN settings.
  • From there. Uncheck the “Use a Proxy Server” option for your LAN and then make sure that the “Automatically detect settings” option is checked.
  • Now click the OK and the Apply buttons.
  • Restart your PC.
Note: If you are using a third-party proxy service, you have to disable it.

Option 4 – Try to reset Winsock, TCP/IP & Flush DNS cache

Resetting Winsock, TCP/IP, and flushing DNS might help in resolving the Chrome Update errors just follow these steps:
  • Right-click on the Start button and click on Command Prompt (administrator) so you can pull up an elevated Command Prompt.
  • After that, execute each one of the commands listed below. And after you typed in one after the other, you have to hit Enter.
  1. netsh winsock reset – type in this command to reset Winsock
  2. netsh int ip reset resettcpip.txt – type in this command to reset TCP/IP
  3. ipconfig /flushdns – type in this command to flush the DNS cache
  • Next, restart your PC and check if the problem’s fixed.

Option 5 – Try to run the Chrome Cleanup tool

You might want to run Google Chrome’s built-in Malware Scanner & Cleanup tool as it could also help in getting rid of any unwanted ads, pop-ups, and even malware, as well as unusual startup pages, toolbars, and anything else that might overtake the network and could affect the performance of the browser.

Option 6 – Get rid of any conflicting browser extensions

  • Open Chrome and press Alt + F keys.
  • Go to More tools and click Extensions to look for any suspicious browser extensions or toolbars.
  • Click the Recycle bin and select Remove.
  • Restart Chrome and press Alt + F keys again.
  • Proceed to On Startup and mark Open a specific page or set of pages.
  • To check if the browser hijacker is still active, click Set pages, if it is active, overwrite the URL.

Option 7 – Reset Google Chrome

Resetting Chrome can also help you get rid of the error. Resetting Chrome will restore its default settings, disabling all the extensions, add-ons, and themes. Aside from that, the content settings will be reset as well and the cookies, cache, and site data will also be deleted. To reset Chrome, here’s what you have to do:
  • Open Google Chrome, then tap the Alt + F keys.
  • After that, click on Settings.
  • Next, scroll down until you see the Advanced option, once you see it, click on it.
  • After clicking the Advanced option, go to the “Restore and clean up option and click on the “Restore settings to their original defaults” option to reset Google Chrome.
  • Now restart Google Chrome.
Read More
How to Fix Error 0x0000605 in Windows
Recently, some users reported not being able to boot up their Windows 10 computers. And during the startup phase, at some time, the bootup sequence is halted with a Recovery error along with an error message saying, “Your PC/Device needs to be repaired” with an error code of 0x0000605. This kind of error message indicates that Windows was not able to verify the digital signature for the file as the signing certificate or it could be that it has expired. To resolve this error, you can follow the potential fixes given below and see if you stumble upon a fix that might work out for you.

Option 1 – Change the Date & Time settings in the BIOS

Some users reported that they were able to fix the error by changing the Date & Time settings in the BIOS. Upon checking, they saw that in their BIOS settings, the date was off several years. As a result, the incorrect date and time settings end up ticking the system into believing that the Windows build has expired long before the actual expiration date. You can check if the error pops up due to the same reasons by accessing the BIOS settings. To do so, you have to tap the Boot key that’s associated with your motherboard manufacturer during the initial startup phase. After that, you can search for a particular boot key online or you can also tap keys like F2, F4, F8, F10, F12, and the Delete key. Once you’re able to access the BIOS settings, locate the Date & time or anything similar, and then check if the date is correct or not. If not, you need to change the date to the actual date and then save the changes made and restart your computer and then check if the issue is now fixed or not. Just remember that if the actual date is past the expiration date of the build you have, you need to change it to an older date. If your Windows 10 PC is able to boot back up, you have to update it to a stable Windows build and then go back to the BIOS settings and change the date to the current one else you will definitely encounter Windows update errors in the future as well as security alerts.

Option 2 – Perform a clean install of a stable Windows 10 build

If every system boot fails accompanied by a BSOD error with error code 0x0000605 “A component of the operating system has expired” and you’ve already followed every instruction on option 1, then it’s most likely that your current Windows build has already expired. Remember that almost all the Windows 10 Insider Preview builds (98xx) are created along with an expiration date and when your computer reaches the expiration date, you won’t be able to boot your computer up. Note that the exact expiration date varies based on the build number. And prior to the expiration date, the operating system will start to display some error warnings telling you that the build will expire and urge you to update the most recent build available. And so once the computer reaches its expiration date, it will begin to reboot every three hours until it no longer boots up which is about 2 weeks approximately after the license has expired. Once the expiration date is up and your computer no longer boots up, you need to perform a clean install and then install the latest Windows 10 build to resolve the issue once and for all.
Read More
A required device isn’t connected
If you are currently facing the “A required device isn’t connected or cannot be accessed” error with codes 0xc0000185, 0xc0000225, 0xc0000001, 0xc00000f, and 0xc000000e on your Windows 10 computer, worry not for this post will help you resolve this problem. All these error codes point out the same thing – your computer needs to be repaired. Some of these error codes are related to the “winload.efi” file which means that you are using the UEFI system. This file also loads up important drivers in order to start the Windows Kernel. And if you got a remark from any of these error codes indicating that there is a hardware failure or that the driver configuration is incorrect, then you must physically check if the wires are connected properly. This kind of error occurs mostly when your computer wasn’t able to locate the system files that are needed to boot up your computer. Thus, the only way to fix this problem is to correct the boot record. It is recommended that you utilize the “/RebuildBCD” option in order to rebuild the BCD files. To do so, follow these steps:
  • You can start by booting into the installation environment for Windows 10 from an installation media.
  • After that, click on Repair your computer and on the blue screen, select Troubleshoot and then select the Advanced options menu.
  • From there, select Command Prompt and once you open it, enter each one of the commands given below by sequence.
    • bootrec /FixMbr
    • bootrec /FixBoot
    • bootrec /ScanOS
    • bootrec /RebuildBcd
  • Once you’re done executing the commands given above, type “exit” to close the Command Prompt window and then restart your computer and see if it fixed error code 0xc000014c.
On the other hand, if rebuilding the BCD using the /RebuildBCD option didn’t help, you can try a crude way to rebuild the boot record from scratch. You can do that by following the given steps below which will export and delete/backup the BCD available in the system.
  • Go to the Advanced Recovery Mode.
  • From there, go to Command Prompt and execute the commands given below and make sure to enter them one after the other.
    • bcdedit /export C:BCD_Backup
    • c:
    • cd boot
    • attrib bcd -s -h –r
    • ren c:bootbcd bcd.old
    • bootrec /RebuildBcd
If it still didn’t help, then troubleshoot the problem further with the help of the following instructions.

Option 1 – Disable the Secure Boot in the BIOS

Disabling the Secure Boot in the BIOS settings is definitely recommended to resolve the error. To disable Secure Boot, here’s what you have to do:
  • First, boot your computer into Windows 10.
  • Next, go to Settings > Windows Update. From there, check if there is anything that you have to download and install if you see any available updates. Usually, OEMs send and update the list of trusted hardware, drivers, and operating systems for your computer.
  • After that, go to the BIOS of your computer.
  • Then go to Settings > Update & Security > Advanced Startup options. If you click on Restart Now, it will restart your computer and give you all the advanced options.
  • Next, select Troubleshoot > Advanced Options. As you can see, this screen offers you further options including System restore, Startup repair, Go back to the previous version, Command Prompt, System Image Recovery, and UEFI Firmware Settings.
  • Select the UEFI Firmware Settings which will take you to the BIOS.
  • From there, go to the Security > Boot > Authentication tab where you should see Secure Boot. Note that every OEM has its own way of implementing the options so it varies.
  • Next, set Secure Boot to Disabled and set Legacy Support to On or Enabled.
  • Save the changes made and exit. Afterward, your computer will reboot.

Option 2 – Run System File Checker

You could also run a System File Checker or SFC scan. All you have to do is select Command Prompt from the Advanced Options. Once you’ve opened Command Prompt, type the “sfc /scannow” command and tap Enter to execute it.

Option 3 – Disable the Early Launch Anti-Malware Protection

  • You need to restart your computer in the Start Menu first while holding down the Shift key on your keyboard.
  • After that, it will restart your computer to Startup Settings.
  • Now ensure that the 8th option is labeled as “Disable early launch anti-malware protection.
  • Then tap the F8 key since the aforementioned option above is listed at number 8. This should launch and load Windows on your PC with the Early Anti-malware protection disabled for that session only when you try to carry out the same task and then check if the error related to the Winload.efi file is now fixed.

Option 4 – Try to run Automatic Startup Repair

In this option, you need to boot your computer into the Advanced Startup Options and from there, run the Automatic Startup Repair and then wait until the process is completed.

Option 5 – Try to reset the BIOS or the UEFI Settings

If updating the BIOS didn’t help in fixing the error, you can try to reset the BIOS instead.
  • Start your computer and tap the F10 key during the booting process to enter the BIOS. If it does not work, you can try tapping the F1 or F2 key as well as the Del key.
  • Once you’re already in the BIOS, tap the F9 key to get the prompt to RestoreLoad default configuration now for the BIOS.
  • Next, click on Yes and then follow the next on-screen instructions that appear to set the BIOS back to its default settings.
  • Once you’re done restoring the default settings of the BIOS, restart your computer and then check if it now boots properly.

Option 6 – Try to physically check the hardware

You should also check the physical status of the hardware in your computer. You can clean the dust off the hardware components like the Network Card of the computer. You might want to use a small blower or you could also use a soft cloth and run the components gently. Make sure that you don’t damage any parts with moisture or cause harm to any circuits while you carry out this task.
Read More
Fix Defender, The Threat Service has stopped
There are times when you see a message in Windows Defender saying, “The Threat Services has stopped, Restart it now” when you try to use it. This kind of error is usually fixed by simply clicking on the Restart now button. However, if the error still appears even after you restart your computer and you see another message that says, “Unexpected error, Sorry, we ran into a problem”, then continue reading as this post will guide you in resolving this issue in Windows Defender. Before you proceed with the given fixes below, you have to create a System Restore point first. This way, you can always undo any changes you’ve made in case something goes wrong.

Option 1 – Make sure that the Windows Defender Services are started

The Windows Defender Advanced Threat Protection service is the one that protects your computer from advanced threats by monitoring and reporting security events that happen on your computer. This is why you have to make sure that this, as well as other required services in Windows Defender, are set to their default values and are started. To do so, follow these steps:
  • In the Cortana search box, type “services” and click on the Services icon to open the Services Manager. Alternatively, you can also tap the Win + R keys to launch the Run prompt and then type “services.msc” in the field and hit Enter to open the Services Manager
  • After opening the Services Manager, look for the following services and make sure that their Startup type is set to their default values:
    • Windows Defender Advanced Threat Protection Service – Manual
    • Windows Defender Antivirus Network Inspection Service – Manual
    • Windows Defender Antivirus Service – Manual
    • Windows Defender Firewall Service – Automatic
  • You can right-click on each one of the listed services and then select Start to start them.
  • And if some of the services don’t have their default values, just double-click on the Services to change the Startup types and select the correct option from the drop-down menu of the Startup type under the Properties box.
  • Next, set up the Startup type of these services to Automatic and then click on the Start button if the services are not running yet.
  • Now click on the Apply and OK buttons to save the changes made and then see if it fixed the problem or not.

Option 2 – Try modifying some entries in the Windows Registry

If the first option didn’t work in fixing the problem, you can try to alter some entries in the Windows Registry using the Registry Editor.
  • First, tap Win + R keys to open the Run dialog box.
  • Then type “Regedit” in the field and hit Enter to open the Registry Editor.
  • Next, navigate to this registry path: HKLMSoftwarePoliciesMicrosoftWindows Defender
  • From there, look for the “DisabledAntivirus” and “DisableAntiSpyware” DWORDS from the right pane and change each one of their values to “0”. On the other hand, if you don’t see any of these DWORDS, you can create them instead and give each one of them a 0 value.
  • To create a DWORD, simply right-click on any empty space and select New > DWORD. Then name them both as “DisabledAntivirus” and “DisableAntiSpyware”.
  • Afterward, set the value of the newly-created DWORDS to 0.
  • Now exit the Registry Editor and reboot your PC to apply the changes made and then check if it has fixed the error in Windows Defender or not.
Read More
"Stop Running This Script" Error - How to Fix It

Stop Running This Script Error

Stop Running This Script Error - What is it?

"Stop Running This Script" Error is a Windows Internet Explorer error message that is displayed in the following format with a yes and a no button:
Stop running this script?
A Script on this page is causing your web browser to run slowly.  If it continues to run, your computer might become unresponsive. This occurs when some scripts take an excessive amount of time to run. To be precise, there are some websites that use JavaScript, JQuery, and Active X scripts to run. These scripts are notorious for taking too much time to run. So, if you use the Internet Explorer as your web browser, then by default if the website takes a long time to load, the ‘Stop running this script error will be triggered. Other than this, if you are scripting an Active X control on the web page to transfer a very heavy file or run a huge database query, this may cause delays and lead to the error display. However, if you use Firefox, then the ‘Stop running this script error code will be promoted as ‘Unresponsive Script’ error.

Solution

Restoro box imageError Causes

The ‘Stop running this script error code’ is triggered due to multiple reasons. These include:
  • Webpage programming errors
  • Running a pop-up killer
  • Spyware and viral infection
  • Active X control errors

Further Information and Manual Repair

Here are some of the best methods that you can try to resolve Internet Explorer’s ‘stop running this script error’ on your PC:

1. Change the Internet Explorer Settings

This can be done by opening Internet Explorer and in the top menu, click on Tools, and then go to Internet Options. Now click on the Advanced Tab option. Locate where it says ‘Disable Script Debugging’. Once you find it uncheck the box beside it. Now close the browser and restart your PC. Access the same website on your IE web browser and see if the website opens. If it does, then the error is resolved. However, if it doesn’t, then you the underlying causes for the stop running this script error message could either be spyware or ActiveX control error.

2. Download Restoro

Whether the error occurs due to spyware invasion of Active X control error, it is advisable to download Restoro on your PC. This is a next-generation, innovative, and multi-functional PC repair tool that has several powerful utilities deployed together in one program. Plus you don’t have to get into the technicalities of resolving Active X control issues. Restoro is safe, bug-free, and efficient. It has a user-friendly interface and simple navigation which makes it quite easy for all levels of users to operate. It is compatible with all Windows versions including Windows 7, 8, XP, Vista, 8.1, and 10. This PC repair tool is a one-stop solution for all your script error repair needs. It includes the following utilities: a registry cleaner, a system stability detector, and an ActiveX control error scanner. It simultaneously scans for ActiveX control errors too. So, if the IE script error is triggered by ActiveX control issues, it resolves them too. To fix the ‘stop running this script’ error code on your PC, click here to download Restoro
Read More
How To Fix the D3dx9_43.dll Error Code

Repair D3dx9_43.dll Error Code

D3dx9_43.dll – What is it?

D3dx9_43.dll is a type of dynamic link library. This is one of the many files contained in the DirectX software collection which is used to load and run most of the Windows PC based games and advanced graphics programs. D3dx9_43.dll error message is displayed when any one of the Microsoft games fails to load. The error message is displayed in either of the following formats:
“D3dx9_43.DLL Not Found" "The file d3dx9_43.dll is missing" "File d3dx9_43.dll not found" "D3dx9_43.dll not found. Reinstalling might help fix this."

Solution

Restoro box imageError Causes

D3dx9_43.dll error may occur due to multiple reasons. These include:
  • D3dx9_43.dll files get corrupt or damaged
  • Missing Microsoft DirectX file
  • Viruses and malware on your system
  • Driver issues
  • Registry overloaded with invalid entries
If the D3dx9_43.dll error is not fixed timely, it not only causes you a great deal of inconvenience as it hampers your ability to play Microsoft games but since the underlying causes of the error are critical, it can result in serious PC damages like system failure, system crash, and data loss. Therefore to avoid it, it is advisable to resolve the error code immediately.

Further Information and Manual Repair

Though this is a critical PC error but the good thing is that it is easy to resolve. To fix it, you don’t always have to pay hundreds of dollars to a professional technician or be technically sound. Here are some of the best ways to repair and resolve D3dx9_43.dll error on your system:

Check the Recycle Bin

If you get the error message "The file d3dx9_43.dll is missing" then the best method to resolve this error from your system is to check your recycle bin. The Microsoft Direct X file could be there especially if you recently uninstalled a gaming program. Here’s why: dll files are shared by multiple programs. So, it is possible that the program you deleted from your PC also shared the same file to load and run. And because of this reason, the file also got removed from your PC when you uninstalled that particular program. Therefore, check your recycle bin. If you find the d3dx9_43.dll in there, restore it and try running the desired Microsoft game again. See if it works.

Re-Download DirectX

Nonetheless, if you can’t relocate it, try installing the latest version of DirectX on your system. This can be done by downloading the DirectX End-User Runtimes Web Installer on your system from the official Microsoft website.

Update Your Drivers

If the error is related to video card driver, then it is advisable to update the driver. By updating the driver for your video card you can fix the D3dx9_43.dll error instantly.

Repair the Registry

Other reasons for the D3dx9_43.dll error could be corrupt and damaged dll files. It triggers registry issues and sometimes even malware infections. DLL files often get corrupt when the registry overloads with too many files these include mostly unnecessary and obsolete files like junk files, cookies, temporary internet history, invalid and bad registry entries. As the clutter and overload the registry, the important files like dynamic link libraries get damaged. Here cleaning and restoring of the registry is the best way to resolve the error pop-ups like D3dx9_43.dll. You can repair the registry manually however, it is time consuming and somewhat technical. But if you are looking for a simple and a quick fix, then download Restoro.

Try Restoro.

Restoro is a next-generation and multi-functional PC repair tool. It is embedded with a variety of PC fixing and performance-boosting utilities all in one. It includes a registry cleaner with an intuitive algorithm that detects all types of registry issues on your system and resolves them in seconds. It cleans the registry, restores the damaged D3dx9_43.dll files, and repairs the registry. Furthermore, Restoro also includes utilities like an antivirus, Active X controls and class detector. With the help of the in-built antivirus you can scan for viruses and malware infecting your system and remove them right away. It also functions as a system optimizer boosting the speed of your PC dramatically. It is safe, efficient, and compatible with all Windows versions. Click here to download Restoro, resolve the D3dx9_43.dll error, and resume enjoying Microsoft games on your PC.
Read More
Virtual desktop with different wallpapers
Virtual desktop
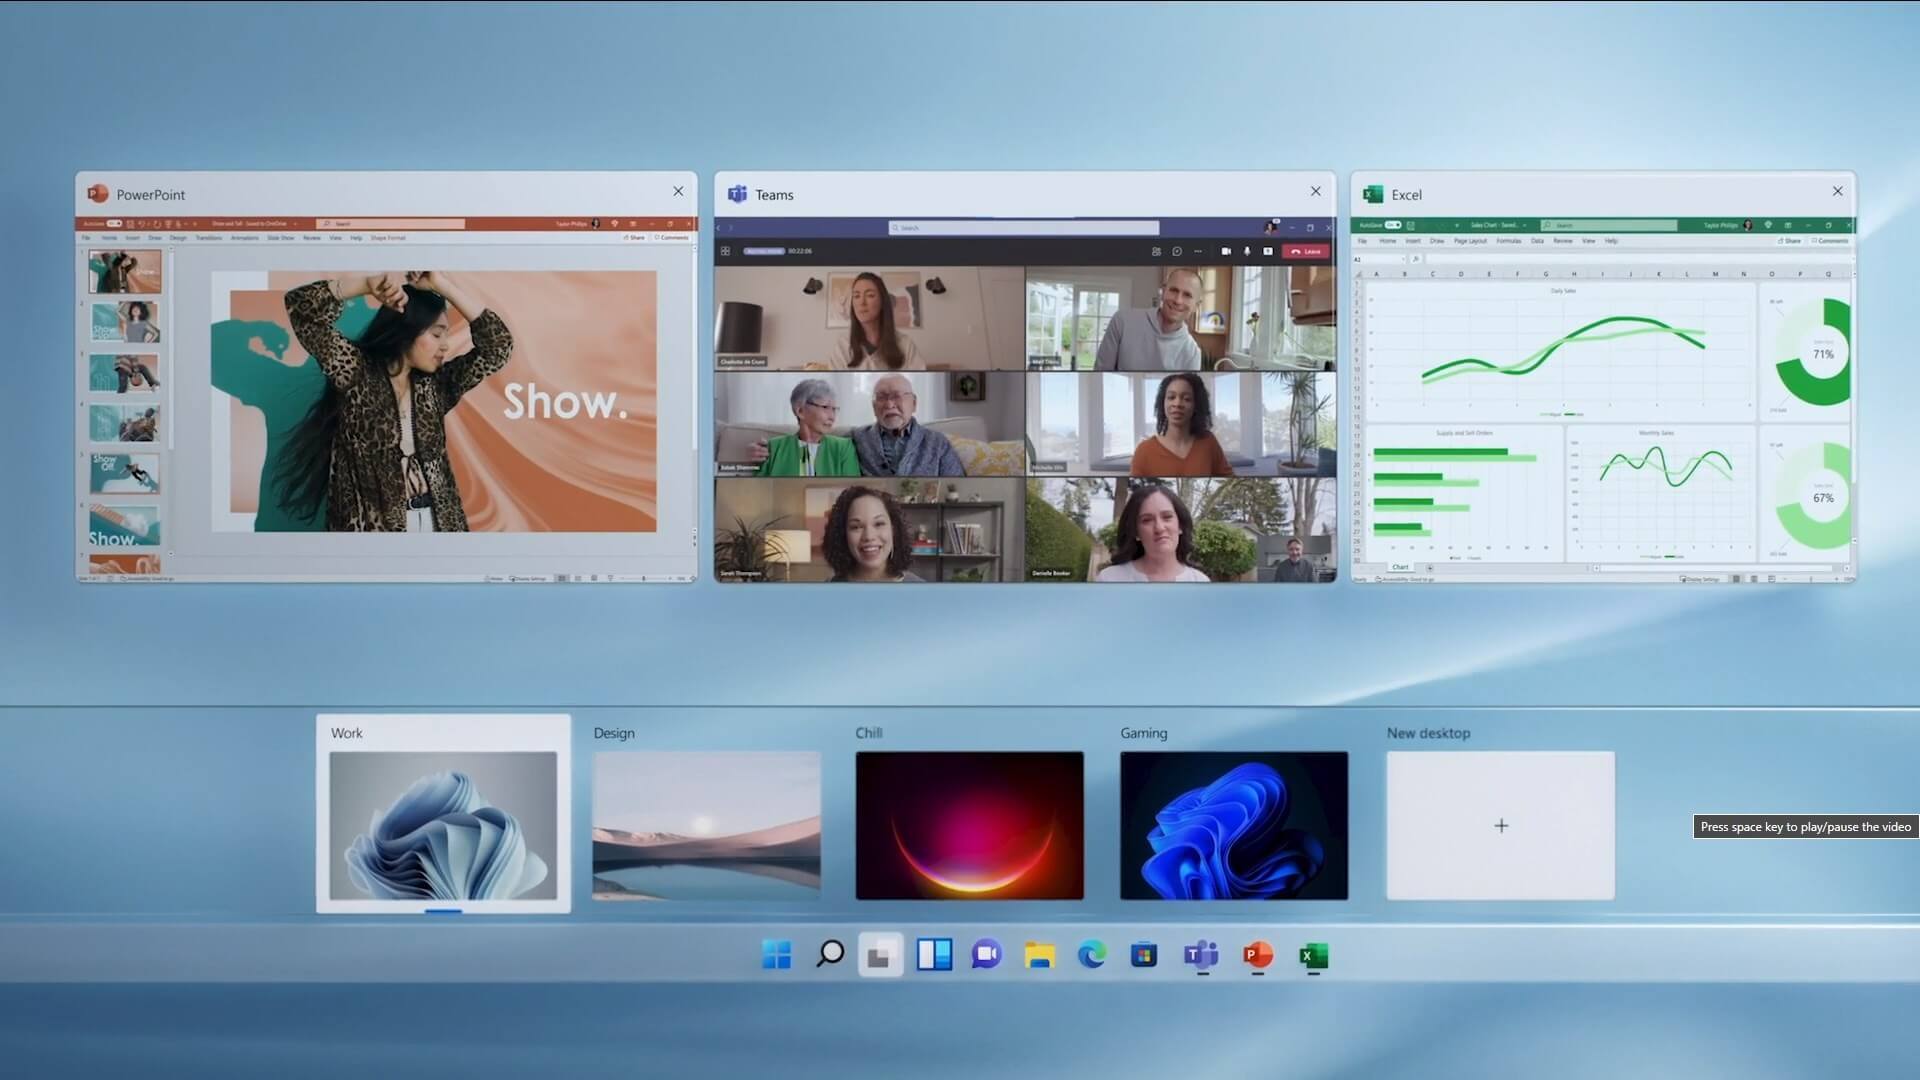
The feature that was originally planned for now scrapped Windows 10X is included in Windows 11. You will be able to customize your Virtual desktop with different wallpapers for each screen. In order to fully customize your virtual desktops with different wallpapers follow this easy step-by-step guide.
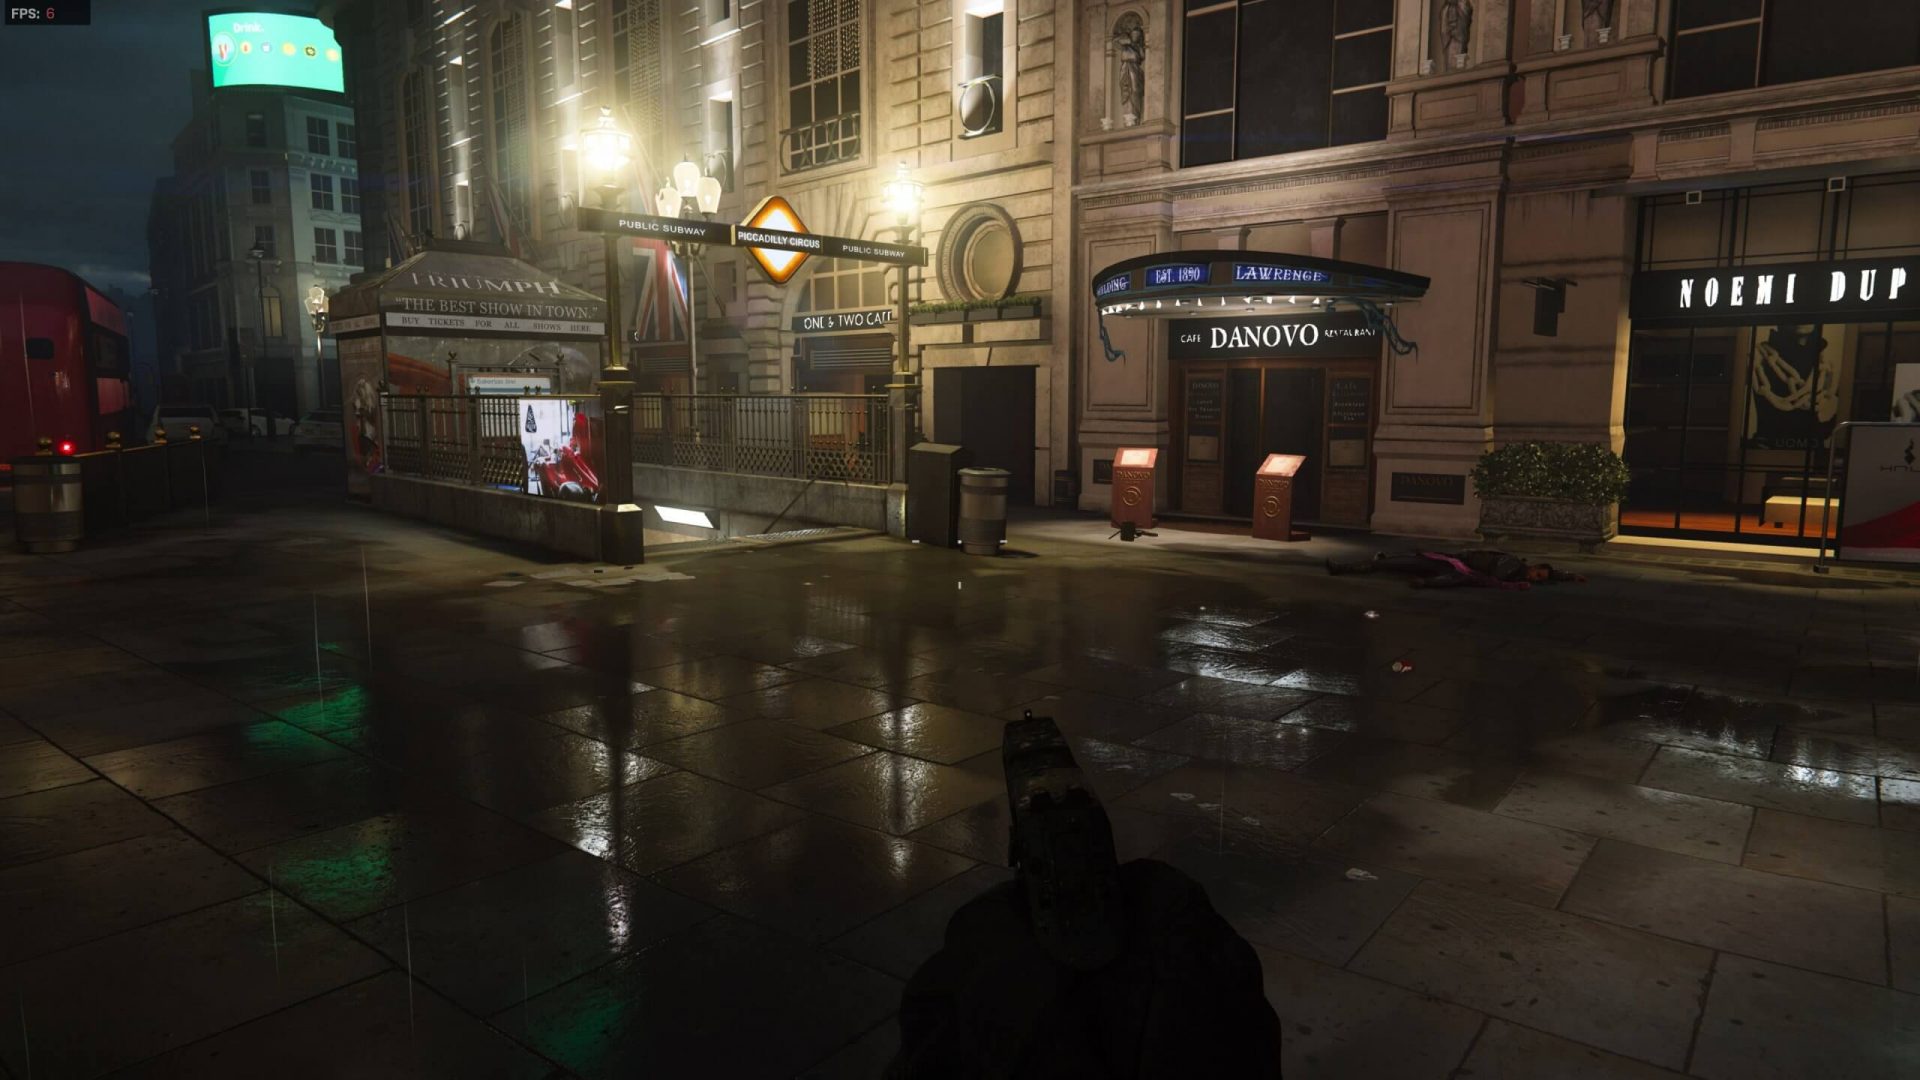
  1. Click on the Task View button in the taskbar
  2. When the Task View opens, select the desktop on which you want to set wallpaper
  3. The view will switch to the selected desktop. Right-click anywhere on the desktop and select personalize
  4. In personalization settings, click on the background
  5. Select wallpaper which you would like to have on the desktop by clicking on browse and navigating to the desired one
  6. Close the settings
  7. Repeat for each virtual desktop you would like to customize
Read More
List of games that support Nvidia RTX tech

RTX nvidiaWhat is RTX

Nvidia GeForce RTX is a high-end professional visual computing platform created by Nvidia, primarily used for designing complex large-scale models in architecture and product design, scientific visualization, energy exploration, and film and video production. Nvidia RTX enables real-time ray tracing. Historically, ray tracing had been reserved for non-real-time applications (like CGI in visual effects for movies and in photorealistic renderings), with video games having to rely on direct lighting and precalculated indirect contribution for their rendering. RTX facilitates a new development in computer graphics of generating interactive images that react to lighting, shadows, and reflections. RTX runs on Nvidia Volta-, Turing- and Ampere-based GPUs, specifically utilizing the Tensor cores (and new RT cores on Turing and successors) on the architectures for ray-tracing acceleration.

Advantage in games

With incredible lighting and shadows, reflection, better smoke, and water effects, and more, RTX has managed to place awesome real-time effects on your desktop all that’s to Nvidia technology behind it. Of course, in order to harvest this kind of technology and features game itself needs to support and have RTX in it, you can not turn RTX in just any game, the game itself must have technology build in it. Therefore we are bringing you the list of all RTX games you can find currently on the market so you can enjoy at the moment best graphics a PC can offer

List of games supporting the technology

  • Amid Evil
  • The Ascent
  • Battlefield V
  • Call of Duty: Black Ops Cold War
  • Call of Duty: Modern Warfare
  • Control
  • Cyberpunk 2077
  • Deliver Us the Moon
  • Doom Eternal
  • Dirt 5
  • Fortnite
  • Ghostrunner
  • Justice Online
  • Weibo
  • JX3
  • Lego Builder’s Journey
  • Mechwarrior 5: Mercenaries
  • The Medium
  • Metro Exodus (and The Two Colonels DLC)
  • Minecraft
  • Moonlight Blade
  • Mortal Shell
  • Observer: System Redux
  • Pumpkin Jack
  • Quake II RTX
  • Ring of Elysium
  • Shadow of the Tomb Raider
  • Stay in the Light
  • Watch Dogs: Legion
  • Wolfenstein: Youngblood
  • World of Warcraft: Shadowlands
  • Xuan-Yuan Sword VII

Upcoming games that will support RTX

  • Atomic Heart
  • Boundary
  • Bright Memory: Infinite
  • Convallaria
  • Dying Light 2
  • F.I.S.T.: Forged in Shadow Torch
  • Five Nights at Freddy’s: Security Breach
  • Grimmstar
  • Maneater
  • Project X
  • Sword and Fairy 7
  • Synced: Off Planet
  • Vampire: The Masquerade — Bloodlines 2
  • The Witcher 3: Complete Edition
Read More
Microsoft vs Google & Facebook
microsoft hqMicrosoft wants to escalate the situation from Australia to the EU, what a surprise. Hello all and welcome to another news article, this time we are focusing on Microsoft pushing the EU to accept law proposition from Australia. For all of you who are not familiar with the given situation let me quickly explain. The feud began when the Australian government proposed a new law that targeted Facebook and Google specifically. The government said that it believed that both of the tech giants were using content from news outlets without paying. Have you ever seen the little news snippets that Google or Facebook sometimes show its users to keep them up to date? These are lifted directly from news websites, and the Australian government claimed that this practice meant that people didn't bother visiting the news website. This then staved news websites of revenue. As such, the government put forward a new law that would mean Google and Facebook would have to pay the source website for every time they displayed a news snippet. Facebook responded by removing its Australian news coverage in light of the law. Google, however, put up a fight. It argued that its snippets encouraged people to click on it to read more, thus driving more traffic to the news website. It also said that such a law would be too expensive to maintain in the long run. As such, Google threatened to remove itself from Australia if the law passed. This was likely a scare tactic, as 95 percent of Australian web users use Google; however, it actually opened the door for its rival, Microsoft. Microsoft saw how it could push its own search engine BING to replace google. It of course went and reached the Australian government to assure them that BING is more than capable to fulfill its needs and fully abide by the proposed law. Now Microsoft knows that if this law passes it could see a similar situation happening in Europe and it is pushing it. US News reported on how Microsoft plans to encourage EU countries to adopt this new law too. The company has teamed up with the European Publishers Council and News Media Europe to make the following statement: Publishers might not have the economic strength to negotiate fair and balanced agreements with these gatekeeper tech companies, who might otherwise threaten to walk away from negotiations or exit markets entirely
Read More
A command is not recognized Error in Windows
A command is not recognized Error, what it is? If you are constantly using programs like CMD or DISM directly from the Run prompt, you might have wondered how they launched instantly and how is it that the Windows operating system is able to find them right away. For instance, when you create a shortcut of a program, the shortcut knows where exactly the program is located and launches it quickly. The Windows operating system keeps a list of paths where the most common system programs are located so when you use the Run prompt, it opens easily. The list kept by Windows is called the Windows Environment Variables. If something goes wrong with this list, the programs won’t work. So in this guide, you will be guided on how you can troubleshoot the problem where any command you use is not recognized as an internal or external command, operable program, or batch file. Before you start troubleshooting the problem, you need to make sure that the program you are trying to run really exists. In fact, this can also happen to the Run program which is pulled up using the Win + R shortcut. To check, go to C:\Windows\System32 and there, check if the program exists or not or you can also try searching for the EXE in the System 32 folder. After making sure that the program exists, refer to the instructions given below.

Modify the Windows Environment Variables:

  • Step 1: Tap the Win + X keys and then select System. After that, it will open the section where you can see all the properties on your computer.
  • Step 2: Next, select the Advanced system setting located on the left pane and click on the Environment Variables.
  • Step 3: After that, locate Path under the System Variables and select EDIT.
  • Step 4: Before you edit, you need to copy the entire string and paste it into the Notepad app so that in case something went wrong, you can paste it back.
  • Step 5: Next, look for the directory path, “C:\Windows\System32”. If you can’t find it, try adding a semi-colon at the end.
  • Step 6: Afterwards, click OK to save the changes made and then exit.
  • Step 7: Now restart your computer as all the paths are picked up when your computer restarts.
Note: Now all you have to do is to try executing the programs once again – the ones where you got the error, “ is not recognized as an internal or external command, operable program or batch file” every time you open them and then see if you can now open these programs or not.
Read More
1 2 3 162
Logo
Copyright © 2022, ErrorTools. All Rights Reserved
Trademarks: Microsoft Windows logos are registered trademarks of Microsoft. Disclaimer: ErrorTools.com is not affiliated with Microsoft, nor claim direct affiliation.
The information on this page is provided for information purposes only.
DMCA.com Protection Status