An Easy Guide to Fixing Error D3dx9_43.dll on Your PC

Repair Error D3dx9_43.dll

D3dx9_43.dll Error - What is it?

D3dx9_43.dll is a type of Dynamic Link Library containing small programs. This file is associated with Microsoft DirectX software. It is used and utilized by most Windows-based games and DirectX advanced graphic programs.

The error D3dx9_43.dll pops on your computer screen when there is some issue when running or loading Microsoft DirectX programs.

This error is often displayed in any one of the following formats:

  • “D3dx9_43.DLL Not Found"
  • "D3dx9_43.dll not found. Reinstalling might help fix this."
  • "The file d3dx9_43.dll is missing"
  • "File d3dx9_43.dll not found"

The good news is that this error code is not fatal.

This means it will not result in system crashes, failure, or data loss. But it may hamper your ability to access, run and load Windows-based games associated with DirectX therefore to avoid the inconvenience it is advisable to repair it immediately.

Solution

Restoro box imageError Causes

D3dx9_43.dll error code can occur due to several reasons. These include but are not limited to:

  • Missing or corrupt D3dx9_43.dll file
  • Outdated drivers
  • Corrupt registry
  • Viral infection

Further Information and Manual Repair

To fix the D3dx9_43.dll error on your PC, try the manual easy to do methods illustrated below. To perform these methods to repair the issue, you don’t need to be a technical whiz. These are simple methods and easy to perform.

Method 1 - Check Your Recycle Bin or Download D3dx9_43.dll File

If you just recently uninstalled a program from your PC, then there is a possibility that the D3dx9_43.dll file got accidentally deleted during the process.

This happens because DLL is a shared file. The program you uninstalled might be running with the same file. In case of accidental deletion of the D3dx9_43.dll file, it is advisable to check your recycle bin to repair the issue.

Simply go to the recycle bin and look for the deleted file; if you locate it simply reinstall. However, if you are unable to find it, then if you have access to an internet connection, simply download the D3dx9_43.dll file from a reliable DLL website.

Method 2 - Update Drivers

If the error code occurs due to outdated drivers, then it is recommended to update drivers on your system. For example, the D3dx9_43.dll file error indicates an outdated video card driver since this file is linked to video game software.

Therefore, simply update the drivers for your video card. Drivers can be updated in Windows by using a driver update wizard from within Device Manager. The wizard will walk you through the entire driver update process, making the updating task a lot simple and hassle-free.

Method 3 - Install an Antivirus

In case of malware infection, it is advisable to install a powerful antivirus. Simply run it to scan your entire PC for viruses. Then remove them to resolve the issue.

Method 4 - Clean and Repair the Registry

D3dx9_43.dll error may also pop up due to registry corruption.

This happens when the registry loads with unnecessary and obsolete files like cookies, junk files, internet history, and bad registry entries.

These files take up all the space and damage the registry. It also results in DLL file corruption and disk fragmentation.

To resolve this it is important to clean the registry and repair it.

A quick way to perform registry clean-up is to download Restoro. This is an advanced PC Fixer embedded with a powerful registry cleaner. It scans for all registry-related errors instantly, removes them, cleans the registry, and repairs the damaged files.

Click here to download Restoro on your PC and resolve error D3dx9_43.dll today!

If you like to learn and find out more about various Windows errors, and how to repair them go to our vast archive or use search to find articles that will explain and help you in solving your issue.
However, if you prefer to do things fast and with automatization then we are proposing to use an automated solution for your issues. The application that we are recommending is Advanced System Repair Pro
Advanced System Repair utilizes multiple tools all in one to give you a quick, simple, reliable, and very thorough diagnosis of your PC. It brings you all the tools you need in one program to clean, fix, protect, optimize and boost your PC!
1-Click Maintenance
All the tools to make it simple and easy! It's like having a professional technician at the click of a mouse.

Junk Cleaner
Keeping your computer free from unnecessary clutter also helps make your computer last longer. Like any other machine, if you keep it clean and take care of it, it will serve you better for longer!

Optimize background apps
Optimize applications background activity with the built-in Application Optimizer feature.

Disk Defrag
With a simple 1-click, Advanced System Repair speeds up your PC by assembling fragmented files on your machine and organizing them more efficiently.

Malware Removal
Finds and removes all types of harmful malware including trojans, worms, bots, adware, spyware, PUPs, and more!

Privacy Cleaner
The all-in-one privacy suite to Clean Your Tracks & Protect Your Privacy! Make your computer safe, secure, and more efficient!

System Tweak/Optimizer
ASR will analyze your complete system and settings to adjust your PC to function at its maximum performance.

Registry Cleaner
Over time, as you install and uninstall applications, the registry can become cluttered with old entries and broken settings which can result in program crashes, and annoying messages and slow the computer down.
Visit our Advanced System Repair Pro Download page to inform yourself about all the benefits of this software and get a free trial copy of it.
advanced system repair pro

Advanced System Repair Pro

One-click automated PC repair solution
ASR logo
With Advanced System Repair Pro you can easily
Replace damaged files
Restore performance
Free disk space
Remove Malware
Protects WEB browser
Remove Viruses
Stop PC freezing
DOWNLOAD
Privacy Policy | Terms of Use | Uinstall
Advanced System Repair Pro is compatible with all versions of Microsoft Windows including Windows 11

Share this article:

You might also like

Resume an Interrupted Download in Chrome
Where all have been there, we are downloading something and for any kind of reason chrome closes, internet breaks, etc. And our download is interrupted and gone forever, and we need to start again. You will be glad to hear that chrome has side a download manager which tracks each download you made and you can use this manager to resume interrupted downloads. Please note that some websites have certain scripts that will prevent you to resume interrupted downloads, in this case, using chrome's download manager will not work and you will have to start the download again. All of this being said, if your download has been interrupted, and went away, pin Chrome press CTRL + J to open download manager, find your interrupted download, and press the resume button. That's it, you have successfully resumed your download.
Read More
Fix PNP_DETECTED_FATAL_ERROR in Windows
If you suddenly encounter a PNP_DETECTED_FATAL_ERROR Blue Screen error, then this post can help you out. The PNP_DETECTED_FATAL_ERROR BSOD usually occurs when any new hardware that is mostly the Plug and Play type is attached. In such cases, when the device is plugged, and the driver for that device crashes or isn’t found or is not compatible, you will most likely encounter this particular BSOD error. There are several error codes that come under this category, some of them are 0x000000CA (0x01681690, 0xEA96A7BE, 0x938A81AD, 0xF8362881. This BSOD error can also occur at any time. However, the only constant thing here is when you plug a PNP device like earphones, microphones, USB drives, and many more. The PNP_DETECTED_FATAL_ERROR bug check has a value of 0x000000CA which indicates that the Plug and Play Manager encountered some severe error which is most likely have something to do with a problematic Plug and Play driver. To fix this error, here are some possible solutions that could help.

Option 1 – Run the Blue Screen Troubleshooter

The Blue Screen troubleshooter is a built-in tool in Windows 10 that helps users in fixing BSOD errors like PNP_DETECTED_FATAL_ERROR Blue Screen error. It can be found on the Settings Troubleshooters page. To use it, refer to these steps:
  • Tap the Win + I keys to open the Settings panel.
  • Then go to Update & Security > Troubleshoot.
  • From there, look for the option called “Blue Screen” on your right-hand side and then click the “Run the troubleshooter” button to run the Blue Screen Troubleshooter and then follow the next on-screen options. Note that you might have to boot your PC into Safe Mode.

Option 2 – Try disabling or removing newly installed hardware

In this option, you will have to disable or remove the hardware you’ve just installed recently since external devices could be the one that’s causing the Blue Screen of Death error to appear. To do that, just disconnect any external device that’s connected to your computer physically and then check if it fixes the PNP_DETECTED_FATAL_ERROR Blue Screen error.

Option 3 – Try disabling BIOS Memory options namely Caching Shadowing

Disabling the BIOS Memory options such as Caching and Shadowing can help you in fixing the PNP_DETECTED_FATAL_ERROR Blue Screen error. All you have to do is enter the BIOS first and then use the Arrow and Enter keys to select your choices. And if you can’t seem to find it, look for specific instructions from your OEM or you could also look out for instructions from the manufacturer of your motherboard.

Option 4 – Try to run the CHKDSK utility

Running the CHKDSK utility might also help you resolve the PNP_DETECTED_FATAL_ERROR Blue Screen error. If your hard drive has issues with integrity, the update will really fail as the system will think that it’s not healthy and that’s where the CHKDSK utility comes in. The CHKDSK utility repairs hard drive errors that might be causing the problem.
  • Open Command Prompt with admin privileges.
  • After opening Command Prompt, execute the following command and hit Enter:
chkdsk /f /r
  • Wait for the process to be completed and then restart your computer.

Option 5 – Try to uninstall programs you’ve installed recently

Chances are, some programs that you just installed might be the one that’s causing the BSOD error. Thus, you need to uninstall the program to resolve the problem.
  • In the search box, type in “control” and then click on Control Panel (desktop app) among the search results.
  • After that, select Programs and Features from the list which will give you a list of all the programs installed on your computer.
  • From there, look for the concerned program and select it and then uninstall it.

Option 6 – Update the Device drivers

  • Tap the Win + R keys to launch Run.
  • Type in devmgmt.msc into the box and tap Enter or click OK to open the Device Manager.
  • After that, a list of device drivers will be displayed. Look for the device driver you and then select either “Update driver” or “Uninstall device”. And if you find any “Unknown device”, you need to update it as well.
  • Select the “Search automatically for updated driver software” option and then follow the instructions to complete the process.
  • If you have chosen to uninstall the driver, follow the screen options to complete the process and then restart your PC.
  • Connect the device and Scan for hardware changes – you can see this option under Device Manager > Action.

Option 7 – Perform a System Restore

Performing System Restore might help you in fixing the PNP_DETECTED_FATAL_ERROR Blue Screen error. You can do this option either by booting into Safe Mode or in System Restore. If you are already in the Advanced Startup Options, just directly select System Restore and proceed with the next steps. And if you have just booted your PC into Safe Mode, refer to the steps below.
  • Tap the Win + R keys to open the Run dialog box.
  • After that, type in “sysdm.cpl” in the field and tap Enter.
  • Next, go to the System Protection tab then click the System Restore button. This will open a new window where you have to select your preferred System Restore point.
  • After that, follow the on-screen instructions to finish the process and then restart your computer and check if the problem is fixed or not.
Read More
Microsoft blocking Office users
Microsoft Office 365 baner
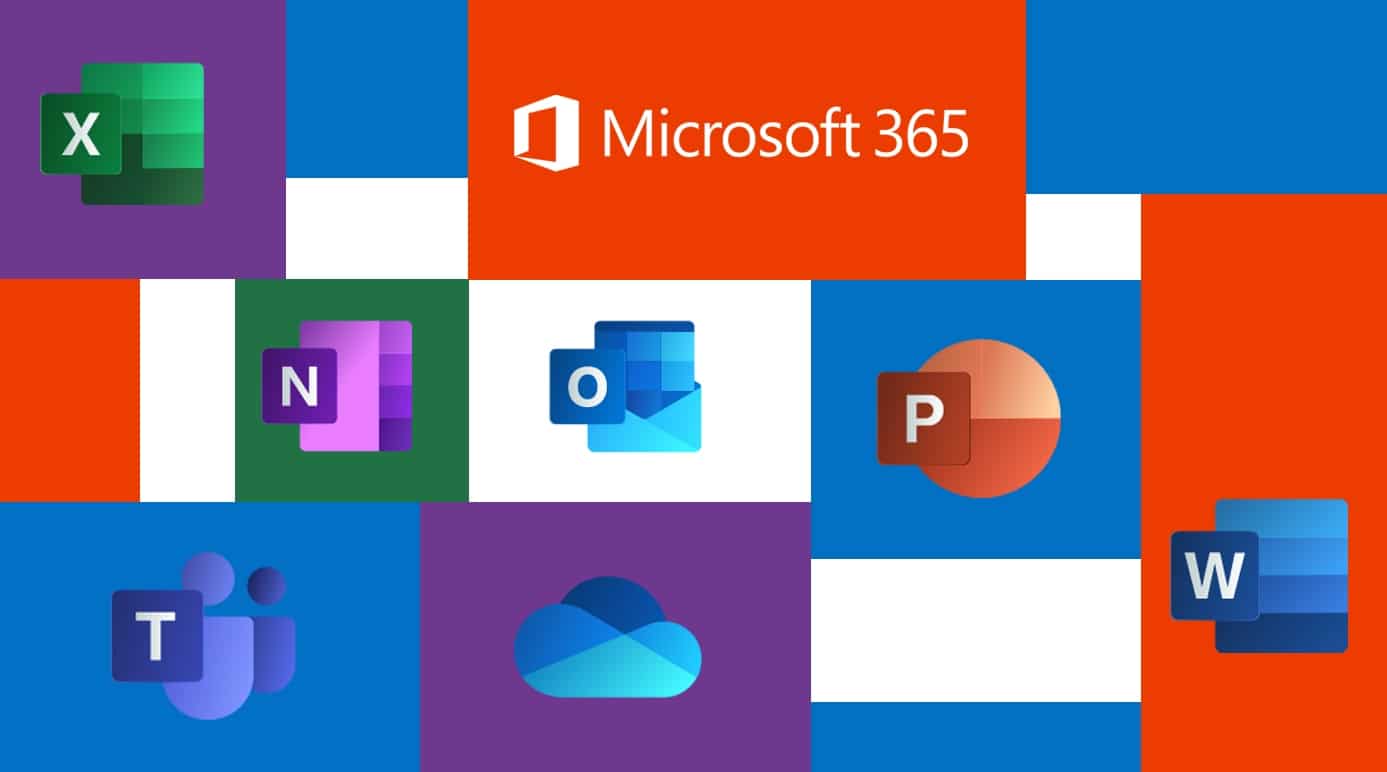
Microsoft starting as of today will block its Office 365 users if they are using Internet Explorer or early versions of Edge browsers. So if you are using older non Chromium Edge versions of Microsoft browsers you can no longer access Office services until you switch. Now normally I would fully support this kind of decision since Internet explorer is a slow and vulnerable browser and the edge is similar in that regard. The new edge browser is great and it should be used but the issue I have is that Office 365 is not free, it is a premium feature and I am wondering how Microsoft plans to deal with people that have already paid for service but suddenly cannot access it anymore.
Read More
How to Obliterate PyLocky Ransomware

What is PyLocky ransomware? And how does it execute its attack?

PyLocky ransomware is a file-locking malware created in order to lock important files and demand ransom from victims in exchange for data recovery. This new ransomware uses the .lockymap extension in marking the files it encrypts. It starts to execute its attack by dropping the following malicious payload in the system:
Name: facture_4739149_08.26.2018.exe SHA256:8655f8599b0892d55efc13fea404b520858d01812251b1d25dcf0afb4684dce9 Size: 5.3 MB
After dropping its malicious payload, this crypto-malware connects the infected computer to a remote server where it downloads more malicious files and places them on system folders. It then applies a data gathering module used to gather data about the user and the computer. The malicious files that were downloaded earlier along with the data obtained are used for another module called stealth protection. This allows PyLocky ransomware to execute its attack without detection from any security or antivirus programs installed in the system. It also modifies some registry keys and entries in the Windows Registry such as:
  • HKEY_CURRENT_USERControl PanelDesktop
  • HKEY_USERS.DEFAULTControl PanelDesktop
  • HKEY_LOCAL_MACHINESoftwareMicrosoftWindowsCurrentVersionRun
  • HKEY_CURRENT_USERSoftwareMicrosoftWindowsCurrentVersionRun
  • HKEY_LOCAL_MACHINESoftwareMicrosoftWindowsCurrentVersionRunOnce
  • HKEY_CURRENT_USERSoftwareMicrosoftWindowsCurrentVersionRunOnce
Once all the modifications are carried out, PyLocky ransomware will begin encrypting its targeted files using a sophisticated encryption cipher. Following the encryption, it adds the .lockymap extension to each one of the encrypted files and releases a ransom note named “LOCKY-README.txt” which contains the following content:
“Please be advised: All your files, pictures document and data has been encrypted with Military Grade Encryption RSA ABS-256. Your information is not lost. But Encrypted. In order for you to restore your files, you have to purchase a Decrypter. Follow these steps to restore your files. 1* Download the Tor Browser. ( Just type in google “Download Tor“ 2‘ Browse to URL: http://4wcgqlckaazungm.onion/index.php 3* Purchase the Decryptor to restore your files. It is very simple. If you don’t believe that we can restore your files, then you can restore 1 file of image format for free. Be aware the time is ticking. Price will be doubled every 96 hours so use it wisely. Your unique ID : CAUTION: Please do not try to modify or delete any encrypted file as it will be hard to restore it. SUPPORT: You can contact support to help decrypt your files for you. Click on support at http://4wcgqlckaazungm.onion/index.php”

How does PyLocky ransomware spread over the web?

PyLocky ransomware spreads using malicious spam email campaigns. Creators of this threat embed an infected attachment to spam emails and send them using a spambot. Crooks may even use deceptive tactics to trick you into opening the malware-laden immediately which is something you must not do. Thus, before opening any emails, make sure that you’ve thoroughly checked them. To successfully obliterate PyLocky ransomware from your computer, refer to the removal guide laid out below.
  • Step 1: Launch the Task Manager by simply tapping Ctrl + Shift + Esc keys on your keyboard.
  • Step 2: Under the Task Manager, go to the Processes tab and look for the process named facture_4739149_08.26.2018.exe and any suspicious-looking process which takes up most of your CPU’s resources and is most likely related to PyLocky ransomware.
  • Step 3: After that, close the Task Manager.
  • Step 4: Tap Win + R, type in appwiz.cpl and click OK or tap Enter to open Control Panel’s list of installed programs.
  • Step 5: Under the list of installed programs, look for PyLocky ransomware or anything similar, and then uninstall it.
  • Step 6: Next, close the Control Panel and tap Win + E keys to launch File Explorer.
  • Step 7: Navigate to the following locations below and look for PyLocky ransomware’s malicious components such as facture_4739149_08.26.2018.exe and LOCKY-README.txt as well as other suspicious files, then delete all of them.
%TEMP% %WINDIR%System32Tasks %APPDATA%MicrosoftWindowsTemplates %USERPROFILE%Downloads %USERPROFILE%Desktop
  • Step 8: Close the File Explorer.
  • Step 9: Tap Win + R to open Run and then type in Regedit in the field and tap enter to pull up Windows Registry.
  • Step 10: Navigate to the following path:
HKEY_CURRENT_USERControl PanelDesktop HKEY_USERS.DEFAULTControl PanelDesktop HKEY_LOCAL_MACHINESoftwareMicrosoftWindowsCurrentVersionRun HKEY_CURRENT_USERSoftwareMicrosoftWindowsCurrentVersionRun HKEY_LOCAL_MACHINESoftwareMicrosoftWindowsCurrentVersionRunOnce HKEY_CURRENT_USERSoftwareMicrosoftWindowsCurrentVersionRunOnce
  • Step 11: Delete the registry keys and sub-keys created by PyLocky ransomware.
  • Step 12: Close the Registry Editor and empty the Recycle Bin.
Try to recover your encrypted files using the Shadow Volume copies Restoring your encrypted files using Windows Previous Versions feature will only be effective if PyLocky ransomware hasn’t deleted the shadow copies of your files. But still, this is one of the best and free methods there is, so it’s definitely worth a shot. To restore the encrypted file, right-click on it and select Properties, a new window will pop up, then proceed to Previous Versions. It will load the file’s previous version before it was modified. After it loads, select any of the previous versions displayed on the list like the one in the illustration below. And then click the Restore button.
Read More
Use the Installation Media to Repair or Boot
If you are not able to access the Windows 10 Advanced troubleshooting options within Windows then you’ve come to the right place as this post will guide you on how you can repair or boot the Windows 10 installation without losing data using the bootable installation USB or DVD media. To repair or boot Windows 10 using the installation media, you have to download the Windows ISO, create a bootable USB or DVD drive, boot from the media and select “Repair your computer” and then select Startup Repair under Advanced troubleshooting. To get started, follow the given steps below carefully. Step 1: Frist, download the Windows ISO. Although this is not necessarily needed, it’s still better if you download the Windows ISO first so make sure that you download the same ISO version as installed on your computer. Step 2: Next, create a bootable USB or DVD drive.
  • Insert your USB drive into your PC.
  • Tap the Win + R keys to open the Run dialog box and type in “cmd” and tap Enter to open the Command Prompt. Alternatively, you can also search for “cmd” in the Cortana search box to open Command Prompt.
  • Once you’ve opened CMD, type in this command to open the DISPART utility – diskpart
  • After that, you should see a new black and white window that would say, “DISKPART>”.
  • Next, type in “list disk” in the command line and tap Enter to see the list of all the Storage devices as well as your hard disk connected to your PC. Here, you have to identify your disk’s number.
  • Type in this command where “X” is the disk number you have identified and then tap Enter – disk X
  • Type in this command and hit Enter to clear the table records and all the visible data on the drive – clean
  • Now you have to recreate a new primary partition of the drive so you’ll have to type in this command and tap Enter right after – create part pri
  • A new primary partition has been created so you have to select it by typing this command and tapping Enter – select part 1
  • Now you have to format it to make it visible to normal users by typing – format fs=ntfs quick
Note: If your platform supports the Unified Extensible Firmware Interface or UEFI, replace the “NTFS” with “FAT32” in the command on Step 10.
  • After that, type in this command and tap Enter after – active
  • Finally, type this command and hit Enter to exit the utility – exit
  • After you prepare the image for the operating system, save it to the root of your USB Storage device.
Step 3: After creating a bootable drive, boot from the media and select the “Repair your computer” option. Once you boot from the USB drive, it will start the Windows 10 installation right away. So you must not keep on clicking Next as you will end up installing Windows. You need to look for the “Repair your computer” link on the first installation screen and click on it and then boot your computer into Advanced Recovery. Step 4: Select Startup Repair under the Advanced options screen
  • Once you’re at the Advanced Recovery screen, select Advanced Options and select Troubleshoot.
  • After that, look for the Startup Repair and click on it and then follow the next on-screen instructions. This solution will help you fix issues that do not allow you to boot into your computer.
  • On the next screen, you will see the admin account with its name. Click on it and verify using the account password associated with the email.
  • After verification, it will start to diagnose your computer and automatically resolve any detected issues related to boot.
  • After the issue is fixed, your computer should reboot normally and you should now be able to use it. Note that your personal files are still intact since the process didn’t delete or wipe them out.
Read More
How to Fix UNEXPECTED_KERNEL_MODE_TRAP error
It is a fact that Blue Screen of Death errors can give you a headache for you will have a hard time fixing it as it is one of the most difficult errors you can encounter on your Windows computer. One of these BSOD errors is the UNEXPECTED KERNEL MODE TRAP error. If you receive this kind of error then it means that the operating system was not able to catch a trap or an exception generated by the CPU. This BSOD error has an error code 0x00000007F and indicates that the Intel CPU generated a trap that the kernel failed to catch. One of the most likely causes is hardware failure due to faulty memory. Aside from this cause, you also have to track down other probable causes for this problem like corrupted system files, incompatible drivers or programs, faulty hardware, and even dusty components, and so on. To fix the UNEXPECTED KERNEL MODE TRAP BSOD error, here are some suggestions that might help.

Option 1 – Uninstall the programs you installed recently

Chances are, some programs that you just installed might be the one that’s causing the BSOD error. Thus, you need to uninstall the program to resolve the problem.
  • In the search box, type in “control” and then click on Control Panel (desktop app) among the search results.
  • After that, select Programs and Features from the list which will give you a list of all the programs installed on your computer.
  • From there, look for the concerned program and select it and then uninstall it.
Note: If you have downloaded the app from the Windows Store, you can simply right-click on it from the application list and then uninstall it. In addition, you might also want to check the hardware components of your computer that might not support the operating system itself. You can disconnect all the external devices like USB drives, scanners, printers, etc., and then reboot your PC. After that, add the devices again one after the other and check if the BSOD error is now fixed or not. Moreover, you can also perform a clean boot to make things easier for you.
  • Log onto your PC as an administrator.
  • Type in MSConfig in the Start Search to open the System Configuration utility.
  • From there, go to the General tab and click “Selective startup”.
  • Clear the “Load Startup items” checkbox and make sure that the “Load System Services” and “Use Original boot configuration” options are checked.
  • Next, click the Services tab and select the “Hide All Microsoft Services” checkbox.
  • Click Disable all.
  • Click on Apply/OK and restart your PC. (This will put your PC into a Clean Boot State. And configure Windows to use the usual startup, just simply undo the changes.)

Option 2 – Update your device drivers

  • Tap the Win + R keys to launch Run.
  • Type in devmgmt.msc into the box and tap Enter or click OK to open the Device Manager.
  • After that, a list of device drivers will be displayed. Look for the device driver you and then select either “Update driver” or “Uninstall device”. And if you find any “Unknown device”, you need to update it as well.
  • Select the “Search automatically for updated driver software” option and then follow the instructions to complete the process.
  • If you have chosen to uninstall the driver, follow the screen options to complete the process and then restart your PC.
  • Connect the device and Scan for hardware changes – you can see this option under Device Manager > Action.

Option 3 – Use the Blue Screen Troubleshooter

The Blue Screen troubleshooter is a built-in tool in Windows 10 that helps users in fixing BSOD errors like UNEXPECTED KERNEL MODE TRAP. It can be found on the Settings Troubleshooters page. To use it, refer to these steps:
  • Tap the Win + I keys to open the Settings panel.
  • Then go to Update & Security > Troubleshoot.
  • From there, look for the option called “Blue Screen” on your right-hand side and then click the “Run the troubleshooter” button to run the Blue Screen Troubleshooter and then follow the next on-screen options. Note that you might have to boot your PC into Safe Mode.

Option 4 – Run the Windows Memory Diagnostic tool

You can use the Memory Diagnostic tool in Windows to check RAM. Before you use this tool, make sure you save all your important work.
  • Tap the Win + R keys to open the Run dialog box.
  • Next, type in “mdsched.exe” in the field and hit Enter to open Memory Diagnostic.
  • After that, the Windows Memory Diagnostic will give out two options such as:
  1. Restart now and check for problems (recommended)
  2. Check for problems the next time I start my computer
  • Select any of the given options. After that, your computer will restart and check for memory-based issues upon the restart. If there are any issues, it will automatically them.

Option 5 – Disable Memory caching in the BIOS

You can also disable memory caching in the BIOS to fix the UNEXPECTED KERNEL MODE TRAP error.
  • Open the BIOS Setup screen.
  • Next, go to Advanced > Cache Memory and then disable it.
  • Tap the F10 key to save the changes made and restart your computer.

Option 6 – Run System File Checker

  • Tap Win + R to launch Run.
  • Type in cmd in the field and tap Enter.
  • After opening Command Prompt, type in sfc /scannow
  • Restart your computer once the scan is completed.

Option 7 – Clean your hardware components for dust

Cleaning your computer’s hardware components for dust might also help in resolving the UNEXPECTED KERNEL MODE TRAP error. Make sure to use a soft cloth in cleaning the hardware as well as a small blower. Moreover, ensure that you do not damage any parts with moisture or cause harm to any circuits while you’re at it.
Read More
Disable Telemetry & Data Collection in Windows
The Windows 10 Telemetry and Data Collection features are auto-enabled and they collect all sorts of user activity and sends it to Microsoft. Microsoft says that the data collected only enhances the overall user experience and Windows functionality better but the number of data breaches happening across the globe has forced users to be extra cautious about their data privacy. So naturally, from stronger passwords and other services management, it is only logical to turn off Windows data gathering. To do so:
  • Press ⊞ WINDOWS + R to open the run dialog.
  • In the Run dialog type: taskschd.msc
  • Press CTRL + SHIFT + ENTER key combo to open Task Scheduler in admin mode.
  • On the left pane, navigate to the: Task Scheduler Library > Microsoft > Windows > Customer Experience Improvement Program
  • At the location, on the middle pane, right-click on the task named Consolidator and select Disable from the context menu...
  • Repeat the process with all other tasks listed in the middle pane.
  • Exit Task Scheduler.
Read More
Easy Remove ShopAtHome Guide

ShopAtHome Toolbar is a browser extension. This extension tracks information when you visit a website, whether typing in the URL or clicking a link, the Browser App recognizes whether the URL is that of an Affiliate Store, and, if so, may redirect you through the affiliate network site to the Affiliate Store’s website, at which time, a tracking cookie will be placed in your browser. This cookie is the tracking mechanism that will follow your transaction with the Affiliate Store.

During installation, the Browser App may automatically change the default search engine used by your Web browser, whether via a built-in search box or otherwise, to our search engine. Upon installation and setup, it defines an auto-start registry entry which makes this program run on each Windows boot for all user logins. A scheduled task is added to Windows Task Scheduler in order to launch the program at various scheduled times.

Multiple anti-virus scanners have detected possible malware in ShopAtHome.com Helper and are therefore classified as potentially unwanted and flagged for optional removal.

About Browser Hijackers

Browser hijacking is actually a form of an unwanted program, often a web browser add-on or extension, which then causes modifications in the browser’s settings. Browser hijackers can do a variety of things on your PC. The idea would be to force users to visit certain sites that are looking to increase their visitor traffic and generate higher ad income. A lot of people assume that these kinds of sites are legitimate and harmless but that is incorrect. Almost every browser hijacker poses an actual threat to your online safety and it is important to classify them under privacy risks. They do not just screw up your web browsers, but browser hijackers could also modify the system registry, leaving your computer or laptop susceptible to other forms of hacking.

Browser hijacking signs and symptoms

Signs that your web browser is hi-jacked include: 1. the home page of your web browser is changed suddenly 2. you find yourself regularly directed to some other web page than the one you actually meant 3. The default search page of the browser is changed 4. you find many toolbars in your web browser 5. you see a lot of pop-ups on your computer screen 6. your internet browser starts running sluggishly or displays frequent glitches 7. Inability to navigate to particular sites, particularly anti-malware as well as other security software sites.

How browser hijacker infects PCs

Browser hijackers infect computers through malicious email attachments, downloaded infected documents, or by checking out infected internet sites. They also come from add-on programs, also called browser helper objects (BHO), web browser extensions, or toolbars. Other times you may have unintentionally accepted a browser hijacker as part of a software program package (generally freeware or shareware). Popular examples of browser hijackers include Conduit, CoolWebSearch, Coupon Server, OneWebSearch, RocketTab, Delta Search, Searchult.com, and Snap.do.

The best ways to get rid of browser hijackers

Some hijackers could be removed simply by uninstalling the related freeware or add-ons from the Add or Remove Programs in the Microsoft Windows Control Panel. Sadly, the majority of the software packages utilized to hijack a web browser are deliberately designed to be hard to detect or remove. Besides, browser hijackers can modify the Windows registry so it can be very difficult to fix manually, particularly if you are not a very tech-savvy person.

Help! Malware Preventing Anti-virus Installation And Access To The Web

All malware is inherently dangerous, but certain kinds of malware do a lot more damage to your computer or laptop than others. Some malware sits in between the computer and the net connection and blocks some or all websites that you would like to visit. It might also block you from adding anything on your PC, especially anti-malware applications. If you’re reading this, odds are you’re stuck with a virus infection that is preventing you to download and/or install Safebytes Anti-Malware software on your PC. Do as instructed below to get rid of the malware by alternate methods.

Boot your PC in Safe Mode

In the event the malware is set to load at Windows startup, then booting in Safe Mode should avoid it. Just the minimum required applications and services are loaded when you boot your personal computer in Safe Mode. To launch your Windows XP, Vista, or 7 PCs in Safe Mode with Networking, please do as instructed below. 1) Press the F8 key repeatedly as soon as your PC boots, but before the big Windows logo shows up. This will conjure up the “Advanced Boot Options” menu. 2) Make use of the arrow keys to choose Safe Mode with Networking and press ENTER. 3) Once you get into this mode, you should have online access again. Now, obtain the virus removal application you need by utilizing the browser. To install the application, follow the guidelines in the installation wizard. 4) Right after installation, do a full scan and let the software delete the threats it detects.

Use an alternate web browser to download a security program

Malicious program code can exploit vulnerabilities in a particular browser and block access to all antivirus software websites. The best solution to avoid this problem is to choose a browser that is well known for its security features. Firefox contains built-in Phishing and Malware Protection to keep you secure online.

Install and run anti-virus from a USB drive

Here’s another solution which is using a portable USB anti-virus software package that can check your system for viruses without the need for installation. Try these simple actions to clean up your affected computer by using portable anti-malware. 1) Make use of another virus-free computer system to download Safebytes Anti-Malware. 2) Put the USB drive into the clean PC. 3) Double click on the downloaded file to run the installation wizard. 4) When asked, choose the location of the USB drive as the place where you would like to store the software files. Follow the on-screen instructions to finish the installation. 5) Now, plug the thumb drive into the corrupted system. 6) Run the Safebytes Anti-malware directly from the pen drive by double-clicking the icon. 7) Run Full System Scan to identify and clean-up up all types of malware.

SafeBytes Anti-Malware Features

If you’re planning to purchase anti-malware for your computer system, there are many brands and utilities for you to consider. Some are very good ones, some are ok types, while some are simply just fake anti-malware software that could harm your PC themselves! While looking for an antimalware tool, pick one that provides reliable, efficient, and total protection against all known computer viruses and malware. While considering the dependable software programs, Safebytes AntiMalware is undoubtedly the highly recommended one. Safebytes is among the well-established computer solutions firms, which provide this complete anti-malware tool. With its cutting-edge technology, this application can help you remove multiples types of malware including computer viruses, worms, PUPs, trojans, adware, ransomware, and browser hijackers. SafeBytes anti-malware takes computer protection to a totally new level with its enhanced features. Here are a few popular features found in this program: Antimalware Protection: With a critically acclaimed anti-malware engine, SafeBytes offers multilayered protection that is intended to find and get rid of viruses and malware that are hidden deep inside your computer’s operating system. Live Protection: SafeBytes provides complete and real-time security for your PC. It’ll continuously monitor your pc for hacker activity and also gives users sophisticated firewall protection. Extremely Speed Scanning: SafeBytes Anti-Malware has got a multi-thread scan algorithm that works up to 5x faster than any other anti-malware software. Web Filtering: SafeBytes provides an instant safety rating on the pages you are about to check out, automatically blocking harmful sites and make sure that you’re certain of your online safety while browsing the net. Lightweight Application: This software program is not “heavy” on the computer’s resources, so you will not find any overall performance troubles when SafeBytes is operating in the background. 24/7 Customer Service: Skilled technicians are at your disposal 24/7! They will quickly fix any technical issues you might be encountering with your security software.

Technical Details and Manual Removal (Advanced Users)

If you wish to manually remove ShopAtHome without the use of an automated tool, it may be possible to do so by removing the program from the Windows Add/Remove Programs menu, or in cases of browser extensions, going to the browsers AddOn/Extension manager and removing it. You will likely also want to reset your browser. To ensure the complete removal, manually check your hard drive and registry for all of the following and remove or reset the values accordingly. Please note that this is for advanced users only and may be difficult, with incorrect file removal causing additional PC errors. In addition, some malware is capable of replicating or preventing deletion. Doing this in Safe Mode is advised.

The following files, folders, and registry entries are created or modified by ShopAtHome

Files: File %PROGRAMFILESSelectRebatsToolbarShopAtHomeToolbar.dll. File %WINDIRDownloaded Program Filesinstall.inf. File %WINDIRDownloaded Program Filessahagent-cdt1004.exe. File %LOCALSETTINGSTempsahagent-cdt1004.exe. File %LOCALSETTINGSTempcdt1004.sah. File %LOCALSETTINGSTempsetup4002b.cab. File %LOCALSETTINGSTempsetup4002b.ini. File %SYSDIRap9h4qmo.ini. Search and Delete: ap9h4qmo.ini. File %SYSDIRap9h4qmo.exe. File %SYSDIRBundleLite_westfrontier1001.exe. File %SYSDIRap9h4qmo.ini. File %WINDIRa95kfrhe.exe. File %SYSDIRa95kfrhe.ini. File %SYSDIRa95kfrhe.ini. File %SYSDIRq17i9a4j.ini. Search and Delete: ap9h4qmo.ini. Directory %LOCALSETTINGSTempSahUpdate. Registry: Key 759C257C-F750-4F52-AB58-FB8A7B8770FE at HKEY_CLASSES_ROOTTypeLib. Key HKEY_CLASSES_ROOT named GRInstall7.Installer Key HKEY_CLASSES_ROOT named GRInstall7.Installer.1
Read More
Fix Netwtw04.sys BSOD Error in Windows 10
Blue Screen of Death errors or Stop errors are indications that something’s wrong with your computer. So when you encounter one, you must find out what the root cause of the problem is before it gets out of hand. One of the BSOD errors you might encounter on your Windows 10 computer is the “DRIVER IRQL NOT LESS OR EQUAL or SYSTEM THREAD EXCEPTION NOT HANDLED, Netwtw04.sys failed” error. As you know, system files or .sys files are some of the essential parts of the Windows operating system. It is a repository of system driver settings used by the Windows operating system in order to communicate with the connected hardware and devices. They are essential for the normal functioning of the operating system. A lot of Windows 10 users are facing this particular Blue Screen of Death error whenever they open an app or disconnect external devices from the system. The Netwtw04.sys file is a part of the Intel PROSet/Wireless Wi-Fi software. And so when you might encounter two kinds of Stop errors for the Netwtw04.sys driver file such as:
  1. “DRIVER_IRQL_NOT_LESS_OR_EQUAL What failed: Netwtw04.sys.” – This kind of error message signifies that a kernel-mode driver tried to access pageable memory at a process IRQL that was too high.
  2. “SYSTEM_THREAD_EXCEPTION_NOT_HANDLED What failed: Netwtw04.sys” – This error message indicates that the root cause of the error might be incompatible drivers with the operating system. In general, the root cause of the Netwtw04.sys BSOD error might be due to several reasons such as corrupted files, incorrect device driver configuration, malicious programs, outdated drivers, bad drivers, corrupted Windows Registry as well as some damaged or corrupted system files.
Whichever of the two error messages you got, you can try the troubleshooting options given below to fix the “DRIVER IRQL NOT LESS OR EQUAL or SYSTEM THREAD EXCEPTION NOT HANDLED, Netwtw04.sys failed” BSOD error.

Option 1 – Try to rollback your Network driver

If you have updated the driver software as of late and you suddenly got this BSOD error, you might have to roll back the device driver – in other words, switch back to the previous working version. To do that, follow these steps:
  • Tap the Win + R keys to launch the Run window and then type in the “devmgmt.msc” command and hit Enter to open the Device Manager window.
  • Under the Device Manager, you will see a list of drivers. From there, look for the Network Adapters and expand it.
  • Next, select the driver entries that are labeled appropriately other than anything in the context of the WAN Miniport.
  • Then select each one of them and double-click to open a new mini window.
  • After that, make sure that you’re on the Driver tab and if you are not, just navigate to it then click the Roll Back Driver button to switch back to the previous version of your Network adapters.
  • Now restart your computer to successfully apply the changes made.

Option 2 – Try to update the Network drivers

If the present Network driver is giving you a headache that is the “DRIVER IRQL NOT LESS OR EQUAL or SYSTEM THREAD EXCEPTION NOT HANDLED, Netwtw04.sys failed” BSOD error, then you need to update the Network drivers. To do so, here’s what you have to do:
  • Tap the Win + R keys to launch the Run window and then type in the “devmgmt.msc” command and hit Enter to open the Device Manager window.
  • Under the Device Manager, you will see a list of drivers. From there, look for the Network Adapters and expand it.
  • Then right-click on each one of the Network drivers and update them all.
  • Restart your PC and see if it helped in fixing the BSOD error.
Note: If updating the network drivers didn’t help in fixing the problem, you can also try to uninstall the very same drivers and restart your Windows 10 PC. After that, the system itself will reinstall the drivers you just uninstalled. Alternatively, you can also download and install the drivers from the manufacturer’s website directly.

Option 3 – Try running the System File Checker Scan

The SFC or System File Checker scan could detect and automatically repair damaged system files that could be causing the Netwtw04.sys failed BSOD error. SFC is a built-in command utility that helps in restoring corrupted files as well as missing files. It replaces bad and corrupted system files to good system files. To run the SFC command, follow the steps given below.
  • Tap Win + R to launch Run.
  • Type in cmd in the field and tap Enter.
  • After opening Command Prompt, type in sfc /scannow
The command will start a system scan which will take a few whiles before it finishes. Once it’s done, you could get the following results:
  1. Windows Resource Protection did not find any integrity violations.
  2. Windows Resource Protection found corrupt files and successfully repaired them.
  3. Windows Resource Protection found corrupt files but was unable to fix some of them.

Option 4 – Run the DISM Tool

The DISM tool is another command-line tool in the Windows operating system that could help users fix various corrupted system files. To use it, follow these steps:
  • Open the Command Prompt as admin.
  • Then type in this command: DISM /Online /Cleanup-Image /RestoreHealth
  • The DISM command you entered will repair the corrupted system image. Do not close the window if the process takes a while as it will probably take a few minutes to finish.

Option 5 – Run the CHKDSK Utility

Running the CHKDSK utility might also help you resolve the Netwtw04.sys failed BSOD error. If your hard drive has issues with integrity, the update will really fail as the system will think that it’s not healthy and that’s where the CHKDSK utility comes in. The CHKDSK utility repairs hard drive errors that might be causing the problem.
  • Open Command Prompt with admin privileges.
  • After opening Command Prompt, execute the following command and hit Enter:
chkdsk /f /r
  • Wait for the process to be completed and then restart your computer.
Read More
How to Enable Last Active Click feature
Microsoft has started to use group along with every open window in the Taskbar ever since the release of Windows 10. Early on, they used to show an individual entry for each one of the windows after grouping them which makes the taskbar look cleaner and organized. However, the main issue lies in the fact that you have to hover on your desired window to get on to them. At the time of writing, you need to tap the Ctrl key and click on the taskbar icon to open the last active window but you have to only click on the program’s taskbar icon after you apply the tweak given in this post for the last active window to open. Take note that the “Last Active” windows feature will only work if the taskbar buttons are combined. Before you get started doing the instructions given below, you need to create a System Restore Point first since you will be dealing with registry files and modifying some of the critical settings in Windows 10. Once you’ve done this, proceed to the given steps below. Step 1: Tap the Win + R keys to open the Run dialog box and then type “Regedit” in the field and hit Enter to open the Registry Editor. Step 2: If a User Account Control or UAC prompt appears, just click on Yes to proceed to open the Registry Editor. Step 3: Next, navigate to the following registry path:
HKEY_CURRENT_USERSoftwareMicrosoftWindowsCurrentVersionExplorerAdvanced
Step 4: From there, right-click on the right side of the panel and select New > DWORD (32-bit) and then name it “LastActiveClick”. Step 5: After that, double click on the newly created DWORd to modify its value. Put “1” as its value data. Step 6: Then click OK and close the Registry Editor. Step 7: Now restart your computer to successfully apply the changes made. Note: In case you want to revert back to the default configuration, all you have to do is set the value data of LastActiveClick to “0” or simply delete that DWORD and restart your computer to successfully apply the changes made.
Read More
1 2 3 162
Logo
Copyright © 2022, ErrorTools. All Rights Reserved
Trademarks: Microsoft Windows logos are registered trademarks of Microsoft. Disclaimer: ErrorTools.com is not affiliated with Microsoft, nor claim direct affiliation.
The information on this page is provided for information purposes only.
DMCA.com Protection Status