Disabling Windows 10 startup delay

First time when your computer is turned ON and when Windows is booting it will wait 10 seconds before starting your startup applications. This 10 second is used to load all of Windows services so everything is running smoothly. If by any chance you do not want to wait for this startup delay and wish to start applications right away then keep on reading and follow this guide precisely.

This guide will require you to play ad tweak with the registry of Windows, it is always recommended to make a registry backup before attempting any tweaks. Also, it is imperative to follow the guide as it is presented step by step.

be aware that this guide will eliminate a 10-second delay for all of your starting applications, there is no way currently to remove delay for only one or a few.

  1. Press ⊞ WINDOWS + R to open the run dialog
  2. In run dialog type Regedit and press ENTER
  3. Locate HKEY_CURRENT_USER\SOFTWARE\Microsoft\Windows\CurrentVersion\Explorer\Serialize
  4. If the key does not exist, make a new one,  Go to HKEY_CURRENT_USER\SOFTWARE\Microsoft\Windows\CurrentVersion\Explorer\, right-click on the explorer and choose new > key. Name it Serialize
  5. Right-click on Serialize and choose New > DWORD (32-bit) Value
  6. Name the value StartupDelayInMSec
  7. Double click on StartupDelayInMSec and locate Value data
  8. Set the value to 0
  9. Save changes and Exit Registry editor
  10. Reboot

If you want to reverse changes and enable delay again, go back to the Registry Editor and delete the StartupDelayInMSec value.

If you like to learn and find out more about various Windows errors, and how to repair them go to our vast archive or use search to find articles that will explain and help you in solving your issue.
However, if you prefer to do things fast and with automatization then we are proposing to use an automated solution for your issues. The application that we are recommending is Advanced System Repair Pro
Advanced System Repair utilizes multiple tools all in one to give you a quick, simple, reliable, and very thorough diagnosis of your PC. It brings you all the tools you need in one program to clean, fix, protect, optimize and boost your PC!
1-Click Maintenance
All the tools to make it simple and easy! It's like having a professional technician at the click of a mouse.

Junk Cleaner
Keeping your computer free from unnecessary clutter also helps make your computer last longer. Like any other machine, if you keep it clean and take care of it, it will serve you better for longer!

Optimize background apps
Optimize applications background activity with the built-in Application Optimizer feature.

Disk Defrag
With a simple 1-click, Advanced System Repair speeds up your PC by assembling fragmented files on your machine and organizing them more efficiently.

Malware Removal
Finds and removes all types of harmful malware including trojans, worms, bots, adware, spyware, PUPs, and more!

Privacy Cleaner
The all-in-one privacy suite to Clean Your Tracks & Protect Your Privacy! Make your computer safe, secure, and more efficient!

System Tweak/Optimizer
ASR will analyze your complete system and settings to adjust your PC to function at its maximum performance.

Registry Cleaner
Over time, as you install and uninstall applications, the registry can become cluttered with old entries and broken settings which can result in program crashes, and annoying messages and slow the computer down.
Visit our Advanced System Repair Pro Download page to inform yourself about all the benefits of this software and get a free trial copy of it.
advanced system repair pro

Advanced System Repair Pro

One-click automated PC repair solution
ASR logo
With Advanced System Repair Pro you can easily
Replace damaged files
Restore performance
Free disk space
Remove Malware
Protects WEB browser
Remove Viruses
Stop PC freezing
DOWNLOAD
Privacy Policy | Terms of Use | Uinstall
Advanced System Repair Pro is compatible with all versions of Microsoft Windows including Windows 11

Share this article:

You might also like

Explanation of deep and dark WEB
Often when we connect to the internet were browsing indexed pages through some well-known search engine, usually Google. But beneath the so-called normal internet lurks deep and dark web. You might have heard of the deep web and dark web if you have some geeky friends and we are here to explain what exactly is the deep and dark web. The first thing to know is that the deep and dark web is not the same thing and they coexist separately from one another, you could say that beneath the deep web lies the dark web, yet another layer of the internet. So let us explore first the deep web. What is exactly a deep web?

Deep web, hidden web, or invisible web

as sometimes referenced are part of worldwide web not indexed by search engines, meaning that engines do not basically see and index content of deep web sites. The content of the deep web is hidden behind HTTP forms and includes many very common uses such as webmail, online banking, private or otherwise restricted access social-media pages and profiles, some web forums that require registration for viewing content, and services that users must pay for, and which are protected by paywalls, such as video on demand and some online magazines and newspapers. The content of the deep web can be located and accessed by a direct URL or IP address but may require a password or other security access to get past public website pages. While it is not always possible to directly discover a specific web server's content so that it may be indexed, a site potentially can be accessed indirectly (due to computer vulnerabilities). To discover content on the web, search engines use web crawlers that follow hyperlinks through known protocol virtual port numbers. This technique is ideal for discovering content on the surface web but is often ineffective at finding deep web content. For example, these crawlers do not attempt to find dynamic pages that are the result of database queries due to the indeterminate number of queries that are possible. It has been noted that this can be (partially) overcome by providing links to query results, but this could unintentionally inflate the popularity of a member of the deep web.

Dark WEB

The dark web is the World Wide Web content that exists on darknets: overlay networks that use the Internet but require specific software, configurations, or authorization to access. Through the dark web, private computer networks can communicate and conduct business anonymously without divulging identifying information, such as a user's location. The dark web forms a small part of the deep web, the part of the Web not indexed by web search engines, although sometimes the term deep web is mistakenly used to refer specifically to the dark web. The darknets which constitute the dark web include small, friend-to-friend peer-to-peer networks, as well as large, popular networks such as Tor, Freenet, I2P, and Riffle operated by public organizations and individuals. Users of the dark web refer to the regular web as Clearnet due to its unencrypted nature. The Tor dark web or Onionland uses the traffic anonymization technique of onion routing under the network's top-level domain suffix .onion.

Dark & Deep WEB difference

The dark web has often been conflated with the deep web, the parts of the web not indexed (searchable) by search engines. The dark web forms a small part of the deep web but requires custom software in order to access its content. This confusion dates back to at least 2009. Since then, especially in reporting on Silk Road, the two terms have often been conflated, despite recommendations that they should be distinguished. Darknet websites are accessible only through networks such as Tor ("The Onion Routing" project) and I2P ("Invisible Internet Project"). Tor browser and Tor-accessible sites are widely used among darknet users and can be identified by the domain ".onion". While Tor focuses on providing anonymous access to the Internet, I2P specializes in allowing anonymous hosting of websites. Identities and locations of darknet users stay anonymous and cannot be tracked due to the layered encryption system. The darknet encryption technology routes users' data through a large number of intermediate servers, which protects the users' identity and guarantees anonymity. The transmitted information can be decrypted only by a subsequent node in the scheme, which leads to the exit node. The complicated system makes it almost impossible to reproduce the node path and decrypt the information layer by layer. Due to the high level of encryption, websites are not able to track the geolocation and IP of their users, and users are not able to get this information about the host. Thus, communication between darknet users is highly encrypted allowing users to talk, blog, and share files confidentially.

Darknet

The darknet is also used for illegal activity such as illegal trade, forums, and media exchange for pedophiles and terrorists. At the same time, traditional websites have created alternative accessibility for the Tor browser in an effort to connect with their users. ProPublica, for example, launched a new version of its website available exclusively to Tor users.
Read More
How to Fix Error 80070103 in Windows 10

Error Code 80070103 –What is it?

Error code 80070103 affects Windows users who attempt to access the latest updates for hardware drivers using Windows Update. Windows 10 users who are affected by this error code will be unable to complete the upgrade process. This error code usually occurs due to the Windows Update attempts to download an incompatible version of a driver or a driver that is already downloaded on one’s device.

Solution

Restoro box imageError Causes

The cause of error code 80070103 in Windows 10 is usually easy to determine. This is due to the fact that the error code only affects users who attempt to access updates related to hardware drivers. In such cases, the error code will only occur if the Windows Update website or tool on your machine attempts to install a driver that is already present on one’s machine or the version of the driver is unsuitable for one’s machine due to lower compatibility.

Further Information and Manual Repair

Manual repair methods are very effective in helping Windows users fix problems related to error code 80070103 as well as other errors. These repair methods can usually be implemented by users with very limited technical skills. In some cases, however, you may need to contact a Windows repair technician, i.e. if you have problems following the manual repair method instructions provided or if the repair methods prove unsuccessful.

In the case of error code 80070103, the problem can be rectified by either hiding the update or reinstalling the hardware driver. Windows users can hide an update on the Windows Update website or via Windows Update within their machine’s Settings. However, users will need to contact their device manufacturer to reinstall hardware drivers in most instances. See below for further details regarding these manual repair methods.

Method One: Hide the Update

In the case where you are informed via an error message box that a driver, for instance, your graphics driver, is incompatible you may need to consider hiding the update to prevent error code 80070103 from reoccurring on your machine.

The incompatible issues will come about when the Windows Update website attempts to download a driver that is already on the device or one with a lower compatibility. When you hide the update, it is in essence, preventing Windows Update from offering this driver in the future. To complete this manual repair method, follow the steps below:

  • Step one: Visit the Microsoft Update site 
  • Step two: Select Custom on the Welcome page after completing the scan for the updates process
  • Step three: Select Hardware, Optional.
  • Step four: Open the second update for the graphics card, then select Don't show this update again check box.
  • Step five: Review and install updates.

You may also complete this process by opening Windows Update within your computer’s settings, then selecting the Optional update or available link. Once you’ve done this, you may then select the updates you would like to install and hide the update that has resulted in the occurrence of error code 80070103.

Method Two: Reinstall Hardware Driver

In the case where you need to install a hardware driver, you will need to contact the manufacturer of your device. Once you’ve contacted the manufacturer or visit the manufacturer’s official website, you can then install the latest device drivers manually. Read the instructions for the installation of the latest drivers carefully. This will ensure you avoid any problems and improve your chances of successfully fixing error code 80070103.

After you’ve contacted your device manufacturer and completed the process of reinstalling the hardware driver, check Windows Update to see whether or not error code 80070103 has been rectified. If the problem was related to your hardware driver and you successfully reinstalled the driver, the error code will not reoccur when you attempt to download the latest updates for your hardware drivers.

However, you may need to take another approach if this manual repair method fails to fix error code 80070103. For instance, consider getting help from a Windows repair technician who is equipped with the skills and expertise necessary to offer a detailed inspection of your machine. Though the error code is related to one’s drivers, the fact that a Windows error code occurred may mean that your system needs a thorough evaluation as other issues may be present.

Method Three: Download an Automated Tool

If you wish to always have at your disposal a utility tool to fix these Windows 10 and other related issues when they do arise, download and install a powerful automated tool.

Read More
Guide How to Remove PCOptimizerPro

PC Optimizer Pro is a PC optimizer utility developed by Xportsoft Technologies. It is classified as a potentially unwanted program, due to its aggressive scan and registration reminders, and that it is often distributed bundled with other programs in a manner that leads many users to not know how it got on their computer. While not inherently malicious, PC Optimizer Pro adds numerous registry keys, startup entries and while running consumes a relatively high amount of system resources, especially during its scans. The software installs from a .exe file that is around 5.20 MB or 5.453.240 Bytes (depending on the version). As of the publication of these videos, the current version of PC Optimizer Pro was detected as malicious or potentially unwanted by at least 21 AntiViruses.

About Potentially Unwanted Applications

If you have ever installed freeware or shareware, chances are high that your computer can get installed with a bunch of unwanted applications. A Potentially Unwanted Program, also called PUP, in short, is actually software that contains adware, installs toolbars, or has other hidden goals. These kinds of programs are almost always bundled up with free software which you download from the net or are also bundled within the custom installers on many download sites. PUPs did not really constitute pure “malware” in the strict sense of the term. Just like malicious software, PUPs cause problems when downloaded and installed on your PC, but what makes a PUP different is that you give consent to download it – although the truth is vastly different – the software installation package actually tricks you into accepting the installation. Irrespective of whether it is regarded as malware or not, PUPs are nearly always harmful to the user as they might bring on adware, spyware, keystroke logging, and also other bad crapware features on your computer.

What do PUPs do on your computer, exactly?

Potentially Unwanted Programs come in many forms and varieties, but in most instances, these are adware programs that show annoying pop-up adverts and advertisements on websites you check out. The PUPs also get installed into your computer in the form of web browser add-ons and toolbars. Not only they needlessly take up space on your computer screen, but toolbars may also manipulate search engine results, watch your web browsing activities, decrease your web browser’s efficiency, and decelerate your internet connection to a crawl. Potentially Unwanted Programs at times act quite similarly to viruses or spyware. Some PUPs include keyloggers, dialers, along with other software to gather your private details that may result in identity theft. These are programs that don’t do anything good for you; in addition to taking over space on your hard drive, they also slow down your computer, often modify settings without your approval, the list of bothersome features goes on.

Ways to avoid PUPs

• Always study the EULA and privacy statement. Don’t agree until you know precisely what you are acknowledging. • Choose the “custom” install whenever installing a software program. In particular, look closely at those small boxes that have been checked as default, where you may ‘agree’ to receive promotions or install software bundlers. • Use good antivirus software, like Safebytes Anti-Malware that offers real-time protection against PUPs. • Avoid adding a freeware program you do not use. Turn off or remove toolbars and web browser extensions you don’t really need. • Always download software from reliable sources like official sites as opposed to untrustworthy sharing space. Avoid file-hosting sites where/when possible.

What you can do if Malware Prevents You From Downloading Or Installing Antivirus?

Practically all malware is bad, but certain types of malware do much more damage to your computer than others. Certain malware goes to great lengths to stop you from downloading or installing anything on your personal computer, particularly antivirus applications. If you are reading this right now, you have probably recognized that a malware infection is the real cause of your blocked web connectivity. So what to do if you need to install an antivirus program like Safebytes? There are a few steps you can take to circumvent this problem.

Install in Safe Mode

The Windows OS has a special mode known as “Safe Mode” in which just the bare minimum required programs and services are loaded. In the event the malware is blocking the internet connection and affecting the computer, running it in Safe Mode will let you download antivirus and run a diagnostic scan while limiting possible damage. To start the computer into Safe Mode, press the “F8” key on your keyboard right before the Windows boot screen comes up; Or right after normal Windows boot up, run MSConfig, look over “Safe Boot” under Boot tab, and click Apply. After you reboot into Safe Mode with Networking, you can download, install, and update anti-malware software from there. Right after installation, run the malware scanner to remove standard infections.

Switch to an alternate browser

Some malware may target vulnerabilities of a specific browser that block the downloading process. If you seem to have malware attached to Internet Explorer, then switch over to an alternate web browser with built-in safety features, such as Firefox or Chrome, to download your favorite antivirus program – Safebytes.

Install and run anti-virus from the USB drive

Another solution is to create a portable anti-malware program on your USB stick. Adopt these measures to employ a thumb drive to clean your infected computer system. 1) Download Safebytes Anti-Malware or MS Windows Defender Offline onto a clean PC. 2) Plug the Thumb drive into the clean computer. 3) Run the setup program by double-clicking the executable file of the downloaded software, with a .exe file format. 4) Choose the flash drive as the location for saving the file. Do as instructed on the screen to complete the installation process. 5) Now, plug the pen drive into the corrupted computer. 6) Double-click the anti-malware software EXE file on the USB flash drive. 7) Press the “Scan” button to run a full system scan and remove viruses automatically.

SafeBytes Anti-Malware: Lightweight Malware Protection for Windows PC

These days, an anti-malware tool can protect your computer from different types of online threats. But how to choose the best one amongst numerous malware protection application that’s available out there? You may be aware, there are numerous anti-malware companies and tools for you to consider. A few are well worth your money, but many aren’t. You have to be very careful not to choose the wrong application, especially if you buy a paid application. In terms of commercial anti-malware application options, many people select well-known brands, such as SafeBytes, and are quite happy with it. SafeBytes anti-malware is a powerful, highly effective protection tool created to help end-users of all levels of IT literacy in detecting and eliminating malicious threats from their computer. Using its cutting-edge technology, this software can assist you to eliminate several types of malware such as computer viruses, trojans, PUPs, worms, ransomware, adware, and browser hijackers. SafeBytes has excellent features when compared to other anti-malware programs. Let’s have a look at a few of them below: Robust, Anti-malware Protection: Safebytes is made on the best virus engine within the industry. These engines will find and get rid of threats even during the initial phases of a malware outbreak. Active Protection: Malware programs aiming to enter the system are discovered and stopped as and when detected by the SafeBytes active protection shields. It’ll check your PC for suspicious activity at all times and safeguards your personal computer from unauthorized access. High-Speed Malware Scanning Engine: SafeBytes’s high-speed malware scanning engine minimizes scan times and extends the life of the battery. Simultaneously, it will effectively detect and eliminate infected computer files or any online threat. Website Filtering: SafeBytes checks the hyperlinks present on a webpage for possible threats and informs you whether the site is safe to explore or not, through its unique safety rating system. Lowest CPU/Memory Usage: SafeBytes is a lightweight and user-friendly antivirus and antimalware solution. Since it utilizes negligible computer resources, this tool leaves the computer’s power exactly where it belongs to: with you. Premium Support: You may get high levels of support round the clock if you’re using their paid software.

Technical Details and Manual Removal (Advanced Users)

If you wish to manually remove PCOptimizerPro without the use of an automated tool, it may be possible to do so by removing the program from the Windows Add/Remove Programs menu, or in cases of browser extensions, going to the browsers AddOn/Extension manager and removing it. You will likely also want to reset your browser. To ensure the complete removal, manually check your hard drive and registry for all of the following and remove or reset the values accordingly. Please note that this is for advanced users only and may be difficult, with incorrect file removal causing additional PC errors. In addition, some malware is capable of replicating or preventing deletion. Doing this in Safe Mode is advised.

The following files, folders, and registry entries are created or modified by PCOptimizerPro

Files: DesktopPC Optimizer Pro.lnk. %Programs%PC Optimizer ProLive Support.url. %Programs%PC Optimizer ProPC Optimizer Pro.lnk. %Programs%PC Optimizer ProUninstallation Guide.url. %Programs%PC Optimizer ProVisit Website.url. %ProgramFiles%PC Optimizer ProPCOptimizerPro.exe. %ProgramFiles%PC Optimizer ProPCOptProCtxMenu.dll. %ProgramFiles%PC Optimizer ProPCOptProTrays.exe. %ProgramFiles%PC Optimizer ProStartApps.exe. %ProgramFiles%PC Optimizer Prouninst.exe. %QuickLaunch%PC Optimizer Pro.lnk. WindowsTasksPC Optimizer Pro Idle.job. WindowsTasksPC Optimizer Pro Scan.job. WindowsTasksPC Optimizer Pro startups.job. WindowsTasksPC Optimizer Pro Updates.job. C:DOCUME1USER1LOCALS1Tempoptprosetup.exe C:WINDOWSsystem32netmsg.dll C:DOCUME1USER1LOCALS1Tempoptprosetup.exe C:DOCUME1USER1LOCALS1Tempis-SJGJ9.tmpoptprosetup.tmp C:DOCUME1USER1LOCALS1Tempis-NTRVH.tmp_isetup_shfoldr.dll C:WINDOWSsystem32shfolder.dll C:DOCUME1USER1LOCALS1Tempis-NTRVH.tmpOptProHelper.dll C:DOCUME1USER1LOCALS1Tempis-NTRVH.tmpitdownload.dll C:1e4e2d65e12311cac2c0eeb8c5c1d7bd1ddc865b367b98b56bc2330bf18436 C:WINDOWSRegistrationR000000000007.clb C:DOCUME1USER1LOCALS1Tempoptprosetup.exe C:WINDOWSsystem32shfolder.dll C:1e4e2d65e12311cac2c0eeb8c5c1d7bd1ddc865b367b98b56bc2330bf18436 C:WINDOWSRegistrationR000000000007.clb C:WINDOWSsystem32shell32.dll C:DOCUME1USER1LOCALS1Tempis-SJGJ9.tmpoptprosetup.tmp C:Program FilesOptimizer Pro 3.99OptimizerPro.exe C:Program FilesOptimizer Pro 3.99unins000.exe C:Program FilesOptimizer Pro 3.99OptProStart.exe c:autoexec.bat C:DOCUME1USER1LOCALS1Tempoptprosetup.exe C:DOCUME1USER1LOCALS1Tempis-SJGJ9.tmpoptprosetup.tmp C:DOCUME1USER1LOCALS1Tempis-NTRVH.tmp_isetup_shfoldr.dll C:DOCUME1USER1LOCALS1Tempis-NTRVH.tmpOptProHelper.dll C:DOCUME1USER1LOCALS1Tempis-NTRVH.tmpitdownload.dll C:Program FilesOptimizer Pro 3.99is-BDCDJ.tmp C:Program FilesOptimizer Pro 3.99is-DB4S5.tmp C:Program FilesOptimizer Pro 3.99is-C16E7.tmp C:Program FilesOptimizer Pro 3.99is-QE691.tmp C:Program FilesOptimizer Pro 3.99is-GQ78C.tmp Registry: Key 003B9C22-6FE0-4BCA-A73F-9AA99B9BBDAA at HKEY_CLASSES_ROOTTypeLib. Key 12AB121E-44C6-488B-8773-B0AE25E662E1 at HKEY_CLASSES_ROOTInterface. Key 203ABD21-41F1-4F1B-BAE3-D6A89A90D239 at HKEY_CLASSES_ROOTCLSID. Key PC Optimizer Pro at HKEY_CURRENT_USERSoftware. Key PC Optimizer Pro at HKEY_LOCAL_MACHINESOFTWARE. Key PC Optimizer Pro at HKEY_LOCAL_MACHINESoftwareMicrosoftWindowsCurrentVersionUninstall. Key PCOptimizerPro.exe at HKEY_LOCAL_MACHINESOFTWAREMicrosoftWindowsCurrentVersionApp Paths. Key PCProCtxMenu at HKEY_CLASSES_ROOT*shellexContextMenuHandlers. Key PCProCtxMenu at HKEY_CLASSES_ROOTlnkfileshellexContextMenuHandlers.
Read More
Something went wrong, We couldn’t start
There are instances when you might encounter an error that says, “Something went wrong, We couldn’t start your program” when you open any Office program. This could be due to an issue with the Office file and any Office app you open throws the same error message. This applies to Office 2019/2016, Office 365 Home, Office for Business as well as Business editions. In this post, you will be guided in what you can do to resolve this error. There are several potential fixes for this error, you might only have to restart your computer or you may have to repair Office from Apps and Features or you could also uninstall and install it back again. For more details, follow each one of the provided options below.

Option 1 – Restart your computer

You might be unable to launch any Office app due to some background process that got stuck or there might be some glitch in the system. Thus, the first thing you can do to resolve the error is simply restarting your computer. Once you’ve restarted your computer, open the Office app again or you could also try to sign in back with your Microsoft account that’s connected to Office. If you’re not quite sure which account you were using, you can follow these steps:
  • Open any Office app.
  • Then click on File and look for your name located in the top-right portion.
  • Now click on it. This will display the email or Microsoft account that’s related to Office.

Option 2 – Try repairing Office from Apps and Features

Since Windows 10 offers some repair features that could replace some of the core files with the original files, you can take advantage of such a feature to fix the “Something went wrong, We couldn’t start your program” error when opening any Office app.
  • Open Windows settings and click the Apps and Features option.
  • Next, scroll down until you see the Microsoft Office installation option. Select it and click on Modify.
  • This will open a window and from there, select Quick Repair or Online Repair and click on the Repair button.
Note: When you choose to repair, you might be given two options which depend on how Microsoft Office was installed. For instance, it was installed via Web Installer or Offline Installer (MSI-based). In Web Installer, select Online Repair > Repair when you’re prompted on how you would like to repair Office. While in MSI-based, you have to select Repair under “Change your installation” and then click on Continue. The repair process makes sure that the app data remains untouched.

Option 3 – Try to uninstall and reinstall Office

If neither of the two given options above worked, then you might want to uninstall Office and reinstall it. All you have to do is download the Microsoft Office Uninstall tool from the official site of Microsoft and run it. This will remove any incomplete Office installation as well as unwanted files. It will also get rid of all the Office apps and settings on your computer.
Read More
Impacts & consequences Of Ransomware
From the various report, it is now clear that no one is prone to Ransomware attacks. Cyber-criminals never target any specific field of the user workgroup for this Ransomware attack. But in past few years, it has hugely affected home users, businesses, organizations. We can say, Ransomware victims come in all shapes & sizes. Many business owners think that they will never be attacked by Ransomware crooks because their business is not so big. But that’s not true. A huge proportion of Ransomware attacks happened in small sector businesses because of their weak security resistances.

Some leading negative consequences of Ransomware attacks faced by almost every victim are:

  1. Permanent or temporary loss of proprietary or sensitive information.
  2. Lots of trouble in performing regular operations.
  3. Huge financial losses sustain for restoring up your files and systems.
  4. Latent harm to the reputation of an organization.
  5. Even making the Ransom payment doesn’t guarantee the safe releasing of your encrypted files.
  6. Attackers get the victim’s money along with their banking details.
  7. Getting the decrypting files doesn’t mean malware infection has completely been removed.
Ransomware put a tremendous impact on disturbing business operations and in the end, leads to data loss situations.

Here are some huge impacts of Ransomware attacks on business are:

  1. Damage or loss of all the crucial information
  2. In the Ransomware post-attack period Business disrupts a lot.
  3. Destruction of hostage data, file, and system.
  4. Business downtime
  5. Victimized company’s reputation dropdown
  6. Productivity loss
Apart from the ransom, the cost of downtime because of restricted system access will bring major concerns. It’s a fact that due to downtime victims may has to pay a cost of ten thousand dollars daily. As, Ransomware is becoming more and more widespread, so all companies require to brush up on their annual cyber-security goals. Moreover, approach for some appropriate implementations of Ransomware recovery plans and commit sufficient funds in their IT budgets for cyber-security resources. Among the most effective impact of Ransomware, “data encryption” is very hard to deal with. Meanwhile, this victim is completely restricted to access any of their encrypted data. The only way for unlocking these encrypted files is through the decryption key which only belongs to hackers. Many times, the decryption key is given to the organization, after the payment of the ransom. But there are also some cases when data is not handover to the victim, even after the ransom payment. The main risk that generates with “operational impact of Ransomware” is on the businesses. Can you just imagine, what will happen if all of a sudden entire services or processes of your business halt down?

Well, this dreadful Ransomware threat is so impactful that it can:

  1. Close down the entire plant
  2. Freeze manufacturing control system
  3. Make other backlogs
All the damages that occur due to downtime can be a major one and can have so many consequences. A well-organized strategy of backup and recovery will not certainly make the Ransomware attack painless. As this takes an extensive amount of money and time for data restoration.

Apart from that, the decision of recovering your system using the backup moreover depends on three things:

  1. First the amount of data loss that is considered acceptable by your business or organization.
  2. Up to how extent, the impact of Ransomware has spread
  3. How fast the Ransomware attack was spotted.
However, in many cases, data gets so encrypted that you can’t revert back to the restore point. At that time external backup is considered the best option. Among the wide-reaching impact of Ransomware “Data loss” is the most effective one.  As it starts from little disruption and leads to permanent business failure. Sometimes data loss in a Ransomware attack leads to disclosure of all your confidential information which ends up in fines and lawsuits. Attackers always look for backup files and folders after encrypting your system data. So that user can’t retrieve their corrupted file from the backup. Such dreadful activities make this Ransomware threat so profitable and effective. Victims don’t have any choice left either they have to pay the ransom or they have to face their risk of data loss.
Read More
How to Fix fltmgr.sys in Windows 10
The fltmgr.sys file or the Filter Manager is the one that’s responsible in making sure that all the file stored in a computer’s hard drive stays on their respective locations and is located in C:/Windows/System32/drivers. Now when you encounter a Blue Screen of Death or BSOD error saying, “Your PC ran into a problem that it couldn’t handle, and now it needs to restart. SYSTEM_SERVICE_EXCEPTION”. This kind of Stop error is due to an error with the driver that’s responsible for enabling the communication between the hardware and the computer. It indicates that this driver allows direct access to the internal hardware from the CPU itself. What’s worse about the SYSTEM_SERVICE_EXCEPTION BSOD error is that there are times when you won’t be able to log in to your computer even after it reboots. However, you need not worry as this post will guide you into fixing this BSOD error. All you have to do is follow the given options below carefully and that before you proceed make sure that you create a System Restore point just in case something goes wrong.

Option 1 – Run the Windows Update

Obviously, since the fltmgr.sys file is a system file from Microsoft, you can try running the Windows Update and see if it fixes the problem or not.

Option 2 – Run the System File Checker

The System File Checker, also known as the SFC scan, is a built-in utility in Windows that can be found in the C:/Windows/System32 folder. This tool allows you to scan and restore any corrupted system files in Windows that might be causing the SYSTEM_SERVICE_EXCEPTION BSOD error. To use this tool, follow the steps below.
  • Tap Win + R to launch Run.
  • Type in cmd in the field and tap Enter.
  • After opening Command Prompt, type in sfc /scannow
The command will start a system scan which will take a few whiles before it finishes. Once it’s done, you could get the following results:
  1. Windows Resource Protection did not find any integrity violations.
  2. Windows Resource Protection found corrupt files and successfully repaired them.
  3. Windows Resource Protection found corrupt files but was unable to fix some of them.
  • Restart your computer and then check if it has fixed the error or not.

Option 3 – Run the Blue Screen Troubleshooter

The Blue Screen troubleshooter is a built-in tool in Windows 10 that can be found on the Settings Troubleshooters page. To use it, refer to these steps:
  • Tap the Win + I keys to open the Settings panel.
  • Then go to Update & Security > Troubleshoot.
  • From there, look for the option called “Blue Screen” on your right-hand side and then click the “Run the troubleshooter” button to run the Blue Screen Troubleshooter and then follow the next on-screen options. Note that you might have to boot your PC into Safe Mode.

Option 4 – Check your hardware for any physical issues

There are times when faulty hardware can result in serious problems in the system such as the SYSTEM_SERVICE_EXCEPTION Blue Screen error. Thus, it is highly recommended that you check the internal components of your CPU to find out if there are any problems. And if there is any physical damage, you need to bring that to a technician to get it fixed or have it replaced.

Option 5 – Run the CHKDSK utility

You can also run the Chkdsk utility to resolve the BSOD error. The Chkdsk utility is the one that repairs hard drive errors that might be causing the problem.
  • Open Command Prompt with admin privileges.
  • After opening Command Prompt, execute the commands listed below, and don’t forget to hit Enter right after you type in each one of them and if you have installed Windows to some different directory, you must replace “C” with the name of the drive you’ve installed Windows with.
  • chkdsk C: /r /x
  • chkdsk C: /f
Read More
How to Enable Last Active Click feature
Microsoft has started to use group along with every open window in the Taskbar ever since the release of Windows 10. Early on, they used to show an individual entry for each one of the windows after grouping them which makes the taskbar look cleaner and organized. However, the main issue lies in the fact that you have to hover on your desired window to get on to them. At the time of writing, you need to tap the Ctrl key and click on the taskbar icon to open the last active window but you have to only click on the program’s taskbar icon after you apply the tweak given in this post for the last active window to open. Take note that the “Last Active” windows feature will only work if the taskbar buttons are combined. Before you get started doing the instructions given below, you need to create a System Restore Point first since you will be dealing with registry files and modifying some of the critical settings in Windows 10. Once you’ve done this, proceed to the given steps below. Step 1: Tap the Win + R keys to open the Run dialog box and then type “Regedit” in the field and hit Enter to open the Registry Editor. Step 2: If a User Account Control or UAC prompt appears, just click on Yes to proceed to open the Registry Editor. Step 3: Next, navigate to the following registry path:
HKEY_CURRENT_USERSoftwareMicrosoftWindowsCurrentVersionExplorerAdvanced
Step 4: From there, right-click on the right side of the panel and select New > DWORD (32-bit) and then name it “LastActiveClick”. Step 5: After that, double click on the newly created DWORd to modify its value. Put “1” as its value data. Step 6: Then click OK and close the Registry Editor. Step 7: Now restart your computer to successfully apply the changes made. Note: In case you want to revert back to the default configuration, all you have to do is set the value data of LastActiveClick to “0” or simply delete that DWORD and restart your computer to successfully apply the changes made.
Read More
How to Fix Low Wi-Fi signal strength on Windows 10
If you are experiencing a Low Wi-Fi signal strength on your Windows 10 PC after you’ve updated or reinstalled it, read on as this post will guide you on what you can do to fix the problem. The way devices connect these days has evolved with our cognitive revolution. Various devices use some or other wireless technology to connect with other devices. However, all wireless technology has some kind of limitation when it comes to range and signal strength. From time to time, you might have faced several Wi-Fi issues. Low Wi-Fi signal strength usually happens after you update or reinstall your Windows 10 system. This issue can be identified easily by looking at the signal bars in the Wi-Fi icon or by measuring its strength. Since this problem is wide scope, there are tons of possibilities which is why this post covers the most generic situations that could help most users. Refer to the options given below to fix the low Wi-Fi signal strength of your Windows 10 PC.

Option 1 – Try running the Network Adapter Troubleshooter

If a few days ago the range and signal of the Wi-Fi was perfectly fine before you did an update or reinstall, it is possible that there were some changes made in the configuration as well. In most cases, the latest configuration that came with the update has not aligned the config in your computer or laptop. The easiest and simplest way to fix this is by using the Network Adapter Troubleshooter. How? Follow the steps below.
  • Right-click on the Wi-Fi icon from the system tray to start troubleshooting.
  • After that, select Troubleshoot problems. Note that it might take a while to run it but once it’s finished, it will show you all the problems with the network adapter.
Note: The Network Adapter Troubleshooter will also fix the issues in the background but there might be some issues that will require manual action. And if the troubleshooter wasn’t able to identify and fix the problem for you, proceed to the next given option below.

Option 2 – Try using the Device Manager

If the problem is related to hardware, you need to seek out the help of the Device Manager. To do so, follow the steps below.
  • Pull up the Device Manager.
  • Next, look for your Wi-Fi adapter under the Network Adapters.
  • Once you found it, right-click on it and open Properties.
  • After that, you will see all the actions related to drivers under the driver tab.
  • You can either update or roll back the selected driver or you could also disable and re-enable it to see if the problem’s fixed.
Note: If updating the driver didn’t help, you might have to dig into the advanced settings. From this post on, it can get a bit complicated as there are terms that you might not understand as well as some configuration. To make it easier for you, you can search for your Wi-Fi adapter online and try following the instructions from there. And before you make any further changes to your computer’s settings, make sure that you create a system restore point first.

Option 3 – Try changing the Wi-Fi Roaming Sensitivity

If you want to enhance the Wi-Fi reception as well as the performance on your Windows 10 PC, you might want to change the Wi-Fi Roaming Sensitivity or Aggressiveness. Roaming Sensitivity is the rate at which your computer chooses and switches to the nearest available point of access which offers a better signal. It is based on the strength and quality of the Wi-Fi and not on the distance to the Wi-Fi point.

Option 4 – Try adjusting the Wi-Fi range

The issue could also be caused by the position of your computer with respect to the Wi-Fi router instead of your hardware or drivers. It could be that your physical location might be a factor for the low signal strength of your Wi-Fi so you might want to adjust the Wi-Fi range to fix the problem.
Read More
Rebuild Search Index in Windows 10
If by any chance your search result in Windows is misleading, missing, or incorrect then it is a high probability that your search index is out of date. To repair this issue follow this guide step by step. Please take note that rebuilding the whole search index can take a long time on some systems depending on the size of the index itself, CPU speed, HD speed, etc. Sometimes it can take even hours on large drives. First, press ⊞ WINDOWS + R to open the run dialog and type in it Control panel to open the control panel. keyboard with windows and r markedrun dialog with control panel typed in 
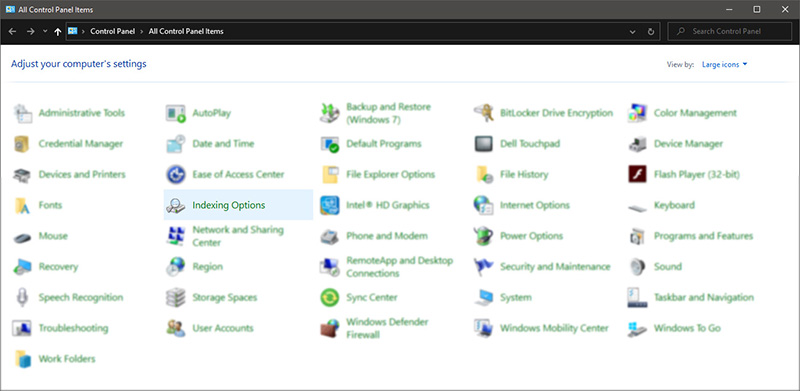
Once you are in the control panel, switch your view to large icons and locate Indexing options. Control panel with indexing options selected
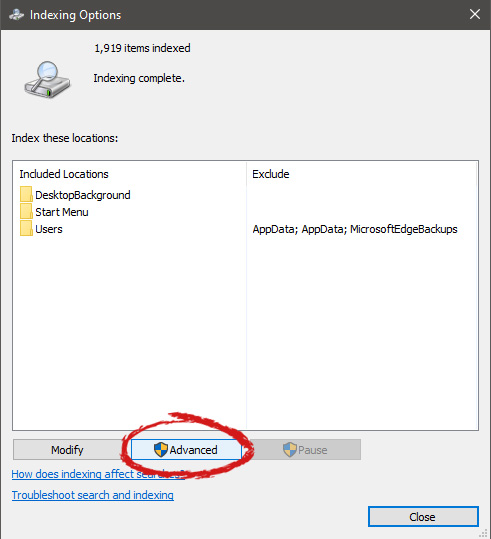
Inside indexing options, click on advanced. indexing options advanced button markedIn advanced options click on the rebuild and confirm. indexing options rebuild button marked
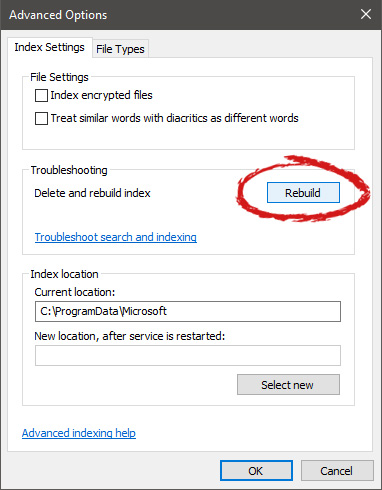
Leave your computer to finish and your searches should be working fine now.
Read More
Your password may have expired or ...
There are instances when you have to connect to another Windows 10 PC via remote connection from another Windows 10 PC. However, when you encountered an error saying, “Your password may have expired or the remote pc might not accept blank passwords” while doing so then read on as this post will walk you through how you can fix it. Here is the full content of the error message:
“Your password may have expired, or the remote PC might not accept blank passwords. Try connecting again. If this keeps happening, ask your admin or tech support for help.”
It is unknown what the exact cause of the error message is as it could involve several factors. Even so, there are still various potential fixes you can try to fix this kind of error. You can try to check if your password has expired or troubleshoot any issues with the network. You could also use a remote desktop application or configure the settings of firewall or restart the remote desktop service. For more details, refer to each one of the given options below. But before you proceed, make sure that you have someone to help assist you on the other side to help you troubleshoot the issue.

Option 1 – Try to check if the password has expired

The first thing you can do to fix the problem is to check if the password has expired as it could be the reason why you’re experiencing this problem. You have to make sure that you are using a user account that is on the remote computer and then check if the user account password has not expired yet. And if your PC is not within your access, then you can just ask someone to verify the password for you.

Option 2 – Try to troubleshoot network issues

To troubleshoot network-related issues that might be the one that triggers the error, you need to run the Network Troubleshooter. To get started, refer to these steps:
  • Open the Search bar on your computer and type in “troubleshoot” to open the Troubleshoot settings.
  • Next, scroll down and select the “Network Adapter” option from the right pane.
  • Then click on the Run Troubleshooter” button.
  • After that, your computer will check for any possible errors and will pinpoint the root cause of the problem if possible.
  • Restart your computer.

Option 3 – Try to use a remote desktop software

A number of users reported that the issue occurred when they used the universal app for Remote Desktop and they were able to fix it by switching to the Remote Desktop application. Thus, you can try to switch to the remote desktop software and see if it fixes the problem or not.

Option 4 – Try to configure Firewall settings

You might also want to configure the settings of the Firewall as it could also help in fixing the problem. It is possible that the firewall is blocking the incoming connection on the remote computer. To check if whether the firewall is the culprit or not, follow the steps below.
  • Go to Windows Security and then go to Firewall and network application.
  • Next, click on the Advanced Settings link. This will open the classic Windows Defender Firewall and Advanced Security application.
  • From there, look for the rule named “Remote Desktop – User Mode (TCP-In)” under inbound rules and check if it has been disabled or not.
  • If the rule is disabled, you have to enable it.
  • Once done, check if the error is now fixed or not.

Option 5 – Try to restart the Remote Desktop service

If none of the four given options given above worked, you might want to restart the Remote Desktop service as it can help you in fixing the problem. To do so, follow these steps:
  • Tap the Win + R keys to open the Run dialog box and type “services.msc” in the field and hit Enter to open the Windows Services Manager.
  • Next, from the list of services, look for the Remote Desktop Service and right-click on it, and then click on the Restart option.
  • Once done, check it was able to fix the “Your password may have expired or the remote pc might not accept blank passwords” error or not.
Read More
1 2 3 162
Logo
Copyright © 2022, ErrorTools. All Rights Reserved
Trademarks: Microsoft Windows logos are registered trademarks of Microsoft. Disclaimer: ErrorTools.com is not affiliated with Microsoft, nor claim direct affiliation.
The information on this page is provided for information purposes only.
DMCA.com Protection Status