Disabling Security Questions in Windows

We’ve already covered disabling Security Questions If you want to disable Security Questions on your Windows 10 computer then you’ve come to the right place as this post will guide you in doing exactly that. In this post, you will be disabling Security Questions using a PowerShell script. This PowerShell script is called “Update-AllUsersQA”. It is designed to remove or disable the security questions and answers for local users on a Windows 10 computer. It lets administrators take control of the security questions in the environment and at the same time minimizes the risk that comes with them.

If a user has a Microsoft account that’s configured to sign in to Windows 10 then he will not probably notice the Password Recovery questions. On the other hand, if he has a chosen local account for installing Windows, he will e prompted to create three security questions that can be used to reset the password and log into the Windows 10 account in case there is any misfortune. However, if you do not have much use for these Security Questions, then you can definitely have them disabled using a simple PowerShell script which you can download from GitHub.

For more details on how to disable security questions in a Windows 10 machine, refer to the steps provided below.

Step 1: You need to first download the .ps1 file from the GitHub repository.

Step 2: Once you’ve downloaded the file, open the PowerShell window with admin privileges.

Step 3: After that, navigate to the folder where you had saved the .ps1 file. Then copy the address of the folder location.

Step 4: Next, change the directory by using the following command:

cd "folder location address"

Step 5: After that, enter the following script to disable the security questions:

Update-AllUsersQA

Once you’ve completed the steps above, the Security Questions should be disabled and you will be notified with a message stating that the feature has been disabled. On the other hand, if you have a change of heart and you want to enable the Security Questions back, here are some steps you need to take:

Step 1: First, open the PowerShell window as admin.

Step 2: Next, run the same script with one more parameter such as:

Update-AllUsersQA -answer SecretAnswer

Step 3: And that’s about it. Do not forget to replace the Secret Answer with your preferred one and once you’re done, it will be set as the answer for all the Security Questions.

Step 4: Now all that’s left to do is go to the Settings app to change the answer to the questions and you should be good to go.

If you like to learn and find out more about various Windows errors, and how to repair them go to our vast archive or use search to find articles that will explain and help you in solving your issue.
However, if you prefer to do things fast and with automatization then we are proposing to use an automated solution for your issues. The application that we are recommending is Advanced System Repair Pro
Advanced System Repair utilizes multiple tools all in one to give you a quick, simple, reliable, and very thorough diagnosis of your PC. It brings you all the tools you need in one program to clean, fix, protect, optimize and boost your PC!
1-Click Maintenance
All the tools to make it simple and easy! It's like having a professional technician at the click of a mouse.

Junk Cleaner
Keeping your computer free from unnecessary clutter also helps make your computer last longer. Like any other machine, if you keep it clean and take care of it, it will serve you better for longer!

Optimize background apps
Optimize applications background activity with the built-in Application Optimizer feature.

Disk Defrag
With a simple 1-click, Advanced System Repair speeds up your PC by assembling fragmented files on your machine and organizing them more efficiently.

Malware Removal
Finds and removes all types of harmful malware including trojans, worms, bots, adware, spyware, PUPs, and more!

Privacy Cleaner
The all-in-one privacy suite to Clean Your Tracks & Protect Your Privacy! Make your computer safe, secure, and more efficient!

System Tweak/Optimizer
ASR will analyze your complete system and settings to adjust your PC to function at its maximum performance.

Registry Cleaner
Over time, as you install and uninstall applications, the registry can become cluttered with old entries and broken settings which can result in program crashes, and annoying messages and slow the computer down.
Visit our Advanced System Repair Pro Download page to inform yourself about all the benefits of this software and get a free trial copy of it.
advanced system repair pro

Advanced System Repair Pro

One-click automated PC repair solution
ASR logo
With Advanced System Repair Pro you can easily
Replace damaged files
Restore performance
Free disk space
Remove Malware
Protects WEB browser
Remove Viruses
Stop PC freezing
DOWNLOAD
Privacy Policy | Terms of Use | Uinstall
Advanced System Repair Pro is compatible with all versions of Microsoft Windows including Windows 11

Share this article:

You might also like

Guide to Quickly Fixing the Thorconnwndclass

Fix Thorconnwndclass

What Is Thorconnwndclass Error?

Thorconnwndclass error is an Outlook error that has recently reared its head. Known to create several problems in the proper functioning of the Outlook application, this error is essentially a constituent of the Norton Antivirus Crash Guard Symantec component. That’s why those using the Norton Antivirus program are most likely to encounter this error.

Solution

Restoro box imageError Causes

When the Thorconnwndclass error occurs, the Outlook closes unexpectedly, users encounter problems while sending or receiving emails and, performance of Outlook is degraded and this happens because issues arise while accessing the PST file. Because of this damaged PST file, stored data is unavailable for access. Other factors that trigger the Thorconnwndclass error are listed below.
  • Corrupt or damaged Outlook Add-ins
  • Corrupt or damaged Outlook bar
  • Unfinished Outlook installation
  • Faulty settings
  • Thorconnwndclass Norton is being used with Outlook
Regardless of the underlying factors that lead up to the occurrence of this error, it's of paramount importance that workarounds are implemented to ensure desired performance of Outlook in the long run.

Further Information and Manual Repair

While there are several ways to rectify this error, some of the most common ones are listed below as follows.
  • The most effective solution is the PST file repair tools available online. These tools use a complex algorithm and thoroughly scan the PST file and repair it as needed. This resolves the Thorconnwndclass error that one encounters in Outlook. Usually such software have an easy to use interface and can easily be used, without the need for the user to have a strong technical background. Another advantage of using these software available online is that they not only repair the file, but they often play a pivotal role in retrieving inaccessible or lost data.
Some other tips for manually resolving this problem are listed below as follows.
  • First and foremost, disable your Norton Antivirus program if it’s installed on your system. Now, open the Outlook application in Safe Mode. Since this problem may also be triggered by damaged or corrupt Outlook add-ins, it is strongly advised that you disable or uninstall them. Now, you will come across some .dat files. Rename them by changing the existing .dat files to new .dat.
  • Another useful approach is to employ the Inbox Repair tool offered by Outlook.
  • Finally, one can also use the scanpst.exe file to fix any problem or error that resides within the  Outlook application.
Read More
Fix NMI_HARDWARE_FAILURE in Windows
If you encounter the NMI_HARDWARE_FAILURE Blue Screen error while using your Windows 10 computer, then read on as this post will guide you in resolving this kind of Blue Screen of Death error. NMI HARDWARE FAILURE or “Non-Maskable Interrupt” Blue Screen error occurs when there is some hardware malfunction in your computer. When you encounter this Blue Screen error, you may get a stop code of 0x00000080 which can randomly occur while you use your computer. However, a lot of users reported encountering this error while they were trying to update or install their Graphics Card drivers. The stop code that you may get for this BSOD error is 0x00000080. The error can occur randomly during your usage of the computer – but a large number of users have reported this error while they are updating or installing their Graphics Card drivers. In this post, we will be covering all the possible fixes for this error. NMI_HARDWARE_FAILURE error on Windows The NMI_HARDWARE_FAILURE bug check has a value of 0x00000080. This bug check indicates that a hardware malfunction has occurred. There are various hardware malfunctions that can cause this kind of Blue Screen error. However, pinpointing the exact cause is quite difficult. Worry no more for the following fixes provided below can help you resolve the NMI_HARDWARE_FAILURE Blue Screen error no matter what the cause of the problem is.

Option 1 – Try removing hardware or drivers that you’ve installed recently

If you have recently installed some hardware or drivers, you might want to disable or remove them since external devices are proven to be one of the factors that trigger Blue Screen errors like NMI_HARDWARE_FAILURE. All you have to do is physically disconnect any external devices that are connected to your computer and then check if it fixes the BSOD error or not.

Option 2 – Try to rollback, update, or disable the Graphics card drivers

Since the NMI_HARDWARE_FAILURE Blue Screen error has something to do with Graphics card drivers, you can either roll back, update or disable them depending on your preference in order to resolve the error.
  • First, boot your computer into Safe Mode.
  • After that, tap the Win + R keys to launch Run.
  • Type in devmgmt.msc into the box and tap Enter or click OK to open the Device Manager.
  • After that, a list of device drivers will be displayed. From there, look for the Display Adapters and click on them.
  • After that, right-click on each entry under the Display Adapters and select the “Uninstall Device” option from the menu.
  • Now restart your computer.
  • After restarting your computer, go to the Settings app and Check for Updates in the Windows Update section.
Note: You also have the option to go directly to the website of your graphics card manufacturers like NVIDIA, Intel, or AMD and go to the section called Drivers then check if there’s a new available update – if there is, download and install it.

Option 3 – Make sure that all memory modules have the same type

This third option is quite technical and tricky. If you often use multiple physical RAMS on your Windows 10 computer, then you have to check first if they are of the same frequency. After that, the first thing you should verify is if the chip is properly compatible or not. And if the sockets are attached using some kind of adapter or non-recommended device, it could cause some issues while giving a performance hit to your computer.  If you were able to find such a setup, you have to undo it or install the proper and recommended as well as compatible hardware.

Option 4 – Try to run the Blue Screen Troubleshooter

As you know, the Blue Screen troubleshooter is a built-in tool in Windows 10 that helps users in fixing BSOD errors like the NMI_HARDWARE_FAILURE error. It can be found on the Settings Troubleshooters page. To use it, refer to these steps:
  • Tap the Win + I keys to open the Settings panel.
  • Then go to Update & Security > Troubleshoot.
  • From there, look for the option called “Blue Screen” on your right-hand side and then click the “Run the troubleshooter” button to run the Blue Screen Troubleshooter and then follow the next on-screen options. Note that you might have to boot your PC into Safe Mode.
Read More
Fix 0xd00000e5, 0x8007139f, 0x80090030 PIN
The quickest and easiest way to log into your computer is when you use the PIN feature in Windows 10. Even though it is a bit slower compared to biometric logins such as Fingerprint and Iris scanning that comes under Windows Hello, the PIN feature is definitely less complicated. However, just like any other module of the software, it is also prone to some errors. In this post, you will be guided in fixing several PIN errors such as 0xd00000e5, 0x8007139f, and 0x8009003. These errors could be caused at different points in time like when you change or create a PIN or when you log into your computer. To fix the 0xd00000e5, 0x8007139f and 0x8009003 PIN errors, there are various solutions you can try. You may empty the contents of the NGC folder or remove and change the PIN or the password. You could also use the Group Policy Editor or reset the ACLs in the NGC folder as well as run built-in tools like System File Checker and the DISM tool.

Option 1 – Take ownership of the NGC folder and delete its contents

  • Boot your computer first into Safe Mode.
  • Next, you need to take ownership of the Ngc folder first and you can do that using Command Prompt.
  • Type “command prompt” in the Windows Search bar and then right-click on the relevant search result and select “Run as administrator”.
  • After that, if a User Account Control or UAC prompt appears, just click on Yes to proceed.
  • Next, type and enter this command: TAKEOWN /F C:WindowsServiceProfilesLocalServiceAppDataLocalMicrosoftNgc
  • Note that the <path> is the location of the folder or file in File Explorer.
  • Now type and enter this second command: ICACLS C:WindowsServiceProfilesLocalServiceAppDataLocalMicrosoftNgc /grant administrators:F
  • Finally, once the command has been executed, restart your computer.
  • Once your computer has restarted, delete all the contents in the Ngc folder and check if the error is now fixed.

Option 2 – Try to remove and change the PIN or password

The 0xd00000e5, 0x8007139f, and 0x8009003 PIN errors could be caused by some conflicting issues with the PIN or password you have set for the User Account of your computer. Thus, you have to remove or change the PIN or password to fix these PIN errors.
  • Remove the PIN by going to Settings > Accounts > Sign-in options.
  • From there, go to the PIN section and click on the Remove button.
  • You will be asked to verify your account to proceed in removing the PIN, enter your credentials.
  • Restart your computer and then set up a new PIN.
  • Once you’re done, restart your computer and check if the error is gone now.

Option 3 – Try to use the Group Policy Editor

  • Tap the Win + R keys to open the Run utility and type “gpedit.msc” in the field and tap Enter to open the Group Policy Editor.
  • Next, navigate to this policy setting: Computer Configuration > Administrative Templates > System > Logon
  • After that, double click on the “Turn on convenience PIN Sign-in” option located on the right-side panel.
  • Then set its radio button to Enabled. You will see the following description when you do so:
“This policy setting allows you to control whether a domain user can sign in using a convenience PIN. If you enable this policy setting, a domain user can set up and sign in with a convenience PIN. If you disable or don’t configure this policy setting, a domain user can’t set up and use a convenience PIN. Note: The user’s domain password will be cached in the system vault when using this feature. To configure Windows Hello for Business, use the Administrative Template policies under Windows Hello for Business.”
  • After setting the radio button to Enabled, it will turn on the Logins in your computer using the PIN.
  • Close the Group Policy Editor and restart your computer for the changes to take effect.

Option 4 – Try to reset the ACLs in the Ngc folder

  • Type “command prompt” in the Windows Search bar and then right-click on the relevant search result and select “Run as administrator”.
  • After opening Command Prompt with admin privileges, execute this command: C:/Windows/Service/Profiles/Local/Service/AppData/Local/MicrosoftNgc /T /Q /C /RESET
  • The command you entered will start checking for errors and fix them automatically.

Option 5 – Run the System File Checker scan and the DISM tool

System File Checker:

  • Tap Win + R to launch Run.
  • Type in cmd in the field and tap Enter.
  • After opening Command Prompt, type in sfc /scannow
The command will start a system scan which will take a few whiles before it finishes. Once it’s done, you could get the following results:
  1. Windows Resource Protection did not find any integrity violations.
  2. Windows Resource Protection found corrupt files and successfully repaired them.
  3. Windows Resource Protection found corrupt files but was unable to fix some of them.
  • Now restart your computer.

DISM tool:

  • Open Command Prompt.
  • Then type in the following commands and make sure to hit Enter right after you type each one of them:
    • Dism /Online /Cleanup-Image /CheckHealth
    • Dism /Online /Cleanup-Image /ScanHealth
    • Dism /Online /Cleanup-image /Restorehealth
  • After that, wait until the process is finished and do not close the window as the process will probably take a couple of minutes.
  • Once it’s done, restart your computer.
Read More
Remove recommended icons from the start menu
windows 11 start menu
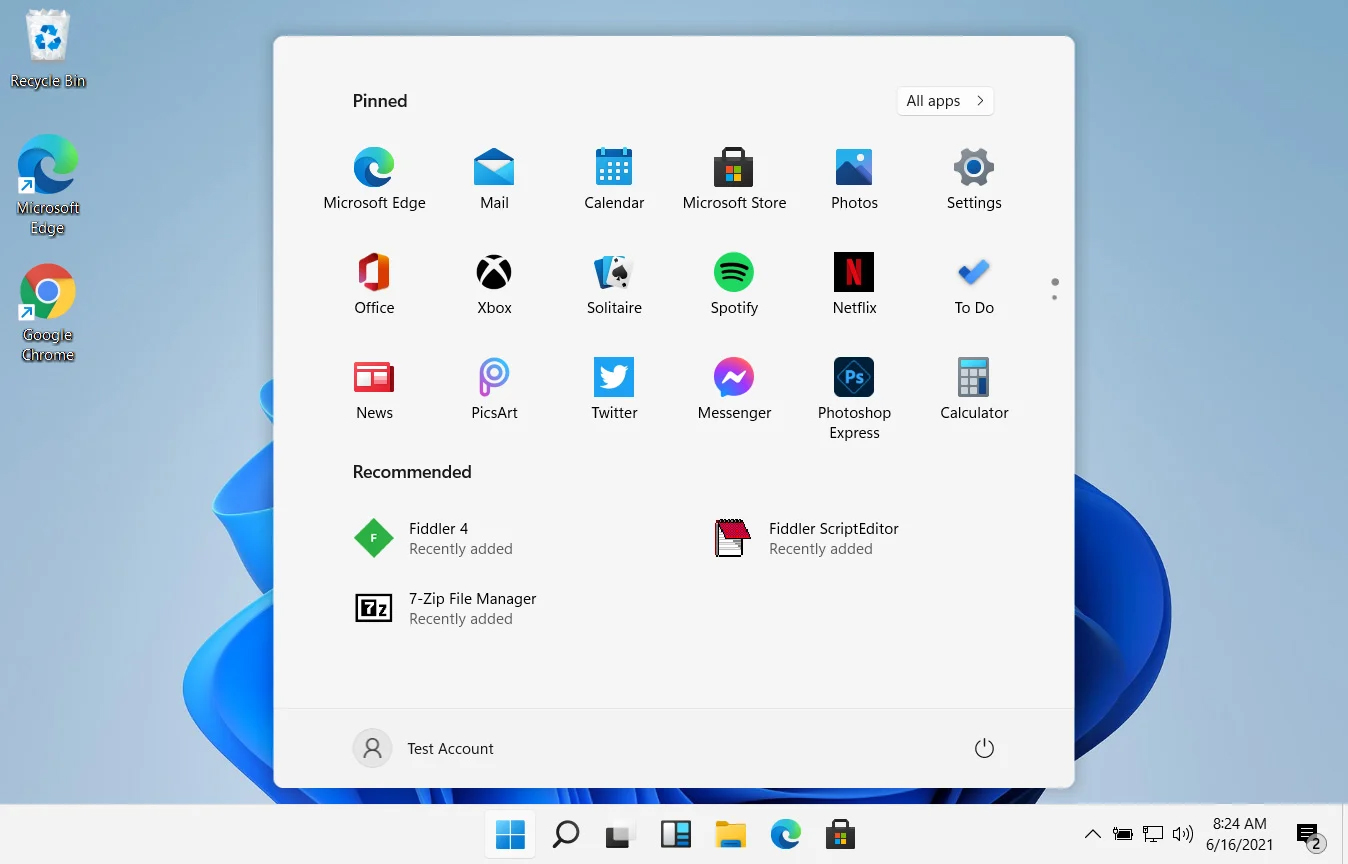
In Windows 11 by default inside the Start menu, there is recommended section that contains recently opened folders, documents, and files. If you do not wish this section and do not want recent items in your Start menu there is an easy way to turn it off.
  1. Press ⊞ WINDOWS + I to open settings
  2. Click on Personalization
  3. On the right side scroll down and click on Start
  4. Click on the switch beside Show recently opened items in Start, Jump lists, and File Explorer
  5. Close settings
Settings will be automatically applied and there will be no more recommended items inside your Start menu to create clutter, it will be nice and clean.
Read More
Fix “Diskpart failed to clear disk attributes”
If you encounter the “Diskpart failed to clear disk attributes” error when you try to change the read-only state of a storage device using the Diskpart application and the request is denied, worry not for this post will give you a couple of fixes to resolve the problem. As you know, Diskpart is used for resolving read-only storage devices by changing their attribute via the command line. So if it is not able to change the attribute of the storage device, then you will most likely encounter an error such as this one. This kind of error is not uncommon and as long as there are no damaged physical attributes, you can resolve it right away. There are tons of reasons why you’re getting this error while using Diskpart, it could be that the storage device has a physical write-protected switch or the disk is hidden or has bad sectors. It could also be because the storage drive might be in RAW format or that you are running the Diskpart application without admin privileges. Whatever the cause may be, here are some options you can try to fix the problem but before you proceed, make sure that you log on to your PC as an administrator.

Option 1 – Check if there is a physical switch on the storage device

There are some USB devices and SD card readers that have a write-protected physical switch that disables all the writable options on the storage device and so if it is turned on, Diskpart won’t be able to change the disk attribute to writable. To check, simply look for the physical switch on both sides of the device and once you found it, make sure that it is toggled off and then plug the storage device back in then try running Diskpart once again.

Option 2 – Modify the WriteProtected key in the Registry Editor

Before you proceed, you have to create a System Restore Point first.
  • Tap the Win + R keys to open Run and type “Regedit” in the field and hit Enter to open the Registry Editor.
  • Next, navigate to the following path:
HKEY_LOCAL_MACHINESYSTEMCurrentControlSetControlStorageDevicePolicies
  • After that, look for the “WriteProtect” registry entry which is located on the left side of the window, and then double click on it.
  • Change its value to “0” and click OK to save the changes made and exit the Registry Editor.

Option 3 – Run CHKDSK to check the drive for errors

When it comes to some issues concerning the hard drive or removable devices, there is a utility in Windows that might help which is called “chkdsk”. This error check utility can help with several issues in the system including the “Diskpart failed to clear disk attributes” error.
  • Tap the Win + S keys to open the Search box.
  • Then type “command prompt” in the field and from the search results that appear, right-click on Command Prompt and select “Run as administrator”.
  • After opening an elevated command prompt, copy and paste the following command and hit Enter:
CHKDSK [volume [[path] filename]] [/F] [/V] [/R] [/X] [/C] [: size]]
Note: In the command given above, “[/F]” will try to fix the system errors while “[/R]” will be the one to fix the bad sectors.
  • Now if you are prompted to run CHKDSK after your reboot your PC, just tap Y and reboot your PC.
  • If CHKDSK is not able to find any errors, tap the Win + E keys and navigate the access window. From there, right-click on the concerned drive and click on Properties.
  • After opening Properties, click on the tab Tools and then click on the “Check” button under the Error-checking section.
  • Wait until the process is completed and then restart your computer.

Option 4 – Clear the attributes on RAW

  • Tap the Win + S keys then type “diskpart” in the field.
  • Click the Diskpart application and if a User Account Control dialog box pops up, click Yes to proceed.
  • After opening an elevated Command Prompt, type in the commands listed below and make sure to tap Enter right after you key in one command after the other.
    • list volume
    • select volume ‘n’ (In this command, you have to replace ‘n’ with the volume number of the drive)
    • format fs=fat32 quick (In this command you also have the flexibility to change the format to ‘ntfs’ or ‘exfat’)
  • After executing the commands given, unplug the removable storage device and wait for a couple of seconds and then plug it back in.
  • Now try any normal write operations and see if the error no longer appears.

Option 5 – Try checking the hardware components

On the other hand, it is also possible that the issue has something to do with a hardware problem and so you need to check the hardware components on your computer to determine that.
Read More
How to use Windows maps offline
If you like to travel but you do not have a navigation device and a place where you are traveling does not have internet coverage do not worry, Windows offline maps are here to help. Traveling in today's world often requires that we have some sort of navigation system, wherever that be a dedicated navigation device, maps on your mobile phone, or something similar. Maps on mobile-phone are nice but they drain the battery of the phone fast and being on a road might require that we have access to our phone, just in case of an emergency call, and dedicated navigation devices often cost a lot of money. Lucky for us Windows comes with a maps feature where you can check local maps and orientate with their help and even if you are in an area where you do not have internet coverage you can still use maps via offline mas mode in Windows. This feature will require that you sacrifice little HDD space because you will need to download maps that you will need and some time preparing in order to find and download maps that you will need but in the end, it is worth it, you have a full map system completely offline and independent of the internet. So in order to prepare all maps that you will need, follow this guide step by step and enjoy your trip.
  1. Select Settings from the Start menu.
  2. Click System.
  3. Select Offline maps.
  4. Click the + button next to "Download maps".
  5. Select the continent where your desired country is located.
  6. Select the region you want to download. Depending on the area, you can download a whole country or you'll have to drill down to a smaller region (for example, with Canada and the USA).
  7. Repeat for any additional regions you want to have as offline maps. You can download more maps while other maps are currently downloading.
  8. Pack your bags
  9. GO!
Read More
Connecting Cortana on Windows and Android
Microsoft's anniversary update has come with many new features and improvements. One of these features is that Microsoft's Cortana can now be installed on your Android phone and as long as you are logged in to your Microsoft account on different devices, she can pass information between devices. You can not see battery life on your desktop PC, notifications, etc. There are some prerequisites in order to get this going, first is to have a Windows version 1607 or newer. The second is to have the last Android version

Installing Cortana on Android

  1. Download and install the Cortana app from the Google Play store.
  2. Open the app and accept the license terms.
  3. Enter the credentials for the Microsoft account you use to sign in to your PC.
  4. After a few seconds, Cortana will open.
  5. Click the settings button and select Sync Notifications.
  6. By default, missed calls, incoming messages, and low battery notifications will be turned on. You can turn this on\off from here. The only option off by default is for App notifications. Any non-system apps such as Facebook and Instagram can also send alerts to your Windows box. You can choose to enable the App notification sync option or leave it off.
  7. If you enable “App notification sync,” you will need to give Cortana permissions to read and control notifications on your phone.
  8. You can then select exactly which applications will be synched to your PC.
  9. Once done you can exit out of Cortana.

Configuring Cortana on PC

  1. Click the Windows button and type Cortana. Click the icon for Cortana and Search Settings.
  2. Scroll through the settings list and look for Send notifications between devices
  3. Click the switch to turn it on.
  4. Sign in to the same Microsoft account you used in the previous section
  5. Navigate back to the Cortana & Search settings tool.
  6. Click Edit Sync Settings. Make sure that your phone shows up on the list. You can also determine if you want PC notifications are sent to your phone.
With those settings in place, you should now start getting alerts for the items you enabled in your Action Center. As notices come in, you will see them pop up in a small bubble on the lower right of your screen. You can dismiss the notification or use the link to find a compatible app in the Windows store.
Read More
USB keep disconnecting and reconnecting
If your USB keeps disconnecting and reconnecting after you connect your USB device on its own randomly, then the problem might have something to do with a hardware or driver issue. The first thing you have to do in such a case is to make sure that the device is working on another computer. This will help you isolate the problem and if it turns out that it works, then the problem lies in your computer and not your USB device. To fix this connection problem between your USB device and Windows 10 computer, you can use the options given below as a reference.

Option 1 – Update or reinstall the Universal Serial Bus Controller driver

Since it could be a driver issue, you can try to update or reinstall the Universal Serial Bus Controller drivers using the Device Manager. Refer to the following steps:
  • First, click the Start button and type “device manager”.
  • Then click on the “Device Manager” from the search results to open it.
  • From there, look for the “Universal Serial Bus controllers” option and then right-click on each one of the USB drivers and select the Update Driver from the menu.
Note: If it is a regular USB drive, then it will be listed as a USB Mass Storage Device but if you have a USB 3.0 device, then look for a USB 3.0 Extensible Host Controller.
  • Restart your PC and then click the “Search automatically for updated driver software” option.
Note: If updating the USB Controller drivers didn’t work, you can try to reinstall them instead.

Option 2 – Try to change the USB port

You might want to change the USB port since modern computers have a variety of USB ports. So if your USB drive supports USB 3.0 or 3.1, make sure that you plug it inside a USB 3.0 or 3.1 ports. If you’re not sure which port, just keep in mind that the USB 3 port is usually blue or you can also use your computer’s documentation or manual as a reference to locate it.

Option 3 – Try to turn off the Power Saving option

You could also try to turn off the Power Saving option to resolve the problem. All you have to do is switch to Power Management after you select the Properties of the USB device and from there, uncheck the “Allow the computer to turn off the device to save power” option. On the other hand, if you are using a laptop and did not use the USB device for a long time, then it could be powered off. This will ensure that the system does not turn off the USB device.

Option 4 – Try to reinstall the latest Universal Serial Bus controller drivers in Compatibility Mode

If you were unable to install the Universal Serial Bus controller drivers you’ve downloaded, you can try installing them again but this time using Compatibility mode. Follow the steps below to do so:
  • You need to download the driver and place it on your desktop.
  • After that, right-click on it and select Properties.
  • Next, switch to the Compatibility tab where you should see two options:
    • Compatibility troubleshooter, and let Windows figure out what works best for you. If it fails, follow the next.
    • Manually choose the version of Windows it was correctly working.
  • Now right-click on the file and select the “Run as administrator” option to install. After that, you should now be able to change your screen aspect ratio to what you were using early on.
Note: If you have other programs that won’t work on the existing version of Windows, then make sure to run the program in a Compatibility mode.

Option 5 – Run the Hardware and Devices Troubleshooters

  • The first thing you need to do is click on Start and then on the gear-like icon to pull up the window for Settings.
  • After opening Settings, look for the Update and Security option and select it.
  • From there, go to the Troubleshoot option located on the left-hand side of the list.
  • Next, select Hardware and Devices from the list and open the Troubleshooter and run it. Once it is doing its job, wait for it to complete the process and then restart the system.
  • After the system restarts, check if the problem’s now fixed. If not, refer to the next option given below.
Read More
Fix 169 IP address error in Windows 10
169 IP address error can stop your computer from connecting to the internet which could be a very frustrating experience. In this guide, we will cover simple but effective tips on how to fix this error so you can continue with internet use.
  1. Reconnect your Modem or Router

    Simple and sometimes effective solution, unplug and plug back in modem or router so IP is fetched again, it is very likely that computer will pick right IP address with this stunt.
  2. Use built-in Windows Network troubleshooter

    Press ⊞ WINDOWS + X top open secret menu Go to settings Go to Network & Internet Inside click on Network troubleshooter Follow onscreen instructions After the troubleshooter ends reboot your PC
  3. Reconfigure IP address

    Press ⊞ WINDOWS + R to open the run dialog Inside run dialog type ncpa.clp and press ENTER Right-click on your network adapter and select properties Uncheck Internet Protocol Version 6 (TCP/IPv6) and click on OK Now press ⊞ WINDOWS + X and click on Command prompt (admin) In command prompt type and after each line press ENTER netsh winsock reset catalog netsh int ip reset reset.log ipconfig /release ipconfig /renew Reboot your computer
  4. Restart DHCP client

    Press ⊞ WINDOWS + R to open the run dialog In run dialog type services.msc and click on OK Find DHCP client Right-click on it and choose Restart Reboot PC
  5. Reinstall Network Adapter

    Press ⊞ WINDOWS + X to open the windows menu Click on Device Manager Expand Network Adapter and right-click on wireless or ethernet adapter, click on Uninstall device Reboot the computer to automatically reinstall the device driver
  6. Reset IP and subnet mask

    Press ⊞ WINDOWS + R to open the run dialog In run dialog type in ncpa.cpl and press OK Right-click on your network adapter and select properties Uncheck Internet Protocol Version 6 (TCP/IPv6) Double click on Internet Protocol Version 4 (TCP/IPv4) Select Use the following IP address and change it to 192.168.0.1 Change Subnet mask to 255.255.255.0 Leave default gateway blank Click OK to save changes
Read More
Preventing installation of Removable Devices
In case you don’t know, Windows 10 supports installation and use of a number of removable devices which includes plug and plays mouse, keyboard, and other USB-based devices. But this could actually pose a threat to the integrity of a computer system and thus, some organizations pose a restriction in using these kinds of devices. the restriction on these devices is also useful especially if you keep on leaving your computer idle and someone tries to mess it up by plugging in a removable device. In such situations, the restriction will defend the user against data theft. Thus, in this post, you will be guided on how you can prevent the installation of removable devices on your Windows 10 computer. There are two options that can help you in preventing the installation of any removable devices on your computer – you can either try to use the Registry Editor or use the Group Policy Editor instead. Follow whichever option you want to use the instructions given below but before you start, don’t forget to create a System Restore Point first.

Option 1 – Prevent installation of Removable Devices via Registry Editor

  • Tap the Win + R keys to open the Run dialog box and type “Regedit” in the field and hit Enter to open the Registry Editor.
  • Next, navigate to this registry path: HKEY_LOCAL_MACHINESOFTWAREPoliciesMicrosoftWindowsDeviceInstallRestrictions
  • From there, look for a DWORD named “DenyRemovableDevices” and set its value to “0”. On the other hand, if you can’t find this DWORD, just simply create it and set its value to 0.
  • Once done, exit the Registry Editor and reboot your PC to apply the changes made.

Option 2 – Prevent installation of Removable Devices via Group Policy Editor

Keep in mind that the Group Policy Editor is not available in the Home Edition of the Windows operating systems. Thus, if you are using one, just stick to the first option, otherwise, proceed to the following steps.
  • Tap the Win + R keys to open the Run utility and type “gpedit.msc” and click OK or tap Enter to open the Group Policy Editor.
  • After that, go to this policy setting: Computer ConfigurationAdministrative TemplatesSystemDevice InstallationDevice Installation Restrictions
  • Next, look for the “Prevent installation of removable devices” entry and once you find it, set it as “Enabled”. From this window, you should see the following description of this policy setting:
“This policy setting allows you to prevent Windows from installing removable devices. A device is considered removable when the driver for the device to which it is connected indicates that the device is removable. For example, a Universal Serial Bus (USB) device is reported to be removable by the drivers for the USB hub to which the device is connected. This policy setting takes precedence over any other policy setting that allows Windows to install a device. If you enable this policy setting, Windows is prevented from installing removable devices and existing removable devices cannot have their drivers updated. If you enable this policy setting on a remote desktop server, the policy setting affects redirection of removable devices from a remote desktop client to the remote desktop server. If you disable or do not configure this policy setting, Windows can install and update device drivers for removable devices as allowed or prevented by other policy settings.”
  • Then click the Apply and OK buttons to save the changes made.
  • Now restart your computer to save the changes made. This should prevent the installation of any removable devices in your Windows 10 computer.
Read More
1 2 3 162
Logo
Copyright © 2022, ErrorTools. All Rights Reserved
Trademarks: Microsoft Windows logos are registered trademarks of Microsoft. Disclaimer: ErrorTools.com is not affiliated with Microsoft, nor claim direct affiliation.
The information on this page is provided for information purposes only.
DMCA.com Protection Status