Disabling Security Questions in Windows

We’ve already covered disabling Security Questions If you want to disable Security Questions on your Windows 10 computer then you’ve come to the right place as this post will guide you in doing exactly that. In this post, you will be disabling Security Questions using a PowerShell script. This PowerShell script is called “Update-AllUsersQA”. It is designed to remove or disable the security questions and answers for local users on a Windows 10 computer. It lets administrators take control of the security questions in the environment and at the same time minimizes the risk that comes with them.

If a user has a Microsoft account that’s configured to sign in to Windows 10 then he will not probably notice the Password Recovery questions. On the other hand, if he has a chosen local account for installing Windows, he will e prompted to create three security questions that can be used to reset the password and log into the Windows 10 account in case there is any misfortune. However, if you do not have much use for these Security Questions, then you can definitely have them disabled using a simple PowerShell script which you can download from GitHub.

For more details on how to disable security questions in a Windows 10 machine, refer to the steps provided below.

Step 1: You need to first download the .ps1 file from the GitHub repository.

Step 2: Once you’ve downloaded the file, open the PowerShell window with admin privileges.

Step 3: After that, navigate to the folder where you had saved the .ps1 file. Then copy the address of the folder location.

Step 4: Next, change the directory by using the following command:

cd "folder location address"

Step 5: After that, enter the following script to disable the security questions:

Update-AllUsersQA

Once you’ve completed the steps above, the Security Questions should be disabled and you will be notified with a message stating that the feature has been disabled. On the other hand, if you have a change of heart and you want to enable the Security Questions back, here are some steps you need to take:

Step 1: First, open the PowerShell window as admin.

Step 2: Next, run the same script with one more parameter such as:

Update-AllUsersQA -answer SecretAnswer

Step 3: And that’s about it. Do not forget to replace the Secret Answer with your preferred one and once you’re done, it will be set as the answer for all the Security Questions.

Step 4: Now all that’s left to do is go to the Settings app to change the answer to the questions and you should be good to go.

If you like to learn and find out more about various Windows errors, and how to repair them go to our vast archive or use search to find articles that will explain and help you in solving your issue.
However, if you prefer to do things fast and with automatization then we are proposing to use an automated solution for your issues. The application that we are recommending is Advanced System Repair Pro
Advanced System Repair utilizes multiple tools all in one to give you a quick, simple, reliable, and very thorough diagnosis of your PC. It brings you all the tools you need in one program to clean, fix, protect, optimize and boost your PC!
1-Click Maintenance
All the tools to make it simple and easy! It's like having a professional technician at the click of a mouse.

Junk Cleaner
Keeping your computer free from unnecessary clutter also helps make your computer last longer. Like any other machine, if you keep it clean and take care of it, it will serve you better for longer!

Optimize background apps
Optimize applications background activity with the built-in Application Optimizer feature.

Disk Defrag
With a simple 1-click, Advanced System Repair speeds up your PC by assembling fragmented files on your machine and organizing them more efficiently.

Malware Removal
Finds and removes all types of harmful malware including trojans, worms, bots, adware, spyware, PUPs, and more!

Privacy Cleaner
The all-in-one privacy suite to Clean Your Tracks & Protect Your Privacy! Make your computer safe, secure, and more efficient!

System Tweak/Optimizer
ASR will analyze your complete system and settings to adjust your PC to function at its maximum performance.

Registry Cleaner
Over time, as you install and uninstall applications, the registry can become cluttered with old entries and broken settings which can result in program crashes, and annoying messages and slow the computer down.
Visit our Advanced System Repair Pro Download page to inform yourself about all the benefits of this software and get a free trial copy of it.
advanced system repair pro

Advanced System Repair Pro

One-click automated PC repair solution
ASR logo
With Advanced System Repair Pro you can easily
Replace damaged files
Restore performance
Free disk space
Remove Malware
Protects WEB browser
Remove Viruses
Stop PC freezing
DOWNLOAD
Privacy Policy | Terms of Use | Uinstall
Advanced System Repair Pro is compatible with all versions of Microsoft Windows including Windows 11

Share this article:

You might also like

How To Speed Up PC Startup
[vc_row][vc_column][vc_column_text]

Boost PC Bootup

Hello and welcome to How To Speed Up PC Startup where we will explore how to make your PC boot-up system faster. When your computer gets older, you'll see a decrease in your PC's load time. This can be very annoying and frustrating, especially if you're not accustomed to exercising patience. Your computer's boot time does not need to be sluggish, even if it's old. While there are reasons why your computer is acting up and giving you the 'slow' sign, there are ways that you can optimize how fast your PC starts up at the beginning. Once you start speeding things up, you’ll never look back!

Start With your BIOS

You may need to tweak your PC’s start-up menu. Since the majority of issues encountered on your PC might not be related to the software running in the back end, you can focus on your computer's hardware. The ideal way to speed up your PC startup is to access your computer's BIOS when booting up. This can be accessed by holding the DEL key or whichever button is used to tap into your BIOS. You can change where your computer boots from. You can opt to put your hard disk right at the top which would elude searching for CDs and other storage media devices when your PC starts up.

Tweak Startup Programs

There are many programs that execute when your computer starts up. These programs normally run in the back end. Most times back-end programs are unnecessary and do not contribute to the productivity or performance of your computer when in use. Instead of allowing these programs to execute when your PC boots up, why not disable them?  By deactivating these programs, you'll be reducing the amount of CPU usage which will accelerate your PC performance. Additionally, there are some installed programs that you never use. Instead of leaving these programs to occupy needed space on your computer system, you can uninstall these to create more room on your computer. This actually increases your PC startup speed.

Put Malware on a Leash

Malware and spyware can cause problems for your start-up. A slow computer is an indication that your computer is plagued by malware. This affects your computer's boot time and whether or not it'll startup as quickly as you intend it to. If your computer gives you the 'virus alert', you need to download an antivirus program that will be able to eradicate all virus threats. Be mindful of where you download antivirus programs since many of them are viruses or have viruses attached to them. Some viruses are tough on your computer. This means that if an antivirus works for your best friend, it may not work for you. Since malware differs in functions and the havoc they cause, it's best to know what you're up against by doing research.

Clean Your Registry

You should also clean out your registry. The fewer unused registry keys you have lying around on your computer, the faster your computer will go. Getting a good registry cleaner from a clean source can help tremendously, but be careful; registry cleaners have the potential to be very dangerous so make sure you backup everything on your computer and only download registry cleaners from a reliable source. By implementing the above tips, you'll see quick improvements when using your computer. On the other hand, if your computer is going through some system-related issues that have to get fixed, there is a one-click solution known as Restoro you could check out to resolve them. This program is a useful tool that could repair corrupted registries and optimize your PC’s overall performance. Aside from that, it also cleans out your computer for any junk or corrupted files that help you eliminate any unwanted files from your system. This is basically a solution that’s within your grasp with just a click. It’s easy to use as it is user-friendly. For a complete set of instructions in downloading and using it, refer to the steps below Perform a full system scan using Restoro. To do so, follow the instructions below.
  1. Download and install Restoro from the official site.
  2. Once the installation process is completed, run Restoro to perform a full system scan. restoro application screen
  3. After the scan is completed click the “Start Repair” button. restoro application screen
[/vc_column_text][/vc_column][/vc_row]
Read More
Setting a default printer in Windows 10
Windows 10 is by far the most personalized Windows so far, most of its personalization comes from him learning our habits on computers and setting future experiences taking them into account. One of these things that Windows likes to set for us is also the default printer. The default printer is set as one which is most used but sometimes we do not want that, we might like to use another printer as default despite Windows choosing one for us. Never worry, setting default printer is easy and this guide will take you to step by step journey of how you can do it in 5 min on your personal computer. Let us begin: First thing is to click on the windows icon on the bottom left and open start menu, from start menu click once on settings. Windows 10 Star menu with marked settings iconWhen the settings window opens, choose DEVICES on it. Windows settings with marked devices sectionOnce the device window opens, click once on printers and scanners, and on the right window go to the bottom and uncheck Let windows manage my default printer. Windows settings for printerUnchecking that box will let Windows know that we do not wish anymore for him to set our default printers according to their use. Once the checkbox is clear go up to your printer list and click on the printer you wish to use as the default one. I will choose Microsoft Print to PDF as my default printer and click on it. Once the printer is clicked option menu will appear. Windows settings manage printerWhen the option menu appears under the printer name, click on Manage which will take you to the printer management screen. When you are on the manage screen, click on the Set as default button, and you are done. Windows settings printer setting
Read More
Fix 0x800F0825 update error in Windows 10
Windows updates have become a regular occurrence in our digital lives. They are frequent and have become quite necessary. Most of the time they bring us quality content like fixed security, resolved bugs, and even new features but from time to time update itself can be not downloaded properly or it can have some issues when installing. Windows Update Error 0x800F0825 is one of these update errors that will be reported seemingly after applying the update. Altho annoying error it is nothing system breaking and can be easily resolved. Hello and welcome everyone, today we will provide you with solutions on how to resolve error 0x800F0825 when trying to complete a Windows update.

Run Windows troubleshooter

Built-in Windows troubleshooter can help a lot in resolving these issues and we will try it as a first solution because of its simplicity and ease of use.
  • Click on START
  • Click on settings Windows 10 Start menu with marked settings icon
  • Navigate to Update & Security > Troubleshoot > Additional Troubleshooter > Windows Update
  • Click on Run the troubleshooter
  • Follow onscreen instructions and let the troubleshooter try to solve the issue

Clear contents of SoftwareDistribution & Catroot2 folders

Altho SoftwareDistribution and Catroot2 folders are essential for the update process it can happen that badly downloaded updates or similar corruption can be stored there and thus producing this error.
  • Open file explorer and locate these two folders, go inside and delete content inside them
  • Try updating again to see if corruption inside folders was the issue.

Update manually

If the previous two solutions have not produced a result and the error is still present then go to the official Microsoft Update Catalog and download the update manually The catalog is here. Search for updates from the Windows Update Catalog In the Search box, type your search terms. You can carry out a full-text search, using a keyword, KB article, MSRC bulletin, driver manufacturer, driver model, driver version, product, and a classification. Select the appropriate version of Windows. Search or click on Advanced Search if you want to refine your search. A list will be displayed. Select the updates that you want to download. Click Add for each selection to add it to the download basket.
  • Download the updates. You may be asked to install an Active-X download control to be able to download files from this site
  • Double-click on the downloaded updates to install them
Administrators can download updates from the Microsoft Download Center or the Windows Update Catalog to deploy to multiple computers If you are running Windows Server Update Services (WSUS) 3.0, System Center Essentials (SCE), or System Center Configuration Manager (SCCM) you can import updates directly into these applications. Security updates, critical updates, service packs, update rollups, definition updates, and critical drivers can be configured to synchronize with your server automatically. You can still import these updates into your application by using Microsoft Update Catalog; however, depending on how you configure WSUS, SCE, and SCCM, you may not need to import the updates.

Disable system protection

In some rare cases, antivirus or firewall could interfere with both downloads and execution of certain files. If each previous solution failed disable temporarily your security software and try executing the update again.
Read More
Fix Your PIN is no longer available in Windows
A recent update in Windows 10 has caused a couple of glitches. One of these glitches is having trouble signing into Windows 10. Some users reported that they were not able to sign in to their computers using a PIN and they weren’t also able to reset it either. If you are one of these users, then you’ve come to the right place as this post will help you resolve issues that you are having in signing in to your computer using your PIN or fingerprint with Windows Hello. When you encounter this issue, you will get an error message on your screen stating:
“Your PIN is no longer available due to a change in the security setting on this device on this device.”

To resolve this problem, you need to follow the steps laid out below carefully.

  • Step 1: The first thing you need to do is to make sure that you are using an administrator account. After signing in as admin, tap the Win + E keys to open the File Explorer.
  • Step 2: After that, under the View menu, enable Hidden items.
  • Step 3: Next, navigate to the following path:
C:\Windows\Service\Profiles\Local\Service\AppData\Local\Microsoft
Note: From there, you should see a folder named “Ngc”. This folder might be the one that’s causing the problem so you are going to fix it by making some changes. This folder contains all the files responsible for any PIN-related settings. So if you are not able to access the Ngc folder, or it has gotten corrupted for some reason during an update here’s how to fix it.
  • Step 4: Try opening the Ngc folder. If you are able to open it, just skip to step 11 but if you can’t open it and you got the “Permission Denied” error message, proceed to the next few steps.
  • Step 5: Right-click on the Ngc folder and select Properties.
  • Step 6: Under Properties, go to the Security tab and click on the Advanced button.
  • Step 7: Next, click on the Change link which corresponds to the Owner field.
  • Step 8: Then click on Object Types and ensure that everything is selected.
  • Step 9: After that, enter your username in the field. You can just use the email that corresponds to your Microsoft account or you can also use the Check Names button to verify it. Now click OK.
  • Step 10: You should now see a change in the owner's name. Just make sure that you enable the checkbox below it which is labeled, “Replace owner on subcontainers and objects” and then click Apply and close everything.
  • Step 11: Next, try opening the Ngc folder again. You should now be able to access it. After opening the folder, delete all of its contents and make sure that it’s empty.
  • Step 12: Restart your PC. After your computer has booted, go to the Account Settings and try setting up a new PIN. You should now be able to set up a new PIN and use it to sign in to your PC.
Read More
How to remove Aro 2012 from your Computer.

Aro2012 is a PC Optimizer Software that typically comes bundled with other software. Even though Aro2012 poses no threat itself, the programs that it comes bundled with may pose a problem to your computer.

From the Author: ARO is an advanced repair and optimization utility designed to help improve and maintain computers running the Windows operating system (both 32- and 64-bit). ARO focuses on finding errors that hide out in the Windows registry, identifying PC and web browser clutter that may be hindering PC performance, and ensuring computers have adequate security solutions installed and up to date. With its advanced scanning engine, ARO provides deep scanning capabilities to identify and repair registry errors. ARO also searches for and removes “junk” files that accumulate over time and can put a damper on PC performance.

When installed Aro2012 creates a startup entry that allows it to run each time the computer is started. It also adds a task scheduler that allows it to run at various times.

About Potentially Unwanted Applications

Have you ever found an unwanted program on your computer system and pondered how it got there since you are sure you didn’t purposefully download and never gave authorization to be installed? A PUA / PUP (potentially unwanted application / potentially unwanted program) is a piece of software that comes bundled with freeware/shareware and you agree to install on your computer. These are programs you definitely don’t want on your PC since it doesn’t give any beneficial service. The term PUP was first coined to outline this downloadable crapware as something other than malicious software. The reason is, most PUPs get into a PC not because they slip via the security holes, for instance, but because the users have installed them by themselves – 100 % unintentionally needless to say. PUPs might not be malware but nevertheless, they are dangerous programs for your laptop or computer. At best, these types of unwanted programs provide hardly any benefit, and at worst, they can be quite harmful to your computer.

What do PUPs do on your PC, precisely?

Most Potentially Unwanted Programs comes in the form of adware, which typically aims to exhibit lots of annoying pop-up ads, banners, coupons, and bargains on web pages you explore. PUPS also comes in the form of unwanted toolbars or browser plug-ins. Not only they entirely take up space on your computer screen, but toolbars could also manipulate search engine results, track your surfing activities, decrease your internet browser’s overall performance, and slow down your internet connection to a crawl. They could appear innocent but PUPs tend to be spyware. And in the large majority of the cases, end-users will not be aware that they’re installing an unwanted program. These are software programs that don’t do anything useful to you; in addition to taking up space on your hard disk drive, they will also slow down your computer, often modify settings without your permission, and the list of frustrating features goes on and on.

How can you avoid ‘crapware’

• Read the fine print so that the end-user license agreement (EULA) you’re accepting is only for the program you actually intend to download. • Always choose “Custom” or “Advanced” installation and never blindly click the Next button, which should let you uncheck any “foistware” software programs you do not want. • Have a solid anti-virus program such as Safebytes Anti-malware that can protect your computer from PUPs. As soon as you install this software, protection from malware and PUPs is already turned on. • Avoid installing a freeware application you will not use. Nowadays ‘freeware’ isn’t actually freeware – but “crapware” bundling nonsense. • Don’t download software programs from pop-ups, online advertisements, file sharing websites, as well as other unreliable sources; look out for any preset, unwanted options when downloading the program. Avoid visiting blogs and sites that support pirated programs.

What To Do When You Cannot Install Any Anti-Malware?

Practically all malware is inherently unsafe, but certain kinds of malicious software do a lot more damage to your computer than others. Some malware is designed to interfere with or prevent things that you’d like to do on your computer. It may well not permit you to download anything from the net or it will prevent you from accessing some or all of the websites, especially the antivirus sites. If you’re reading this, odds are you’re stuck with a malware infection that is preventing you to download and install the Safebytes Anti-Malware program on your computer. Although this type of issue will be harder to get around, there are some actions you can take.

Install in Safe Mode

If the malware is set to load at Windows startup, then booting in safe mode should avoid it. Only minimal required applications and services are loaded when you start your computer into Safe Mode. To launch your Windows XP, Vista, or 7 computers in Safe Mode with Networking, follow the instructions below. 1) At power-on/startup, hit the F8 key in 1-second intervals. This should bring up the Advanced Boot Options menu. 2) Use the arrow keys to select Safe Mode with Networking and hit ENTER. 3) Once this mode loads, you should have internet access. Now, get the virus removal application you need by using the internet browser. To install the program, follow the guidelines within the setup wizard. 4) Immediately after installation, do a complete scan and let the software get rid of the threats it detects.

Download the antivirus program in a different internet browser

Web-based viruses could be environment-specific, aiming for a particular internet browser or attacking specific versions of the browser. If you seem to have a trojan attached to Internet Explorer, then switch over to a different internet browser with built-in security features, such as Chrome or Firefox, to download your favorite antivirus program – Safebytes.

Install and run anti-malware from a Thumb drive

Another option is to create a portable antivirus program on your USB flash drive. Adopt these measures to use a thumb drive to clean your corrupted system. 1) Make use of another virus-free computer to download Safebytes Anti-Malware. 2) Insert the USB drive on the same computer. 3) Double-click the Setup icon of the antivirus software to run the Installation Wizard. 4) Select the USB flash drive as the destination for saving the software file. Follow the on-screen instructions to finish the installation process. 5) Now, insert the pen drive into the corrupted PC. 6) Run the Safebytes Anti-malware directly from the flash drive by double-clicking the icon. 7) Simply click “Scan Now” to run a scan on the affected computer for viruses.

SafeBytes Anti-Malware: Lightweight Malware Protection for Windows PC

Want to install the very best anti-malware software for your laptop or computer? There are plenty of applications available that come in paid and free versions for Windows systems. Some of them are excellent, some are ok types, and some will ruin your PC themselves! You need to pick out a product that has obtained a good reputation and detects not only viruses but other kinds of malware also. On the list of strongly recommended applications by industry experts is SafeBytes Anti-Malware, the most dependable program for Microsoft Windows. SafeBytes can be described as a powerful, real-time antivirus application that is designed to assist the typical computer user in protecting their computer from malicious threats. Using its outstanding protection system, this software will quickly detect and get rid of most of the security threats, including adware, viruses, browser hijackers, ransomware, trojans, worms, and PUPs. SafeBytes has got a plethora of wonderful features that can help you protect your computer from malware attacks and damage. A few of them are given as below: Active Protection: SafeBytes provides round-the-clock protection for your personal computer limiting malware attacks instantly. It’ll continuously monitor your laptop or computer for hacker activity and also gives users superior firewall protection. Most Reliable AntiMalware Protection: With a critically acclaimed malware engine, SafeBytes gives multilayered protection which is designed to catch and remove viruses and malware which are concealed deep in your computer. Extremely Speed Scanning: SafeBytes’s very fast malware scanning engine lessens scanning times and extends battery life. At the same time, it will effectively detect and remove infected computer files or any internet threat. Website Filtering: Through its unique safety ranking, SafeBytes notifies you whether a website is safe or not to access it. This will ensure that you’re always certain of your online safety when browsing the web. Minimal CPU and RAM Usage: This software is lightweight and will run quietly in the background, and will not affect your computer efficiency. Premium Support: Support service is readily available for 24 x 7 x 365 days through email and chats to answer your queries.

Technical Details and Manual Removal (Advanced Users)

To eliminate Aro 2012 manually, go to the Add or Remove programs list in the Control Panel and choose the program you want to get rid of. For web browser plug-ins, go to your web browser’s Addon/Extension manager and select the add-on you intend to disable or remove. It is also advised to reset your web browser to its default state to fix corrupt settings. To ensure complete removal, find the following registry entries on your computer and remove them or reset the values accordingly. Please keep in mind that only professional users should try to manually edit the registry because removing any single critical system file results in a serious issue or perhaps a PC crash. Additionally, some malicious programs have the capability to defend against its deletion. Completing this task in Safe Mode is advised.
Files: Search & Delete ARO2013_tbt.exe CleanSchedule.exe soref.dll AROSS.dll CheckForV4.dll aro.exe Registry: Search and delete: CURRENT_USER / AROReminder
Read More
Touchpad Set user settings to driver failed
One of the useful things you can use on your laptop is touchpads. They help users in achieving tasks through the gestures and multi-finger tap or touch support it brings in the scope for various shortcuts. However, not all times touchpad brings productivity as it can also encounter some issue every now and then. One of these issues has been reported on a couple of Lenovo laptops that use touchpad drivers from the Alps Pointing Device. According to the reports, an error saying, “Set user settings to driver failed” when they use the touchpad. This type of error on the touchpad usually occurs when a computer boots up and it could be caused by a faulty update on the Alps pointing device driver which is being installed in the background. To fix this error on the touchpad, you could try to disable the Alps pointing device entry from the MSConfig or you could try to get the latest version of the driver or uninstall the driver altogether. Before you proceed with the troubleshooting tips given below, make sure that you create a System Restore point first. Once you have that covered, proceed to the following options.

Option 1 – Try disabling the entry of the Alps pointing device from MSConfig

This first given option was able to fix the problem for many users so to get started, follow these steps:
  • In the Start Search box, type “MSConfig” and select System Configuration from the search results.
  • Next, go to the Services tab and look for the Alps pointing device entry from the list that appears, and uncheck it.
  • Then click the Apply and OK buttons to save the changes made.
  • Now restart your computer and see if the error in the touchpad is now fixed.

Option 2 – Try to download and install the latest version of the driver

The next option you can check out to fix the error is to download and install the latest version of the driver from the official website of Lenovo support. Note that an updated version of the touchpad driver will most likely get rid of the error. However, you have to make sure that the version you’re going to get is compatible with your existing Windows version.

Option 3 – Try to uninstall the Alps Pointing device driver

If the first two given options didn’t work, you can try uninstalling the Alps Pointing-device driver instead. You can do this under the Mice and other pointing devices section. After you uninstall the driver, restart your computer and delete the driver’s leftover folder inside this location in File Explorer (C:/Program Files). Once you’re done, restart your computer and check if the error is now gone. Keep in mind that after you’ve uninstalled the driver, any extra configuration features that Lenovo drivers offered before the uninstallation will no longer be available.
Read More
How to Fix Error Code 0x80070057

What Repairs Error Code 0x80070057?

What Exactly Is Error Code 0x80070057?

The Error Code 0x80070057 is rather typical with Win7. Customers of Win7 maintain reporting that each moment they strive to install this Operating system, it shows this problem error. Often, the total information that comes with this specific error is:
"Error Code 0x80070057: The parameter is wrong"
When this problem happens, you will end up struggling to move private documents from one person to another.

Solution

Restoro box imageError Causes

You could get the error message when you attempt installing Win7,
"An Internal Error has occurred. Incorrect parameters".
If this happens to you, realize that you are dealing with malfunction code 0x80070057. This error occurs mostly when you are trying to build a full backup of your Windows 7 OS.

The primary source of Error 0x80070057 is huge registry values.

Extensive registry values usually occur when you are trying to back up your Windows 7 OS. This means that you need to immediately create a bigger virtual memory space to avert the occurrence of the error.

Error Code 0x80070057 can be a result of incompatibility between the motherboard and some drivers.

Check whether the computer's motherboard and the installed drivers are compatible. If you can't do this effectively on your own, it might be a good idea to enlist the services of a qualified technician.

The Problem Signal 0x80070057 has a close Connection with RAID Installations

RAID installations have a tendency of sparking off the Error Code 0x80070057. If you experience this error while using RAID, first turn off the RAID setup and check whether that resolves the problem.

Further Information and Manual Repair

Error Code 0x80070057 is repairable. Thus, there's absolutely no cause for alarm when you see it with respect to your own Windows 7 Operating System. So what can you do to resolve it? a) Increase Virtual Memory: This is perhaps the most common solution to Error Code 0x80070057. In most cases, simply raising the virtual memory especially on Windows 7 Operating-System completely eliminates the error. Moreover, you don't have to be technically advanced to effect the change. Simply follow these steps:-
  • Click the Start Button and visit Control Panel
  • Click System Security, and proceed to System.
  • Click the Advanced System Settings, subsequently proceed to the Advanced Level Tab.
  • Click Change, which can be under the Virtual Memory
  • Change the virtual memory value. For instance, you can customize entirely from 2000MB to 6000MB.
  • Click Set, then Ok. You are done
As with each additional change you make with respect to your Computer, you will have to conclude by re-booting it. This way you make certain that they'll stay as you've established them and apply the necessary modifications. If the error still persists after attempting the preceding fix, download a registry-cleaning software. The software will clean up your disk and free up memory thus increasing the available virtual memory for your computer. This should solve your persistent Error Code 0x80070057.
Read More
How to get rid of Gardening Enthusiast Toolbar

The Gardening Enthusiast toolbar is another product that is advertised as a helpful addition to your browsing experience when it is really nothing more than the software you should remove as soon as possible. It is touted as a toolbar that will provide you with a lot of useful gardening tips. That is the hook to get you to install it. But, in truth, the only thing that it does is provide you with links to popular gardening websites that you can easily find on any search engine.

When installed the extension will change your default search engine and home page to MyWay.com

While browsing the internet with this extension you will see additional sponsored ads and links throughout your browsing session.

Anti-virus applications have marked this extension as a Browser Hijacker and are therefore marked for removal. While not considered malware, the fact that many users find it to hinder browser performance has led to its detection and flag for optional removal.

About Browser Hijackers

Browser hijacking means a malicious program code has control over and modified the settings of your browser, without your permission. Practically all browser hijackers are made for marketing or advertising purposes. Usually, hijackers will force hits to internet sites of their preference either to increase web traffic producing higher ad earnings, or to obtain a commission for every user visiting there. Nevertheless, it isn’t that harmless. Your internet safety is jeopardized and it is extremely annoying. Once the malware attacks your laptop or computer, it starts to mess things up a whole that slows your PC down to a crawl. In the worse case, you will be forced to tackle serious malware threats too.

Browser hijacking symptoms

The typical symptoms that suggest having this malware on your PC are: your home page has been reset to some unfamiliar website; you see new unwanted favorites or bookmarks added, usually directed to ad-filled or pornography sites; the default online search engine has been changed and the web browser security settings have been lowered without your knowledge; find new toolbars that you didn’t add; you notice lots of pop-up ads on your screen; your web browser gets sluggish, buggy, crashes quite often; Inability to navigate to certain sites, especially anti-malware and also other security software webpages.

Exactly how browser hijacker finds its way to your PC

A browser hijacker can be installed on your computer when you go to an infected site, click an e-mail attachment, or download something from a file-sharing website. They could be included with toolbars, BHO, add-ons, plug-ins, or browser extensions. Other times you might have accidentally accepted a browser hijacker as part of a software program package (generally freeware or shareware). Examples of popular browser hijackers are Fireball, Ask Toolbar, GoSave, CoolWebSearch, Babylon Toolbar, and RocketTab. Browser hijackers can record user keystrokes to gather potentially invaluable information that leads to privacy issues, cause instability on computers, significantly disrupt user’s browsing experience, and ultimately slow down the PC to a point where it will become unusable.

Removing browser hijackers

Certain browser hijacking could be easily reversed by identifying and eliminating the corresponding malware application from your control panel. Unfortunately, many of the software products used to hijack an internet browser are deliberately designed to be hard to detect or get rid of. You should think of undertaking manual fixes only if you are a tech-savvy person, as risks are associated with tinkering with the computer registry and HOSTS file. Browser hijackers can be effectively removed by installing anti-malware software on the affected PC. If you need to remove persistent hijackers effectively, install the award-winning anti-malware tool Safebytes Anti-Malware. And employ a system optimizer, like Total System Care, to eliminate all related files in the registry and fix browser issues.

How To Get Eliminate Malware That Is Preventing Anti-Malware Installation?

All malware is inherently harmful, but certain kinds of malicious software do more damage to your computer or laptop than others. Certain malware types alter internet browser settings by including a proxy server or change the computer’s DNS configuration settings. When this happens, you’ll be unable to visit certain or all of the sites, and thus unable to download or install the necessary security software to get rid of the computer virus. If you are reading this, chances are you’re stuck with a virus infection that is preventing you to download and/or install Safebytes Anti-Malware software on your computer. Even though this sort of problem can be harder to get around, there are some steps you can take.

Remove viruses in Safe Mode

Safe Mode is a special, basic version of Microsoft Windows where only the bare minimum services are loaded to prevent viruses as well as other problematic applications from loading. In the event, the malware is set to load immediately when PC boots, shifting to this particular mode can prevent it from doing so. To enter into Safe Mode or Safe Mode with Networking, press F8 while the PC is starting up or run MSCONFIG and locate the “Safe Boot” options under the “Boot” tab. Once you reboot into Safe Mode with Networking, you could download, install, as well as update anti-malware software from there. At this point, you can run the antivirus scan to eliminate viruses and malware without any interference from another application.

Switch over to an alternate internet browser

Malicious code might exploit vulnerabilities on a specific browser and block access to all antivirus software websites. In the event you suspect that your Internet Explorer happens to be hijacked by a virus or otherwise compromised by cybercriminals, the most effective thing to do would be to switch over to a different browser like Firefox, Chrome, or Safari to download your chosen computer security software – Safebytes Anti-Malware.

Install security software on a flash drive

To successfully get rid of the malware, you need to approach the problem of installing the anti-malware program on the affected computer system from a different perspective. To run antivirus from a USB drive, follow these simple measures: 1) Make use of another virus-free computer to download Safebytes Anti-Malware. 2) Plug the USB drive into the clean computer. 3) Double click on the downloaded file to open the installation wizard. 4) When asked, select the location of the pen drive as the place in which you want to store the software files. Follow the activation instructions. 5) Unplug the pen drive. You may now use this portable antivirus on the infected computer. 6) Double-click the anti-malware program EXE file on the pen drive. 7) Click on “Scan Now” to run a complete scan on the affected computer for viruses.

Benefits and Features of SafeBytes Security Suite

If you’re planning to purchase anti-malware for your desktop, there are numerous brands and utilities for you to consider. Some are well worth your money, but most aren’t. You must select a company that creates industry-best anti-malware and has earned a reputation as trustworthy. Among few good applications, SafeBytes Anti-Malware is the highly recommended software program for security-conscious people. SafeBytes anti-malware is a very effective and easy-to-use protection tool that is designed for end-users of all levels of IT literacy. Using its cutting-edge technology, this application will help you get rid of several types of malware like viruses, worms, PUPs, trojans, adware, ransomware, and browser hijackers.

SafeBytes anti-malware takes PC protection to a totally new level with its enhanced features. Here are some of the features you will like in SafeBytes.

Anti-Malware Protection: Built upon a highly acclaimed anti-virus engine, this malware removal tool can detect and remove several stubborn malware threats such as browser hijackers, potentially unwanted programs, and ransomware that other typical antivirus programs will miss. Real-time Threat Response: SafeBytes offers real-time active supervision and protection from all known viruses and malware. It will constantly monitor your computer for hacker activity and also gives end-users sophisticated firewall protection. Safe Browsing: Safebytes allots all sites a unique safety ranking that helps you to have an idea of whether the website you’re about to visit is safe to browse or known to be a phishing site. Lightweight: SafeBytes is renowned for its low impact on processing power and great detection rate of countless threats. It works silently and efficiently in the background so you are free to make use of your personal computer at full power all the time. 24/7 Premium Support: You will get 24/7 technical support to quickly resolve any issue with your security software. SafeBytes will keep your personal computer safe from the latest malware threats automatically with hardly any input needed from you again. Malware problems will become a thing of the past once you put this software to use. You’ll get the best all-around protection for the money you spend on SafeBytes Anti-Malware subscription, there is no doubt about it.

Technical Details and Manual Removal (Advanced Users)

If you do not wish to use malware removal software and like to remove Gardening Enthusiast manually, you could do so by going to the Add/Remove Programs menu in the Control Panel and deleting the offending program; in cases of browser add-ons, you may uninstall it by visiting the browsers Add-on/Extension manager. You might also want to reset your home page and search engine providers, and also delete browsing history, temporary files, and internet cookies. To make sure of complete removal, find the following Windows registry entries on your computer and remove them or reset the values appropriately. However, editing the Windows registry is really a difficult job that only experienced computer users and professionals should attempt to fix the problem. In addition, certain malware keeps replicating which makes it difficult to eliminate. Completing this task in Safe Mode is advised.
Folders: C:\Program Files\GardeningEnthusiast_7j Files: Search and Delete: 7jbar.dll 7jhighin.exe 7jmedint.exe 7jregfft.dll 7jregiet.dll 7jhkstub.dll 7jreghk.dll 7jSrcAs.dll 7jSrchMn.exe NP7jStub.dll 7jPlugin.dll 7jauxstb.dll 7jbprtct.dll 7jdlghk.dll 7jradio.dll 7jieovr.dll INSTALL.RDF
Read More
Microsoft Store Error 0x80072F7D in Windows
Check your connection. Microsoft Store needs to be online. It looks like you’re not. Check connection Code: 0x80072F7D
This is the error that you get if trying to open the Microsoft store on Windows 10 and it fails. If you experienced this error and are unable to access the store do not despair we are here to help you. This particular error is usually due to some internet issues, follow the presented guide step by step in order to solve it and be able to access the Windows store again.
  1. Check your Internet connection

    Since this error is closely tied to internet connection it is advisable to first eliminate the obvious and check if your computer is connected to the internet.
  2. Run Network troubleshooter

    Built-in Windows troubleshooter is a great tool and we will be using it in the next few segments in order to locate the issue and fix it. Open Windows 10 Settings app using the WINDOWS + I Click on Network & Internet Click on Network troubleshooter Select network adapter to diagnose Press the Next button.
  3. Run Internet Connections troubleshooter

    Press WINDOWS + I to open the Settings app Click on the Update & Security Click on the Troubleshoot Select Additional troubleshooters option Click on Internet Connections option Hit Run the troubleshooter button.
  4. Run Windows Store Apps troubleshooter

    Press WINDOWS + I to open the Settings app Select Update & Security Click on the Troubleshoot Use the Additional troubleshooters option Click on the Windows Store Apps option Press Run the troubleshooter button
  5. Temporarily disable security software

    Your antivirus or firewall might be interfering with the application, sometimes, in some cases store is detected as a false positive in some security applications, and its access to the internet is cut. Disable your security suite to see if this is the case.
Read More
How to turn the game mode off in Windows 11
Among other things and innovations, Windows 11 brings to the table is the game mode. The game mode is a system designed to release some resources and optimize your system when Windows 11 detects that you are playing games. It also turns off automatic updates while the game is active. game mode in Windows 11
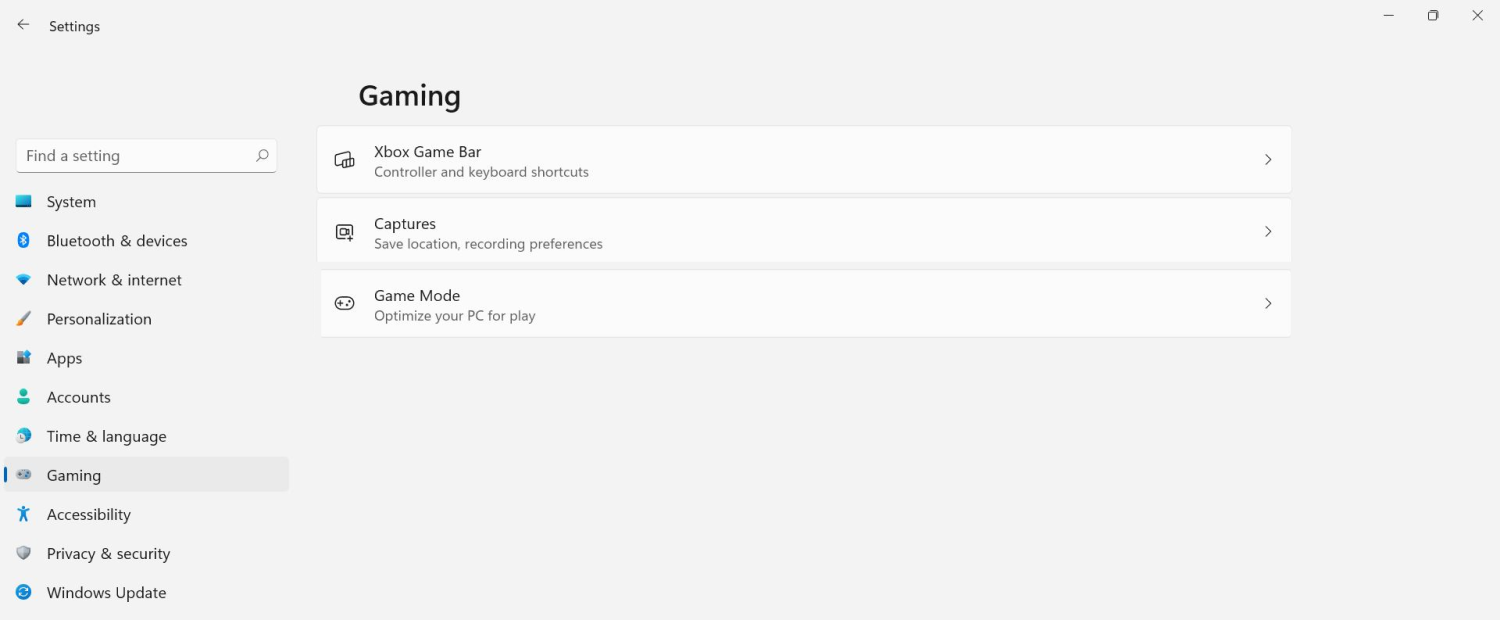
The game mode is active at all times and usually, everything works great but in some instances, it can sadly cause some performance issues. If you are one of these unlucky people where game mode is not working as supposed to do, don’t panic, we have a quick guide for you on how to turn it off.
  1. Press ⊞ WINDOWS + I to open settings
  2. Inside click on Gaming
  3. Select Game mode
  4. Click switch beside Game mode to turn it off
  5. Close settings
Everything will be automatically saved and applied and you should not have any issues from now on. If for any reason you wish to turn game mode back ON, just follow the same steps and turn the switch to ON.
Read More
1 2 3 162
Logo
Copyright © 2022, ErrorTools. All Rights Reserved
Trademarks: Microsoft Windows logos are registered trademarks of Microsoft. Disclaimer: ErrorTools.com is not affiliated with Microsoft, nor claim direct affiliation.
The information on this page is provided for information purposes only.
DMCA.com Protection Status