Disable the Notifications for any Apps

Since Windows 10 introduced the concept of notifications, almost any application installed on your computer sends you one. However, there are times when too many notifications can be quite annoying. Although some of them are important, most of them are not and are only getting in the way of your tasks. So if you don’t like to be flooded with tons of notifications on your Windows 10 computer, say no more as this post will help you out in disabling notifications for any apps installed.

And now with the new feature in Windows 10 called Focus Assist, you will be able to manage the level of notifications that you receive. This new feature also allows you to disable all notifications except for the ones from important or priority apps. You will just have to maintain a list of priority applications or you could also disable all the notifications except for the important ones like alarms. In addition, you could also set up some automatic rules such as the Focus Assist timings which means that you can make Focus Assist enabled for a certain period of time during the day or when you are duplicating your display or playing a game and whatnot. So if there is an application that keeps on spamming you with notifications, you can just disable the notifications for that application.

To get started on disabling notifications, refer to the steps given below.

  • Step 1: Go to Settings > System.
  • Step 2: From there, open Notifications and actions and then scroll down to the “Get notifications from these apps” section.
  • Step 3: After that, look for the application that you want to disable notifications for and click on the toggle button that corresponds to disabling notifications for that application. You could also click open to explore additional settings for that particular application.

Note: You can disable notifications or just the notification banners, your choice. Aside from that, you can also control the notification sound as well as its behavior when the computer screen is locked. What’s more, is that you can also adjust the number of notifications displayed in the Action Center or select the priority applications. As stated earlier, Windows 10 gives you control that allows you to customize every nook and cranny of the notification on your Windows 10 computer. Apart from applications, there are also other notifications-related settings that you can control including disabling notifications about tips, tricks, and suggestions as well as summary notifications from Windows Defender that you get every time you use or scan your computer.

If you like to learn and find out more about various Windows errors, and how to repair them go to our vast archive or use search to find articles that will explain and help you in solving your issue.
However, if you prefer to do things fast and with automatization then we are proposing to use an automated solution for your issues. The application that we are recommending is Advanced System Repair Pro
Advanced System Repair utilizes multiple tools all in one to give you a quick, simple, reliable, and very thorough diagnosis of your PC. It brings you all the tools you need in one program to clean, fix, protect, optimize and boost your PC!
1-Click Maintenance
All the tools to make it simple and easy! It's like having a professional technician at the click of a mouse.

Junk Cleaner
Keeping your computer free from unnecessary clutter also helps make your computer last longer. Like any other machine, if you keep it clean and take care of it, it will serve you better for longer!

Optimize background apps
Optimize applications background activity with the built-in Application Optimizer feature.

Disk Defrag
With a simple 1-click, Advanced System Repair speeds up your PC by assembling fragmented files on your machine and organizing them more efficiently.

Malware Removal
Finds and removes all types of harmful malware including trojans, worms, bots, adware, spyware, PUPs, and more!

Privacy Cleaner
The all-in-one privacy suite to Clean Your Tracks & Protect Your Privacy! Make your computer safe, secure, and more efficient!

System Tweak/Optimizer
ASR will analyze your complete system and settings to adjust your PC to function at its maximum performance.

Registry Cleaner
Over time, as you install and uninstall applications, the registry can become cluttered with old entries and broken settings which can result in program crashes, and annoying messages and slow the computer down.
Visit our Advanced System Repair Pro Download page to inform yourself about all the benefits of this software and get a free trial copy of it.
advanced system repair pro

Advanced System Repair Pro

One-click automated PC repair solution
ASR logo
With Advanced System Repair Pro you can easily
Replace damaged files
Restore performance
Free disk space
Remove Malware
Protects WEB browser
Remove Viruses
Stop PC freezing
DOWNLOAD
Privacy Policy | Terms of Use | Uinstall
Advanced System Repair Pro is compatible with all versions of Microsoft Windows including Windows 11

Share this article:

You might also like

How to Fix Error 0x80073712 in Windows
There are times when system files get corrupted and if the Windows Update process finds the system’s integrity questionable, chances are, the update, upgrade or the installation may fail and you will only be getting an error code 0x80073712 instead of completing the process. The error code 0x80073712 indicates that a file needed by the Windows setup or the Windows Update is most likely missing or damaged. To resolve the problem, here are some suggestions you can try.

Option 1 – Try running the DISM Tool

Running the DISM Tool helps in repairing the Windows System Image as well as the Windows Component Store in Windows 10. Using this built-in tool, you have various options such as the “/ScanHealth”, “/CheckHealth”, and “/RestoreHealth”.
  • Open the Command Prompt as admin.
  • Then type in this command: exe /Online /Cleanup-image /Restorehealth
  • Do not close the window if the process takes a while as it will probably take a few minutes to finish.
After you run this tool, a log file is created at C:WindowsLogsCBSCBS.log. On the other hand, if the Windows Update client is already broken, you will be prompted to use a running Windows installation as the repair source or use a Windows side-by-side folder from a network share, as the source of the files. Although the chances of this happening are less, if it turns out to be the case, you need to run an advanced command in the DISM tool to repair a broken Windows Update. Just repeat the process above but use the following command instead:
DISM.exe /Online /Cleanup-Image /RestoreHealth /Source:C:RepairSourceWindows /LimitAccess

Option 2 – Try running the System File Checker

System File Checker or SFC is a built-in command utility that helps in restoring corrupted files as well as missing files. It replaces bad and corrupted system files with good system files that might be causing the error 0x80073712. To run the SFC command, follow the steps given below.
  • Tap Win + R to launch Run.
  • Type in cmd in the field and tap Enter.
  • After opening Command Prompt, type in sfc /scannow
The command will start a system scan which will take a few whiles before it finishes. Once it’s done, you could get the following results:
  1. Windows Resource Protection did not find any integrity violations.
  2. Windows Resource Protection found corrupt files and successfully repaired them.
  3. Windows Resource Protection found corrupt files but was unable to fix some of them.

Option 3 – Try running the Chkdsk utility

You can also try running the Chkdsk utility to resolve the Windows Update error 0x80073712. If your hard drive has issues with integrity, the update will really fail as the system will think that it’s not healthy and that’s where the Chkdsk utility comes in. The Chkdsk utility repairs hard drive errors that might be causing the problem.
  • Open Command Prompt with admin privileges.
  • After opening Command Prompt, execute the commands listed below, and don’t forget to hit Enter right after you type in each one of them and if you have installed Windows to some different directory, you must replace “C” with the name of the drive you’ve installed Windows with.
  • chkdsk C: /r /x
  • chkdsk C: /f
Note: The Chkdsk function might take a while before it finishes its operations so you need to be patient and wait until the entire process is completed.

Option 4 – Try running the Windows Update Troubleshooter

Running the built-in Windows Update troubleshooter could also help you resolve the Windows Update error 0x80073712. To run it, go to Settings and then select Troubleshoot from the options. From there, click on Windows Update and then click the “Run the troubleshooter” button.

Option 5 – Try running Microsoft’s online troubleshooter

You also have the option to run Microsoft’s online troubleshooter which could help you fix Windows Update errors.
Read More
8 Android Apps that threaten your security
Security on your PC and on your accounts is the important thing. Security on your phone device is also very very important. That is why we are bringing you a list of 8 applications that are marked by the cybersecurity team as ones that could be used to steal data from you. If you have by any chance any of these applications installed, uninstall them immediately.

List is as follows:

  • Cake VPN (com.lazycoder.cakevpns)
  • Pacific VPN (com.protectvpn.freeapp)
  • eVPN (com.abcd.evpnfree)
  • BeatPlayer (com.crrl.beatplayers)
  • QR/Barcode Scanner MAX (com.bezrukd.qrcodebarcode)
  • Music Player (com.revosleap.samplemusicplayers)
  • tooltipnatorlibrary (com.mistergrizzlys.docscanpro)
  • QRecorder (com.record.callvoicerecorder)
If you would like to read more helpful articles and tips about various software and hardware visit errortools.com daily.
Read More
Fix 0xc00d36cb error in Windows 10
0xc00d36cb error shows up when you are trying to play a video or movie using the default player in Windows. This error can occur due to a glitch in the media player or corrupted system files. in this guide, we will show you how to tackle this issue and fix it.
  1. Run the video playback troubleshooter

    • Click on Start and select Settings.
    • Go to Update and Security.
    • Scroll down and open the Troubleshoot tab.
    • Scroll down and select the Video Playback option.
    • Click the Run the Troubleshooter button.
    • The troubleshooter will perform an initial scan and offer a few options.
    • Select Continue with this troubleshooter.
    • The troubleshooter will scan the system again for driver and codec issues.
    • Follow on-screen instructions and apply recommended fixes.
  2. Reset the Movies and TV app

    • Click on Start and select Settings.
    • Go to Apps and open the Apps and features tab.
    • Scroll down to Movies and TV.
    • Select Movies and TV.
    • Click Advanced options.
    • Scroll down and click on the Reset button.
  3. Create a new user account

    • Click on Start and select Settings.
    • Open Accounts.
    • Open the Family & other users tab.
    • Scroll down to Other users and click the Add someone else to this PC button.
    • In the Microsoft account window, type your email address.
    • If you don’t want to enter an email address and establish a local account, click on I don’t have this person’s sign-in information option instead.
    • Next, select Add a user without a Microsoft account (for a local account).
      • Else, enter your Microsoft account login details.
    • Enter a user name and password for your new account. Also, select a security question and add an answer to it.
    • Once the new profile is ready, log out of your current account.
  4. Check for permission issues

    • Right-click on the problematic file and select Properties.
    • Open the Security tab.
    • Click the Advanced button.
    • In the Advanced Security Setting window, click the Change link.
    • In the Select User or Group window, enter Everyone in the text box.
    • Click the Check Names button.
    • Click OK and Apply to save the changes.
    • Close all the Properties windows.
    • Try playing the file or modifying the properties and check for any improvements.
Read More
Fix NVIDIA Control Panel Access denied
As you know, the NVIDIA Control Panel is the central control panel for all devices that run the graphics drivers manufactured by NVIDIA. This control panel comes bundled with the drive package itself which is why there is no need for users to download it or update it separately. However, recently, some users reported that when they tried to make changes to the configuration in the NVIDIA Control Panel, they were unable to do so and encountered an error message instead saying, “Access denied. Failed to apply selected settings to your system”. If you also got the same error message, then you’ve come to the right place as this post will walk you through fixing this error in the NVIDIA Control Panel. There are several suggestions given in this article to fix the error. You can try to run the file named “nvcplui.exe” as an administrator or restore the most recent version of the folder where the aforementioned file is located. You could also try to restart NVIDIA’s process or restart the NVIDIA Display driver service or update the NVIDIA drivers in your computer. For more details, refer to each one of the options given below.

Option 1 – Try running the nvcplui.exe file as an administrator

  • Tap the Win + E keys to open File Explorer and navigate to this path: C:/Program Files/NVIDIA Corporation/Control Panel/Client
  • After that, look for the exe file and right-click on it, and then select the Run as administrator option.
  • Next, select Yes if a User Account Control or UAC prompt appears.

Option 2 – Try to restore the most recent version of the folder

The next thing you can do to fix the error is to restore the most recent version of the folder where the nvcplui.exe file is located. Keep in mind that this option is tricky so you have to be careful.
  • Tap the Win + E keys to open File Explorer.
  • Next, navigate to this path: C:/ProgramData/NVIDIA DRS
  • From there, right-click on the DRS folder and select Properties.
  • After that, go to the Previous Versions, System Protection, or System Restore tab in the Properties window.
  • Now restore the most recent version of the contents inside that folder. This will revert the old working configuration of DRS.

Option 3: Restart the process of the NVIDIA Control Panel

  • Tap the Ctrl + Shift + Esc keys to open the Task Manager.
  • After opening the Task Manager, look for the process named NVIDIA Control Panel Application.
  • Once you found it, expand it and right-click on the NVIDIA Control Panel sub-process, and click on End Task.
  • Now try opening the NVIDIA Control Panel from the Start Menu and see if it now works fine or not.

Option 4: Restart the NVIDIA Display Driver Service

  • Tap the Win + R keys to open the Run dialog box.
  • Then type “services.msc” in the field and hit Enter to open the Windows Services Manager.
  • After opening the Services window, you will see a list of services. From there, look for services named “NVIDIA Display Container LS” and double click on it to open its Properties.
  • Now make sure that the service is Started. If it isn’t, you need to start it, otherwise, you need to Stop it and Start It again. You also have to make sure that the Startup Type is set to Automatic.
  • Do the same for the NVIDIA LocalSystem Container service.
  • Restart your computer and check if the problem’s fixed.

Option 5– Try updating the drivers from the official site of NVIDIA

If both the first and second given options didn’t work, you can also try updating the drivers from the official NVIDIA website. And in case you don’t know the type of Nvidia graphics card that your computer is on, follow the steps below:
  • Tap the Win + R keys to open the Run dialog box.
  • Next type in “dxdiag” in the field and click OK or hit Enter to open the DirectX Diagnostic Tool.
  • From there, you can see what type of Nvidia graphics card that your system is on.
  • Take note of your graphics card information and then look for the best drivers for your operating system. Once you’ve downloaded and installed the file, restart your PC.
Read More
Office 2021 release date set for October 5th
Microsoft-Office-2021-1024x425Microsoft office has two major packages, an online one, and an offline version. The online version of the course is Office 365 that requires a monthly subscription and it is always regularly updated and maintained. Another version is more of a typical old school application, install it and use it, no constant internet connection is required and no monthly subscription is required, buy once and use it. The last version of buying it once and use it was Office 2019 and after two years we are going to receive a new version soon. Microsoft has set its release date for October 5th of this year and as always it will feature the current latest version of office applications and one-time purchase. The new office will support dark mode and other improvements tied to the new Windows 11 and some specific features tied to Office itself.
Read More
Could not configure one or more components
If you are trying to install or upgrade your Windows 10 computer but suddenly encountered an error message saying, “Windows could not configure one or more system components”, read on as this post will show you how you can fix the problem. You are not alone in experiencing this problem as other users also reported having the same scenario. Some of them reported getting the following error message:
“Windows could not configure one or more system components. To install Windows restart the computer with error code 0xc1900101-0x30018.”
When you check on the Windows 10 rollback log, you will see a part with the “iisetup.exe” that’s related to the abort. Usually, the upgrade process completes over 50% and gets stuck and then rolls back later on and generates the error logs. This kind of error, in most cases, appears during the upgrade of Windows 10 and is related with the Internet Information Services or IIS in Windows 10. For some unknown reason, it restricts the installation or the upgrade which causes the error to appear. To fix the “Windows could not configure one or more system components” error, you can try to remove the IIS from the Windows Features or rename the “inetsrv” folder. You could also move all the folders related to IIS to another drive. For more details, refer to the options provided below.

Option 1 – Try to remove the IIS from Windows Features

The IIS is installed from the Windows Features and you can find it at Control Panel > Programs. From there, uncheck the checkbox for the Internet Information Services. Once done, click on the OK button to save the changes. Note that this process will get rid of all the related programs, services, and folders from Windows 10. So if you want to, you can just install them later on or use an offline installer from the official site of Microsoft.

Option 2 – Try renaming the inetsrv folder

The next option you can check out to resolve the problem is to rename the “inetsrv” folder. If you have uninstalled IIS from the Windows Features, this should remove the folders as well, however, it didn’t remove the folder then you have to delete the folders that are related to the IIS by following these steps:
  • First, you have to boot into the Advanced Recovery Mode and from there, open Command Prompt.
  • Next, execute this command to rename the folder from this location, C:Windowssystem32inetsrv: rename C:/Windows/system32/inetsrv/inetsrv.old
  • Once done, boot into your computer normally and try to upgrade Windows 10 again, and check if the problem is fixed or not.

Option 3 – Try to move the folders related to IIS to a different drive

  • Tap the Win + R keys to launch the Run utility and type “services.msc” in the field and hit Enter to open the Windows Services Manager.
  • Next, look for the Application Host Helper Service from the list of services and stop it.
  • Once done, take ownership of the “WinSxS” folder and then move the *windows-iis*.*” folders to another drive. You can just search using the “*windows-iis*.*” keyword in the Start Search.
  • Next, tap the Ctrl + X keys and paste the folders to another drive.
  • After that, start the update process for Windows 10 again.
Read More
New focus sessions in Windows 11
focus session
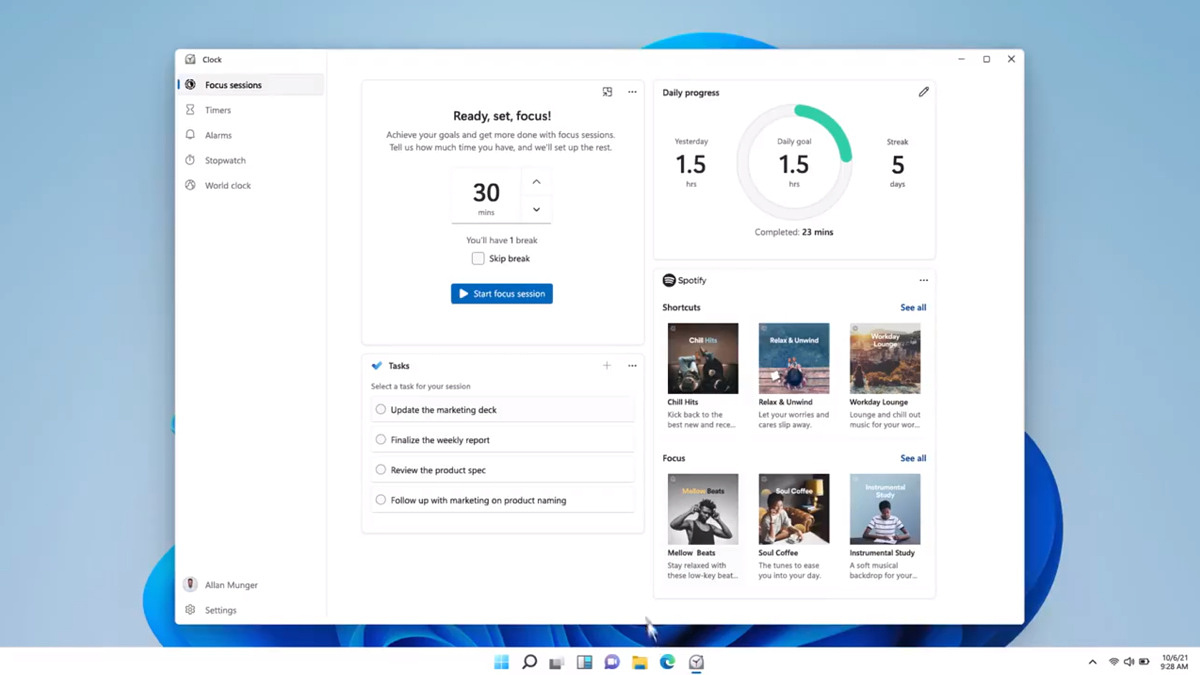
Windows and Devices chief Panos Panay has revealed new focus sessions feature that will be in Windows 11 on his Twitter account today. He himself is referring to it as a game-changer especially with Spotify integration.

So what is a focus session?

From the video clip provided on Twitter, we can see that focus session users will be able to choose a specific task from the previously made task list, choose songs that will play in the background while the task is active, and set a timer for the chosen task with breaks. Maybe the best comparison and explanation would be a desktop google calendar task with music, basically, that’s it. A neat and good organizer inside your Windows 11 operating system. I think that this is generally a good idea and for sure it will find its audience.
Read More
New Microsoft Windows 11 store
When Microsoft held Windows 11 presentation it took special time to present the upcoming new Windows 11 store as kind of a big deal. It was openly stated that with new Windows we will get a new store with a different attitude and new look.

microsoft storeNew Microsoft store

Microsoft has stated that both customer and developer feedback over time has contributed to their redesign and rethinking of the store itself. They want to be sure that policies for developers are more straightforward and clear so more developers will decide to bring their product to Windows. As for customers, they want more safety and more security so they feel protected when making a purchase. The new store will come in Windows 11 but also in Windows 10 as well via update.

Stories and collections

Introducing the new store will be curated stories. Microsoft believes that stores should be focused on user experience so stories from customers themselves will play a big role here. They are rich editorial content to keep you informed about the best apps and inspire you to achieve more with your device. This approach to information is aimed at bringing unknown applications to users via presenting them in a professional manner. Android apps in the store As stated in Windows 11 unveiling and presentation, Android apps will work inside Windows 11. Microsoft has teamed up with Amazon to bring you Android apps directly inside Windows via the new Microsoft store.

Pop up store from within a browser

When you are surfing on a certain webpage and want to save and install the application from there, a new pop-up store window will show allowing you to install the app directly. Microsoft has not said will this feature work outside their Edge browser so we will have to wait and see about that.

Support for multiple types of applications

Since now developers were tied to certain formats if they wanted to publish their application in any kind of environment. Microsoft wants to bridge this. Windows developers can publish any kind of app, regardless of app framework and packaging technology – such as Win32, .NET, UWP, Xamarin, Electron, React Native, Java, and even Progressive Web Apps. For Progressive Web Apps Microsoft has made open-source tool PWABuilder 3.

Flexibility and choice of commerce platform

Starting July 28, app developers will also have an option to bring their own or a third-party commerce platform in their apps, and if they do so they don’t need to pay Microsoft any fee. They can keep 100% of their revenue.
Read More
Quick Workarounds to Repair Error 126
[vc_row][vc_column][vc_column_text]

Fix Error 126

What Is Error 126?

Error 126 is a very commonly occurring error that is often the result of damaged system files of Windows. They usually occur during the installation of some Windows program or application. When Error 126 is generated, it terminates the installation process almost instantly. It is important to take corrective measures immediately to ensure that no such problems are encountered again in the future.

Solution

Restoro box imageError Causes

There are a variety of conditions that may trigger Error 126. These conditions are listed below as follows.
  • Corruption of the service-related DLL file
  • Missing or damage service-related DLL file
  • Corrupt, damaged, or Misconfigured system files
  • Improper hardware or application installations or uninstallations
  • Existence of viruses, malware, adware, or spyware in the system
  • Corrupt or incorrect registry entries in the system files
When any of the above-listed conditions occur, the corrupt system files will go to the improper links or missing information. Eventually, the problems with the files will keep the applications or programs from responding in the usual manner. Whatever are the reasons for error generation, it is of utmost importance that the error is removed to ensure smooth functioning of the system.

Further Information and Manual Repair

There are many different ways this error can be rectified. However, the two most effective solutions are listed below as follows.
  • This solution is for the advanced user. Turn on the system and log on to it as the Administrator. Now click on the Start button. Now click on All programs -> Accessories -> System Tools. Here you will come across the option for System Restore. Click on it. A new window will appear. Select 'restore my computer to an earlier time' point. Now clock on Next. A list of restore points will now appear in front of you. Choose the latest restore point you come across from this list and click on ‘Next’. In the next window that opens, click on ‘Next’ again. This is the confirmation window. Once the restoration finishes, restart your computer.
  • This solution is for novice users. Download an Error 126 repair utility program. Install it on your system. Now use it to scan your system for error. Find out if there is any option to fix/repair error. When you come across it, click on it as soon as the scan is complete. Restart your computer. Your system is now free of Error 126.
[/vc_column_text][/vc_column][/vc_row]
Read More
A Quick Guide to Resolving Error 0x800ccc17

How to Fix Error 0x800ccc17

What is error 0x800ccc17?

This is a typical Outlook Express error code. Outlook Express is email software by Microsoft. This error may pop up when sending or receiving emails on your Outlook Express. It cancels email sending and receiving operations. In other others, the 0x800ccc17 error code hampers your email communication via Outlook Express account. This error message is displayed in the following format:
0x800CCC17 - User cancelled operation

Solution

Restoro box imageError Causes

0x800ccc17 error code may appear on your PC due to multiple reasons. These include:
  • Issues with Pop3uid.dbx file (this file supports Outlook Express software on Windows Vista)
  • Viral infection
  • Registry corruption
No matter what the underlying reason for this error code may be, it is advisable to resolve the issue right away without any delay. This error may cause great deal of inconvenience. It may lower your office productivity badly especially if you interact and communicate with people of other office departments via your Outlook Express account.

Further Information and Manual Repair

Here are some of the best and efficient do-it-yourself methods to resolve the 0x800ccc17 error code on your system. These methods are very easy to work around and do not require any kind of technical expertise.

Method 1 - Restart Your PC

Sometimes this might error can be resolved by simply rebooting your system. So, restart your PC and try using your Outlook Express account again. If it works, the error is resolved. However, if it persists then try other methods given below.

Method 2 - Rename pop3uid.dbx File on Your System

If the underlying cause of error 0x800ccc17 is related to pop3uid.dbx file damage, then simply rename it to resolve. This can be done by searching for the file pop3uid.dbx. After locating it rename it to ‘pop3uid.bak’. Now reopen Outlook Express and try sending or receiving emails again. If the operations are executed successfully then the error is resolved.

Method 3 - Remove Viruses

Viruses can infect your PC without you knowing about it. These malicious programs usually enter your system through phishing emails and file downloads. If the error 0x800ccc17 is triggered due to viral infection then it is advisable to install a powerful antivirus and remove all viruses from your PC.

Method 4 - Repair the Registry

If you don’t clean the registry frequently it fills up with unnecessary and obsolete files like junk files, cookies, internet history, and bad registry entries. These files then corrupt and damage the registry thereby generating codes like error 0x800ccc17. To resolve this, you first need to remove all these unnecessary files and repair the registry. Though this can be done manually if you are not technically sound, it may be time-consuming and slightly tricky. Therefore it is advisable to download Restoro. This is a powerful registry cleaner that wipes away all obsolete files instantly, cleans the registry, and repairs it in seconds. Click here to download Restoro and fix error 0x800ccc17 on your PC today.
Read More
1 2 3 162
Logo
Copyright © 2022, ErrorTools. All Rights Reserved
Trademarks: Microsoft Windows logos are registered trademarks of Microsoft. Disclaimer: ErrorTools.com is not affiliated with Microsoft, nor claim direct affiliation.
The information on this page is provided for information purposes only.
DMCA.com Protection Status