DDR5 what we know so far about it

DDR5 memory module
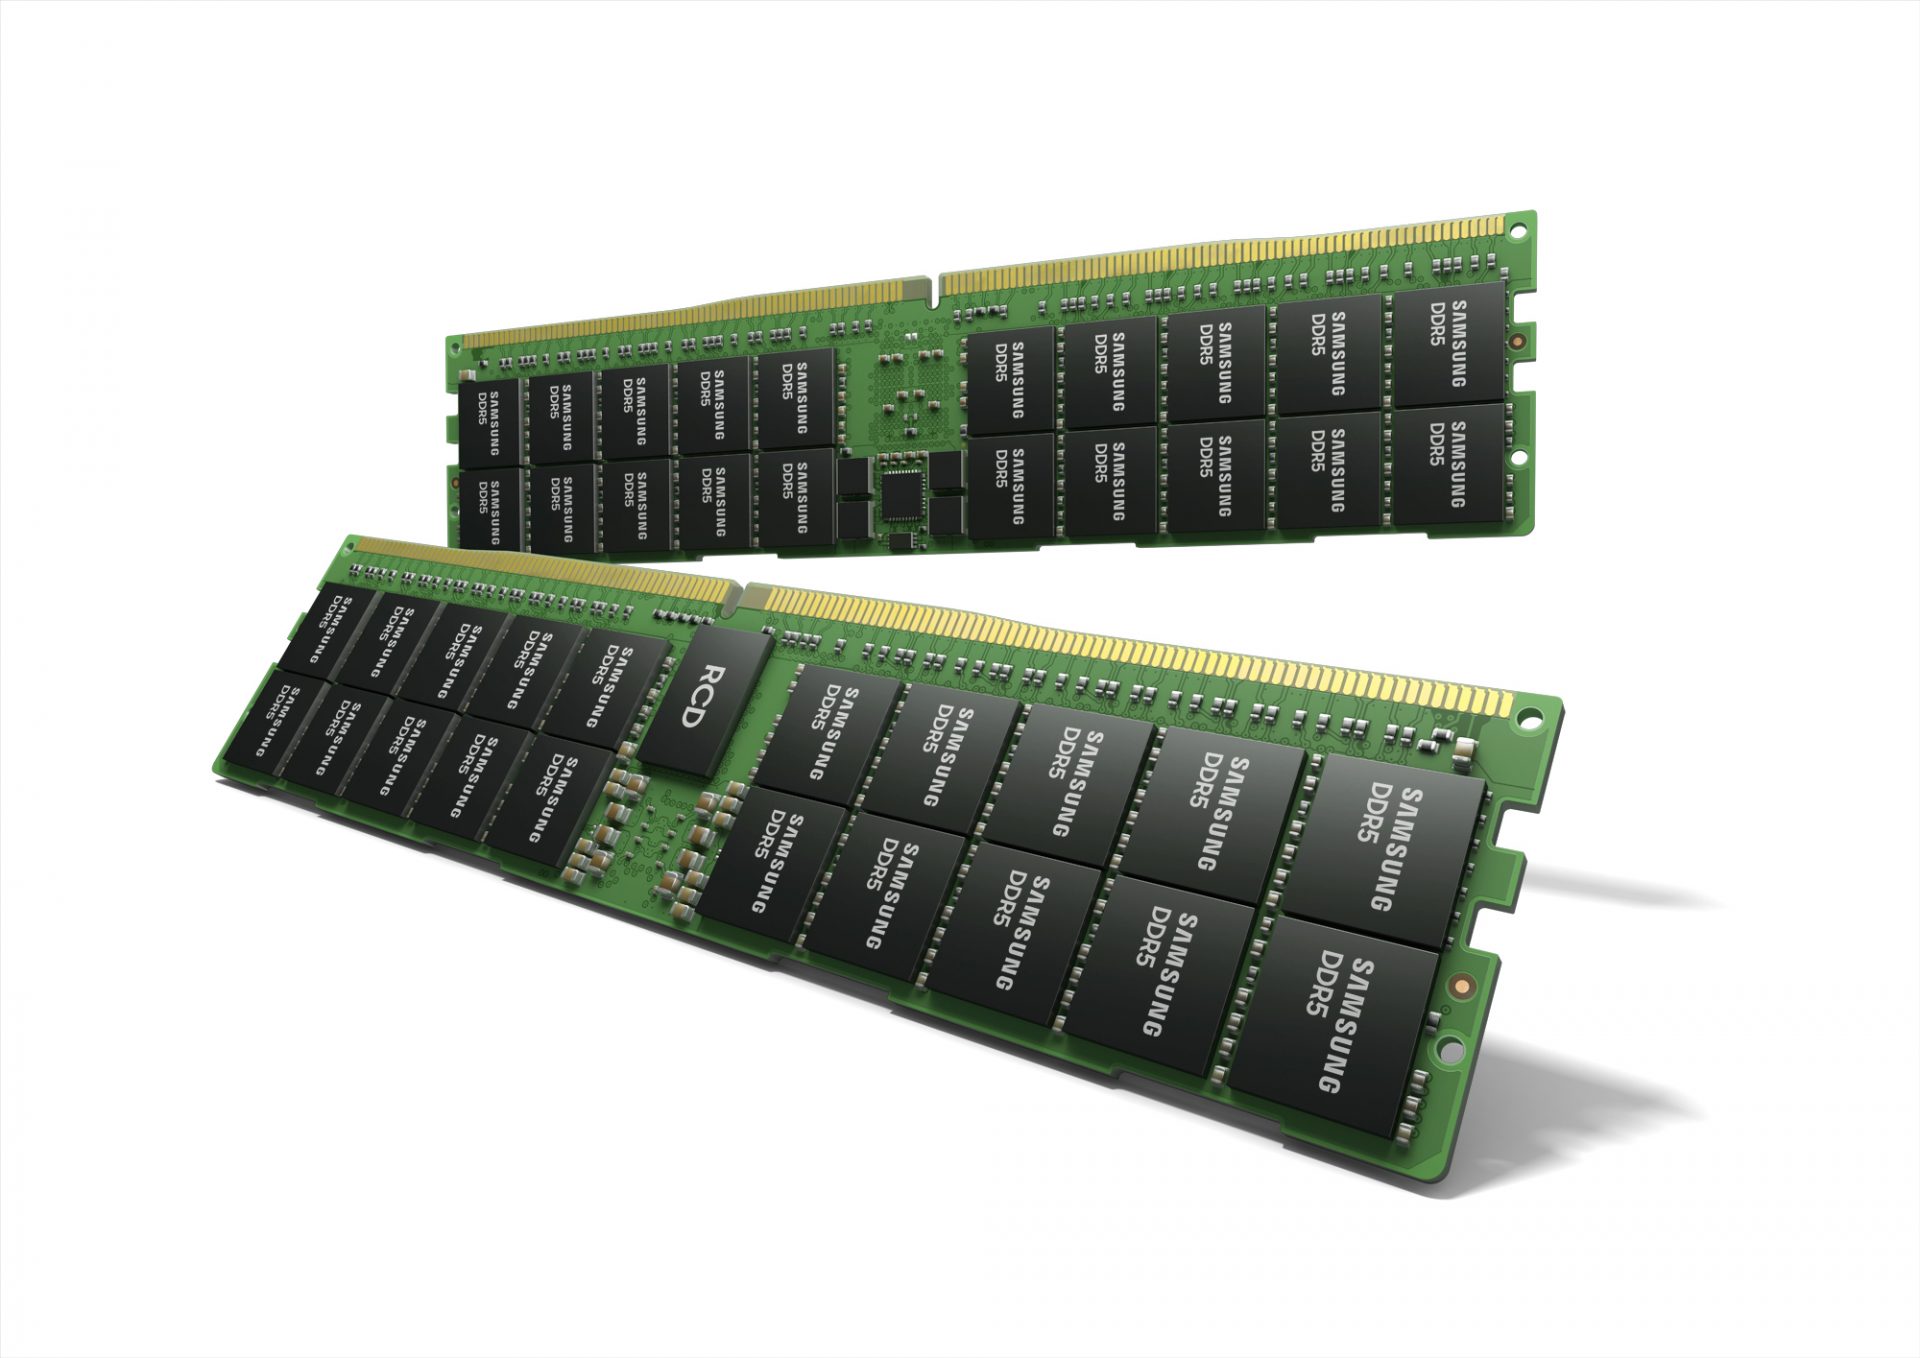
Next-generation of RAM, DDR5 supposed to hit shelves around late summer or fall in 2021if everything goes as planned.

Its goal is to increase speed and efficiency, wants to pack more memory in a single stick, and have better power management.

Hardware requirements for DDR5

Using the latest memory technology will require other hardware to follow certain standards and the first ones that will need to follow are CPUs and Motherboards.

Intel is already prepared with its Alder Lake CPUs that suppose to come out also later this year. AMD on other hand has not stated anything at the time of this writing but it is a bet that their next generation that will come in 2022 will have full support.

It is speculated that bot companies and their respective CPUs will have both support for DDR4 and DDR5.

A story about motherboards is a little different. Motherboards will support DDR4 or DDR5 memory banks, not both, so make sure that your motherboard will support the memory you plan on getting.

Capacity of memory

The goal and aim for the DDR5 memory stick are to reach a whopping 126GB per stack. This will be done by using a dual in-line module or DIMM enabling larger capacity.

That being said, the first modules that we will see are more likely to be 16GB as standard and 8GB as low entry ones.

Power consumption of DDR5 memory

The standard voltage that DDR4 operates under is 1.2V. DDR5 wants to lower this to 1.1V without sacrificing speed.

Voltage regulation on modules themselves will be now integrated on memory banks instead of leaving that to motherboards which will help to detect memory errors directly on the memory bank.

Speed of memory

The most common speed of DD4 memory banks is 2,666MHz, more expansive ones go from 3,600 to 4,000MHz.

DD5 aims to raise this bar to 4,800MHz and offers greater speed.

Should you get it right away?

Hardware is ever-evolving, we have PCIe 3.0 to PCIe 4.0, and taking into account that sometimes the newest tech can cause some unexpected behavior it is always the best strategy to wait for a little.

Price for the newest tech has also been in its heist just when it is released and seeing how DDR5 will benefit mostly servers mostly since even today memory, processors, and other available equipment can tackle all daily tasks.

If you like to learn and find out more about various Windows errors, and how to repair them go to our vast archive or use search to find articles that will explain and help you in solving your issue.
However, if you prefer to do things fast and with automatization then we are proposing to use an automated solution for your issues. The application that we are recommending is Advanced System Repair Pro
Advanced System Repair utilizes multiple tools all in one to give you a quick, simple, reliable, and very thorough diagnosis of your PC. It brings you all the tools you need in one program to clean, fix, protect, optimize and boost your PC!
1-Click Maintenance
All the tools to make it simple and easy! It's like having a professional technician at the click of a mouse.

Junk Cleaner
Keeping your computer free from unnecessary clutter also helps make your computer last longer. Like any other machine, if you keep it clean and take care of it, it will serve you better for longer!

Optimize background apps
Optimize applications background activity with the built-in Application Optimizer feature.

Disk Defrag
With a simple 1-click, Advanced System Repair speeds up your PC by assembling fragmented files on your machine and organizing them more efficiently.

Malware Removal
Finds and removes all types of harmful malware including trojans, worms, bots, adware, spyware, PUPs, and more!

Privacy Cleaner
The all-in-one privacy suite to Clean Your Tracks & Protect Your Privacy! Make your computer safe, secure, and more efficient!

System Tweak/Optimizer
ASR will analyze your complete system and settings to adjust your PC to function at its maximum performance.

Registry Cleaner
Over time, as you install and uninstall applications, the registry can become cluttered with old entries and broken settings which can result in program crashes, and annoying messages and slow the computer down.
Visit our Advanced System Repair Pro Download page to inform yourself about all the benefits of this software and get a free trial copy of it.
advanced system repair pro

Advanced System Repair Pro

One-click automated PC repair solution
ASR logo
With Advanced System Repair Pro you can easily
Replace damaged files
Restore performance
Free disk space
Remove Malware
Protects WEB browser
Remove Viruses
Stop PC freezing
DOWNLOAD
Privacy Policy | Terms of Use | Uinstall
Advanced System Repair Pro is compatible with all versions of Microsoft Windows including Windows 11

Share this article:

You might also like

How To Fix The "Referenced Memory At" Error Code

"Referenced Memory At" Error Code

Referenced Memory at - What is it?

0x Referenced Memory at 0x is an error code that occurs when the random memory addresses conflict. This error causes running programs or browsers to crash. Referenced memory at error code is considered as a service violation error. It is displayed as the following:

“The instruction at 0xf77041d24 referenced memory at 0×00000000. The memory could not be read.”

Solution

Restoro box imageError Causes

The ‘referenced memory at’ errors is either triggered by:
  • Hardware failure
  • Problems with the RAM and the registry
Hardware failure may result if the driver is not installed properly. The problems in the RAM indicate registry issues that occur due to data overload in the hard disk and poor PC maintenance. The registry saves all the information and activities you perform on your system on the hard disk. This includes the junk files, temporary files, invalid registry entries, and files of both installed and uninstalled programs.  These files accumulate and take over a lot of RAM space. Also, the referenced memory at error can be considered to be a form of memory leak where unknown third-party software can take up the memory space that has been reserved for a particular program. For example, if you have toolbars and add-ons installed in your browser, it can also lead to invalid registry storage in the registry. If you don’t clean the registry, these unnecessary files can overload your data and lead to hard disk/RAM damage and corruption triggering obscure error messages like referenced memory at error.

Further Information and Manual Repair

Referenced memory is a critical error; if not resolved it can lead to serious PC damages like a system failure. To avoid this, it is advisable to fix it right away. Here are a couple of ways to repair this issue on your system:

Cause: Hardware Failure

Solution: If the referenced memory at error is generated due to hardware failure then to resolve this error you must reinstall the driver that has caused the error to appear. Let’s say if the error pops up because of the printer driver, reinstall it. For re-installation of the driver, simply go to the control panel and click on the Device Manager option. Once you click it you will see a detailed page with a list of devices. Now click on the printer (the problematic driver in this situation) to reinstall the driver software. Double click on it to open the properties dialog box and then click the driver tab and update the driver. Once you have updated the driver, try using the printer. Check if it works. If it works and the referenced memory at the error code does not appear on the screen, this means the problem was with the hardware. However, if the error still pops up then this means the problem is deeper. It’s related to the registry.

Cause: Problems with the RAM and the registry

Solution: If the problem is with the RAM and the registry, then it is advisable to download Restoro. Restoro is a new, next-generation, and highly functional registry cleaner. It detects and removes all the registry issues, unnecessary and obsolete files saved in the hard disk taking up a lot of RAM space. It clears the RAM and cleans up the disk. Furthermore, it repairs the damaged files, fragmented disk, and the corrupt registry in seconds enabling you to resume the program that you were running before the error occurred. Restoro has a user-friendly interface and easy navigation. To run and operate this system you don’t need any kind of technical expertise. In just a few clicks you can resolve the critical referenced memory at error on your PC. It is compatible with all Windows versions Click here to download and install Restoro on your PC and fix the referenced memory error code now.
Read More
Microsoft vs Google & Facebook
microsoft hqMicrosoft wants to escalate the situation from Australia to the EU, what a surprise. Hello all and welcome to another news article, this time we are focusing on Microsoft pushing the EU to accept law proposition from Australia. For all of you who are not familiar with the given situation let me quickly explain. The feud began when the Australian government proposed a new law that targeted Facebook and Google specifically. The government said that it believed that both of the tech giants were using content from news outlets without paying. Have you ever seen the little news snippets that Google or Facebook sometimes show its users to keep them up to date? These are lifted directly from news websites, and the Australian government claimed that this practice meant that people didn't bother visiting the news website. This then staved news websites of revenue. As such, the government put forward a new law that would mean Google and Facebook would have to pay the source website for every time they displayed a news snippet. Facebook responded by removing its Australian news coverage in light of the law. Google, however, put up a fight. It argued that its snippets encouraged people to click on it to read more, thus driving more traffic to the news website. It also said that such a law would be too expensive to maintain in the long run. As such, Google threatened to remove itself from Australia if the law passed. This was likely a scare tactic, as 95 percent of Australian web users use Google; however, it actually opened the door for its rival, Microsoft. Microsoft saw how it could push its own search engine BING to replace google. It of course went and reached the Australian government to assure them that BING is more than capable to fulfill its needs and fully abide by the proposed law. Now Microsoft knows that if this law passes it could see a similar situation happening in Europe and it is pushing it. US News reported on how Microsoft plans to encourage EU countries to adopt this new law too. The company has teamed up with the European Publishers Council and News Media Europe to make the following statement: Publishers might not have the economic strength to negotiate fair and balanced agreements with these gatekeeper tech companies, who might otherwise threaten to walk away from negotiations or exit markets entirely
Read More
Fix NVIDIA Control Panel Access denied
As you know, the NVIDIA Control Panel is the central control panel for all devices that run the graphics drivers manufactured by NVIDIA. This control panel comes bundled with the drive package itself which is why there is no need for users to download it or update it separately. However, recently, some users reported that when they tried to make changes to the configuration in the NVIDIA Control Panel, they were unable to do so and encountered an error message instead saying, “Access denied. Failed to apply selected settings to your system”. If you also got the same error message, then you’ve come to the right place as this post will walk you through fixing this error in the NVIDIA Control Panel. There are several suggestions given in this article to fix the error. You can try to run the file named “nvcplui.exe” as an administrator or restore the most recent version of the folder where the aforementioned file is located. You could also try to restart NVIDIA’s process or restart the NVIDIA Display driver service or update the NVIDIA drivers in your computer. For more details, refer to each one of the options given below.

Option 1 – Try running the nvcplui.exe file as an administrator

  • Tap the Win + E keys to open File Explorer and navigate to this path: C:/Program Files/NVIDIA Corporation/Control Panel/Client
  • After that, look for the exe file and right-click on it, and then select the Run as administrator option.
  • Next, select Yes if a User Account Control or UAC prompt appears.

Option 2 – Try to restore the most recent version of the folder

The next thing you can do to fix the error is to restore the most recent version of the folder where the nvcplui.exe file is located. Keep in mind that this option is tricky so you have to be careful.
  • Tap the Win + E keys to open File Explorer.
  • Next, navigate to this path: C:/ProgramData/NVIDIA DRS
  • From there, right-click on the DRS folder and select Properties.
  • After that, go to the Previous Versions, System Protection, or System Restore tab in the Properties window.
  • Now restore the most recent version of the contents inside that folder. This will revert the old working configuration of DRS.

Option 3: Restart the process of the NVIDIA Control Panel

  • Tap the Ctrl + Shift + Esc keys to open the Task Manager.
  • After opening the Task Manager, look for the process named NVIDIA Control Panel Application.
  • Once you found it, expand it and right-click on the NVIDIA Control Panel sub-process, and click on End Task.
  • Now try opening the NVIDIA Control Panel from the Start Menu and see if it now works fine or not.

Option 4: Restart the NVIDIA Display Driver Service

  • Tap the Win + R keys to open the Run dialog box.
  • Then type “services.msc” in the field and hit Enter to open the Windows Services Manager.
  • After opening the Services window, you will see a list of services. From there, look for services named “NVIDIA Display Container LS” and double click on it to open its Properties.
  • Now make sure that the service is Started. If it isn’t, you need to start it, otherwise, you need to Stop it and Start It again. You also have to make sure that the Startup Type is set to Automatic.
  • Do the same for the NVIDIA LocalSystem Container service.
  • Restart your computer and check if the problem’s fixed.

Option 5– Try updating the drivers from the official site of NVIDIA

If both the first and second given options didn’t work, you can also try updating the drivers from the official NVIDIA website. And in case you don’t know the type of Nvidia graphics card that your computer is on, follow the steps below:
  • Tap the Win + R keys to open the Run dialog box.
  • Next type in “dxdiag” in the field and click OK or hit Enter to open the DirectX Diagnostic Tool.
  • From there, you can see what type of Nvidia graphics card that your system is on.
  • Take note of your graphics card information and then look for the best drivers for your operating system. Once you’ve downloaded and installed the file, restart your PC.
Read More
Setup has failed to determine install choices
Running the Windows Setup does not always go smoothly as you could encounter some errors along the way. One of these errors is the “Something happened, Setup has failed to determine supported install choices” error. The only given option in such cases is to click the Close button and exit the setup. This kind of error in Windows setup can occur when you try to downgrade to the previous version of Windows using the built-in mechanism. This error could be caused by a corrupted image or it is also possible that the set of files are incomplete. Aside from that, it could also be due to compatibility issues or that the module used to downgrade the Windows operating system is not configured properly. To fix this error, you have to run the Windows Setup program in compatibility mode so that you can downgrade Windows. You could also use the image for the lower version of Windows that’s available on the official site of Microsoft. But before you do any of these, make sure that you’re logged in as an administrator. To fix the “Something happened, Setup has failed to determine supported install choices” error, follow the given options below sequentially.

Option 1 – Try to run the Installer of the downgraded version in Compatibility Mode

This is the first thing you can try to resolve the issue instead of going right ahead on making a bootable device. So if you are downgrading Windows, you can try to run the installer in the compatibility mode for that specific Windows version.
  • Look for the setup file.
  • Once you find it, right-click on it and select Properties from the context menu.
  • After that, go to the Compatibility tab and mark the checkbox for “Run this program in compatibility mode for:” and from the drop-down list, select either Windows 7 or Windows 8.
  • You also have to check the “Run as administrator” option.
  • Now click the Apply button and then click OK to save the changes made and check if it has resolved the issue or not.

Option 2 – Try to troubleshoot compatibility

This option is almost the same as the first one except it is an alternative way of fixing the “Setup has failed to determine supported install choices” error in case the first one didn’t work. In this option, you will troubleshoot the compatibility issue.
  • Look for the setup file.
  • Then right-click on it and select the “Troubleshoot compatibility” from the context menu.
  • After that, click on the “Try recommended setting” option. Once the process is done, the error message should be gone.

Option 3 – Run the DISM tool

You can run the DISM tool as well to help fix the error code 0x80244022 during Windows Update. Using this built-in tool, you have various options such as the “/ScanHealth”, “/CheckHealth”, and “/RestoreHealth”.
  • Open the Command Prompt with admin privileges.
  • Then type in the following commands and make sure to hit Enter right after you type each one of them:
    • Dism /Online /Cleanup-Image /CheckHealth
    • Dism /Online /Cleanup-Image /ScanHealth
    • exe /Online /Cleanup-image /Restorehealth
  • Do not close the window if the process takes a while as it will probably take a few minutes to finish.

Option 4 – Try using the image from the official site of Microsoft

If none of the options given above worked, you can try to use the image from Microsoft’s official site. This would help, especially if the error is caused by a corrupted image or image folder with incomplete files.
Read More
Disable Privacy Settings Experience at sign-in
Creating a new Windows 10 account comes with options related to privacy. For instance, you will see the options to disable or enable Speech recognition, Find my device, Location service, Inking & typing, and many more. And if you often have to create a test account in Windows 10 v1809 and you don’t want to give this option, you can just disable the Privacy Settings Experience at sign-in on your Windows 10 PC using a couple of instructions given in this guide. To disable the Privacy Settings Experience, you can use the Registry Editor and the Group Policy Editor. But before you get started, you need to log in as an administrator. Moreover, it would also be better if you create a backup copy of the Registry files as well as create a System Restore Point before you make any changes. After you have those things covered, refer to the steps given below to disable the Privacy Settings Experience at sign-in on your Windows 10 PC. Since there are two ways to get things done, choose one option that you prefer.

Option 1 – via Registry Editor

  • Tap the Win + R keys to open the Run dialog box and type “Regedit” in the field and hit Enter to open the Registry Editor.
  • Next, navigate to this path: HKEY_LOCAL_MACHINESOFTWAREPoliciesMicrosoftWindowsOOBE
  • From there, look for the OOBE value and if you can’t find it there, you can just create it. To do so, right-click on the Windows key and select New > Key, and then name it “OOBE”.
  • After that, right-click on the OOBE value and select New > DWORD (32-bit) value, and name it “DisablePrivacyExperience”.
  • Then double click on DisablePrivacyExperience and set its value to “1”.
  • Now exit the Registry Editor and restart your PC for the changes to take effect.

Option 2 – via the Group Policy Editor

  • Tap the Win + R keys to open the Run dialog box.
  • Then type “gpedit.msc” in the field and hit Enter to open the Group Policy Editor.
  • After that, navigate to this path: Computer Configuration > Administrative Templates > Windows Components > OOBE
  • Next, look for a setting named “Don’t launch privacy settings experience on user login” located on your right-hand side and then double click on it and select Enabled.
  • Now click on the Apply and OK buttons to save the changes made.
  • Restart your PC.
Read More
Fix Page Fault in Non-Paged Area in Windows 10
Page Fault in Non-Paged Area is a blue screen error usually happening with faulty drivers but it can come from different issues like faulty RAM. In this short article, we will cover usual ways on how to approach and solve this error.

Solving Page fault in Non-Paged Area

Page Fault in Non-Paged Area
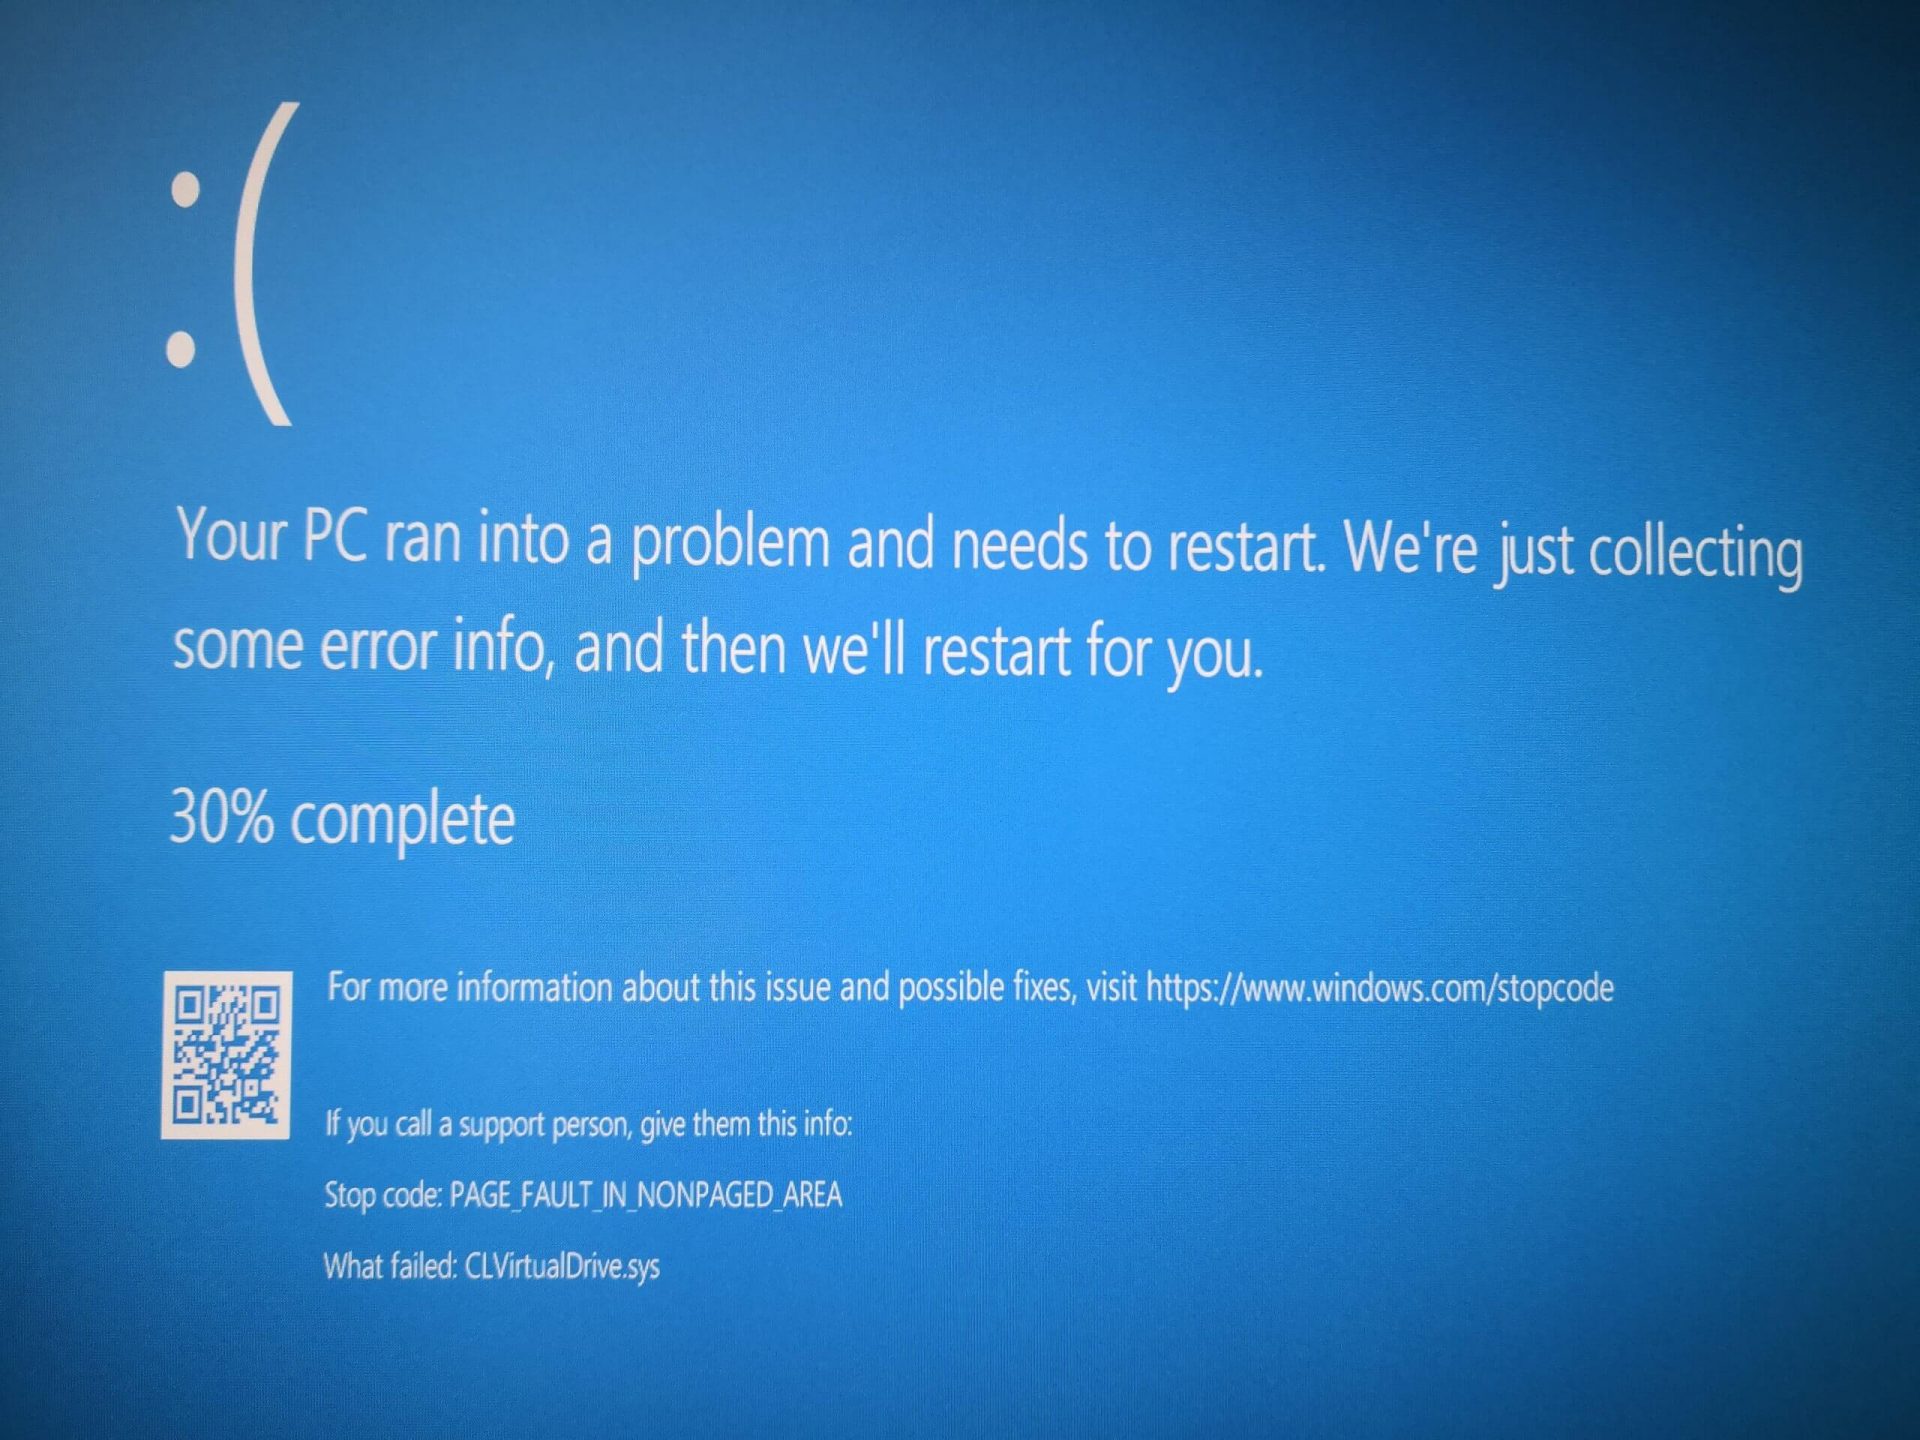
Rollback using system restore

Simple and easy solution, roll back to the previous system restore point where Windows was stable and working.

Fix Page Fault in Non-Paged Area using device manager

  1. Press ⊞ WINDOWS + X to open the hidden menu
  2. Click on device manager
  3. Find a device with a question mark and right-click on it
  4. Click on the rollback driver button

Fix via command prompt

  1. Press ⊞ WINDOWS + X to open the hidden menu
  2. Click on command prompt (admin)
  3. Inside command prompt type in SFC / scannow and press ENTER
  4. Wait for the process to be finished and then reboot the PC

Fix via DISM tool

  1. Press ⊞ WINDOWS + X to open the hidden menu
  2. Click on command prompt (admin)
  3. Inside command prompt type in DISM /Online /Cleanup-image /Restorehealth and press ENTER
  4. Wait for the process to be finished and then reboot the PC

Page fault in Non-Paged Area via a dedicated tool

Sometimes manual and provided solutions just simply cannot cut it because the issue is triggered also with something else and not just a single issue. Use DRIVERFIX to fix this specific issue with a single click.
Read More
Fix NTOSKRNL.exe high CPU, Memory & Disk usage
This post will guide you in fixing high CPU, Memory, and Disk usage problems caused by NTOSKRNL.exe. NTOSKRNL stands for “NT Operating System Kernel. This file is a kernel image that is responsible for a lot of systems-based processes such as Hardware Virtualization, Process, and Memory. Aside from that, it is also the one that compresses the old pages of memory that reduces the overall amount of memory being used. If you notice that your computer is running slowly and you find that the NTOSKRNL.exe file is hogging your resources such as disk usage, CPU usage as well as memory usage, then read on as this post will guide you in fixing the problem caused by NTOSKRNL.exe. Make use of the options given below to resolve the issues caused by NTOSKRNL.exe. 1] Scan your computer for potential malware There might be a good chance that your computer might be infected with malware. And this malware might be associated with the NTOSKRNL.exe file and hence making it consume a lot of system resources. So, I would really recommend you to make sure that your Antivirus is up to date and then scan your computer with it specifically the C:/Windows/System32 folder because this is the location where the NTOSKRNL.exe file is located.

Option 1 – Put your computer in a Clean Boot State

The first thing you have to do is to put your computer in a Clean Boot State as this can help you in finding any incompatible programs that are causing the problem.
  • Log onto your PC as an administrator.
  • Type in MSConfig in the Start Search to open the System Configuration utility.
  • From there, go to the General tab and click “Selective startup”.
  • Clear the “Load Startup items” check box and make sure that the “Load System Services” and “Use Original boot configuration” options are checked.
  • Next, click the Services tab and select the “Hide All Microsoft Services” check box.
  • Click Disable all.
  • Click on Apply/OK and restart your PC. (This will put your PC into a Clean Boot State. And configure Windows to use the usual startup, just simply undo the changes.)
  • From there, start to isolate the problem by checking which one of the programs you installed recently is the root cause of the problem.
Once you’ve found any incompatible programs, you need to uninstall them. Refer to the steps below to do so.
  • In the search box, type in “control” and then click on Control Panel (desktop app) among the search results.
  • After that, select Programs and Features from the list which will give you a list of all the programs installed on your computer.
  • From there, look for the concerned program and select it and then uninstall it.
Note: If you have downloaded the app from the Windows Store, you can simply right-click on it from the application list and then uninstall it.

Option 2 – Update or rollback drivers

If the first option didn’t work for you, then it’s time to either update or roll back the device drivers. It is most likely that after you updated your Windows computer that your driver also needs a refresh. On the other hand, if you have just updated your device drivers then you need to roll back the drivers to their previous versions. Whichever applies to you, refer to the steps below.
  • Open the Devices Manager from the Win X Menu.
  • Then locate the device drivers and right-click on them to open the Properties.
  • After that, switch to the Driver tab and click on the Uninstall Device button.
  • Follow the screen option to completely uninstall it.
  • Finally, restart your computer. It will just reinstall the device drivers automatically.
Note: You can install a dedicated driver on your computer in case you have it or you could also look for it directly from the website of the manufacturer.

Option 3 – Try to run the DISM tool

If the first two options didn’t work, then running the Deployment Imaging and Servicing Management might. Using this built-in tool, you have various options such as the “/ScanHealth”, “/CheckHealth”, and “/RestoreHealth”.
  • Open the Command Prompt with admin privileges.
  • Then type in the following commands and make sure to hit Enter right after you type each one of them:
    • Dism /Online /Cleanup-Image /CheckHealth
    • Dism /Online /Cleanup-Image /ScanHealth
    • exe /Online /Cleanup-image /Restorehealth
  • Do not close the window if the process takes a while as it will probably take a few minutes to finish.

Option 4 – Try to stop the Runtime Broker process

The RuntimeBroker.exe or the Runtime Broker process is the one that monitors access to Windows APIs to make sure that the apps do not violate the core security of Windows. This process usually leaves a very small footprint. However, there are times when it consumes more resources than it’s supposed to and does not release memory after the work is done that results in a memory leak. As a result, it affects NTOSKRNL.exe which is why you have to stop the Runtime Broker process. To do so, refer to these steps:
  • Tap the Ctrl + Shift + Esc to open the Task Manager.
  • After opening Task Manager, go to the Processes tab and look for the Runtime Broker process.
  • Once you find it, check if it is using more than 15% of your memory. If it is, then you most likely have an issue with an app installed on your computer.
  • Select the Runtime Broker process and right-click on it and then click on the End Task option to end its process.

Option 5 – Try to run the Performance Troubleshooter

  • Tap the Win + R keys to open the Run dialog box.
  • Type “msdt.exe /id PerformanceDiagnostic” in the field and hit Enter to open the Performance troubleshooter.
  • Then click on Next to get started. Wait until the process is completed.

Option 6 – Try using the Windows Performance Toolkit

You can also use the Windows Performance Toolkit in finding the root cause of the problem. Just refer to the following steps to use this toolkit.
  • Search for “cmd” in the Cortana Search box and click on Command Prompt from the search results to open it.
  • Next, type in the command given below or copy and paste it and then hit Enter:
xperf -on latency -stackwalk profile -buffersize 1024 -MaxFile 256 -FileMode Circular && timeout -1 && xperf -d cpuusage.etl
  • After executing the command, wait for at least 60 seconds and then check the logs of the Windows Performance toolkit which is stored in a file named cpuusage.etl in the folder located at C:/Windows/System32. From there, you should see a list of all the causes of the System Resources being hogged.
Read More
Fix CSGO Crashes in Windows 10
Counter strike has evolved from half-life mod into the full-featured game and has kept in popularity for years, even today game is wildly popular and has a huge player base. Sadly game can crash in Windows 10. Here in this article, we will address how to fix csgo crashing in Windows 10 so you can play it smoothly and crash-free as it was meant to be played.
  1. Update your display drivers

    Often in the gaming world having the latest display drivers can mean a world of difference. Counterstrike GO is no different, make sure that your drivers are updated to the latest version, if they are not, go to your manufacturer's website and download the latest version.
  2. Update Windows

    Just how much important is it to have the latest display drivers so it is to have the latest Windows update. Often problematic things are addressed in the update itself.
  3. Turn off compatibility mode

    Compatibility mode is most often the cause of crashes. Go to the game installation folder and search for csgo.exe. Once you locate it right-click on it and choose properties. Under properties, find the compatibility tab and turn off compatibility mode if it is ON. Uncheck run as administrator also
  4. Delete CSGO.EXE and add cl_disablehtmlmotd 1

    If disabling compatibility mode has not solved the issue do next: Pull up the installation directory folder, find csgo.exe, and delete it Pull up the Steam Library and locate Counter-Strike Global Offensive Right-click on it to select properties Find the local tab and click on verify integrity of game files When that is complete, go back into the Counter-Strike Global Offensive installation folder and search for cgo.exe Turn compatibility OFF like in the previous step Return to the Steam Library, right-click on Counter-Strike Global Offensive and click on properties again Go under the launch options settings In the new window, type in cl_disablehtmlmotd 1 Save the changes and restart the game
  5. Lower game settings

    If previous steps did not help and the game still crashes, try lowering game graphic settings. Crashes can happen if a game is heavy on the current system resources.
Read More
Checking the Bluetooth Battery level
In case you don’t know, Windows 10 now allows users to check the Bluetooth battery level of devices. More often than not, the accessories or peripherals users use for their Windows 10 devices are connected to it using Bluetooth technology. This high-speed low-powered wireless technology is designed to link mobile devices, computers, and other network devices over a short distance wirelessly. Monitoring the battery level of a device where Bluetooth is enabled isn’t an easy task as most of these devices do not support the Bluetooth battery monitor or the battery level display. And even when on devices that do, you still have to install additional software to find it. However, Windows 10 eliminates this requirement and all you have to do is add a Bluetooth device and connect that Bluetooth device. How? Follow the instructions provided below. Step 1: Adding a Bluetooth Device The easiest way to get your Bluetooth device battery to be displayed on your Windows 10 screen is to simply add a Bluetooth device. To do so, follow these sub-steps:
  • First, turn on the Bluetooth mode on your device.
  • Next, go to Windows Settings > Devices > Bluetooth & other devices.
  • From there, click on the “+” button next to the ‘Add Bluetooth or other devices” option and select the type of device you want to add.
Step 2: Connecting the Bluetooth Device Once you’ve added the device, it will be visible under the “Add a device” screen.
  • Now select the newly added Bluetooth device and click the “Done” button.
  • After that, it will now be connected. Go back to the “Bluetooth & other devices” window and scroll down to the section of “Mouse, Keyboard, and Pen”.
  • From there, move the cursor alongside the connected device to display its battery level.
Keep in mind that there are several ways in which you can display the battery information of the Bluetooth device. However, Windows 10 understands only one of them per se. So if your device is not a Bluetooth Low Energy device, Windows 10 won’t be able to show its battery information and won’t display its battery level.
Read More
Mapi32.dll Outlook Error - Quick Fix

Mapi32.dll Outlook Error

What is Mapi32.dll Outlook Error?

Mapi32.dll is a Windows Messaging Application Programming Interface that enables Windows to perform various email functions and launch messaging programs like Microsoft Outlook and Microsoft Office. The inability of the interface to execute email functions properly results in the Mapi32.dll Outlook Error. This error occurs mostly when you are attempting to upgrade the operating system to a new version.

Solution

Restoro box imageError Causes

The common causes of the Mapi32.dll Outlook Error during the OS upgrade are:
  • Damaged or Corrupt Outlook user profile
  • The software is overwritten by some other program
  • Outlook PST file corruption
The Mapi32.dll Outlook Error message is displayed in either of the following forms:
  • Mapi32.dll is missing
  • Cannot start Microsoft Office Outlook. Mapi32.dll is corrupt or the wrong version.
  • Mapi32.dll was not found
  • Mail is not installed

Further Information and Manual Repair

So, what if you experience this issue and how do you fix it? Well, first there is no need to panic as Microsoft has recognized this issue and provided adequate solutions to fix this problem in no time. However, to ensure the Mapi32.dll Outlook error is a quick fix, you must first understand the cause of the issue and the message displayed on the screen.
  1. Let’s say the errors occur because your Outlook profile is corrupt. In this scenario, the best solution is to create a new Outlook profile. Regardless of whether you have Windows Vista or XP, to create your new Outlook profile, first, you will have to click on the Control Panel, then User Account, and then Mail. Once you click on the Mail tab, the mail set up dialog box will open. In this dialog box there will be a ‘Show Profiles’ tab, click and then click the Add tab that appears next. Now type the name for your new Outlook profile and then click ‘OK’. After that, add an email account to go with the profile.
  2. If Mapi32.dll is missing or corrupt, you will have to run ‘Fixmapi.exe’ to resolve the problem. It is located in the System32 folder inside the Windows directory in Windows Explorer.
  • Therefore, first start Windows Explorer and then locate the following folder on your computer: C: /Program Files/Common Files/System/Msmapi1033
  • Now find Fixmapi.exe and double click it
  • After that locate the Mapi32.dll file and rename it to MSmapi32.old and press enter.
  • Restart your computer when finished.
A word of advice for computer users is to scan for viruses with an antivirus program or a registry cleaner regularly to prevent the Mapi32.dll Outlook error from occurring in the first place. Viruses often latch onto .dll files and corrupt them. It’s always best to have a forward-looking approach.
Read More
1 2 3 162
Logo
Copyright © 2022, ErrorTools. All Rights Reserved
Trademarks: Microsoft Windows logos are registered trademarks of Microsoft. Disclaimer: ErrorTools.com is not affiliated with Microsoft, nor claim direct affiliation.
The information on this page is provided for information purposes only.
DMCA.com Protection Status