Copy & Paste text between devices

If you have multiple products with Windows on them, Copy & Paste text between them is easy as 1,2,3 and we will be happy to tell you how can you do it.

Hello and welcome everyone, today we will see how can we share text information between 2 devices using Windows 10 in instant. In order for you to be able to share text information between devices, there are two prerequisites that you must meet. The first is that all devices must be connected to the internet, the second is that you must have a Microsoft account.

If you have both of these things continue with the tutorial, if you do not have a Microsoft account go to Microsoft website and create one for free.

Also, know that this option needs to be turned ON on all devices in order to work. So steps we will explain will have to be done on each device, if you already have some device logged in and connected to Microsoft account, you can skip setting it up.

Click on ⊞ WINDOWS and click on settings.

Windows 10 Star menu with marked settings iconThen click on System.

Windows settings system markedOnce you are in the system, on the left tabs find and click on Clipboard.

windows settings clipboardIf you are not logged in to your Microsoft account do so on the right panel by locating Sync across devices and click on sign in.

clipboard sign inWhen you are signed in click on the option to turn it on.

sync across devicesOne option is turned ON, you will be greeted with two choices, to copy everything from the clipboard automatically or to choose text which you want to sync and paste it with ⊞ WINDOWS + V. Choose whatever better suits your needs, and you are done.

Repeat these steps for other devices and you are done.

If you like to learn and find out more about various Windows errors, and how to repair them go to our vast archive or use search to find articles that will explain and help you in solving your issue.
However, if you prefer to do things fast and with automatization then we are proposing to use an automated solution for your issues. The application that we are recommending is Advanced System Repair Pro
Advanced System Repair utilizes multiple tools all in one to give you a quick, simple, reliable, and very thorough diagnosis of your PC. It brings you all the tools you need in one program to clean, fix, protect, optimize and boost your PC!
1-Click Maintenance
All the tools to make it simple and easy! It's like having a professional technician at the click of a mouse.

Junk Cleaner
Keeping your computer free from unnecessary clutter also helps make your computer last longer. Like any other machine, if you keep it clean and take care of it, it will serve you better for longer!

Optimize background apps
Optimize applications background activity with the built-in Application Optimizer feature.

Disk Defrag
With a simple 1-click, Advanced System Repair speeds up your PC by assembling fragmented files on your machine and organizing them more efficiently.

Malware Removal
Finds and removes all types of harmful malware including trojans, worms, bots, adware, spyware, PUPs, and more!

Privacy Cleaner
The all-in-one privacy suite to Clean Your Tracks & Protect Your Privacy! Make your computer safe, secure, and more efficient!

System Tweak/Optimizer
ASR will analyze your complete system and settings to adjust your PC to function at its maximum performance.

Registry Cleaner
Over time, as you install and uninstall applications, the registry can become cluttered with old entries and broken settings which can result in program crashes, and annoying messages and slow the computer down.
Visit our Advanced System Repair Pro Download page to inform yourself about all the benefits of this software and get a free trial copy of it.
advanced system repair pro

Advanced System Repair Pro

One-click automated PC repair solution
ASR logo
With Advanced System Repair Pro you can easily
Replace damaged files
Restore performance
Free disk space
Remove Malware
Protects WEB browser
Remove Viruses
Stop PC freezing
DOWNLOAD
Privacy Policy | Terms of Use | Uinstall
Advanced System Repair Pro is compatible with all versions of Microsoft Windows including Windows 11

Share this article:

You might also like

How to remove weather widget from W11
The latest Windows 11 update has brought with it not so popular widget from Windows 10, the weather widget that will reside into the taskbar and constantly show stuff like temperature, weather conditions, etc. The weather widget is not a bad thing but most users found it a little annoying and turned it off in Windows 10. If you wonder how can you do the same but this time inside Windows 11 please keep reading. weather widget
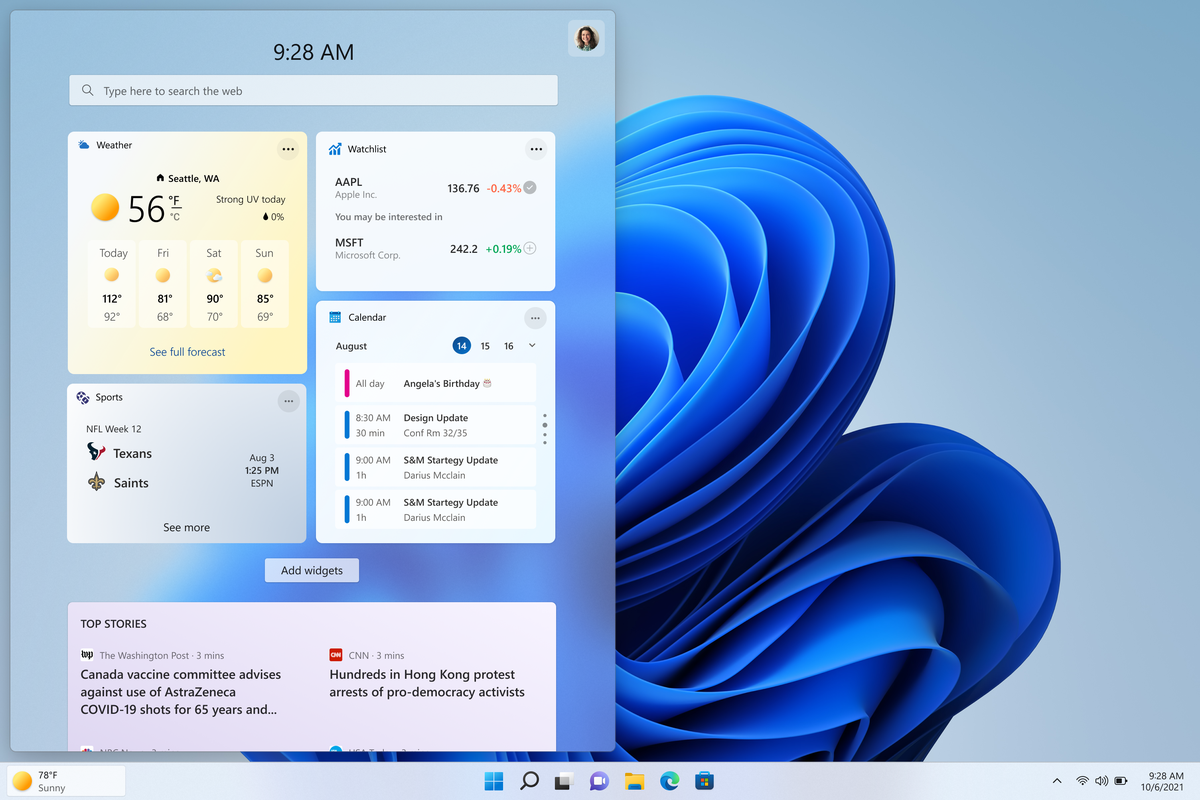
The first step is to right-click  anywhere on the taskbar (in empty space) and choose Taskbar settings Once the taskbar settings are opened, find Widgets and click on the switch on the far right to turn it off, immediately no more information will be shown on the taskbar and it will be free again. And that is all there is to it.
Read More
Fix BAD_SYSTEM_CONFIG_INFO error in Windows
If you encounter the BAD_SYSTEM_CONFIG_INFO Blue Screen error in your Windows 10 PC, then read on as this post will guide you in fixing this issue. Usually, this kind of Blue Screen error is caused by some issues with the Boot Configuration Data file. The main issue inside of the Boot Configuration Data file is that either some boot order files or older files might be in conflict with the newer ones or the stable ones and thus triggering the BAD SYSTEM CONFIG INFO Blue Screen error. This kind of Stop error also indicates that there is an error in the Windows Registry which is why you need to update potential culprit drivers as well as edit some entries in the Registry if need be. But before you get started, make sure that you create a System Restore Point first. After creating a System Restore Point, try to boot your computer into Safe Mode and then restart your computer normally. However, if it doesn’t work, proceed to the given options below.

Option 1 – Run System Restore

Performing System Restore might help you in fixing the BAD SYSTEM CONFIG INFO Blue Screen error. You can do this option either by booting into Safe Mode or in System Restore. If you are already in the Advanced Startup Options, just directly select System Restore and proceed with the next steps. And if you have just booted your PC into Safe Mode, refer to the steps below.
  • Tap the Win + R keys to open the Run dialog box.
  • After that, type in “sysdm.cpl” in the field and tap Enter.
  • Next, go to the System Protection tab then click the System Restore button. This will open a new window where you have to select your preferred System Restore point.
  • After that, follow the on-screen instructions to finish the process and then restart your computer and check if the problem is fixed or not.

Option 2 – Update or rollback your device drivers

If the first option didn’t work for you, then it’s time to either update or roll back the device drivers. It is most likely that after you updated your Windows computer that your driver also needs a refresh. On the other hand, if you have just updated your device drivers then you need to roll back the drivers to their previous versions. Whichever applies to you, refer to the steps below.
  • Open the Devices Manager from the Win X Menu.
  • Then locate the device drivers and right-click on them to open the Properties.
  • After that, switch to the Driver tab and click on the Uninstall Device button.
  • Follow the screen option to completely uninstall it.
  • Finally, restart your computer. It will just reinstall the device drivers automatically.
Note: You can install a dedicated driver on your computer in case you have it or you could also look for it directly from the website of the manufacturer.

Option 3 – Try fixing the Windows Registry files

In order to fix the Windows Registry files, you need to make a bootable Windows 10 USB drive and then boot your PC using it. To do so, refer to the steps below.
  • Once you see the Welcome Screen, click on Next.
  • Then click on the “Repair your computer” option located on the bottom-left section of the window.
  • Next, click on Troubleshoot > Advanced Options > Command Prompt.
  • After opening Command Prompt, execute each one of the commands listed below in the sequence that they are given:
    • CD C:WindowsSystem32config
    • ren C:WindowsSystem32configDEFAULT DEFAULT.old
    • ren C:WindowsSystem32configSAM SAM.old
    • ren C:WindowsSystem32configSECURITY SECURITY.old
    • ren C:WindowsSystem32configSOFTWARE SOFTWARE.old
    • ren C:WindowsSystem32configSYSTEM SYSTEM.old
  • After executing the commands given above, type in the next ones below and make sure to execute them in the given sequence below.
    • copy C:WindowsSystem32configRegBackDEFAULT C:WindowsSystem32config
    • copy C:WindowsSystem32configRegBackSAM C:WindowsSystem32config
    • copy C:WindowsSystem32configRegBackSECURITY C:WindowsSystem32config
    • copy C:WindowsSystem32configRegBackSYSTEM C:WindowsSystem32config
    • copy C:WindowsSystem32configRegBackSOFTWARE C:WindowsSystem32config
  • Now type “exit” to close Command Prompt.
  • Restart your PC for the changes to take effect.

Option 4 – Run a Memory Check to test RAM

On the other hand, you can also fix the BAD SYSTEM CONFIG INFO Blue Screen error by running a Memory Check using the Windows Memory Diagnostic. Refer to these steps to do so.
  • Tap the Win + R keys to open the Run dialog box.
  • Then type “mdsched.exe” in the field and hit Enter to open the Windows Memory Diagnostic.
  • After that, the Windows Memory Diagnostic will give out two options such as:
  1. Restart now and check for problems (recommended)
  2. Check for problems the next time I start my computer
  • Select any of the given options. After that, your computer will restart and check for memory-based issues upon the restart. If there are any issues, it will automatically them.

Option 5 – Rebuild BCD files and repair MBR files

Like what you did on the third option above, you also have to make a bootable Windows 10 USB drive for this option and then boot your Windows 10 PC using it.
  • Once you get to the Welcome Screen part, click on Next.
  • Afterward, click on the Repair your computer option located on the bottom-left part of the window.
  • Then click on Troubleshoot.
  • Next, select the Advanced Options and then Command Prompt.
  • Once Command Prompt has been pulled up, enter each one of the following commands and in the sequence that they are given to rebuild BCD files and repair MBR files:
    • bootrec /repairbcd
    • bootrec /osscan
    • bootrec /repairmbr
  • Now type “exit” to close Command Prompt and then restart your computer to successfully apply the changes made.
Read More
Connecting Cortana on Windows and Android
Microsoft's anniversary update has come with many new features and improvements. One of these features is that Microsoft's Cortana can now be installed on your Android phone and as long as you are logged in to your Microsoft account on different devices, she can pass information between devices. You can not see battery life on your desktop PC, notifications, etc. There are some prerequisites in order to get this going, first is to have a Windows version 1607 or newer. The second is to have the last Android version

Installing Cortana on Android

  1. Download and install the Cortana app from the Google Play store.
  2. Open the app and accept the license terms.
  3. Enter the credentials for the Microsoft account you use to sign in to your PC.
  4. After a few seconds, Cortana will open.
  5. Click the settings button and select Sync Notifications.
  6. By default, missed calls, incoming messages, and low battery notifications will be turned on. You can turn this on\off from here. The only option off by default is for App notifications. Any non-system apps such as Facebook and Instagram can also send alerts to your Windows box. You can choose to enable the App notification sync option or leave it off.
  7. If you enable “App notification sync,” you will need to give Cortana permissions to read and control notifications on your phone.
  8. You can then select exactly which applications will be synched to your PC.
  9. Once done you can exit out of Cortana.

Configuring Cortana on PC

  1. Click the Windows button and type Cortana. Click the icon for Cortana and Search Settings.
  2. Scroll through the settings list and look for Send notifications between devices
  3. Click the switch to turn it on.
  4. Sign in to the same Microsoft account you used in the previous section
  5. Navigate back to the Cortana & Search settings tool.
  6. Click Edit Sync Settings. Make sure that your phone shows up on the list. You can also determine if you want PC notifications are sent to your phone.
With those settings in place, you should now start getting alerts for the items you enabled in your Action Center. As notices come in, you will see them pop up in a small bubble on the lower right of your screen. You can dismiss the notification or use the link to find a compatible app in the Windows store.
Read More
A Quick Guide to Resolving the Runtime Error R6025

Repair Runtime Error R6025

What is the Runtime Error R6025?

The runtime error R6025 can be quite annoying for PC users as it pops up randomly anytime. It is a type of runtime error but typically associated with C++ programming. The error is displayed in the following format:

‘Runtime Error! Program: C:…R6025-Pure Virtual Function Call’

Solution

Restoro box imageError Causes

The runtime error R6025 is triggered due to the following reasons:
  • Runtime components of Visual C++ libraries are missing
  • Microsoft.NET framework damaged
  • Registry corrupted with bad files and data overload
  • Virus and malware invasion

Further Information and Manual Repair

Try the solutions given below to repair the runtime error R6025 on your system:

Cause: Microsoft.NET framework damaged

Solution: If this is the underlying cause of the error, then it is advisable to reinstall and repair the Microsoft.NET framework on your PC. To reinstall this framework, go to the start menu, click control panel, programs and then click ‘Turn Windows features on or off’. Here you might be promoted for an administrator password. Insert the password to proceed. Now locate Microsoft.NET framework 3.5.1 and uncheck this box, press OK and then reboot your system. After that open ‘Turn Windows features on or off’ and check the Microsoft.NET framework 3.5.1 and then restart your PC. This will hopefully resolve the error.

Cause: Runtime components of Visual C++ libraries are missing

Solution: If runtime components of Visual C++ libraries are missing, then you will have to download and install these from different websites. This can be time-consuming and slightly complicated for you if you are not technically sound.

Cause: Malware Attack

Solution: If the runtime error R6025 is triggered due to a malware attack, then you will have to install and run a powerful antivirus on your PC. This will help detect and remove such malicious software affecting your system.

Cause: Registry Issues

Solution: If registry corruption is the underlying cause of the runtime error R6025 on your PC, then you need to clean up the registry and repair it. The best way to clean and repair the registry is to download Restoro. Restoro is an advanced PC repair tool integrated with powerful and highly functional utilities all in one. Utilities include a registry cleaner and a system optimizer. It has easy navigation, a user-friendly interface, and is compatible with all Windows versions. Users of all levels can operate it to resolve all kinds of PC errors including the runtime error R6025. The registry cleaner utility wipes out all the unnecessary, malicious, obsolete files and invalid entries overloading the RAM. It frees up the disk space, repairs the damaged files and the registry. Furthermore, Restoro also functions as a system optimizer. It detects system instability issues and resolves them while boosting the speed of your PC. To resolve the runtime Error R6025 on your system in seconds click here to download Restoro PC repair tool now!
Read More
Program Cannot Start Because MSVCR100.Dll Is Missing, What Can I Do?

Fix MSVCR100.Dll Is Missing

What Does (The Software Can Not Start Because MSVCR100.Dll Is Missing) Mean?

When you get the error information, "The Software Can Not Begin Because MSVCR100.Dll Is Missing", what this implies is that the Computer will be lacking the  MS Visual C++ 2010 libraries. The malfunction is rather frequent throughout installations. It doesn't matter the number of times you try to reinstall the program. The malfunction can happen whether you've been utilizing your pc for many years, or it's really a recent one.

Solution

Restoro box imageError Causes

a) Missing MSVCR100.DLL: As the problem message indicates, you get this information mainly because MSVCR100.DLL is completely missing. b) Broken MSVCR100.DLL: When the msvcr100.dll is broken, you will also get the same error, suggesting the software won't start. The thing you need to understand is the fact that MSVCR100.DLL is playing an important role in the application referred to as MS Visual C++ 2010 Redistributable Package. Without the MS Visual C++ 2010 Redistributable Package, any software that you simply make an effort to install won't start. You could possibly complete installing it by pursuing proper installation procedures, and then end up getting the "The Software Can Not Begin Because MSVCR100.Dll Is Missing" error.

Further Information and Manual Repair

If you get the "The Software Can Not Begin Because MSVCR100.Dll Is Missing" error information on an effective setup of any software, you shouldn't worry. You can really repair the issue and commence your recently installed software without any more hassle. Start by checking whether you presently use 64-bit or 32-bit Windows. Visit the start button, in case you use Winxp. Type winver. On the window that appears, click Run, subsequently push enter. Head to Start, in case you use both Win7 or Vista. Subsequently, click on the search box and type “Computer”. Right-click windows and subsequently click on Properties. Under Windows Edition, you'll find whether your Windows is 64-bit or 32-bit. Search for the correct variation of MS Visual C++ 2010 Redistributable Package, as soon as you discover whether your Windows is 64-bit or 32-bit. Down load the x86 variant of MS Visual C++ Redistributable Package if your version is 32-bit and you must obtain the x64 variant of MS Visual C++, for those who own a-64-bit version of Windows Operating System. You must never obtain MS Visual C++ 2010 Redistributable Package from third-party websites. This is because Microsoft doesn't charge a cent for the files. The files are openly and easily available on Microsoft. These files come in many different variants. Consequently, select what's suitable for your own Computer with regards to the version of Windows which you operate.
  • Never pick the edition of MS Visual C++ 2010 Redistributable Package that's not compatible or appropriate to your Windows Operating System.

Make use of the release date, when installing MS Visual C++ 2010 Redistributable Package. You might also look out for Service Pack 1 and obtain it for your Windows. Service Pack 1 only ensures that you simply obtain the latest edition. As soon as you end installing the most up-to-date version of MS Visual C++ 2010 Redistributable Package as demonstrated above, reboot your computer and you'll not have to worry about getting the annoying"The Software Can Not Begin Because MSVCR100.Dll Is Missing" error message anymore.
Read More
Fix Generic PnP monitor driver issue
Universal PnP or plug-and-play monitors use a generic PnP Windows driver. Whenever a user plugs a USB device or monitor into a PC the system will automatically identify the device and it will install the proper driver for smooth running. Generic PnP Monitor in Windows 10 means that Windows 10 installed a monitor driver as the PNP did not recognize the device. This generic PnP monitor driver may not work perfectly like the manufacturer’s one. It can lead to issues like unable to set the best monitor resolution and the screen refresh rate. Therefore, it is important to fix this issue. All of that being said let us fix your PnP display driver issue.
  1. Reconnect monitor

    Always try this first, just by unplugging the monitor and then plugging it back may resolve the issue, if the monitor was not detected properly the first time, there are very high chances that this method will resolve the issue.
  2. Check if the Device Manager is reporting an error and update the driver

    If the hardware is functioning properly then the issue might be in Windows not detecting device or driver malfunction. In any case, the Device Manager will be the one who will report this problem. In order to check to see if the driver is properly working press ⊞ WINDOWS + X to open the hidden start menu. keyboard with windows and x marked Once it opens, click on Device Manager to open it, If you have a driver device error inside Windows, you should see it immediately when entering the Device Manager, it will have a yellow exclamation mark beside it. Right-click on it and choose update driver.
  3. Reinstall driver

    If driver update failed or you already have the latest drivers, reinstalling them could fix the issue since drivers might have corrupted during installation of some update or application. Follow steps from point 3 to get to the driver in Device Manager, then right-click on it but instead of update choose to uninstall. Reboot Windows once the driver is uninstalled and Windows will install a new one automatically. If you do not want to update drivers automatically install the latest driver for your device, then reboot.
  4. Check Windows update

    Check to see if the latest Windows update is installed, update your Windows if needed
  5. Fix driver issue with DRIVERFIX

    If everything else fails, get DRIVERFIX, a premium solution for your PC issues, and fix driver errors.
Read More
Fix The backup application could not start
Windows comes with a built-in backup solution. However, if it failed because of an internal error, you will encounter an error message saying, “The backup application could not start due to an internal error, Server execution failed (0x80080005)”. When you get this kind of error, it means that it did not start and the process failed with a Server execution error. If you got this kind of error worries not for this post will guide you in fixing the problem in your Windows 10 computer. The Windows Backup service is an excellent feature in Windows that only works on the NTFS file system and if you want to use this make sure that you have formatted your files system to NTFS. It is performed by the Volume Shadow Copy, all you have to do is right-click on any folder and if you see the “Previous versions” option, this means that a backup process runs from time to time and can bring back old files when needed. To resolve the “The backup application could not start due to an internal error”, here are two suggestions you can check out.

Option 1 – Check if the Volume Shadow Copy service is running and restart it

The first thing you need to do is check if the Volume Shadow Copy service. To do that, refer to the following steps:
  • Click on Start and type “cmd” and right-click on Command Prompt from the search results.
  • Then select the “Run as administrator” option to open Command Prompt with admin privileges.
  • After that, type “net stop sdrsvc” and hit Enter to execute the command in stopping the Volume Shadow Copy service.
  • Next, type the “net start sdrsvc” command and hit Enter to start the service again.
Note: You can also restart the service using the Windows Services Manager.
  • In the Cortana search box, type “services” and click on the Services icon to open the Services Manager. Alternatively, you can also tap the Win + R keys to launch the Run prompt and then type “services.msc” in the field and hit Enter to open the Services Manager.
  • From there, look for the Volume Shadow Service (sdrsv) from the list of services. Its Startup type should be set to Manual by default.
  • Restart the service and if you don’t encounter any error while you turn it on, re-run the backup service and see if the backup process runs successfully.

Option 2 – Try to run the Volume Shadow Copy Service in a Clean Boot State

If the first option didn’t work and the service still keeps on failing even though the service is running, you can try putting your computer in a Clean Boot State and then try to run Windows Backup again.
  • Log onto your PC as an administrator.
  • Type in MSConfig in the Start Search to open the System Configuration utility.
  • From there, go to the General tab and click “Selective startup”.
  • Clear the “Load Startup items” check box and make sure that the “Load System Services” and “Use Original boot configuration” options are checked.
  • Next, click the Services tab and select the “Hide All Microsoft Services” check box.
  • Click Disable all.
  • Click on Apply/OK and restart your PC. (This will put your PC into a Clean Boot State. And configure Windows to use the usual startup, just simply undo the changes.)
  • Now try to run the Volume Shadow Copy service again and see if the process goes smoothly.
Note: You might also want to delete all the files in the backup solution if you want to start fresh with the backup solution. Just go to C:/System/Volume/Information/Windows Backup and take ownership of the folder. After that, make sure to stop the Volume Shadow Copy service and then delete all the files inside it.
Read More
Downloads folder loads slowly in Windows
If you are frequently experiencing slow loading of folders in your Windows 10 computer, Downloads folder for instance, then you’ve come to the right place as this post will help you resolve such issue. Slow loading of folders is a common problem faced by many users even when they are using the latest hardware like SSDs. So if you experience the same thing, be it with the Downloads folder or other folders on your computer, there is a way to resolve that issue and make the folder load faster. Slow-loading means when you attempt to open the folder, it takes a couple of seconds before it displays its contents. In such cases, you’ll see a green loading address bar that says “Working on it” which can get quite annoying especially if you are in a hurry. And if you notice that this only happens in the Downloads folder, there certainly is something wrong. This kind of problem can occur on SSDs and normal hard drives. The main reason behind the occurrence of this problem is that the folder may have been optimized for viewing photos or other media formats which is why it takes quite longer than usual to load all the files and their thumbnails. However, since the Downloads folder usually contains all kinds of files like documents, zip files, audio/video files, etc. there is no need to optimize this folder for media files only because doing so is only going to make the Windows File Explorer slow in loading the folder’s contents and thumbnails which does not exist for many files.

Option 1 – Configure the Downloads folder

  • Right-click on the Downloads folder or the folder you’re having trouble opening.
  • Then click on Properties and go to the Customize tab.
  • After that, click on the “Optimize this folder for” option in the drop-down menu.
  • Next, select General items from the drop-down which might have been set by default to Pictures or Video.
  • You also have the option to apply this template to all the subfolders, that is if your folder has any subfolders.
  • Now apply the settings and restart Windows Explorer.
Note: Once you’ve completed the steps above, it should now make the folder content display a lot faster than before. Now try to open the Downloads folder which would not take much time as you will see the changes right away.

Option 2 – Run CHKDSK to check your disk for errors

When it comes to some issues concerning the hard drive or removable devices, there is a utility in Windows that might help which is called “chkdsk”. This error check utility can help with several issues in the system including File System Error -2147219196.
  • Tap the Win + S keys to open the Search box.
  • Then type “command prompt” in the field and from the search results that appear, right-click on Command Prompt and select “Run as administrator”.
  • After opening an elevated command prompt, copy and paste the following command and hit Enter:
chkdsk /r /f
  • Now if you are prompted to run CHKDSK after your reboot your PC, just tap Y and reboot your PC.
  • If CHKDSK is not able to find any errors, tap the Win + E keys and navigate the access window. From there, right-click on the concerned drive and click on Properties.
  • After opening Properties, click on the tab Tools and then click on the “Check” button under the Error-checking section.
  • Wait until the process is completed and then restart your computer.
  • Once your computer has restarted, try accessing the file and check if the error persists.
Read More
Windows keyboard shortcuts for easy life
Hello everyone and welcome to our useful tips and tricks and problem-solving article blog. This time we are doing something different, instead of solving issues this time we are focusing on some quality of life tips like keyboard shortcuts in your Windows 10.
Shortcut Keys Description
Windows Key Opens/closes the Start menu.
Windows Key + Up Arrow Maximizes the selected window.
Windows Key + Down Arrow Reduces the window size. (Restore down.)
Windows Key + M Minimizes all open windows.
Windows Key + Shift + M Opens minimized windows.
Windows Key + Tab Shows Task View.
Windows Key + L Locks the screen.
Windows Key + A Opens the Action Center.
Windows Key + V Opens Clipboard History.
Windows Key + I Opens the Settings menu.
Windows Key + F Opens the Feedback hub.
Windows Key + H Opens the dictation toolbar.
Windows Key + P Opens the projection settings.
Windows Key + . (Windows Key + ;) Opens the emoji panel.
Windows Key + C Opens Cortana in listening mode.
Windows Key + C (Windows Key + Q) Opens Windows Search.
Windows Key + G Opens the Xbox game bar.
Windows Key + X Opens the secondary start menu.
Windows Key + <number> Opens the app in the taskbar relative to the number input. For example, if Chrome is the fourth app on the taskbar, using Windows Key + 4 will open Chrome.
Windows Key + Alt + <number> Opens the right-click menu for the app in the taskbar relative to the number input. For example, if Chrome is the fourth app on the taskbar, using Windows Key + Alt + 4 will open Chrome’s right-click menu.
Windows Key + D Shows/hides open apps on the desktop.
Windows Key + E Opens File Explorer.
Windows Key + U Opens Ease of Access in the Settings menu.
Windows Key + Print Screen Takes a screenshot of the desktop.
Windows Key + Control + F Opens the Find Computers window.
Windows Key + Control + D Creates a virtual desktop.
Windows Key + Control + Left Arrow Switches to the virtual desktop on the left.
Windows Key + Control + Right Arrow Switches to the virtual desktop on the right.
Windows Key + Control + F4 Closes the active virtual desktop.
Windows Key + Space Switches between installed languages (for writing text).
Read More
Fix 0xC03A0005 error in Windows 10
When performing a Windows Backup to the NAS device (backup to a network share) that is running Samba, fails with an error message The backup failed, The version does not support this version of the file format (0xC03A0005). The problem occurs because of a conflict with the VHD file that is created by Windows Backup and is mounted during the process. There are three types of VHD files:
  1. Fixed,
  2. Expandable
  3. Differencing
If the VHD file is a sparse file that is not supported by the native VHD driver, the mounting will fail, and you will get this error. An example VHD file is one that keeps expanding depending on the backup size. The problem occurs only in the case of  File Level backup (file/folders in a volume) but not on the block level backup as the vhd file is never mounted. However, in the case of File Level Backup, the vhd is mounted, created by Windows Backup, which does not support the mounting of sparse files.

The solution is to use Strict Allocate: option in the smb.conf file

Login to SMB using SSH. Open the configuration file using the VI editor located at /etc/samba/smb.conf. If the option is not there, you can manually add strict allocate = yes which will make sure there are no sparse file that is created.
Read More
1 2 3 162
Logo
Copyright © 2022, ErrorTools. All Rights Reserved
Trademarks: Microsoft Windows logos are registered trademarks of Microsoft. Disclaimer: ErrorTools.com is not affiliated with Microsoft, nor claim direct affiliation.
The information on this page is provided for information purposes only.
DMCA.com Protection Status