Connecting a Wireless Printer to a Windows PC

Although it’s easy to set up wired printers in most cases and they have their charm, you don’t have to be around the printer if you are connected to the same network. So in this post, you will be guided on how you can install and set up a wireless printer on your Windows 10 computer.

The idea here is to ensure that your Wi-Fi printer and your Windows 10 computer are connected on the same network and to do that, you need to carry out the following steps:

  • You have to connect the printer to the Wi-Fi network.
  • You have to add the printer or scanner to Windows 10.
  • You have to install the printer software.
  • You have to change the default printer.
  • And troubleshoot the printer.

For more details, follow the instructions below.

Step 1: Connect your printer to the Wi-Fi network.

In this step, you need to turn on your printer and look for the option to connect to a Wi-Fi network. Note that the step to connect to the Wi-Fi network depends on what kind of printer you use as well as its OEM since there will be a user interface or a Wi-Fi button that will get the job done for you. Once your printer is connected to the Wi-Fi network, you need to keep it turned on until the setup is completed.

Step 2: Next, add a printer or scanner to Windows 10

  • Since you’re already connected to the Wi-Fi network, you now have to go to Settings > Devices > Printers & scanners.
  • From there, click on the Add a printer or scanner option.
  • After that, the scanning process will begin as Windows 10 looks for the printer and once it finds it, it will display the printer in the result.
  • Choose the Wi-Fi printer from the results and click on the Add device option. Once you click this option, Windows will install the drivers via Windows 10 update. Note that this process will apply to all the printers – connected, wireless, and so on.

Step 3: You have to install a printer software

In this step, you need to use the driver software from the OEM even though the default printer software works since in most cases, the driver software from OEM works better compared to the default ones and offers much better functionality like ink-saving modes, and many more.

Step 4: You now have to change the default printer

After installing the printer software, you now have to set or change the default printer in your computer. If you have not installed any printer, the default printer in Windows is the one that saves the files. Now since you have already installed your printer, all that’s left for you to do is to change the default printer of Windows 10 to the one you installed earlier. To do that, follow these sub-steps:

  • Go to Settings and navigate to Devices > Printers & scanners.
  • From there, check the checkbox labeled, “Let Windows manage my default printer” if there are many printers. This will recommend you to use the most used printer. But if you don’t want to switch to the most used printer, then uncheck the checkbox.
  • Once done, click on the printer you want to set as the default one and go to Manage, and then click on the Set as default button.

Step 5: If you have any issues with your newly installed printer, then you need to troubleshoot it

One of the first basic troubleshooting you can perform to resolve the printer issue is running the Printer Troubleshooter. This built-in troubleshooter can detect and automatically fix the problem for you. To use it, follow these steps:

  • Tap the Win + R keys to open the Run dialog box.
  • Next, type “exe /id PrinterDiagnostic” in the field and click OK or hit Enter to open the Printer Troubleshooter.
  • Then click the Next button and follow the next on-screen instructions to fix the issue with the printer.
If you like to learn and find out more about various Windows errors, and how to repair them go to our vast archive or use search to find articles that will explain and help you in solving your issue.
However, if you prefer to do things fast and with automatization then we are proposing to use an automated solution for your issues. The application that we are recommending is Advanced System Repair Pro
Advanced System Repair utilizes multiple tools all in one to give you a quick, simple, reliable, and very thorough diagnosis of your PC. It brings you all the tools you need in one program to clean, fix, protect, optimize and boost your PC!
1-Click Maintenance
All the tools to make it simple and easy! It's like having a professional technician at the click of a mouse.

Junk Cleaner
Keeping your computer free from unnecessary clutter also helps make your computer last longer. Like any other machine, if you keep it clean and take care of it, it will serve you better for longer!

Optimize background apps
Optimize applications background activity with the built-in Application Optimizer feature.

Disk Defrag
With a simple 1-click, Advanced System Repair speeds up your PC by assembling fragmented files on your machine and organizing them more efficiently.

Malware Removal
Finds and removes all types of harmful malware including trojans, worms, bots, adware, spyware, PUPs, and more!

Privacy Cleaner
The all-in-one privacy suite to Clean Your Tracks & Protect Your Privacy! Make your computer safe, secure, and more efficient!

System Tweak/Optimizer
ASR will analyze your complete system and settings to adjust your PC to function at its maximum performance.

Registry Cleaner
Over time, as you install and uninstall applications, the registry can become cluttered with old entries and broken settings which can result in program crashes, and annoying messages and slow the computer down.
Visit our Advanced System Repair Pro Download page to inform yourself about all the benefits of this software and get a free trial copy of it.
advanced system repair pro

Advanced System Repair Pro

One-click automated PC repair solution
ASR logo
With Advanced System Repair Pro you can easily
Replace damaged files
Restore performance
Free disk space
Remove Malware
Protects WEB browser
Remove Viruses
Stop PC freezing
DOWNLOAD
Privacy Policy | Terms of Use | Uinstall
Advanced System Repair Pro is compatible with all versions of Microsoft Windows including Windows 11

Share this article:

You might also like

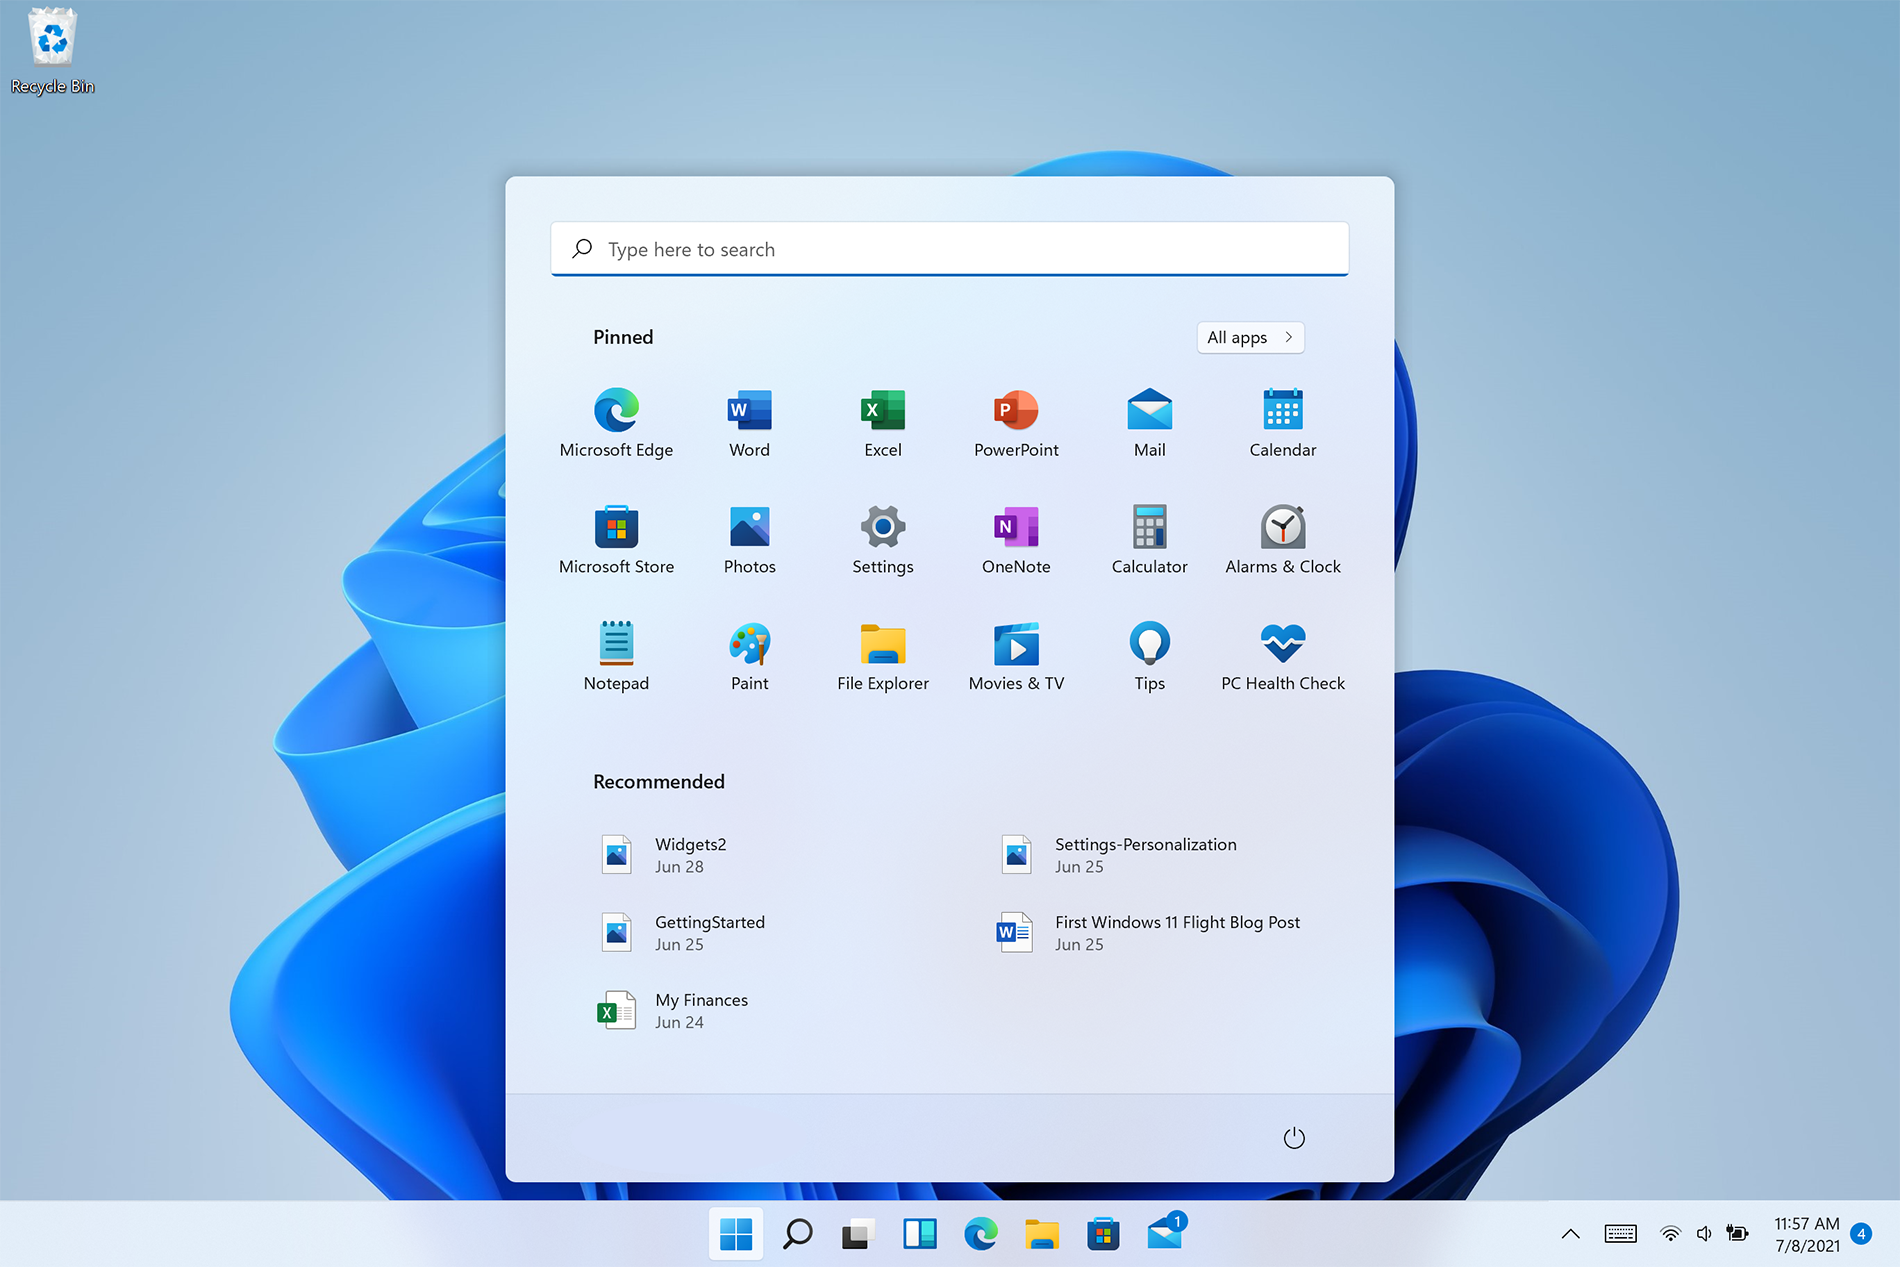
Personalize Windows 11 Start menu
Windows 11 is released and its adoption goes slower than Microsoft would like but nevertheless, it is slowly getting adopted, especially among new computers. Windows 11 has brought us a new modern look of OS but if you would like to personalize it a little more you can. Follow the guide on various things that you can change inside Windows 11.

windows 11 desktop iconsPersonalize list of recently added apps, opened items, folders

The recommended section that shows recently added apps and recently open items can be turned off and hidden now to be shown. In order to do this follow these steps:
  1. Open Windows Settings by pressing WINDOWS + I
  2. Click on personalization in the sidebar
  3. Click on START and go through the options
  4. Turn OFF switch beside recently accessed files
  5. Additionally, you can also change which folders appear on the Start menu.

Remove apps or change app order on the Start Menu

To remove application not to be shown in the Start menu at all follow this simple guide:
  1. Right-click on app
  2. Choose unpin
  3. To place the application on Start click on All Apps, right-click on the app and choose Pin to Start
  4. To drag and rearrange apps, simply click on them and drag them to the new place.

Change the Start Menu location

When Windows 11 was first released Start Menu could only be located in the middle of the screen but thanks to plenty of backlash from users now it is possible to move it on a more traditional left side.
  1. Press WINDOWS + I to open the settings app
  2. Click on Personalization
  3. Look for taskbar behaviors
  4. Inside taskbar behaviors look for Taskbar alignment
  5. Change alignment to left

Change the Start Menu color

In order to change the color of the Start Menu follow the next steps:
  1. Open Settings app
  2. Go to personalization settings
  3. Go to Colors
  4. Switch to custom
  5. Under accent color pick a color you like or make your custom one.
Read More
How to Fix Task Scheduler Error 0x80070057
One of the important functions in the Windows operating system is the Task Scheduler. It can automatically run various tasks at a certain time where you’ll have to add a task that needs to be executed and then choose the time it has to run at. So when that time comes, the Task Scheduler will run the task automatically. However, some users reported getting an Error 0x80070057 where the Task Scheduler fails to start. This kind of error may be due to a disabled service that prevents the service from running. It is also possible that the antivirus program interfered with the task – it could be that the Task Scheduler is somewhat in the block list since the antivirus adds it to the list automatically when it’s installed. On the other hand, it could be that you lack administrator-level privilege which is why the Task Scheduler was not able to carry out the task. To fix this issue, here are some suggestions you can try.

Option 1 – Try to restart the Task Scheduler service

As mentioned, it is possible that the Task Scheduler service could be disabled. You could have disabled it when trying to enhance your computer’s performance and whatnot. Thus, you need to verify if it’s running or not and then restart it.
  • First, you need to tap the Win + R keys on your keyboard to open the Run dialog box.
  • Next, type “services.msc” in the field and click OK or tap Enter to open the Windows Services Manager.
  • You will see a list of Services and from there, look for the Task Scheduler service and double click on it.
  • After that, go to the General tab and click on the Startup Type options and then select “Automatically” from the given list.
  • Click on the “RUN” option and select the “Restart the Service” option.
  • And click on the “After Second Failure” option and then select the “Restart-Service” option again.
  • Now click on the “After Subsequent Failures” tab and select the “Restart the Service” option.
  • Finally, click on the Apply and OK buttons and then run the Task Scheduler and see if the issue is now fixed.

Option 2 – Try to temporarily disable the anti-virus program

As mentioned, the error could be due to the antivirus program or the Windows Defender Firewall installed in your computer. Thus, disabling them or any security software installed on your computer is always a good idea you can try when you’re not able to access the shared drive on your computer. There are times when you encounter problems like the Task Scheduler Error 0x80070057 due to interference of antivirus or security programs. Thus, you have to disable both your antivirus program for the meantime and check if it fixes the error or not.

Option 3 – Run the Task Scheduler with an administrator account

Like pointed out, the Task Scheduler Error 0x80070057 may be due to the lack of admin privileges. Thus, you have to log in to an administrator account and try running the Task Scheduler again. It is also recommended that the administrator account you’re going to use as a password when logging in.

Option 4 – Repair the Task Scheduler by deleting corrupted tasks

Note that a single corrupted file can cause big problems so this option is quite important. And for you to delete a corrupted task or any task from the Task Scheduler, you have to use the Registry Editor if you are not able to use the Task Scheduler interface. To do so, follow these steps:
  • Tap the Win + R keys to open the dialog box for Run.
  • Next, type in Regedit and click on OK or tap Enter to open the Registry Editor.
  • Then navigate to this path: ComputerHKEY_LOCAL_MACHINESOFTWAREMicrosoftWindows NTCurrentVersionScheduleTaskCacheTree
Note: In this path, you can see all the tasks that are currently set in the Task Scheduler. And since it would be hard to tell which one of them is corrupted, you have to delete the latest one in Task Scheduler last. But before you do so, make sure that you take note of the ID of the tasks. And for you to get the ID, you have to select the task you wish to delete and double click on the ID string located on your right-hand side, and then copy it in the Notepad.
  • Right-click on the task name and then delete it.
  • After that, delete the very same GUID which you have copied earlier from these folders:
  • ComputerHKEY_LOCAL_MACHINESOFTWAREMicrosoftWindows NTCurrentVersionScheduleTaskCacheBoot
  • ComputerHKEY_LOCAL_MACHINESOFTWAREMicrosoftWindows NTCurrentVersionScheduleTaskCacheLogon
  • ComputerHKEY_LOCAL_MACHINESOFTWAREMicrosoftWindows NTCurrentVersionScheduleTaskCacheMaintenance
  • ComputerHKEY_LOCAL_MACHINESOFTWAREMicrosoftWindows NTCurrentVersionScheduleTaskCachePlain
  • ComputerHKEY_LOCAL_MACHINESOFTWAREMicrosoftWindows NTCurrentVersionScheduleTaskCacheTasks
Note: You might not see the same GUID from these folders but if you see it, delete it right away.
  • Next, navigate to this location: C:/Windows/System32/Tasks
  • Delete the very same tasks you just deleted from the Registry Editor.
  • Restart your PC and check if the Task Scheduler is back to its normal state or not.
Read More
How to Fix the Blue Screen Locale ID 1033 Error Code

Troubleshoot Locale ID 1033 Error Code

What is the Blue Screen Locale ID 1033 Error?

Blue screen locale id 1033 error as the name suggests, is a type of BSoD error. This error may occur during Windows startup, program load, or while the program is running. The error indicates poor PC maintenance and occurs without any warning. The error message is prompted in the following format:
Problem signature: Problem Event Name: BlueScreen OS Version: 6.0.6002.2.2.0.16.7 Locale ID: 1033
When the error occurs, the computer screen turns blue and the user is unable to view or access the program. It is advisable to fix the error right away, virtually because BSoD is a critical PC error, it can pose serious threats to your system.

Error Causes

The two most common causes of the occurrence of the Blue Screen Locale ID1033 error code are:
  • Registry issues
  • Viral infection

Further Information and Manual Repair

You don’t need to hire a technician or be a computer whiz to resolve Blue Screen Locale ID1033 error code. Here are some methods that you can try to resolve this error on your PC. These methods are easy to perform and result-driven.

Method 1: Perform a PC Scan by Downloading an Anti-Virus

Since this error is indicative of a viral infection, it is suggested you perform a PC scan by installing an antivirus on your system. Make sure you download an antivirus that is powerful and has the ability to scan all kinds of viruses.

Method 2: Clean and Repair the Registry

Another alternative method is to clean and repair the registry. The Registry is a component of the PC that stores all information and activities performed on the PC. This includes both important and unnecessary files like junk files, cookies, internet history, temporary files, invalid entries, bad registry keys, and more. These files not only accumulate in the registry but also damage and corrupt it thereby generating error codes like the Blue Screen Locale ID1033 error code. Congratulations, you have just fixed Blue Screen Locale ID 1033 Error Code in Windows 10 all by yourself. If you would like to read more helpful articles and tips about various software and hardware visit errortools.com daily. Now that’s how you fix Blue Screen Locale ID 1033 Error Code in Windows 10 on a computer. On the other hand, if your computer is going through some system-related issues that have to get fixed, there is a one-click solution known as Restoro you could check out to resolve them. This program is a useful tool that could repair corrupted registries and optimize your PC’s overall performance. Aside from that, it also cleans out your computer for any junk or corrupted files that help you eliminate any unwanted files from your system. This is basically a solution that’s within your grasp with just a click. It’s easy to use as it is user-friendly. For a complete set of instructions in downloading and using it, refer to the steps below Perform a full system scan using Restoro. To do so, follow the instructions below.
      1. Download and install Restoro from the official site.
      2. Once the installation process is completed, run Restoro to perform a full system scan. restoro application screen
      3. After the scan is completed click the “Start Repair” button. restoro application screen
Read More
Fix Partner did not connect to router Error
One of the great remote assistance software that helps you remotely access and control computers is TeamViewer. However, despite how efficient it is, there are still times when it throws up some errors and one of them is when TeamViewer is not able to connect and throws an error that says, “No connection to partner, Partner did not connect to router, Error Code WaitforConnectFailed”. This kind of error in TeamViewer mostly occurs when the Partner computer is not connected to a network. On the other hand, it could also occur when they are connected to a network so there are various causes for this issue. It could also be that the installation of the program itself was at fault or there is an incompatibility between the TeamViewer versions installed on both the computers and so on. Although there are several causes for this error, the potential fixes are still the same. You can try to restart the network or allow Full Access Control to TeamViewer or flush the DNS cache. For more information, refer to the following options but before you proceed, make sure that both your Windows 10 computer and TeamViewer program are updated to their latest stable versions.

Option 1 – Reboot your router

The first thing you can try to do to fix the error is to simply restart your router. All you need to do is reboot the router from its Admin panel or you can also turn it off manually and turn it back on after a couple of seconds so that it can completely reboot. Once you’re done, try accessing your server again and see if the error is now fixed.

Option 2 – Allow Full Access Control to TeamViewer

  • First, open TeamViewer, and then from the Menu bar, click on Extras.
  • After that, click on Options and select Advanced from the left side navigation panel.
  • Next, click on the “Show advanced options” button located on the right-hand side.
  • Then select Full Access from the drop-down menu of the Access Control option under the “Advanced settings for connection to this computer section”.
  • Now click OK and check if the error is now fixed or not.

Option 3 – Try to flush the DNS configuration

You could also try to flush the DNS configuration in your computer to fix the error. How? Refer to these steps:
  • Tap the Win + X key combination and click on the Command Prompt (Admin) option or you could also search “cmd” in the Cortana search box and right-click on Command Prompt from the search results and select the “Run as administrator” option.
  • After opening Command Prompt with admin privileges, enter each one of the commands given below sequentially in order to flush the DNS cache.
    • ipconfig/release
    • ipconfig/renew
    • ipconfig/flushdns
  • Now type the exit command to close Command Prompt and then restart your computer and see if the problem is fixed.
On the other hand, you could also try to reset Winsock as well as the TCP/IP.

Option 4 – Run the Network Adapter troubleshooter

To run the Network Troubleshooter, refer to these steps:
  • Open the Search bar on your computer and type in “troubleshoot” to open the Troubleshoot settings.
  • Next, scroll down and select the “Network Adapter” option from the right pane.
  • Then click on the Run Troubleshooter” button.
  • After that, your computer will check for any possible errors and will pinpoint the root cause of the problem if possible.
  • Restart your computer.

Option 5 – Try to perform Network Reset

You might perform a Network Reset to resolve the problem if none of the four given options worked. This will reset the entire network configuration including your IP address. To perform Network Reset, follow these steps:
  • Tap the Win + I keys to open Settings.
  • From there, go to the Network and Internet section.
  • Next, scroll down and look for “Network Reset” under the status pane.
  • After that, click on Network Reset and then on Reset now to start resetting the network configuration. Once done, check if it is able to fix the error or not.
Read More
Error 0x00000024 – A Quick Fix
[vc_row][vc_column][vc_column_text]

Repair Error 0x00000024

What is Error 0x00000024?

Error 0x00000024 can be seen when you start up and a screen comes up asking which mode you would startup in. Regardless of the mode you select, it leads up to the Windows screen with the loading bar and your computer crashes from there onwards. When you press F8 in order to select the “Disable Automatic Restart On System Failure” option, that is when this error shows up:
ST0P 0X00000024 (x00190203, 0x82700550, 0xc000012, 0x00000000)
Due to this error, both Safe and Normal modes become inaccessible.

Solution

Restoro box imageError Causes

If you’re having this error then it is the indication of an issue with the file NTFS.sys. Further, there might also be problems with the IRP (Interrupt Request Packet) or the disk may have been corrupted. There are multiple other causes of this error, including heavy fragmentation of your hard drive or problems caused by your antivirus software.

Further Information and Manual Repair

First and foremost, you are suggested to run Chkdsk. In order to do this, you have to enter your BIOS and select CDROM as your primary booting device. Now follow the below-mentioned steps:
  1. Insert your Windows XP installation CD into the CDROM and reboot your PC.
  2. Press any key to proceed with the boot from CD when you are prompted to do so.
  3. When the Windows XP setup menu shows up, hit the “R” key to proceed with repairing Windows.
  4. If there is only one Windows installed on your computer then hit the “1” key and proceed by pressing enter. If there are more than two Windows then hit the number which is associated (according to the screen you are viewing) to the Windows you want to repair. Usually, this is C:/Windows and associated with “1” but if that is not the case then you should simply press the number that corresponds with the windows you want to repair and proceed.
  5. Now, you will see a screen that prompts you to enter your administrator password. Most people don’t have an admin password and in that case, you should simply hit enter and you’d be good to go. If you do have an administrator password, however, then you should type it in, hit enter, and proceed.
  6. When the DOS prompt shows up, type in chkdsk/f and hit return.
If you see no improvement in solving Error 0x00000024, and the problem keeps persisting, then you should start over. But this time you should type sfc/scannow instead of chkdsk/f and hit return. There are a few other complex methods that you can try as well but this is the most recommended procedure as it is easier, quicker, and most likely to fix the error.[/vc_column_text][/vc_column][/vc_row]
Read More
How to Deal With Error Code 42

Repair and Solve Error Code 42

Code 42 - What is it?

Code 42 Error is referred to as a Device Manager Error code. Before we explain what this code indicates, it is important to understand what ‘Device Manager’ is and its functions.

Device Manager is basically a Windows tool that helps manage devices attached to the system such as the Printer, Scanner and the USB Device. The Device Manager Error code 42 occurs when a duplicate device is detected.

Error Code 42 is displayed in the following format:

“Windows cannot load the device driver for this hardware because there is a duplicate device already running in the system. Code 42”

Solution

driverfix boxError Causes

Narrowing down to one particular cause for error code 42 is not virtually possible because it may be triggered due to many underlying reasons. These include:

  • When a bus driver incorrectly generates and creates 2 identically named devices
  • When a device with a serial number is found in a new location without being removed from its original location
  • Mis-configured drivers

No matter what the reason for this error code,, to avoid inconvenience and to ensure proper hardware performance, it is advisable to fix it right away without any delay.

Further Information and Manual Repair

If you’re not technically sound, the code 42 message display can panic you. But don’t worry, the error message sounds complex but it is quite easy to fix.

To resolve code 42 in a few minutes, simply try the methods given below. These methods are easy-to-perform, effective and more importantly require no technical expertise.

Method 1 - Restart Your System

Code 42 can pop up due to some temporary glitch in the Device Manager. By simply restarting your PC, you can resolve this problem.

Therefore, first things first, restart your system. However, in case it doesn’t work out, try other methods.

Method 2 - Launch the Troubleshooting Wizard

Launch the troubleshooting wizard to find the underlying problem and resolve it accordingly. To do this, proceed with the following steps:

  • Go to the start menu
  • Type Device Manager in the search bar and press enter
  • Now click on the ‘General Tab’
  • Then click on ‘Trouble Shoot’ to launch the Troubleshooting Wizard
  • After that follow the instructions in this Wizard to diagnose the problem and resolve it.

Method 3 - Restore Your PC to its Previous State

Another method to fix code 42 is to use the System Restore tool to restore your PC to its previous working state before the error popped up. To do this,

  • Go to the start menu
  • Type System Restore in the search bar and press enter
  • Now click on ‘Restore my computer to an earlier time’ and then click ‘Next’
  • After that select the restore point on the restore point list and confirm settings
  • Restart your PC to activate changes
  • Before restoring your PC to its previous state, create a backup. By creating data backup you can avoid data loss issues, which are likely to occur during this process.

Creating backup manually can be time-consuming and a painstaking task. The best way to create backup and restore your PC to its normal state is to download DriverFIX.

It is a user-friendly device driver management software that helps create data backup automatically and simultaneously restores your PC back to its normal working state in a few seconds.

This software is compatible with all Windows versions.

Click here to download DriverFIX on your system to resolve error code 42.
Read More
Bluetooth flaw, Android and Windows in danger
bluetoothResearchers have discovered 16 vulnerabilities in Bluetooth connections that could be exploited and make from minor to some serious damage to your device. The flaw can be used on chips manufactured by Intel, Qualcomm, and Texas Instruments while connecting to external devices like speakers, headphones, keyboards, mice, etc.

Who is affected?

Mentioned chips are used by many in a vast range of devices including big players with their products like Microsoft Surface laptops, Dell desktops, Samsung Phones, Google Pixel, and OnePlus handsets. The Bluetooth bug affects a wide range of devices, including smartphones, laptops as well as smart home gadgets. In total, more than one billion devices that rely on Bluetooth are believed to be impacted.

What is the damage?

The amount of damage possible with this flaw depends on the type of device with the chipset. Some devices can only be crashed after a specially crafted packet is sent to the flawed chip. If that's the case with your gadget, it can be easily resolved with a simple restart. With other devices, hackers can take advantage of the Bluetooth Classic flaw to remotely run malicious code. That could allow malware to be installed remotely. Researchers say vendors were informed about these issues months ago before the findings were published. The good news is this should have given plenty of time for the relevant patches to be pushed out that remedy the flaws. However, you'll need to make sure that you're running the latest version of the operating system to be protected by the patch crafted by the manufacturers.

Android Bluetooth threat

The researchers emphasize the lack of basic tests in Bluetooth certification to validate the security of Bluetooth Low Energy (BLE) devices. The BrakTooth family of vulnerabilities revisits and reasserts this issue in the case of the older, but yet heavily used Bluetooth classic (BR/EDR) protocol implementations. We would also advise users to disable Bluetooth on devices that do not need it. This way you can prevent attackers from sending you malformed LMP packets. Since BrakTooth is based on the Bluetooth Classic protocol, an adversary would have to be in the radio range of the target to execute the attacks. So, in a safe environment Bluetooth can be enabled.
Read More
There is insufficient disk space to ...
If you are trying to copy a folder or file in your Windows 10 computer but encountered an error that says, “There is insufficient disk space to complete operation”, then you’ve come to the right place as this post will walk you through how you can fix the error. This kind of problem could be due to lack of disk space, corrupted disk, and many more. In such cases, this error usually pops up when you move or copy a file or folder to a particular location. There are several potential fixes you can check out to fix this error. You can try to run the Storage Sense or Disk Cleanup or try copying or moving the file in a Clean Boot State. You could also try formatting the given partition to NTFS. For more information, refer to each one of the options provided below.

Option 1 – Try to delete the temporary files

The error could be caused by some temporary or junk files in your computer and so you need to clear them up to fix the problem. You can achieve that using the Storage Sense feature.
  • Open Setting > System > Storage from the WinX Menu.
  • From there, you will see a list of all the local and connected storage devices along with the details on the free space. Make sure that Storage Sense is on.
  • Next, find a link that says “Free Up Space” and click it to open.
  • After that, a screen which is the built-in program in Windows 10 will appear and will scan your computer for the following junk files so you can free up disk space:
    • Windows Upgrade Log Files
    • The system created Windows Error Reporting Files
    • Thumbnails
    • Temporary Internet Files
    • Previous Windows Installation Files
    • Delivery Optimisation Files
    • DirectX Shader Cache
  • Choose the files you want to get rid of and then click on the remove files option. Note that you’ll have an idea of the total size as you select any of the junk files listed above.
  • Now go to the “Free Up Space Now” section and click the Clean now button. This will get rid of all the temporary or junk files in your computer and should hopefully fix the “There is insufficient disk space to complete operation” error.

Option 2 – Restart your computer in a Clean Boot State

If the first options didn’t work and you still see the “There is insufficient disk space to complete operation” error when you copy folder or files, you can try putting your computer in a Clean Boot State and then again.
  • Log onto your PC as an administrator.
  • Type in MSConfig in the Start Search to open the System Configuration utility.
  • From there, go to the General tab and click “Selective startup”.
  • Clear the “Load Startup items” check box and make sure that the “Load System Services” and “Use Original boot configuration” options are checked.
  • Next, click the Services tab and select the “Hide All Microsoft Services” check box.
  • Click Disable all.
  • Click on Apply/OK and restart your PC. (This will put your PC into a Clean Boot State. And configure Windows to use the usual startup, just simply undo the changes.)
  • Now try to connect copy the folder or file once more and check if the error is now gone.

Option 3 – Try formatting the given partition to NTFS

Even though this option may take a lot of your time, it is proven to fix the “There is insufficient disk space to complete operation” error as reported by many users who also went through the same dilemma. So if the removable disk is showing the same error message no matter which computer you insert it, you might have to format the drive with the help of Command Prompt. But before you do that, you must know that all the contents of your drive will be permanently deleted after you format it.
  • Tap Win + R to launch Run.
  • Type in cmd and then tap Enter or click OK to open the Command Prompt.
  • And in the elevated window of Command Prompt, type in the following command:
format F: /fs:ntfs
In the command given above, “F” is the drive letter and “NTFS” is the file system you want. Just remember to replace “F” with the drive letter you want to format as well as the file system you prefer. Brace yourself as this process might take quite a while even if you only have a 4 GB USB drive – so you must not close the window under any circumstances as the drive might get corrupted and wait for the process to finish.
Read More
Excluding a folder from Windows Defender scan
The Windows Defender program can both scan and monitor almost the entire folder on a Windows 10 computer. So if you have a folder that may have files that could trigger an alarm to Windows Security, then it would be better if you add an exclusion to Windows Security. Note that it is okay to do this as long as you’re certain that the contents of the folder you want to exclude are safe and that Windows Defender is only throwing out warnings for nothing. This way, Windows Defender won’t scan those folders in the future. And besides, there are also some Windows folders and files that you may exclude from the Antivirus scans, especially if you want to save your scan time. This kind of feature also comes in handy when you trust a file type or folder or any process that you believe is safe but the Windows Security considers as malicious. To exclude a folder or a file or process or a file type from the Windows Security scan, here are some steps you can follow. Make sure to do them carefully. Step 1: Search for “Windows Security” in the Search box and then click on it from the search results to open it. Step 2: Next, click on Virus & threat protection > Manage settings > Add or remove exclusions. Step 3: After that, on the next screen, click on Add an exclusion > Folder. It will show you a list that includes File, Folder, File Type, and Process. Step 4: Now click on “+Add and exclusion” on the next window and then select a folder you want to exclude and click OK to add it in the Exclusions list. Step 5: Click on the down arrow button to remove it and then click on the Remove button. Note: If you want to only ignore a few file types, it’s better if you configure your antivirus program to ignore these files with a specific extension. This way, it will ignore all of them no matter what their location is. Also keep in mind that when you select a folder, all the subfolders in it will also be excluded from the scan. Thus, you need to understand what you’re about to do. Once you’re done excluding the folder, it is recommended that you protect the folder using the Controlled Folder Access since this folder is not monitored for threat. The Controlled Folder Access will ensure that an external program does not alter it. This way, you can be sure that even though this folder is not included in the scan, it is still secure.
Read More
Animated background on desktop on Windows 10
Windows Vista had in it animated wallpapers on desktop but sadly how they were heavy on system resources Microsoft abandoned the idea. Moving forward a couple of years later we have Windows 10 but still, we do not have live animated wallpapers. Since I am the kind of person who does not want to wait on Microsoft and now it is time to bring animated wallpapers back I am going to make one all by myself and you are welcome to join the ride and do the same for you as well. Enough talk, let's dive into how we can make animated wallpaper for our Windows 10.

Choosing the application

First, we will need some form of application which can we look at our animated wallpapers and since they are animations it means video, so we will need a video player and what better choice than a VLC player, an open-source light weighs all-format player. Get a VLC player from here and install it.

Finding video source

The next thing is to of course have some looping video that we will use as background. There are many sites and ways to get seamless loop videos, I use this youtube channel for my backgrounds. Altho you can use any video footage you want it is recommended that it is not too long, that it is hi-resolution so we do not have pixels on-screen, and if you can, get it as seamless since we do not want to see stutter when the video is lopped from the beginning. So hopefully you have desired video and VLC player installed.

Putting it all together

Copy the following code and paste it into your search bar in Windows to open the Startup folder, or navigate to the Startup folder yourself via file explorer if you know where it is. %appdata%\Microsoft\Windows\Start Menu\Programs\Startup Now, next thing is to copy and past the VLC shortcut into this folder so it is started when Windows is first time booted. Right-click on the shortcut and in the edit field paste this: "C:\Program Files\VideoLAN\VLC\vlc.exe" --video-wallpaper --qt-start-minimized --no-qt-fs-controller --repeat --no-video-title-show --qt-notification=0 "C:\videopath\filename.mp4" where "C:\Program Files\VideoLAN\VLC\vlc.exe" is the path where VLC is installed, point this to where you have installed it "C:\videopath\filename.mp4" is the path where you have your video that you wish to use as animated wallpaper. Please note also that in my case there is mp4 as an extension but it does not need to be mp4, just use any extension VLC can open and play.

Conclusion

And that's it, you have successfully made an animated background or live wallpaper on your Windows 10 computer. You can change your wallpaper anytime by editing shortcut and giving it a new path to a new video or simply overwrite the existing one with a new baring same name.
Read More
1 2 3 162
Logo
Copyright © 2022, ErrorTools. All Rights Reserved
Trademarks: Microsoft Windows logos are registered trademarks of Microsoft. Disclaimer: ErrorTools.com is not affiliated with Microsoft, nor claim direct affiliation.
The information on this page is provided for information purposes only.
DMCA.com Protection Status