Choosing default browser in Windows 11

Default applications in previous Windows versions were a pretty straightforward process. The user went to the settings application and picked for each category which application he would like to choose from the list of installed ones.

In Windows 11 things are little changed. In this article, we will show you how to choose the default internet browser inside Windows 11, and sadly it is a more tedious task than in previous versions.

windows 11 default browser
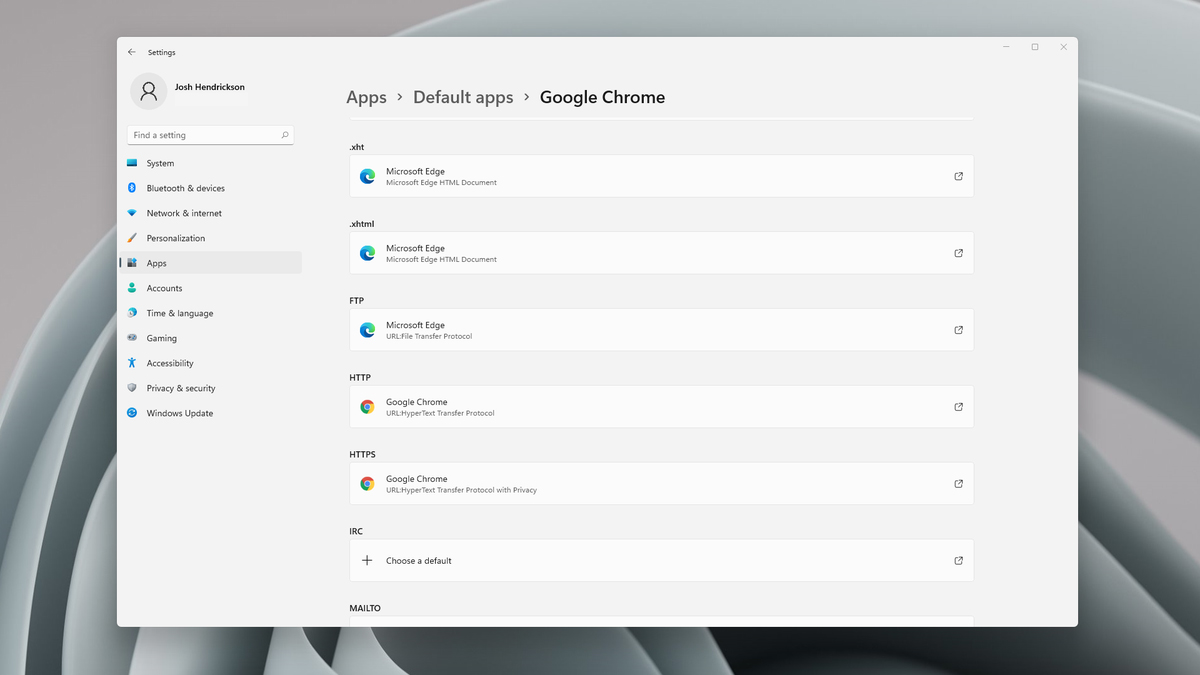
Choosing default browser in settings

As in previous versions of the Windows operating system you will need to use the settings application in order to change your default Internet browser. Previously, in Windows 10, a variety of general categories like email, web browser, and photo viewer were all listed under the Default Apps section of the Settings panel. It was easy to click on one of those categories and click on the option you like best from the small pop-up suggestion window.

In the Windows 11 Insider Build, you’ll see a gauche list of an individual file or link types that you’ll need to specify your preferred browser for. The types include: HTM, HTML, PDF, SHTML, SVG, WEBP, SHT, FTP, HTTP, and HTTPS. There are additional optional types you can specify your preferred browser for as well.

The issue here is in order to use a single browser which most users do you will have to go through each file type and set your preferred one. I am really not sure why this was introduced or why it has to be this way, all I can do is hope that in the final release of Windows 11 this feature will be rolled back as it used to be and that you could set your default browser in just one simple click.

If you like to learn and find out more about various Windows errors, and how to repair them go to our vast archive or use search to find articles that will explain and help you in solving your issue.
However, if you prefer to do things fast and with automatization then we are proposing to use an automated solution for your issues. The application that we are recommending is Advanced System Repair Pro
Advanced System Repair utilizes multiple tools all in one to give you a quick, simple, reliable, and very thorough diagnosis of your PC. It brings you all the tools you need in one program to clean, fix, protect, optimize and boost your PC!
1-Click Maintenance
All the tools to make it simple and easy! It's like having a professional technician at the click of a mouse.

Junk Cleaner
Keeping your computer free from unnecessary clutter also helps make your computer last longer. Like any other machine, if you keep it clean and take care of it, it will serve you better for longer!

Optimize background apps
Optimize applications background activity with the built-in Application Optimizer feature.

Disk Defrag
With a simple 1-click, Advanced System Repair speeds up your PC by assembling fragmented files on your machine and organizing them more efficiently.

Malware Removal
Finds and removes all types of harmful malware including trojans, worms, bots, adware, spyware, PUPs, and more!

Privacy Cleaner
The all-in-one privacy suite to Clean Your Tracks & Protect Your Privacy! Make your computer safe, secure, and more efficient!

System Tweak/Optimizer
ASR will analyze your complete system and settings to adjust your PC to function at its maximum performance.

Registry Cleaner
Over time, as you install and uninstall applications, the registry can become cluttered with old entries and broken settings which can result in program crashes, and annoying messages and slow the computer down.
Visit our Advanced System Repair Pro Download page to inform yourself about all the benefits of this software and get a free trial copy of it.
advanced system repair pro

Advanced System Repair Pro

One-click automated PC repair solution
ASR logo
With Advanced System Repair Pro you can easily
Replace damaged files
Restore performance
Free disk space
Remove Malware
Protects WEB browser
Remove Viruses
Stop PC freezing
DOWNLOAD
Privacy Policy | Terms of Use | Uinstall
Advanced System Repair Pro is compatible with all versions of Microsoft Windows including Windows 11

Share this article:

You might also like

Fix Windows Update Error 0x800F0922
A lot of users connect to the internet are using VPN on their Windows 10 computers which means that their regions could be different from the actual region of their Windows 10 computers. Thus, if you are facing some issues in updating your computer in this kind of environment, specifically the Windows Update error 0x800F0922, you need to follow the tips given in this guide to help you resolve the issue. When you encounter this kind of Windows Update error, you might see either of the following error messages on your screen:
“Windows could not search for updates, Code 0x800F0922 Windows Update encountered an unknown error” Or: “Windows failed to install the update with error 0x800F0922”
This issue might be caused by two possible reasons such as:
  1. VPN issues
  2. Not enough space on the System Reserved partition
To resolve the problem, here are some tips that might help:

Option 1 – Try disabling the VPN

As mentioned, if you are using VPN, this could be the reason why you’re getting the Windows Update error 0x800F0922 so the most obvious thing to do is for you to turn off the VPN and try to run the Windows Update once more. And if you use a VPN software that works using their software, you can just completely exit or log-off from its account. On the other hand, if you are using a built-in Windows 10 VPN, you can simply turn it off or delete all the settings you have created there. Although it’s understandable that you might have to use a VPN connection to connect to the work network, you really have to disable it at least until the Windows Update is no longer stuck in the error 0x800F0922. It would be best if you do this when you are not working.

Option 2 – Try to free up space in the System Reserved partition

The System Reserved partition is a part of the hard disk created when Windows is first installed on it. It is where the Boot Configuration Database, Boot Manager Code, Windows Recovery Environment, and the reserves space for the startup files are stored. And as mentioned early on, the error might be due to some insufficient space in the System Reserved partition so the next thing you can do is to increase the space in this partition. Note that it is a complex process so you need to make sure that you have made backups to all your data on the computer. So if ever something goes out of hand, at least you have copies of your important files in case you aren’t able to boot into the system at all.
Read More
Facebook messengers alternatives
People are becoming more and more concerned with their privacy and Facebook's flagship messaging application is caught between it all. While still widely popular it has becoming to lose its ground due to many unanswered questions about privacy encryption. Lucky for all of us there are alternatives for more secure messaging.

SIGNAL

Arguably the most secure of all well-regarded messaging apps, Signal is the favorite of the European Commission, as well as newsrooms around the world. While Signal doesn’t disclose how many daily or monthly users the app has, Google’s Play Store says it has been installed more than 50 million times. While using Signal, each voice or video call connected through the app includes full end-to-end encryption. Signal takes an extra step by hiding message metadata so that the location of the original message is missing. While it asks for your mobile number, that number isn’t used with your profile. Instead, it acts as a numeric username. Once registered, you will find 1-1 chat, audio, and video calls, disappearing or “secret” chats, and a privacy lock so nobody can access the app even if they have your phone. Best of all, it’s completely free to use.

TELEGRAM

One of the biggest competitors to Facebook Messenger (and WhatsApp), Telegram is a very strong alternative. With more than 400 million users, it offers an interface that should feel right at home for anyone coming from Messenger. Telegram offers some huge benefits over Messenger, including features like groups that can hold up to 200,000 members for a chat. There is no limit on your media or chat size, and you can share all types of files between users and in groups. From a privacy standpoint, Telegram has robust security, but it is worth noting that only “secret” messages are end-to-end encrypted and can self-destruct. Non-secret messages can be stored on Telegram’s servers so you can pick them up between your devices quickly. That’s a consideration worth knowing prior to making Telegram your default Messenger replacement. Telegram is free across all platforms.

THREEMA

Rising in popularity, Threema is another privacy-focused alternative that has quickly become a competitor to Facebook Messenger. This paid service ($2.99 on both App Store and Play Store) is a pay-once, use forever option. Once you pay the small fee, you gain all of Threema’s touted privacy options, like open-source end-to-end encryption for both messages and calls. Like Signal, Threema won’t require you to link any phone numbers or emails to your account. All chats are handled anonymously, and the service generates a random user ID when you first open and register for the app. No data is collected from any of your chats and no ads are shown. The Swiss-made app does have its own servers hosted in Switzerland, which do not store any chat messages. Another privacy benefit of Threema is the notion that all of your contact lists, groups, and user profiles are hosted on your device, not on the Swiss servers. Because of that, Threema can once again state that none of your personal info is stored anywhere they have access.
Read More
How to Fix ‘Your Computer is Low on Memory’ Error

‘Your Computer is Low on Memory’ Error Repair

Your Computer is Low on Memory, What is it?

Low on Memory is a Windows PC memory leak error. You may come across it out of the blue however, there are various underlying reasons for this PC error. It is like a warning sign that indicates memory/RAM issues on your system. The ‘Your Computer is Low on Memory’ error means that your PC does not have enough memory space for all the activities you are trying to perform. Due to this error, your Windows and programs can also stop working. If this error is not fixed timely it can lead to serious PC threats like valuable data loss and hard disk corruption. Along with this memory error, you may also come to experience other types of signs including PC poor performance, speed issues, out-of-memory notifications, and display problems.

Solution

Restoro box imageError Causes

The ultimate and the underlying cause of low memory error is data overload in the RAM which triggers registry issues. To understand this better, here is a comprehensive explanation. The computer has 2 types of memory, RAM (Random Access Memory) and virtual memory. All programs and activities that you do on your computer are saved by the registry in the RAM. This includes obsolete and unnecessary files too like junk files, cookies, internet history, temporary files, invalid registry entries, and bad registry keys. Due to poor PC maintenance practices, these files accumulate in the RAM, thereby overloading it. Also, all programs on the PC use RAM to run. So, when there isn’t enough RAM for the program you are trying to run on your system, Windows temporarily moves information that would normally be stored in RAM to a file called a paging file which is also referred to as the virtual memory. By moving the information to and from the paging file- the virtual memory, Windows temporarily frees up enough RAM for programs to run smoothly. However, when you start running more programs than the RAM installed on your PC can support, low memory errors begin to occur. It triggers that the computer is out of RAM and is also low on virtual memory.

Further Information and Manual Repair

PC users should know that this is a critical error therefore it is advisable to fix it immediately before the damage sets in. Here are some of the best solutions that you can try to resolve Your computer is low on memory and similar memory leak errors on your system.

1. Run Few Programs at a Time

This is a temporary solution to prevent low memory problems.  By running a few programs at one time you can easily keep this memory error away from popping on your computer screen. However, this can cause you inconvenience if you run several programs together to perform different tasks simultaneously.

2. Increase the Virtual Memory Size

Though Windows automatically attempts to augment the virtual memory size the first time you experience ‘low on memory issues; however this again is a temporary way out of this problem. But if you are looking for a solution that can resolve these memory issues for a long time, then you can try manually increasing your PC’s memory size. Increase it up to a maximum size this is by the way determined by the amount of RAM installed on your system. Nonetheless, the drawback of this solution is that increasing the paging file size can reduce your PC performance. It can make your programs run more slowly.

3. Install More RAM

Another solution to resolve low on memory issues is to install more RAM. To do this first check your system properties to see the size of the RAM already installed on your PC. To do this press the Windows key+ Pause/Break key this will open system properties. If the RAM size is lower than 2 GB then you need to install more RAM. But if it is more then you should look for two things one check the piece of software that is causing the problem and secondly you need to clean the registry and remove the unnecessary files from your RAM and hard disk. This would free up space dramatically and resolve the low memory issue right away.

4. Download and Run Restoro, Registry Cleaner on your System

To clean the registry and wipe out unnecessary and obsolete files overloading your RAM and disk space, you should download Restoro. Restoro is a next-generation and highly functional error cleaner. By running this error cleaner on your system, you can easily scan for junk stored in your RAM and hard disk and remove it in seconds, clearing up ample disk space. This will resolve all your PC memory-related issues. Furthermore, it repairs the damaged files and restores the registry too. It spares you from the hassle of installing more RAM or virtual memory. Since this PC repair tool also functions as a system optimizer, it simultaneously boosts the speed of your system thus resolving speed issues too, all in one go. Restoro is a bug-free and efficient tool. It has a user-friendly interface making it easy for all levels of users to operate and run it on their systems. Furthermore, it is compatible with all Windows versions including Windows 7, 8, XP,  Vista & 10. Click here to download Restoro to resolve Low on Memory issues on your PC in seconds!
Read More
Microsoft vs Google & Facebook
microsoft hqMicrosoft wants to escalate the situation from Australia to the EU, what a surprise. Hello all and welcome to another news article, this time we are focusing on Microsoft pushing the EU to accept law proposition from Australia. For all of you who are not familiar with the given situation let me quickly explain. The feud began when the Australian government proposed a new law that targeted Facebook and Google specifically. The government said that it believed that both of the tech giants were using content from news outlets without paying. Have you ever seen the little news snippets that Google or Facebook sometimes show its users to keep them up to date? These are lifted directly from news websites, and the Australian government claimed that this practice meant that people didn't bother visiting the news website. This then staved news websites of revenue. As such, the government put forward a new law that would mean Google and Facebook would have to pay the source website for every time they displayed a news snippet. Facebook responded by removing its Australian news coverage in light of the law. Google, however, put up a fight. It argued that its snippets encouraged people to click on it to read more, thus driving more traffic to the news website. It also said that such a law would be too expensive to maintain in the long run. As such, Google threatened to remove itself from Australia if the law passed. This was likely a scare tactic, as 95 percent of Australian web users use Google; however, it actually opened the door for its rival, Microsoft. Microsoft saw how it could push its own search engine BING to replace google. It of course went and reached the Australian government to assure them that BING is more than capable to fulfill its needs and fully abide by the proposed law. Now Microsoft knows that if this law passes it could see a similar situation happening in Europe and it is pushing it. US News reported on how Microsoft plans to encourage EU countries to adopt this new law too. The company has teamed up with the European Publishers Council and News Media Europe to make the following statement: Publishers might not have the economic strength to negotiate fair and balanced agreements with these gatekeeper tech companies, who might otherwise threaten to walk away from negotiations or exit markets entirely
Read More
How to Fix Error 126

Troubleshoot Error 126

Error 126 - What is it?

Error 126 is a Windows PC error that mostly occurs either during program installation or removal. It is commonly experienced by Vista, XP and Windows 7 users. When the error 126 is generated, it usually terminates the program installation process, immediately. It is advisable to take corrective error repair measures immediately to ensure that you are easily able to install your desired program and you don’t encounter the error again.

Solution

Restoro box imageError Causes

There are multiple reasons for the occurrence of the error code 126 including. The reasons are listed below:
  • Dll file corruption
  • Missing or damaged dll files
  • Corrupt and misconfigured system files
  • Improper program installation
  • Viral infection
  • Corrupt registry
  • Improper hardware

Further Information and Manual Repair

To resolve the error 126 on your PC, you don’t always have to hire a technician or be a computer programmer yourself. Though this error is critical the good news is that it is very easy to resolve. You can fix the error even if you are not technically sound. Try the solutions that we have listed below to help you resolve error 126 immediately:

Solution 1: Disable Firewall Protection

Sometimes Firewall protection may stop you from installing new programs on your PC successfully and this may display the error 126 on your PC. In such a scenario, disable Firewall protection and then try installing the desired program again. See if it works.

Solution 2: Restore Points

Sometimes dll files can go missing due to program removals and you may come across the error 126. To resolve it, restore points. This will help you restore your PC back to the way it was functioning before you removed a program and will also help you recover the lost and missing dll files.
  • This can be done, by clicking the start menu.
  • Now go to all programs, then accessories, and then system tools.
  • Here you will see the ‘System Restore’ option. Simply click on it.
  • This will help you open a new window. Here select the option ‘Restore My Computer to an Earlier Time’ point.
  • As you select it, it will show you a list of restore points.
  • Choose the latest restore point you see in the list and click ‘Next’ to continue. Now confirm to finish restoration.
  • Restart your PC to activate the changes.

Solution 3: Scan for Viruses

The underlying cause for the error could also be related to viruses on your PC. To remove the viruses, you will have to download a powerful antivirus and scan your entire PC. Please note, anti-viruses are notorious for slowing down system performance, so you might have to compromise on the speed of your PC.

Solution 4: Run a Hardware Diagnostic

To find out which hardware is causing the error message to pop up, you will have to run a hardware diagnostic. For this, simply go to the start menu, type Memory Diagnostic in the search bar. Now access this tool and click on Diagnose your Memory problems. As you click on it, it will ask you to perform the check by either restarting the PC immediately or on the next restart. Select the immediate one to get going. The system will carry a scan on the memory and show you the list of problematic errors detected during the scan. To resolve this error then all you have to do is replace the piece of faulty hardware. Nonetheless, if no faulty hardware is detected, this means the error is related to the registry.

Solution 5: Clean and Restore the Registry

The error 126 is also sometimes generated due to poor PC maintenance which leads to registry issues. The registry basically saves and stores all the data and activities performed on the PC. This also includes junk files, invalid registry entries, bad keys, temporary files, internet history, and cookies. This accumulates a lot of disk space. If not removed, they damage the registry and corrupt other important files like system and dll files, thereby generating PC-related error codes like error 126. The best way to resolve this error on your PC in seconds is to download Restoro on your PC. This is an advanced and multi-functional PC repair tool embedded with multiple powerful utilities including an intuitive registry cleaner, an antivirus, and a system optimizer. The registry cleaning feature detects all registry issues and errors. It wipes out all the unnecessary and obsolete files cluttering the system, fixes the damaged dll files, and restores the registry back to normal. Simultaneously, the antivirus utility scans for all privacy errors and malicious software infecting your system. This includes malware, adware, spyware, and Trojans. The system optimizer feature ensures your PC performance does not slow down. It boosts the speed of your PC to its optimum level. This PC fixer is safe, user-friendly, and efficient. It can be downloaded on any Windows version. Click here to download Restoro on your system and resolve error 126 right away!
Read More
Fix Media Player – Server Execution Failed
You might be trying to play music files using the Windows Media Player, but were unable to do so since you encountered an error saying, “Windows Media Player Error – Server Execution Failed” error. If you encountered this error, worry not for this post will guide you on how to fix it using some potential fixes. In the error message, the “Server execution failed” indicates that the “wmplayer.exe” is still running or shutting down at that point and it is possible that it is stuck which is not able to close properly. To fix this error, there are several potential fixes you can try. The first one is to run the Video Playback troubleshooter. While you could also try to disable the WMP Network Sharing Service or register both the jscript.dll and vbscript.dll files. For more information, refer to the options provided below.

Option 1 – Try to run the Video Playback troubleshooter

The first thing you can do to fix the problem, you can try to run the Video Playback troubleshooter instead. To run it, simply go to Settings > Update & security > Troubleshoot. From there, scroll down until you see the Video Playback option and then click on the “Run the troubleshooter” button to get started. This troubleshooter will detect and automatically fix any problems related to video playback so it should help fix the error.

Option 2 – Try to disable the WMP Network Sharing Service

If the Video Playback troubleshooter didn’t work in fixing the problem, the next thing you need to do is disable the Windows Media Player Network Sharing Service. The WMP Network Sharing Service is used to share the libraries of the Windows Media Player to other users on the network as well as media devices using the Universal Plug and Play. And since you are not using any network here, then you can disable this service to fix the problem. How? Refer to the given steps below.
  • Tap the Win + R keys to open the Run dialog box and type “services.msc” in the field and tap Enter to open the Services Manager.
  • Next, look for the Windows Media Player Network Sharing Service from the list of Services and right-click on it.
  • After that, click on the Stop option and see if it fixes the Windows Media Player error.

Option 3 – Try to register the jscript.dll and vbscript.dll files

  • Tap the Win + X keys and from the menu select the Windows PowerShell (Admin) option to open an elevated Command Prompt.
  • Next, type this command to register the jscript.dll file and click on the confirmation box: regsvr32 jscript.dll
  • After that, execute the regsvr32 vbscript.dll command to register the vbscript.dll file.
  • Once you’re done, these DLL files will be re-registered and should fix the Windows Media Player error.
Read More
Fix Cannot load Management Console
TPM, also known as Trusted Platform Module, is a specialized chip used for security as well as encryption of users’ private data like Fingerprint, Facial data, and many more. TPM also comes with a Management Console and if you are not able to load the Management Console and you got the “Cannot load Management Console” error instead, read on as this post will guide you in fixing the problem. This type of issue usually happens when you clear or disable the TPM using the settings in the BIOS and so when you run the Trusted Platform Module Management console, you encounter the error. To fix the “Cannot load Management Console” error in your Windows 10 computer, here are some options you should check out.

Option 1 – If TPM is cleared in the BIOS:

If the Trusted Platform Module is cleared in the settings of the BIOS, you have to close and restart the TPM Management console or TPM.msc once again. It could be that the TPM Management has to reload the changes again after you’ve made them which is why you encounter the “Cannot load management console” error.

Option 2 – If TPM is disabled in the BIOS:

If you opted to disable TPM using the BIOS settings or you have turned it off by accident, then you have to enable it back and you have two options to do that – you can either enable TPM from the BIOS or using the Windows PowerShell. For more details, refer to the instructions below.

Enabling TPM from the BIOS:

  • You need to first reboot your PC and then go to the BIOS.
  • From there, look for TPM under the security options and in case the TPM management option has been disabled or greyed out, refer to the sub-steps given below to make it active again
    • Enable the Admin password in the BIOS.
    • Then go back to the TPM settings and check if the TPM management is already available.
  • After that, you should now be able to enable TPM. Remember that it’s always a good idea to have an ADMIN password for your BIOS as it makes sure that no one can change the settings in your computer BIOS and Security level options.

Enable TPM via Windows PowerShell:

  • This second option is a lot easier compared to the first one if you have admin privileges. So once you’ve opened the Windows PowerShell with admin privileges, you need to run the following command:
    • $tpm = gwmi -n rootcimv2securitymicrosofttpm win32_tpm
    • $tpm.SetPhysicalPresenceRequest(6)
  • After you execute the commands given above, you need to restart your computer.
  • Now, once your computer has restarted, you need to accept any BIOS prompts and then check if the “Cannot load management console” error is now fixed.
Read More
How to Fix Internal Error 2771

How to Fix Internal Error 2771

Internal Error 2771 - What is it?

Internal Error 2771 is an internal error code associated with Kaspersky Internet Security and Antivirus software. This error pops up when Kaspersky Internet Security software fails to install on your PC successfully. Installation of the software is interrupted and therefore it ends prematurely. This happens mostly when you try to install a new build on an existing installation. Internal Error 2771 is displayed in one of the following formats:
Internal Error 2771, Sandbox Feature or Internal Error 2771, WholeProduct Feature

Solution

Restoro box imageError Causes

This error may result on your computer screen due to several reasons. Some of the most common underlying causes include:
  • A leftover Registry Key
  • Bad entries from previous Security Package
  • INFCACHE.1 file corrupted
  • Conflicts with other security software installed on your system

Further Information and Manual Repair

To successfully overcome this problem and ensure the successful installation of Kaspersky Internet Security software on your system, try the methods given below.

Method 1- Remove the Leftover Registry Key

Sometimes Internal error code 2771 may appear during installation due to the leftover registry key from the previous Kaspersky software removal. A registry key is often created when uninstalling the previous Kaspersky version from the PC. This key is left behind even after you reboot your system. This key is called AVP**_post_ uninstall, you need to delete it to ensure the new version of the Kaspersky program is installed successfully on your PC.  For this, simply go to the start menu and type Regedit in the search bar. Now navigate to HKEY_LOCAL_MACHINESOFTWAREMicrosoftWindowsCurrentVersionRun and then look here for the registry key called AVP**_post_ uninstall. In order to delete this file, right-click it and then select delete. Once uninstalled, reboot your PC and then try installing the Kaspersky Internet Security program again. Hopefully, this will resolve the issue. If the software installs smoothly, then the error is fixed, in case it still persists, then try other methods illustrated below.

Method 2 - Remove the INFCAHCE.1  Corrupt File

Another reason for the error pop-up may be INFCAHCHE.1 corruption. This file is basically used to store driver information and inf file locations. However, if it contains corrupted information, then you must remove it. To do this, go to the start menu and type cmd into the search bar. This will open a command prompt. Here type del C:\Windows\infinfcache.1. Now reboot your PC and try installing Kaspersky software on again.

Method 3 - Fix Software Conflict

Security software conflict can also result in internal error 2771 code display. And when this happens, the installation of Kaspersky prematurely ends. Security software conflict may occur if you have Comodo Firewall installed on your PC. A firewall is known to cause issues with Kaspersky software programs. The best way to resolve this issue is to uninstall all security software programs on your PC. Once all security software is removed, then install Kaspersky on your system. If the installation is successfully completed, then reinstall the other software again.

Method 4 - Download Restoro

Error 2771 can also result on your computer screen if traces of the previously installed Kaspersky software still remain in the registry despite the program removal. In such an event it is advisable to download Restoro. This is a cutting-edge and user-friendly PC Repair Tool deployed with an intuitive interface and a powerful registry cleaner. The registry cleaner scans your entire PC in seconds and detects all registry-related problems. It removes all the bad entries, invalid registry keys, traces of previously uninstalled programs, junk files, and cookies that are known for registry corruption. It takes just a few clicks to perform this process. Once all traces are removed, you can install the new version of the Kaspersky Internet Security program on your PC without interruption. Click here to download Restoro and be on your way to resolve Internal Error 2771 on your computer!
Read More
Creating custom Keyboard shortcuts in Windows
Keyboard shortcuts are undeniably one of the most utilized ways and are helpful in maximizing productivity through the various applications at top speed in Windows 10. It offers the option to create custom keyboard shortcuts that allow users to launch apps, and even websites, instantly. There are already tons of keyboard shortcuts that are built-in in Windows 10 but in case you don’t know, you can actually create new ones. Doing so is not a difficult task and in this post, you will be guided on how you can exactly create custom keyboard shortcuts in your Windows 10 computer. Most users would create desktop shortcuts or pin the apps in the taskbar to speed up the process of working on their computers. It is an easy task to do since you can easily do it by dragging an app from the Start Menu to the desktop or by simply right-clicking on the executable app and selecting the “Create Shortcut” option. However, doing so would take physical effort and there are times when you have to minimize all the apps to get to the desktop so you can click the shortcut and this is where the Custom Keyboard Shortcuts come in handy. You can create Custom Keyboard Shortcuts in Windows 10 for various programs – from the traditional desktop apps to the new universal apps – you can fling in a shortcut so that you can instantly open them faster compared to when doing it manually and besides this also wouldn’t affect any of the ongoing system activity. To get started, you need to follow the steps provided below carefully.

To add Custom Keyboard hotkeys to a program and website desktop shortcuts, here’s what you have to do:

Step 1: First, you have to right-click on the app or website and select Properties. Step 2: After that, go to the Shortcut tab and from there, you will see the “Shortcut key” textbox which allows you to enter a new or custom keyboard shortcut for the app or website. Step 3: In the textbox field, input your preferred letters to set up the new hotkey. Keep in mind that this custom shortcut has to be combined with the Ctrl + Alt keys which means that if you want to select “N”, you have to tap the Ctrl + Alt + N keys. Step 4: Once done, click on the Apply and OK buttons to save the changes made and then close the window. Step 5: After that, tap the newly created keyboard shortcut, Ctrl + Alt + N keys again to open the app or website you’ve set up earlier.

To add Custom Keyboard hotkeys to a desktop app or an independent program that can be installed using direct download, here’s what you have to do:

Step 1: First, open the Start Menu and look for the icon/tile of the required app in the menu. However, if you are not able to find the desired app, then just click on the All Apps option to navigate through all the apps that are installed on your PC. Step 2: Once you find the app, just right-click on it and select More and then click on the “Open file location” option. Step 3: This will open a new window with the shortcut icon. Right-click on the app’s shortcut icon and select Properties. Step 4: This will open the Properties window where you can add the shortcut combination. Keep in mind that just like the previous method, the custom shortcut has to be combined with the Ctrl + Alt keys. For instance, if you select E, then you also have to set a keyboard shortcut that includes Ctrl + Alt, so it will be, Ctrl + Alt + E. Step 5: Once you’re done, click on the Apply and OK buttons to save the changes made. You should now be able to use the custom shortcut key you’ve set.
Read More
A 3 Step DIY Guide to Repairing Error 501

Fix Error 501

Error 501 - What is it?

Error 501 is an error code that sometimes may occur while you are using Internet Explorer on your Windows PC. The error message is displayed as:

'Error 501: Not implemented or not supported.'

Solution

Restoro box imageError Causes

It is difficult to narrow down the ultimate cause of error 501. This is because this error code can be triggered by multiple reasons such as:
  • Third-party confliction or due to an incorrect HTTP 1.1 setting
  • Improper program installation
  • Changes in the “LocalAccountTokenFilterPolicy” registry key
  • Corrupted Registry Database

Further Information and Manual Repair

The occurrence of this error regardless of what the cause is may cause a lot of inconvenience to you. And if not fixed on the time it can lead to system failure too. To repair the error 501, identifying the cause for the error really helps. By identifying the cause, you can easily select the most suitable solution to fix it.

Let us walk you through the solutions to fix error 501 timely:

Cause: Third-party conflicts or due to an incorrect HTTP 1.1 setting

Solution: If the above cause is the reason for error 501, this means the Local Policy Rights Settings have been altered. And because of that, Windows is not running your desired program. To solve this error simply log on to Windows as an administrator. Then run local computer policy snap-in. Open it and click on the computer configuration. Here you will see the Windows settings option. Click on it and then open security settings, local policies, and click on properties. Now in the add users section select the user which you want to add to the policy and save by pressing OK. After you’ve made changes, now try using internet explorer again. If this is the cause for the error pop, the error will not occur. If it still occurs then this means there is some other underlying cause for the error. Read on to find out.

Cause: Improper Program Installation

Solution: Error 501 may also occur due to improper program installation. The best way to resolve it is to uninstall recently installed programs.

Cause: Changes in the “LocalAccountTokenFilterPolicy” registry key

Solution: Sometimes during installation registry keys also get damaged or changed. If changes in the LocalAccountTokenFilterPolicy” registry key is the issue, then you need to alter the registry key ‘LocalAccountTokenFilterPolicy settings and its value. This key inside the registry database allows Windows to control the various access options that you have. However, due to wrong settings, it denies access and shows error 501 when you open Internet Explorer. To alter registry key settings can be tricky and complex if you are not a computer programmer. In such as scenario it is advisable to download Restoro. This is a user-friendly and multi-functional repair tool embedded with a powerful register cleaner. In addition to this, it also functions as anti-virus and a system optimizer.

Restoro Solution

Restoro is simple and easy to use. To operate this tool on your PC and to reset registry settings you don’t need any technical expertise or sound knowledge. Its smooth navigation makes it easy for users to scan and repair errors like 501 due to registry misconfiguration in seconds.  With this helper, you don’t have to modify Windows registry settings manually. It will do it automatically. Furthermore, if Error 501 is triggered by a corrupted registry database, you can run it to repair this issue too. It cleans and wipes out all the unnecessary and obsolete files that could be corrupting your registry. This includes junk files, internet history, and invalid registry entries. It clears up your hard disk space and repairs your corrupted registry. If your PC’s registry is damaged due to malicious software like viruses and malware, then it uses advanced antivirus to remove them from your system. It has a value-adding backup feature that enables you to create a backup of your files for data safety and recovery in case of loss during repair. Restoro is compatible with all Windows versions.

Starting with Restoro

Here are 3 simple steps to get started:
  1. Click here to download Restoro.
  2. Once the installation is complete, run it to scan for errors
  3. After scanning the errors, simply click repair to resolve the issues including the error code 501.
Along with fixing error code 501 triggered by registry damage, it also repairs all other PC-related issues. It helps maintain a stable and error-free system for the longest time.
Read More
1 2 3 162
Logo
Copyright © 2022, ErrorTools. All Rights Reserved
Trademarks: Microsoft Windows logos are registered trademarks of Microsoft. Disclaimer: ErrorTools.com is not affiliated with Microsoft, nor claim direct affiliation.
The information on this page is provided for information purposes only.
DMCA.com Protection Status