Best free & paid eMail clients in 2021

Having an eMail in today's modern world is no longer a privilege or being geeky, it has surely become a necessity. From Facebook to LinkedIn or Steam many services today require you to have an account in order to use them, and in order to create an account, you need working eMail.

That being said many people today have several eMail accounts, one for social media, one for work, maybe even one for very close friends and family. How creating eMail today is completely free we might end up with several eMail accounts.

eMail clients have also evolved much since their first days and became more than just applications for receiving eMails, today they can take various different tasks having additional features built into them like calendar, batch eMail processing, etc.

Taking all of said into account I am presenting to you within my personal opinion some of the best eMail clients starting with free ones.

Best free eMail clients

Google Gmail

https://gmail.com

gmail eMail client
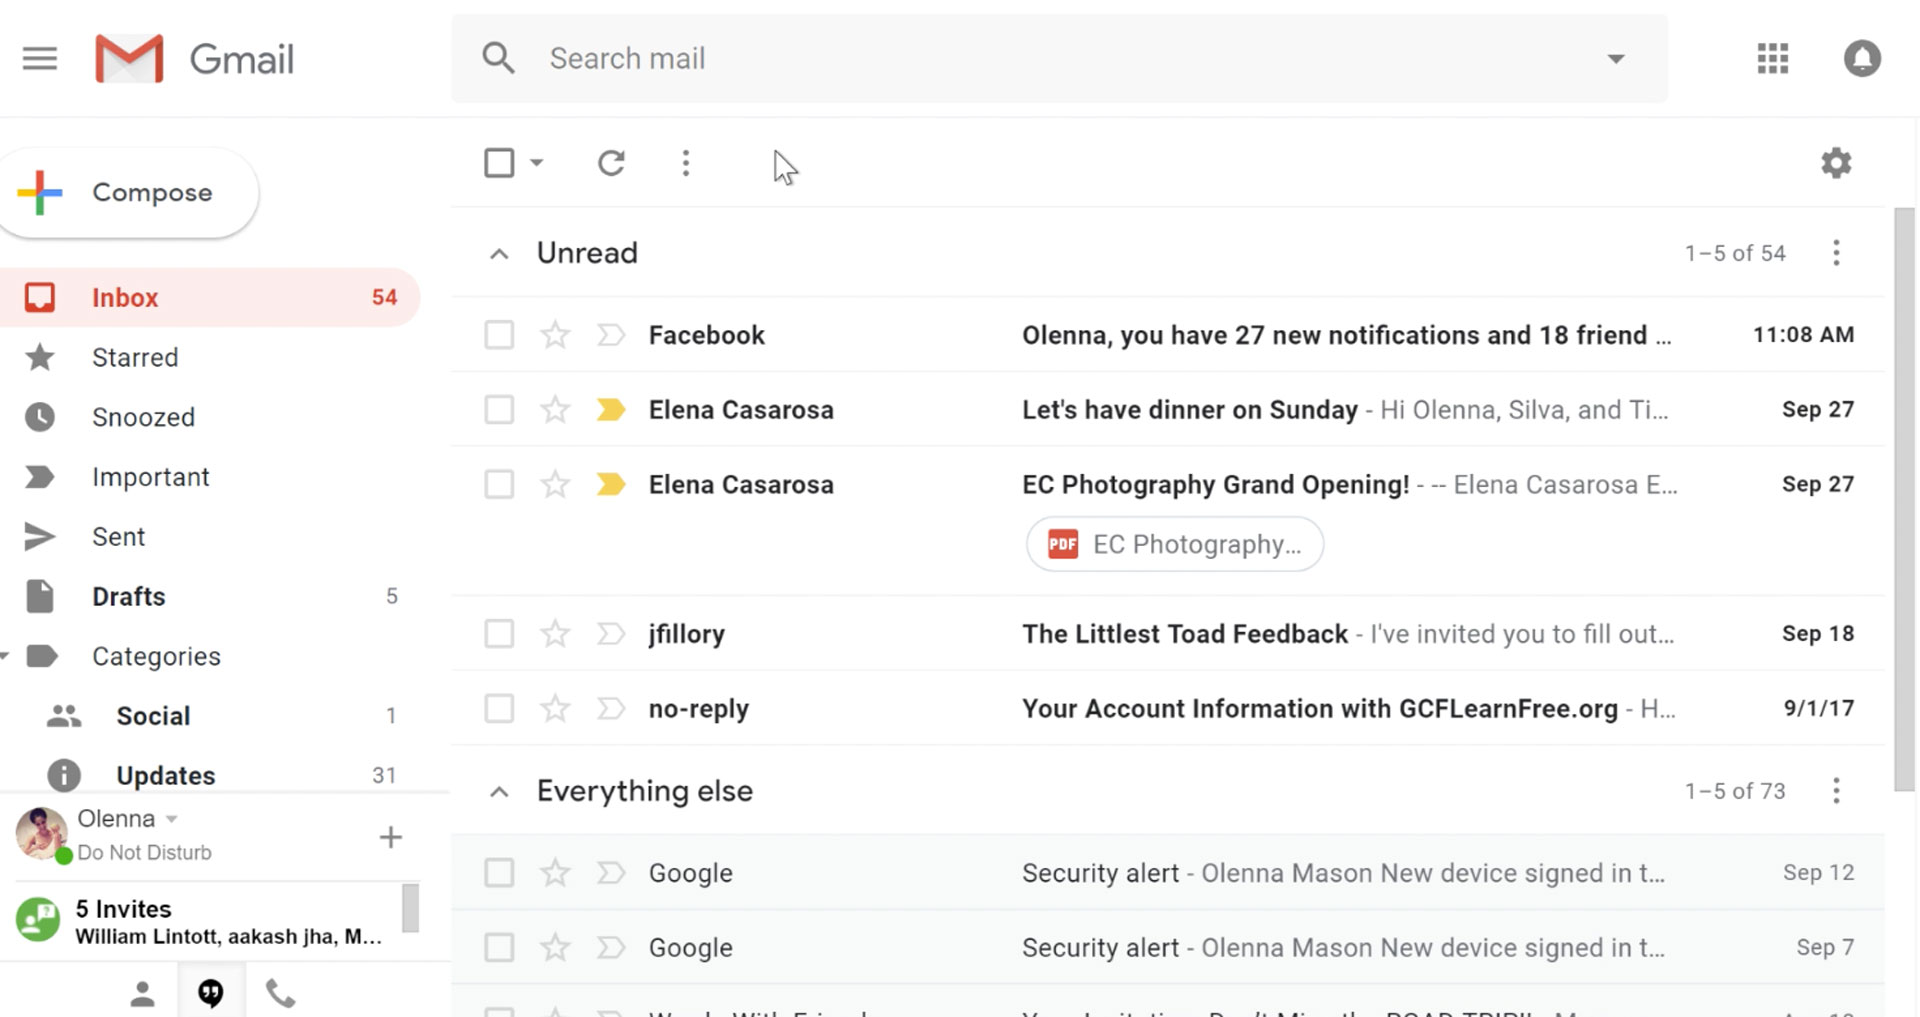
It would be very difficult to even start a free eMail list without mentioning Google's Gmail. Introduced all the way back in 2004 as an invite-only service it became over time the most popular email platform largely due to the fact Google is offering free eMail accounts.

There are a lot of good things to be said about Gmail itself, most of the area is clutter-free and the largest space is reserved for eMail itself letting users focus on what is important. WEB client itself means that you do not need to have any application installed on your device, altho via Google chrome, you can use Gmail offline offering you flexibility if needed.

The ability to connect and manage other accounts like Outlook, Yahoo, etc is just making Gmail even more attractive, and the snooze feature is a really neat little detail that will pause eMail notifications if you need to focus on other things.

Lack of organizing messages into folders is a little confusing since Gmail offers its own unique label system but sometimes I need to have old reliable save eMail to folder.

All in all, Gmail is a great service and it offers a great eMail on the go experience.

Mail eMail client

https://www.microsoft.com/en-us/p/mail-and-calendar/

mail eMail app
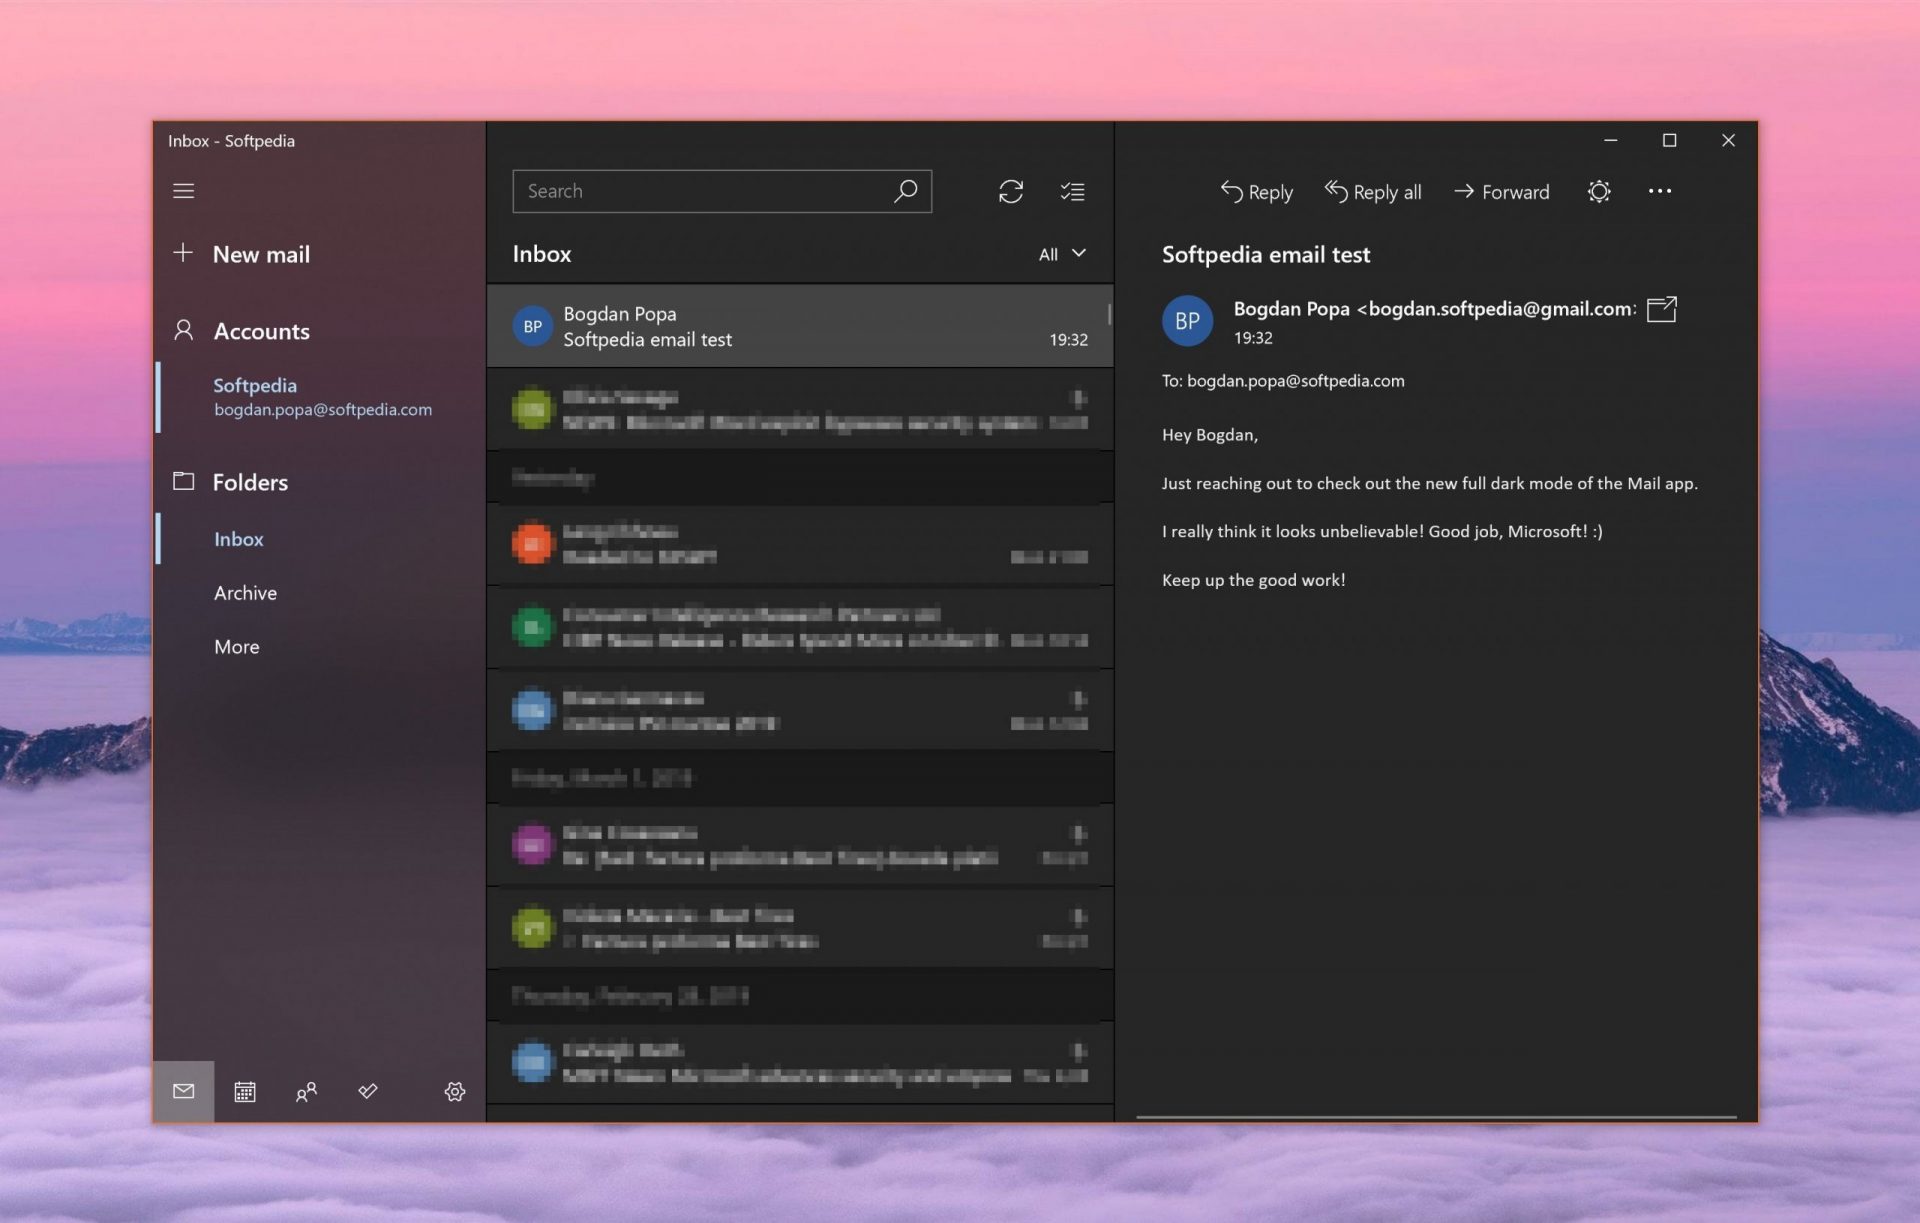
Free Windows eMail client simply called Mail is what was once outlook express. Mail itself has the ability to work with other popular accounts like Google Gmail account, Yahoo, iCloud etc. How it comes with Windows OS and it integrates very well with Microsoft Calendar, this eMail client is for many the first choice.

On the negative side, I might say this is a strip-down version of Outlook which is paid solution so some features are missing if we would compare the two.

Overall, a simple and nice eMail client worth your time, especially if you are on the Windows platform.

Mozilla Thunderbird

https://www.thunderbird.net

mozilla thunderbird eMailGreat eMail client matching in functions against paid and premium solutions of big tech companies. Fueled with plenty of customization options and reskinning ones this eMail client offers a lot for its free price tag.

It is also fueled by Mozilla community focusing on privacy and security. It can work with any mail service and it is lightweight with a clean look, altho the look itself can be heavily customized.

The bad side is that client itself relies on email services to provide cloud-based emails, so if you are receiving your email via a service that does not have a cloud-based service in itself all of your received emails will be locked to the computer where you have received them. Also customizing it can be sometimes a little too technical for the average computer user.

All in all, Thunderbird is one great eMail client and it would be a shame not to use it because of its technical side, if you need a reliable and secure eMail client on a single machine, look no further than Thunderbird.

Paid eMail clients

Microsoft Outlook

https://www.microsoft.com/en-us/microsoft-365/

microsoft outlook
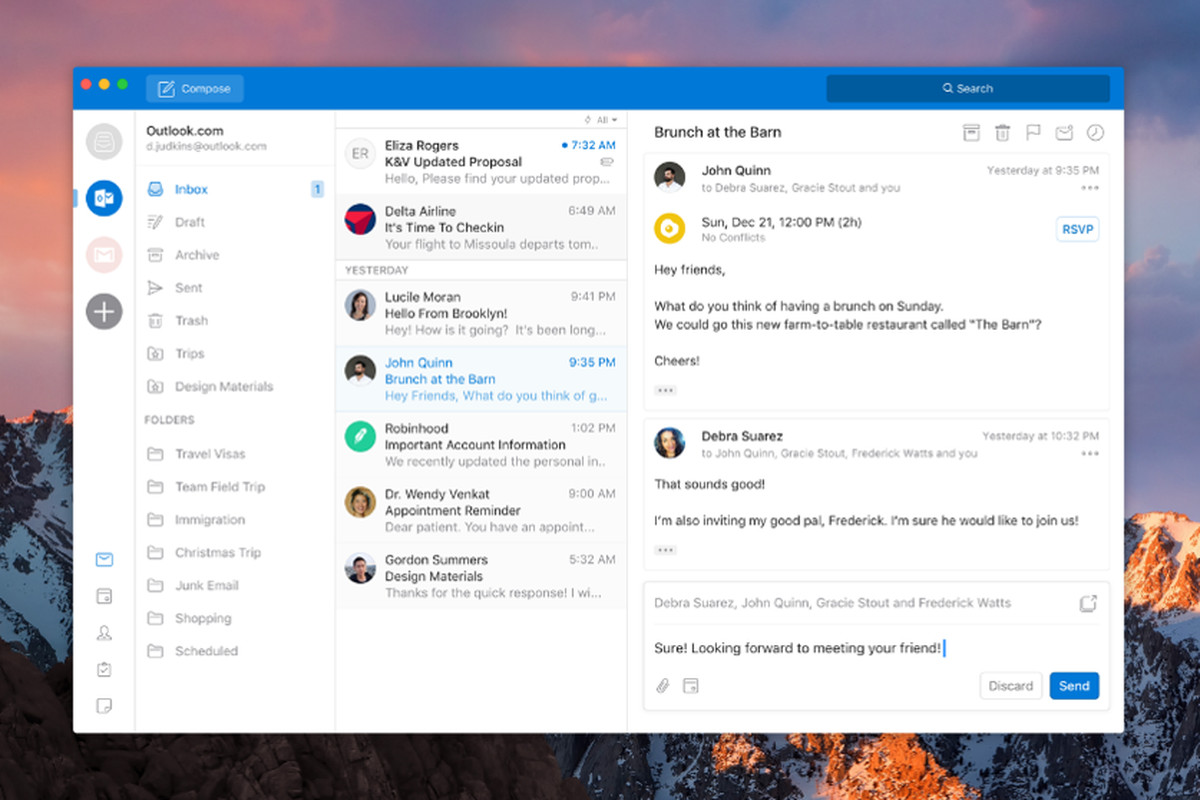
Outlook comes as a part of the Microsoft Office suite and as one of the oldest eMail clients, it is still widely popular and adopted through many users and businesses. It has tight integration with all Microsoft services and full integration with Calendar making it one of the if not the best eMail client out there.

Outlook also has a free online service completely free for personal use as well.

The downside is that you can not get it as a separate product if you want a business version other than as a part of the Office suite.

The final verdict would be that this is perhaps the best eMail client out but the big downside is that there is no desktop version outside the Office suite.

eM Client

https://www.emclient.com/

em client
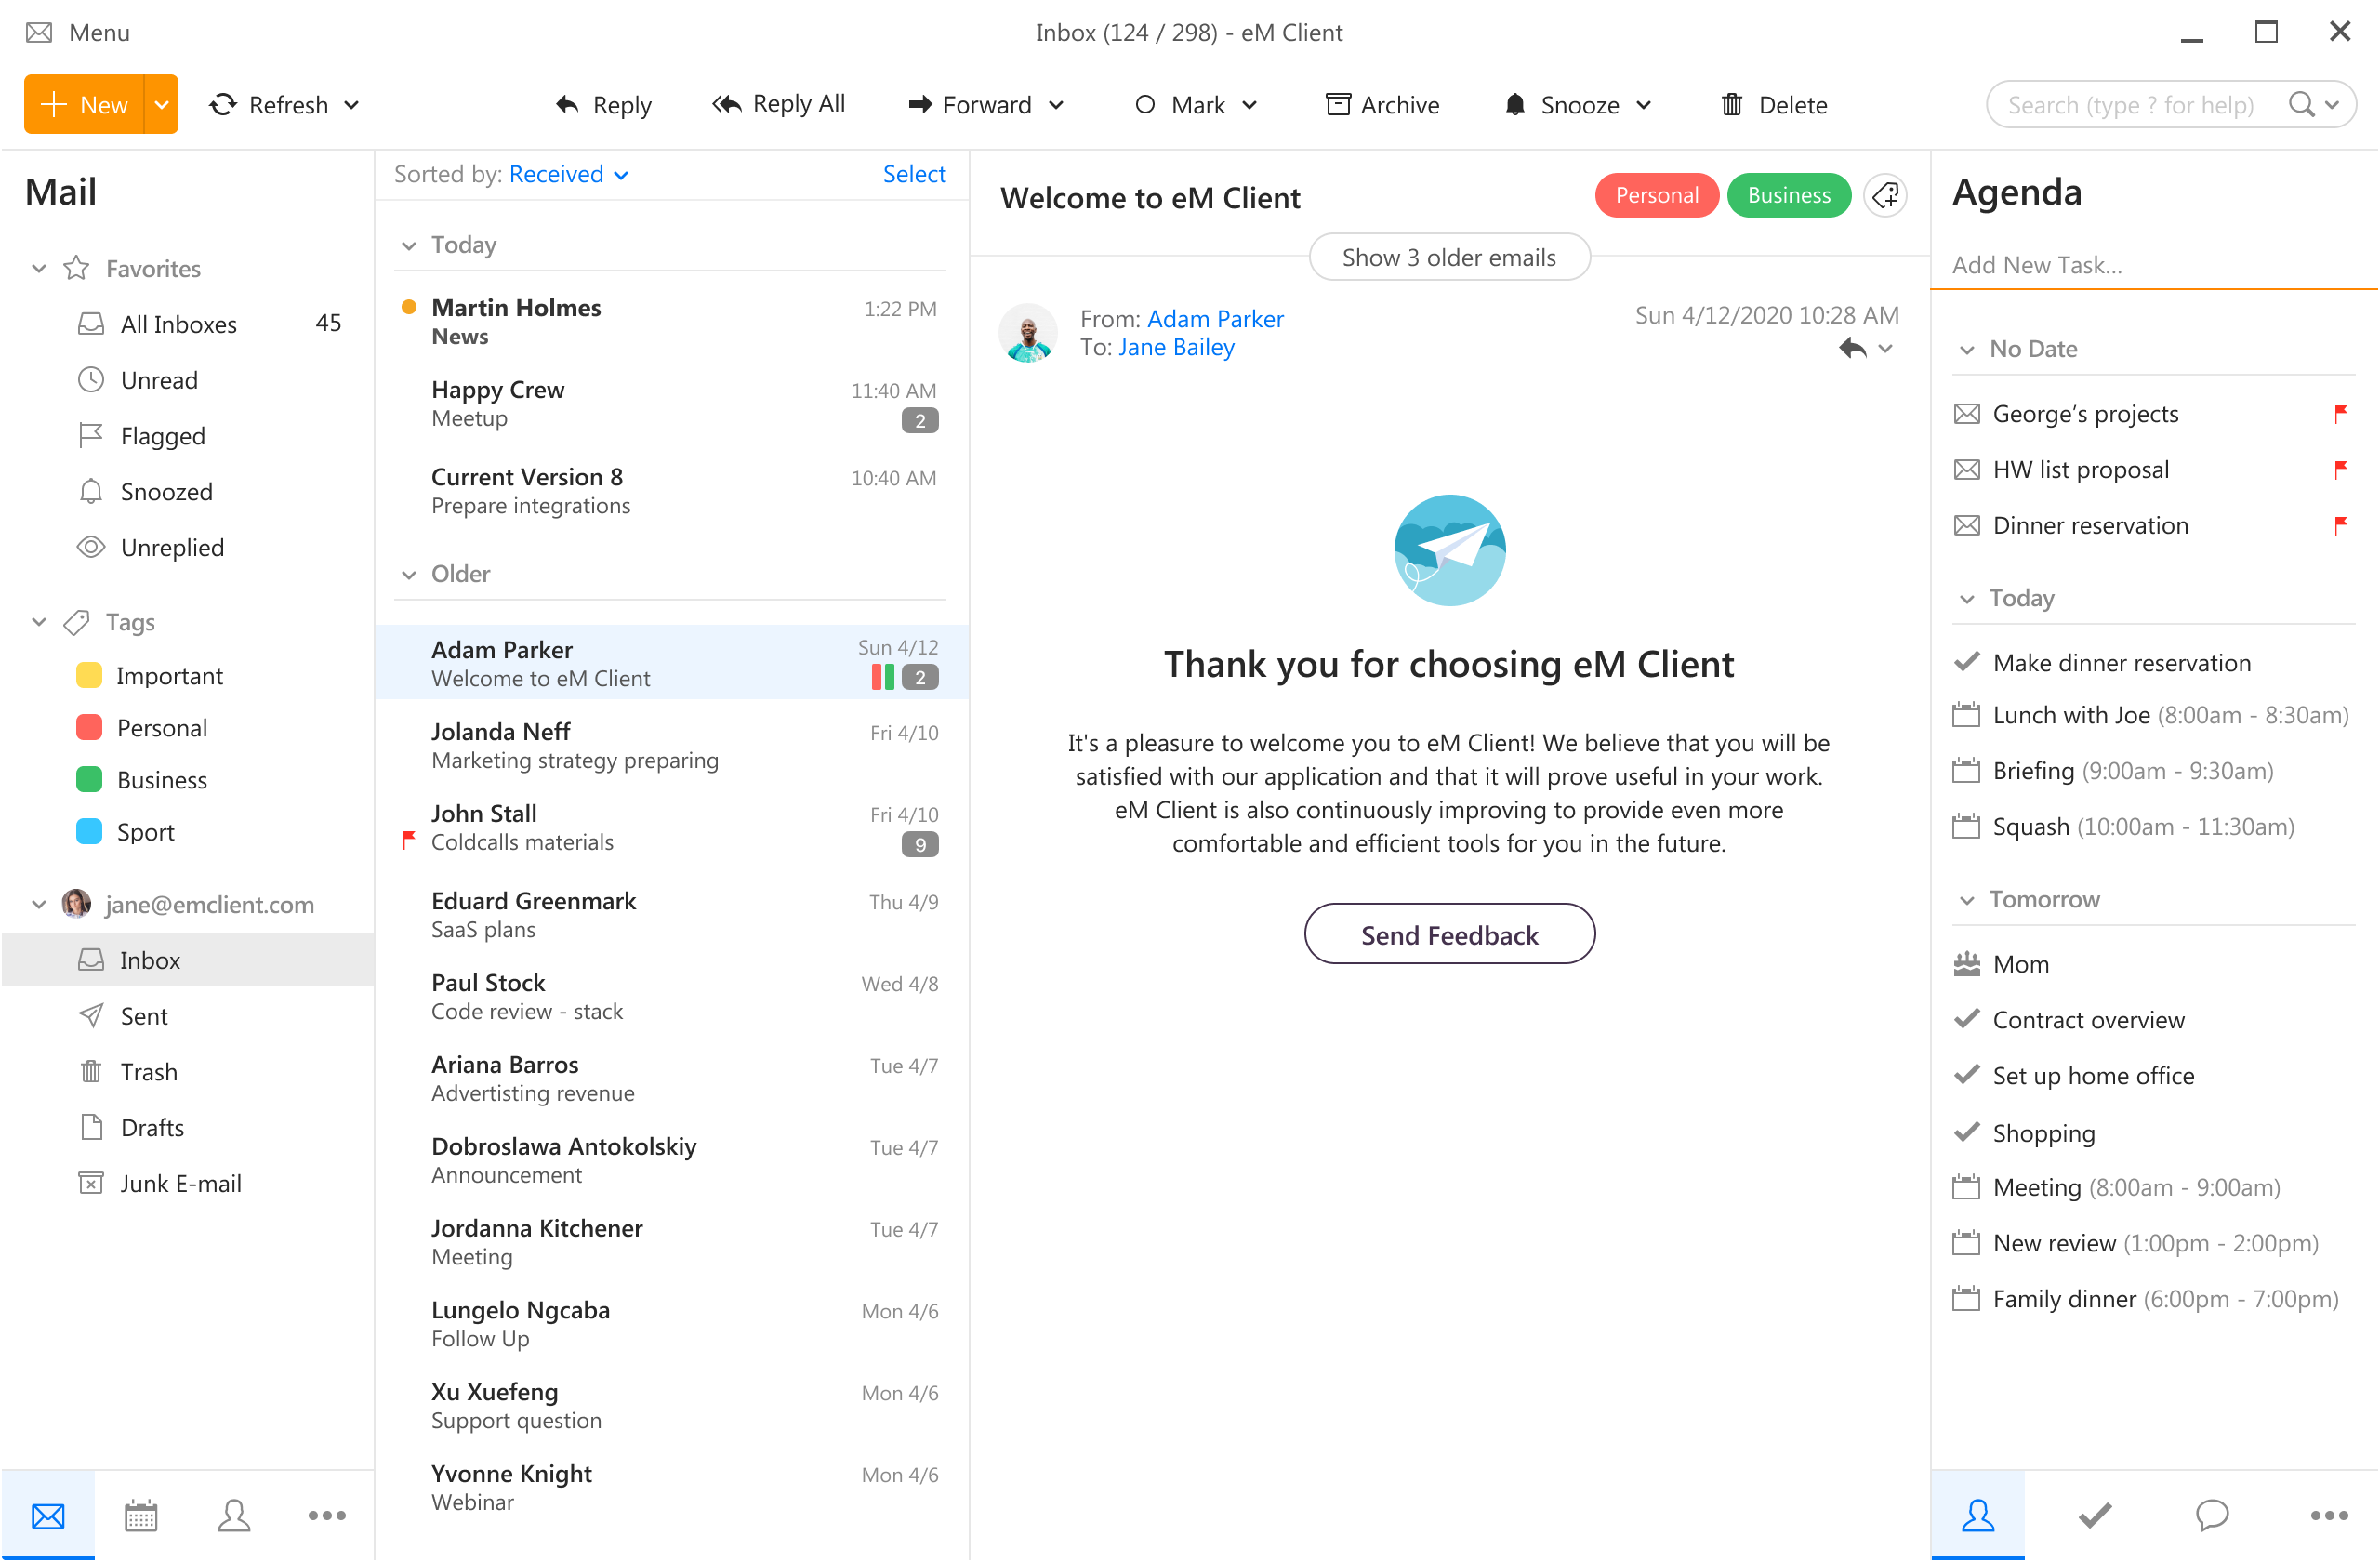
eM Client offers a wide array of features, including a calendar, contacts, and chat. Support is provided for all the major email services including Gmail, Yahoo, iCloud, and Outlook.com. The latest version also offers PGP encryption, live backup, basic image editing capabilities, and auto-replies for Gmail.

Its automatic system makes it very easy to get emails from other services since there is no manual setting, all that is needed is to type in your email and eM Client will do everything else automatically.

A one-time purchase is not pricy and it could offer some features that some free clients are missing. Go check it out with a free trial and see if it is for you.

Mailbird

https://www.getmailbird.com

mailbird
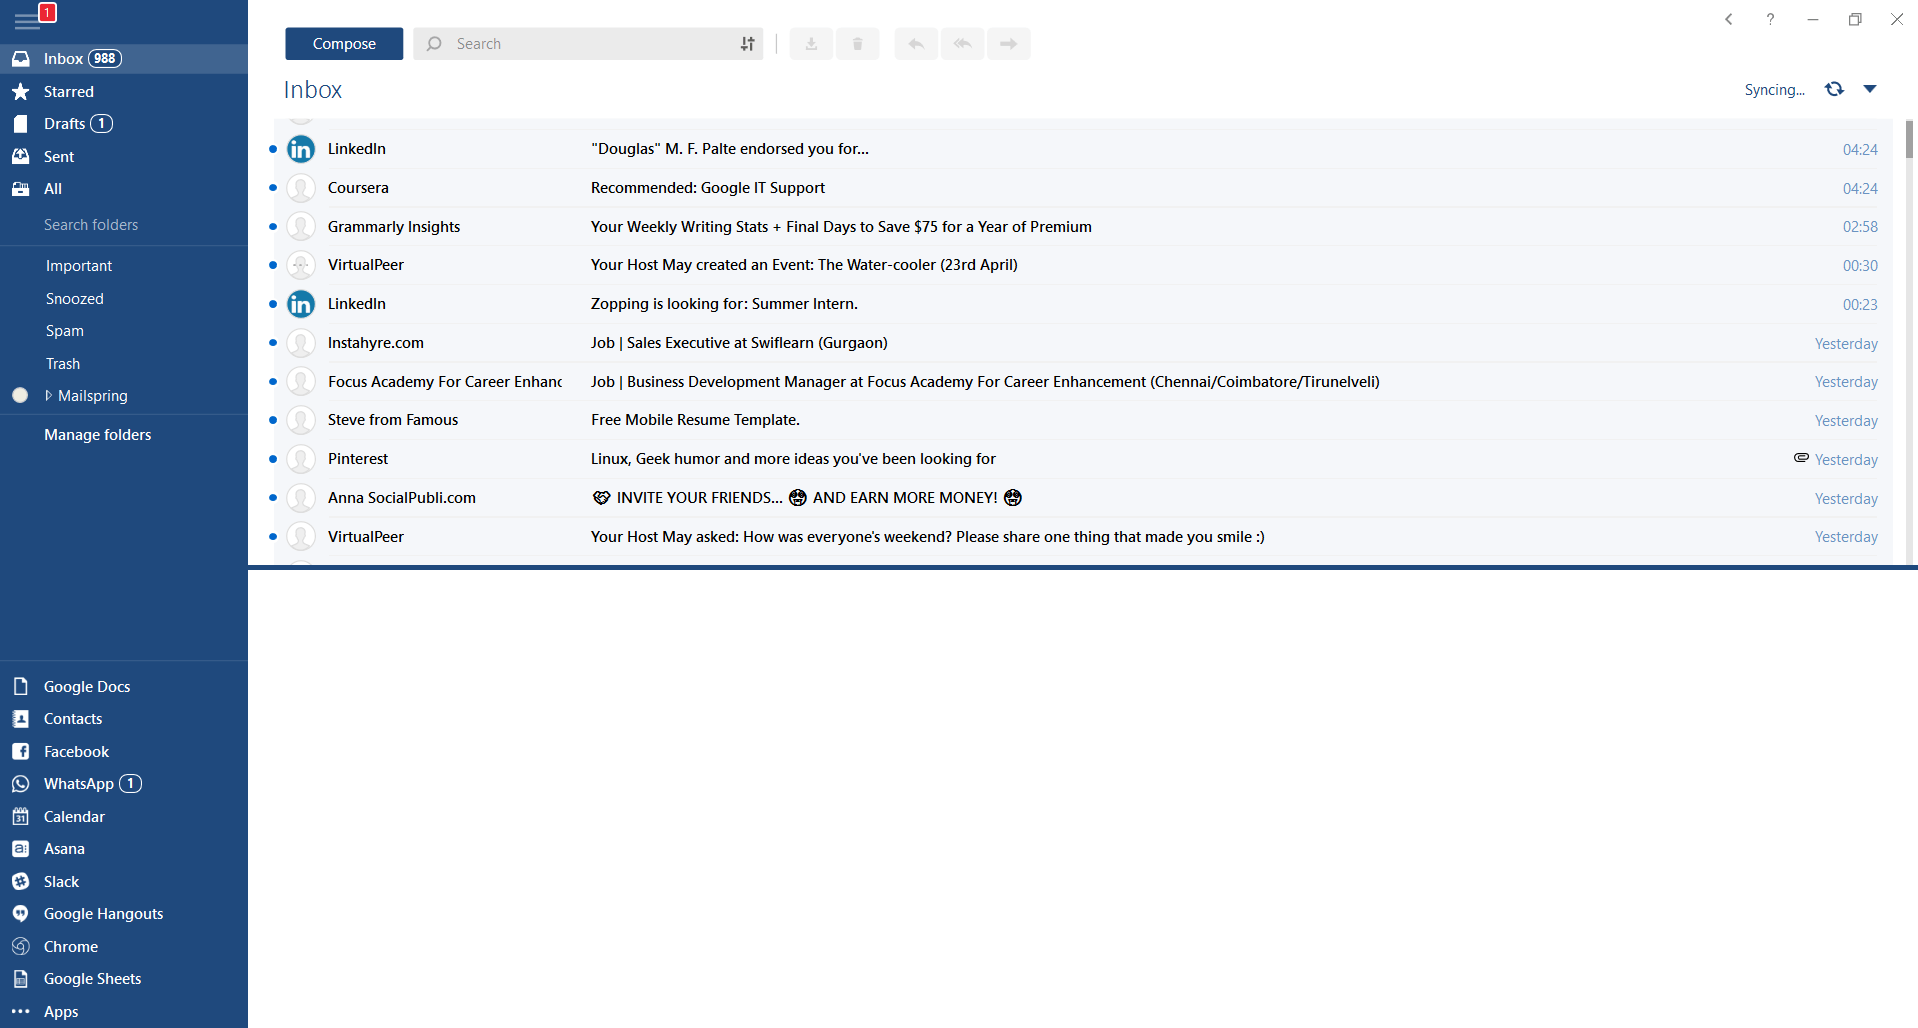
This eMail client's main focus is the simplicity of use with visual appeal while tackling multiple eMail accounts. It has many built-in apps along with a customizable interface. Unlike some more Microsoft-centric email clients, Mailbird Business supports a diverse range of integrated apps, including WhatsApp, Google Docs, Google Calendar, Facebook, Twitter, Dropbox, and Slack, all making for a better-streamlined workflow.

The downside of this client is the yearly subscription plan. I think people, in general, want to get away from software subscription plans so I will include this as a downside but bear in mind it is downside just in terms of a business plan not in the client itself.

Inky

https://www.inky.com/

inky eMail client
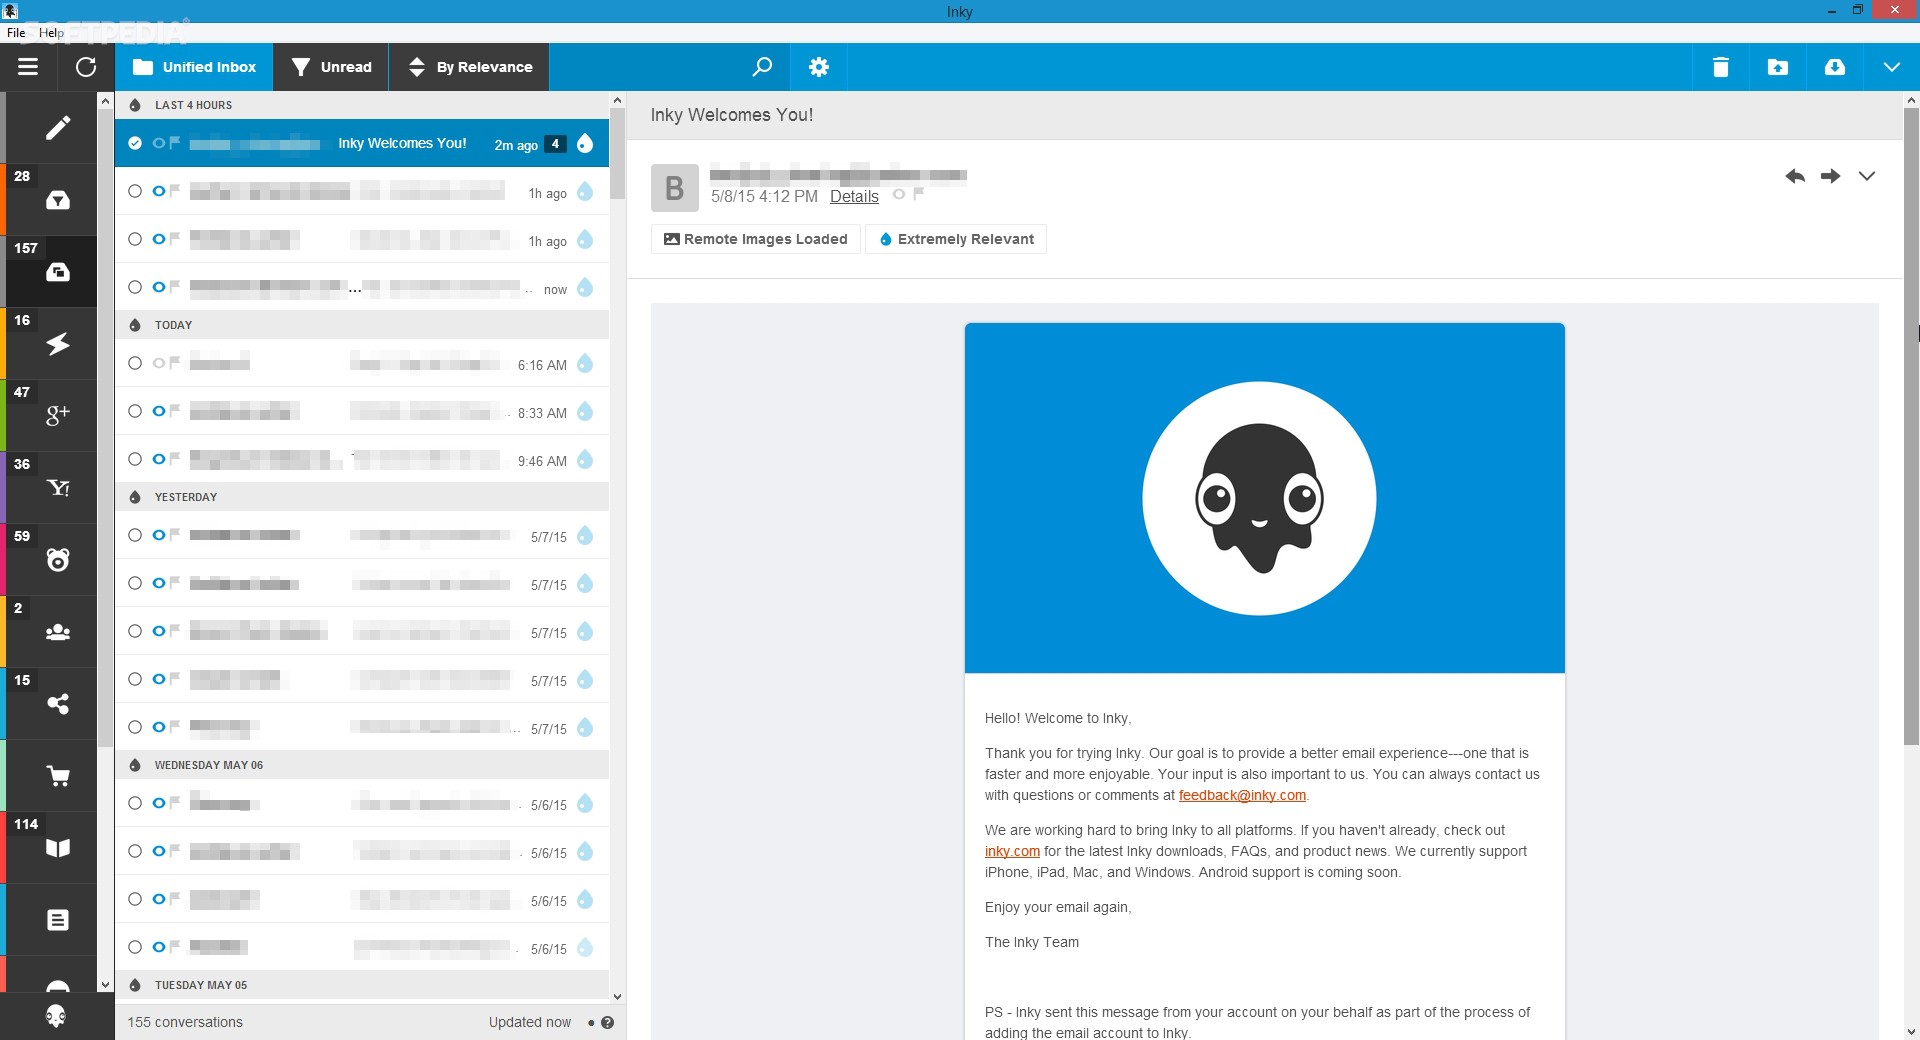
Inky is eMail client if you are looking for security. It uses AI along with machine learning in order to block all types of phishing attacks that can get through to other clients. The proprietary machine learning technology can literally read an email to determine if it has phishing content, and then is able to quarantine the email or deliver it with the malicious links disabled. It also takes things a step further and offers an analytics dashboard, which allows an administrator to see patterns of attacks based on dates, or targeted users.

The downside is that client itself is so much focused on security that sometimes some nonsecurity features get overlooked and provide a poor experience but if you need a good and greatly secured eMail client Inky is one to check out.

If you like to learn and find out more about various Windows errors, and how to repair them go to our vast archive or use search to find articles that will explain and help you in solving your issue.
However, if you prefer to do things fast and with automatization then we are proposing to use an automated solution for your issues. The application that we are recommending is Advanced System Repair Pro
Advanced System Repair utilizes multiple tools all in one to give you a quick, simple, reliable, and very thorough diagnosis of your PC. It brings you all the tools you need in one program to clean, fix, protect, optimize and boost your PC!
1-Click Maintenance
All the tools to make it simple and easy! It's like having a professional technician at the click of a mouse.

Junk Cleaner
Keeping your computer free from unnecessary clutter also helps make your computer last longer. Like any other machine, if you keep it clean and take care of it, it will serve you better for longer!

Optimize background apps
Optimize applications background activity with the built-in Application Optimizer feature.

Disk Defrag
With a simple 1-click, Advanced System Repair speeds up your PC by assembling fragmented files on your machine and organizing them more efficiently.

Malware Removal
Finds and removes all types of harmful malware including trojans, worms, bots, adware, spyware, PUPs, and more!

Privacy Cleaner
The all-in-one privacy suite to Clean Your Tracks & Protect Your Privacy! Make your computer safe, secure, and more efficient!

System Tweak/Optimizer
ASR will analyze your complete system and settings to adjust your PC to function at its maximum performance.

Registry Cleaner
Over time, as you install and uninstall applications, the registry can become cluttered with old entries and broken settings which can result in program crashes, and annoying messages and slow the computer down.
Visit our Advanced System Repair Pro Download page to inform yourself about all the benefits of this software and get a free trial copy of it.
advanced system repair pro

Advanced System Repair Pro

One-click automated PC repair solution
ASR logo
With Advanced System Repair Pro you can easily
Replace damaged files
Restore performance
Free disk space
Remove Malware
Protects WEB browser
Remove Viruses
Stop PC freezing
DOWNLOAD
Privacy Policy | Terms of Use | Uinstall
Advanced System Repair Pro is compatible with all versions of Microsoft Windows including Windows 11

Share this article:

You might also like

How to Fix Windows 10 Error 0x80072ee7

How to Fix Windows 10 Error 0x80072ee7

Error Code 0x80072ee7 - What is it?

Error Code 0x80072ee7 is an error code that is most commonly associated with Windows 10 and the use of the Windows Store. Several things can cause this error, which has been present as an error message in Windows 10 and all the way back through Windows 8.

Common symptoms include:

  • An error message when you attempt to connect to the Windows Store.
  • Inability to download or install purchases from the Windows Store.

Fortunately, there are several simple methods that can be used to attempt to resolve Error Code 0x80072ee7 on your Windows machine. These methods don’t require advanced computer knowledge or familiarity with high-level tools, so the average user should be able to complete them without help. However, if you feel like you need assistance in resolving Error Code 0x80072ee7, always contact a qualified Windows repair technician who can assist you.

Solution

Restoro box imageError Causes

There are four basic things that can cause Error Code 0x80072ee7 to appear on a Windows device. The first is that the connection to the Internet is limited in some manner, either due to a system or equipment error. Secondly, some parts of the update components could be missing. Next, an error within the DNS can be a cause. Finally, having any kind of compatibility errors on the machine (for example, between the antivirus software that you run and the Windows Update tool) can lead to the appearance of Error Code 0x80072ee7.

Further Information and Manual Repair

There are a few different methods that you can try in order to resolve the appearance of Error Code 0x80072ee7 on your Windows machine. These are fairly simple to complete, but if you do not feel confident in your ability to carry them out successfully, you may want to get in touch with a qualified computer repair technician to help you.

Here are the best methods to employ as you seek to resolve Error Code 0x80072ee7 on your Windows device:

Method One: Check Your Connection

Make sure that you are able to connect to the Internet by visiting several common sites like Google in order to ensure that your issue is not related to your Internet service provider or the equipment that you are using to access the Internet.

Method Two: Use an Alternative DNS

If you believe that your DNS connection may be the problem, you can change the specific DNS that you are using to one that is provided by Google. This can resolve any conflicts that may occur because of the IP address detected on your device. In order to do this, simply follow these steps:

  • Step One: Go into your control panel and click on the option for “Network and Internet,” then select “Network and Sharing Center.” You’ll want to find the option to “change adapter settings,” which is normally located on the left bar of the navigation panel.
  • Step Two: Find the connection method that you are employing (i.e. Wi-Fi network).
  • Step Three: Right-click and find the connection properties menu. Under the TCP/IPV4 menu, click on the option to change your DNS numbers to manual entry and set your preferred DNS server to “8.8.8.8” and your alternate server to “8.8.4.4”.

Once these steps are complete, you can reattempt to connect to the Windows Store. You may need to restart your computer before connecting.

Method Three: Run the Fix It Tool from Windows

Microsoft has created a great tool that can automatically scan your computer for a number of common errors and attempt to fix them as they are encountered. This can be downloaded directly from the Windows site and can be used to try to fix not only Error Code 0x80072ee7 but also many other error messages that may pop up on your computer.

After you have run the Fix It tool, it is always a good idea to restart your computer to allow any changes that have been made to fully take effect.

Method Four: Use An Automated Tool

If you wish to always have at your disposal a utility tool to fix these Windows 10 and other related issues when they do arise, download and install a powerful automated tool.

Read More
How to Repair Error Code 33

How to Repair Error Code 33

Code 33 - What is it?

Code 33 is a typical Device Manager error. This error code occurs when Windows is unable to start a device that you are trying to use on your PC. The error code 33 is usually displayed in the following format:

“Windows cannot determine which resources are required for this device. Code 33”

Solution

driverfix boxError Causes

Error code 33 may be triggered due to two reasons. One reason can be the translator's failure to find the correct resource for the device driver.

And since this error code is associated with the Device Manager, another reason can be an outdated or corrupted device driver. In most cases, the underlying problem for Device Manager error code is outdated/corrupted drivers.

The good news is that Device Manager error code 33 is not detrimental. However, if the error is not resolved timely, it can lower the functionality and the performance of your PC. You may not be able to use the hardware device.

Further Information and Manual Repair

To resolve code 33, you don’t need to be technically sound or hire a professional computer programmer. Just like any other Device Manager error code, code 33 is also easy to repair.

To help you fix this issue on your system, below are some of the best, easy, and effective DIY solutions.

Method 1 - Configure Hardware Device

Properly configure the problematic hardware device to fix error code 33. It is important to understand that when you install a device that is not plug-and-play, the resource settings are not configured automatically.

This means for such devices you will have to perform device configuration manually.

For device configuration, here’s what you should do:

  1. Go to the start menu
  2. Click Control Panel, then click Performance and Maintenance, and then System
  3. Now on the hardware tab, click on Device Manager and then double click the device you wish to configure
  4. Click the resources tab and then click on the check box next to the Use Automatic Setting
  5. After that click, the ‘Setting Based On’ and then click the hardware configuration you wish to change
  6. Press the ‘Resource Type’ you will like to configure in the ‘Resource Settings’ box
  7. Now go to the Change Settings tab and type a new value for the Resource Type

Method 2 - Update the Problematic Drivers

Code 33 can also be generated due to driver problems. In such a scenario, it is recommended to update the outdated or corrupted drivers.

Identifying all problematic drivers and updating them individually can be frustrating and time-consuming. Therefore to save time and avoid the hassle involved in updating drivers manually, it is advisable to download DriverFIX.

Method 3 - Download DriverFIX to Update Drivers Automatically

DriverFIX is a next-generation and user-friendly program compatible with all Windows versions.

This software is exclusively designed to repair and resolve device driver-related problems and error codes.

Once installed, its intelligent and intuitive programming system detects all outdated, corrupted, and misconfigured device drivers on your PC. It automatically updates all the problematic drivers in a few seconds. It makes sure that the driver versions are the latest and compatible with your operating system.

Furthermore, it also ensures that drivers are continuously updated whenever new versions are available. So, you don’t have to worry about keeping device drivers up to date.

Click here to download DriverFIX to resolve Device Manager error code 33 today!

Read More
0x800ccc79 Error Code - A Quick Fix
[vc_row][vc_column][vc_column_text]

0x800ccc79 Error Code Repair

0x800ccc79 Error - What is it?

0x800ccc79 error is an error message that you may come across when sending emails through Outlook Express from Microsoft. This error message is accompanied by a notification that is displayed as ‘email was not delivered’ or ‘the server doesn’t support SSL connection’.

Solution

Download Available to Recover all Lost Outlook data

Restoro box imageError Causes

This error code 0x900ccc79 is triggered due to the following causes:
  • Problems related to email servers
  • Changes in the configuration settings
  • Corrupted Windows Registry

Further Information and Manual Repair

When you receive the error 0x800ccc79 it may hamper your ability to send emails. Therefore it is advisable to fix it to ensure your emails are sent and received without any difficulty.

This Outlook error 0x800ccc79 is quite easy to repair. By following the quick fix 0x800ccc79 error code solutions given below you can resolve this error in just a couple of minutes.

Here’s what you need to do to fix this error right away:

Cause: Configuration issues

Solution: If the error occurs due to Outlook Express being configured to use the SSL protocol while sending and receiving emails via the web, then to resolve it, you need to allow Outlook Express to bypass the Secure Socket Layer settings.

To do so, click on ‘tools’ and then on ‘Accounts’. Now select the email account that you want to modify.

Now select the ‘Properties’ tab and then click on ‘Advanced Settings’.

Here search for the following text message ‘This server requires a secure connection’. Once you locate it, uncheck all the checkboxes given next to this option. After that save the changes and restart Outlook Express to see bring the changes into effect.

Cause: Missing or Corrupt Registry Entries

Solution: If the error 0x800ccc79 occurs due to missing or corrupt registry entries, then the best way to fix this error is to download and install a good registry cleaner on your PC.

The registry cleaner will help you clean your corrupt and damaged Windows registry entries and get rid of this error right away. It is suggested you download the registry cleaner tool from a reliable website to avoid any malware or virus downloads simultaneously.

Once you download the registry cleaner on your system, click on scan. The cleaner will scan your computer completely for registry errors and show you the results in a list form.

After the scanning is complete, click on repair to fix the errors.

So, next time if you or anyone at your office comes across the Outlook Express error 0x800ccc79, you can try these solutions and fix the error immediately without waiting for the network personnel to come and resolve it.

[/vc_column_text][/vc_column][/vc_row]
Read More
Disable WEB camera with PowerShell in Windows
Windows PowerShell is a powerful tool inside the Windows environment often overlooked by typical users which is a great mistake since it can offer a large array of functionality and usability and if used well can offer a unique working experience. Today we will be using PowerShell to turn the WEB camera off so it can not be accessed, completely disabling it for use. You might want to do this for security reasons or just want to learn few new things. Whatever your reason might be, I am welcoming you to this tutorial and please do keep reading.

Finding device ID

In order to disable the WEB camera first thing we need to do is to find a matching device ID. We will find this value inside the device manager, so press ⊞ WINDOWS + X to open the secret menu. keyboard with windows and x markedIn the menu choose device manager and click on it. Windows menu device manager
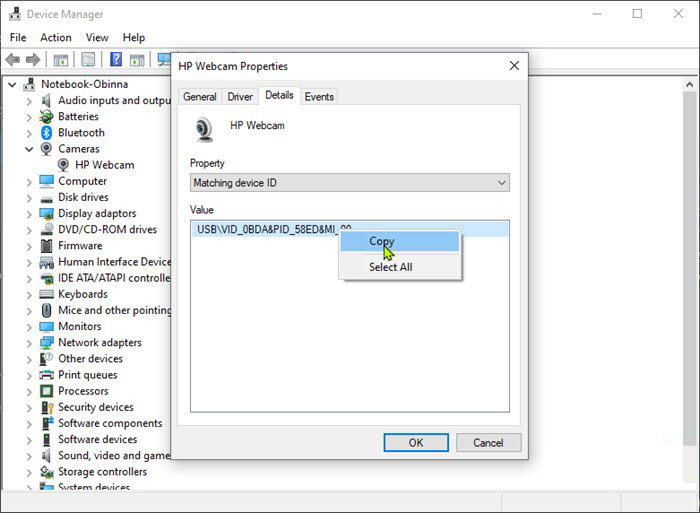
When the device manager opens, expand the Imaging devices or Cameras section. Right-click Integrated Camera or the primary webcam, and click Properties. Go to the Details tab. Under the Property section, click to select Matching device ID from the drop-down. Right-click the value and select Copy camera device managerThe next step is to download and install Windows Driver Kit (WDK)

PowerShell script

Create and run a PowerShell script with the following parameters/values to disable the camera. Substitute the <FOLDER> placeholder with the actual name of the folder where your copy of Devcon is residing
$id = (Get-CimInstance Win32_PnPEntity |

where caption -match '<PRIMARY CAMERA>').pnpDeviceID

$ppid = "{0}{1}" -f '@',$id

Set-Location c:\<FOLDER>

Devcon status $ppid

Devcon disable $ppid

Devcon status $ppid
To enable the camera device, run the command below in PowerShell:
devcon enable $ppid
Read More
Fix Chrome is Waiting for cache in Windows
There are times when you may encounter some glitches on your Google Chrome browser in your Windows 10 computer. One of these glitches is when the connection status of Chrome keeps on saying “Waiting for cache” which is displayed at the bottom-left side of the browser in the Status bar. At the time of writing, it isn’t clear yet what could be causing this problem. Although it is possible that it’s caused by browser cache, some extensions in the browser. On the other hand, it could also be caused by the browser profile or due to some fragmented files or that the SSD is occupied. Whatever the cause is, you can check out each one of the given options below to fix the problem.

Option 1 – Try clearing browser cache

There are times when some data in the browser is conflicting with the loading of the website and triggers some problems like “Waiting for cache”. And so you can try to clear your browser’s data. This might be a very basic solution but oftentimes it works in fixing this kind of error in Google Chrome. Follow the steps below to clear the data in your browser.
  • Open your Google Chrome browser.
  • After that, tap the Ctrl + H keys. Doing so will open a new panel that allows you to delete the browsing history and other data in your browser.
  • Now select every checkbox that you see and click on the Clear browsing data button.
  • Then restart your Chrome browser and check if you can now open any website or not.

Option 2 – Try to disable writing of Cache files to the SSD

You can also disable the writing of Cache files to the SSD to stop Google Chrome’s dependency on the SSD to gather all the cache files.

Option 3 – Delete the User Profile in Chrome

You can also try deleting the User Profile folder in Chrome. To do so, follow these steps:
  • You need to first end every single process of Google Chrome. To do so, right-click on the Taskbar then select the Task Manager. And if the Task Manager is not responding, you can just use the Alt + Ctrl + Del keys and then select the Task Manager.
  • After opening the Task Manager, under Processes, look for Google Chrome’s process which would most likely be named “chrome.exe”.
  • Right-click on Google Chrome’s process and then select the End task option.
  • Next, tap the Win + R keys to open the Run dialogue box.
  • Then copy and paste “%USERPROFILE%AppDataLocalGoogleChromeUser Data” and hit Enter.
  • From there, look for a folder named “Default folder” and then copy the folder to another drive as a backup.
  • After creating a copy of the folder, delete the Default folder.
  • Next, open Google Chrome again and go to Settings > Advanced > Reset.

Option 4 – Reset Chrome

Resetting Chrome can also help you fix the error. This means that you will be restoring its default settings, disabling all the extensions, add-ons, and themes. Aside from that, the content settings will be reset as well and the cookies, cache, and site data will also be deleted. To reset Chrome, here’s what you have to do:
  • Open Google Chrome, then tap the Alt + F keys.
  • After that, click on Settings.
  • Next, scroll down until you see the Advanced option, once you see it, click on it.
  • After clicking the Advanced option, go to the “Restore and clean up option and click on the “Restore settings to their original defaults” option to reset Google Chrome.
  • Now restart Google Chrome.

Option 5 – Try to clean reinstall Chrome

There are instances when programs leave files behind after you’ve uninstalled them and the same thing can happen to Chrome so before you reinstall Chrome, you have to make sure that you have deleted the User Data folder. To do so, refer to the following steps:
  • Hit the Win + R keys to open the Run dialog box.
  • Next, type “%LOCALAPPDATA%GoogleChromeUser Data” in the field and hit Enter to open the User Data folder.
  • From there, rename the default folder and name it something else, e.g. “Default.old”.
  • After that, install Google Chrome again and check if the issue is now fixed.
Read More
How to Fix (1058) ERROR_SERVICE_DISABLED Error in Windows 10
This post will guide you in fixing the (1058) ERROR_SERVICE_DISABLED error you can encounter when trying to launch various games. Usually, this error pops up during startup and prevents you from running the game. In fact, this error has become quite a headache for many users. Some of the games it affects are Smite, Paladins, Far Cry, and many more. In most cases, this error is caused by missing or corrupted game files. It could also be caused by the anti-cheat utility you might have installed along with your games. Whichever the cause is, you can try to check out the possible fixes given below to resolve the (1058) ERROR_SERVICE_DISABLED error.

Option 1 – Verify the Integrity of the Game files

This is the first option you can try no matter what kind of issues you are having with Steam games.
  • Double click on the game’s icon located on your Desktop and then go to the Library tab in the Steam window.
  • From there, look for GTA V from the list of games installed in your library.
  • Next, right-click on its entry and select Properties.
  • After that, navigate to the Local Files tab and click the “Verify Integrity of Game Files” button.
  • Now, wait for the tool to complete checking the game’s integrity. You should see that some of the files may have been downloaded.
  • Reopen the game and see if it now runs properly without crashing.

Option 2 – Apply some tweaks in the Service’s startup settings

As pointed out earlier, the error can also occur due to the anti-cheat tools that were installed alongside the game. These tools are usually used by games to check if you are running something which might give you an unfair advantage over other players. These anti-cheat tools include but are not limited to BattlEye, EasyAntiCheat, and PunkBuster. The error might occur if the service’s startup settings are not correctly configured which is why you can apply some tweaks in order to resolve the problem.
  • Tap the Win + R keys to open the Run dialog box.
  • Next, type “services.msc” in the field and hit Enter or click OK to open Services.
  • From the list of Services, look for any of the services mentioned above such as BattlEye, EasyAntiCheat Service, or PunkBuster Service. Then right-click on the service and select Properties from the context menu.
  • After that, check if the service is started by checking the Service status. If it is started, click on the Stop button to stop the service and if it is already stopped, leave it as it is, at least for now.
  • Next, make sure that the Startup type menu in the Service’s properties is set to Automatic before you go on.
  • Now confirm any dialog boxes that may appear as you set the Startup type and then click on the Start button located in the middle before you exit Properties.
Note: You might get the following error message when you click on the Start button:
“Windows could not start the service on Local Computer. Error 1079: The account specified for this service differs from the account specified for other services running in the same process.”
If you got the error message above, then here’s how you can fix it:
  • Tap the Win + R keys to open the Run dialog box.
  • Next, type “services.msc” in the field and hit Enter or click OK to open Services.
  • From the list of Services, look for any of the services mentioned above such as BattlEye, EasyAntiCheat Service, or PunkBuster Service. Then right-click on the service and select Properties from the context menu.
  • Now go to the Log On tab and click on the “Browse…” button.
  • After that, type in your account’s name under the “Enter the object name to select” box and click on Check Names then wait for the name to be recognized.
  • Then click OK once you’re done and type in the password in the Password field when you are prompted to do so. This should resolve the issue.

Option 3 – Try reinstalling the Anti-cheat program

If the first two options did not work out, you can try reinstalling the anti-cheat program.
  • Open Steam from your Desktop or by searching for it in the Start menu.
  • After opening the Steam client, go to the Library tab in the Steam window and then look for the Rust entry from the list.
  • Next, right-click on the game’s icon in the library and select Properties.
  • Now go to the Local Files tab under Properties and click the Browse Local Files button.
  • From there, look for BattlEye, EasyAntiCheat, or PunkBuster folder depending on the game, and then double click on it to open the folder.
  • Then right-click on EasyAntiCheat_setup.exe or the BattlEye installed file in the folder or PunkBuster and select the Run as administrator option.
  • Exit the Steam client by clicking Steam > Exit from the menu located at the top.
Read More
Brave and Vivaldi are blocking google FLoC
FLoC is Google’s alternative to third-party cookies and is based on machine learning. This will allow the browser, any browser, to anonymously study how users are browsing and then group them into ‘cohorts’. Following this, you will be served ads based on your cohort and not on your individual data. So, you are still going to be targeted with ads but in a more anonymous manner. Google claims that this will improve user privacy since this “federated learning” happens on the user’s device and artificial intelligence-based learning involves sharing lesser users than what happens with third-party cookies. If something like this gets widely adopted by ad companies and services, it should “protect users” from tracking methods that are more intrusive than third-party cookies, like browser fingerprinting.

Who is against it?

Privacy-focused browsers DuckDuckGo, Brave, and Vivaldi have all warned users against FLoC and have said that they are going to block it on their end. Brave says that Google FLoC has a design that does not respect the customer’s privacy and consent. It has been designed to provide browsing behavior and interest data with any website that users may interact with, and this process does not involve fully informed consent. Vivaldi, another popular Chromium-based web browser, has also made its stance clear regarding the status of FLoC. The company said in a Reddit thread that the FLoC experiment does not work in Vivaldi. It happens because for FLoC to work, some features need to be enabled under the hood, but Vivaldi does not provide those options. The company also added that it plans to stop the entire FLoC component from being a part of the browser, regardless of how Google may implement it. Considering that Brave and Vivaldi have been privacy-focused browsers since their beginnings, the decision to stay away from FLoC is not surprising.
Read More
Fix error code 16 in Windows 10
Access denied error code 16 is tied to websites, it is an error which you will encounter when trying to visit some specific website or if you are unlucky on all of the websites. Lucky for us this error is fixable and in order for us to do this, follow this guide for possible solutions.
  1. Check Date and Time, Incorrect date and time can often interfere with services in your Windows, browsers are not different and this can cause some websites not to be shown. Check your date and time and set it correctly if needed.
  2. Try to access the website from another device. If you manage to open a website on another PC or some other device then keep reading in order to find the solution, if you can not, then the problem is on the website itself.
  3. Turn off Firewall or antivirus. New antivirus and firewall applications can sometimes mark certain websites as malicious and will cut contact with them rendering them unable to be accessed or opened. Try turning the firewall and antivirus temporarily off and then try to access the website.
  4. Try opening web site in another browser. To eliminate browser-specific issues and their configuration, try opening the website in another browser.
  5. Disable PROXI server. Some applications, especially malicious ones can change your proxi setting in LAN. go to your LAN settings and turn off proxi if it is enabled.
  6. Reset your Browser. If this issue is caused by bad data in your browser or by its settings and preferences, resetting the complete browser will solve the issue.
  7. Use VPN. Sometimes the reason for you was not able to access some website might be because the site is not available for your region, to bypass this issue use VPN and reroute your location.
Read More
Disable Facebook face recognition
Facebook has an algorithm inside it that can recognize your face in pictures and videos which is meant to help people tag friends when they upload media into Facebook. It is a neat feature meant to help all Facebook users but what if we do not want to be detected in pictures and videos? What if we do not want to be tagged? If you are one of the Facebook users that do not wish to be detected and recognized by Facebook in media keep on reading to find out how you can disable this option.
  1. Open the Facebook website and log into your account.
  2. Click on the arrow visible in the top menu bar.
  3. Select the Settings & privacy option.
  4. Click on the Settings option.
  5. Switch to the Face recognition tab on the left-hand side.
  6. Click the Edit button.
  7. Select No from the drop-down list.
And you are done, you do not need to log out or restart facebook in order for changes to have an effect. Now you are free from face recognition and detection.
Read More
InboxAce Removal Tutorial

InboxAce is a browser extension for Google Chrome developed by Mindspark and gives users easy access to the most popular email clients with just 1 click away. This extension changes your default search engine, as well as your home page to MyWay.com. Several anti-virus scanners have marked this extension as a Browser Hijacker due to its information mining nature.

While installing this extension monitors user browsing activities. It logs the website you visit, the links you click, the products you buy, basically everything that you do in a browser. This information is later used to display unwanted targeted ads that are injected into your search results.

About Browser Hijackers

Browser hijacking means that a malicious code has power over and modified the settings of your internet browser, without your consent. Browser hijacker malware is designed for many different reasons. Typically, it will drive users to particular websites which are looking to increase their advertising campaign revenue. Many people believe that these kinds of sites are legitimate and harmless but that is incorrect. Almost every browser hijacker poses an actual threat to your online safety and it is vital to classify them under privacy risks. Browser hijackers can also permit other malicious programs without your knowledge to further damage the computer.

How to determine if your browser has been hijacked

Signs that an internet browser is hijacked include: the home page of your respective browser is changed unexpectedly; you observe new unwanted favorites or bookmarks added, usually directed to ad-filled or pornography sites; default online search engine is modified; find new toolbars which you did not add; unstoppable flurries of popup advertisements show up on your computer screen; your browser gets slow, buggy, crashes very often; Inability to navigate to particular sites, especially anti-malware and also other security software sites.

How it infects your PC

Browser hijackers might use drive-by downloads or file-sharing websites or an e-mail attachment in order to reach a targeted computer. They also come from add-on applications, also known as browser helper objects (BHO), browser extensions, or toolbars. Other times you may have unintentionally accepted a browser hijacker as part of a software bundle (usually freeware or shareware). A good example of some notorious browser hijackers includes Conduit, Anyprotect, Babylon, DefaultTab, SweetPage, Delta Search, and RocketTab, but the names are continually changing. Browser hijackers can disrupt the user’s web surfing experience greatly, record the websites frequented by users and steal private information, cause problems in connecting to the internet, and then finally create stability problems, making applications and systems crash.

Tips on how to get rid of browser hijackers

Some types of browser hijackers can be effortlessly removed from your PC by deleting malicious software or any other recently installed freeware. But, most hijackers are extremely tenacious and need specialized applications to eliminate them. And there’s no denying the very fact that the manual repairs and removal methods could be a difficult job for a novice PC user. On top of that, there are many risks connected with tinkering around with the system registry files. Anti-malware software is very effective with regards to picking up and eliminating browser hijackers that normal anti-virus application has overlooked. SafeBytes Anti-Malware will counter persistent browser hijackers and provide you real-time computer protection against all types of malware. In addition to anti-malware, a system optimizer program, similar to Total System Care, could help you fix Windows registry errors, get rid of unwanted toolbars, secure your online privacy, and increase overall computer performance.

Find Out How To Install Safebytes Anti-Malware On An Infected PC

Malware can cause all sorts of damage once they invade your computer, starting from stealing your personal details to deleting files on your computer system. Some malware goes to great lengths to stop you from installing anything on your computer system, particularly antivirus programs. If you’re reading this, odds are you’re stuck with a malware infection that is preventing you to download or install the Safebytes Anti-Malware program on your PC. There are a few fixes you could try to get around with this particular problem.

Remove viruses in Safe Mode

If any virus is set to run automatically when Windows starts, entering Safe Mode could very well block this attempt. Just the minimum required programs and services are loaded when you start your PC into Safe Mode. The following are the steps you have to follow to boot into the Safe Mode of your Windows XP, Vista, or 7 computers (visit Microsoft website for instructions on Windows 8 and 10 computers). 1) At power-on/startup, tap the F8 key in 1-second intervals. This will bring up the Advanced Boot Options menu. 2) Use the arrow keys to choose Safe Mode with Networking and press ENTER. 3) When you are into this mode, you should have online access once again. Now, make use of your browser normally and navigate to https://safebytes.com/products/anti-malware/ to download and install Safebytes Anti-Malware. 4) After installation, do a full scan and let the program eliminate the threats it finds.

Switch over to an alternate web browser

Some viruses may target vulnerabilities of a particular web browser that block the downloading process. If you’re not able to download the security software using Internet Explorer, this means malware could be targeting IE’s vulnerabilities. Here, you must switch to another browser such as Firefox or Chrome to download Safebytes software.

Make a bootable USB anti-virus drive

Another option is to save and operate an anti-malware program completely from a Thumb drive. Adopt these measures to run the antivirus on the affected computer. 1) On a clean computer, install Safebytes Anti-Malware. 2) Plug the Thumb drive into the clean computer. 3) Double click on the exe file to open the installation wizard. 4) When asked, select the location of the USB drive as the place where you would like to put the software files. Follow activation instructions. 5) Unplug the pen drive. You may now utilize this portable anti-virus on the affected computer system. 6) Double click the EXE file to open the Safebytes tool right from the pen drive. 7) Simply click “Scan Now” to run a complete scan on the affected computer for viruses.

A Look at the Best AntiMalware Program

If you are looking to download the anti-malware program for your PC, there are various tools in the market to consider but you just cannot trust blindly anyone, irrespective of whether it is paid or free program. Some are very good ones, some are ok types, and some are just bogus anti-malware programs that could ruin your computer themselves! You should select one that is dependable, practical, and has a strong reputation for its malware source protection. When considering commercial antimalware tool options, many people select well-known brands, such as SafeBytes, and they are quite happy with it. SafeBytes is a powerful, real-time anti-malware application that is designed to assist the typical computer end user in safeguarding their computer from malicious internet threats. When you have installed this software, SafeByte's state-of-the-art protection system will make sure that no viruses or malware can seep through your personal computer.

SafeBytes anti-malware takes PC protection to a totally new level with its enhanced features. Here are some of the features you will like in SafeBytes.

World-class AntiMalware Protection: Built on a greatly acclaimed anti-virus engine, this malware removal application can detect and remove numerous obstinate malware threats like browser hijackers, PUPs, and ransomware that other typical antivirus programs will miss. Active Protection: SafeBytes gives you round-the-clock protection for your computer limiting malware intrusions instantly. This software will constantly keep track of your computer for suspicious activity and updates itself continuously to keep abreast of the constantly changing threat landscape. Extremely Speed Scanning: SafeBytes’s virus scan engine is one of the fastest and most efficient in the industry. Its targeted scanning highly increases the catch rate for malware that is embedded in various computer files. Safe Web Browsing: SafeBytes checks and gives a unique safety rating to each and every website you visit and block access to web pages known to be phishing sites, thus protecting you from identity theft, or known to contain malicious software. Light-weight: SafeBytes gives total protection from online threats at a fraction of the CPU load because of its advanced detection engine and algorithms. Premium Support: Skilled technicians are at your disposal 24/7! They will promptly resolve any technical issues you might be experiencing with your security software. On the whole, SafeBytes Anti-Malware is a solid program as it has lots of features and could detect and remove any potential threats. You can rest assured that your PC will be protected in real-time as soon as you put this tool to use. You will get the very best all-around protection for the money you spend on SafeBytes anti-malware subscription, there is no doubt about it.

Technical Details and Manual Removal (Advanced Users)

If you’d like to manually get rid of InboxAce without the use of an automated tool, it may be actually possible to do so by removing the program from the Microsoft Windows Add/Remove Programs menu, or in cases of web browser plug-ins, going to the browsers AddOn/Extension manager and removing it. It is also highly recommended to factory reset your browser settings to their default state. If you choose to manually delete the system files and registry entries, utilize the following list to ensure that you know precisely what files to remove before executing any actions. But bear in mind, this can be a tricky task and only computer professionals could accomplish it safely. Also, certain malware is capable of replicating itself or preventing deletion. You’re urged to do this process in Safe Mode.
Files: Search and Delete: 1gauxstb.dll 1gbar.dll 1gbarsvc.exe 1gbprtct.dll 1gbrmon.exe 1gbrstub.dll 1gdatact.dll 1gdlghk.dll 1gdyn.dll 1gfeedmg.dll 1ghighin.exe 1ghkstub.dll 1ghtmlmu.dll 1ghttpct.dll 1gidle.dll 1gieovr.dll 1gimpipe.exe 1gmedint.exe 1gmlbtn.dll 1gmsg.dll 1gPlugin.dll 1gradio.dll 1gregfft.dll 1greghk.dll 1gregiet.dll 1gscript.dll 1gskin.dll 1gsknlcr.dll 1gskplay.exe 1gSrcAs.dll 1gSrchMn.exe 1gtpinst.dll 1guabtn.dll AppIntegrator64.exe AppIntegratorStub64.dll BOOTSTRAP.JS chromegffxtbr.jar CHROME.MANIFEST CREXT.DLL CrExtP1g.exe DPNMNGR.DLL EXEMANAGER.DLL Hpg64.dll INSTALL.RDF installKeys.js LOGO.BMP NP1gStub.dll T8EXTEX.DLL T8EXTPEX.DLL T8HTML.DLL T8RES.DLL T8TICKER.DLL VERIFY.DLL s_pid.dat 1gEIPlug.dll 1gEZSETP.dll NP1gEISb.dll 000653A1.exe Folders: %APPDATA%\InboxAce_1g\ %PROGRAMFILES%\InboxAce_1g\ %PROGRAMFILES%\InboxAce_1gEI\ Registry: Key HKLM\SOFTWARE\Classes\InboxAce_1g.DynamicBarButton Key HKLM\SOFTWARE\Classes\InboxAce_1g.DynamicBarButton\CLSID Key HKLM\SOFTWARE\Classes\InboxAce_1g.DynamicBarButton\CurVer Key HKLM\SOFTWARE\Classes\InboxAce_1g.DynamicBarButton.1 Key HKLM\SOFTWARE\Classes\InboxAce_1g.DynamicBarButton.1\CLSID Key HKLM\SOFTWARE\Classes\InboxAce_1g.FeedManager Key HKLM\SOFTWARE\Classes\InboxAce_1g.FeedManager\CLSID Key HKLM\SOFTWARE\Classes\InboxAce_1g.FeedManager\CurVer Key HKLM\SOFTWARE\Classes\InboxAce_1g.FeedManager.1 Key HKLM\SOFTWARE\Classes\InboxAce_1g.FeedManager.1\CLSID Key HKLM\SOFTWARE\Classes\InboxAce_1g.HTMLMenu Key HKLM\SOFTWARE\Classes\InboxAce_1g.HTMLMenu\CLSID Key HKLM\SOFTWARE\Classes\InboxAce_1g.HTMLMenu\CurVer Key HKLM\SOFTWARE\Classes\InboxAce_1g.HTMLMenu.1 Key HKLM\SOFTWARE\Classes\InboxAce_1g.HTMLMenu.1\CLSID Key HKLM\SOFTWARE\Classes\InboxAce_1g.HTMLPanel Key HKLM\SOFTWARE\Classes\InboxAce_1g.HTMLPanel\CLSID Key HKLM\SOFTWARE\Classes\InboxAce_1g.HTMLPanel\CurVer Key HKLM\SOFTWARE\Classes\InboxAce_1g.HTMLPanel.1 Key HKLM\SOFTWARE\Classes\InboxAce_1g.HTMLPanel.1\CLSID Key HKLM\SOFTWARE\Classes\InboxAce_1g.MultipleButton Key HKLM\SOFTWARE\Classes\InboxAce_1g.MultipleButton\CLSID Key HKLM\SOFTWARE\Classes\InboxAce_1g.MultipleButton\CurVer Key HKLM\SOFTWARE\Classes\InboxAce_1g.MultipleButton.1 Key HKLM\SOFTWARE\Classes\InboxAce_1g.MultipleButton.1\CLSID Key HKLM\SOFTWARE\Classes\InboxAce_1g.PseudoTransparentPlugin Key HKLM\SOFTWARE\Classes\InboxAce_1g.PseudoTransparentPlugin\CLSID Key HKLM\SOFTWARE\Classes\InboxAce_1g.PseudoTransparentPlugin\CurVer Key HKLM\SOFTWARE\Classes\InboxAce_1g.PseudoTransparentPlugin.1 Key HKLM\SOFTWARE\Classes\InboxAce_1g.PseudoTransparentPlugin.1\CLSID Key HKLM\SOFTWARE\Classes\InboxAce_1g.Radio Key HKLM\SOFTWARE\Classes\InboxAce_1g.Radio\CLSID Key HKLM\SOFTWARE\Classes\InboxAce_1g.Radio\CurVer Key HKLM\SOFTWARE\Classes\InboxAce_1g.Radio.1 Key HKLM\SOFTWARE\Classes\InboxAce_1g.Radio.1\CLSID Key HKLM\SOFTWARE\Classes\InboxAce_1g.RadioSettings Key HKLM\SOFTWARE\Classes\InboxAce_1g.RadioSettings\CLSID Key HKLM\SOFTWARE\Classes\InboxAce_1g.RadioSettings\CurVer Key HKLM\SOFTWARE\Classes\InboxAce_1g.RadioSettings.1 Key HKLM\SOFTWARE\Classes\InboxAce_1g.RadioSettings.1\CLSID Key HKLM\SOFTWARE\Classes\InboxAce_1g.ScriptButton Key HKLM\SOFTWARE\Classes\InboxAce_1g.ScriptButton\CLSID Key HKLM\SOFTWARE\Classes\InboxAce_1g.ScriptButton\CurVer Key HKLM\SOFTWARE\Classes\InboxAce_1g.ScriptButton.1 Key HKLM\SOFTWARE\Classes\InboxAce_1g.ScriptButton.1\CLSID Key HKLM\SOFTWARE\Classes\InboxAce_1g.SettingsPlugin Key HKLM\SOFTWARE\Classes\InboxAce_1g.SettingsPlugin\CLSID Key HKLM\SOFTWARE\Classes\InboxAce_1g.SettingsPlugin\CurVer Key HKLM\SOFTWARE\Classes\InboxAce_1g.SettingsPlugin.1 Key HKLM\SOFTWARE\Classes\InboxAce_1g.SettingsPlugin.1\CLSID Key HKLM\SOFTWARE\Classes\InboxAce_1g.SkinLauncher Key HKLM\SOFTWARE\Classes\InboxAce_1g.SkinLauncher\CLSID Key HKLM\SOFTWARE\Classes\InboxAce_1g.SkinLauncher\CurVer Key HKLM\SOFTWARE\Classes\InboxAce_1g.SkinLauncher.1 Key HKLM\SOFTWARE\Classes\InboxAce_1g.SkinLauncher.1\CLSID Key HKLM\SOFTWARE\Classes\InboxAce_1g.SkinLauncherSettings Key HKLM\SOFTWARE\Classes\InboxAce_1g.SkinLauncherSettings\CLSID Key HKLM\SOFTWARE\Classes\InboxAce_1g.SkinLauncherSettings\CurVer Key HKLM\SOFTWARE\Classes\InboxAce_1g.SkinLauncherSettings.1 Key HKLM\SOFTWARE\Classes\InboxAce_1g.SkinLauncherSettings.1\CLSID Key HKLM\SOFTWARE\Classes\InboxAce_1g.ThirdPartyInstaller Key HKLM\SOFTWARE\Classes\InboxAce_1g.ThirdPartyInstaller\CLSID Key HKLM\SOFTWARE\Classes\InboxAce_1g.ThirdPartyInstaller\CurVer Key HKLM\SOFTWARE\Classes\InboxAce_1g.ThirdPartyInstaller.1 Key HKLM\SOFTWARE\Classes\InboxAce_1g.ThirdPartyInstaller.1\CLSID Key HKLM\SOFTWARE\Classes\InboxAce_1g.ToolbarProtector Key HKLM\SOFTWARE\Classes\InboxAce_1g.ToolbarProtector\CLSID Key HKLM\SOFTWARE\Classes\InboxAce_1g.ToolbarProtector\CurVer Key HKLM\SOFTWARE\Classes\InboxAce_1g.ToolbarProtector.1 Key HKLM\SOFTWARE\Classes\InboxAce_1g.ToolbarProtector.1\CLSID Key HKLM\SOFTWARE\Classes\InboxAce_1g.UrlAlertButton Key HKLM\SOFTWARE\Classes\InboxAce_1g.UrlAlertButton\CLSID Key HKLM\SOFTWARE\Classes\InboxAce_1g.UrlAlertButton\CurVer Key HKLM\SOFTWARE\Classes\InboxAce_1g.UrlAlertButton.1 Key HKLM\SOFTWARE\Classes\InboxAce_1g.UrlAlertButton.1\CLSID Key HKLM\SOFTWARE\Classes\InboxAce_1g.XMLSessionPlugin Key HKLM\SOFTWARE\Classes\InboxAce_1g.XMLSessionPlugin\CLSID Key HKLM\SOFTWARE\Classes\InboxAce_1g.XMLSessionPlugin\CurVer Key HKLM\SOFTWARE\Classes\InboxAce_1g.XMLSessionPlugin.1 Key HKLM\SOFTWARE\Classes\InboxAce_1g.XMLSessionPlugin.1\CLSID Key HKLM\SOFTWARE\MozillaPlugins\@InboxAce_1g.com/Plugin Key HKLM\SOFTWARE\InboxAce_1g Key HKLM\SYSTEM\CurrentControlSet\Enum\Root\LEGACY_INBOXACE_1GSERVICE Key HKLM\SYSTEM\CurrentControlSet\Enum\Root\LEGACY_INBOXACE_1GSERVICE%#MANIFEST#%00 Key HKLM\SYSTEM\CurrentControlSet\Enum\Root\LEGACY_INBOXACE_1GSERVICE%#MANIFEST#%00\Control Key HKLM\SYSTEM\CurrentControlSet\Services\InboxAce_1gService Key HKLM\SYSTEM\CurrentControlSet\Services\InboxAce_1gService\Security Key HKLM\SYSTEM\CurrentControlSet\Services\InboxAce_1gService\Enum Key HKCU\Software\InboxAce_1g Key HKLM\SOFTWARE\Microsoft\Windows\CurrentVersion\Run\ Value: InboxAce Search Scope Monitor Data: C:\PROGRA~1\INBOXA~2\bar.bingsrchmn.exe /m=2 /w /h Key HKLM\SOFTWARE\Microsoft\Windows\CurrentVersion\Run\ Value: InboxAce_1g Browser Plugin Loader Data: C:\PROGRA~1\INBOXA~2\bar.bingbrmon.exe00\Control Key HKLM\SYSTEM\CurrentControlSet\Services\InboxAce_1gService Key HKLM\SYSTEM\CurrentControlSet\Services\InboxAce_1gService\Security Key HKLM\SYSTEM\CurrentControlSet\Services\InboxAce_1gService\Enum Key HKCU\Software\InboxAce_1g Key HKLM\SOFTWARE\Microsoft\Windows\CurrentVersion\Run\ Value: InboxAce Search Scope Monitor Data: C:\PROGRA~1\INBOXA~2\bar.bingsrchmn.exe /m=2 /w /h Key HKLM\SOFTWARE\Microsoft\Windows\CurrentVersion\Run\ Value: InboxAce_1g Browser Plugin Loader Data: C:\PROGRA~1\INBOXA~2\bar.bingbrmon.exe
Read More
1 2 3 162
Logo
Copyright © 2022, ErrorTools. All Rights Reserved
Trademarks: Microsoft Windows logos are registered trademarks of Microsoft. Disclaimer: ErrorTools.com is not affiliated with Microsoft, nor claim direct affiliation.
The information on this page is provided for information purposes only.
DMCA.com Protection Status