Android apps inside Windows 11

Android apps inside Windows 11The euphoria around Windows 11 is not dying and reveal that Android apps will work natively inside Windows 11 has raised many emotions and questions.

So, Microsoft has announced that Android apps will run natively inside Windows 11 OS and that they will reside alongside your other installed ones as icons, etc.

It is no secret that many users have been using emulation software to run Android apps inside Windows so far, so what is the difference?

It is still emulation

Whatever you would like to believe it is still emulation and Android apps are at the end of the day still Android apps running inside emulated environment.

This time we will not need third-party emulation software running inside Windows, we will have third-party emulation services running inside Windows.

Intel has teamed up with Microsoft in order to integrate Intel bridge algorithms in order to run Android apps, meaning that yea, pretty much we have emulation services running in order to run the application.

The problem with this kind of approach is that well emulation software is running and consuming system resources only when we start it, this kind of service is always running and always consuming resources and for someone who really does not care about Android apps at all, this is just a waste of resources.

Android store

The store is another issue here, instead of the Google play store we will have the Amazon app store integrated inside the new Microsoft store.

This means that any kind of for example game progress or login information from Google store cannot be transferred into Windows 11, add to that information that in the Amazon app store there are tons of missing applications like SLACK, TRELLO, BitWarden, etc and we might have a serious question here about the use of this feature.

Android apps that do not use Android services

If you even look past that it is still emulation and that it is available on the Amazon app store there is still concern about applications not using Google services for their running.

Many Android apps are relying on Google services like location or optimize their use of on-device resources, handle in-app purchases, etc. that cannot be found on this system.

Uber is a prime example that uses Google location service to determine your location and for its mapping data, with that application, is useless.

Other like Guardian will even pop up message that says Google play service is required in order to even work.

Android apps without Eero system

Amazon Eero system for enhanced internet access is not even yet available in its own app store which brings us to missing some key players like Bank of America, Chase mobile, Bueller, etc.

And across the board, the apps that are present in the Amazon Appstore are often as good as abandoned. Lots of titles are numerous versions behind their up-to-date Play Store counterparts, and plenty of programs you encounter in the Amazon environment clearly haven't been touched in years.

Conclusion

Many new Windows 11 features are quality features that I personally consider good but although this one seems innovative and good I simply cannot stand back it up.

Android apps were already inside Windows with emulation software which used google services and was working just fine, this was not needed in my opinion.

If you like to learn and find out more about various Windows errors, and how to repair them go to our vast archive or use search to find articles that will explain and help you in solving your issue.
However, if you prefer to do things fast and with automatization then we are proposing to use an automated solution for your issues. The application that we are recommending is Advanced System Repair Pro
Advanced System Repair utilizes multiple tools all in one to give you a quick, simple, reliable, and very thorough diagnosis of your PC. It brings you all the tools you need in one program to clean, fix, protect, optimize and boost your PC!
1-Click Maintenance
All the tools to make it simple and easy! It's like having a professional technician at the click of a mouse.

Junk Cleaner
Keeping your computer free from unnecessary clutter also helps make your computer last longer. Like any other machine, if you keep it clean and take care of it, it will serve you better for longer!

Optimize background apps
Optimize applications background activity with the built-in Application Optimizer feature.

Disk Defrag
With a simple 1-click, Advanced System Repair speeds up your PC by assembling fragmented files on your machine and organizing them more efficiently.

Malware Removal
Finds and removes all types of harmful malware including trojans, worms, bots, adware, spyware, PUPs, and more!

Privacy Cleaner
The all-in-one privacy suite to Clean Your Tracks & Protect Your Privacy! Make your computer safe, secure, and more efficient!

System Tweak/Optimizer
ASR will analyze your complete system and settings to adjust your PC to function at its maximum performance.

Registry Cleaner
Over time, as you install and uninstall applications, the registry can become cluttered with old entries and broken settings which can result in program crashes, and annoying messages and slow the computer down.
Visit our Advanced System Repair Pro Download page to inform yourself about all the benefits of this software and get a free trial copy of it.
advanced system repair pro

Advanced System Repair Pro

One-click automated PC repair solution
ASR logo
With Advanced System Repair Pro you can easily
Replace damaged files
Restore performance
Free disk space
Remove Malware
Protects WEB browser
Remove Viruses
Stop PC freezing
DOWNLOAD
Privacy Policy | Terms of Use | Uinstall
Advanced System Repair Pro is compatible with all versions of Microsoft Windows including Windows 11

Share this article:

You might also like

How to Fix Windows 8 Error 0x80070490

How to Fix Windows 8 Error 0x80070490

Error Code  0x80070490 - What is it?

Error code 0x80070490 occurs in versions of Windows including Windows 8 or 8.1 and Windows 7 or Windows Vista. This error often arises when users attempt to install updates via Windows Update or Microsoft Update.

The main reason for the error relates to the Component-Based Servicing (CBS) manifest which has become damaged. When the error occurs, the Windows device is unable to successfully install updates.

Solution

Restoro box imageError Causes

Error code 0x80070490 might appear for various reasons but is most prominent in the following cases:

  • Attempts to install Windows 8 or 8.1
  • A corrupted Component-Based Servicing (CBS)

Further Information and Manual Repair

The solutions for error code 0x80070490 vary so users may need to attempt each solution to find the best results.

  1. Repair Corrupted Windows Files with System File Checker

The System File Checker (SFC.exe) is a Windows-based utility that enables users to check and repair corrupted or damaged system files. It can also restore missing systems files which can be the cause of errors such as error code 0x80070490.

To repair files, begin scan by swiping the right edge of the screen then opening the search box. Type Command Prompt, right-click this option, then select Run as Administrator. Once the scan begins, wait for the process to be completed then restart your device. Check if the error is resolved by reattempting updates. If error code 0x80070490 in Windows 8 or 8.1 persists on your device, proceed to the solution below.

  1. Perform Clean Boot

A clean boot is one of the best ways to reduce conflict among files – an issue that may arise whenever users update, install or run programs on their Windows device.

To run a clean boot, your device reboots using limited drives and programs. The process allows you to identify which conflict among programs is causing errors on your Windows device.

You can access the clean boot tool by entering msconfig in the search box. Select Services, then System Configuration. Check the Hide all Microsoft services checkbox then select Disable all. Next, go to the Startup tab, click and open Task Manager. After selecting the Startup tab, make sure you right-click each startup program. Click Disable from the context menu then close Task Manager when done. Select OK on the System Configuration menu then restart your machine to clean boot Windows 8 or 8.1.

If the clean boot successfully identifies and resolves issues with corrupted files, you will be able to access updates using Windows Update or Microsoft Update. Error code 0x80070490 will no longer occur. But if that proves unsuccessful, other options are available below including running Windows Update Troubleshooter.

  1. Run Windows Update Troubleshooter

This method can provide a simple solution for users as it verifies whether your Internet connection, network adapter and Windows Update services are functioning properly. However, if you are uncertain as to whether you will be able to troubleshoot, seek assistance from a qualified Microsoft technician.

To run Windows Update Troubleshooter, simply download from Microsoft’s website. Be sure you are downloading the tool recommended for your operating system, in this case Windows 8 or 8.1. After you download Windows Update Troubleshooter, run it to enable the tool to check for and resolve update issues on your device.

  1. Use DSIM or System Update Readiness Tool

The System Readiness Tool or DSIM is another method you can use to correct issues related to error code 0x80070490. This tool checks problems on your system that might prevent your computer from performing Windows updates including issues related to damaged system files.

Once you download and install this tool, it will be able to run automatically. The process may be technical, however, requiring specialized knowledge to successfully download and run the tool. Consider getting assistance from an IT professional in this case. Also, check Microsoft's online resources to download the tool.

  1. Use an Automated Tool

Having an automated tool at hand will enable users to always be prepared. Download a powerful automated utility tool to provide solutions whenever error codes or other problems affect your Windows 8 device.

Read More
Fix Could not find the Recovery Environment
If you suddenly find the Windows Recovery Environment not working and you see an error message saying, “Could not find the recovery environment”, then you’ve come to the right place as this post will guide you on how you can fix it. In times when you can’t boot into the Windows Recovery Environment, there could be several reasons behind it. However, have you ever wondered where exactly the Windows Recovery Environment is in your computer? Windows initially places the Windows RE Image file in the installation partition during Windows Setup so if you have installed Windows in the C drive, you can find the Windows RE at the C:/Windows/System32/Recovery or C:/Recovery folder. Keep in mind that this folder is hidden and later on, the system copies the image file into the recovery tools partition to make sure that one can boot into recovery if there are any issues with the drive partition. The “Could not find the recovery environment” error mostly occurs if the Windows Recovery Environment is disabled or if the “Winre.wim” file is corrupted. Thus, to fix this error, you need to refer to the given suggestions below.

Option 1 – Try to enable Windows Recovery Environment

  • In the Windows Start Search, type “PowerShell” and from the search results that appear, right-click on Windows PowerShell and then select the “Run as administrator” option to open it with admin privileges.
  • Next, type the “reagentc /info” command and tap Enter to execute it.
  • After that, if the output states that Status is enabled, then you’re all set.
  • Now type the “reagentc /enable” command and tap Enter to enable the Windows Recovery Environment. You will see a success message at the end signifying that Windows RE is available.

Option 2 – Try to fix the corrupted or missing “Winre.wim” file

If the Winre.wim file is either corrupted or missing, you need to get a new copy of this file from another computer where the Windows RE is working. Once you’re able to get a new copy of the Winre.wim file, you have to set the image path to a new location. For more details, refer to these steps:
  • First, type “Powershell” in Windows Start Search and right-click on Windows PowerShell from the results, and select Run as administrator.
  • Next, execute the given command below to change the path of the WIM file to the new location. Note that the steps should be used when the file path of the Windows Recovery Environment is different from the usual spot.
Reagentc /setreimage /path C:RecoveryWindowsRE
  • As mentioned, if the file is corrupted, you just have to get a new copy from another PC but before you do that, make sure that the WINRE on that computer is disabled (just enable it later on) and then place it in the C:/Recovery path and then set its path again using the command given above and then verify its path by executing the following command.
reagentc /info command
Note: Since the Recovery folder is hidden as well as the WINRE folder in it and you won’t be able to access them using the Windows File Explorer, you need to use the Windows PowerShell or Command Prompt so that you can access them.

Option 3 – Try checking and fixing the WinRE Reference in the Windows Boot Loader

The Windows Boot Loader is the one that determines if it has to load the Windows Recovery Environment. It could be that the boot loader is pointing to an incorrect location which is why you’re getting the error. To resolve it, you have to check and fix the WinRE Reference in the boot loader. How? Follow these steps:
  • In the Windows Start Search, type “PowerShell” and from the search results that appear, right-click on Windows PowerShell and then select the “Run as administrator” option to open it with admin privileges.
  • After that, execute the “bcdedit /enum all” command.
  • Next, look for an entry in the Windows Boot Loader identifier set as Current and look for “recoverysequence” in that section and take note of the GUID.
  • Ensure that the device and the osdevice items show the path for the Winre.wim file and that they are the same. If not, you need to point the current identifier to the one which has the same.
  • Once you’ve found the new GUID, execute this command: bcdedit /set {current} recoverysequence {GUID_which_has_same_path_of_device_and_device}
  • Now check if the error in the Recovery Environment is fixed or not.

Option 4 – Try creating a Recovery Media

You could also try creating a Recovery Media to resolve the error in the Windows RE. All you have to do is download the Windows 10 ISO file using the Media Creation tool and then create a recovery drive. Once you’re done, check if it fixes the problem or not.
Read More
How to do Disk cleanup in Windows 10
Disk cleanup is part of Windows 10 tools and it is essential in keeping your computer up and running in optimal settings and to free so much needed space as well as remove temporary files that can accumulate over time. Using disk cleanup from time to time is recommended and a very useful habit that will save you some headaches and optimize your computer running time, speed up boot sequence, etc. Think of it like cleaning up your desk, from time to time it can get too overwhelmed with junk and non-important things and if you are keeping it tidy all the time each time you need to find something it will be much faster and easier, same goes with computers, so if you do not have it, try to develop a habit that once per month you start disk clean up and remove trash from your hard drive. In order to do so, press ⊞ WINDOWS + E to bring File Explorer up Keyboard with windows and e markedOnce File Explorer is up and running right-click on the hard drive you wish to run disk cleanup on and click on properties. file explorer hd propertiesProperties Windows will open on the general tab, on that tab you have disk cleanup on the lower right part of properties, click on it. local disk properties cleanupWait for Windows to gather information about your hard drive and files on it. After it is finished you will be greeted with the next screen: disk cleanup section chooserHere you can thick and mark which items you would like to get rid of and which ones you would like to keep. Note that you can freely tick all of them and remove them since removing these files will not break WIndows in any way. make your choices and click on ok. You can also click on Clean up system files to run system files cleaner and get rid of junk there, you will not be able to choose any options there, Windows will alone clean up what is not needed. After disk cleanup is finished least thing you will have is more free disk space, but like mentioned, keeping your Windows and computer healthy goes a long way in its usability, speed, and performance.
Read More
How to Fix Windows Update Error 0x800706be
Error 0x800706be is a Windows error code that pops up when a particular system file is having some issue. This error pops up on other Windows-compatible software as well as driver vendors. This error signifies a misconfigured or corrupted system file so you might encounter this error in different instances. For instance, this error might pop up when you click the audio icon from the system tray or when the Windows Upgrade or Update has failed. Needless to say, this error can be caused by different factors. Anyhow, this post will show you what you can do to fix the problem when the error pops up during a Windows Update or Upgrade. If you are seeing this error when you try to install the latest Windows updates, it will show a Windows Update failed message and you obviously won’t be able to update your Windows 10 PC until you fix this error. You will keep seeing this error even when you try to reboot or update it a couple of times. As mentioned, the error code 0x800706be appears when there is something wrong with your system files – they are either corrupted or misconfigured. This error is most likely caused by the corrupted Windows Update Components. Corruption of these files is not unusual and it could happen anytime. So since the Windows Update files or components are corrupted, you won’t be able to successfully install the latest Windows Updates. Here are some options you can try to fix the problem.

Option 1 – Try running the Windows Update Troubleshooter

Running the Windows Update troubleshooter is one of the basic things to do when facing any kind of issue with Windows Updates. As long as it can it will detect the issue and automatically solve them so that there will be no need for you to do more technical steps to resolve the issue.
  • Tap the Windows and R keys on your keyboard to open the Run dialog box.
  • Then type in “control.exe /name Microsoft.Troubleshooting” in the field and tap Enter to open the Windows Update Troubleshooter.
  • After that, click Windows Update and follow the next on-screen instructions.

Option 2 – Try resetting the Windows Update Components

This is another basic thing to do in fixing the error 0x800706be. It is also one of the solutions that mostly worked for users who also got this error when trying to install Windows updates. And since the problem is caused by corrupted Windows update components, the most logical thing to do is to delete old files and reset components. To reset the Windows Update components, follow the given instructions below carefully.
  • Tap the Windows key once.
  • Then in the Windows Start Search, type in “command prompt”.
  • From the search results displayed, right-click on Command Prompt and select the “Run as administrator” option.
  • After that, type in “net stop wuauserv” and tap Enter.
  • Next, type in “net stop cryptSvc” and tap Enter.
  • Then type in “net stop bits” and tap Enter.
  • Type in “ren C:\Windows\Software\Distribution Software\Distribution.old” and then tap Enter.
  • Afterward, type in “C:\Windows\System32\catroot2\Catroot2.old” and tap Enter.
  • Next, type “net start cryptSvc” and tap Enter.
  • Then type “net start bits” and tap Enter.
  • Finally, type in “net start msiserver” and tap Enter.
  • Now close Command Prompt and then try updating Windows once more.
Read More
How to Fix Windows 10 Error 0x8000222

How to Fix Windows 10 Error 0x8000222

Error Code 0x8000222 - What is it?

Error Code 0x8000222 is an error that occurs during the installation process for Windows 10. It is also present in past versions of the software, going all the way back to Windows 7 and even affecting Windows software products, including Microsoft Word, PowerPoint, and other items in the Microsoft Office Suite.

Common symptoms include:

  • Inability to complete the installation process for new versions of the operating system, Microsoft Office programs, or other Windows-based software

While there are several factors that can contribute to the appearance of Error Code 0x8000222 during the installation process, most of these factors can be addressed using a few high-level methods. These methods do require some advanced knowledge and computing skills, so if you are unable to complete the steps below successfully or do not have confidence in your ability to undertake these methods on your own, contact a qualified computer repair service that is familiar with the Windows 10 installation process.

Solution

Restoro box imageError Causes

There are a few different issues that can cause Error Code 0x8000222 to arise during the installation process on your Windows operating system. The first is a corrupted file in your system library or dynamic link library, also called the DLL. The second is interference by your proxy, firewall, or antivirus software that inhibits the machine from being able to access the files that it needs to successfully complete the installation of your Windows operating system or software.

Further Information and Manual Repair

To address and resolve Error Code 0x8000222 on your Windows operating system, regardless of the version of the software that you are using, there are a few steps that you can take. Keep in mind that these steps do require some advanced skills and knowledge about your computer, so if you don’t believe that you can undertake these steps on your own or if the following methods do not fully resolve the issue on your device, talk to a qualified computer repair technician for assistance.

Here are the best ways to address Error Code 0x8000222 on your Windows machine:

Method One:  Fix Your DLL Dependencies Registry

Before implementing this method, make sure that a proxy is not active on your computer. To check to see if there is an active proxy, simply press the Windows key together with the “R” key and type in the command “cmd”, then when the prompt opens up, type in the following command:  “netsh winhttp import proxy source=ie”. From the box that follows, if you see a message saying that there has been an error writing in the proxy settings and that access has been denied, it means that you can turn off the proxy setting in your Internet Explorer and the error will go away on its own.

If you do not have an active proxy, it is time to check and see whether your DLL dependencies are properly set up. To do so, open up the command prompt again by pressing the Windows key and “R” key at the same time and typing in “cmd”. Once the command prompt is active, simply typing in “regsvr32 Officevalidator.dll”, then attempt to resume your installation once it has been complete.

In some cases, you may need to restart your computer before attempting the Windows installation process.

Method Two:  Turn Off Firewalls and Antivirus Software Before Installing

If the above method did not successfully resolve the problem, you can go into your control panel and turn off any firewalls or antivirus programs that may be interfering with your ability to complete the Windows installation process. Depending on the programs that you use for your antivirus needs, you may need to restart your computer before you reattempt to do the installation process.

You should be able to turn your firewall and antivirus programs back on once the installation process has run through to completion.

In most cases, taking the steps above will fully resolve the appearance of Error Code 0x8000222 on your Windows 10 machine.

Method Three: Use An Automated Tool

If you wish to always have at your disposal a utility tool to fix these Windows 10 and other related issues when they do arise, download and install a powerful automated tool.

Read More
Razer unveils their first internal PC hardware
razer pc hardware components
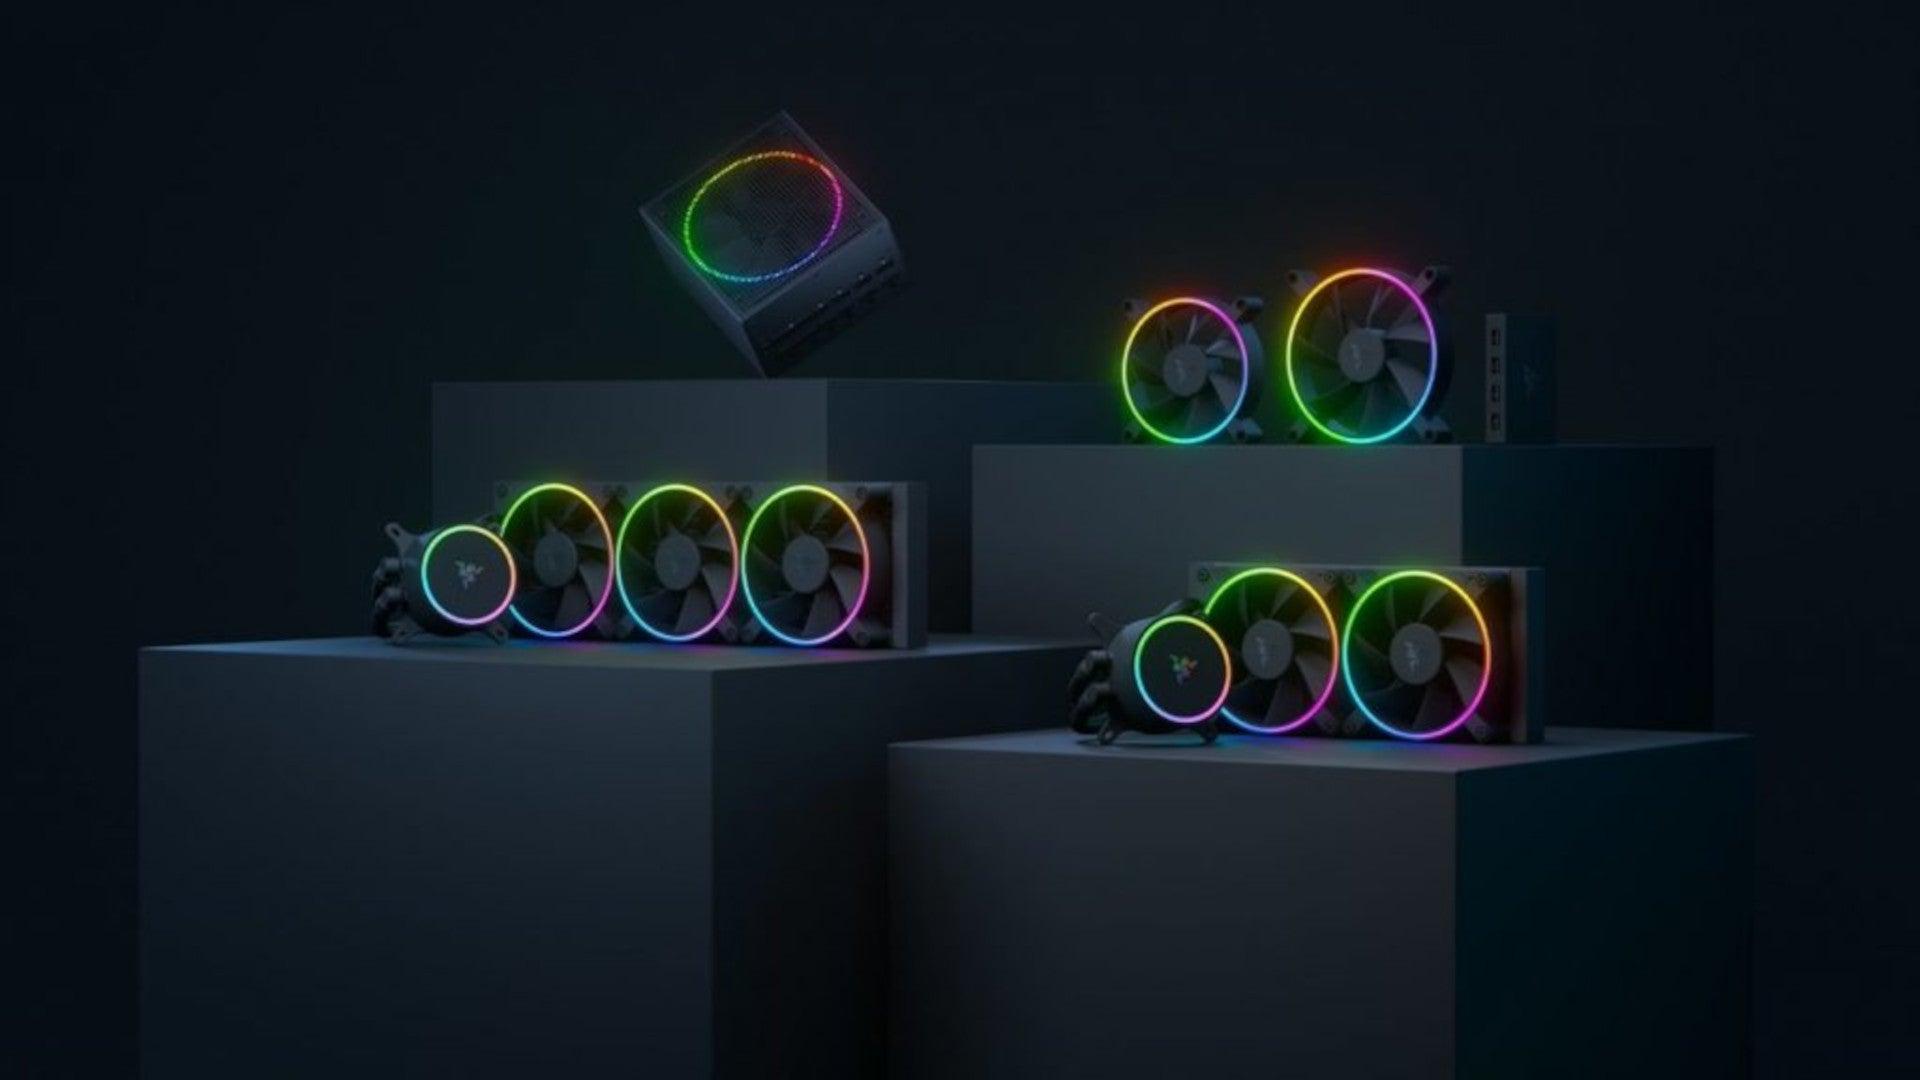
Razer is a well-known brand among PC gamers and users, it started as a peripheral manufacturer focused on keyboards and mouse but after years passed Razer expanded its inventory offerings. It soon started offering headphones and lately has branched into wider product lines like gaming chairs and protection masks. It is not a big surprise that Razer is expanding into other branches of the PC industry. This time, however, it has revealed not one but three new hardware for your PC. Case fans, all in one liquid cooler and power supply. There are not many details about the products themselves but one thing is one hundred percent confirmed, they come with Razer Chroma, all of them, even the fans.

Katana Chroma ATX PSU

razer power supply
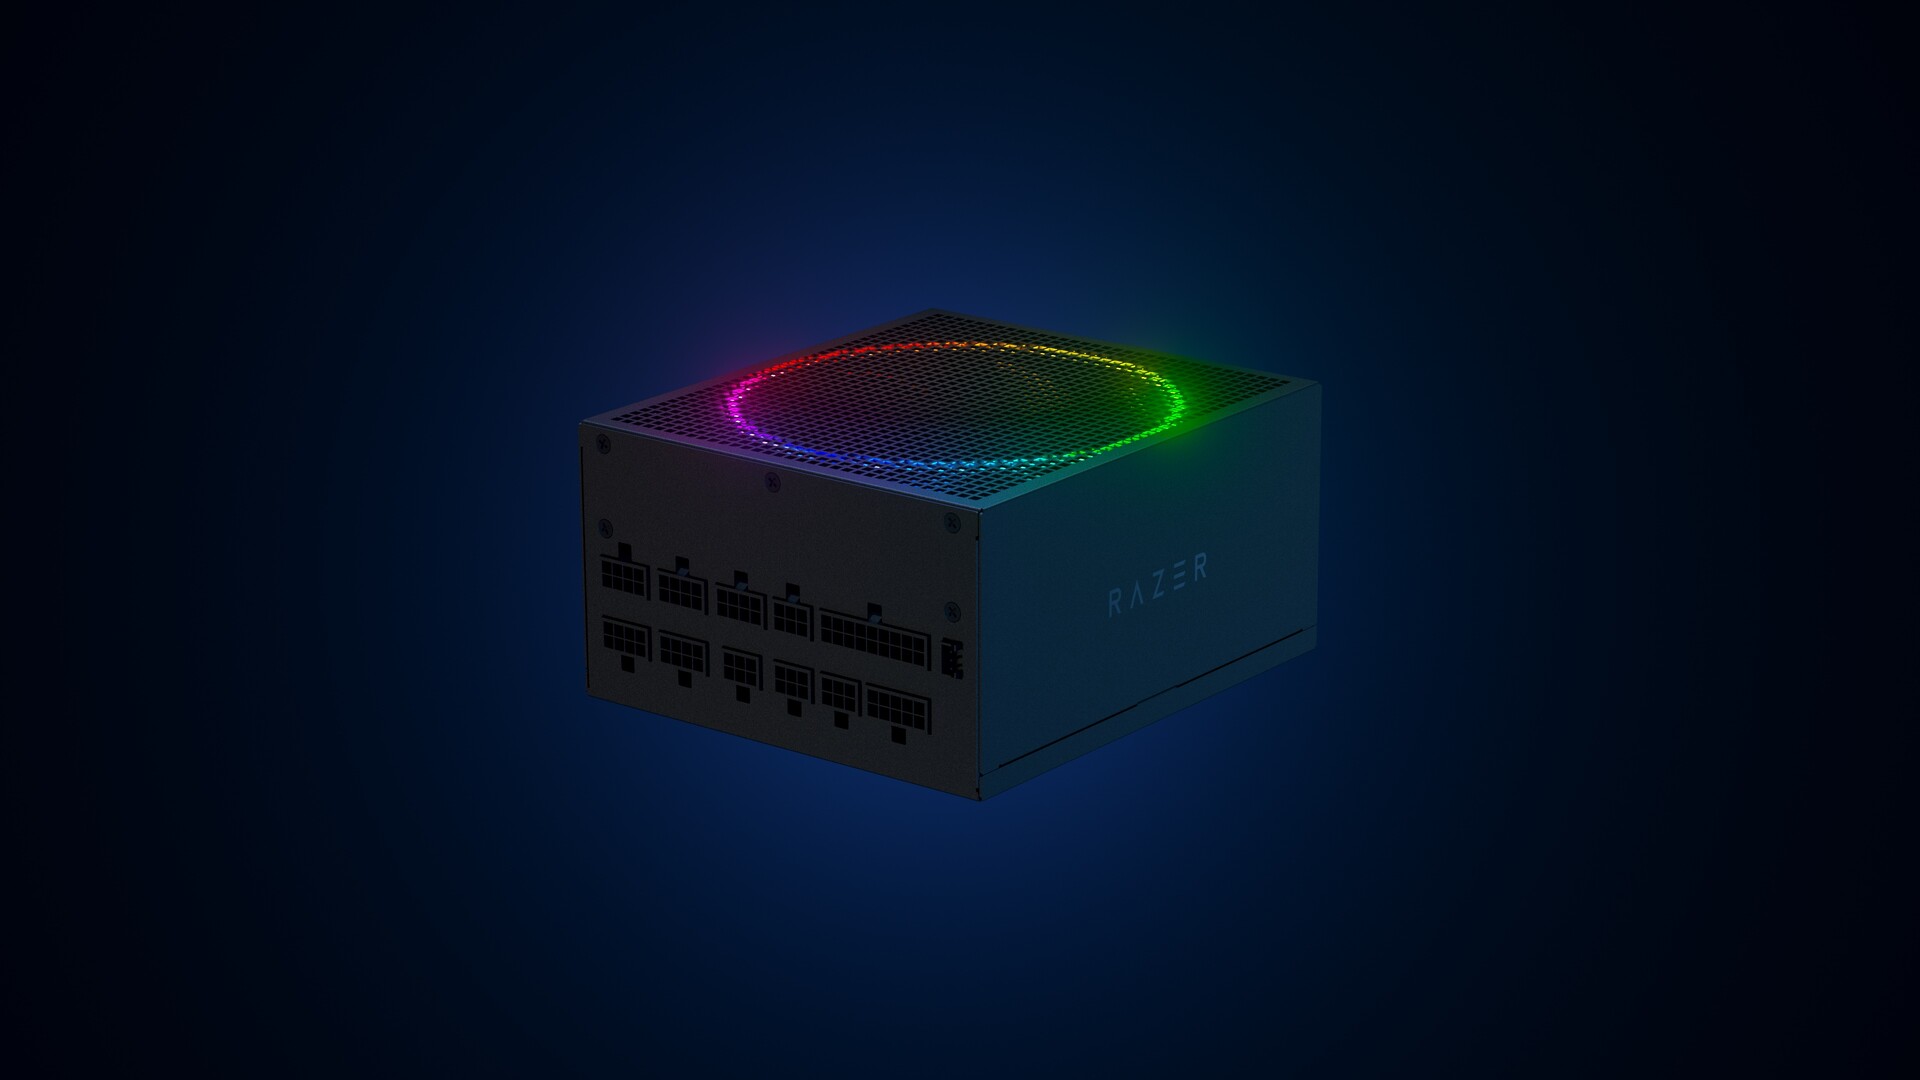
Most interesting for me personally is Razers Katana, the power supply unit. It is a modular power supply ranging from 750W to 1200W with the additional option of Titanium rated one with an impressive 1600W of power. Power supply will start shipping in early 2022 and at the time of writing this article no price range has been released.

Razer Hanbo AIO

razer water cooling
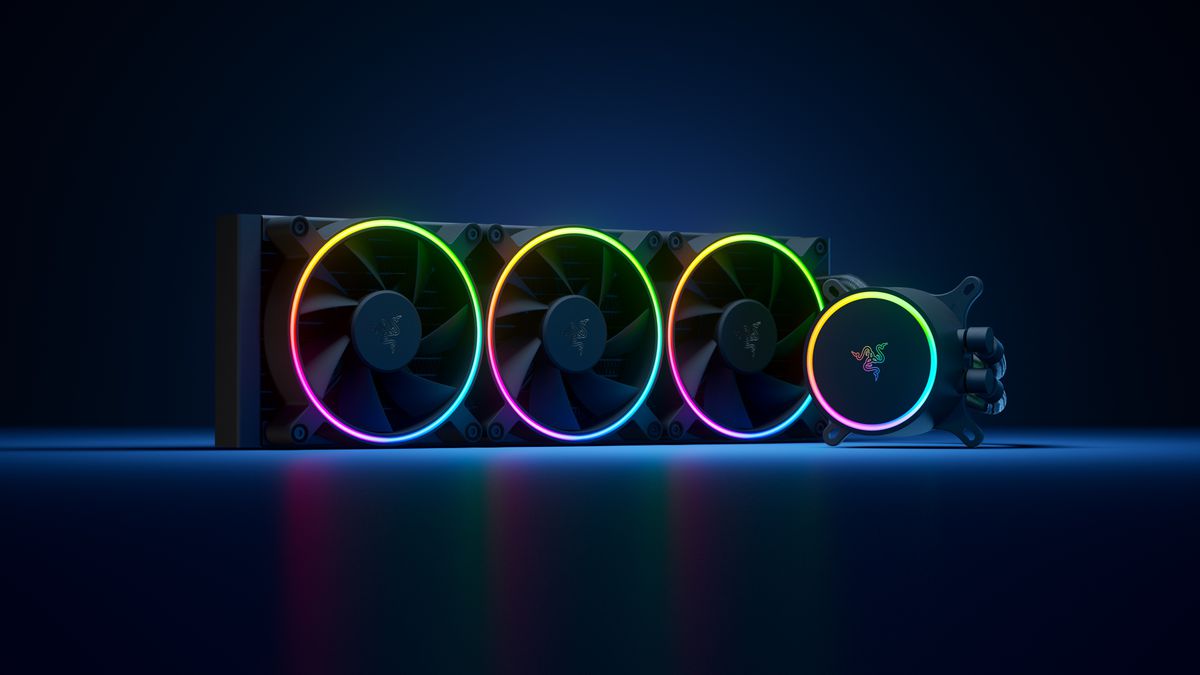
Hanbo liquid cooler will feature an optimized intake design so it can ensure greater heat transfer and fluid dynamic for improved reliability and silent operation. Radiator comes in 240mm size with two fans and a larger one of 360mm with three fans. The pump will be able to rotate in any direction of full 360 degrees so it can fit in any case. Hanbo will be released in November this year but no pricing has been released so far.

Razer Kunai Chroma case fans

razer case fans
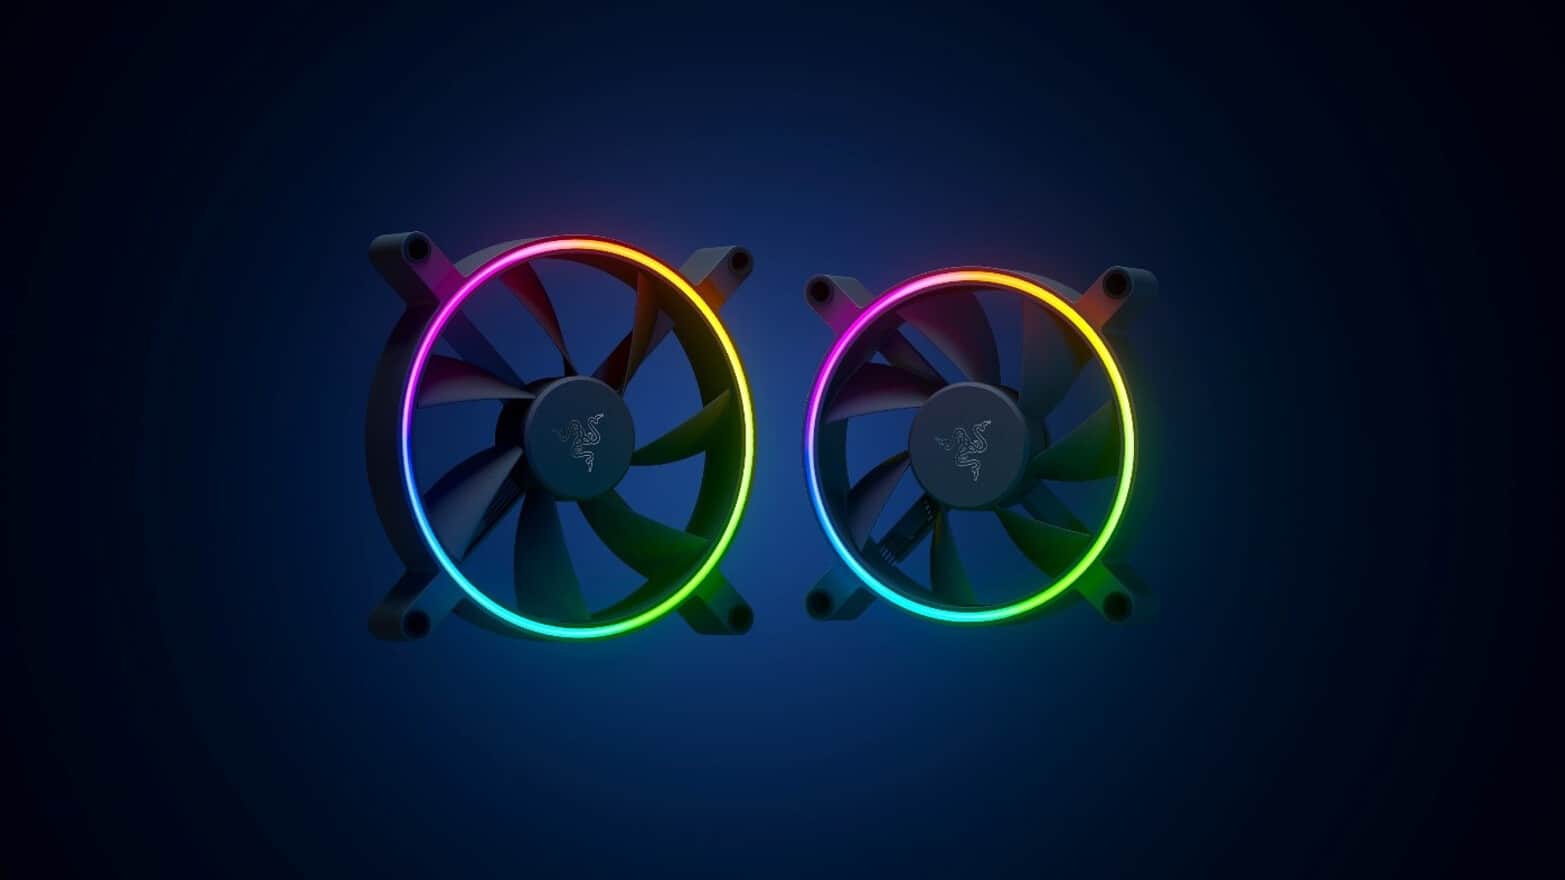
Kunai fans will boast high static pressure performance with lowered noise. They will go as far as 2200rpm for the 120mm version where the 140mm version will go up to 1600rpm. They will come with addressable LEDs and up to eight fans will be able to be connected to Razer’s PWM fan controller that will come with a magnet at the back for easy attachment to any steel part of PC casing. PWM will use Razer’s Synapse software to customize pulse width modulation in order to improve airflow and noise. PWM will be priced at $49.99 in the Razer Store and it is available for preorder. Fans are priced at $44.99 for one 120mm or $129.99 for a three-pack of 120mm. One 140mm will go for $49.99 and a three-pack will be $129.99.
Read More
Disable Facebook face recognition
Facebook has an algorithm inside it that can recognize your face in pictures and videos which is meant to help people tag friends when they upload media into Facebook. It is a neat feature meant to help all Facebook users but what if we do not want to be detected in pictures and videos? What if we do not want to be tagged? If you are one of the Facebook users that do not wish to be detected and recognized by Facebook in media keep on reading to find out how you can disable this option.
  1. Open the Facebook website and log into your account.
  2. Click on the arrow visible in the top menu bar.
  3. Select the Settings & privacy option.
  4. Click on the Settings option.
  5. Switch to the Face recognition tab on the left-hand side.
  6. Click the Edit button.
  7. Select No from the drop-down list.
And you are done, you do not need to log out or restart facebook in order for changes to have an effect. Now you are free from face recognition and detection.
Read More
Fix UTCSVC high CPU and Disk usage in Windows
There is a lot of high resource utilization by any process that slows down a Windows operating system and one of the services that could cause such a thing is the utcsvc.exe process. This particular process at times can cause high CPU and disk usage. So if you are currently facing this problem, read on as this post will guide you on how you can resolve the problem. UTC which stands for Universal Telemetry Client is a software that runs a service named Diagnostic Tracking Service or DiagTrak. This service is used by Microsoft to collect customer feedback, analyze customer’s problems, and push resolution via updates in order to make the Windows 10 operating system better. This service is an executable file that could be translated to Service Host and even though the process does not usually cause problems, there are actually times when it does especially if it results in high resource utilization. In such cases, you might want to consider disabling it to fix its high CPU and disk usage.

According to Microsoft:

“We collect information about you, your devices, applications and networks, and your use of those devices, applications, and networks. Examples of data we collect include your name, email address, preferences, and interests; browsing, search and file history; phone call and SMS data; device configuration and sensor data; and application usage.”
There are several ways you can disable the utcsvc.exe process. You can disable it using the Service Manager, Registry Editor, and Group Policy Editor. For more details, refer to the instructions laid out below.

Option 1 – Disable the Connected User Experience & Telemetry Service via Service Manager

Note that this option is for standalone systems, so if you’re not using one, refer to the next given options below.
  • Tap the Win + R keys to open the Run dialog box.
  • Then type “services.msc” in the field and tap Enter or click OK to open the Services Manager.
  • From the given list of services, look for the Connected User Experience service. Once you found it, click on it and you’ll see its description which states:
“The Connected User Experiences and Telemetry service enables features that support in-application and connected user experiences. Additionally, this service manages the event-driven collection and transmission of diagnostic and usage information (used to improve the experience and quality of the Windows Platform) when the diagnostics and usage privacy option settings are enabled under Feedback and Diagnostics.”
  • Next, right-click on it and select Properties.
  • Now, change its Startup Type to Disabled and click on the Apply and OK buttons to save the changes made.

Option 2 – Disable the Connected User Experience & Telemetry Service via Registry Editor

  • Tap the Win + R keys to launch the Run utility and type “Regedit” in the field and click OK to open the Registry Editor.
  • Next, navigate to this registry path: HKEY_LOCAL_MACHINESOFTWAREPoliciesMicrosoftWindowsDataCollection
  • After that, right-click on the folder named “DataCollection” and select New > DWORD (32-bit) Value.
  • Now name the new value “AllowTelemetry” and make sure that its Value data is “0” and then click on OK to save the changes made.
  • Restart your computer.

Option 3 – Disable the Connected User Experience & Telemetry Service via Group Policy Editor

If you have to disable the service related to the Universal Telemetry Client for company-managed systems, then you can do that using the Group Policy Editor.
  • Tap the Win + R keys to open the Run utility and type “gpedit.msc” in the field and hit Enter to open the Group Policy Editor.
  • Next, navigate to this path: Computer Configuration > Administrative Templates > Windows Components> Data Collection and Preview Build
  • After that, double-click on Data Collection and Preview Build to open its settings.
  • From there, look for the “Allow Telemetry” item and double click on it to open its Properties.
  • Next, set the radio button to Disabled and then click on the Apply button to save the changes made.
  • Restart your computer.

Option 4 – Run the Hardware and Devices Troubleshooter or the Performance Troubleshooter

Hardware and Devices Troubleshooter:

  • The first thing you need to do is click on Start and then on the gear-like icon to pull up the window for Settings.
  • After opening Settings, look for the Update and Security option and select it.
  • From there, go to the Troubleshoot option located on the left-hand side of the list.
  • Next, select Hardware and Devices from the list and open the Troubleshooter and run it. Once it is doing its job, wait for it to complete the process and then restart the system.
  • After the system restarts, check if the problem’s now fixed. If not, refer to the next option given below.

Performance Troubleshooter:

  • Tap the Win + R keys to open the Run dialog box.
  • Type “exe /id PerformanceDiagnostic” in the field and hit Enter to open the Performance troubleshooter.
  • Then click on Next to get started. Wait until the process is completed.
Read More
Automatically backup files & folders
If you are a person which spends a lot of time in front of the computer doing work, then you are aware of the importance of having a proper backup of your archive so if anything bad happens you will lose almost none of the work. We can never tell when we might experience HDD failures or when we might be a victim of cyber attacks, natural disasters,s and other unpredictable circumstances where we could lose all of our data in a matter of minutes. Having a backup of our data is very important but sometimes we are too busy or not around and we miss that data backup we wanted to do, and if in this case disaster strikes we are out of luck and data is lost. To avoid such circumstances, you can set up automatic Windows Backups at a scheduled time. This way it will help to have the loss of important files and documents from unexpected hazards. in order to create automatic backups of your files, you have several options, and below we will explore each one in hopes that you will find one that best suits your needs.
  1. Create automatic file backup with OneDrive

    This is probably the best way to do it because each time when you sign in OneDrive files get backed up right away, files are stored in the cloud and can be accessed on any device via a Microsoft account. To get started, open the Settings app first. Click on the Update & Security category Select the Backup tab from the left pane. Move to the right page and click on the Back up files button that is available under Back up files to OneDrive. Select the folders you want to backup in the cloud, and remove those ones you don’t want to backup. On the next page, click the Start backup button to start the procedure.
  2. Create a backup using File History

    File History is an inbuilt feature that allows users to create automatic file backup on Windows 10. File History allows the users to back up their files in an external or cloud drive at different intervals of time. To create automatic file backup using File History: Press the ⊞ WINDOWS + I to open the Settings app. Click on the Update & Security category and then select the Backup tab from the left pane. Under the Back up using File History section, click on Add a drive button. Now choose the drive to store the backup files. Windows will use this drive for File History. Then turn on the toggle button under Automatically back up my files. This will back up your data to the drive automatically whenever you connect it to the system. Below the toggle button, click on the “More options” link to set how frequently File History will back up. Use the Keep my backups drop-down menu to get the option to configure the time for how long you want to keep your backups. By default, it will keep your backups forever. Under the section Back up these folders, tap on the Add a folder button in order to add one more folder to the backup. Then click on the Add a folder button, under Exclude these folders. This will exclude the files that you don’t want to back up. You can stop the drive from storing backup files to change the backup storage location. To do this, click the Stop using drive option under the Back up to a different drive category.
  3. Backup using Windows backup & restore tool

    Open Control Panel Click on the System and Security option Scroll down and select the Backup and Restore (Windows 7) button Next click on the Set up backup button, available under the Back up or restore your files section Under the Save backup on section, select the Backup Destination where you want your backup files to get stored On the “Set up backup” page, Windows will ask you to choose the way to backup, check Let me choose checkbox, and then hit the Next button Under the section Computer, select the files and folders you want to backup. Then uncheck the box next to the Include a system image of drives option, and then hit the Next button Now click on the Change schedule link. Set the time and check the box beside Run backup on a schedule button Click OK then select the Save settings and run backup option
Read More
Fix error code 0x80190001 in Windows
If you are trying to install a Feature Update in Windows 10 but you got the error code 0x80190001, then it means that there is something wrong with the installation files. The installation files are either corrupted or some of them failed to be downloaded. On the other hand, the issue might also have something to do with a driver issue. When you encounter error 0x80190001, you will see the either of following error message on your screen:
“Something went wrong Couldn’t download Windows 10, please check your network settings and try again. You can contact Microsoft support for help with this error. Here’s the error code 0x80190001”. Or: “An unexpected error was encountered while attempting to download files required for the upgrade”.
Here are some fixes that could help you resolve the error 0x80190001. Follow them carefully.

Option 1 – Run the Network Troubleshooter

As mentioned in the error message the issue might have something to do with the network settings of your computer so you can try to run the Network Troubleshooter and then try updating or installing Windows 10 again.

Option 2 – Update Network drivers

  • Tap the Win + R keys to launch Run.
  • Type in msc into the box and tap Enter or click OK to open the Device Manager.
  • After that, look for Network Adapters from the list of device drivers displayed. Once you find it, expand it to see the Network drivers.
  • Right-click on it and select the option “Uninstall device” – do the same thing for the other Network drivers.
  • Restart your PC so Windows can detect and reinstall the drivers you just uninstalled.

Option 3 – Use Storage Sense to clean up temporary and junk files

  • Open Setting > System > Storage from the WinX Menu.
  • From there, you will see a list of all the local and connected storage devices along with the details on the free space.
  • Now make sure that the Storage Sense feature is turned On then go find a link that says “Free Up Space” and click it to open.
  • After that, a screen which is the built-in program in Windows 10 will appear and will scan your computer for the following junk files so you can free up disk space:
  • Windows Upgrade Log Files
  • The system created Windows Error Reporting Files
  • Thumbnails
  • Temporary Internet Files
  • Previous Windows Installation Files
  • Delivery Optimisation Files
  • DirectX Shader Cache
Note: Once you’re done freeing up space on your drive, try to run the setup file again.

Option 4 – Delete the contents in the SoftwareDistribution folder

The Software Distribution folder in the Windows operating system is a folder that can be found in the Windows directory and is used to store files temporarily which might be required to install the Windows Update on your PC. Thus, it is required by the Windows Update and maintained by WUAgent. A lot of users tried deleting the files in this folder to fix the problem and so far it has worked. Like them, you can try clearing the Windows Update cache by simply deleting the contents of the folder named “SoftwareDistribution” since Windows apparently can’t clear and re-download the update contents once they are corrupted. Thus, deleting the contents of this folder will make Windows download the contents again which will fix the problem. To do that, follow the steps below.
  • Open the WinX Menu.
  • From there, open Command Prompt as admin.
  • Then type in the following command – don’t forget to hit Enter right after typing each one of them.
net stop wuauserv net stop bits
  • After entering these commands, it will stop the Windows Update Service and the Background Intelligent Transfer Service.
  • Next, go to the C:/Windows/SoftwareDistribution folder and get rid of all the folders and files thereby tapping the Ctrl + A keys to select them all and then click on Delete. Note that if the files are in use, you won’t be able to delete them.
  • Once all the contents in the Software Distribution folder are deleted, restart your PC and then go back to Command Prompt and input the following commands again.
net start wuauserv net start bits
 Since the folder has already been flushed, it will be populated afresh the instant your restart your computer and open Windows Update.

Option 5 – Run the Windows Update Troubleshooter

You might also want to run the Windows Update Troubleshooter as it is also known to help users resolve Windows Update errors like error 0x80190001.

Option 6 – Try to disable your antivirus program

Disabling the antivirus program or any security software installed in your computer is always a good idea you can try when the Windows Update process does not go smoothly. So before you try updating your computer again, make sure to disable the antivirus or security program and once the Windows Update is done, don’t forget to enable the antivirus program back again.

Option 7 – Try to use the Media Creation tool

The Media Creation tool in Windows allows you to use the ISO installation file to make a bootable device that you can use to install Windows on your PC. Note that this is kind of different from the usual installation process as it could erase your computer’s current settings and data on the primary drive. Thus, before you proceed, you need to backup all your data into some removable drive and then use the Media Creation Tool to make a bootable drive.
  • After making the bootable drive, you need to plug it into your computer and then reboot.
  • Next, tap the F10 or Esc key to open the boot options.
  • Now set the boot priority of the removable drive the highest. Once the setup comes forth, follow the next onscreen instructions and install Windows without any problems.
Read More
1 2 3 162
Logo
Copyright © 2022, ErrorTools. All Rights Reserved
Trademarks: Microsoft Windows logos are registered trademarks of Microsoft. Disclaimer: ErrorTools.com is not affiliated with Microsoft, nor claim direct affiliation.
The information on this page is provided for information purposes only.
DMCA.com Protection Status