What is Trojan Kryptik and what does it do

Trojan. Kryptik is a malicious computer infection known as a Trojan horse. Trojan. Kryptik can load at startup and recreate itself which makes it difficult to manually remove from the infected computer. Trojan. Kryptik can compromise the infected system by allowing a remote hacker to gain access without the user's permission or knowledge. Trojan. Kryptik can also lead to the infection of other unknown malware parasites.

trojan krypticTrojan.Kryptik creates the following registry entry or registry entries:

Directory
%ALLUSERSPROFILE%\windrivgr 19.7
%LOCALAPPDATA%\DsHcaJnIIz
File name without path
scaalqtw.exe
Regexp file mask
%ALLUSERSPROFILE%\sqldump.exe
%APPDATA%\b[NUMBERS].exe
%APPDATA%\Microsoft\Windows\Start Menu\Programs\Startup\[RANDOM CHARACTERS].com.url
%APPDATA%\Origin\update.vbe
%APPDATA%\Stanfind.exe
%APPDATA%\vpn gui.exe
%LOCALAPPDATA%\Microsoft\Windows\Symbols\wvfilters.sys
%TEMP%\nvc.exe
%TEMP%\system.exe
%TEMP%\winsrvcs32.exe

If you like to learn and find out more about various Windows errors, and how to repair them go to our vast archive or use search to find articles that will explain and help you in solving your issue.
However, if you prefer to do things fast and with automatization then we are proposing to use an automated solution for your issues. The application that we are recommending is Advanced System Repair Pro
Advanced System Repair utilizes multiple tools all in one to give you a quick, simple, reliable, and very thorough diagnosis of your PC. It brings you all the tools you need in one program to clean, fix, protect, optimize and boost your PC!
1-Click Maintenance
All the tools to make it simple and easy! It's like having a professional technician at the click of a mouse.

Junk Cleaner
Keeping your computer free from unnecessary clutter also helps make your computer last longer. Like any other machine, if you keep it clean and take care of it, it will serve you better for longer!

Optimize background apps
Optimize applications background activity with the built-in Application Optimizer feature.

Disk Defrag
With a simple 1-click, Advanced System Repair speeds up your PC by assembling fragmented files on your machine and organizing them more efficiently.

Malware Removal
Finds and removes all types of harmful malware including trojans, worms, bots, adware, spyware, PUPs, and more!

Privacy Cleaner
The all-in-one privacy suite to Clean Your Tracks & Protect Your Privacy! Make your computer safe, secure, and more efficient!

System Tweak/Optimizer
ASR will analyze your complete system and settings to adjust your PC to function at its maximum performance.

Registry Cleaner
Over time, as you install and uninstall applications, the registry can become cluttered with old entries and broken settings which can result in program crashes, and annoying messages and slow the computer down.
Visit our Advanced System Repair Pro Download page to inform yourself about all the benefits of this software and get a free trial copy of it.
advanced system repair pro

Advanced System Repair Pro

One-click automated PC repair solution
ASR logo
With Advanced System Repair Pro you can easily
Replace damaged files
Restore performance
Free disk space
Remove Malware
Protects WEB browser
Remove Viruses
Stop PC freezing
DOWNLOAD
Privacy Policy | Terms of Use | Uinstall
Advanced System Repair Pro is compatible with all versions of Microsoft Windows including Windows 11

Share this article:

You might also like

How to Fix Error 126

Troubleshoot Error 126

Error 126 - What is it?

Error 126 is a Windows PC error that mostly occurs either during program installation or removal. It is commonly experienced by Vista, XP and Windows 7 users. When the error 126 is generated, it usually terminates the program installation process, immediately. It is advisable to take corrective error repair measures immediately to ensure that you are easily able to install your desired program and you don’t encounter the error again.

Solution

Restoro box imageError Causes

There are multiple reasons for the occurrence of the error code 126 including. The reasons are listed below:
  • Dll file corruption
  • Missing or damaged dll files
  • Corrupt and misconfigured system files
  • Improper program installation
  • Viral infection
  • Corrupt registry
  • Improper hardware

Further Information and Manual Repair

To resolve the error 126 on your PC, you don’t always have to hire a technician or be a computer programmer yourself. Though this error is critical the good news is that it is very easy to resolve. You can fix the error even if you are not technically sound. Try the solutions that we have listed below to help you resolve error 126 immediately:

Solution 1: Disable Firewall Protection

Sometimes Firewall protection may stop you from installing new programs on your PC successfully and this may display the error 126 on your PC. In such a scenario, disable Firewall protection and then try installing the desired program again. See if it works.

Solution 2: Restore Points

Sometimes dll files can go missing due to program removals and you may come across the error 126. To resolve it, restore points. This will help you restore your PC back to the way it was functioning before you removed a program and will also help you recover the lost and missing dll files.
  • This can be done, by clicking the start menu.
  • Now go to all programs, then accessories, and then system tools.
  • Here you will see the ‘System Restore’ option. Simply click on it.
  • This will help you open a new window. Here select the option ‘Restore My Computer to an Earlier Time’ point.
  • As you select it, it will show you a list of restore points.
  • Choose the latest restore point you see in the list and click ‘Next’ to continue. Now confirm to finish restoration.
  • Restart your PC to activate the changes.

Solution 3: Scan for Viruses

The underlying cause for the error could also be related to viruses on your PC. To remove the viruses, you will have to download a powerful antivirus and scan your entire PC. Please note, anti-viruses are notorious for slowing down system performance, so you might have to compromise on the speed of your PC.

Solution 4: Run a Hardware Diagnostic

To find out which hardware is causing the error message to pop up, you will have to run a hardware diagnostic. For this, simply go to the start menu, type Memory Diagnostic in the search bar. Now access this tool and click on Diagnose your Memory problems. As you click on it, it will ask you to perform the check by either restarting the PC immediately or on the next restart. Select the immediate one to get going. The system will carry a scan on the memory and show you the list of problematic errors detected during the scan. To resolve this error then all you have to do is replace the piece of faulty hardware. Nonetheless, if no faulty hardware is detected, this means the error is related to the registry.

Solution 5: Clean and Restore the Registry

The error 126 is also sometimes generated due to poor PC maintenance which leads to registry issues. The registry basically saves and stores all the data and activities performed on the PC. This also includes junk files, invalid registry entries, bad keys, temporary files, internet history, and cookies. This accumulates a lot of disk space. If not removed, they damage the registry and corrupt other important files like system and dll files, thereby generating PC-related error codes like error 126. The best way to resolve this error on your PC in seconds is to download Restoro on your PC. This is an advanced and multi-functional PC repair tool embedded with multiple powerful utilities including an intuitive registry cleaner, an antivirus, and a system optimizer. The registry cleaning feature detects all registry issues and errors. It wipes out all the unnecessary and obsolete files cluttering the system, fixes the damaged dll files, and restores the registry back to normal. Simultaneously, the antivirus utility scans for all privacy errors and malicious software infecting your system. This includes malware, adware, spyware, and Trojans. The system optimizer feature ensures your PC performance does not slow down. It boosts the speed of your PC to its optimum level. This PC fixer is safe, user-friendly, and efficient. It can be downloaded on any Windows version. Click here to download Restoro on your system and resolve error 126 right away!
Read More
The task image is corrupt/tampered 0x80041321
If you suddenly encountered an error that says, “The Task image is corrupt or has been tampered with”, along with an error code of 0x80041321, read on as this post will guide you on what you can do to resolve this problem in your Windows 10 computer. According to security experts, this kind of error has something to do with a corrupt scheduled backup task wherein each time the task service plans to execute a task, it validates a few things. And if it finds any issue with the integrity or corruption in the registry, it will mark those tasks as corrupt and throws the error 0x80041321. There are several options you can check out to fix the problem. You can try using the Registry Editor to edit and fix the corrupted tasks or you could also delete the schedule keys or the WindowsBackup file, as well as try deleting the task from the Task Scheduler or refresh the User_Feed_Synchronization. But before you of these potential fixes, make sure that you check every option and verify if it’s not associated or trying to run a file which it should not. In addition, make sure that you create a System Restore point as well so that you can undo any changes you will be making if anything goes wrong. Once you have these things covered, refer to each one of the options provided below.

Option 1 – Try to use the Registry Editor to edit and fix corrupted tasks

The first thing you can do to fix the problem is to edit those tasks via Registry Editor, as well as fix the corrupted ones in System32. Before you proceed, keep in mind that since you are dealing with the Backup triggered by the Task Scheduler, you can find the entries for the tasks in different locations. You can find the Task Scheduler at Task Scheduler Library > Microsoft > Windows > Windows Backup, whereas, you can find it in this path in the Registry Editor, HKEY_LOCAL_MACHINE SOFTWARE Microsoft Windows NT CurrentVersion Schedule WindowsBackup AutomaticBackup. On the other hand, you can find the Windows System folder at C:/Windows/System32/Tasks/MicrosoftWindows/WindowsBackup. You need to ensure that the name of the task name is the same as everywhere and take note of the name. Once you have these covered, follow the steps below.
  • Tap the Win + R keys to open Run and type “Regedit” in the field and hit Enter to open the Registry Editor.
  • Next, navigate to this key: ComputerHKEY_LOCAL_MACHINESOFTWAREMicrosoftWindows NTCurrentVersionScheduleTaskCacheTreeMicrosoftWindowsWindowsBackup
  • From there, take note of the GUID value in the ID entry of the task under the AutomaticBackup and Windows Backup Monitor folder.
  • After that, you have to remove the task registry entries related to the ID from these locations
    • HKEY_LOCAL_MACHINESOFTWAREMicrosoftWindows NTCurrentVersionScheduleTaskCachePlain
    • HKEY_LOCAL_MACHINESOFTWAREMicrosoftWindows NTCurrentVersionScheduleTaskCacheLogon
    • HKEY_LOCAL_MACHINESOFTWAREMicrosoftWindows NTCurrentVersionScheduleTaskCacheBoot
  • Once done, you have to create a temporary copy of the corrupted task file by going to this location: C:/Windows/System32/Tasks/MicrosoftWindows/WindowsBackup
  • From there, look for the AutomaticBackup and Windows Backup Monitor tasks and copy them to a location where you can keep them safe.
  • Next, you have to fix the corrupted task by deleting it from this location: C:/Windows/System32/Tasks/MicrosoftWindows/WindowsBackup
  • After that, you have to recreate the task by going to Task Scheduler > Microsoft > Windows> Windows Backup.
  • Now click on the Action menu and on Import task and navigate to the backup files and import them.
  • Once you’ve created the tasks, run them manually and see if the error is now fixed.

Option 2 – Try to delete the Schedule keys in the Registry

  • Launch the Registry Editor and go to this key: HKLMSOFTWAREMicrosoftWindows NTCurrent VersionSchedule
  • From there, delete all of its sub-keys.
  • Once done, exit the Registry Editor and check if the Backup Tasks are now working.

Option 3 – Try to remove the WindowsBackup file

The next thing you can do to fix the problem is to remove the WindowsBackup file if the first two options didn’t work. It is possible that the problem has something to do with corrupted Task files. The task files are XML files that include parameters, programs to use, and many more. If any of these files end up getting corrupted, the task scheduler will have trouble running it and will throw the “The Task image is corrupt or has been tampered with” error.
  • To delete it, go to C:WindowsSystem32TasksMicrosoftWindowsWindowsBackup.
  • From this location, get rid of all the files. You could also these files via Command Prompt using the DEL command.
  • Once done, go to the Backup and Restore in the Control Panel and set up the Windows Backup again.

Option 4 – Try to delete the task from the Task Scheduler

If you don’t want to delete the files from Windows Explorer, you can delete them instead via Task Scheduler.
  • Open the Task Scheduler and go to Task Schedule LibraryMicrosoftWindowsWindowsBackup.
  • From there, delete both of the tasks and set up Windows Backup again.
  • Once done, go to the Task Manager and run the AutomaticBackup task again and see if it works.

Option 5 – Try to restart the Task Scheduler service

As mentioned, it is possible that the Task Scheduler service could be disabled. You could have disabled it when trying to enhance your computer’s performance and whatnot. Thus, you need to verify if it’s running or not and then restart it.
  • First, you need to tap the Win + R keys on your keyboard to open the Run dialog box.
  • Next, type “services.msc” in the field and click OK or tap Enter to open the Windows Services Manager.
  • You will see a list of Services and from there, look for the Task Scheduler service and double click on it.
  • After that, go to the General tab and click on the Startup Type options and then select “Automatically” from the given list.
  • Click on the “RUN” option and select the “Restart the Service” option.
  • And click on the “After Second Failure” option and then select the “Restart-Service” option again.
  • Now click on the “After Subsequent Failures” tab and select the “Restart the Service” option.
  • Finally, click on the Apply and OK buttons and then run the Task Scheduler and see if the issue is now fixed.

Option 6 – Try refreshing the User_Feed_Synchronization

According to security experts, enabling and disabling the User Feed sync also known as the User_Feed_Synchronization task can help resolve the problem.
  • Tap the Win + X keys and select the PowerShell (admin) option from the menu.
  • Next, type the “msfeedssync disable” command and tap Enter.
  • Repeat the same process but this time run the “msfeedssync enable” command.
Read More
How to Fix Error 0x80070057

Repair Error 0x80070057

Error Code 0x80070057 - What is it?

Error 0x80070057 is a typical Windows 7 error code. It may occur when you try to back up files by using Windows Backup on Windows 7 and the backup fails.  The error message is often displayed as the following:

“An internal error has occurred: The parameter is incorrect: (0x80070057)”

Besides this, you may also experience this error message when you format a hard disk drive to install Windows 7.

Solution

Restoro box imageError Causes

The error 0x8007005 occurs due to multiple reasons. However, the most common causes for this error code include:
  • The partition that is reserved for the system is damaged
  • Misconfigured registry keys
  • Misconfigured decimal symbol settings

Further Information and Manual Repair

Here are some of the best and easy DIY methods to resolve the error 0x80070057 on your PC.

Solution 1: Change the Decimal Symbol Setting

As mentioned above the error 0x80070057 sometimes can be triggered by misconfigured decimal symbol settings. Therefore, try changing the settings to fix the problem. The error is likely to occur if the decimal symbol is not set to ‘.’ (dot). This is common in languages and locales other than English such as German. Here’s what you need to do to change the decimal symbol setting:
  • First, open the Control Panel, click the clock, then language, and then region.
  • Now click the formats tab and go to the additional settings menu.
  • Here you will find the decimal symbol field, now type "." (dot) and then click OK twice.
  • After that, you must restart your PC to activate the changes.

Solution 2: Create a New Partition and Reinstall Windows 7

If the error 0x80070057 is linked to partition damage, then this method is the best way to resolve it. Here’s what you need to do:
  • Insert the Windows 7 DVD and start the installation.
  • Select your language preference to install. Here you will see a screen of the Microsoft License Agreement. Click on the I accept option to proceed with the installation process.
Then click next.
  • Choose a custom advance option and select the Disk O partition 1 option.
  • Once selected, click delete. When you do this you will be prompted if you want to confirm the deletion, click OK to continue.
  • Now repeat the same however now select Disk O partition 2.
Delete this partition as well. Now click New to create a new partition. Here define the disk size and then click apply. Please note, the size of the default value is the maximum size of the disk. After doing so, select disk 0 partition 2 and then click the formatting tab. Once the formatting is complete, click next to continue Now you will be able to complete the installation of Windows 7 on your PC without any problem.

Solution 3: Add a Registry Key Value

If the underlying cause of the error 0x80070057 is a registry issue, then it is serious as such issues can put your PC at serious risks like system failure, crash, and data loss. To resolve this error and add a registry key value here’s what you need to do: Go to the start menu and type Regedit.exe in the search bar and then press enter. Locate and click the following registry sub-key: HKEY_LOCAL_MACHINESOFTWAREPoliciesMicrosoftSystem. Once you locate it, now go to the edit menu and point to new, and then click DWORD Value. After that, type CopyFileBufferedSynchronousIo and press enter again. Right-click now on the text you just typed and then click Modify. In the Value data box, type 1 and then click ok and exit the registry editor. This will fix the error on a temporary basis but not permanently. However, a long-term solution is to clean and repair the registry.

Solution 4: Restoro

The registry gets cluttered with unnecessary and redundant files like junk files, cookies, internet history, and bad registry keys. If these are not removed timely, they can damage the registry and corrupt DLL files. It often leads to disk fragmentation (disk partition) too. To remove these files immediately, clean and restore the registry and repair the corrupt files, it is advisable to download Restoro.

Why Restoro

  • This is an advanced and highly functional Registry Cleaner. It is deployed with a cutting-edge and intuitive algorithm that scans your entire PC to detect all registry issues in seconds. It cleans the cluttered disk and restores the registry back to normal.
  • It is safe, bug-free, and efficient. This software is easy to use and compatible with all Windows versions.
  • In addition to this, it is also deployed with several other powerful utilities like an antivirus that detects all malicious software and removes them right away. It also functions as a system optimizer and boosts the speed of your PC significantly.
Click here to download Restoro and resolve error 0x80070057 now!
Read More
How to Fix the Error Code 28

How to Fix the Error Code 28

Error Code 28- What is it?

The error code 28 is a driver error. This is one of the many device manager error codes. When this error occurs on your computer, the following message is displayed:

“The drivers for this device are not installed. (Code 28)”

Another driver device error message you might encounter is error code 41. 

Error Causes

Error 28 occurs because of unsuccessful device driver installation. This usually happens when you try to update new drive versions on your system. It is advisable to repair this error right away as it can hamper your ability to use certain hardware. For example, if error 28 occurs due to the unsuccessful installation of the USB driver, then it if not fixed and resolved it may prevent you from using hardware devices. Unsuccessful driver installation means you either didn’t install it properly or your computer has registry issues. If it’s the registry then you must fix it without any delay because it can expose your PC to serious threats like system crash and failure. To avoid such inconvenience, repair it.

Further Information and Manual Repair

When it comes to repairing the error code 28, here’s what you can do: Simply go to the control panel and click on the Device Manager option:
  • In the details pane with the list of devices, locate the device for which you want to reinstall the driver software.
  • Double click on it to open the properties dialog box.
  • Now click on the driver tab and then click update driver.
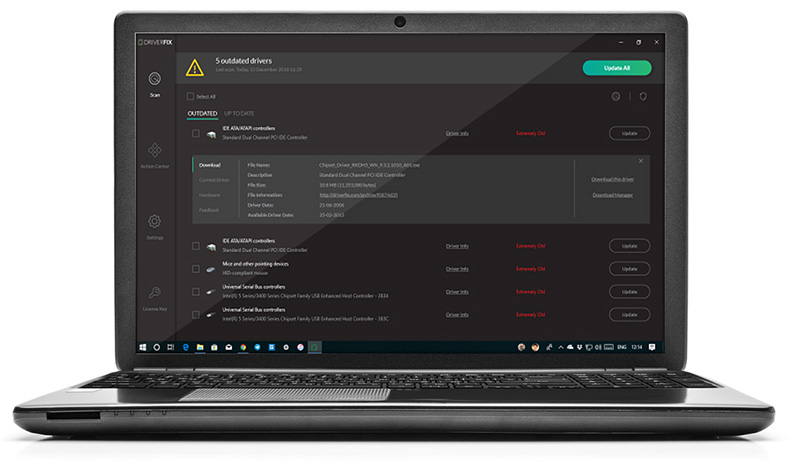
After updating, try using that device again if it doesn’t work and shows the error code 28 on your computer screen then this means the underlying cause is the registry. Congratulations, you have just Fixed Error Code 28 In Windows 10 all by yourself. If you would like to read more helpful articles and tips about various software and hardware visit errortools.com daily. Now that’s how you fix Error Code 28 In Windows 10 on a computer. On the other hand, if your computer is going through some driver-related issues that have to get fixed, there is a one-click solution known as DRIVERFIX you could check out to resolve them. This program is a useful tool that could repair corrupted drivers and optimize your PC’s overall performance. This is basically a solution that’s within your grasp with just a click. It’s easy to use as it is user-friendly. For a complete set of instructions in downloading and using it, refer to the steps below Perform a full system scan using DRIVERFIX. To do so, follow the instructions below.
  1. Download and install DRIVERFIX. from the official site.
  2. Once the installation process is completed, run DRIVERFIX. to perform a full system scan. driverfix screenshot
  3. After the scan is completed click the “Update All” button. driverfix screenshot
Read More
Quick Solution Guide to Error Code 40

Quick Solution to Error Code 40

Error Code 40 – What is it?

Error Code 40 is a device driver error that users encounter on any Windows 2000 and later operating systems. It occurs when the peripheral device that you connect to your PC cannot be accessed due to a change in the system registry.

This is due to the presence of invalid sub-keys of the device driver in the system registry. It is a common error that users come across and appears on your PC with either of the following messages:

“Information in the registry entry for this driver is invalid”

OR

"Windows cannot access this hardware because its service key information in the registry is missing or recorded incorrectly. (Code 40)"

Solution

driverfix boxError Causes

As mentioned above, the error code is triggered when the device driver’s invalid sub-keys appear in the registry, effectively changing it. This happens when the windows system files get damaged due to the following factors:

  • An incomplete program uninstallation
  • An incomplete program installation
  • Hardware is not removed properly
  • System recovery from viruses
  • An improper system shut down

Factors such as incomplete installations or uninstallations or an improper system shut down can cause files to become damaged that threaten the health of your computer.

Removing viruses from the computer is also another factor as it removes the entries in the Windows system files which contain the viruses including spyware or malware

Further Information and Manual Repair

Fixing Error Code 40 is similar to fixing other device manager error codes. Here are a few methods you can try.

Method 1 – Use System Restore

You can use system restore to eliminate the problem. Here is how you can use it:

  • Log in using an Administrator account
  • Click ‘Start’ button and select All Programs > Accessories > System Tools > System Restore
  • Click ‘Restore my computer to an earlier time’ and click ‘Next’
  • Select the last Windows restore point from the ‘On this list, click a restore point’ list, and click ‘Next’
  • Click ‘Next’ on the confirmation window to proceed
  • Restart your PC after restoration is complete
By restoring the system via a last saved system checkpoint, you can obtain undamaged Windows system registry files that can help avert the error code.

Method 2 – Manually uninstall then reinstall the device driver

If using system restore also does not work in removing the error code, you may have to resort to manually uninstalling and then reinstalling the device driver causing the problem.

This would be necessary since the remaining incomplete files due to a partial removal or installation of programs is what contributes to the error code. By uninstall and reinstalling the device driver program, it would lead to the completion of the files.

You can do this by firstly logging in as Administrator and open Device Manager. Select the device that is causing the problem and double click it and make sure that the peripheral is connected properly to the PC. Upon opening, click on the ‘Driver’ tab and then select ‘Update Driver’.

Make sure to refer to the system documentation that you received with your PC or computer to check for the motherboard details and driver specifics.

Method 3 – Use software to automatically download the driver

Manually uninstalling and reinstalling the driver will do the trick, however, it may be time-consuming especially when you would have to resort to your hardware user manual.

Therefore, using a program such as DriverFIX can save you a lot of time and frustration in having your device work properly on your computer.

DriverFIX, with its user-friendly approach to help you fix your PC issues, comes with an integrated database that detects which drivers you need to reconfigure within just a few seconds and downloads it automatically.

It further ensures that your drivers are installed in their entirety leaving no room for any incomplete files to remain that create Error Code 40.

It also has the added advantage of being able to backup and restores your files should there be the slightest possibility of system file damage.

Thus, registry damage can be averted by letting the software roll back the system files to an earlier healthy checkpoint. Driver Assist is the answer to fixing your PC error codes accurately and quickly.

Click here to download DriverFIX to fix Error Code 40 quickly and effectively!
Read More
Lock folder with password in Windows 10
Hello and welcome everyone. In today's article, you will learn how to lock folder and content in it. Please be aware of few things:
  1. The method is shown here works, but you need to be careful and follow step by step or you will damage your files permanently,
  2. If you forget your password, you can not access your files anymore
  3. Your files altho protected can still show up in recent files of some applications
All of that being said, let us start with locking the local folder on the computer with the password. Go to the folder where you have files that you would like to hide and lock with a password. Enter the folder and create the new text file inside it. Skip the name for now and go inside it. Copy and paste the following code inside the file:
cls @ECHO OFF title Folder Locker if EXIST "Control Panel.{21EC2020-3AEA-1069-A2DD-08002B30309D}" goto UNLOCK if NOT EXIST Locker goto MDLOCKER :CONFIRM echo Are you sure u want to Lock the folder(Y/N) set/p "cho=>" if %cho%==Y goto LOCK if %cho%==y goto LOCK if %cho%==n goto END if %cho%==N goto END echo Invalid choice. goto CONFIRM :LOCK ren Locker "Control Panel.{21EC2020-3AEA-1069-A2DD-08002B30309D}" attrib +h +s "Control Panel.{21EC2020-3AEA-1069-A2DD-08002B30309D}" echo Folder locked goto End :UNLOCK echo Enter password to Unlock folder set/p "pass=>" if NOT %pass%==Your-Password-Here goto FAIL attrib -h -s "Control Panel.{21EC2020-3AEA-1069-A2DD-08002B30309D}" ren "Control Panel.{21EC2020-3AEA-1069-A2DD-08002B30309D}" Locker echo Folder Unlocked successfully goto End :FAIL echo Invalid password goto end :MDLOCKER md Locker echo Locker created successfully goto End :End
Now locate this line of code in the document: if NOT %pass%==Your-Password-Here goto FAIL and replace Your-Password-Here with your password. !!! Write down somewhere your password, if you lose it you will lock the folder even for you !!! Save the file as FolderLocker.bat and double-click on it to execute it. If everything was done correctly, a new folder with the name: Locker Move files that you want to hide and protect inside that folder. Double click again on FolderLocker.bat The command prompt will appear with the question do you want to lock the folder, press Y, and press ENTER. The command prompt will close and the Locker folder will disappear. In order to unhide and access the folder, you will need to double click on FolderLocker.bat again but this time command prompt with ENTER your password will appear. Type in your chosen password and the folder is back. If you wish to hide and lock it again just double click on FolderLocker.bat again, confirm with Y and it is hidden again.
Read More
How to Fix Windows 10 Error Code 0xC004E003

How to Fix Windows 10 Error Code 0xC004E003

What is Error Code 0xC004E003?

Error code 0xC004E003 almost always appears when there are damaged files in the Windows operating system. These files could be corrupt for a number of reasons and are usually a serious danger to the life of the computer system. These file errors may be caused by a number of things. Incomplete installation setup, incorrect deletion of hardware or utilities, or an unfinished file erasure. The trigger might also be in the event that the computer system is contaminated with a virus or adware or spyware, or even by the improper shut down of the computer. Any of these scenarios have the possibility to result in the removal or corruption of data of the Windows system data files.

The data system files that are damaged will give linked data and archives that are missing or wrongly linked. These are needed for the proper functioning of the software. This can also happen when or after installing third-party software that might have changed the system files. If it is suspected that a program installation will need to be stopped, it is best to let it run through the setup and then delete it later. While it installs, it is altering program files, and likely rearranging them. Stopping this in the middle can scramble files associated with the program and files vital to the usage of the computer.

Solution

Restoro box imageError Causes

This error will pop up after installing third-party software that has changed the system files. These system files are necessary to finish the activation process. A restore point will be necessary if it is ultimately determined that a system restore is necessary, to bring the computer back to the state it was in previous to the failed installation.

  • Error code “0xC004E003” appears and does not allow the system to continue the install.
  • The computer will not allow any further access or installation of the program.
  • The computer may crash.
  • The third-party program will not have installed completely or successfully.
  • The system will not start up correctly.
  • Personal files are corrupt or missing.

Further Information and Manual Repair

There are several steps that can be taken when the error code 0xC004E003 appears. It is helpful to know that this can occur from trying to install third party software. Going forward, do not attempt to install third-party software that is not trusted, and does not attempt to abruptly stop the third-party software from installing. This may cause the program to corrupt the files or delete important files. Recovering from this error can be easy if there is a recent restore point already backed up in the recovery portion of the system's files.

  • Method One

Run an error scan. The problem should be resolved after rebooting the computer once these steps have been completed.

  1. Download and save an error code fix utility.
  2. Setup the program and then click the Scan button.
  3. Click the Repair Errors button when the diagnostic has been completed successfully.
  4. Reboot the computer.
  • Method Two

Best when utilized by an expert.

  1. Start the system up and sign in as the admin.
  2. Click on Get Started, then select Programs, Accessories, Tools, and then System Restore.
  3. On the next screen, click on Restore my PC to an Earlier Period, and then click Next.
  4. Select the most recent system restore date within the drop-down menu of “select restore point”.
  5. Click Next.
  6. Click Next on the confirmation window.
  7. Reboot the system after the system has finished restoring.
  • Method Three

Another option for restoring. This method can be used by a novice.

  1. Right-click on the Start button, then select Control Panel.
  2. Look for the Control Panel for Recovery.
  3. Select Recovery, then Open System Restore, then Next.
  4. Choose the restore point right before the problematic installation.
  5. Click Next, click Finish.

NOTE: If there are no restore points available, the system recovery may not be turned on. To check this, go to Control Panel, and select Recovery. Configure System Restore, Configure. Then, select Turn on system protection. Having a current restore point for a computer ensures the ease of recovery if any problems with the computer arise.

If you wish to always have at your disposal a utility tool to fix these Windows 10 and other related issues when they do arise, download and install a powerful automated tool.

Read More
Virtual desktop with different wallpapers
Virtual desktopThe feature that was originally planned for now scrapped Windows 10X is included in Windows 11. You will be able to customize your Virtual desktop with different wallpapers for each screen. In order to fully customize your virtual desktops with different wallpapers follow this easy step-by-step guide.
  1. Click on the Task View button in the taskbar
  2. When the Task View opens, select the desktop on which you want to set wallpaper
  3. The view will switch to the selected desktop. Right-click anywhere on the desktop and select personalize
  4. In personalization settings, click on the background
  5. Select wallpaper which you would like to have on the desktop by clicking on browse and navigating to the desired one
  6. Close the settings
  7. Repeat for each virtual desktop you would like to customize
Read More
Moving mouse pointer via the keypad in W11
windows 11 mouse pointerIn Windows 11 if you do not own a mouse or it has suddenly malfunctioned you can still move your arrow on-screen using the numeric pad. In this guide, we will guide you on how to turn this option ON, follow this easy guide step by step.
  1. Press ⊞ WINDOWS + I to open Windows settings
  2. Click on Accessibility on left
  3. Scroll down to reach the interaction section on the right and click on Mouse
  4. Click on Switch beside Mouse keys under accessibility options
  5. Set your preferences
  6. Close settings
Settings will be as always automatically applied.
Read More
0x8019019a when setting up Yahoo Mail
The error code 0X8019019A is shown when a user fails to add his Yahoo account to the Mail app due to the outdated or corrupt installation of the Mail app. Not using an App-specific but a normal Yahoo account password may also result in the error at hand. In this guide, we will show you how to effectively fix this error so you can set up Yahoo mail.
  1. Reboot PC

    Perform a restart of your system to rule out a temporary glitch in the system. Also, check if you can successfully access your email through a web browser using the same credentials as you are using with the Mail app. Additionally, make sure that no VPN or proxy server is being used to access the internet (VPN/proxy may work fine with the web version of Yahoo mail but may hinder the access through a mail client).
  2. Update Windows and the Mail App to the Latest Build

    If your system is not updated to the latest build it can create incompatibility between the OS modules. Updating the Windows and Mail app of your system to the latest build may solve the problem.
  3. Re-add the Yahoo Account to the Mail App

    The Yahoo account issue could be a result of a temporary glitch in the communication modules of the system. The glitch may get cleared if you remove and then re-add the Yahoo account to the Mail app.
  4. Reset the Mail App to the Defaults

    You may fail to add the Yahoo account to the Mail app if the installation of Mail itself is corrupt. In this scenario, resetting the Mail app to the defaults may solve the problem.
  5. Generate an App Password and Use it to Add the Yahoo Account to the Mail App

    Yahoo has implemented tons of security features to its accounts. One such feature is the use of app-specific passwords for less secure apps like the Mail app. If your Yahoo username or password is not working with the Mail app, then using the App-specific password may solve the problem.
Read More
1 2 3 162
Logo
Copyright © 2022, ErrorTools. All Rights Reserved
Trademarks: Microsoft Windows logos are registered trademarks of Microsoft. Disclaimer: ErrorTools.com is not affiliated with Microsoft, nor claim direct affiliation.
The information on this page is provided for information purposes only.
DMCA.com Protection Status