How to Fix Error 421

Repair Error 421

What is the Error 421?

Error 421 is a common SMTP (Simple Mail Transfer Protocol) Outlook error message. MS Outlook is one of the best and popular email applications widely used by PC Windows users for sending and receiving emails within and outside workplaces.

It is most commonly used in offices by professionals for faster communication.

This error may occur while sending and receiving emails on the server. The error 421 messages is displayed in either of the following formats:

“An unknown error has occurred: Server error 421”

"Could not send your message. Error 421"

421 4.2.1 : (DYN:T1) http://postmaster.info.aol.com/errors/421dynt1.html

421 4.3.1 Out of disk space for temp file

421 4.3.2 All server ports are busy

421 Downstream server error

421 Fork failed

421 Greylisting enabled, please try later

“An unknown error has occurred. Subject ‘Testing’, Account: ‘pop.charter.net’, Server: ‘mail.charter.net’, Protocol: SMTP, Server Response:

’421 Message rejected’, Port: 25, Secure(SSL): No, Server Error: 421, Error Number: 0x800CCC67”

Solution

Restoro box imageError Causes

Some common causes for this critical Outlook error are:

  • PST storage size exceeds 2GB file size
  • Improper ISP settings
  • Slow internet connection
  • PST file corruption
  • Trojan attack and viral infection

This is a critical Outlook error that should be resolved timely. If you delay, it may cause you a great deal of inconvenience.

The error code 421 hampers your ability to access your email account, send and receive emails, add new contacts, view emails, calendar entries, and journals. In other words, it just brings your email activities to a standstill locking you out of the account.

Further Information and Manual Repair

To resolve this error code on your system, you don’t always have to hire a professional or call the network personnel to do the job. It may be a critical error but the good news is that it is quite easy to fix. Even if you don’t have technical expertise, you can still repair it.

Here are some of the best methods to repair this issue on your system:

1. Change the Server Settings to its Maximum Limit

Try changing your server settings. Here set the inbound connections limit at the maximum limit.

  • To do this, open the Microsoft Exchange Server Administrator utility. The access path of this utility will vary depending on the installation procedure used to set up Exchange Server.
  • Once you open the MS Exchange Server Administrator utility, click the ‘Connections’ icon in the left side navigation pane. Now double click the internet mail service icon in the right side pane. As you click it, the Properties window will open.
  • Now click the ‘Connections’ tab in the Properties window and then click the ‘Advanced’ button. This will open the configuration window.
  • Here reset the number for ‘Maximum Number of Inbound Connections’ to a high number, its maximum limit. After changing the settings, close all open Exchange Server Administrator program windows to successfully complete the process.

After the process is complete, try accessing your Outlook email account again; if it works, then that’s great the error 421 is resolved. However, if it doesn’t, then the problem could be related to viral infection.

2. Download a PST Repair Tool

If the cause of the error is PST files corruption, then not only will you be locked out of your email account, you are also at risk of losing all the data stored in your email account.

However, the best way to resolve the error and ensure full data recovery is to download a reliable PST repair tool. By running a PST repair tool on your system, you can resolve the error 421 right away. It recovers your data, repairs corrupt and damaged PST files.

3. Scan Your PC with Restoro.

If viral infection and Trojans are causing the error 421 to pop up on your system, then it is recommended to download and scan your PC with Restoro.

This is an advanced, intuitive, and user-friendly PC fixer. It is not just an antivirus but also a system optimizer and a registry cleaner.

Unlike common antivirus software that only removes viruses and simultaneously slows down the system’s speed, Restoro removes all types of malicious software on your PC including malware, spyware, Trojans, and viruses, and also boosts the speed of your PC significantly.

It is safe, easy to operate, and a quick fixer. It is compatible with all Windows versions.

Click here to download Restoro and resolve error 421 today!

If you like to learn and find out more about various Windows errors, and how to repair them go to our vast archive or use search to find articles that will explain and help you in solving your issue.
However, if you prefer to do things fast and with automatization then we are proposing to use an automated solution for your issues. The application that we are recommending is Advanced System Repair Pro
Advanced System Repair utilizes multiple tools all in one to give you a quick, simple, reliable, and very thorough diagnosis of your PC. It brings you all the tools you need in one program to clean, fix, protect, optimize and boost your PC!
1-Click Maintenance
All the tools to make it simple and easy! It's like having a professional technician at the click of a mouse.

Junk Cleaner
Keeping your computer free from unnecessary clutter also helps make your computer last longer. Like any other machine, if you keep it clean and take care of it, it will serve you better for longer!

Optimize background apps
Optimize applications background activity with the built-in Application Optimizer feature.

Disk Defrag
With a simple 1-click, Advanced System Repair speeds up your PC by assembling fragmented files on your machine and organizing them more efficiently.

Malware Removal
Finds and removes all types of harmful malware including trojans, worms, bots, adware, spyware, PUPs, and more!

Privacy Cleaner
The all-in-one privacy suite to Clean Your Tracks & Protect Your Privacy! Make your computer safe, secure, and more efficient!

System Tweak/Optimizer
ASR will analyze your complete system and settings to adjust your PC to function at its maximum performance.

Registry Cleaner
Over time, as you install and uninstall applications, the registry can become cluttered with old entries and broken settings which can result in program crashes, and annoying messages and slow the computer down.
Visit our Advanced System Repair Pro Download page to inform yourself about all the benefits of this software and get a free trial copy of it.
advanced system repair pro

Advanced System Repair Pro

One-click automated PC repair solution
ASR logo
With Advanced System Repair Pro you can easily
Replace damaged files
Restore performance
Free disk space
Remove Malware
Protects WEB browser
Remove Viruses
Stop PC freezing
DOWNLOAD
Privacy Policy | Terms of Use | Uinstall
Advanced System Repair Pro is compatible with all versions of Microsoft Windows including Windows 11

Share this article:

You might also like

How to use Control Panel in Windows 11
Windows 11 has brought us a new and revamped settings application that will cover most personalization and overall settings for your operating system. But as much as the new settings app is tweaked and modified there are still some things that can be modified only inside Control Panel. windows 11 control panel
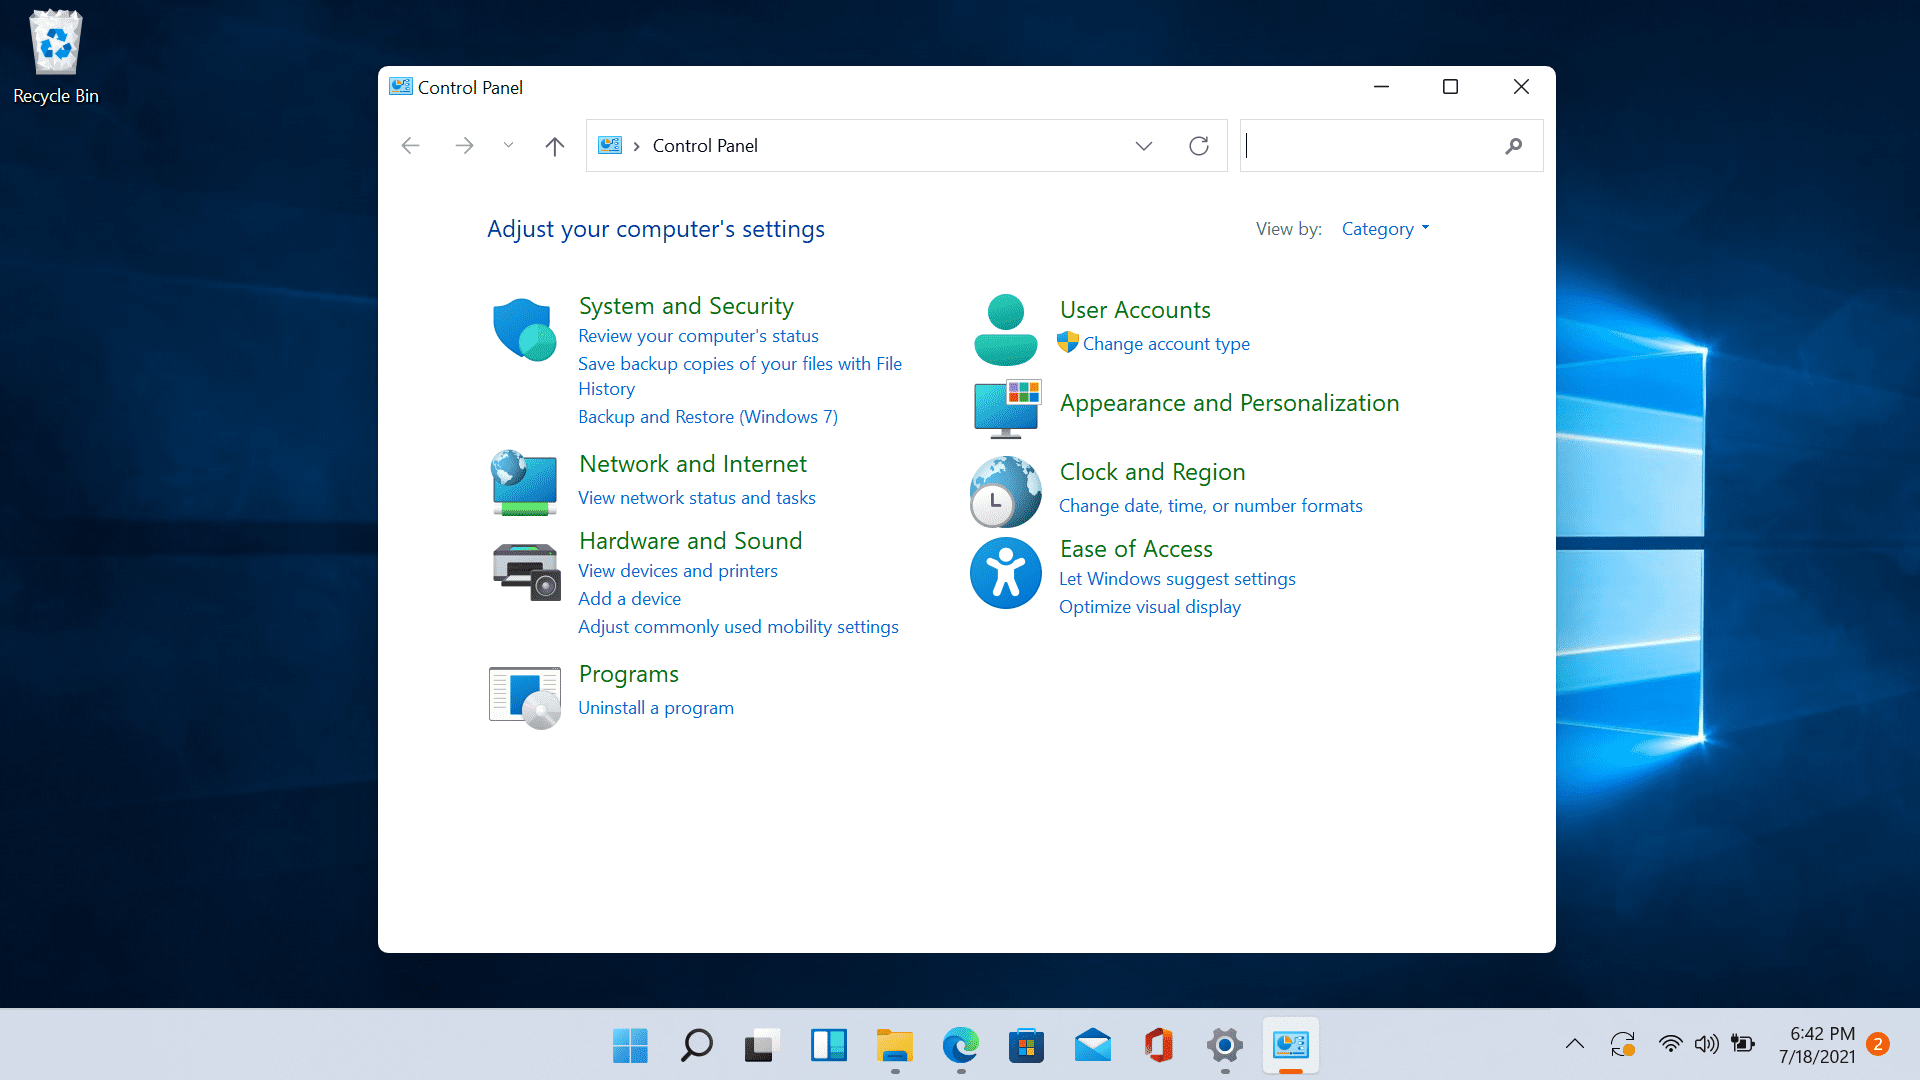
Since the Control Panel icon itself is somewhat not right away once clicked on the start button we are presenting you a couple of ways to open it so you can change each detail you want.

Via Start menu

The most straightforward and easiest way to reach and open the control panel is via the Start menu. In order to do it just click on the Start menu and type in the control panel. Then click on Control Panel Icon in the results.

Pin Control panel icon to the taskbar

In order to actually pin the control panel to Taskbar, you will need to open it first. Use the previous simple and fast steps in order to quickly open it then in the taskbar right-click on its icon. Choose Pin to Taskbar and close control panel. Now you can open the control panel quickly just by clicking it on its icon in the Taskbar.

Add Desktop icon

If you liked the idea to have an icon that you can click in order to fast open the control panel but you are not very fond of the icon being located in your Taskbar then let's place it on Desktop instead. In order to place a special control panel icon on the desktop, we will use Windows setting app. Open settings app with ⊞ WINDOWS + I and go to Personalization tab. Inside the personalization tab, go to Themes and click on Desktop Icon Settings. Check the box beside Control Panel and click on OK. The Control Panel icon will appear now on your Desktop and you can double click on it to launch it.

Run Control Panel from the Run dialog box

Same as in the previous version of Windows you can also open the Control Panel via Windows built-in run menu. This is mostly the preferred way to gain access to it by system administrators. Press ⊞ WINDOWS + R to open the run dialog. Inside dialog type in control and press ENTER. Control Panel will open right away.
Read More
How to Fix ISDone.dll Error in Windows
As you know, games with good graphics and fast play are definitely resource-intensive and can consume a lot of storage space on your computer. Because of that, they have to be compressed before it gets downloaded to your computer and then unpacked to the hard drive before it gets installed. However, if an error occurs in your computer’s RAM during the installation process or if your hard disk does not have enough memory to handle the process, then you might encounter the isDone.dll error which states:
“An error occurred when unpacking, Unarc.dll returned error code -1, ERROR: archive data corrupted (decompression fails).”
If you encounter the isDone.dll error message on your Windows 10 computer, then read on as this post will show you how you can fix it. This error has something to do with the incomplete installation of PC games or files of larger size. The ISDone.dll error appears due to faulty Unarc.dll file residing in the System32 folder on 32-bit operating systems and the SysWOW64 folder on 64-bit systems. So, if you see this error message, then, it means your computer was not able to read installation archive files.

What is Unarc.dll file?

Unarc.dll is a dynamic link library for Windows. Some applications or games require this file to function properly. So, if it goes missing or, an error occurs when you start a game or an application, you may get various kinds of errors. ISDone.dll error while playing games on PC

Option 1 – Try to reinstall the game

The isDone.dll error could also be caused by the installation of an unknown application. Or it could also be caused by an outdated or corrupted application. In other words, if the game you are trying to install is broken or corrupted, then it’s no wonder why you’re getting the isDone.dll error. To fix this, make sure that you download the latest updated version of the game and then try to install it again and see if the problem is resolved or not.

Option 2 – Try to re-register the .dll file using the Regsvr32 tool

  • The first thing you have to do is to locate the DLL file named dll on your computer and rename it to Unarc-bak.dll.
  • Next, copy the Unarc.dll file from another well-functioning computer and save it on your desktop.
  • After that, move the DLL file you just copied to the System32 folder if you are using a 32-bit operating system, or the SysWOW64 folder if you are using a 64-bit operating system.
  • Now you have to register the new DLL file and you can do that using Windows PowerShell.
  • Open Windows PowerShell and then execute this command if you have placed the DLL file in the System32 folder: regsvr32 %systemroot%System32unarc.dll
  • On the other hand, if you have placed the DLL file in the SysWOW64 folder, then execute this command: regsvr32 %systemroot%SysWOW64unarc.dll
  • Once you’re done, a message will be displayed saying that the DLL file was registered.
  • Restart your computer and check if the problem is now fixed.

Option 3 – Troubleshoot the isDone.dll error in a Clean Boot State

You can also troubleshoot the isDone.dll error in a Clean Boot state. It could be that there are some third-party applications in your computer that're preventing the application from getting installed and to isolate this possibility, you need to boot your computer in a Clean Boot State and then try installing the program again. Putting your computer in this state can help you identify which program is the culprit and thus isolates the problem. In a Clean Boot state, your computer will start using only the pre-selected minimal set of drivers and startup programs. Note that you have to disable and enable one process at a time.
  • Log onto your PC as an administrator.
  • Type in MSConfig in the Start Search to open the System Configuration utility.
  • From there, go to the General tab and click “Selective startup”.
  • Clear the “Load Startup items” check box and make sure that the “Load System Services” and “Use Original boot configuration” options are checked.
  • Next, click the Services tab and select the “Hide All Microsoft Services” check box.
  • Click Disable all.
  • Click on Apply/OK and restart your PC. (This will put your PC into a Clean Boot State. And configure Windows to use the usual startup, just simply undo the changes.)
  • After you’ve set your computer into a Clean Boot State, make sure that you’re signed in as administrator and then try to install the application again.

Option 4 – Try updating or reinstalling your Graphics drivers

Updating or reinstalling the Graphics drivers in your computer can also help in resolving compatibility issues between the operating system and the driver that might have caused the isDone.dll error.
  • First, boot your computer into Safe Mode.
  • After that, tap the Win + R keys to launch Run.
  • Type in devmgmt.msc into the box and tap Enter or click OK to open the Device Manager.
  • After that, a list of device drivers will be displayed. From there, look for the Display Adapters and click on them.
  • After that, right-click on each entry under the Display Adapters and select the “Uninstall Device” option from the menu.
  • Now restart your computer.
  • After restarting your computer, go to the Settings app and Check for Updates in the Windows Update section.
Note: You also have the option to go directly to the website of your graphics card manufacturers like NVIDIA, Intel, or AMD and go to the section called Drivers then check if there’s a new available update – if there is, download and install it.

Option 5 – Try scanning your computer using Windows Defender

The isDone.dll error might also be infected with malware or virus and to eliminate it, you have to scan your computer using security programs like Windows Defender.
  • Tap the Win + I keys to open Update & Security.
  • Then click on the Windows Security option and open Windows Defender Security Center.
  • Next, click on Virus & threat protection > Run a new advanced scan.
  • Now make sure that Full Scan is selected from the menu and then click the Scan Now button to get started.
Read More
Media Creation Tool Error 0x80072f76 – 0x20016
One of the most useful tools in the Windows 10 operating system is the Windows Media Creation tool. This tool is used to download and install the latest version of Windows 10. However, there are times when you might encounter some issues while using this tool. One of these issues is the Error code 0x80072F76 – 0x20016. If you encounter this error, you will see the following error message during setup:
“We’re not sure what happened, but we’re unable to run this tool on your PC. If you continue experiencing problems, reference the error code when contacting customer support – Error code: 0x80072F76 – 0x20016.”
This kind of error in the Media Creation tool could be due to an interrupted download or unstable internet connection, and many more. To fix it, you can run the Windows Update troubleshooter or try using another browser to download the tool to another location. You can also try changing the DNS or the ISP connection or use the Windows 10 Update Assistant as well as delete the $Windows.~BT & $Windows.~WS folders. Check out the given suggestions below to fix the Media Creation Tool Error code 0x80072F76 – 0x20016 in your Windows 10 computer.

Option 1 – Try to run the Windows Update troubleshooter

Windows 10 have various troubleshooters that can help you resolve many system issues. So if you’re dealing with Windows Update errors like Error Code 0x80072f76 – 0x20016, you can run the Windows Update troubleshooter to resolve it. To run the Windows Update troubleshooter, go to Settings and then select Troubleshoot from the options. From there, click on Windows Update and then click the “Run the troubleshooter” button. After that, follow the next on-screen instructions and you should be good to go.

Option 2 – Try using a different browser to download the tool to another location

You could also use another browser in downloading the tool and place it in a different location on your computer but if you do not have another browser, you can just install one and then download the same tool to another location like the Desktop.

Option 3 – Try to change the DNS

  • Tap the Win + R keys to open the Run dialog box.
  • Then type “inetcpl.cpl” in the field and hit Enter to pull up the Internet Properties.
  • After that, go to the Connections tab and select the LAN settings.
  • From there. Uncheck the “Use a Proxy Server” option for your LAN and then make sure that the “Automatically detect settings” option is checked.
  • Now click the OK and the Apply buttons.
  • Restart your PC and then check if the Media Creation tool error is fixed.
Note: If you are using a third-party proxy service, you have to disable it.

Option 4 – Try to change the ISP connection

There are times when the connection to the Microsoft servers is interrupted due to some glitch or it could also be blocked by your Internet Service Provider or ISP. To rule out this possibility, you can try to change your computer’s internet connection and then see if it fixes the problem.

Option 5 – Try to use the Windows 10 Update Assistant

There’s another tool you can use as an alternative to the Media Creation tool. It is called the Windows 10 Update Assistant. This tool can also help you download and install Windows updates seamlessly.

Option 6 – Try to delete the $Windows.~BT and $Windows.~WS folders

From time to time, the Windows Update files also get corrupted which can cause some problems and conflicts when downloading and installing a Windows Update. To fix this, you need to delete the $Windows.~BT & $Windows.~WS folders in your computer.
Read More
Fix Windows Update Error Code 0x8e5e0147
As you already know, the Windows Update mechanism in Windows 10 is a bit complex as it depends on thousands of files and services in order to properly function. There are DLL files and services that support this mechanism’s proper functioning. And so if there is any malfunction with any of these files or services, it will result in some errors when running Windows Update. One of these errors is the error code 0x8e5e0147 which has the following error message: “There was a problem installing some updates, but we’ll try again later. If you keep seeing this and want to search the web or contact support for information, this may help – Error 0x8e5e0147” To fix this error, there are several methods you can try. You can run the Windows Update troubleshooter or reset the Windows Update components manually or clear the SoftwareDistribution folder and install the update manually. You could also reset the Windows Update Agent to default using a command in PowerShell.

Option 1 – Try to run the Windows Update troubleshooter

The first thing you can do to fix the Windows Update error code 0x8e5e0147 is to run the Windows Update Troubleshooter. To run it, go to Settings and then select Troubleshoot from the options. From there, click on Windows Update and then click the “Run the troubleshooter” button. After that, follow the next on-screen instructions and you should be good to go.

Option 2 – Try to reset the Windows Update components

If by any chance that the third option didn’t work, you can also try resetting the Windows Update components as it could also help you resolve the Windows Update error. How? Refer to the following steps:
  • Open Command Prompt with admin privileges.
  • After that, type each one of the following commands and hit Enter after you key in one after the other.
    • net stop wuauserv
    • net stop cryptsvc
    • net stop bits
    • net stop msiserver
Note: The commands you entered will stop the Windows Update components such as Windows Update service, Cryptographic services, BITS and MSI Installer.
  • After disabling WU components, you need to rename both the SoftwareDistribution and Catroot2 folders. To do that, type each one of the following commands below and don’t forget to hit Enter after you type one command after the other.
    • ren C:/Windows/SoftwareDistribution/SoftwareDistribution.old
    • ren C:/Windows/System32/catroot2/Catroot2.old
  • Next, restart the services you’ve stopped by entering another series of commands. Don’t forget to hit Enter after you key in one command after the other.
    • net start wuauserv
    • net start cryptsvc
    • net start bits
    • net start msiserver
  • Close Command Prompt and reboot your PC.

Option 3 – Try downloading and installing the Windows Updates manually

Windows Update error code 0x8e5e0147 might be due to a Windows Update that has failed. So if it is not a feature update and only a cumulative update, you can download the Windows Update and install it manually. But first, you need to find out which update has failed, and to do so, refer to the following steps:
  • Go to Settings and from there go to Update and Security > View Update History.
  • Next, check which particular update has failed. Note that Updates that have failed to install will be displayed under the Status column which has a label of “Failed”.
  • After that, go to the Microsoft Download Center and look for that update using its KB number and once you find it, download and then install it manually.
Note: You can also use the Microsoft Update Catalog, a service from Microsoft that provides a list of software updates that can be distributed over a corporate network. With the help of this service, it can be easier for you to find Microsoft software updates, drivers as well as fixes. Option 4 – Try to reset the Windows Update Agent Since you can’t update the Windows Update Agent on your Windows 10 computer manually, you can try resetting it instead and you can do it using the Reset Windows Update Agent tool which you can download from the official Microsoft website. This tool allows you to:
    • Scan all protected system file and replace the corrupted one’s (sfc /scannow)
    • Scan, detect, and repair corruptions in Windows system image
    • Clean up superseded components
    • Reset Windows Update components
  • Change invalid values in Windows Registry
  • Delete temporary files
Moreover, this tool also allows you to carry out these operations:
  • Open Internet Explorer settings
  • Search for Windows Updates
  • Explorer for local or online solutions
  • Restart your computer
Read More
Guide to Patching Error Code 34

Guide to Fixing Error Code 34

Code 34 - What is it?

Code 34 is one of the several Device Manager error codes. This error code indicates that a hardware device on your PC is not properly configured.

This usually occurs when the device installed on your system is a non-plug and play. Non-plug and play devices don’t configure automatically and require manual configuration from the users end.

Error code 34 is usually displayed in the following format:

“Windows cannot determine the settings for this device. Code 34”

Solution

driverfix boxError Causes

Error code 34 may be triggered due to several reasons like:

  • Improper device configuration
  • Missing or outdated drivers

Device Manager error codes like code 34 are easy to fix. These error codes don’t indicate any serious PC problem, nor are they fatal like blue screen of death error codes.

Nonetheless fixing it immediately is advisable to ensure the proper functioning of the plugged-in hardware device. If you don’t resolve it, you may not be able to use the device.

Further Information and Manual Repair

When PC users experience error codes like code 34, they instantly think of hiring a professional for repair especially if they lack technical understanding.

If you are not a technical whiz and you are also thinking of hiring a professional for the repair job, then don’t! Here’s why, to begin with, Device Manager error codes can be resolved easily, better yet you can fix it by yourself without spending a dime even if you are not technically sound.

To help you, below is a list of easy and effective repair solutions for error code 34. Try them to resolve the issue.

Method 1 - Configure the Device by Using Device Manager

This is one of the best ways to resolve error code 34 on your system. The procedure will take 5 to 7 minutes. Simply follow the steps illustrated below to configure the problematic device on your PC.

  1. First off, go to the start menu
  2. Now type Device Manager in the search bar and press enter to continue
  3. Now in the Device Manager locate the problematic device and click on it
  4. Click on the resources tab to change the resource settings
  5. Now click on the Use Automatic Settings check box
  6. After that click on the Settings based on the tab and then click on the hardware configuration of the device you want to change
  7. Press resource type in the resource settings box to make further changes
  8. Once that is done, click change settings and type a new value for the resource type

Method 2 - Consult the Hardware Manufacturer for Resource Settings

You may not be able to configure resource settings for some devices in such an event it is advisable to consult your hardware manufacturer. Your hardware manufacturer can provide you with specific resource settings. Follow the manufacturer’s instructions to repair error code 34.

If the error continues to persist even after device configuration, then the problem may be linked to driver corruption. In that case, try method 3.

Method 3 - Download DriverFIX to Update Drivers Automatically

Whether code 34 is caused by outdated or corrupted drivers, simply download DriverFIX to resolve. DriverFIX is an advanced and user-friendly software program deployed with an intelligent programming system.

The software scans your PC to detect all problematic drivers. It finds and matches the latest and compatible versions and then updates the drivers accordingly that too automatically and on a regular basis.

Click here to download DriverFIX to repair Device Manager error code 34 on your PC automatically.

Read More
Fix ERR_CACHE_MISS error in Google Chrome
One of the most popular and most used web browsers commonly used by Windows users is Google Chrome. This well-known web browser has been introducing various features recently in order to stay at the top. However, it makes the web browser a lot more complex and thus prone to errors. Although this may not be a big deal, it can be quite annoying as it can interrupt your web browsing. There are various errors that can come up with this level of complexity of the web browser. One of these errors is the “This site can’t be loaded from the cache, ERR_CACHE_MISS” error message that can suddenly appear while you browse the web using your Google Chrome browser on your Windows 10 PC. Take note that when you encounter this particular error, there really is no direct fault in the Chrome browser as there are also issues with caching the website data locally in the computer. Moreover, this error can also occur when a website is coded in an incorrect manner or if there are some browser extensions or toolbars that are in conflict with the proper functioning of the website. To fix the ERR_CACHE_MISS error in Google Chrome, refer to the possible solutions laid out below.

Option 1 – Try clearing browser data

There are times when some data in the browser is conflicting with the loading of the website and triggers errors like ERR_CACHE_MISS. And so you can try to clear your browser’s data. This might be a very basic solution but oftentimes it works in fixing this kind of error in Google Chrome. Follow the steps below to clear the data in your browser.
  • Open your Google Chrome browser.
  • After that, tap the Ctrl + H keys. Doing so will open a new panel that allows you to delete the browsing history and other data in your browser.
  • Now select every checkbox that you see and click on the Clear browsing data button.
  • Then restart your Chrome browser and check if you can now open any website or not.

Option 2 – Try using the Developer Tools

You can also try using the Developer tools in Google Chrome to help you fix the ERR_CACHE_MISS error. Refer to the steps below to do so.
  • Open Google Chrome.
  • Tap the Ctrl + Shift + I keys on your keyboard and then tap the F1 key to open the Settings tab inside the Chrome Developer Tools.
  • Next, select the Disable cache option while DevTools is open and apply those settings.
  • After that, refresh your browser and check if the entries you’ve seen previously in the Network tab are gone.
  • Now try to load the same webpage again and see if the problem is resolved.

Option 3 – Reset Winsock, TCP/IP & Flush DNS

Resetting Winsock, TCP/IP, and flushing DNS might help you resolve the ERR_CACHE_MISS error. To do so, follow these steps:
  • Right-click on the Start button and click on Command Prompt (administrator) so you can pull up an elevated Command Prompt.
  • After that, execute each one of the commands listed below. And after you typed in one after the other, you have to hit Enter.
  1. netsh winsock reset – type in this command to reset Winsock
  2. netsh int ip reset resettcpip.txt – type in this command to reset TCP/IP
  3. ipconfig /flushdns – type in this command to flush the DNS cache
  • Next, restart your PC and check if the problem’s fixed.

Option 4 – Get rid of any conflicting browser extensions

  • Open Chrome and press Alt + F keys.
  • Go to More tools and click Extensions to look for any suspicious browser extensions or toolbars.
  • Click the Recycle bin and select Remove.
  • Restart Chrome and press Alt + F keys again.
  • Proceed to On Startup and mark Open a specific page or set of pages.
  • To check if the browser hijacker is still active, click Set pages, if it is active, overwrite the URL.
Note: If removing the browser extensions or toolbars didn’t work, you can also try to reset your Google Chrome browser.
  • Open Google Chrome, then tap the Alt + F keys.
  • After that, click on Settings.
  • Next, scroll down until you see the Advanced option, once you see it, click on it.
  • After clicking the Advanced option, go to the “Restore and clean up option and click on the “Restore settings to their original defaults” option to reset Google Chrome.
  • Now restart Google Chrome.
Read More
Transferring characters in diablo 2 remake
Diablo 2 resurrected has hit official release and servers seem to be finally taken care of and everything seems to be running smoothly now. The game also received great praise from gamers and attracted old players of the original Diablo 2 game. diablo 2 gameplay
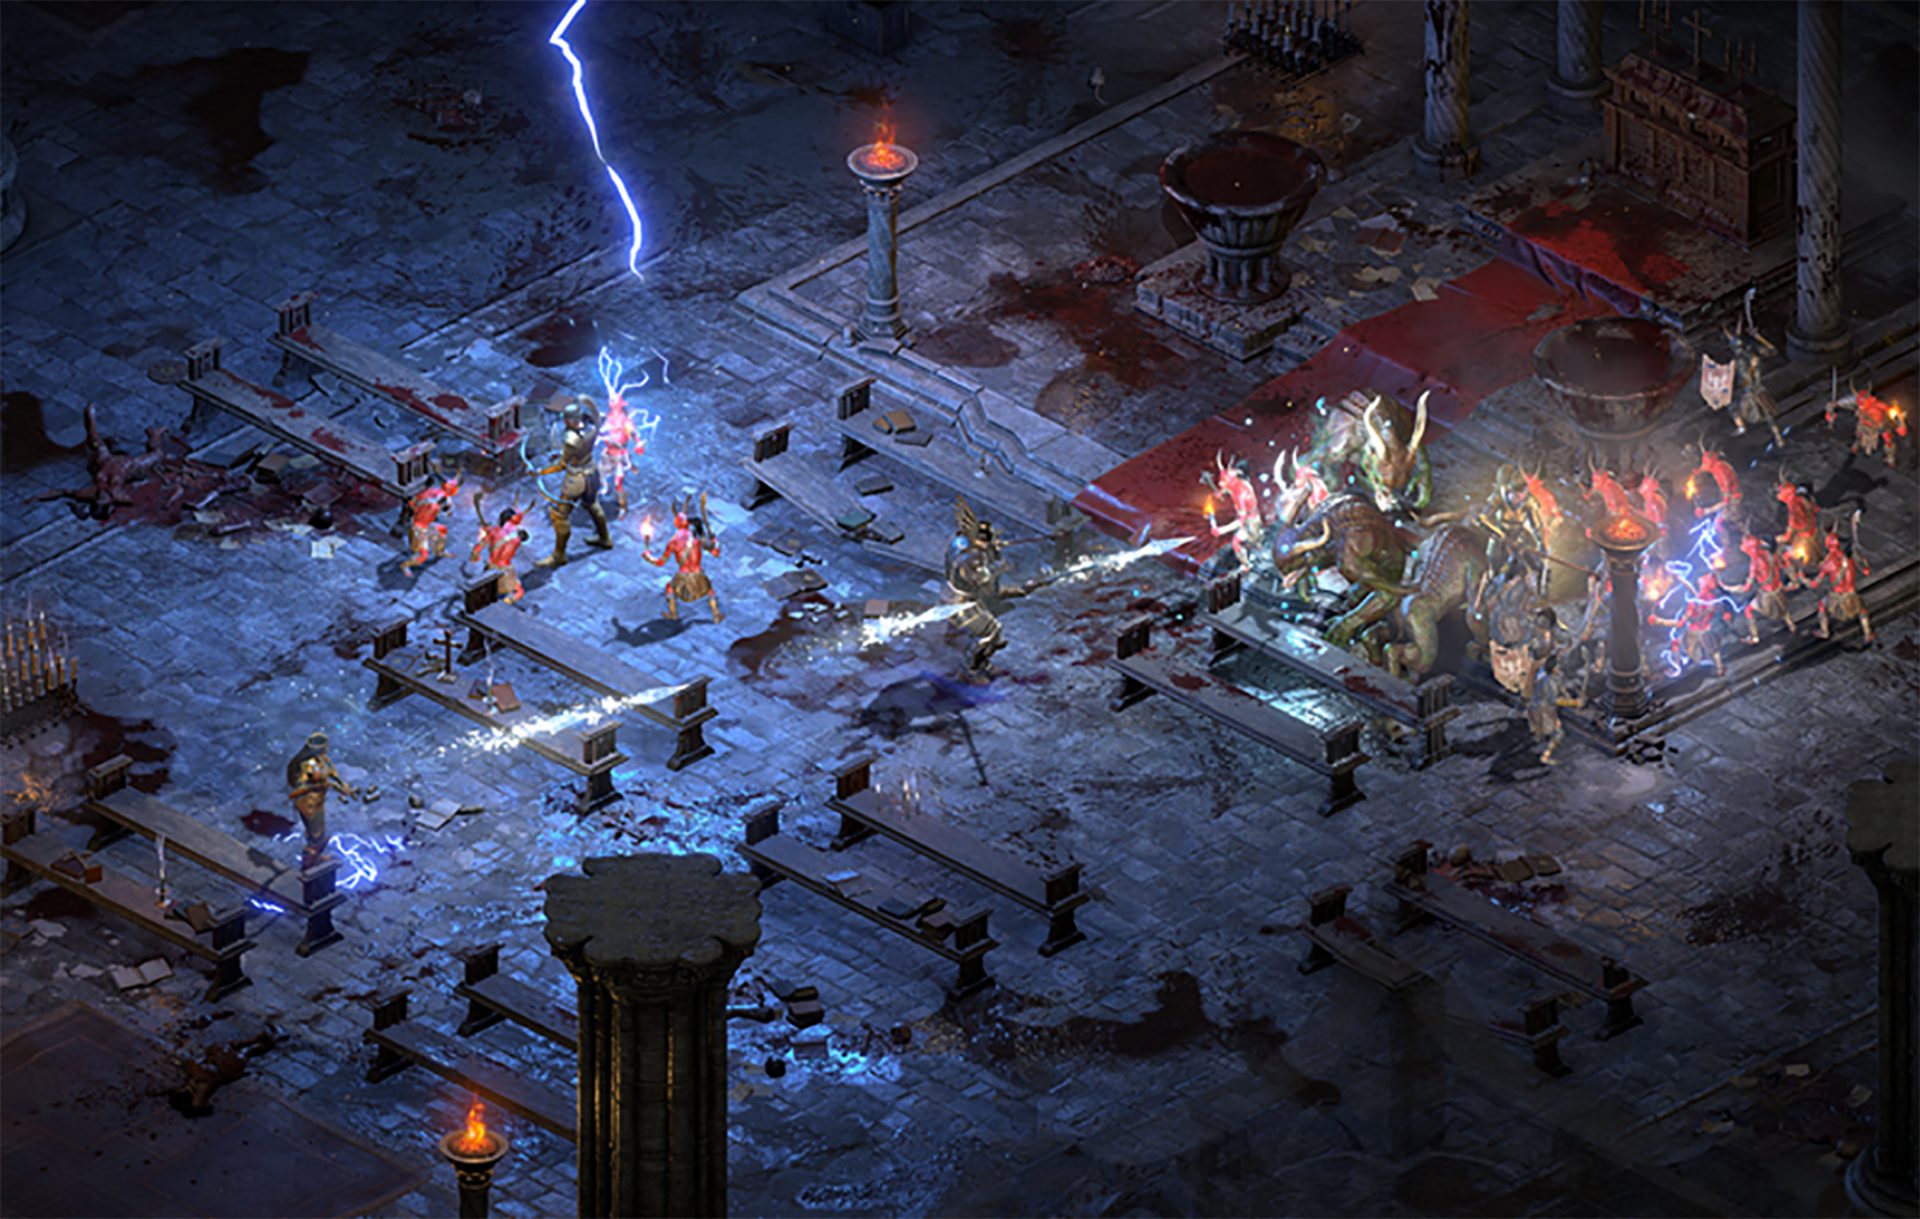
Speaking of old players of old Diablo 2, they can transfer their old characters into remaster and continue playing them within this new great HD environment. There are some steps and requirements but we are here to help and transferred characters will bring full stash, inventory, and equipped items with them.

Requirements

There are not many requirements for this transfer to occur but they must be respected in order to be successful. The first thing is a minor requirement and somewhat annoying but it needs to be done, firstly fire up Diablo 2 resurrected and create a character, any kind of character with any kind of name, any kind of class. This strange requirement is to actually create a character folder and register it inside D2 resurrected so we can copy old ones there. The second requirement will be that characters that you wish to be transferred must be offline characters. Old battle net online characters cannot be transferred at this moment and probably will not be in the future as well. So for all of you that wish to transfer online characters, bad luck, for the rest of us casuals playing offline single-player mode, we can enjoy our characters.

Process of diablo 2 character trasfer

The process itself of transferring characters when previously mentioned requirements are met is just a simple and copy operation. If you have somewhere backed your characters go into your backup folder and copy files in c:\users\*current user*\saved games\*diablo 2 resurrected folder* If you do not have characters backed up and just have old Diablo 2 installed and playing it, you can go to c:\users\*current user*\saved games\*diablo 2 folder* and just copy all characters files into c:\users\*current user*\saved games\*diablo 2 resurrected folder* Your old characters end with .d2s extension, grab all that you want to transfer, and copy them into D2R. Take note that copied characters cannot be brought back into Diablo 2, once they are copied into Diablo 2 resurrected all further progress on them will be tied to the new game.

Conclusion

That’s it about the transfer process and requirements for it. Fire up the new game version and enjoy.
Read More
MS Mariner, new OS for servers based on Linux
mariner installerWell if anyone told me just a few years ago that I will see the day when Microsoft releases a new OS based on Linux I would be very amused, but that day has come. Mariner is the newest OS out of nowhere. Microsoft’s new Linux Distro, dubbed Common Base Linux (CBL)-Mariner, isn’t the type of distro you’d want to install directly on any old machine. It’s primarily meant for cloud infrastructure and edge products. Specifically Microsoft’s Cloud and Edge products. But if you are curious, it’s possible to run. Juan Manuel Rey, a Microsoft Senior Program Manager for Azure VMware, recently published a guide to ISO CBL-Mariner image. With that, you can easily get it up and running. And you can build CBL-Mariner on an Ubuntu 18.04 desktop. So you can try it out since it is free. You can get it from here: https://github.com/microsoft/CBL-Mariner It is obvious that Microsoft aims to set itself as a leader in enterprise server environments with this move and it is very likely that it may succeed or at least give a good shake to its competitors, mainly red hat and Suse which are two dominant distros in that field. Many believe that they can win over by providing regular updates and package delivery via their already established system and that feature could be a turning point for some. In any case, time will tell and we shall see.
Read More
A Guide to Fix Error Code 0x80070004 on Windows 10

Error Code 0x80070004 on Windows 10 – What Is It?

Some users trying to upgrade from Windows 7 or Windows 8/8.1 reported experiencing installation rollback with error code 0x80070004. This error normally appears when the Computer Name is set to names that can’t be used for the computer. It’s also possible this error occurs if users or program files folder were redirected to a different partition.

Solution

Restoro box imageError Causes

The Error code 0x80070004 on Windows 10 is normally caused if any of the following were used as the Computer Name and the user tried to upgrade to Windows 10:

  • System (or SYSTEM)
  • SELF
  • LOCAL
  • Network
Failure to fix this error message might result in others, including error code  0xc0000001

Further Information and Manual Repair

If you don’t solve this error, you won’t be able to upgrade from Windows 7 or Windows 8/8.1 to Windows 10. Note that this error will continuously bring you back to the original OS unless fixed.

Please note that if you’re not confident in doing these steps, you might want to consider seeking the help of an expert or using an automated tool that will help fix this.

Here are a few methods to try.

Method 1: Check and Change the Computer Name

The most common cause of this error is if your computer uses any of the following reserved names:

  • LOCAL
  • System (or SYSTEM)
  • Network
  • SELF

These reserved names are not meant to be used as computer names. If this is what your computer uses and you try to upgrade to Windows 10, you will surely get this error. Check your computer name and if you see any of the reserved names, change it right away.

Changing Computer Name in Windows 8.1

If you’re trying to upgrade from Windows 8.1, you can change the name of the computer by following these steps:

  • Step 1: Open the Start menu then simply type “rename computer”. After that, choose “Rename this computer”
  • Step 2: A dialog box will open. Just click the “Change” button
  • Step 3: A new dialog box will open. Type the new name. Click Apply then Ok.

Changing Computer Name in Windows 7

If you’re trying to upgrade from Windows, you can follow the steps below to change the name of your computer.

  • Step 1: Go to the Start menu then on the Computer section, right-click the mouse and choose “Properties”.
  • Step 2: A new dialog box will appear. Go to “Computer name, domain, and workgroup settings” then click “Change settings”. In case you’re asked for administrative access, make sure to grant it.
  • Step 3: Find the “Computer Name” tab then click “Change”
  • Step 4: Change the computer name and click Ok.

Method 2: Fix the “Users” directory issue

If the first method doesn't work, it probably means the computer name isn’t the cause of this error. Another reason why users experience Error code 0x80070004 when upgrading to Windows 10 is if the “Users” directory was relocated. So, when you try upgrading to Windows 10, the installer wasn’t able to find the user profiles on the “%systemdrive%”, where the current operating system is installed.

If you changed or moved any of the Users, Program Data, or Program Files folders, this will cause the error. Before you upgrade to Windows 10, you might be required to reset or reinstall your current operating system (Windows 7 or Windows 8.1).

If you haven’t made any changes or haven’t moved any of the mentioned folders, there’s a great chance that your users' profiles are corrupted. You can also reinstall your current operating system. However, you might want to check for the corrupter user profile first. To do this, follow the steps below:

  • Step 1: Go to the Start menu and type System
  • Step 2: Click System  then go to the Advanced tab
  • Step 3: Go to Settings, which you’ll find under User Profiles

On the Users Profiles, make a copy of all the accounts somewhere. Sign out from the current user account then try logging in back using the accounts you’ve copied. For each account, you get an error, delete it. However, make sure that you don’t delete the UpdateUser and Administrator account ever.

After this is done, try upgrading your operating system to windows 10 again.

Method 3: Try a trusted and secured Automated Tool

If the above methods still not useful, you might want to rely on an automated tool. Find a secured and trusted tool. It will help fix this issue.

Read More
GoForFiles Removal Guide

GoforFiles is a Potentially Unwanted Program that allegedly allows users to easily search for files, movies, apps, and other useful things on the internet. In our testing, this program on further inspection does not work, it only displays an error for every search query. To top this off this program comes bundled up with other programs which could be malicious or unwanted. This program adds startup links into windows, allowing it and its bundled programs to launch every time Windows is restarted or launched. A task scheduled is also made, that lets the launch of the program at different random times during the day. Many anti-virus applications have marked this program and its bundled counterparts as Potentially Unwanted Programs, and it is highly recommended to remove these programs from your computer.

About Potentially Unwanted Programs

Exactly what is a Potentially Unwanted Program (PUP)?

People have encountered it – you download free software, you then discover some unwanted applications on your computer system, or discover a strange toolbar has been included with your browser. You didn’t have them installed, so how did they appear? These unwanted applications, which are called Potentially Unwanted Programs, or PUP in short, usually tag along as a software bundle when downloading the application and could cause serious problems for computer users. PUP does not involve malware in the traditional sense. What normally makes a PUP different from malicious software is the fact that when you download one, you’re doing it with your consent – although in most cases unintentionally and reluctantly. But, there is no doubt that PUPs remain bad news for computer users as they can be incredibly damaging to the PC in many ways. How do unwanted programs affect you? Unwanted programs come in many forms. More commonly, they will be found in adware bundlers which are known to utilize aggressive and misleading advertising. The majority of bundlers install many adware applications from a number of vendors, each of which features its own EULA policy. Safebytes Anti-malware completely removes this threat and safeguards your PC against PUP or malware infection. PUPS also appear in the form of undesirable toolbars or internet browser plug-ins. Not just they needlessly use up space on your screen, toolbars can also manipulate search results, track your web browsing activities, decrease your internet browser’s performance, and slow down your web connection to a crawl. They could seem harmless but PUPs are generally spyware. They may include dialers, keyloggers, and also other software built inside them that could monitor you or send out your sensitive information to 3rd parties. Because of this unwanted program, your application may freeze, your security protections can get disabled that could leave your computer susceptible, your system could get ruined, and this list goes on and on.

Tips for preventing PUPs

• Study cautiously prior to agreeing to the license agreement as it could have a clause about PUPs. • Always opt for the custom if you are given an option between Recommended and Custom Installations – never click Next, Next, Next thoughtlessly. • Install an advert blocker/pop-up blocker; Deploy anti-malware products such as Safebytes Anti-malware. These software programs will establish a wall between the computer and online criminals. • Be alert when you download and install freeware, open-source software, or shareware. Avoid downloading and installing browser extensions and applications you are not knowledgeable about. • Always download software from reliable sources like official sites as opposed to untrustworthy sharing space. Avoid torrents and peer-to-peer clients.

Can't Install Safebytes Anti-malware because of a Virus? Try This!

Malware could potentially cause all sorts of damage after they invade your system, from stealing your private details to erasing files on your PC. Some malware sits in between the computer and your internet connection and blocks some or all internet sites that you really want to visit. It might also prevent you from the installation of anything on your machine, especially an anti-virus program. If you’re reading this now, you’ve probably realized that a malware infection is a reason for your blocked internet traffic. So what to do when you want to download and install antivirus software like Safebytes? Do as instructed below to get rid of malware through alternative methods.

Boot your PC in Safe Mode

In Safe Mode, you can actually change Windows settings, un-install or install some applications, and remove hard-to-delete viruses. In the event, the virus is set to load automatically when the computer boots, switching to this mode could prevent it from doing so. To get into Safe Mode or Safe Mode with Networking, press F8 while the system is starting up or run MSConfig and find the “Safe Boot” options under the “Boot” tab. Once you are in safe mode, you can attempt to install your antivirus program without the hindrance of the malicious software. Right after installation, run the malware scanner to remove standard infections.

Switch over to an alternative internet browser

Malicious program code might exploit vulnerabilities on a particular browser and block access to all anti-malware software websites. If you appear to have a trojan attached to Internet Explorer, then switch over to a different web browser with built-in safety features, such as Firefox or Chrome, to download your favorite antivirus program – Safebytes.

Make a bootable USB antivirus drive

Another option is to save and operate an antivirus program entirely from a USB drive. To run anti-virus using a USB drive, follow these simple measures: 1) Make use of another virus-free PC to download Safebytes Anti-Malware. 2) Connect the flash drive to a USB port on the clean computer. 3) Run the setup program by double-clicking the executable file of the downloaded software, with a .exe file extension. 4) Choose the USB stick as the location for saving the software file. Follow the on-screen instructions to finish the installation process. 5) Now, plug the USB drive into the infected system. 6) Double-click the EXE file to run the Safebytes program from the thumb drive. 7) Run Full System Scan to identify and get rid of all kinds of malware.

Protect your PC from Malware With SafeBytes Security Suite

To protect your computer or laptop from various internet-based threats, it is very important to install an anti-malware application on your laptop. However, with so many antimalware companies out there, nowadays it is actually tough to decide which one you should obtain for your personal computer. A few of them are excellent, some are decent, and some will destroy your PC themselves! You must be careful not to choose the wrong product, especially if you buy premium software. Among few good applications, SafeBytes Anti-Malware is the highly recommended software program for the security-conscious end user. Safebytes is one of the well-established PC solutions firms, which offer this comprehensive anti-malware application. Using its outstanding protection system, this utility will instantly detect and remove the majority of the security threats, including browser hijackers, viruses, adware, ransomware, trojans, worms, and PUPs. SafeBytes anti-malware takes computer protection to a whole new level with its advanced features. Let’s look into a few of them below: Optimum AntiMalware Protection: With a critically acclaimed anti-malware engine, SafeBytes offers multilayered protection which is intended to catch and eliminate threats that are hidden deep in your computer’s operating system. Real-time Threat Response: SafeBytes provides round-the-clock protection for your computer limiting malware intrusions in real-time. It will continuously monitor your computer for hacker activity and also gives users advanced firewall protection. Web Protection: Safebytes allots all sites a unique safety score that helps you to get an idea of whether the webpage you’re about to visit is safe to view or known to be a phishing site. Faster Scanning: SafeBytes Anti-Malware has got a multi-thread scan algorithm that works up to 5x faster than any other antivirus software. Light-weight: SafeBytes is a lightweight and user-friendly antivirus and antimalware solution. Since it uses minimal computer resources, this software leaves the computer power exactly where it belongs to: with you actually. 24/7 Online Support: Support service is readily available for 24 x 7 x 365 days via email and chats to answer your concerns. SafeBytes has created an excellent anti-malware solution to help you conquer the latest computer threats and virus attacks. You now may understand that this tool does more than just scan and delete threats on your PC. You’ll get the best all-around protection for the money you spend on SafeBytes AntiMalware subscription, there is no doubt about it.

Technical Details and Manual Removal (Advanced Users)

If you wish to carry out the removal of GoforFiles manually instead of using an automated software tool, you can follow these simple steps: Go to the Windows Control Panel, click on the “Add/Remove Programs” and there, select the offending application to uninstall. In cases of suspicious versions of web browser plug-ins, you can easily get rid of it through your web browser’s extension manager. It is also highly recommended to factory reset your web browser to its default state to fix corrupt settings. In order to ensure the complete removal, manually check your hard disk and registry for all of the following and eliminate or reset the values as needed. But bear in mind, this can be a complicated task and only computer experts can perform it safely. Also, certain malware is capable of replicating itself or preventing deletion. You’re urged to do this process in Windows Safe Mode.
Files: %ProgramFiles%GoForFiles.comGoForFiles.com.exe %UserProfile%DesktopGoForFiles.com.lnk %UserProfile%StartMenuGoForFiles.comGoForFiles.com.lnk %UserProfile%StartMenuGoForFiles.comHelp.lnk %UserProfile%StartMenuGoForFiles.comRegistration.Lnk %UserProfile%ApplicationDataMicrosoftInternetExplorerQuickLaunchGoForFiles.com.lnk Registry: HKEY_CURRENT_USERSoftware376694984709702142491016734454 HKEY_CURRENT_USERSoftwareMicrosoftWindowsCurrentVersionRun376694984709702142491016734454
Read More
1 2 3 162
Logo
Copyright © 2022, ErrorTools. All Rights Reserved
Trademarks: Microsoft Windows logos are registered trademarks of Microsoft. Disclaimer: ErrorTools.com is not affiliated with Microsoft, nor claim direct affiliation.
The information on this page is provided for information purposes only.
DMCA.com Protection Status