A Quick Guide to Fixing the Error 0x800ccc7d

[vc_row][vc_column][vc_column_text]

Troubleshooting Error 0x800ccc7d

0x800ccc7d - What is it?

0x800ccc7d is an SSL (Secure Sockets Layer) error message code that occurs in applications like Microsoft Outlook or Outlook Express. The error message is displayed as: ‘ unknown error 0x800ccc7d- secure sockets layer ’.

Many offices use Microsoft Outlook for email communication and sending instant messages within the office. This is a highly functional application that enables users to interact with peers efficiently, manage contacts, journals, and reminders.

However, the error 0x800ccc7d may hamper your ability to send and receive emails efficiently. Therefore it is advisable to repair it right away.

Solution

Restoro box imageError Causes

The error 0x800ccc7d is triggered by the following causes:

  • Damaged profile in Outlook
  • Incorrect email account settings
  • The Outlook installation is corrupt and damaged. This usually happens due to issues in hard disk storage.
  • The outgoing SMTP server does not support secure connections

Further Information and Manual Repair

If you come across 0800ccc7d error code while using Microsoft Outlook or Outlook Express, then don’t you worry! This problem can be easily resolved. In fact, it is so easy to repair that you can do it by yourself even if you are not a technical expert.

Here are some ways to fix the 0800ccc7d SSL Outlook error:

Solution 1: Use Scanpst.exe

You may not know this but Microsoft offers an inbuilt Outlook Repair tool. This tool is technically known as Scanpst.exe. This tool is useful when you need to repair Basic header corruption. However, it may not be the best choice if the problem is big and complex.

Solution 2: Reset Your Outlook Settings

Sometimes this error message may occur when the STMP server requires authentication or does not recognize the senders' email addresses. In this scenario, you should check your Outlook settings to make sure that your STMP username and server are correct. For this follow this procedure:

  • Go to the Tools menu and then click on Accounts
  • Now click on your email account then check its properties
  • Click general and make sure that your email address is created in your account’s control panel. If not, then edit and create.
  • Next, click servers and see if the box next to the option that says My server requires authentication is checked or not. If not, then check it to resolve the error.

Solution 3: Disable any Anti-Virus

Another alternative to resolve this error is to disable any Anti-virus or Firewall you have installed on your PC. Once you disable it then try sending or receiving the email again. This usually works.

Solution 4: Download 0x800ccc7d Repair Tool

The fourth solution available to resolve this issue is by downloading the 0x800ccc7d repair tool. Though it is similar to Microsoft Outlook built-in scanpst.exe tool, but as compared to it the 0x800ccc7d repair tool is a highly functional tool.

There are many 0x800ccc7d repair tools available but we recommend you to Restoro.

This tool is a third-party tool that can deal, scan, and fix 0x800cc7d error in no time. What makes this repair tool an excellent choice is that it can repair all broken PST files and emails, recover Outlook items, retrieve deleted files, recover password-protected data, split files to recover oversize PST files, and more.

To access and install the 0x800ccc7d repair tool all you need to do is download it here and install it on your PC. Now run it to scan errors. Once the errors are scanned, hit the repair tab to resolve.

So, next time when you experience the error 0x800ccc7d, try using these solutions to fix the problem right away![/vc_column_text][/vc_column][/vc_row]

If you like to learn and find out more about various Windows errors, and how to repair them go to our vast archive or use search to find articles that will explain and help you in solving your issue.
However, if you prefer to do things fast and with automatization then we are proposing to use an automated solution for your issues. The application that we are recommending is Advanced System Repair Pro
Advanced System Repair utilizes multiple tools all in one to give you a quick, simple, reliable, and very thorough diagnosis of your PC. It brings you all the tools you need in one program to clean, fix, protect, optimize and boost your PC!
1-Click Maintenance
All the tools to make it simple and easy! It's like having a professional technician at the click of a mouse.

Junk Cleaner
Keeping your computer free from unnecessary clutter also helps make your computer last longer. Like any other machine, if you keep it clean and take care of it, it will serve you better for longer!

Optimize background apps
Optimize applications background activity with the built-in Application Optimizer feature.

Disk Defrag
With a simple 1-click, Advanced System Repair speeds up your PC by assembling fragmented files on your machine and organizing them more efficiently.

Malware Removal
Finds and removes all types of harmful malware including trojans, worms, bots, adware, spyware, PUPs, and more!

Privacy Cleaner
The all-in-one privacy suite to Clean Your Tracks & Protect Your Privacy! Make your computer safe, secure, and more efficient!

System Tweak/Optimizer
ASR will analyze your complete system and settings to adjust your PC to function at its maximum performance.

Registry Cleaner
Over time, as you install and uninstall applications, the registry can become cluttered with old entries and broken settings which can result in program crashes, and annoying messages and slow the computer down.
Visit our Advanced System Repair Pro Download page to inform yourself about all the benefits of this software and get a free trial copy of it.
advanced system repair pro

Advanced System Repair Pro

One-click automated PC repair solution
ASR logo
With Advanced System Repair Pro you can easily
Replace damaged files
Restore performance
Free disk space
Remove Malware
Protects WEB browser
Remove Viruses
Stop PC freezing
DOWNLOAD
Privacy Policy | Terms of Use | Uinstall
Advanced System Repair Pro is compatible with all versions of Microsoft Windows including Windows 11

Share this article:

You might also like

Computer makes a beeping noise when you turn it on
Recently, a few users reported that they were unable to turn on their computers for some reason and at the same time their computers Computer makes a beeping noise couple of times or continuously whenever they try to turn them on. The sounds the computers are making can be quite annoying and it also signifies that there is something wrong with them. The problem might have something to do with the hardware inside of the computer system rather than Windows 10 itself. As you know, a computer is designed to deliver audible error sounds every time some part of the hardware is not properly working. For instance, if you hear a single beep, this indicates that your GPU is having some issues and if you’re hearing two beeps, it indicates that your RAM is not working properly, whereas three beeps that repeat after a pause when you turn on your computer means that there is something wrong with the system memory. On the other hand, if your computer is beeping continuously, this means that the problem lies with the processor. To fix this issue, here are some suggestions that might help but before you proceed, make sure that you know how to manage your computer’s hardware, if not, better have some expert do it for you.

Option 1 – Try checking the RAM

One of the basic things you can do in this kind of case is to check the RAM. Prepare some screwdrivers and dig into your PC and then look for the RAM slots and ensure that they are attached firmly. There are times when moving around your computer daily can cause certain components in your computer to become loose. Worst case scenario is that the RAM might be broken so really have to replace it.

Option 2 – Try checking the graphics card

After digging into your computer, check the graphics card and give it some good cleaning. As you know, you have to remove certain components like the graphics card regularly and clean them to help increase their lifespan and avoid errors in a startup. And if it turns out that the graphics card is broken, you have to replace it with a new one to fix the problem.

Option 3 – Try checking the processor

The processor is the brain of every computer so if it ends up not working, everything else is useless. Thus, you need to check it to see if it’s firmly attached and see if it needs some cleaning of dust and other debris. After that, try turning on your computer again. If it doesn’t work, then you might have to take your system to a technician to resolve the problem for you.
Read More
Overwatch lost connection to the game server
Overwatch has taken the world by the storm, it introduced new mechanics in gameplay, colorful characters, various game modes and it is constantly updated with new content for free. If you have friends to play with this game is even better but sometimes errors occur and the game loses connection to the game server making it unplayable since it requires a constant internet connection to the server to function. Keep reading and try provided solutions as they are presented to fix this issue and continue gaming.
Read More
Fix Remote Desktop: Your credentials ...
Experiencing issues while using Remote Desktop connections is not uncommon. One of the issues that users encountered recently while trying to connect to their Remote Desktop network is the error saying, “Your credentials did not work, The login attempt failed”. If you are one of these users, then you’ve come to the right place as this post will walk you through fixing the problem. When facing this kind of problem, the first thing you can try before you do some troubleshooting steps is to verify the credentials. But if you are certain that you’ve entered the correct credentials just like what other users reported, then it’s completely a different matter. Based on the reports, this error is common on newly installed versions of Windows 10 or after reinstalling the operating system which could mean that the problem might be due to the Windows security policies or the username might have been recently modified. The latter case is a possibility especially if you’ve reinstalled Windows 10 and had entered a new username. In such a case, you will really have a difficult time connecting to your Remote Desktop connection since its credentials do not really automatically change. If you’ve verified that your credentials are correct, then now’s the time you troubleshoot the problem with the help of the potential fixes provided below. Just make sure that you follow each one of them in sequence.

Option 1 –Try to run the Network Adapter troubleshooter

To run the Network Troubleshooter, refer to these steps:
  • Open the Search bar on your computer and type in “troubleshoot” to open the Troubleshoot settings.
  • Next, scroll down and select the “Network Adapter” option from the right pane.
  • Then click on the Run Troubleshooter” button.
  • After that, your computer will check for any possible errors and will pinpoint the root cause of the problem if possible.
  • Restart your computer.

Option 2 – Try to change the network profile from public to private

According to some reports, this error occurs on systems where the network profile was set to public. Thus, you need to change the network profile to private to resolve the problem. How? Refer to these steps:
  • Go to Start and from there click on Settings > Network & Internet > Status.
  • Next, click on the “Change connection properties” option.
  • After that, set the radio button of Network Profile from Public to Private.
  • Wait for a couple of seconds until the system is done applying the changes you’ve made and then see if you can now connect to the Remote Desktop connection.

Option 3 – Try changing the account username

As mentioned, one of the possible causes for this error is the reinstallation of the operating system. You might have changed the username for the system but it does not really change the username of the Remote Desktop connection as well. Thus, you have to change the username back to what it was before you’ve reinstalled Windows 10.

Option 4 – Try modifying the Windows Security Policy

You can also try to edit the Windows Security Policy as it could help in resolving the error. This Windows Security Policy, when enabled, will not allow non-admin users to log on to the Remote Desktop connection. So if you want to allow non-admin users to use the Remote Desktop connection, then you need to modify this policy. Note that you can only do that if you are the admin of the system yourself.
  • Tap the Win + R keys to open the Run utility.
  • Then type “secpol.msc” in the field and tap Enter or click OK to open the Local Security Policy.
  • After opening the Local Security Policy window, select Local Policies > User Rights Agreement located on the left pane.
  • Next, double click on “Allow log on through Remote Desktop Services” located in the right pane.
  • And in the next window that appears, select Add user or group.
  • After that, type in the username of the intended non-admin user under the “Enter the object names to select” column.
  • Once done, click on the Check Names button to fix the username and then click OK to save the changes made.
  • Restart your computer.

Option 5 – Use the Group Policy Editor

  • Tap the Win + R keys to open the Run dialog box and then type “gpedit.msc” in the field and tap Enter to open the Group Policy Editor.
  • Next, navigate to this path: Computer Configuration > Administrative Templates > System > Credentials Delegation.
  • Double click on the “Allow delegating default credentials with NTLM-only server authentication” policy setting located on the right pane to edit it.
  • After that, shift its radio button to Enabled and click on Show.
  • Then type “TERMSRV/*” in the Value box and click OK.
  • Now repeat the same for the following policy settings:
    • “Allow delegating default credentials”
    • “Allow delegating saved credentials”
    • “Allow delegating saved credentials with NTLM-only server authentication”
  • Once you’re done, restart your computer and see if the problem is fixed.
Read More
How to fix random Computer crashes
Computer crashes are one of the most annoying things that can happen to users. It often loses your data and work, you must spend extra time if you were in the middle of something and can even break Windows itself. Computer without crashes working fineBefore we move to the article I just want to say that technically there are no random crashes, there is always a reason why the system hangs up, why you received blue screen, annoying restarts out of nowhere and many more PC crashes. In this article, we will explore many possible reasons why something may occur and offer you straight forward solution on how to escape the situation and prevent it from happening again. Without further delay, let's begin:
  1. Check switch connectors and power outlets

    Yes, sometimes the most basic approach provides the best results, check to see if your power outlet is stable and providing you with constant voltage, if not, maybe you want to invest in a UPS system so you do not face random shutdowns and restarts during work, also while you are at it, check to see if that reset and power switch are connected properly and that they are not dirty or loose.
  2. Clean your PC and check connectors

    Dirt can cause many issues with computers, from overheating to shutdowns to blue screens and memory dumps, check to see if your computer is clean enough and that all connectors are connected tight into their respective sockets.
  3. Check the temperature of your CPU

    CPU overheating can cause so-called random freezes and blue screens, the computer might shut down or restart also without any visible reason. Check to see if your fan on the CPU is working properly and change the thermal paste if needed.
  4. Check the health of your hard drive

    If your hard drive is beginning to go down the path of dying out, many issues can come from this condition. There are many tools on the internet and in Windows itself to check if your hard drive is working properly.
  5. Run antivirus and firewall

    Random lock-ups or similar issues can also occur if by any chance you have some malware on your system, run protection software, and keep it updated to make sure the issue does not come from the computer being infected with malicious applications.
  6. Keep system clean

    Have a habit to clean regularly system files and registries, keep removing unnecessary files from your computer and regularly update your Windows and applications along with drivers.
  7. Run memory test

    Bad RAM bank can cause many issues during the work, check it out to be sure the problem is not RAM itself.
  8. Do not run applications that are too demanding for your system

    Some applications require stronger hardware, and some require the latest hardware, if your computer is a little outdated, running a demanding application can cause issues like freezing, restarts, etc.
  9. Remove applications you do not use

    This does not seem like anything important but if you are not using a specific application just remove it from the system, why? Sometimes an application has some ties to certain services and if it is outdated can cause issues for newer ones.
  10. Stop installing everything you find on the internet

    Yes, that extension for chrome looks cool, yes, that fancy new player seems sick but if it is from an unverified source and from the unknown publisher without any reviews maybe you are better off with it. You can never tell what you might be placing into your system from the internet.
And that's it, 10 reasons and solutions on what to do on random computer freezes, crashes, etc.
Read More
How to Fix Error Code 0x8007267C on Your PC

How to Fix Error Code 0x8007267C on Your PC

Error Code 0x8007267C – What is it?

Error code 0x8007267C is specific to Windows 10. This error is triggered when no DNS server is currently configured in your network settings during the Activation process. If you are fairly confident in your ability to address command-line tools and networking issues, you can follow the steps below to try to remedy the error code on your own. If not, you may need to contact a qualified technician in order to resolve the error successfully.

Solution

Restoro box imageError Causes

The cause of Error Code 0X8007267C within the Window 10 system is fairly straightforward. Windows Activation requires a valid DNS server to be configured in order to complete the Activation process; if one is not available or properly configured, then you may see this error code and Activation will fail.

Further Information and Manual Repair

The following methods may help you to resolve this error, but you’ll need to have some familiarity with command-line tools to complete the steps successfully. If these methods do not work or if you are uncomfortable in using the command prompt, you may need to consult a technician to fully resolve this particular error code on the Windows 10 system.

Method 1: Register a DNS server within your network properties and test the connection.

In order to resolve this error code, client connectivity to a DNS server must first be established. The following steps may help you to determine the root problem with your connectivity status:

  1. Open a command prompt, after which you'll run IPCONFIG /all
  2. Verify the following values: The IP address that has been assigned, the DNS server, the subnet mask, and the default gateway. Compare each to ensure that all are set with the values that correspond to your specific environment
  3. Check for basic IP connectivity to the DNS server using the PING command. In using the PING command, utilize the address of the DNS server found in Step 1

ping <DNS Server IP address>

If basic connectivity to the DNS server in question is failing, then you will need to resolve that issue before going further in the process.

After troubleshooting the above basic connectivity issues to the DNS server, you can reattempt Windows Activation by using the command below from within an Elevated Command selection:

cscript windowssystem32slmgr.vbs -ato

If the steps above did not work for you, you may want to try the steps found in method 2.

Method 2: Use phone-based authentication with a MAK (multiple activation key).

If a DNS server is not connected to your network, you can use an alternative method to complete the Windows Activation process. Bypass Method 1 by using a MAK product key instead to activate the volume license installation. Certain MAK product key providers have a variation on the specific key numbers that you will need to use. If you are using TechNet media or MSDN media, you will have to change the product key listed to the product key provided. The product keys provided by either TechNet media or MSDN media for Windows Server 2008 or for Windows Vista Enterprise will be the MAK product key that you will enter in a later step.

Like the previous method, you will need to have some familiarity or confidence in your ability to operate Command Line tools before proceeding. Once you have found your MAK product key, you’ll need to open a command prompt and use the following command to change the product key to match the MAK product key, which should look something like the example below:

            slmgr –ipk xxxxx-xxxxx-xxxxx-xxxxx-xxxxx-xxxxx

After completing the product key change, use the following command to initiate the phone activation wizard, thereby completing the activation of the system:

            slui 04

The activation wizard should be able to walk you through the remainder of the process in a step-by-step manner. In addition to appearing as an error code in Windows 10, this particular error may apply to multiple versions of Windows, including:

  • Windows 7 Enterprise
  • Windows 7 Enterprise E
  • Windows 7 Enterprise N
  • Windows 7 Professional
  • Windows 7 Professional E
  • Windows 7 Professional N

Steps to address the error code may be different in any of these other versions of Windows. If you have difficulty in resolving the error effectively, seek professional technical help.

Read More
Microsoft Windows 11 limitations surfacing
windows 11As more and more people get into insider preview of upcoming Windows 11 we will see more and more different takes and opinions on it. Generally speaking, the first wave was quite positive when it was previewed but how time is passing more and more limitations and frustration comes to the surface. Some of the limitation that is inside it, which have been confirmed by Microsoft itself includes features missing that we had in Windows 10 like moving the application to the taskbar in order to pin it, moving the file in the taskbar to open it in default application and some big annoyances like Windows opening widgets always in Edge no matter what is your default browser. Not being able to move the taskbar from the bottom is also one of many illogical things. There is not really a point in these missing features since they were working fine in Windows 10 and many users liked them since they could customize Windows more to their liking, now with this new look at limitations it reminds me personally much of apple macOS and I will be honest, I am not a big fan of that kind of thinking. If I wanted that kind of OS I would have gotten myself a MAC, not custom build PC, but hey, Linux is always a free alternative, and how Microsoft itself is pushing limitations and in my opinion bad design choices along with awful system requirements that might just be a case for a lot of users. I am really not sure what is logic behind these moves and I am sure they have their reasons but this time it seems that their take on the new OS is not resonating well with the overall user population, well at least what I have heard so far. Things of course can still be changed and made for the better and I would rather see release postponed and issues addressed than getting more system hogging and limited new OS that at its current state looks like reskinned Windows 10 with limitations.
Read More
What to do if you can’t delete Partition
There are times when it is really inevitable to delete your hard drive partitions especially if you are already running low on disk space in your Windows 10 computer. Users typically delete the volume which is not being used in such cases in order to free up some space for the volume that’s running low on disk space. To resolve the problem, users tend to use the Disk Management utility to delete hard drive partitions. However, some users reported that the “Delete volume” option is not available as it is grayed out. Thus, users aren’t able to delete hard drive partitions and aren’t able to free up disk space. This kind of problem usually occurs when there is a Page file on the volume that you are trying to delete and so on. Oftentimes, this issue is mistaken for the problem where you are unable to delete an EFI-protected partition. However, in this case, not only you are unable to delete EFI-protected partition but also NTFS file systems. This is really hard to deal with but worries not for there are some potential fixes you can check out to resolve this problem.

Option 1 – Try to manage the Page file in the Partition

As mentioned earlier, if a Page file exists in a partition, you won’t be able to delete it. The page file is what stores your data when the system’s random access memory fills up. To resolve this, follow these steps:
  • Go to the Start menu and type “View advanced system settings” in the field and open it from the search results.
  • Next, click on Settings in the Advanced tab.
  • On the new window that pops up, go to the Advanced tab and select Change.
  • Next, uncheck the checkbox of “Automatically manage paging file size for all drives” and highlight the drive you want to delete.
  • Then select “No paging file” and click on Set.
  • Now click on the Apply and OK buttons on all the windows and restart your computer.

Option 2 – Delete storage partition via Command Prompt

  • Tap the Win + X keys or right-click on the Start button and select Command Prompt (Admin) or you could also type in “cmd” in the Cortana search box and right-click on the Command Prompt icon and then select the “Run as Administrator” option from the context menu.
  • Once you have Command Prompt pulled up as admin, type in and enter this command – diskpart
  • After entering this command, the Diskpart Utility will start. Diskpart Utility is a command-line-based utility just like Command Prompt but it will get a UAC Prompt after you invoke it so you have to click Yes for the UAC Prompt.
  • After that, type in list volume and tap Enter to see the list of all the partitions created on your PC. This includes both types of partitions that are visible to the normal users in the File Explorer as well as the ones that are created by Windows 10 by default which helps it in storing the boot files and other essential system files.
  • You should see a list of all the partitions made on your computer. Select the partition you want to delete by its Unique Identification number as Volume X where X denotes the Unique Identification Number.
  • Next, type in the select volume number command and hit Enter to select the desired volume.
  • Then delete the volume you’ve selected and type in the delete volume command and hit Enter to delete the volume you just selected and convert it into unallocated space.

Option 3 – Delete storage partition via Windows PowerShell

  • Start by tapping the Win + X keys or simply right click on the Start button and select Windows PowerShell (Admin) or you could also type in “Windows PowerShell” in the Cortana search box and right-click on the Windows PowerShell icon and select the “Run as administrator” option.
  • Once you’ve opened the Windows PowerShell, type in the Get-Volume command and hit Enter to get a list of all the partitions on your PC.
  • Next, select the drive letter you want to delete and then type in the Remove-Partition –DriveLetter command and hit Enter to delete the selected partition. Note that you need to replace the drive letter with the letter of the partition you want to get rid of.
  • After that, it will ask you for confirmation. Just hit the Y key for Yes or hit the A key to say Yes to All. This will delete all the partition you’ve selected and will move them in as unallocated space.
Read More
The Extended Attributes Are Inconsistent Error
One of the most critical errors inside your Windows operating system is The Extended Attributes Are Inconsistent error. This error means that your operating system has been corrupted and it may produce many annoying issues like for example time lags, random crashes, and even freezing of the system when running multiple applications. There are a lot of reasons for this error, from the registry to faulty application installations to sometimes even hardware issues like bad RAM memory or bad hard drive. Mostly issue is due to corrupted files inside Windows and most often people only think that resetting the PC or complete reinstallation is the only way to fix this problem. Although reinstalling the system or resetting the PC will solve this error for sure there are other less time-consuming ways to fix this error. The Extended Attributes Are Inconsistent Error
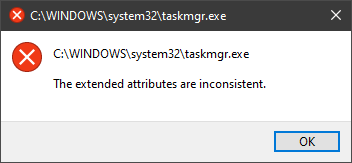
In this guide, we will show you common ways in fixing Extended Attributes are inconsistent errors inside your Windows that are easy to do and less time-consuming than complete reinstallation of the system.

Fixing Extended Attributes Are Inconsistent error

Run SFC scan

  1. Press ⊞ WINDOWS + X to open the hidden menu
  2. Click on command prompt (admin)
  3. In command prompt type in SFC /scannow and press ENTER
  4. Wait for the operation to complete
  5. Reboot your PC

Use System Image Repair Tool

  1. Press ⊞ WINDOWS + X to open the hidden menu
  2. Click on command prompt (admin)
  3. In command prompt type in Dism /Online /Cleanup-Image /RestoreHealth and press ENTER
  4. Wait for the operation to complete
  5. Reboot your PC

Change all user accounts to the administrator

  1. Press ⊞ WINDOWS + R to open the run dialog
  2. Type in netplwiz and press ENTER
  3. Select a first user account and click on Properties
  4. Click on the Group Membership tab
  5. Choose Others from the options
  6. Select administrator (if all accounts are already administrators change all to users)
  7. Repeat process for all other accounts
  8. Click OK to save settings

Change Windows Sound scheme to default

  1. Right-click on the sound icon in the taskbar
  2. Click on Sound options
  3. Go to the Sounds tab
  4. In Sound Scheme click and choose Windows Default
  5. Under Program Events choose Windows User Account Control
  6. Click on the drop-down menu and choose None
  7. Click on Apply
  8. Click on OK

Downgrade the Sound driver

  1. Press ⊞ WINDOWS + X to open the hidden menu
  2. Click on Device Manager
  3. Find your Audio driver and right-click on it
  4. Click on uninstall and then on OK
  5. Reboot your system

Do System Restore

If none of the provided solutions have worked, perform a system restore to the last point where everything was working fine.

Reset PC

If even system restore has not solved the issue or you do not have valid point in system restore time, perform Reset this PC and hopefully, the error will be finally fixed.

Conclusion

If all of the provided methods have not managed to repair this error that checks your hardware, your computer might have some faulty components if after complete PC reset error persists.
Read More
Turn On/Off and Clear Windows Clipboard
Windows 10 has a Cloud Clipboard feature that allows users to have a list of multiple copied text in place so that they can reuse it. And each time the computer restarts, the Clipboard Data is cleared. However, you can actually do it manually. How? Read on as this post will walk you through how you can turn on or off as well as clear the Clipboard history in Windows 10. This kind of feature is already available in Windows 10 v1903. In the previous versions of Windows, there was no feature to turn off history in the clipboard and users have to use other ways to clear the clipboard history. And now it seems that Microsoft has put an end to this dilemma as it now allows users to clear the clipboard history. To turn on or off or clear the Clipboard history, here are some instructions you need to follow: Step 1: Tap the Win + X keys to open the power menu and select Settings. Step 2: After that, navigate to Settings > System > Clipboard. Step 3: From there, turn off the toggle button under the Clipboard history section. This will turn off the Cloud Clipboard feature. As a result, the default clipboard will hold one last item and will not display the data on the clipboard. Note: When you tap the Win + V keys to invoke the clipboard manager, you will see a prompt that says, “Can’t show history, See all copied items in place, Turn on clipboard history”. You have the option to turn it back on by simply clicking on the available button. Doing so would only hide the existing data and makes sure that no copy of the data is kept.

Conclusion

On the other hand, if you want to clear the clipboard without affecting its history data, you have to make sure to pin the items on the clipboard that you want to stay. After that, click on the three-dotted icon for the menu and click on the “clear all” option. This will delete all the entries but will keep the pinned items on your clipboard.
Read More
Fix DRIVER_IRQL_NOT_LESS_OR_EQUAL in Windows
DRIVER_IRQL_NOT_LESS_OR_EQUAL will cause your computer to go to the blue screen of death but do not worry there are solutions around this and we are here to instruct you on how to solve this.
  1.  Uninstall and install network drivers

    DRIVER_IRQL_NOT_LESS_OR_EQUAL is most commonly tied to bad network drivers, whatever that be a corruption of the driver files or their incompatibility. So first thing is to check if this is the case. Press ⊞ WINDOWS + X to open the hidden menu in Windows and click on Device Manager. keyboard with windows and x marked Windows menu device manager In the Device Manager expand Network adapters, choose adapter, right-click on it and choose Uninstall. network device manager 
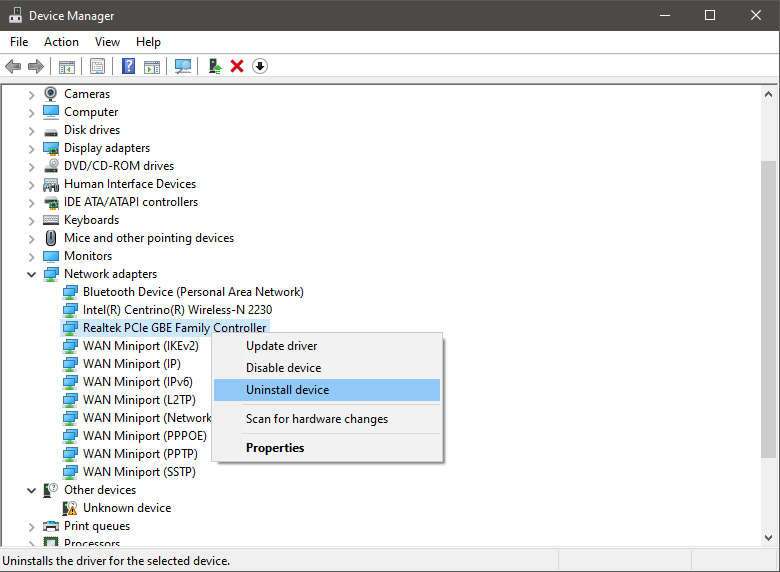
Install latest driver or reboot so Windows will install the driver automatically
  2. Update driver

    If you do not want to reinstall the driver or you are unable to for whatever reason updating the driver might do the trick. To update driver: Press ⊞ WINDOWS + X to open the hidden menu in Windows and click on Device Manager. keyboard with windows and x markedWindows menu device manager In the Device Manager expand Network adapters, choose adapter, right-click on it and choose Update Driver. network device manager update
  3. Fix via Command prompt

    If both of the beforementioned solutions fail, try running the command prompt and fix the issue from there. Press ⊞ WINDOWS + X to open the hidden menu in Windows and click on Command Prompt (administrator) keyboard with windows and x markedWindows menu command prompt admin In command prompt type next line and press ENTERDEL /F /S /Q /A “C:\Windows\System32\drivers\mfewfpk.sys Reboot the system
  4. Scan your PC for malware

    Sometimes corruption in the system is caused by malware, Scan your system for malware, viruses, etc.
  5. Check connections or other hardware issues

    If all methods fail, open your PC case and check to see if connections everywhere are properly connected and tight. Clean your PC and turn it back ON
  6. Use system restore

    If anything fails, use Windows system restore and bring back computer into a state where everything was working fine.
Read More
1 2 3 162
Logo
Copyright © 2022, ErrorTools. All Rights Reserved
Trademarks: Microsoft Windows logos are registered trademarks of Microsoft. Disclaimer: ErrorTools.com is not affiliated with Microsoft, nor claim direct affiliation.
The information on this page is provided for information purposes only.
DMCA.com Protection Status