Simple Manual to Fix Corrupted PST Files Quick

Fix Corrupted PST Files Quick

Just what is a PST File?

PST file is the acronym for Private Storage Table. It is a proprietary file structure utilized in the ms-outlook program shop and to preserve attachments as well as e-mails, notifications, scheduled calendar events, and even more.

This structure can also be called a Personal Folder File. The storage limit or the size varies today with respect to the Outlook version you've got installed.

The PST file size limit depends on the edition you have installed. Outlook 2002 and earlier versions have a memory limitation of 2GB while later versions such as Outlook 2013 have up to 50GB memory limit.

Error Causes

You will be amazed to discover there is not a single cause behind this problem. The File can be damaged due to a number of reasons including:

  • Virus infection
  • Incorrect file system recovery
  • Data storage device failure
  • Storage size limit exceeds
  • Sometimes due to power failure when accessing the PST files

Once this File becomes corrupted and broken, it places you in danger of losing your important e-mails and attachments.

Moreover, this stops you from getting or sending e-mails to and from your own associates. And in case you would like to add new contacts, you are greatly hindered. It reduces your productivity.

For individuals relying completely on the Outlook program for communicating via e-mails and maintaining a track of important dates that they have set reminders for and scheduled in their calendars, the PST file problem is a nightmare.

It decreases productiveness and performance.

Further Information and Manual Repair

To regain the damaged File without removing old e-mails Install a PST File Repair Tool. The latter one is probably the best way to resolve this issue without compromising on your old important emails and contacts.

There are a number of repair resources out there. Each device provides a distinct degree of characteristics and performance. We urge you to use Stellar Phoenix Outlook PST Repair Tool.

Not only does this repair tool aid work out PST file error that is damaged, but it also helps with data recovery. With this particular tool, it is possible to recover even the erased files you've removed from your Outlook Installation before the PST file got corrupted.

Wait there is more! It is also possible to raise the memory limit by installing this repair tool on your computer.

What this means is in the event the PST file corruption's cause was associated with the storage size limit, it is easily worked out. With an increase in memory, you can keep your older emails and continue storing new mail from associates.

To begin, Click here to Download Install Stellar Phoenix Outlook PST Repair on your personal computer and run it to restore the PST files.

If you like to learn and find out more about various Windows errors, and how to repair them go to our vast archive or use search to find articles that will explain and help you in solving your issue.
However, if you prefer to do things fast and with automatization then we are proposing to use an automated solution for your issues. The application that we are recommending is Advanced System Repair Pro
Advanced System Repair utilizes multiple tools all in one to give you a quick, simple, reliable, and very thorough diagnosis of your PC. It brings you all the tools you need in one program to clean, fix, protect, optimize and boost your PC!
1-Click Maintenance
All the tools to make it simple and easy! It's like having a professional technician at the click of a mouse.

Junk Cleaner
Keeping your computer free from unnecessary clutter also helps make your computer last longer. Like any other machine, if you keep it clean and take care of it, it will serve you better for longer!

Optimize background apps
Optimize applications background activity with the built-in Application Optimizer feature.

Disk Defrag
With a simple 1-click, Advanced System Repair speeds up your PC by assembling fragmented files on your machine and organizing them more efficiently.

Malware Removal
Finds and removes all types of harmful malware including trojans, worms, bots, adware, spyware, PUPs, and more!

Privacy Cleaner
The all-in-one privacy suite to Clean Your Tracks & Protect Your Privacy! Make your computer safe, secure, and more efficient!

System Tweak/Optimizer
ASR will analyze your complete system and settings to adjust your PC to function at its maximum performance.

Registry Cleaner
Over time, as you install and uninstall applications, the registry can become cluttered with old entries and broken settings which can result in program crashes, and annoying messages and slow the computer down.
Visit our Advanced System Repair Pro Download page to inform yourself about all the benefits of this software and get a free trial copy of it.
advanced system repair pro

Advanced System Repair Pro

One-click automated PC repair solution
ASR logo
With Advanced System Repair Pro you can easily
Replace damaged files
Restore performance
Free disk space
Remove Malware
Protects WEB browser
Remove Viruses
Stop PC freezing
DOWNLOAD
Privacy Policy | Terms of Use | Uinstall
Advanced System Repair Pro is compatible with all versions of Microsoft Windows including Windows 11

Share this article:

You might also like

Fix Windows Activation Error 0xC004F212
Microsoft allows its users to download a copy of Windows to install on PCs. However, when you enter the key after the installation and you got the Activation Error 0xC004F212 instead, then it means that the license key and the Windows version you’ve just installed, do not match. When you encounter this error, you will see the following error message on your screen:
“The product key used on this PC didn’t work with this edition of Windows. Activation Error 0xC004F212.”
Every time Microsoft generates a license for a copy of Windows, it is associated with one particular Windows variant. Windows comes in many editions like Enterprise, Home, Professional, and so on. For instance, if you bought a license for Windows 10 Enterprise but you have installed Windows 10 Professional instead, then the activation will surely fail and you’ll encounter the Activation Error 0xC004F212. You will be asked to select which edition you want to install when you reinstall Windows 10 using a digital license. If you opted for an edition other than the one you are licensed to use, then you will most likely get the Activation Error 0xC004F212. If you have purchased your license key from a store or some website, you might want to check back with them about the exact version of Windows. Doing so will help you narrow down the problem. And if you have second thoughts about the license key’s validity, you can just reach out to a Microsoft Support agent to check the validity of the license key. Also, if have bought it from the store, there should be an option to get a refund. That way you can choose to buy the right version of Windows.

Option 1 – Try running the Windows 10 Activation Troubleshooter

The first thing you can do to resolve the Activation Error 0xC004F212 is to run the Windows 10 Activation Troubleshooter. To do so, follow these steps:
  • Go to Settings and then select Activation.
  • After that, click on the Windows Activation and then troubleshoot. This will help you address most of the commonly found activation issues in Windows devices.
The Windows 10 Activation Troubleshooter will determine if your license key is a valid Windows 10 digital license for an edition that is not currently installed. If it turns out that it’s not, then the troubleshooter will show you how to install the correct edition.

Option 2 – Try forcing Windows 10 ISO to use the right version

You can also try to force Windows 10 ISO to use the correct version depending on the product key. Note that this option only works between Windows 10 Home and Professional version since they both have a common ISO. So if it’s Enterprise, then this option won’t work for you.
  • Extract the Windows 10 ISO files using an extractor.
  • Then browse to the folder you created and go to the sources folder.
  • From there, you need to create a text file named “PID.txt” and make sure to follow the exact format given below:
[PID] Value=xxxxx-xxxxx-xxxxx-xxxxx-xxxxx
Note: “xxxxx” is the KEY to your Windows version.
  • Next, you need to create the ISO again or bootable media that will repack everything and then create the Media file. You can use the Media Creation tool for this.
Note: Windows will check the key during the installation and will figure out the right version of Windows.

Option 3 – Contact Microsoft Support for assistance

If you’re at your wits’ end in trying to update your Windows 10 computer, you should consider contacting Microsoft Support for help as they can offer you various options that would make fixing Windows Activation Error 0xC004F212 a lot easier and faster.
Read More
Windows 11 launch date set for October 5th
windows 11 release date
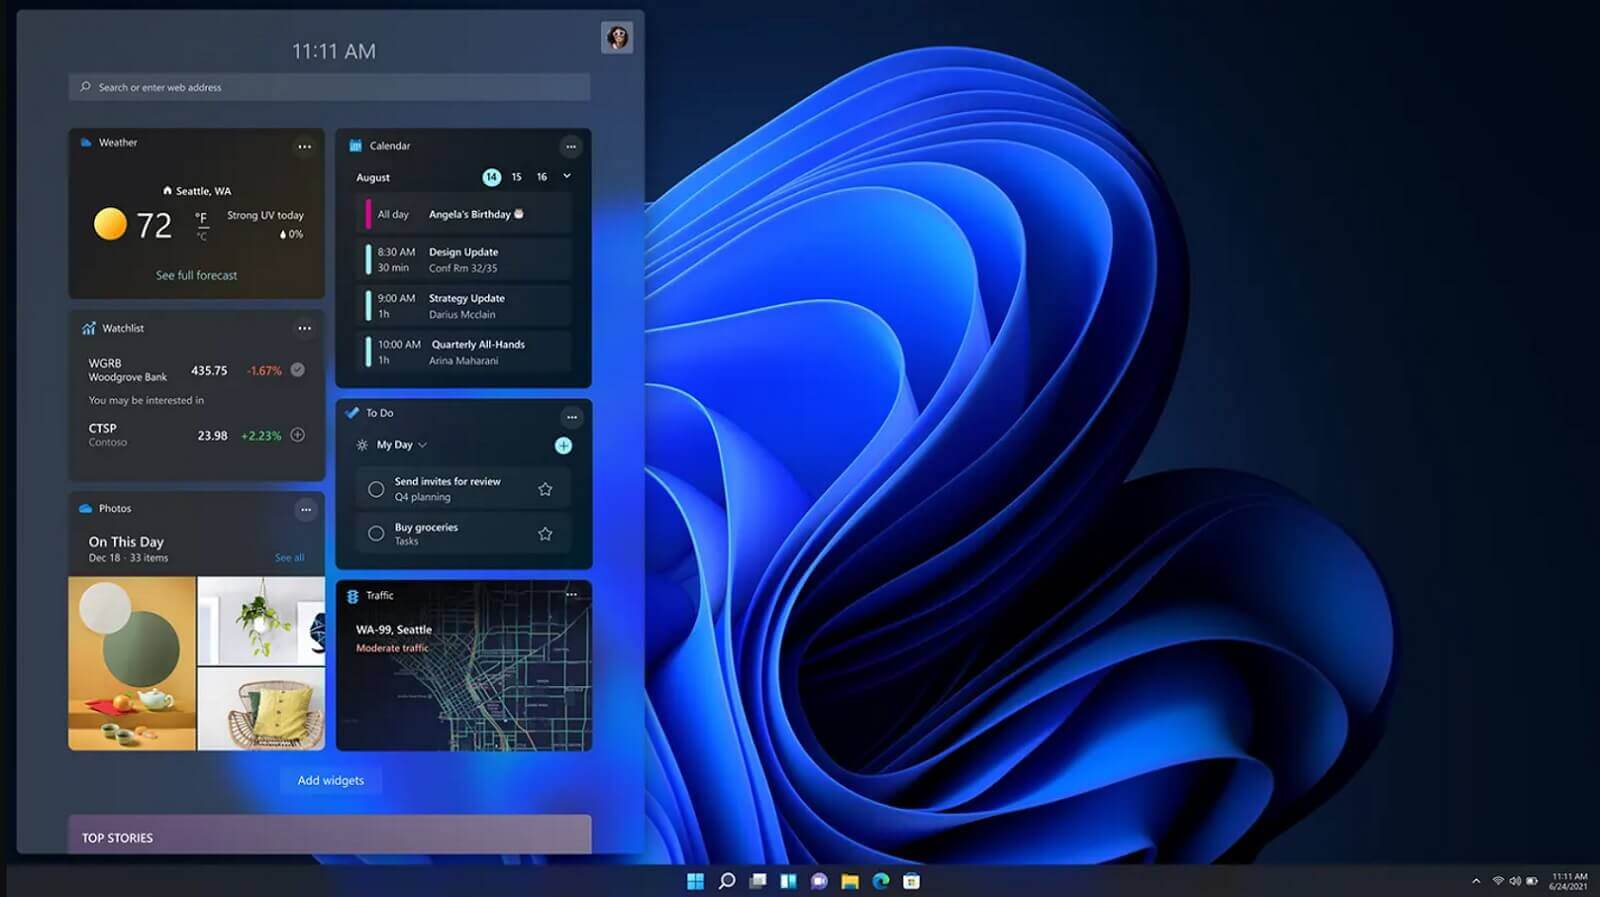
It is officially confirmed, Windows 11 release date is October 5th. Windows 11 will be released as a free upgrade to all registered Windows 10 users that have supported hardware for it. The rest of the users will be able to install it via ISO file as a clean installation if their computer supports Windows 10 hardware requirements. The official price for the license for Windows 11 has not yet been set but I assume after release it will be set. Priority for W11 will have users who are upgrading from W10 as stated by Microsoft. Also, it was officially confirmed that Android apps will not be running natively in this first release of Windows 11, that feature will come in a future update, official statement below:
"We look forward to continuing our journey to bring Android apps to Windows 11 and the Microsoft Store through our collaboration with Amazon and Intel; this will start with a preview for Windows Insiders over the coming months,"
The rest of the features will be all included inside Windows 11 on launch.
Read More
How to Fix R6025 Pure Virtual Function Call

Correct R6025 Pure Virtual Function Call

What is R6025 Pure Virtual Function Call Error?

R6025 pure virtual function call’ is a runtime error that occurs suddenly on the screen and disrupts the program being run prior to it. This error display indicates that the program has been corrupted. R6025 runtime error usually occurs with the Visual C++ framework.

Solution

Restoro box imageError Causes

This error occurs when the C++ program crashes which is usually because of the malfunctioning or missing of the device driver or incomplete device driver files. It happens because your application indirectly calls a pure virtual member function in a context where a call to the function is invalid. Most of the time, the compiler detects it and reports it as an error when building the application. R6025 error is usually detected at run time.

Further Information and Manual Repair

To fix the R6025 pure virtual function call error, you need to find the call to the pure virtual function. After you find the call, you need to rewrite the code so that it is not called again. There are 2 ways to do this:

Alternative 1

One way to fix the R6025 pure virtual function call is to replace the function with an implementation that calls the Windows API function DebugBreak. The DebugBreak causes a hard-coded breakpoint. Once the code stops running at this breakpoint, it is easy for you to view the call stack. By viewing the call stack you can identify the place where the function was actually called.

Alternative 2

Another quick way to find a call to a pure virtual function to fix the R6025 error is to set a breakpoint on the _purecall function that is usually found in PureVirt.c. By breaking this function you can trace the problem occurring and rewrite the call to ensure the error does not occur and the program you are trying to develop on the Visual C++ framework is easily developed. If R6025 Error is related to Windows Registry Problem Then here’s how you can fix the problem: To fix the runtime error R6025, run registry cleaner software to scan and fix all errors.  This alternative is suitable if the R6025 error is related to the Windows registry problem and where the error has occurred due to corrupted or malicious registry entries. You can download the registry cleaner repair tool for free. Run it to scan errors and then click the fix error button to repair the problem immediately.
Read More
Fix Windows can not find STEAM.EXE in Windows
If you are getting this error even if STEAM.EXE is present on your system then follow the easy guide to solve the issue.
  1. Scan your system for malware

    Scan your complete system for viruses and other malware. If all the scans come negative then move to the next step.
  2. Disable your anti-virus software

    Some anti-virus and anti-malware software can detect steam as a potential threat and block it. Turn off your protection software and try to run Steam once all your protection is disabled. If this works you will need to either place Steam in the applications exception list or to move to another protection software.
  3. Remove administrator privileges from steam client

    Right-click on steam.exe and choose properties, go to the compatibility tab, and uncheck run this program as administrator. Try to run Steam again.
  4. Delete Steam registry value

    If everything else failed try deleting the registry value for steam. Open registry editor and locate key: HKEY_LOCAL_MACHINE\SOFTWARE\Microsoft\Windows NT\CurrentVersion\Image File Execution Options Double click on Image File Execution, find steam on left, right-click on it, and choose delete. Save and exit the registry editor.
Read More
How to Fix Backup Error 0x80070002
[vc_row][vc_column][vc_column_text]

Backup Error 0x80070002

What is Backup Error 0x80070002?

Error 0x80070002 shows once you’re done backing up files through the Windows Backup program on a system running Windows 7, you see a notification that pops up with a message that reads something like: “Check your backup results. The backup completed but some files were skipped.” You try finding out the reason and you hover over to the Options button beside the message, then you get to read the following lines: “Check your backup results. The backup completed but some files were skipped. View skipped files.” Upon clicking the “View Skipped Files” option, the backup error 0x80070002 pops up on your screen and you’re left scratching your head, wondering what you’re going to do now.

Solution

Restoro box imageError Causes

There are multiple error logs that you will encounter in backup error 0x80070002 as per different conditions. The two most common cases in which this error shows up are stated below:

Case 1

You will see the following message when you press “View skipped files”: “Backup encountered a problem while backing up file C: Windows/System32/config/systemprofile. Error: (The system cannot find the file specified. (0x80070002))” You will face this case if you have backed up a library that included custom folders that were located in your user profile.

Case 2

Upon pressing “View Skipped files” you will encounter the below-mentioned messages: “Backup encountered a problem while backing up file C:/Users<User>AppDataLocalLow. Error: (The system cannot find the file specified. (0x80070002))” “Backup encountered a problem while backing up file C:/Users<User>Contacts. Error: (The system cannot find the file specified. (0x80070002))” “Backup encountered a problem while backing up file C:/Users<User>Searches. Error:(The system cannot find the file specified. (0x80070002))” You are likely to encounter any of these messages in case:
  • The Windows Backup program is trying to back up your files in either one or all of these folders (LocalLow, Searches, Contacts).
  • All three of these folders don’t exist in your system.
Keep in mind that all three of these folders exist due to the installation of certain programs and applications on your system.

Notes

The backup error 0x80070002 is also found to occur while using USB devices instead of storage devices. Other occurrences include the times when input/output (I/O) operations are performed on the USB device, which results in failure.

Further Information and Manual Repair

To make sure this issue is resolved, you will have to follow either one of the following solutions as appropriate to your situation:

Solution for Case 1

  1. Ignore the error. The store files of the custom library in your user profile will not be created as backups.
  2. Transfer the library folder from where it currently exists to a place outside its current folder (user profile). For instance, you can move the library folder to an entirely new destination such as “C: My Folders”
  3. Remove the library folder from the list of files that you are backing up using the Windows Backup program. Then, add the original place of the library’s content in the list.
  4. Go back and check step two. If carried out successfully then add a link to the folder you moved from the library. Check to see if the backup includes the library folder. To make sure, you have to do as follows:
  • Go to Start and select your username.
  • Hover across to the folder you wish to move, right-click on it and select “Cut”.
  • Head to the navigation pane and search for the area you will store the folder in, right-click and select “Paste” so that the folder is moved to that location.
  • Right-click on the folder that you just moved and select “Copy”.
  • Go back to Start, select your username, right-click any vacant space in your folder and select “Paste Shortcut”.
Note: If you want to store the folder in a different place other than the folder in which it currently exists (user profile), you will need to create a new folder. In order to do so, go to the Windows Explorer menu and look up the root of the drive. Hit “New Folder” and then choose edit to change its name. You can set it as any name for instance, “My Folders”.

Solution for Case 2

You can ignore this error safely. However, if you wish not to see this error in the future during your backup operations then you will need to carry out the following steps:
  1. Create all the folders listed in the error message including LocalLow, Contacts, and Searches.
  2. Remove all of these folders from the Backup settings to make sure they aren’t being backed up then add the folders which are in their original place. To carry out this procedure, you will have to follow the below-mentioned steps:
  • Head over to the Control Panel and open “Backup & Restore”.
  • Go to the Backup section and select “Change Settings”.
  • Click Next in the Setup backup dialog box.
  • Select “Let me choose” in the dialog box termed “What do you want to back up” then proceed by clicking Next.
  • Expand Data Files, expand <user> Libraries, expand Additional Locations then proceed by clearing out the AppData Folder, searches, and Contacts check boxes.
  • Expand Computer as well as the item for your system drive (expand Local Disk (D:)), expand users, expand <user>, then go to AppData, Searches and Contacts and mark them if they are present.
  • Proceed by clicking next and select “Save Settings” then exit.
  • Back to Backup & Restore, select Back up now and your new backup will begin proceeding. The entire process will complete without any errors now.
[/vc_column_text][/vc_column][/vc_row]
Read More
DISM Error 14098, component store corrupted
As you know, one of the useful and efficient utilities in Windows 10 is the DISM tool. It can be used with the Command Prompt command line which allows users to carry out various tasks. However, there are instances when the DISM tool could encounter some errors when you try to execute a command. One of these errors is the one that states, “The component store has been corrupted”. This kind of DISM error is due to an error in the image file. When you encounter the DISM Error 14098 when running the DISM tool, you will see the following content in the command line:
“C:>Dism /Online /Cleanup-Image /RestoreHealth /Source:c:testmountwindows /LimitAccess Deployment Image Servicing and Management tool Version: 10.0.10586.0 Image Version: 10.0.10586.0 [==========================100.0% Error: 14098 The component store has been corrupted. The DISM log file can be found at C:WINDOWSLogsDISMdism.log C:>”
There are several fixes you can check out to fix the DISM Error 14098, “The component store has been corrupted”. You can try to run the Restore Health command or reset the Windows Update components, or whitelist the dism.exe in your antivirus program, as well as try to uninstall any recently installed updates. Follow the options provided below for more details.

Option 1 – Run the Restore Health command in a Clean Boot State

  • First, you need to put your computer in a Clean Boot State.
  • Type in MSConfig in the Start Search to open the System Configuration utility.
  • From there, go to the General tab and click “Selective startup”.
  • Clear the “Load Startup items” check box and make sure that the “Load System Services” and “Use Original boot configuration” options are checked.
  • Next, click the Services tab and select the “Hide All Microsoft Services” check box.
  • Click Disable all.
  • Click on Apply/OK and restart your PC. (This will put your PC into a Clean Boot State. And configure Windows to use the usual startup, just simply undo the changes.)
  • Now open Command Prompt with admin privileges.
  • Then type and enter this command to execute it: Dism /Online /Cleanup-Image /RestoreHealth
  • Wait until the process is completed and restart your computer.
Note: If the Restore Health command fails, you can use the “/StartComponentCleanup parameter” by executing this command: Dism /Online /Cleanup-Image /StartComponentCleanup

Option 2 – Try to reset the Windows Update components

If by any chance that the second option didn’t work, resetting the Windows Update components could also help you resolve the problem. How? Refer to the following steps:
  • Open Command Prompt with admin privileges.
  • After that, type each one of the following commands and hit Enter after you key in one after the other.
    • net stop wuauserv
    • net stop cryptsvc
    • net stop bits
    • net stop msiserver
Note: The commands you entered will stop the Windows Update components such as Windows Update service, Cryptographic services, BITS, and MSI Installer.
  • After disabling WU components, you need to rename both the SoftwareDistribution and Catroot2 folders. To do that, type each one of the following commands below, and don’t forget to hit Enter after you type one command after the other.
    • ren C:/Windows/SoftwareDistribution/SoftwareDistribution.old
    • ren C:/Windows/System32/catroot2/Catroot2.old
  • Next, restart the services you’ve stopped by entering another series of commands. Don’t forget to hit Enter after you key in one command after the other.
    • net start wuauserv
    • net start cryptsvc
    • net start bits
    • net start msiserver
  • Close Command Prompt and reboot your PC.

Option 3 – Whitelist the “dism.exe” in your antivirus program

The DISM error 14098 might also be caused by your antivirus program which could be interfering it from running. To fix this, you have to whitelist dism.exe. How? Refer to these steps:
  • Open the Windows Defender Security Center from the system tray area.
  • Next, click the “Virus & threat protection” option and then open the “Virus and threat protection settings”.
  • After that, scroll down until you find the “Exclusions” and click on the “Add or remove exclusions” option.
  • Then click the plus button and select the type of exclusion you want to add and from the drop-down list, select Folder.
  • Next, navigate to this path and select the WinSxS folder: C:/Windows/WinSxS
  • When a User Account Control or UAC prompt, just click on Yes to proceed.

Option 4 – Try to uninstall recently installed updates

There are times when some Windows Updates affect some mechanism internally when you update your Windows 10 computer. As a result, it causes issues with other components of the operating system which could be the reason why you’re getting the DISM error 14098.
  • Go to Settings and select Update and Security > Windows Update.
  • From there, click on the “View update history” option and then click on the “Uninstall Updates” option.
  • This will open a new window that contains the list of installed Windows Updates.
  • Now right click on the Windows Update you wish to uninstall and click Uninstall.
Read More
How to Download Steam saves
Steam is one of if not the largest online store for the digital distribution of games on the PC platform. The game gets downloaded to your PC when you are planning to play it and its saves are synched in the Steam cloud. They get automatically downloaded when you install the game but you can also get your saves by directly downloading them from Valve's website in your browser. If Steam isn’t automatically downloading your old save games after you install a game, ensure Steam Cloud is enabled for that game within Steam. Locate the game in your Steam library, right-click it, and then select Properties. Click the Updates tab and ensure the Enable Steam Cloud synchronization option is checked for the game. If this option isn’t checked, Steam won’t automatically download your cloud saves. If you don’t see a Steam Cloud option for a game here, that game doesn’t support Steam Cloud. Not all games on Steam do, it’s up to each game developer.

Download the Files in Your Web Browser

Valve lets you download your Steam cloud save files via a web browser, too. You can download just your saved files without re-downloading the entire game. To find your saved files, visit Valve’s View Steam Cloud page in your web browser and sign in with your Steam account. You’ll see a list of games using your Steam Cloud storage. Locate the game in the list and click Show Files to see all the files for a game. Each game has a page showing all the files it’s storing in Steam Cloud, as well as the date they were modified. To download a file, click Download. Download all the save files for your game, and you’ll have a copy of its save games. This feature is especially useful for multi-platform games that don’t automatically synchronize save files between platforms.
Read More
Fix Boot Configuration Data error 0xc0000185
This post will guide you in fixing a particular problem where your Windows 10 computer does not even let you turn it on and it appears as soon as it starts to boot the operating system and it displays an error message that says, “The Boot Configuration Data for your PC is missing or contains errors, Error code 0xc0000185”. On the other hand, it may also display a different error message saying, “The operating system couldn’t be loaded because a required file is missing or contains errors”. There are various suggestions you can try to resolve this error. You could check the physical status of your hardware or rebuild the Boot Configuration Data, use the Automatic Startup Repair or System Restore, or better yet, reset your Windows 10 computer. Since your computer will not boot, you will have to either try to get into the Advanced Startup Options screen, boot Windows 10 in Safe Mode, or use a bootable Windows 10 media to boot your computer.

Option 1 – Try to rebuild the BCD files

The first thing you can do to resolve the issue is to Rebuild Boot Configuration Data or BCD files.
  • You can start by booting into the installation environment for Windows 10 from an installation media.
  • After that, click on Repair your computer and on the blue screen, select Troubleshoot and then select the Advanced options menu.
  • From there, select Command Prompt and once you open it, enter each one of the commands given below by sequence.
    • bootrec /FixMbr
    • bootrec /FixBoot
    • bootrec /ScanOS
    • bootrec /RebuildBcd
  • Once you’re done executing the commands given above, type “exit” to close the Command Prompt window and then restart your computer and see if it fixed error code 0xc000014c.

Option 2 – Try to run Automatic Startup Repair

In this option, you need to boot your computer into the Advanced Startup Options and from there, run the Automatic Startup Repair and then wait until the process is completed.

Option 3 – Try running System Restore in Advanced Startup Options

Since you probably can’t boot into your Windows 10 computer, you can try to run System Restore again in the Advanced Startup Options.
  • Boot your computer into the Advanced Startup Options screen.
  • From there, you will see some options to troubleshoot when you can’t log in to Windows in the usual way.
  • Now select Troubleshoot > Advanced Options > Command Prompt.
  • After that, type “rstrui” and hit Enter to execute the command which will start the System Restore process.

Option 4 – Try to perform repair install by creating a Windows 10 installation media

  • Click this link and then click the Download Tool Now button.
  • Next, click the “Use the tool to create installation media (USB flash drive, DVD, or ISO file)…” option and follow the next given instructions on the screen.
  • Now select the ISO file option in step 5.
  • After that, you should now have an ISO file.
  • Next, go to the location where you’ve downloaded the ISO file.
  • Then right-click on the Windows 10 ISO file and select the Open with option and then select File Explorer.
  • Now click on “setup.exe” and follow the next instructions that appear on the screen. When asked, you have to select either Nothing (clean install) or Keep personal files only option. Take note that you must not select the “Keep personal files, apps, and Windows settings since it doesn’t really work.

Option 5 – Try to physically check the hardware

You should also check the physical status of the hardware in your computer. You can clean the dust off the hardware components like the Network Card of the computer. You might want to use a small blower or you could also use a soft cloth and run the components gently. Make sure that you don’t damage any parts with moisture or cause harm to any circuits while you carry out this task.
Read More
The procedure entry point could not be located
If you receive an error message that says, “Entry point not found, The procedure entry point could not be located in the dynamic link library” on your Windows 10 PC, then you will find this post useful for this will provide you some potential fixes to fix the error. This kind of error can occur if a program fails to locate the DLL library that it needs in order to run. It can also occur if the library is not in the specified directory in the path or if the DLL file has gone missing or has become corrupted. To fix the “The procedure entry point could not be located in the dynamic link library” error, check out the following options given below.

Option 1 – Try to reinstall the program

The first thing you can do to resolve the error is to uninstall the program that throws the error and download its latest version from its official site and then install it again.

Option 2 – Run System File Checker scan

If reinstalling the program didn’t work, you can also try running the System File Checker or SFC scan to fix the error. System File Checker is a command utility built into your computer that helps restore corrupted files and missing files. Refer to the following steps to run it:
  • Hit the Win + R keys to launch Run.
  • Type in cmd in the field and tap Enter.
  • After opening Command Prompt, type in sfc /scannow
The command will start a system scan which will take a few whiles before it finishes. Once it’s done, you could get the following results:
  1. Windows Resource Protection did not find any integrity violations.
  2. Windows Resource Protection found corrupt files and successfully repaired them.
  3. Windows Resource Protection found corrupt files but was unable to fix some of them.
 Reboot your computer.

Option 3 – Try checking the details in the Event Viewer

The Event Viewer can also help you resolve the error as it contains detailed information about the error that could help you pinpoint its root cause and resolve it.

Option 4 – Try to re-register the problematic DLL file

You may have to re-register the ntdll.dll file using the regsvr32.exe before you can successfully install the program and fix the error. The Regsvr32 tool is a command-line utility that can be used to register and unregister OLE controls like DLL and ActiveX (OCX) controls in the Windows operating system. Follow the steps below to use it.
  • Open Command Prompt as admin from the WinX menu.
  • Next, type the following commands in the elevated Command Prompt and hit Enter to execute the command. This will re-register the affected DLL file using the Windows operating system tool, regsvr32.exe.
    • exe /[DLL file]
    • exe [DLL file]
Note: Replace “[DLL file]” with the name of the DLL file that was pointed out in the error.
  • After you execute the given commands, you should see a message saying, “DllRegisterServer in vbscript.dll succeeded” if the Regsvr32 tool was able to run successfully. After that, try to install the program again and see if it now works.

Option 5 – Try to replace the DLL file with a trusted source

  • First, you need to get the new DLL file from another computer with preferably the same file version number.
  • After that, you need to boot your PC into Safe Mode and navigate to the paths listed below and then replace the file using a USB drive or other external storage devices.
    • x86: This PC > C:/Windows/System32
    • x64: This PC > C:/Windows/SysWOW64
  • Next, type “cmd” in the Cortana search box and right click on Command Prompt, and select “Run as administrator” to open it with administrator privileges.
  • Now type the “regsvr32 ntdll.dll” command and hit Enter.
  • Restart your PC and check if the error is now fixed.

Option 6– Try to scan your computer using Windows Defender

It is also possible that the DLL file might be infected with malware or virus which could explain why you’re getting the error. Thus, you have to scan your computer using security programs like Windows Defender.
  • Tap the Win + I keys to open Update & Security.
  • Then click on the Windows Security option and open Windows Defender Security Center.
  • Next, click on Virus & threat protection > Run a new advanced scan.
  • Now make sure that Full Scan is selected from the menu and then click the Scan Now button to get started.
Read More
Fix Lost internet connection in Windows 10
Losing an internet connection is not a pleasant thing, especially if it happens often. If you are a gamer this phenomenon can be very disturbing since it can stop your progress or even get your account banned if you are playing competitively. Luckily we have the solution for this annoyance, keep on reading and follow the guide.
  1. Update your driver

    Outdated or wrong drivers can cause a lot of issues and the device can exhibit strange behavior this way. To update driver Right-click on Start Click on Device Manager Locate your network adapter, wifi card, or device you are using for internet access right-click on it and choose update driver
  2. Renew IP

    Right-click on Start Click on command prompt (admin) In command prompt type ipconfig /renew and press ENTER
  3. Reset Winsock API

    Right-click on Start Click on command prompt (admin) In command prompt type netsh winsock reset catalog and press ENTER then type netsh int ipv4 reset reset.log and press ENTER reboot PC
Read More
1 2 3 162
Logo
Copyright © 2022, ErrorTools. All Rights Reserved
Trademarks: Microsoft Windows logos are registered trademarks of Microsoft. Disclaimer: ErrorTools.com is not affiliated with Microsoft, nor claim direct affiliation.
The information on this page is provided for information purposes only.
DMCA.com Protection Status