How to remove Ammyy Admin

What is Ammyy Admin

AmmyyAdmin is a software developed by Ammy. This software allows you to manage network computers and servers remotely without complicated NAT settings adjustments or Firewall problems. The program is similar in marketed function to TeamViewer or LogMeIn. This software does not require installation and it lets you control other computers or share files over the software. It usually comes bundled with other software.
This software copes files into your computer and sometimes creates new startup keys that allow it to start each time your computer is restarted. AmmyAdmin might display additional ads in your browser as well as pop-up ads. Due to its ability to silently install and run remote administration, it could be used maliciously by those who intend to damage your computer or steal data. AmmyyAdmin is flagged for optional removal, and if you did not intentionally install it, removal is highly recommended

What is a Potentially Unwanted Program (PUP)?

If you’ve ever downloaded freeware or shareware, odds are high that your computer can get installed with a bunch of unwanted programs. A PUA / PUP (potentially unwanted application / potentially unwanted program) is a software program that comes bundled with freeware/shareware and you agree to install it on your computer system. These are programs you definitely don’t want on your system simply because it does not give any beneficial service.

PUP doesn’t involve malware in the traditional sense. One simple difference between malware and PUP is distribution. Malware is typically dropped through vulnerability exploitation and in contrast, PUP gets installed with the consent of the end-user, who consciously or unknowingly authorizes the PUP installation on their computer. A PUP might not be viewed as malicious or harmful but nonetheless, it is a common cause of clunky operating systems; some PUPs are a lot more aggressive by deliberately slowing down your PC.

How PUPs affect you?

Potentially Unwanted Programs appear in different forms and varieties, but most times, they are adware programs that exhibit irritating pop-up adverts and advertisements on web pages you explore. In addition, most free software nowadays comes with quite a few unwanted add-ons; in many instances a web browser toolbar or browser modification like a homepage hijacker. They’ll modify browser settings, change default search provider, substitute the default home page with their very own websites, decelerate internet speed, and will damage your computer as well.

They could look harmless but PUPs are usually spyware. Some might carry dialers, keyloggers, web browser hijackers, and tracking components that will collect system details, or tracks customer habits and relays these records to third-party organizations. Because of this unwanted program, your application might freeze, your security protections could get disabled which may leave the computer susceptible, your system may get damaged, and the list goes on and on.

Tips on protecting yourself from unwanted software

• When installing anything on your PC, always read the fine print, including the EULA. Do not accept terms of use that are for bundled programs.
• Select the “custom” install whenever downloading a software program. Particularly, pay attention to those small boxes which have been checked as default, where you might ‘agree’ to receive advertisements or install software bundlers.
• Use anti-PUP software. Security applications like Safebytes Anti-Malware offer the very best real-time protection from PUPs and also other malware.
• Be alert if you download and install freeware, open-source programs, or shareware. Avoid downloading and installing browser extensions and programs you are not knowledgeable about.
• Use only official product sites for downloading applications. Avoid download websites completely since the majority of websites force users to download the software using their own download manager, which is often bundled with some kind of unwanted program.

Safebytes Anti-Malware scans and detects malware for free. To complete removal, and ensure full PC protections, a paid license key is required.

Malware could potentially cause a lot of damage to your computer. Some malware sits in between the computer and the net connection and blocks a few or all internet sites that you would like to check out. It could also block you from installing anything on your computer, particularly anti-virus programs. If you are reading this article now, you’ve perhaps recognized that a malware infection is a reason behind your blocked net connectivity. So what do if you need to download and install an anti-virus application like Safebytes? There are a few solutions you can attempt to get around with this issue.

Boot Windows in Safe Mode

The Windows-based PC includes a special mode called “Safe Mode” where only the minimum required programs and services are loaded. In the event the malware is blocking internet connection and affecting your PC, running it in Safe Mode enables you to download antivirus and run a scan while limiting potential damage. To enter into Safe Mode or Safe Mode with Networking, press F8 while the system is booting up or run MSCONFIG and locate the “Safe Boot” options in the “Boot” tab. Once you’re in Safe Mode, you can try to download and install your anti-malware software program without the hindrance of the malicious software. Following installation, run the malware scanner to eliminate most standard infections.

Obtain the security program in an alternate web browser

Certain malware may target vulnerabilities of a specific web browser that obstruct the downloading process. If you seem to have a virus attached to Internet Explorer, then switch over to an alternate browser with built-in security features, such as Firefox or Chrome, to download your favorite antivirus program – Safebytes.

Create a portable anti-malware for removing malware

Here’s another solution which is utilizing a portable USB antivirus software that can check your system for malicious software without the need for installation. Adopt these measures to run the anti-malware on the infected computer system.
1) On a clean computer, install Safebytes Anti-Malware.
2) Plug the Thumb drive into the uninfected computer.
3) Double-click the exe file to run the installation wizard.
4) Pick a USB flash drive as the location when the wizard asks you where you want to install the program. Follow the on-screen instructions to finish the installation process.
5) Remove the flash drive. Now you can utilize this portable anti-virus on the affected computer system.
6) Double-click the anti-malware program EXE file on the flash drive.
7) Run Full System Scan to identify and clean-up up all sorts of malware.

These days, an anti-malware program can protect your computer from different forms of online threats. But how to select the right one amongst countless malware protection software that is available in the market? As you might be aware, there are numerous anti-malware companies and products for you to consider. Some of them are great, some are ok types, while some will ruin your computer themselves! You have to choose one that is reliable, practical, and has a strong reputation for its malware source protection. One of the strongly recommended software is SafeBytes AntiMalware. SafeBytes has a superb reputation for quality service, and customers appear to be very happy with it.

SafeBytes can be described as a highly effective, real-time anti-malware application that is created to assist everyday computer users in safeguarding their computers from malicious internet threats. Using its cutting-edge technology, this application will assist you to eradicate multiples types of malware like computer viruses, PUPs, trojans, worms, ransomware, adware, and browser hijackers.

There are many wonderful features you will get with this security product. Below are some typical features found in this software:

Robust, Anti-malware Protection: Built on a highly acclaimed anti-virus engine, this malware removal application has the capacity to find and get rid of various obstinate malware threats like browser hijackers, PUPs, and ransomware that other common antivirus software will miss.

Real-time Protection: Malware programs attempting to get into the system are identified and stopped as and when detected by the SafeBytes active protection shields. They are very effective in screening and eliminating different threats because they’re constantly improved with the latest updates and alerts.

Internet Security: Safebytes assigns all sites a unique safety score that helps you to get an idea of whether the webpage you’re going to visit is safe to browse or known to be a phishing site.

Light-weight: This software program is not “heavy” on the computer’s resources, so you’ll not notice any performance problems when SafeBytes is working in the background.

24/7 Online Support: Skilled technicians are at your disposal 24/7! They will promptly resolve any technical issues you might be experiencing with your security software.

SafeBytes has come up with a wonderful anti-malware solution that can help you conquer the latest malware threats and virus attacks. Once you’ve installed SafeBytes Anti-Malware, you will no longer need to bother about malware or other security worries. To ensure the complete removal, manually check your hard drive and registry for all of the following and remove or reset the values accordingly. Please note that this is for advanced users only and may be difficult, with incorrect file removal causing additional PC errors. In addition, some malware is capable of replicating or preventing deletion. Doing this in Safe Mode is advised.

Files:
%APPDATA%AMMYY
C:%DOCUMENTS%%%USER%%LocalTemp$inst.tmp
C:%DOCUMENTS%%%USER%%LocalTemp$insttemp_0.tmp
C:%DOCUMENTS%%%USER%%LocalTempAA_v3.exe
C:%DOCUMENTS%%%USER%%LocalTempencrypted.exe
C:Documents and Settings%USER%Application DataCasablanca
C:Documents and Settings%USER%Application DataBl 430 493 557.ADO
C:Documents and Settings%USER%Application DataDakar
C:Documents and Settings%USER%Application DataMegaloblast.a
C:Documents and Settings%USER%Application DataCrypto.dll
C:%DOCUMENTS%%%USER%%LocalTempnsh2.tmpSystem.dll
Key: HKUS-1-5-21-1801674531-413027322-2147225017-500SoftwareAmmyy
Key: HKLMSOFTWAREAmmyy

If you like to learn and find out more about various Windows errors, and how to repair them go to our vast archive or use search to find articles that will explain and help you in solving your issue.
However, if you prefer to do things fast and with automatization then we are proposing to use an automated solution for your issues. The application that we are recommending is Advanced System Repair Pro
Advanced System Repair utilizes multiple tools all in one to give you a quick, simple, reliable, and very thorough diagnosis of your PC. It brings you all the tools you need in one program to clean, fix, protect, optimize and boost your PC!
1-Click Maintenance
All the tools to make it simple and easy! It's like having a professional technician at the click of a mouse.

Junk Cleaner
Keeping your computer free from unnecessary clutter also helps make your computer last longer. Like any other machine, if you keep it clean and take care of it, it will serve you better for longer!

Optimize background apps
Optimize applications background activity with the built-in Application Optimizer feature.

Disk Defrag
With a simple 1-click, Advanced System Repair speeds up your PC by assembling fragmented files on your machine and organizing them more efficiently.

Malware Removal
Finds and removes all types of harmful malware including trojans, worms, bots, adware, spyware, PUPs, and more!

Privacy Cleaner
The all-in-one privacy suite to Clean Your Tracks & Protect Your Privacy! Make your computer safe, secure, and more efficient!

System Tweak/Optimizer
ASR will analyze your complete system and settings to adjust your PC to function at its maximum performance.

Registry Cleaner
Over time, as you install and uninstall applications, the registry can become cluttered with old entries and broken settings which can result in program crashes, and annoying messages and slow the computer down.
Visit our Advanced System Repair Pro Download page to inform yourself about all the benefits of this software and get a free trial copy of it.
advanced system repair pro

Advanced System Repair Pro

One-click automated PC repair solution
ASR logo
With Advanced System Repair Pro you can easily
Replace damaged files
Restore performance
Free disk space
Remove Malware
Protects WEB browser
Remove Viruses
Stop PC freezing
DOWNLOAD
Privacy Policy | Terms of Use | Uinstall
Advanced System Repair Pro is compatible with all versions of Microsoft Windows including Windows 11

Share this article:

You might also like

What to do if Google Drive Unable to Connect
As you know, the Google Drive service is a Backup and Synchronization service provided by Google. It was launched way back in April 2012 which provides users with the options to synchronize, store and share files by uploading them to Google’s servers where they stay until they are deleted personally by the users and can be accessed anywhere using the Google Account that’s used to upload them. Recently, a lot of users reported that they were unable to connect to Google Drive from their Windows 10 computers. This kind of problem has been noticed in the middle of the upload process and can be seen at times after the app launches. If you also experience the same issue, then you’ve come to the right place as this post will guide you in fixing it. There are a lot of possible reasons why this kind of problem occurs. It could be that the app was not able to launch properly or the internet got disconnected when the app was about to launch. It is also possible that the Firewall has blocked the app from connecting to the internet or that the antivirus program is preventing the app from making contact with its database. Aside from that, it is possible that the account you are using on your computer is preventing Google Drive from connecting to the internet due to some configuration errors. Follow the suggestions provided below to fix the connection issue with Google Drive.

Option 1 – Configure the Firewall

As mentioned, the Windows Firewall might be blocking the app from contacting its database so, in this option, you have to allow Google Drive through the Firewall. To do so, follow these steps:
  • In the Windows Start Search, type “firewall” and click on the “Allow an app or feature through Windows Firewall” option from the search results.
  • After that, you will see a list of apps, and here, click on the “Change Settings” button.
  • Next, scroll down and make sure to check both the “Public” and “Private” options for Google Drive.
  • Now click on Ok to save the changes made and then try to launch Google Drive again.

Option 2 – Try to launch Google Drive again

Google Drive might have not launched properly that’s why it can’t connect to its servers so you can try to launch it again and see if it helps.
  • Tap the Ctrl + Shift + Esc keys to open the Task Manager.
  • Next, go to the Processes tab and click on the “View” option located at the top.
  • After that, uncheck the “Group by Type” option and click on the “Google Drive Sync” from the list of processes.
  • Then click on the “End Task” option and close the Task Manager.
  • Launch Google Drive again and see if the issue is now resolved.

Option 3 – Temporarily disable third-party antivirus

Aside from Firewall, antivirus programs, especially the third party ones, are also known to block files applications the instant it detects a threat to the system. Thus, your antivirus program might be the reason why you can’t download anything on your Windows 10 computer. To fix this, you can try to disable the antivirus program on your computer in the meantime and then try to launch Google Drive again. Do not forget to enable them again as disabling them can leave your computer vulnerable to cyber threats.

Option 4 – Try to create a new account

There are times when a certain configuration for a user account might be blocking some elements of the Google Drive app. In such cases, you can try to create a new account to fix the problem.
  • Click on the Windows key and then click on the icon for Settings.
  • From there, click on the Accounts button and select the “Family & Other People” option from the left pane.
  • Next, click the “Add someone else to this PC” option.
  • After that, click on the “I don’t have this person’s sign-in information” option and select the “Add a user without a Microsoft Account” setting.
  • Type in the credentials for the new account you are creating and click on Next.
  • After the account is created, click on the account and then select the “Change account type” option.
  • Click on the drop-down menu and select the “Administrator” option and then click on OK.
  • Now sign out of the current account and sign in to the new one and then open Google Drive again.
Read More
Cannot find a system image on this computer
If you are trying to restore your computer using a System Image that has been created by the Windows Backup and Restore tool but encountered an error message instead that says, “Windows cannot find a system image on this computer”, you’ve come to the right place as this post will walk you through in fixing this error. Here’s the complete context of the error message:
“Windows cannot find a system image on this computer, Attach the backup hard disk or insert the final DVD from a backup set and click Retry. Alternatively, close this dialog for more options.”
In the error message, you are offered two choices – to either Retry or Cancel the operation. You can try to select Retry to try again but you will most likely get the same error if you do so. This kind of error can occur if the name of the WindowsImageBackup folder or any of its sub-folders has been modified. On the other hand, this error can also pop up if this folder or any of its sub-folders have gone missing or have become corrupted. To resolve the error, you can try to move the WindowsImageBackup folder or check its sub-folders. You can also try to isolate the System Image file or rename the System Image folder or remove all the unwanted sub-folders as well as use Command Prompt in Repair mode.

Option 1 – Try to move the WindowsImageBackup folder

The WindowsImageBackup folder must be stored in the root of the volume where it is stored, in line with the functioning of the System Restore utility. For example, if the WindowsImageBackup folder is stored in the “C:/Backups/System Restore Backups/New” location, then you have to move it to the C: drive as well.

Option 2 – Try to check the subfolders of the WindowsImageBackup folder

The classification of folders and files plays an important part to restore in restoring a computer from a System Restore point. Thus, if have modified the names of any files or folders inside the WindowsImageBackup folder, then you need to set the defaults. After that, run System Restore again and check if it fixes the error.

Option 3 – Try to isolate the System Image file

If the System Image file is stored in a USB storage device along with various System Restore images, then it’s no wonder why you’re getting this error. To set things right, you have to make sure that the System Restore image you wish to restore your computer from, is the only one that’s present at the root of the USB storage device.

Option 4 – Try renaming the System Image folder

If you have renamed the System Image folder prior to running System Restore, then it is most likely the reason why you’re getting the “Windows cannot find a system image on this computer” error. This error pops up because the System Restore utility in Windows 10 looks out for the WindowsImageBackup folder so if you have renamed it, you need to change its name back to what it originally was to fix the error.

Option 5 – Try to remove all the sub-folders of the WindowsImageBackup folder

If you have stored some foreign files inside the WindowsImageBackup folder, you need to get rid of them right away and return the folder to its default state as this folder must be left alone and should not be meddled with if you want to run System Restore smoothly.

Option 6 – Try to use Command Prompt in Repair Mode

  • Open Command Prompt while your computer is in the Repair Mode.
  • Next, type and enter this command where you need to replace “<Partition Letter>” with your drive’s letter: dir <Partition Letter>
  • After you’ve found the WindowsImageBackup folder in any of the partitions, type and enter this command: dir <Parition Letter>WindowsImageBackup /s
  • The command you entered will display all the contents of the folder exceeding 10 GB in total size. You can check and confirm the integrity of the folder and if you find that the integrity is violated, then it is the reason why you’re getting the error.
Read More
Fix “We couldn’t find any drives” Error
If you encountered an error message saying, “We couldn’t find any drives, To get a storage driver, click Load driver” when you try to install Windows in a VirtualBox machine, then you’ve come to the right place as this post will guide you in fixing this error. This error message is displayed on the screen where you have to choose a partition to install the guest operating system. This error is most likely due to the lack of correct settings as well as a corrupted virtual disk. To fix this error, you have to remove existing storage devices, create a new storage device and select the correct ISO file.

For complete instructions, follow the given steps below.

Step_1: The first thing you have to do is remove all the existing Storage devices and since this option is already available in VirtualBox by default, there is no need for you to install any third-party software. Step_2: After that, open VirtualBox and select the virtual machine and then click the Settings button. Step_3: Next, switch to the Storage section and on your right-hand side, you will see “Controller: SATA” and two other sub-labels. From there, select Controller: SATA and then click on the red cross button that says, “Remove selected storage controller”. Step_4: Now click on the Add new storage controller icon and select the “Add SATA Controller” option from the given list. Step_5: Afterwards, click the “Add hard disk” button and select the “Create new disk” option, and then you have to create a new virtual disk for your virtual machine. Step_6: Verify if you have selected Dynamically allocated while you create the virtual hard disk. Once the process is completed, you will get a “.vdi” file in the list. Step_7: Next, click on the “Add optical drive” button and select the “Choose disk” option. Here, you have to select the ISO file and if you can find an ISO file in the given list, select it from there, else, you have to click the Add button and navigate to the folder where the ISO file is located. Step_8: Once you’re done, click the OK button and boot your virtual machine. You should see options instead of the “We couldn’t find any drives, To get a storage driver, click Load driver” error message. If you see the options, you can now create a new partition and start the installation process of the Windows operating system in the VirtualBox machine without any problem.
Read More
Nostalgia hit: Commodore 64 emulator and games
If you are a kid or in your teenage years you maybe will be not familiar with Commodore 64 but we are welcoming you anyway to go with us on this journey through time and find out about one of the most influential and beloved home computer of all time.

commodore 64
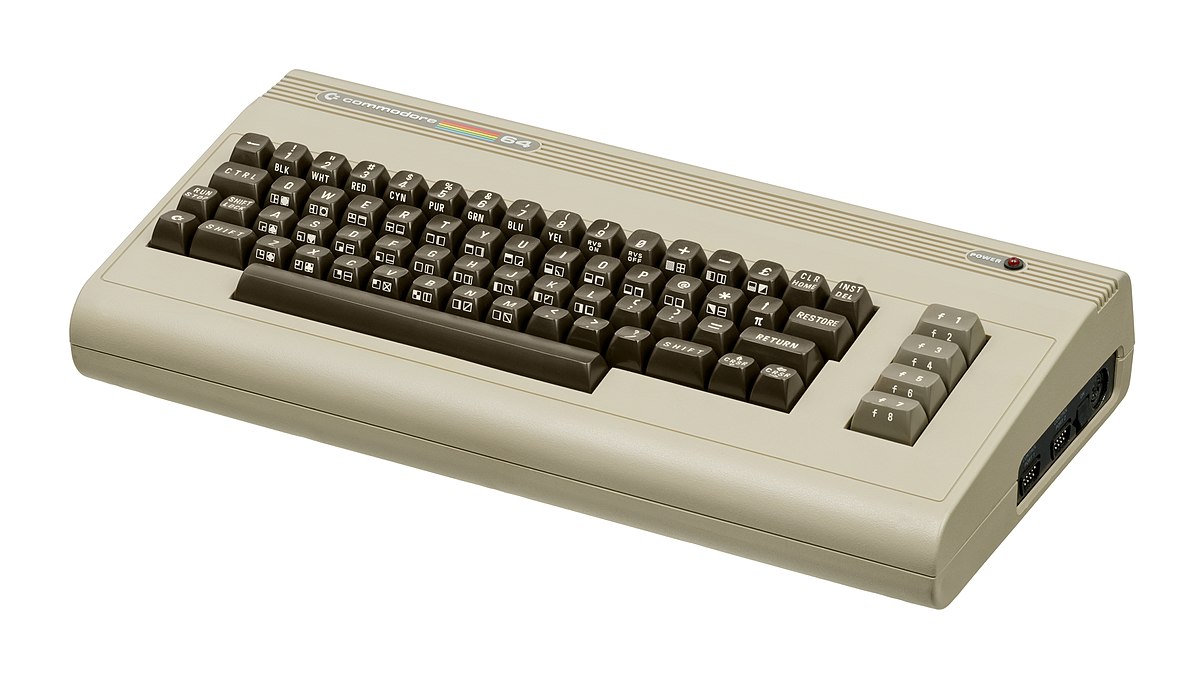
History of Commodore

Firstly shown to the world in January of 1982, at the Consumer Electronics Show, C64 caught attention right away with its low price of only $595. Although it had some issues like limited functionality in some fields and a non-wide range of use by 1984 its price dropped below $200 and it cemented itself as an affordable home computer for the middle class. In as same year Apple has released their Apple II computer with far superior capabilities, commodore 64 remains a middle-class favorite due to its price. Also, the company has decided to distribute its homemade computer via some other means including not only just electronics stores specialized in that kind of equipment but in general shops and big department stores, through toy stores and book shops as well as through specialized dealers. This has given C64 a more competitive edge and mixed with the affordable price it soon became a staple of home computing. c64 storeWith sales booming and the early reliability issues with the hardware addressed, software for the C64 began to grow in size and ambition during 1984. This growth shifted to the primary focus of most US game developers. The two holdouts were Sierra, who largely skipped over the C64 in favor of Apple and PC compatible machines, and Broderbund, who was heavily invested in educational software and developed primarily around the Apple II. In the North American market, the disk format had become nearly universal while cassette and cartridge-based software all but disappeared. So most US-developed games by this point grew large enough to require multi-loading. At a mid-1984 conference of game developers and experts at Origins Game Fair, Dan Bunten, Sid Meier, and a representative of Avalon Hill said that they were developing games for the C64 first as the most promising market. By 1985, games were an estimated 60 to 70% of Commodore 64 software. Over 35% of SSI's 1986 sales were for the C64, ten points higher than for the Apple II. 
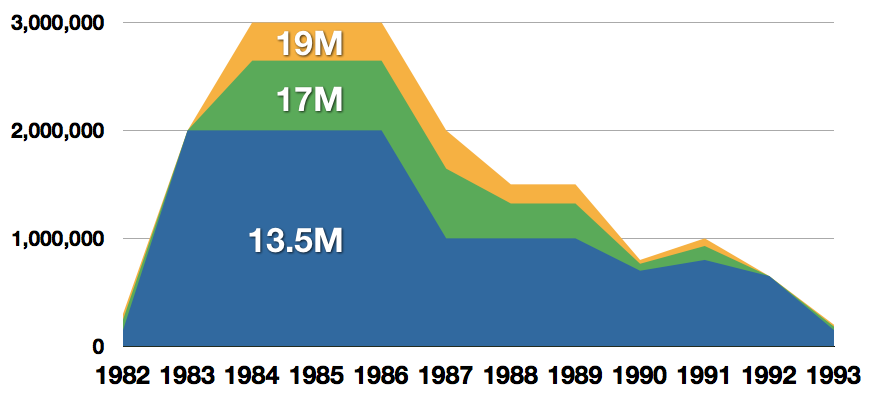
Everything was great for Commodore but the industry was moving forward and by the year 1988, PC compatible computers were stated to be the largest and fastest-growing home entertainment systems pushing C64 on to second place. Also, Nintendo’s gaming system has started to take hold in the world with amazing 7 million systems sold in 1988 only. By the year 1991, many developers exited the gaming market for Commodore 64 home computer system and its popularity started to fall due to lack of software and not so many hardware changes. commodore salesCommodore announced that the C64 would be finally discontinued in 1995. However, only one month later in April 1994, the company filed for bankruptcy. When Commodore went bankrupt, all production on their inventory, including the C64, was discontinued, thus ending the C64's 11 and a half year production.

Legendary titles

The history of Commodore 64 is interesting ones and I believe that it has done much for computers in general, yes it ran 11 years and that seems like a small-time, but remember that it was 11 years of C64 alone, there were other computers released by the company but none except arguably AMIGA 500 has not reached that much popularity as Commodore 64. That being said the system has left some of the great titles in its catalog that are great to be played even today and have been classic games on other platforms, even on PC itself. That being said I am giving you the top 100 games for Commodore 64:
  1. maggot
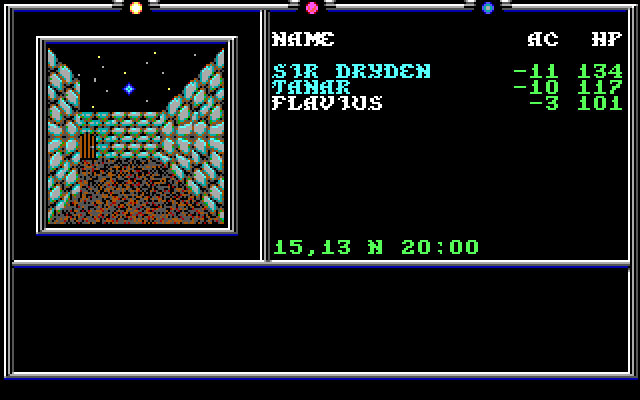
Zak McKracken and the Alien Mindbenders
  2. Pirates!
  3. Maniac Mansion
  4. IK+
  5. Bubble Booble
  6. Turrican II: The Final Fight
  7. Last Ninja 2
  8. Space Rogue
  9. Ultima IV: Quest of the Avatar
  10. Archon: The Light and the Dark
  11. Turrican
  12. Wasteland
  13. Defender of the Crown
  14. Elite
  15. Ultima V: Warriors of Destiny
  16. Laser Squad
  17. Prince of Persia
  18. Impossible Mission
  19. U.L.E.
  20. Pool of Radiance
  21. Bruce Lee
  22. Paradroid
  23. Project Stealth Fighter
  24. Curse of the Azure Bonds
  25. Ultima III: Exodus
  26. Legacy of the Ancients
  27. Winter Games
  28. Leaderboard Golf
  29. Supremacy
  30. Airborne Ranger
  31. Exile
  32. Last Ninja, The
  33. World Class Leader Board
  34. MicroProse Soccer
  35. Project Firestart
  36. Boulder Dash
  37. Summer Games 2
  38. Great Giana Sisters, The
  39. Neuromancer
  40. Mad Doctor
  41. Mail Order Monsters
  42. Zork I: The Great Underground Empire
  43. Buck Rogers: Countdown to Doomsday
  44. Katakis
  45. Bard's Tale, The: Tales of the Unknown
  46. WIzball
  47. Times of Lore
  48. Emlyn Hughes International Soccer
  49. Ultimate Wizard
  50. Alternate Reality: The Dungeonalternate reality dungeon
  51. World Games
  52. Leaderboard Executive
  53. California Games
  54. Samurai Warrior: The Battles of Usagi Yojimbo
  55. Summer Games
  56. Creatures 2: Torture Trouble
  57. Gunship
  58. Space Taxi
  59. International Karate
  60. Silent Service
  61. Bard's Tale III, The: Thief of Fate
  62. Seven Cities of Gold
  63. Armalyte
  64. Raid on Bungeling Bay
  65. Alter Ego: Male Version
  66. Enforcer: Fullmetal Megablaster
  67. Detective Game, The
  68. Creatures
  69. Skate or Die!
  70. Heart of Africa
  71. E.R.O. - Helicopter Emergency Rescue Operation
  72. Way of the Exploding Fist, The
  73. Stunt Car Racer
  74. Wizard of Wor
  75. Bard's Tale II, The: The Destiny Knight
  76. Mayhem in Monsterland
  77. Train, The: Escape to Normandy
  78. Jumpman
  79. Champions of Krynnchampions of krynn
  80. Pitstop II
  81. Barry McGuigan World Championship Boxing
  82. Montezuma's Revenge
  83. Boulder Dash II: Rockford's Revenge
  84. Spy vs Spy
  85. Mercenary: Escape from Targ
  86. Midnight Resistance
  87. Lords of Midnight
  88. Lode Runner
  89. Castles of Doctor Creep, The
  90. Boulder Dash Construction Kit
  91. Buggy Boy
  92. Racing Destruction Set
  93. Dino Eggs
  94. Realm of Impossibility
  95. Rainbow Islands
  96. Beach-Head II: The Dictator Strikes Back
  97. Barbarian: The Ultimate Warrior
  98. Grand Prix Circuit
  99. Head Over Heels
  100. Sentinel, The

Commodore 64 emulator and game ROMs

Commodore 64 might be in the past but its legacy still lives on even today through emulators and ROMs for emulators. You can even purchase one in working condition if you want and relive the full experience as it once was. vice c64 emulator
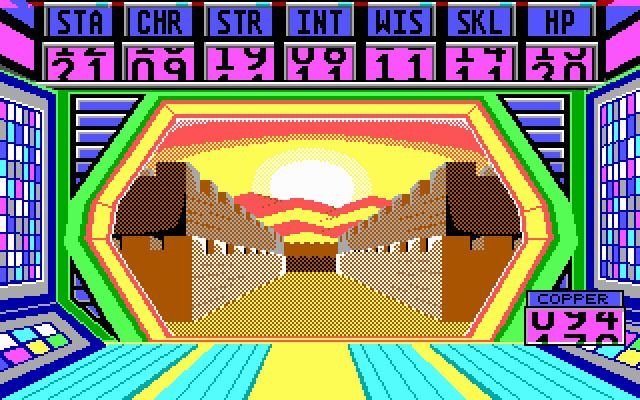
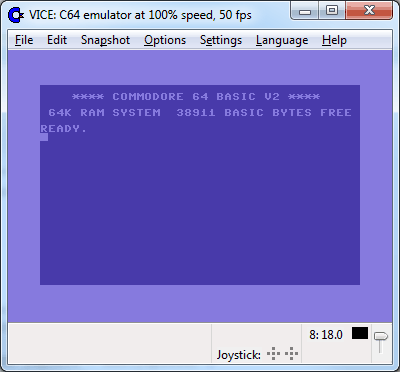
If you are not keen on spending money for reliving and checking games or software of C64 here are some links to help you to at least experience part of it completely free. Commodore 64 Emulator C64 Game ROMs

Conclusion

It is without a doubt that the C64 home system has made a great mark on home computers echoing even today and I am very grateful that I have been part of it as a kid. Sometimes today I will still spin some old classic via emulator just for nostalgia and enjoy its simplicity. Thank you for reading the article and I hope to see you soon again.
Read More
Razer is making only 1337 smartwatches
razer smartwatch
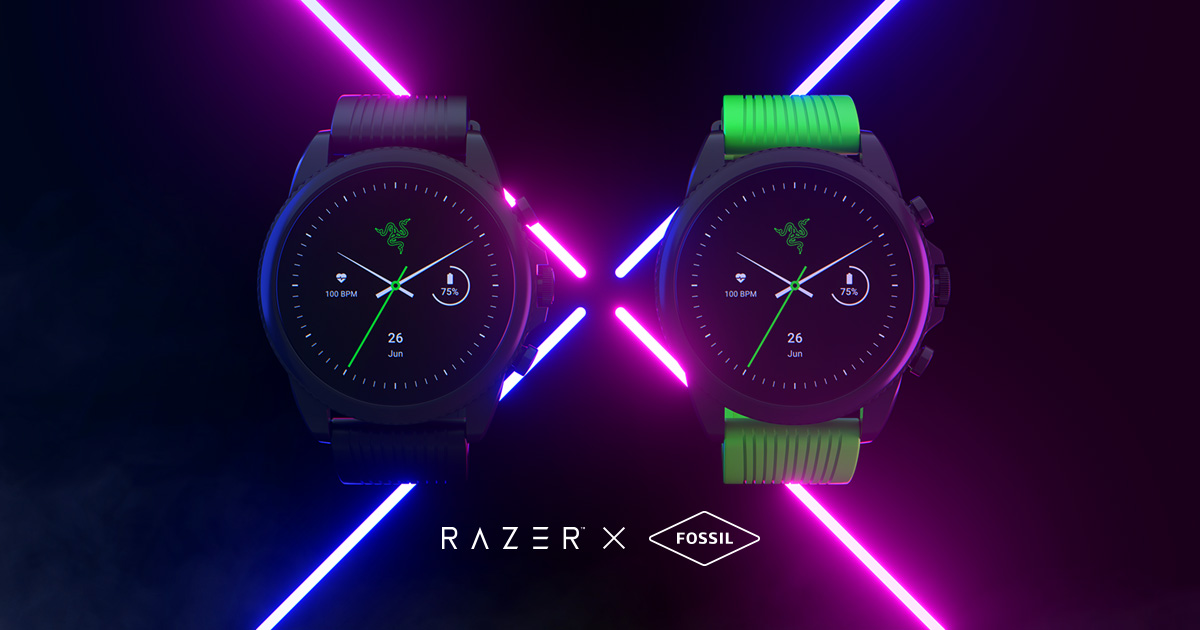
Razer had some strange dives into stuff not really aimed at gamers and the gaming community overall like its Zephir smart mask and now it is venturing into the area of smartwatches teaming up with Fossil. I am not clear if this initiative was set in motion by Razer or Fossil and I really do not know why limited production numbers. Officially named RAZER X FOSSIL GEN 6 SMARTWATCH, this watch comes with the official following text on Razer's page:
Way more. Way faster. Way ahead of the game. Get time on your side with the limited-edition Razer X Fossil Gen 6 Smartwatch—only 1,337 pieces worldwide. Designed for the next generation of gamers, supercharge your style with customizable straps, dials, Razer Chroma™ RGB effects, and more.
Now, I am a fan of Razer and I like their products, mostly keyboards and mouse altho chair is also very good and in top of the product line in that field but I can not really stand behind this product and decision, and the only reason why I can not stand behind it is this 1337 (leet, or elite) a limited number of available pieces that is nothing more than a gimmick to sell watches at a higher price. Watch itself is not really bad, as a matter of fact, it has some solid hardware statistics.

Technical characteristics

Featuring a 1.28-inch AMOLED Display with 3 unique Razer watch faces (Analog, Text, Chroma*), 4 customizable Razer Chroma™ RGB effects, and 2 custom-designed, interchangeable straps, this Razer's baby is packing 44mm, Stainless Steel case with 22mm, straps. It runs on Wear OS by Google as an operating system of a choice and under software, it is packing Qualcomm Snapdragon Wear 4100+ CPU paired with 1GB of RAM and 8GB Storage. The display is running at 416x416 resolution with 326ppi. Watch input is with 2 configurable Push buttons, One rotating Home button, touchscreen, and voice. It has in it a loudspeaker, microphone, and vibration. Connection is via Bluetooth 5.0, GPS, NFC SE, and Wi-Fi. The battery can in their word work for 24 Hr + multi-day Extended Mode **Varies based on usage and after updates install**. USB data cable with magnetic dock snaps to split rings on the watch case back and spins 360 degrees for ease of use. Approximately half an hour to reach 80%. Sensors included in the watch itself are: Accelerometer, Altimeter, Ambient Light, Compass, Gyroscope, Off-body IR, PPG Heart Rate, SPO2. Smartwatch is water-resistant up to 3 ATM & it comes with preloaded apps like: Agenda, Alarm, Battery-Optimized Activity Mode, Calendar, Cardio Level Tracking, Cardiogram, Contacts, Enhanced Phone Dialer App, Google Assistant, Google Fit (Workout, Heart Rate, Goals, Breathe), Google Maps, Google Pay™, Google Play Store, Nike Run Club, Noonlight, Smart Battery Modes, Spotify, Stopwatch, Timer, Translate, Wellness Apps with Sleep Tracking.

Conclusion

Watch is Dropping on 01.10.22, 8 AM PST which is 4 days from now and altho it is an interesting device with solid hardware I can not stand behind it due to its limited edition numbers and with $329 price tag. With the same amount of money, you can get yourself Samsung or Apple watch with more features packing. But of course, that is just my personal preference and if you want to own this limited edition Razer smartwatch, go for it.
Read More
Fix Qualcomm Atheros Qca61x4a Driver Issue
Qualcomm Atheros Qca61x4a Driver is a software driver used in WI FI communication between OS and device itself. When this driver stops working usually it means loss of connection and no internet available. This error knows to comes frequently and repeat itself over long periods of time which makes it quite annoying. If you are one of the unlucky users of Windows who get this error please keep reading in order to eliminate it and continue working on your computer normally.
  1. Disable & Enable the Qualcomm Adapter Driver

    Press ⊞ WINDOWS + X to open the secret menu, click on the device manager. In device manager expand network adapters. Right-click on Qualcomm Atheros Qca61x4a wireless network adapter and click on disable Right-click on Qualcomm Atheros Qca61x4a wireless network adapter and click on enable
  2. Rollback the Qualcomm Adapter driver

    Press ⊞ WINDOWS + X to open the secret menu, click on the device manager. In device manager expand network adapters. Right-click on Qualcomm Atheros Qca61x4a wireless network adapter and click on properties Under properties, window click on Driver tab and left-click on Roll Back driver (if the option is greyed there is no previous driver, follow next step) Choose your reason and click on OK
  3. Update Qualcomm Atheros driver to the latest version

    Press ⊞ WINDOWS + X to open the secret menu, click on the device manager. In device manager expand network adapters. Right-click on Qualcomm Atheros Qca61x4a wireless network adapter and click on Update Driver
  4. Install the new driver in compatibility mode

    Right-click on the installer package and choose properties Go to the compatibility tab Choose compatibility settings and install.
Read More
Fix Element Not Found for Bootrec /Fixboot
One of the most useful utilities for advanced users in Windows is the Windows command line or Command Prompt. It is efficient in fixing system files, checking the disk for errors as well as other intensive tasks that are made convenient using this. One of the tasks you can carry out using Command Prompt is repairing the Windows bootup process if it encounters any issues. However, if you tried running the “bootrec/fixboot” command and you receive an error message saying, “Element not found”, read on as this post will guide you in fixing this error. This kind of error in the command line could be due to a damaged BCD or MBE, inactive system partition, or it could also be that there is no drive letter being assigned to the EFI partition. Whichever the case is, here are some possible fixes that should help you resolve the problem.

Option 1 – Try to repair BCD

As mentioned the error could be caused by a damaged BCD and so to fix the problem, you need to repair BCD by following these steps:
  • First, make sure that you have a bootable Windows 10 USB drive with you and use it to boot your computer.
  • Once you’re on the Welcome Screen, click on Next.
  • After that, click on Repair your computer located at the bottom-left portion of the window.
  • Then select Troubleshoot > Advanced Options > Command Prompt.
  • After you open the Command Prompt window, execute the following command:
bootrec /fixboot
  • Afterward, enter the next command below to rename the BCD file:
ren BCD BCD.bak
  • Next, type the following command and make sure to replace “b:” with the letter of your bootable drive attached to your computer.
bcdboot c:Windows /l en-us /s b: /f ALL
  • Now, wait until the process is completed and restart your computer to successfully apply the changes made.

Option 2 – Try assigning the drive letter to the EFI partition

  • Tap the Win + X keys or right-click on the Start button and click on Command Prompt (Admin) to open Command Prompt with admin privileges.
  • Then type the following command to start the Diskpart utility:
diskpart
  • After that, if you receive a UAC prompt, just click on Yes to proceed.
  • Next, type the following command to list all the volumes created on your PC including both types of partitions that are visible to a normal user in the File Explorer as well as the ones created by Windows 10 by default which helps it in storing the boot files and other important system files:
list volume
  • Now type the following command to select the desired volume:
select volume number
  • Then type the following command to assign a letter to the selected volume:
assign letter=<LETTER>
Note: Make sure to replace “<LETTER>” with the letter you want to allocate to that partition. Afterward, it will assign a letter to the selected volume.
  • Reboot your PC to apply the changes made.

Option 3 – Try setting the System Partition to Active

Like the first given option, you also have to make sure that you have a bootable Windows 10 USB drive before you proceed to set the System Partition to Active. Once you have it covered, refer to these steps:
  • Boot your computer using the bootable Windows 10 USB drive.
  • Next, click Next when you get to the Welcome Screen.
  • Then click on Repair your computer located at the bottom left part of the window and select Troubleshoot > Advanced Options > Command Prompt.
  • After opening Command Prompt, type the following command and hit Enter to start the Diskpart utility. It is a command line-based utility just like Command Prompt but has a UAC prompt once you provoke it. So if you encounter a UAC prompt, just click on Yes to proceed.
diskpart
  • Now type the following command:
list disk
  • From there, select your primary disk by typing the following command:
select disk number
  • After that, list all the partitions on the selected disk by entering the following command:
list partition
  • The command you just entered will list all the partitions created on your PC including both types of partitions that are visible to a normal user in the File Explorer as well as the ones created by Windows 10 by default which helps it in storing the boot files and other important system files.
  • Now type the following command to select the partition that is usually around 100 MB in size:
select partition number
  • Finally, type the following command to mark the partition active:
active
  • Then type the “exit” command to exit the disk part utility.
Read More
How to Fix PFN_LIST_CORRUPT Error on Windows
If you suddenly encounter PFN_LIST_CORRUPT Blue Screen of Death error while using your computer then it means that the Page Frame Number or PFN list is corrupted. Page Frame Number is an indexing number used by the hard drive to find out the location of every single file on the physical disk. This kind of Blue Screen error is usually caused by a driver that’s passing a bad memory descriptor list and it can either be temporary or permanent. And so to fix this particular BSOD error, read on as this post contains a couple of suggestions that could help. Keep in mind that when you get a Blue Screen error like PFN_LIST_CORRUPT, the power connection to your PC must not be interrupted and so if you are using a laptop, it’s best if you connect it to a power source. On the other hand, if creating a dump from 0% to 100% takes up more than 5-10 minutes, then you have to force shut down your computer by pressing and holding the Power Key for 10 seconds or at least until the CPU lights turn off. After you do that, proceed to the troubleshooting tips prepared below.

Option 1 – Run the Blue Screen Troubleshooter

The Blue Screen troubleshooter is a built-in tool in Windows 10 that helps users in fixing BSOD errors like PFN_LIST_CORRUPT. It can be found on the Settings Troubleshooters page. To use it, refer to these steps:
  • Tap the Win + I keys to open the Settings panel.
  • Then go to Update & Security > Troubleshoot.
  • From there, look for the option called “Blue Screen” on your right-hand side and then click the “Run the troubleshooter” button to run the Blue Screen Troubleshooter and then follow the next on-screen options. Note that you might have to boot your PC into Safe Mode.

Option 2 – Run a System File Checker scan

You can also try to run a System File Checker or SFC scan in order to scan your computer for corrupted files that might be the cause behind the PFN_LIST_CORRUPT error. Once it finds any corrupted system files, it will automatically fix them. To run System File Checker, here’s what you have to do:
  • Tap Win + R to launch Run.
  • Type in cmd in the field and tap Enter.
  • After opening Command Prompt, type in sfc /scannow
The command will start a system scan which will take a few whiles before it finishes. Once it’s done, you could get the following results:
  1. Windows Resource Protection did not find any integrity violations.
  2. Windows Resource Protection found corrupt files and successfully repaired them.
  3. Windows Resource Protection found corrupt files but was unable to fix some of them.
  • Restart your computer after the scan is completed.

Option 3 – Check for any hard disk errors

  • On your desktop, right-click on the “This PC” or computer icon and then select Manage to open the Disk Management. Here you get to check your drive’s health.
  • Next, click on Disk Management on the left side panel.
  • From there, check the state of your drives. If it shows that all your partitions are healthy then it means all is good and that the problem may have something to do with some physical issues with your hard drive.
You might also want to run the CHKDSK utility to help you fix any issues with your hard disk. If your hard drive has issues with integrity, the update will really fail as the system will think that it’s not healthy and that’s where the CHKDSK utility comes in. The CHKDSK utility repairs hard drive errors that might be causing the problem.
  • Open Command Prompt with admin privileges.
  • After opening Command Prompt, execute the following command and hit Enter:
chkdsk /f /r
  • Wait for the process to be completed and then restart your computer.

Option 4 – Update the Device drivers

Updating the Device drivers can also help you fix the PFN_LIST_CORRUPT Blue Screen error. To do so, follow the steps below.
  • Tap the Win + R keys to launch Run.
  • Type in devmgmt.msc into the box and tap Enter or click OK to open the Device Manager.
  • After that, a list of device drivers will be displayed. If you see a red or yellow sign that shows up against the driver, right-click on the driver and select “Update Driver Software”.
  • Select the “Search automatically for updated driver software” option and then follow the instructions to complete the process.
  • Restart your PC and then check if the Blue Screen error is now fixed or not.

Option 5 – Disable OneDrive

The PFN_LIST_CORRUPT error might also be caused by OneDrive. Thus, you have to try disabling this program to resolve the problem.
  • Tap the Ctrl + Shift + Esc keys to open the Task Manager.
  • Once the Task Manager is open, click on More Details located at the bottom left portion of the window.
  • Then go to the Startup tab and select Microsoft OneDrive and then click Disable.
Read More
Adaptive Brightness is not working
The Adaptive Brightness setting in Windows 10 is a useful setting you can use in adjusting your computer’s brightness. It helps you get the brightness automatically based on the light around your computer. However, there are times when it does not work or it doesn’t turn off when you want it to. If this issue happened right after you update or install Windows 10, then read on as this post will give you a couple of options you can try to resolve the problem.

Option 1 – Try to run the Power Troubleshooter

The first thing you can do to resolve the issue with Adaptive Brightness is to run the Power Troubleshooter as the problem could occur due to some conflicted power settings. To use it, refer to the following steps:
  • Open the Windows 10 Settings panel and go to Update & Security and then to Troubleshoot.
  • After that, scroll down to your left-hand side and click the Power option.
  • From there, you should see the “Run the troubleshooter” button. Click on it to fix the problem.
  • Afterward, follow the next on-screen instructions that follow.

Option 2 – Try disabling or turning off the corresponding options in GPU settings

The problem might be due to the Graphics card settings. If you are using either an AMD graphics card or the HD graphics of Intel, you may have to disable the power-related options in the GPU settings. To be specific, you have to disable the Vari-Bright in AMD graphics card settings or the Display Power Saving Technology under Intel’s Graphics panel.
  • AMD users:
    • Open the AMD Radeon settings panel.
    • Then go to Preferences. From there, select Radeon Additional Settings.
    • Next, go to the Power tab and click the PowerPlay option.
    • You should find an option called “Enable Vari-Bright” located on your right-hand side. Remove the mark from its checkbox and then save the changes you’ve made.
  • Intel users:
    • Open the Intel Graphics and Media Control Panel from your Desktop.
    • Then select the Basic mode and go to the Power tab.
    • From there, select “On battery” as Power Source and then you’ll get the Display Power Saving Technology option. It should be set to enabled by default.
    • Now remove the mark from the checkbox and then save the changes you’ve made.

Option 3 – Try resetting the Power Plan defaults

You might also want to use a command-line tool to resolve the problem. This command-line tool is known as PowerCfg. It is a command utility tool that will scan your computer for 60 seconds to know its power. This tool gives detailed results in the form of an HTML report that will help you in evaluating the real cause of the battery drain issues. You can also use this tool to reset the Power Plan defaults of your computer. To use it, follow the steps below.
  • Open the Command Prompt as administrator.
  • Then type in the following command and tap Enter to execute it:
powercfg –restoredefaultschemes
  • After the command has been executed, restart your computer.

Option 4 – Try updating your Graphics drivers

  • First, boot your computer into Safe Mode.
  • After that, tap the Win + R keys to launch Run.
  • Type in devmgmt.msc into the box and tap Enter or click OK to open the Device Manager.
  • After that, a list of device drivers will be displayed. From there, look for the Display Adapters and click on them.
  • After that, right-click on each entry under the Display Adapters and select the “Uninstall Device” option from the menu.
  • Now restart your computer.
  • After restarting your computer, go to the Settings app and Check for Updates in the Windows Update section.
Note: You also have the option to go directly to the website of your graphics card manufacturers like NVIDIA, Intel, or AMD and go to the section called Drivers then check if there’s a new available update – if there is, download and install it.

Option 5 – Try disabling adaptive brightness via Registry Editor

Since you will be dealing with Registry files in this post, you need to create a System Restore point first. Once you have that covered, proceed to the following steps:
  • Tap the Win + R keys to open the Run dialog box.
  • Next, type “regedit” in the field and hit Enter to open the Registry Editor.
  • After that, navigate to this path: HKEY_LOCAL_MACHINESOFTWAREIntelDisplayigfxcuiprofilesMediaBrighten Movie
  • Now double click on the “ProcAmpBrightness” and set its value to “0”.
  • Now go to this path: HKEY_LOCAL_MACHINESOFTWAREIntelDisplayigfxcuiprofilesMediaDarken Movie
  • From there, double click on “ProcAmpBrightness” and set the value to “0”.
  • Then close the Registry Editor and restart your PC and then see if the problem’s fixed or not.
Read More
Windows 11 new features and preview
Microsoft has presented its next version of their flagship product, Windows 11, and feelings are divided among users. Some users like it very much and eager to upgrade, some do not like the graphic overhaul it went through, but overall I think Microsoft has done a good job with it. Here in this article, we will discuss some of the new features which Windows brings to the table, well at least ones that were showed, I am sure there are plenty more which we will see once OS has been released.

New Start menu

Winodws 11 start menu
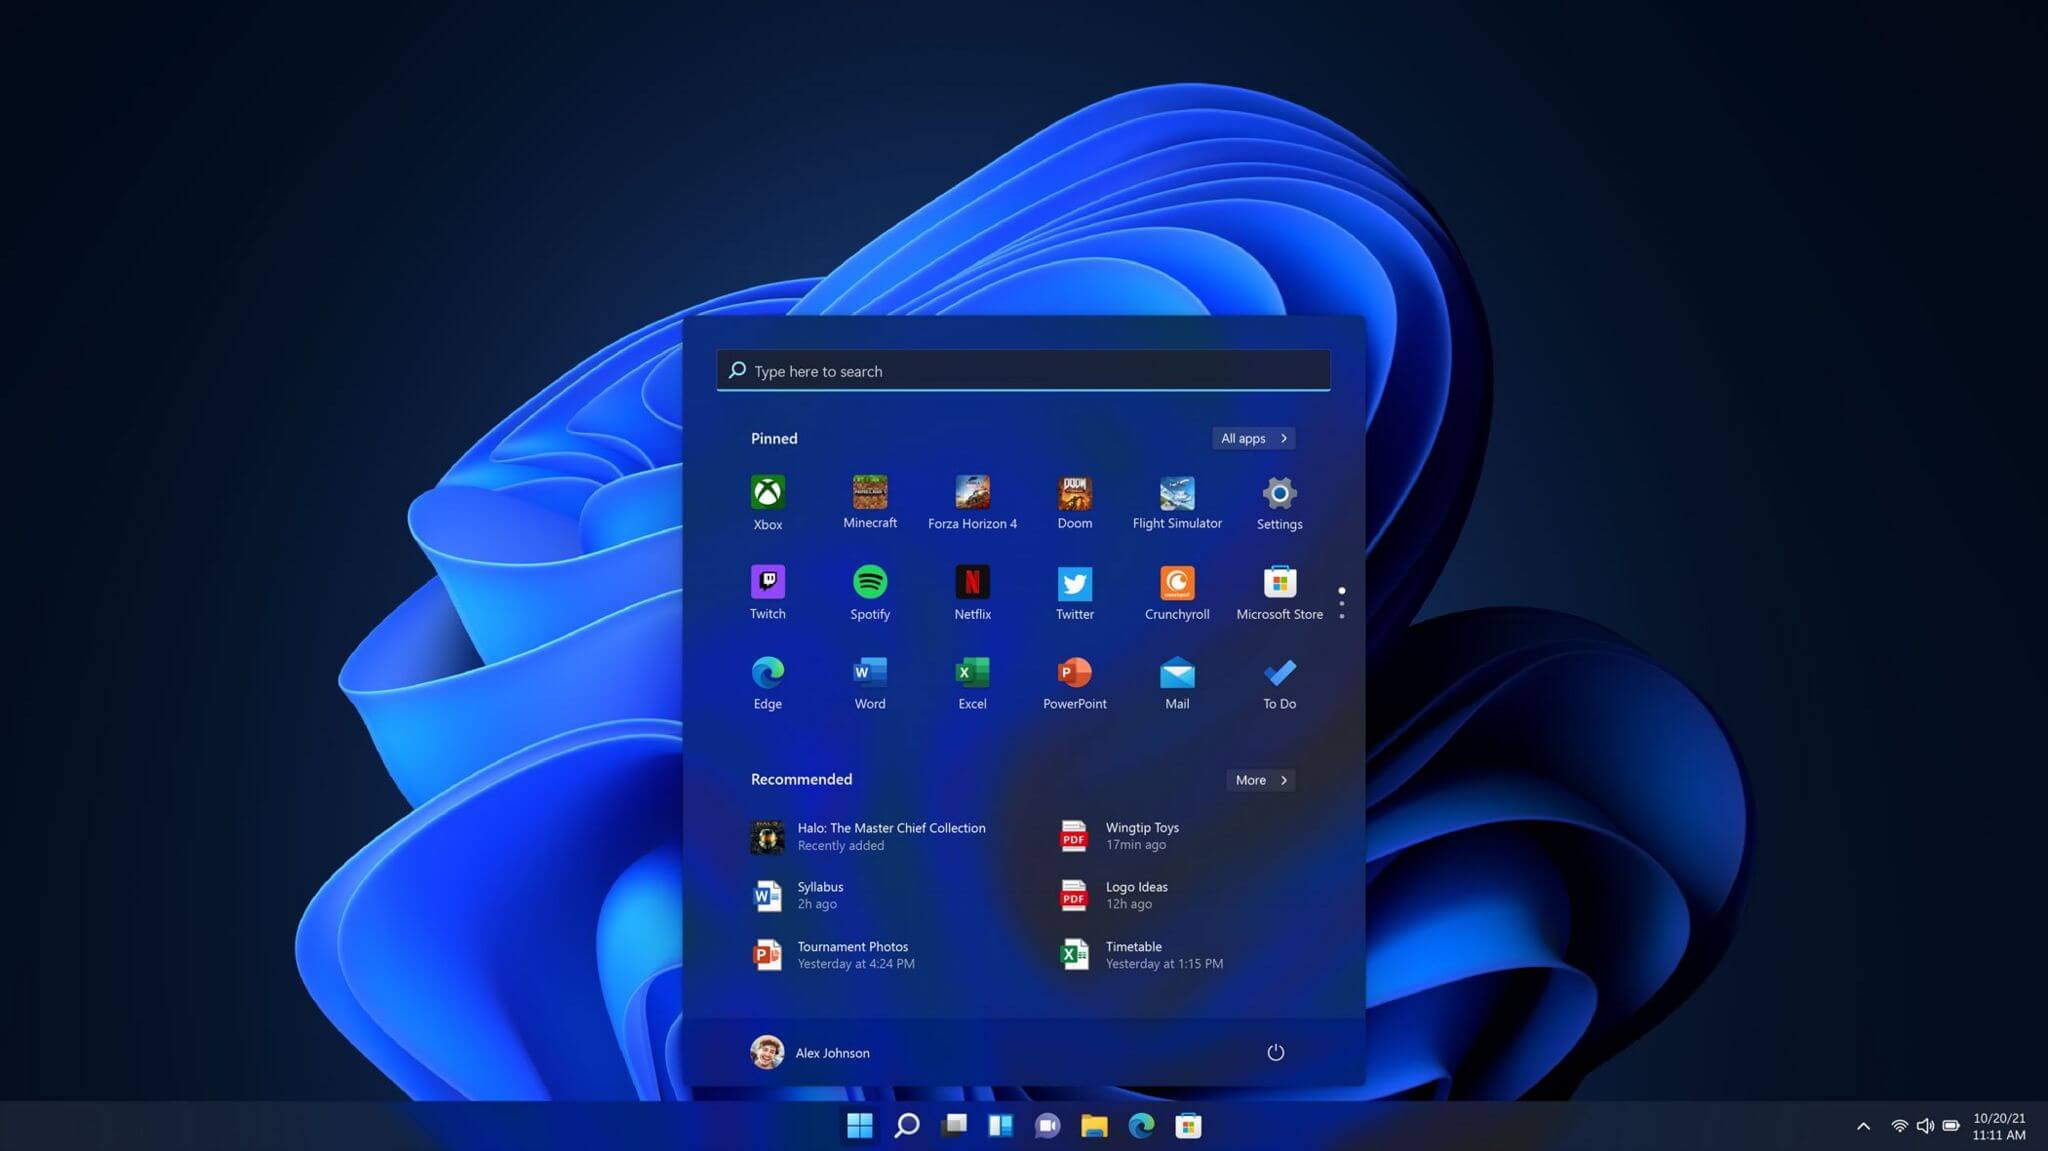
One of the first things that everyone saw when Microsoft has unveiled Windows 11 is its Start menu. Funny enough this is what has caused most of the divide among users, some find it interesting, and some do not like it. Truth is, it is different, and it is centered in the middle instead of the lower left part of the screen. It has been confirmed however that the Start menu can be moved to any part of the screen so if you want, you could place it on the lower left as it has always been. Live tiles do not longer exist in the Start menu, instead, we have styled simple icons.

Windows 11 Snap controls are great

Windows 11 snap controls
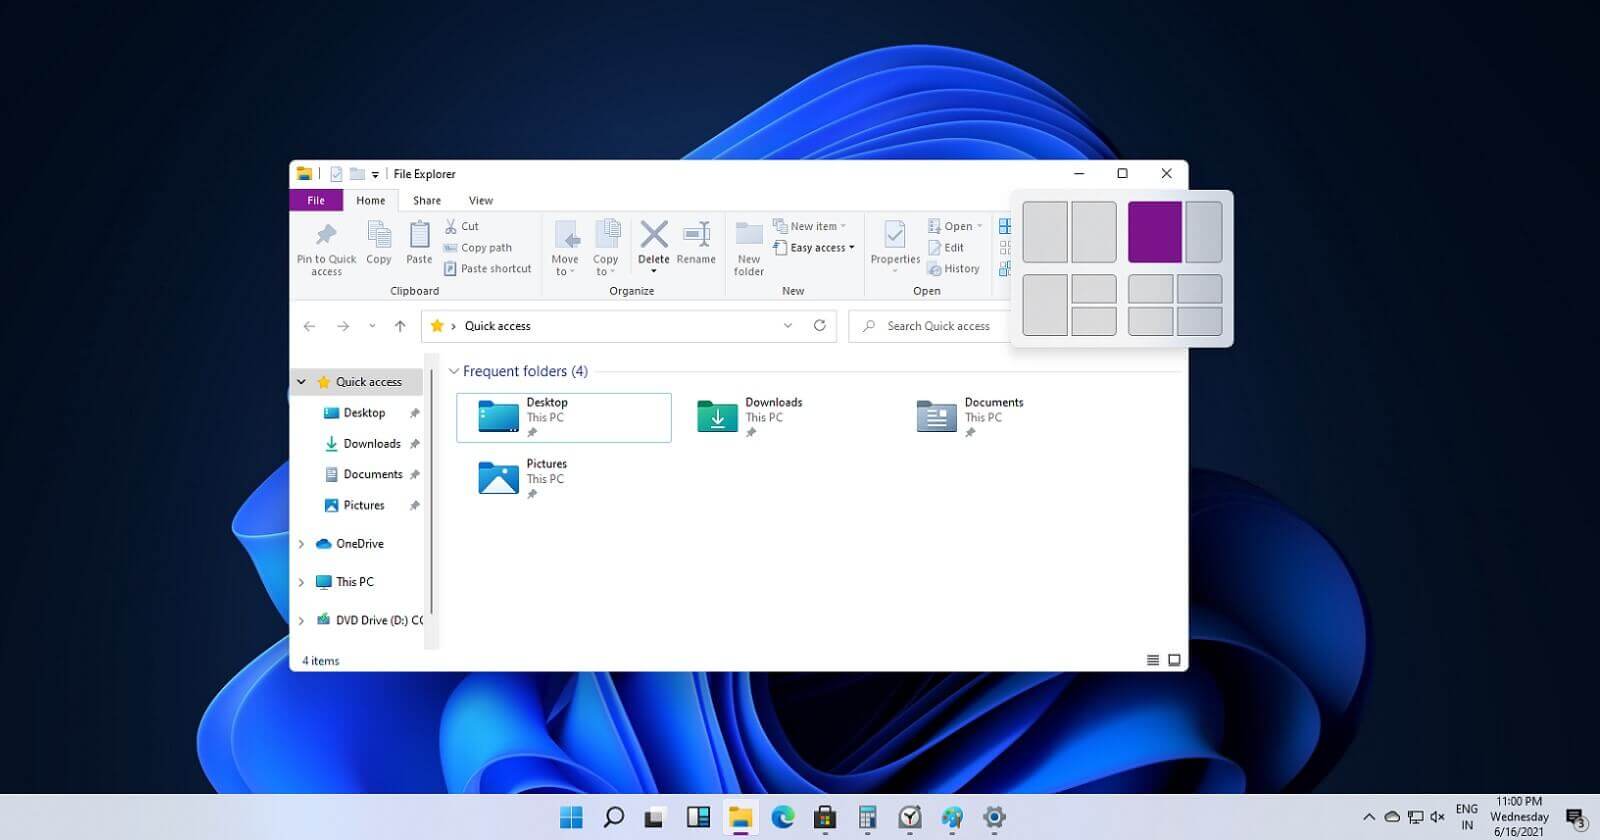
If you have used the cascade option in previous Windows versions then it is most likely that you will like the new Snap controls. You can quickly snap windows side by side, or arrange them in sections on your desktop just by hovering over maximize button on the title bar.

Windows 11 File Explorer

Windows 11 file explorer
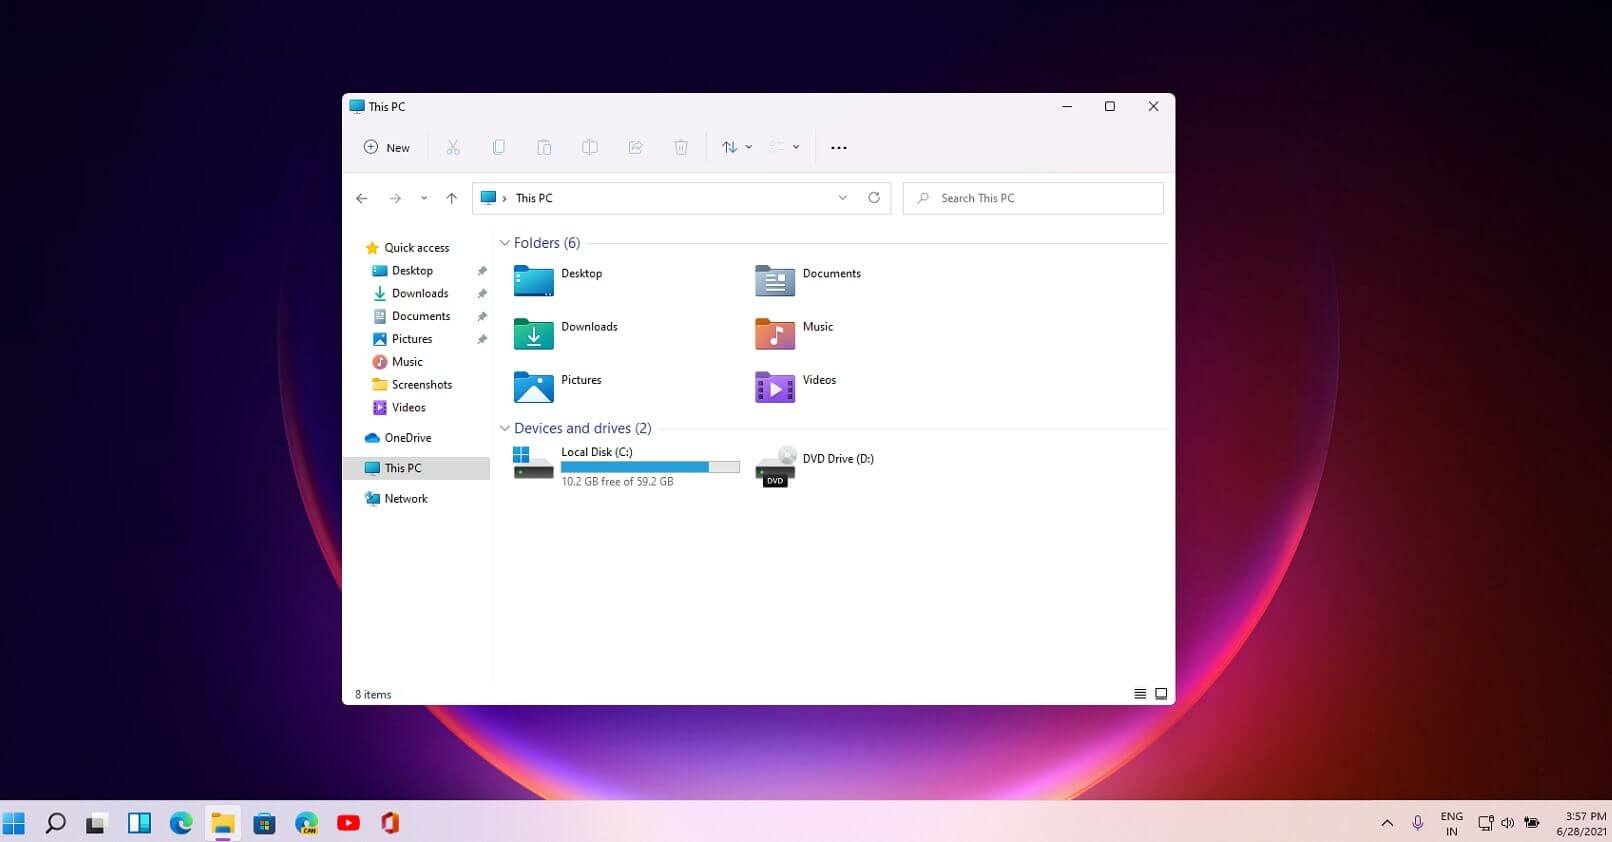
File explorer has gone through some visual and design changes, the ribbon on top has been completely removed and replaced with a header-like feature with a slick and clean design. The header contains a nice organized and designed single row of icons like cut, paste, copy, rename, delete, and new folder icons.

Settings app ovberhaul

Windows 11 settings app
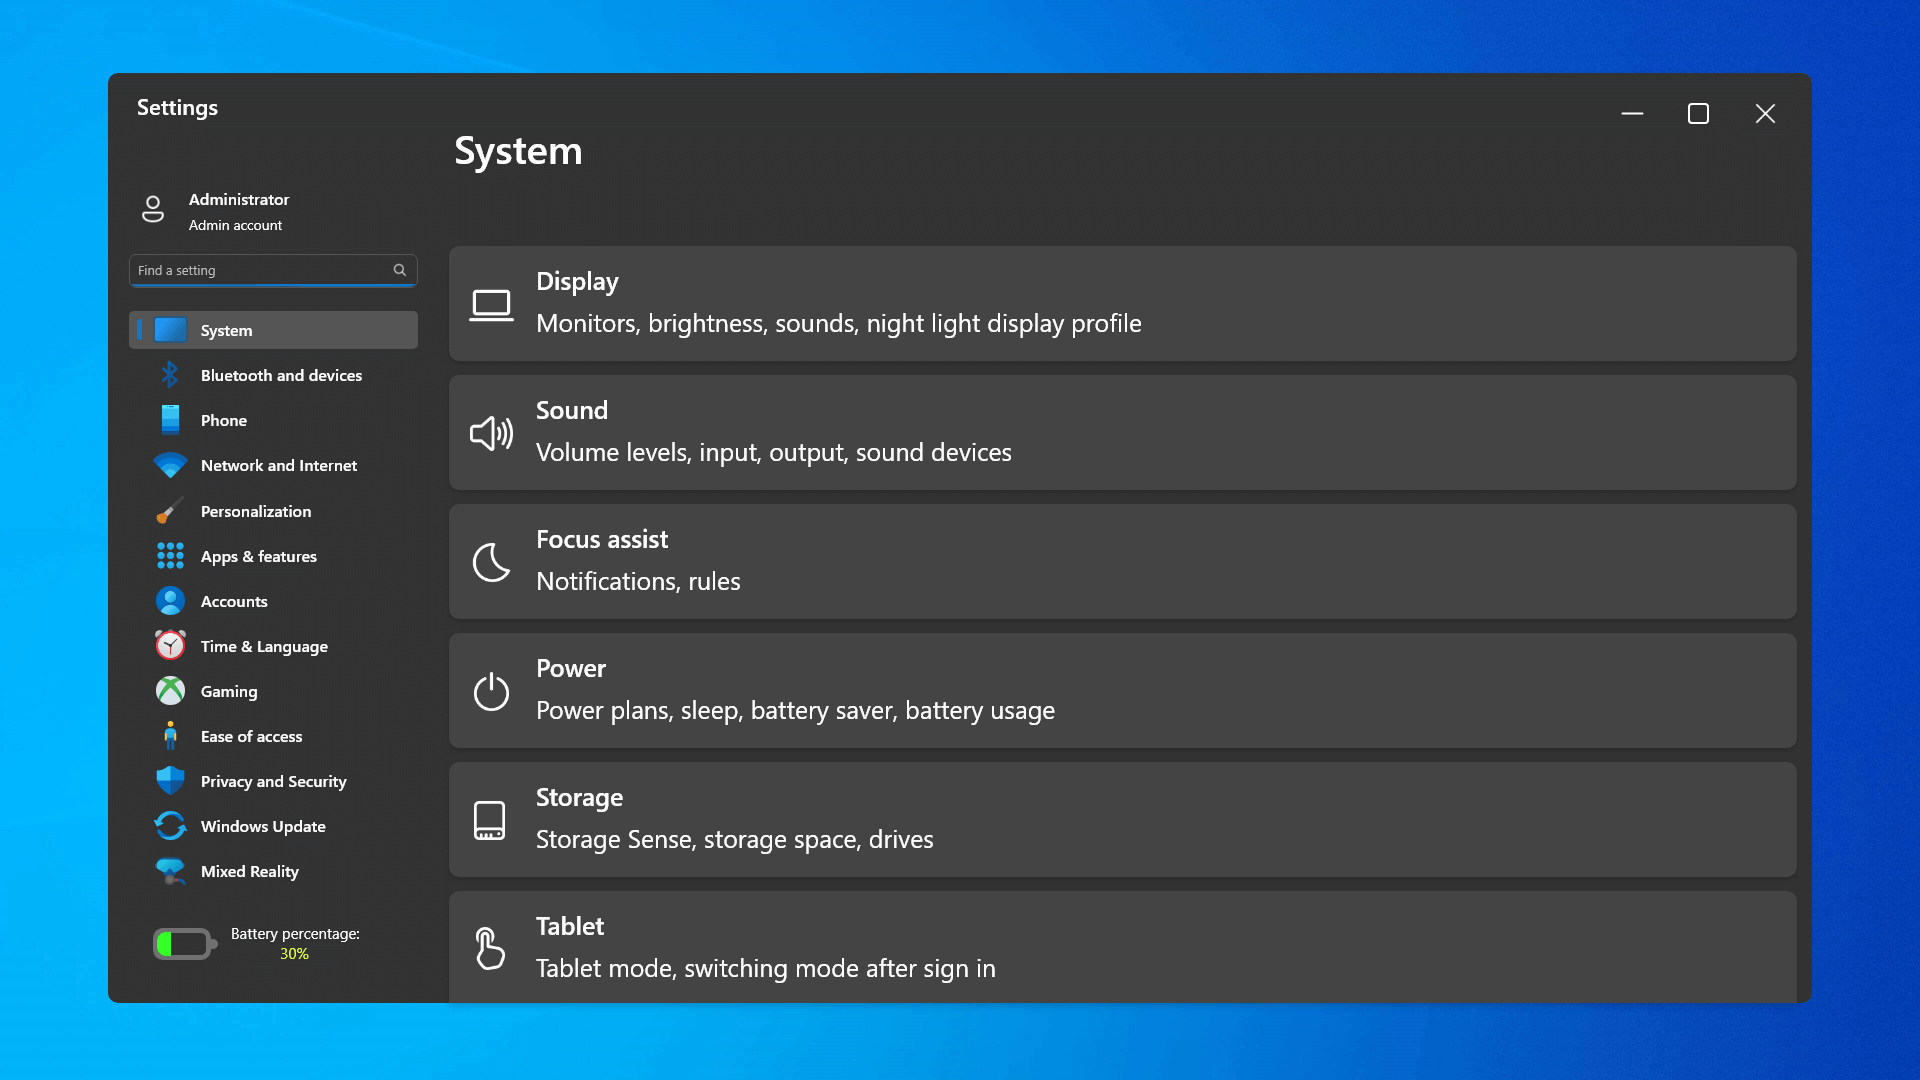
The settings app also has gone through visual and design changes. It has a new design that is very visually appealing and navigation has been simplified and more organized. Finding the right and desired setting is much faster and clearer now.

Widget tab makes comeback in Windows 11

Windows 11 widgets bar
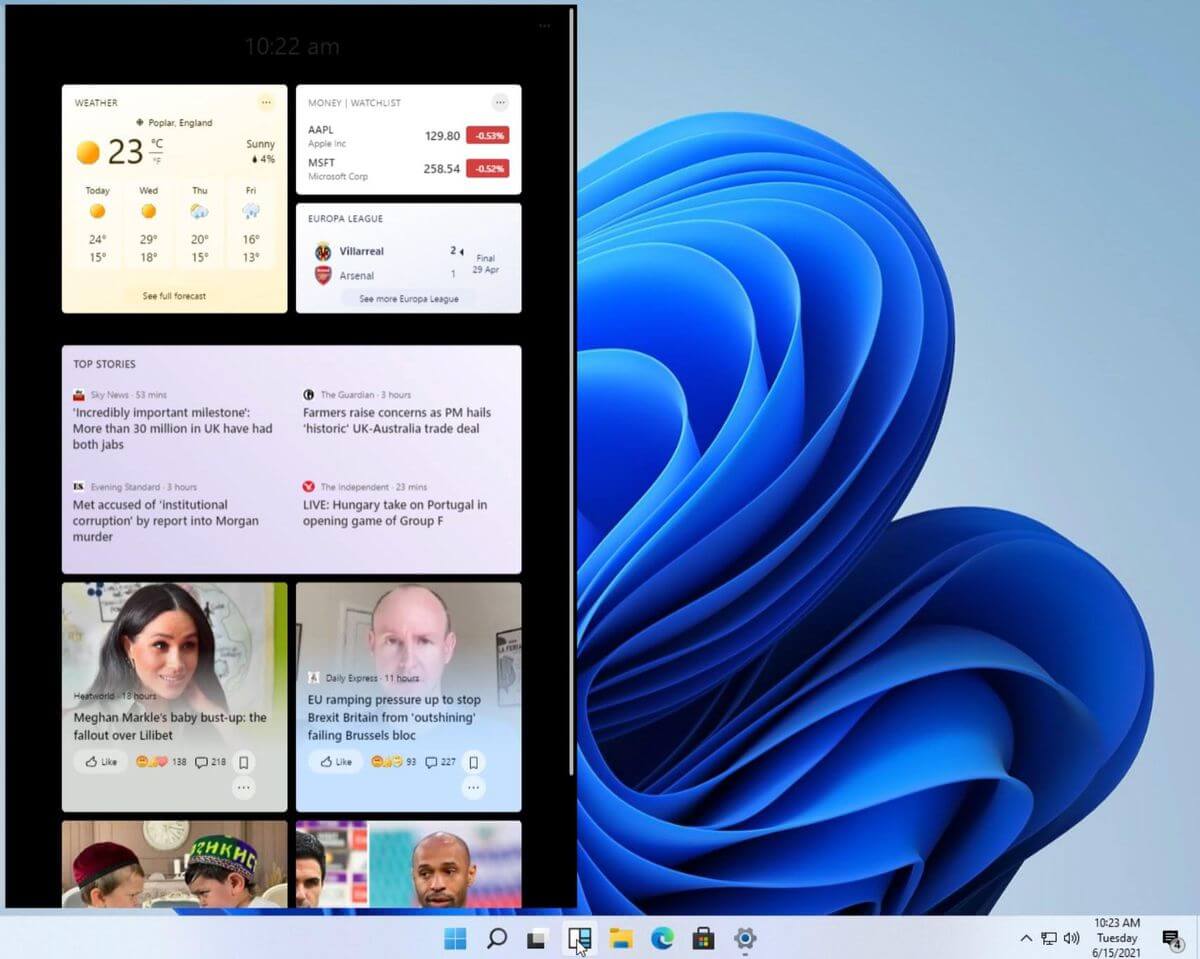
Yes, widgets are back but not like you remember them. Instead of being all-time present at your desktop like once they used to be, now there is a button on the taskbar which brings the widget bar up that contains desired widgets. This way they are easily accessible and do not clutter desktops. So far we have weather, news, calendar, and stocks widget but we will see how development on these goes. I expect to have community-made widgets like in old days for all of our needs.

XBOX app

Windows 11 xbox appThe new Xbox app is now integrated into Windows 11, offering quick access to Xbox Game Pass games, the social parts of the Xbox network, and the Xbox store.

Security and TPM 2.0 in Windows 11

Windows 11As widely known by now Windows 11 will require you to have a TPM 2.0 module capable CPU in order to install it. This system requirement has caused a lot of controversies but essentially it seems that MS's goal is to protect your personal data by using this module. The upside of course is that your data will be protected much more than in previous Windows versions, the downside, of course, will be that you will need newer hardware to run OS on it. and that is essentially it, keep on tuned on more Windows 11 information and overall articles tied to PC and technology here at errortools.com
Read More
1 2 3 162
Logo
Copyright © 2022, ErrorTools. All Rights Reserved
Trademarks: Microsoft Windows logos are registered trademarks of Microsoft. Disclaimer: ErrorTools.com is not affiliated with Microsoft, nor claim direct affiliation.
The information on this page is provided for information purposes only.
DMCA.com Protection Status