How to remove ConvertDocsOnline from Your PC

ConvertDocsOnline is a Browser Extension for Google Chrome developed by Mindspark Inc. This extension offers users a quick and easy way to convert documents without any additional applications installed on their computer, it also has quick access links to popular websites that the average user might find interesting. While all this may look appealing and nice, this extension injects itself into your browser.

While installed, ConvertDocsOnline will monitor your browsing activity and record visited websites, clicked links, downloads, and even viewed products. All this information is later used/sold to Mindsparks Ad network to better serve user-targeted ads.

Browsing the internet with this extension installed will result in ad placement throughout your browsing sessions. These ads might appear as normal links (sponsored content), ad links, or even pop-up ads.

ConvertDocsOnline has been marked as a Browser Hijacker by several Anti-Virus scanners and is therefore recommended for optional removal from your PC.

About Browser Hijackers

Browser hijackers (sometimes referred to as hijackware) are a type of malware that changes web browser settings without the user’s knowledge or permission. These types of hijacks are increasing at an alarming rate around the globe, and they can be truly nefarious and sometimes dangerous too. There are plenty of reasons why you may have a browser hijack; however commercial, marketing, and advertising are definitely the primary reasons for their creation. In most cases, browser hijacking is used for earning advertising revenue that comes from forced ad mouse clicks and site visits. It might appear naive, but the majority of these sites are not legitimate and may pose a significant threat to your online safety. In a much worst case, your internet browser could be hijacked to download malicious software that can do a lot of damage to your PC.

Symptoms of browser hijacker malware

Symptoms that a web browser is a hi-jacked include:
1. the browser’s homepage is modified
2. your internet browser is constantly being redirected to adult websites
3. the default online search engine and/or the default browser settings are altered
4. you see many toolbars in your internet browser
5. you might find endless pop-up adverts on your computer screen
6. your web browser gets slow, buggy crashes very often
7. you can’t navigate to certain web pages, such as computer security software-related websites.

How they infect computer systems

Browser hijackers can enter a PC in some way or other, for example via downloads, file sharing, and e-mail also. Many browser hijackings come from add-on software, i.e., toolbars, browser helper objects (BHO), or plug-ins added to browsers to give them extra functionality. Browser hijackers sneak to your computer in addition to free software downloads also that you unwittingly install alongside the original. Examples of popular browser hijackers are Fireball, CoolWebSearch. GoSave, Ask Toolbar, RocketTab, and Babylon Toolbar.

The existence of any browser hijacker on your computer could drastically diminish the web browsing experience, record your internet activities that lead to critical privacy issues, degrade overall computer efficiency, and result in application instability also.

Removing browser hijackers

Certain hijackers could be removed by simply uninstalling the related freeware or add-ons from the Add or Remove Programs in the Windows control panel. But, many hijacking codes are certainly not very easy to get rid of manually, since they go deeper into your operating system. Beginner PC users should not try for the manual form of removal methods, as it calls for thorough system knowledge to perform fixes on the system registry and HOSTS file.

Browser hijackers can be effectively removed by installing and running anti-malware software on the affected PC. To get rid of any browser hijacker from your laptop or computer, you should download this particular certified malware removal application – SafeBytes Anti-Malware. Along with the antivirus tool, a system optimizer, like SafeBytes’s Total System Care, will help you in getting rid of all related files and modifications in the computer registry automatically.

Virus Blocking Access To Safebytes Website And Preventing Anti-Malware Downloads - What You Should Do?

All malware is bad and the level of the damage will vary greatly in accordance with the type of infection. Some malware types modify browser settings by including a proxy server or modify the PC’s DNS configuration settings. In such cases, you’ll be unable to visit some or all of the websites, and thus unable to download or install the necessary security software to remove the malware. If you are reading this now, you may have probably realized that a malware infection is the cause of your blocked net traffic. So how to proceed when you want to install antivirus software such as Safebytes? Do as instructed below to remove malware through alternate ways.

Get rid of viruses in Safe Mode

The Windows operating system includes a special mode known as “Safe Mode” where just the bare minimum required programs and services are loaded. If the malicious software is set to load immediately when PC boots, switching into this particular mode can prevent it from doing so. In order to enter into Safe Mode or Safe Mode with Networking, press the F8 key while the PC is starting up or run MSConfig and look for the “Safe Boot” options under the “Boot” tab. Once you are in safe mode, you can try to download and install your antivirus software application without the hindrance of the malware. Now, you can actually run the antivirus scan to eliminate computer viruses and malware without hindrance from another malicious application.

Switch to an alternate internet browser

Some malware only targets certain internet browsers. If this is your situation, make use of another internet browser as it can circumvent the malware. If you’re not able to download the anti-virus program using Internet Explorer, this means the virus could be targeting IE’s vulnerabilities. Here, you need to switch to a different internet browser like Firefox or Chrome to download the Safebytes Anti-malware program.

Install antivirus on a USB drive

Another option would be to make a portable anti-malware program on your USB stick. Adopt these measures to run the anti-malware on the infected PC.
1) On a clean PC, download and install Safebytes Anti-Malware.
2) Plug the pen drive into the clean PC.
3) Double click on the downloaded file to open the installation wizard.
4) When asked, choose the location of the pen drive as the place where you would like to store the software files. Follow the instructions on the computer screen to finish up the installation process.
5) Now, transfer the thumb drive to the infected PC.
6) Double-click the anti-malware program EXE file on the pen drive.
7) Run Full System Scan to detect and clean-up up all kinds of malware.

Review of SafeBytes Anti-Malware

If you are planning to purchase anti-malware for your desktop, there are plenty of brands and utilities for you to consider. Some are good ones, some are decent, while some are simply just bogus anti-malware applications that can ruin your personal computer themselves! You have to pick a tool that has got a good reputation and detects not only computer viruses but other sorts of malware also. When thinking about trustworthy programs, Safebytes Anti-Malware is certainly the strongly recommended one.

Safebytes is one of the well-established PC solutions companies, which provide this all-inclusive anti-malware software. Using its cutting-edge technology, this application will assist you to get rid of multiples types of malware including computer viruses, trojans, PUPs, worms, ransomware, adware, and browser hijackers.

SafeBytes anti-malware takes computer protection to a whole new level with its advanced features. These are some of the highlighted features included in the tool.

Real-time Active Protection: SafeBytes gives real-time active monitoring and protection against all known viruses and malware. It’ll monitor your PC for suspicious activity continuously and safeguards your PC from illegal access.

Robust, Anti-malware Protection: Built upon a highly acclaimed anti-virus engine, this malware removal tool has the capacity to find and get rid of several stubborn malware threats such as browser hijackers, PUPs, and ransomware that other typical antivirus applications will miss.

Extremely Speed Scanning: SafeBytes Anti-Malware has got a multi-thread scan algorithm that works up to 5 times faster than any other anti-malware software.

Web Protection: Through its unique safety score, SafeBytes informs you whether a site is safe or not to access it. This will make sure that you’re always certain of your safety when browsing the world wide web.

Light-weight: SafeBytes is really a lightweight tool. It uses up an extremely small amount of processing power as it operates in the background so you’re free to use your Windows-based PC the way you want.

24/7 Assistance: Support service is available 24 x 7 x 365 days through chat and email to answer your concerns.

SafeBytes can keep your personal computer protected from most advanced malware threats automatically, thus keeping your online experience secure and safe. Malware issues will become a thing of the past once you put this software program to use. You’ll get the best all-around protection for the money you spend on SafeBytes AntiMalware subscription, there is no doubt about it.

Technical Details and Manual Removal (Advanced Users)

To eliminate ConvertDocsOnline manually, go to the Add/Remove programs list in the Control Panel and choose the program you want to get rid of. For internet browser extensions, go to your web browser’s Addon/Extension manager and select the add-on you intend to remove or disable. You might also want to reset your home page and search engine providers, as well as delete browsing history, temporary files, and internet cookies.

In order to ensure the complete removal, manually check your hard drive and Windows registry for all of the following and remove or reset the values as needed. But bear in mind, this can be a tricky task and only computer professionals could carry it out safely. Furthermore, certain malicious programs are capable to defend against its removal. It is advised that you carry out the removal process in Safe Mode.

Files:
%LOCALAPPDATA%\ConvertDocsOnlineTooltab
%LOCALAPPDATA%\Google\Chrome\User Data\Default\Local Extension Settings\pebplbnpogfdllkijjlabbjbbngdadjl
%UserProfile%\Local Settings\Application Data\Google\Chrome\User Data\Default\Local Extension Settings\pebplbnpogfdllkijjlabbjbbngdadjl
%LOCALAPPDATA%\Google\Chrome\User Data\Default\Extensions\pebplbnpogfdllkijjlabbjbbngdadjl
%UserProfile%\Local Settings\Application Data\Google\Chrome\User Data\Default\Extensions\pebplbnpogfdllkijjlabbjbbngdadjl

Registry:
HKEY_LOCAL_MACHINE\Software\Google\Chrome\PreferenceMACs\Default\extensions.settings, value: pebplbnpogfdllkijjlabbjbbngdadjl
HKEY_LOCAL_MACHINE\Software\Microsoft\Internet Explorer\DOMStorage\convertdocsonline.dl.myway.com
HKEY_LOCAL_MACHINE\Software\Microsoft\Internet Explorer\DOMStorage\convertdocsonline.dl.tb.ask.com
HKEY_CURRENT_USER\SOFTWARE\Wow6432Node\ConvertDocsOnline
HKEY_CURRENT_USER\SOFTWARE\ConvertDocsOnline
HKEY_LOCAL_MACHINE\Software\[APPLICATION]\Microsoft\Windows\CurrentVersion\Uninstall..Uninstaller
ConvertDocsOnlineTooltab Uninstall Internet Explorer

If you like to learn and find out more about various Windows errors, and how to repair them go to our vast archive or use search to find articles that will explain and help you in solving your issue.
However, if you prefer to do things fast and with automatization then we are proposing to use an automated solution for your issues. The application that we are recommending is Advanced System Repair Pro
Advanced System Repair utilizes multiple tools all in one to give you a quick, simple, reliable, and very thorough diagnosis of your PC. It brings you all the tools you need in one program to clean, fix, protect, optimize and boost your PC!
1-Click Maintenance
All the tools to make it simple and easy! It's like having a professional technician at the click of a mouse.

Junk Cleaner
Keeping your computer free from unnecessary clutter also helps make your computer last longer. Like any other machine, if you keep it clean and take care of it, it will serve you better for longer!

Optimize background apps
Optimize applications background activity with the built-in Application Optimizer feature.

Disk Defrag
With a simple 1-click, Advanced System Repair speeds up your PC by assembling fragmented files on your machine and organizing them more efficiently.

Malware Removal
Finds and removes all types of harmful malware including trojans, worms, bots, adware, spyware, PUPs, and more!

Privacy Cleaner
The all-in-one privacy suite to Clean Your Tracks & Protect Your Privacy! Make your computer safe, secure, and more efficient!

System Tweak/Optimizer
ASR will analyze your complete system and settings to adjust your PC to function at its maximum performance.

Registry Cleaner
Over time, as you install and uninstall applications, the registry can become cluttered with old entries and broken settings which can result in program crashes, and annoying messages and slow the computer down.
Visit our Advanced System Repair Pro Download page to inform yourself about all the benefits of this software and get a free trial copy of it.
advanced system repair pro

Advanced System Repair Pro

One-click automated PC repair solution
ASR logo
With Advanced System Repair Pro you can easily
Replace damaged files
Restore performance
Free disk space
Remove Malware
Protects WEB browser
Remove Viruses
Stop PC freezing
DOWNLOAD
Privacy Policy | Terms of Use | Uinstall
Advanced System Repair Pro is compatible with all versions of Microsoft Windows including Windows 11

Share this article:

You might also like

Fix ERR_CACHE_MISS error in Google Chrome
One of the most popular and most used web browsers commonly used by Windows users is Google Chrome. This well-known web browser has been introducing various features recently in order to stay at the top. However, it makes the web browser a lot more complex and thus prone to errors. Although this may not be a big deal, it can be quite annoying as it can interrupt your web browsing. There are various errors that can come up with this level of complexity of the web browser. One of these errors is the “This site can’t be loaded from the cache, ERR_CACHE_MISS” error message that can suddenly appear while you browse the web using your Google Chrome browser on your Windows 10 PC. Take note that when you encounter this particular error, there really is no direct fault in the Chrome browser as there are also issues with caching the website data locally in the computer. Moreover, this error can also occur when a website is coded in an incorrect manner or if there are some browser extensions or toolbars that are in conflict with the proper functioning of the website. To fix the ERR_CACHE_MISS error in Google Chrome, refer to the possible solutions laid out below.

Option 1 – Try clearing browser data

There are times when some data in the browser is conflicting with the loading of the website and triggers errors like ERR_CACHE_MISS. And so you can try to clear your browser’s data. This might be a very basic solution but oftentimes it works in fixing this kind of error in Google Chrome. Follow the steps below to clear the data in your browser.
  • Open your Google Chrome browser.
  • After that, tap the Ctrl + H keys. Doing so will open a new panel that allows you to delete the browsing history and other data in your browser.
  • Now select every checkbox that you see and click on the Clear browsing data button.
  • Then restart your Chrome browser and check if you can now open any website or not.

Option 2 – Try using the Developer Tools

You can also try using the Developer tools in Google Chrome to help you fix the ERR_CACHE_MISS error. Refer to the steps below to do so.
  • Open Google Chrome.
  • Tap the Ctrl + Shift + I keys on your keyboard and then tap the F1 key to open the Settings tab inside the Chrome Developer Tools.
  • Next, select the Disable cache option while DevTools is open and apply those settings.
  • After that, refresh your browser and check if the entries you’ve seen previously in the Network tab are gone.
  • Now try to load the same webpage again and see if the problem is resolved.

Option 3 – Reset Winsock, TCP/IP & Flush DNS

Resetting Winsock, TCP/IP, and flushing DNS might help you resolve the ERR_CACHE_MISS error. To do so, follow these steps:
  • Right-click on the Start button and click on Command Prompt (administrator) so you can pull up an elevated Command Prompt.
  • After that, execute each one of the commands listed below. And after you typed in one after the other, you have to hit Enter.
  1. netsh winsock reset – type in this command to reset Winsock
  2. netsh int ip reset resettcpip.txt – type in this command to reset TCP/IP
  3. ipconfig /flushdns – type in this command to flush the DNS cache
  • Next, restart your PC and check if the problem’s fixed.

Option 4 – Get rid of any conflicting browser extensions

  • Open Chrome and press Alt + F keys.
  • Go to More tools and click Extensions to look for any suspicious browser extensions or toolbars.
  • Click the Recycle bin and select Remove.
  • Restart Chrome and press Alt + F keys again.
  • Proceed to On Startup and mark Open a specific page or set of pages.
  • To check if the browser hijacker is still active, click Set pages, if it is active, overwrite the URL.
Note: If removing the browser extensions or toolbars didn’t work, you can also try to reset your Google Chrome browser.
  • Open Google Chrome, then tap the Alt + F keys.
  • After that, click on Settings.
  • Next, scroll down until you see the Advanced option, once you see it, click on it.
  • After clicking the Advanced option, go to the “Restore and clean up option and click on the “Restore settings to their original defaults” option to reset Google Chrome.
  • Now restart Google Chrome.
Read More
Best free & paid eMail clients in 2021
Having an eMail in today's modern world is no longer a privilege or being geeky, it has surely become a necessity. From Facebook to LinkedIn or Steam many services today require you to have an account in order to use them, and in order to create an account, you need working eMail. That being said many people today have several eMail accounts, one for social media, one for work, maybe even one for very close friends and family. How creating eMail today is completely free we might end up with several eMail accounts. eMail clients have also evolved much since their first days and became more than just applications for receiving eMails, today they can take various different tasks having additional features built into them like calendar, batch eMail processing, etc. Taking all of said into account I am presenting to you within my personal opinion some of the best eMail clients starting with free ones.

Best free eMail clients

Google Gmail

https://gmail.com gmail eMail client
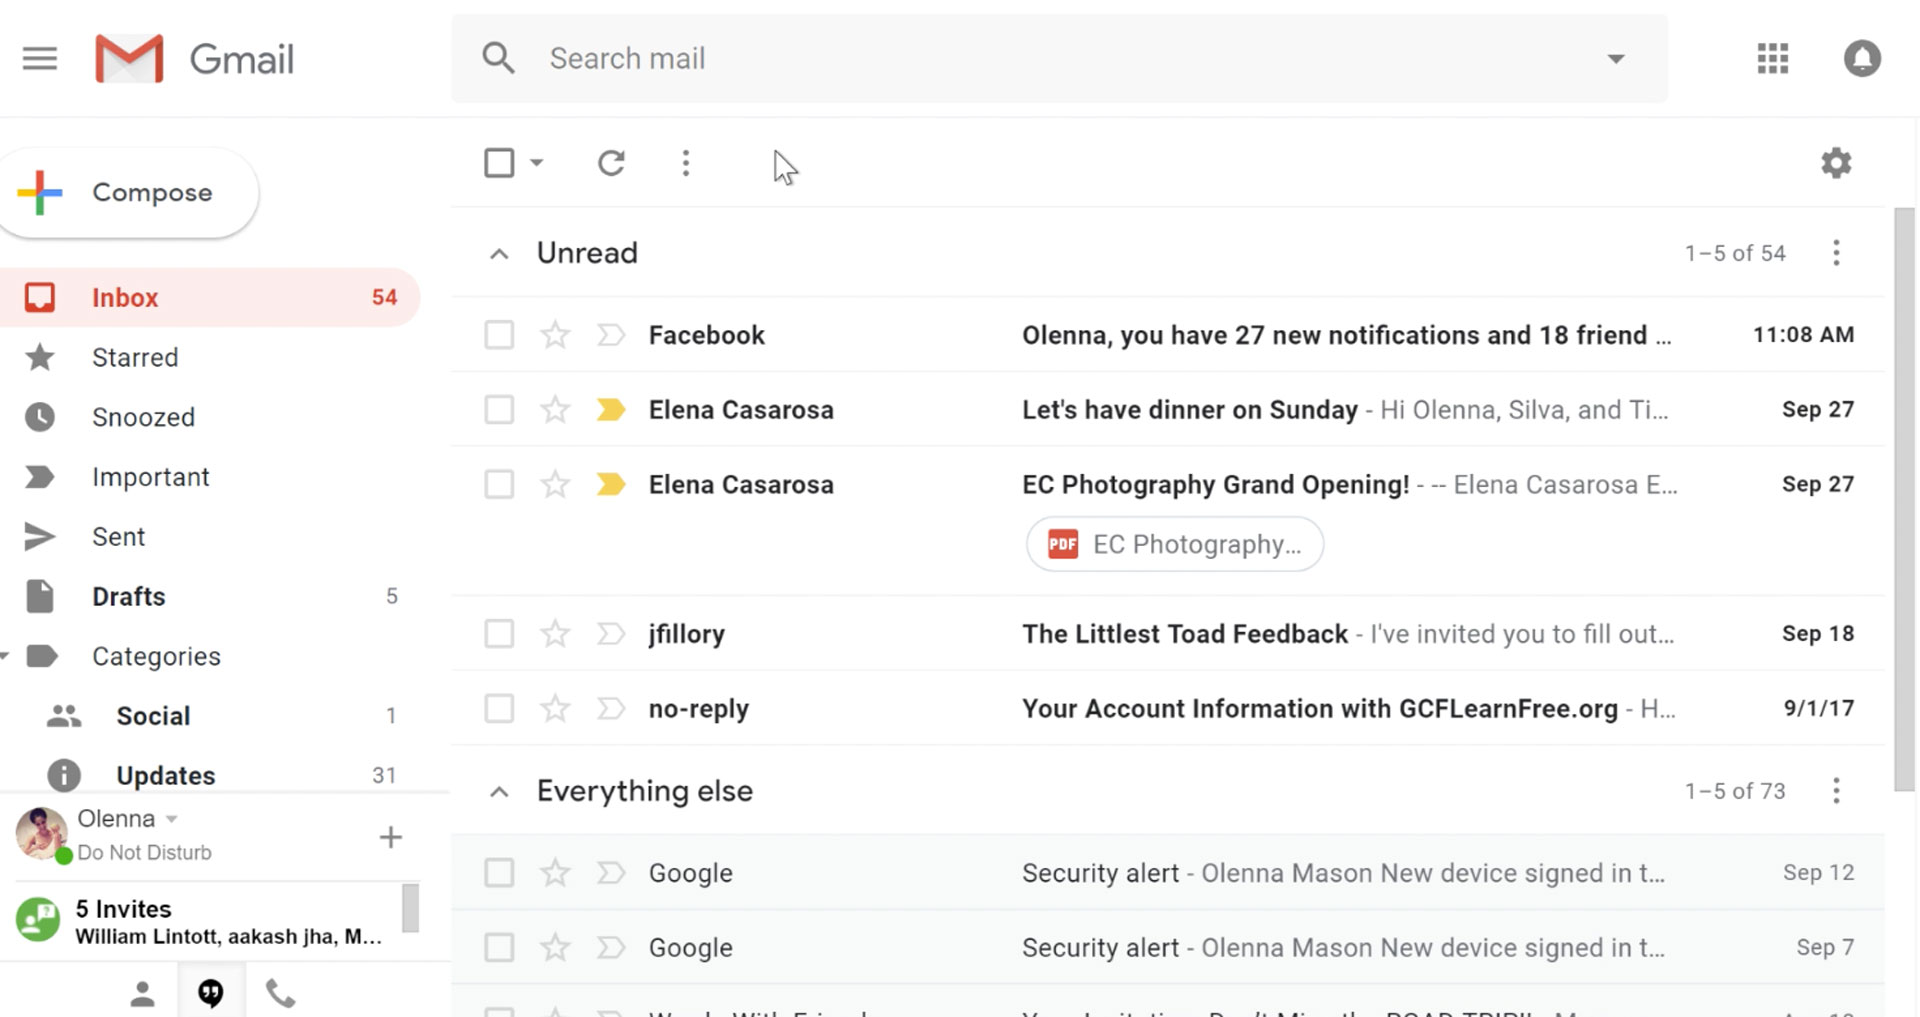
It would be very difficult to even start a free eMail list without mentioning Google's Gmail. Introduced all the way back in 2004 as an invite-only service it became over time the most popular email platform largely due to the fact Google is offering free eMail accounts. There are a lot of good things to be said about Gmail itself, most of the area is clutter-free and the largest space is reserved for eMail itself letting users focus on what is important. WEB client itself means that you do not need to have any application installed on your device, altho via Google chrome, you can use Gmail offline offering you flexibility if needed. The ability to connect and manage other accounts like Outlook, Yahoo, etc is just making Gmail even more attractive, and the snooze feature is a really neat little detail that will pause eMail notifications if you need to focus on other things. Lack of organizing messages into folders is a little confusing since Gmail offers its own unique label system but sometimes I need to have old reliable save eMail to folder. All in all, Gmail is a great service and it offers a great eMail on the go experience.

Mail eMail client

https://www.microsoft.com/en-us/p/mail-and-calendar/ mail eMail app
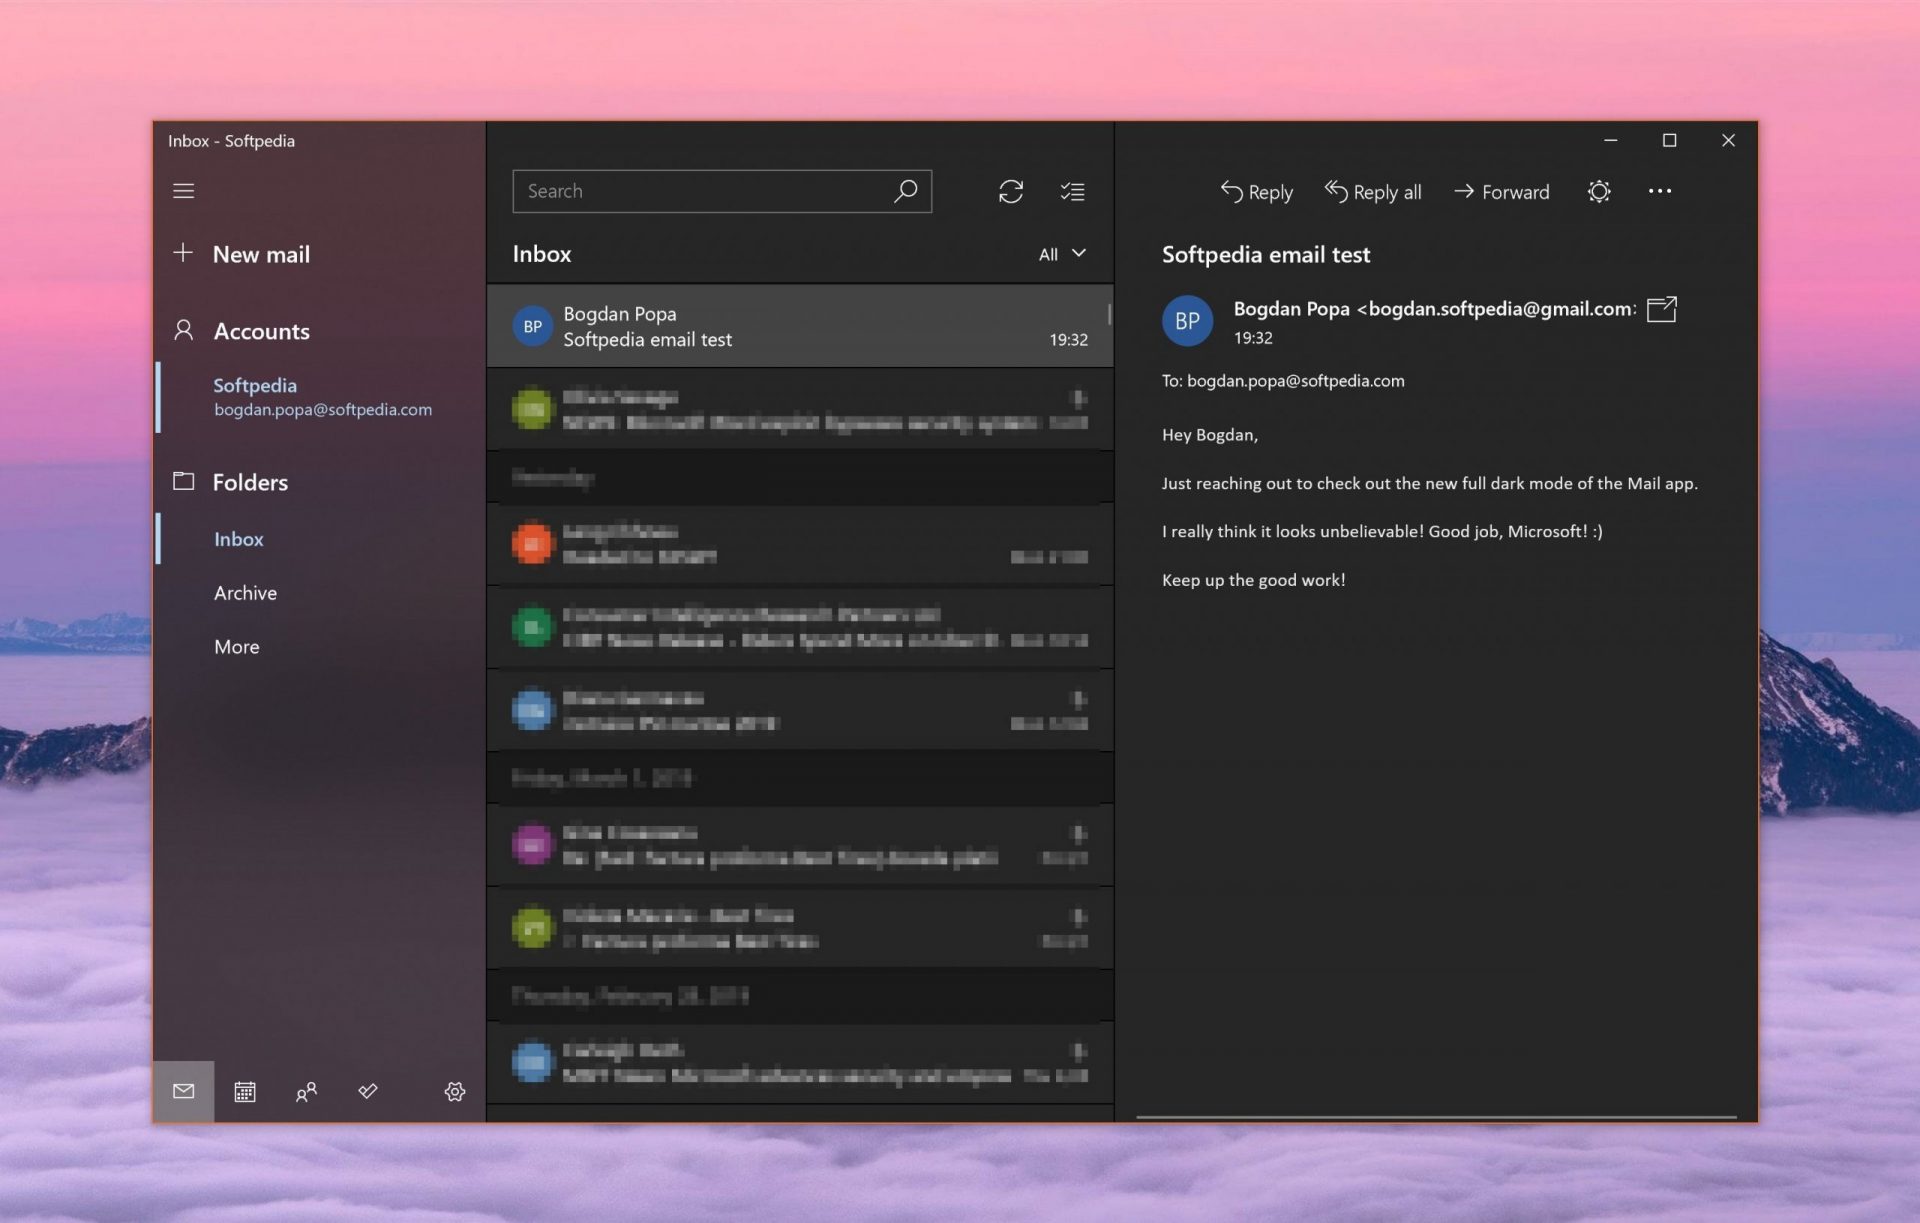
Free Windows eMail client simply called Mail is what was once outlook express. Mail itself has the ability to work with other popular accounts like Google Gmail account, Yahoo, iCloud etc. How it comes with Windows OS and it integrates very well with Microsoft Calendar, this eMail client is for many the first choice. On the negative side, I might say this is a strip-down version of Outlook which is paid solution so some features are missing if we would compare the two. Overall, a simple and nice eMail client worth your time, especially if you are on the Windows platform.

Mozilla Thunderbird

https://www.thunderbird.net mozilla thunderbird eMailGreat eMail client matching in functions against paid and premium solutions of big tech companies. Fueled with plenty of customization options and reskinning ones this eMail client offers a lot for its free price tag. It is also fueled by Mozilla community focusing on privacy and security. It can work with any mail service and it is lightweight with a clean look, altho the look itself can be heavily customized. The bad side is that client itself relies on email services to provide cloud-based emails, so if you are receiving your email via a service that does not have a cloud-based service in itself all of your received emails will be locked to the computer where you have received them. Also customizing it can be sometimes a little too technical for the average computer user. All in all, Thunderbird is one great eMail client and it would be a shame not to use it because of its technical side, if you need a reliable and secure eMail client on a single machine, look no further than Thunderbird.

Paid eMail clients

Microsoft Outlook

https://www.microsoft.com/en-us/microsoft-365/ microsoft outlook
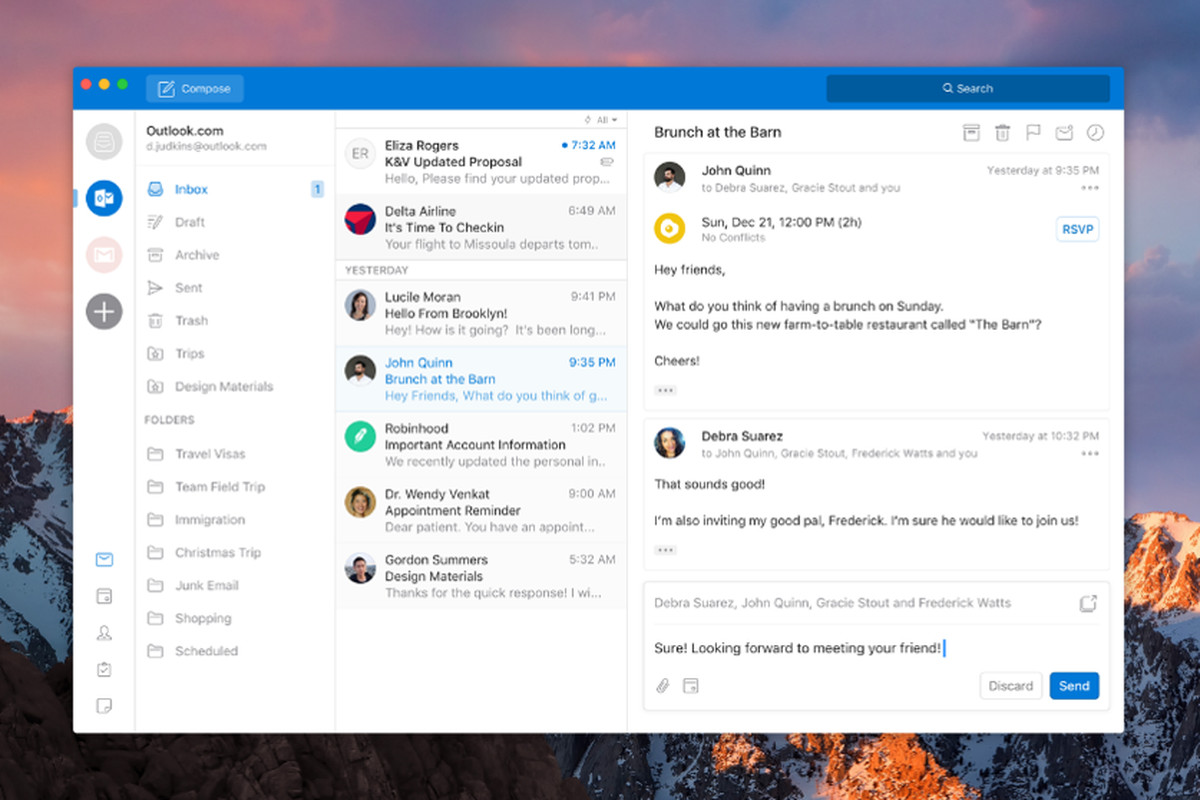
Outlook comes as a part of the Microsoft Office suite and as one of the oldest eMail clients, it is still widely popular and adopted through many users and businesses. It has tight integration with all Microsoft services and full integration with Calendar making it one of the if not the best eMail client out there. Outlook also has a free online service completely free for personal use as well. The downside is that you can not get it as a separate product if you want a business version other than as a part of the Office suite. The final verdict would be that this is perhaps the best eMail client out but the big downside is that there is no desktop version outside the Office suite.

eM Client

https://www.emclient.com/ em client
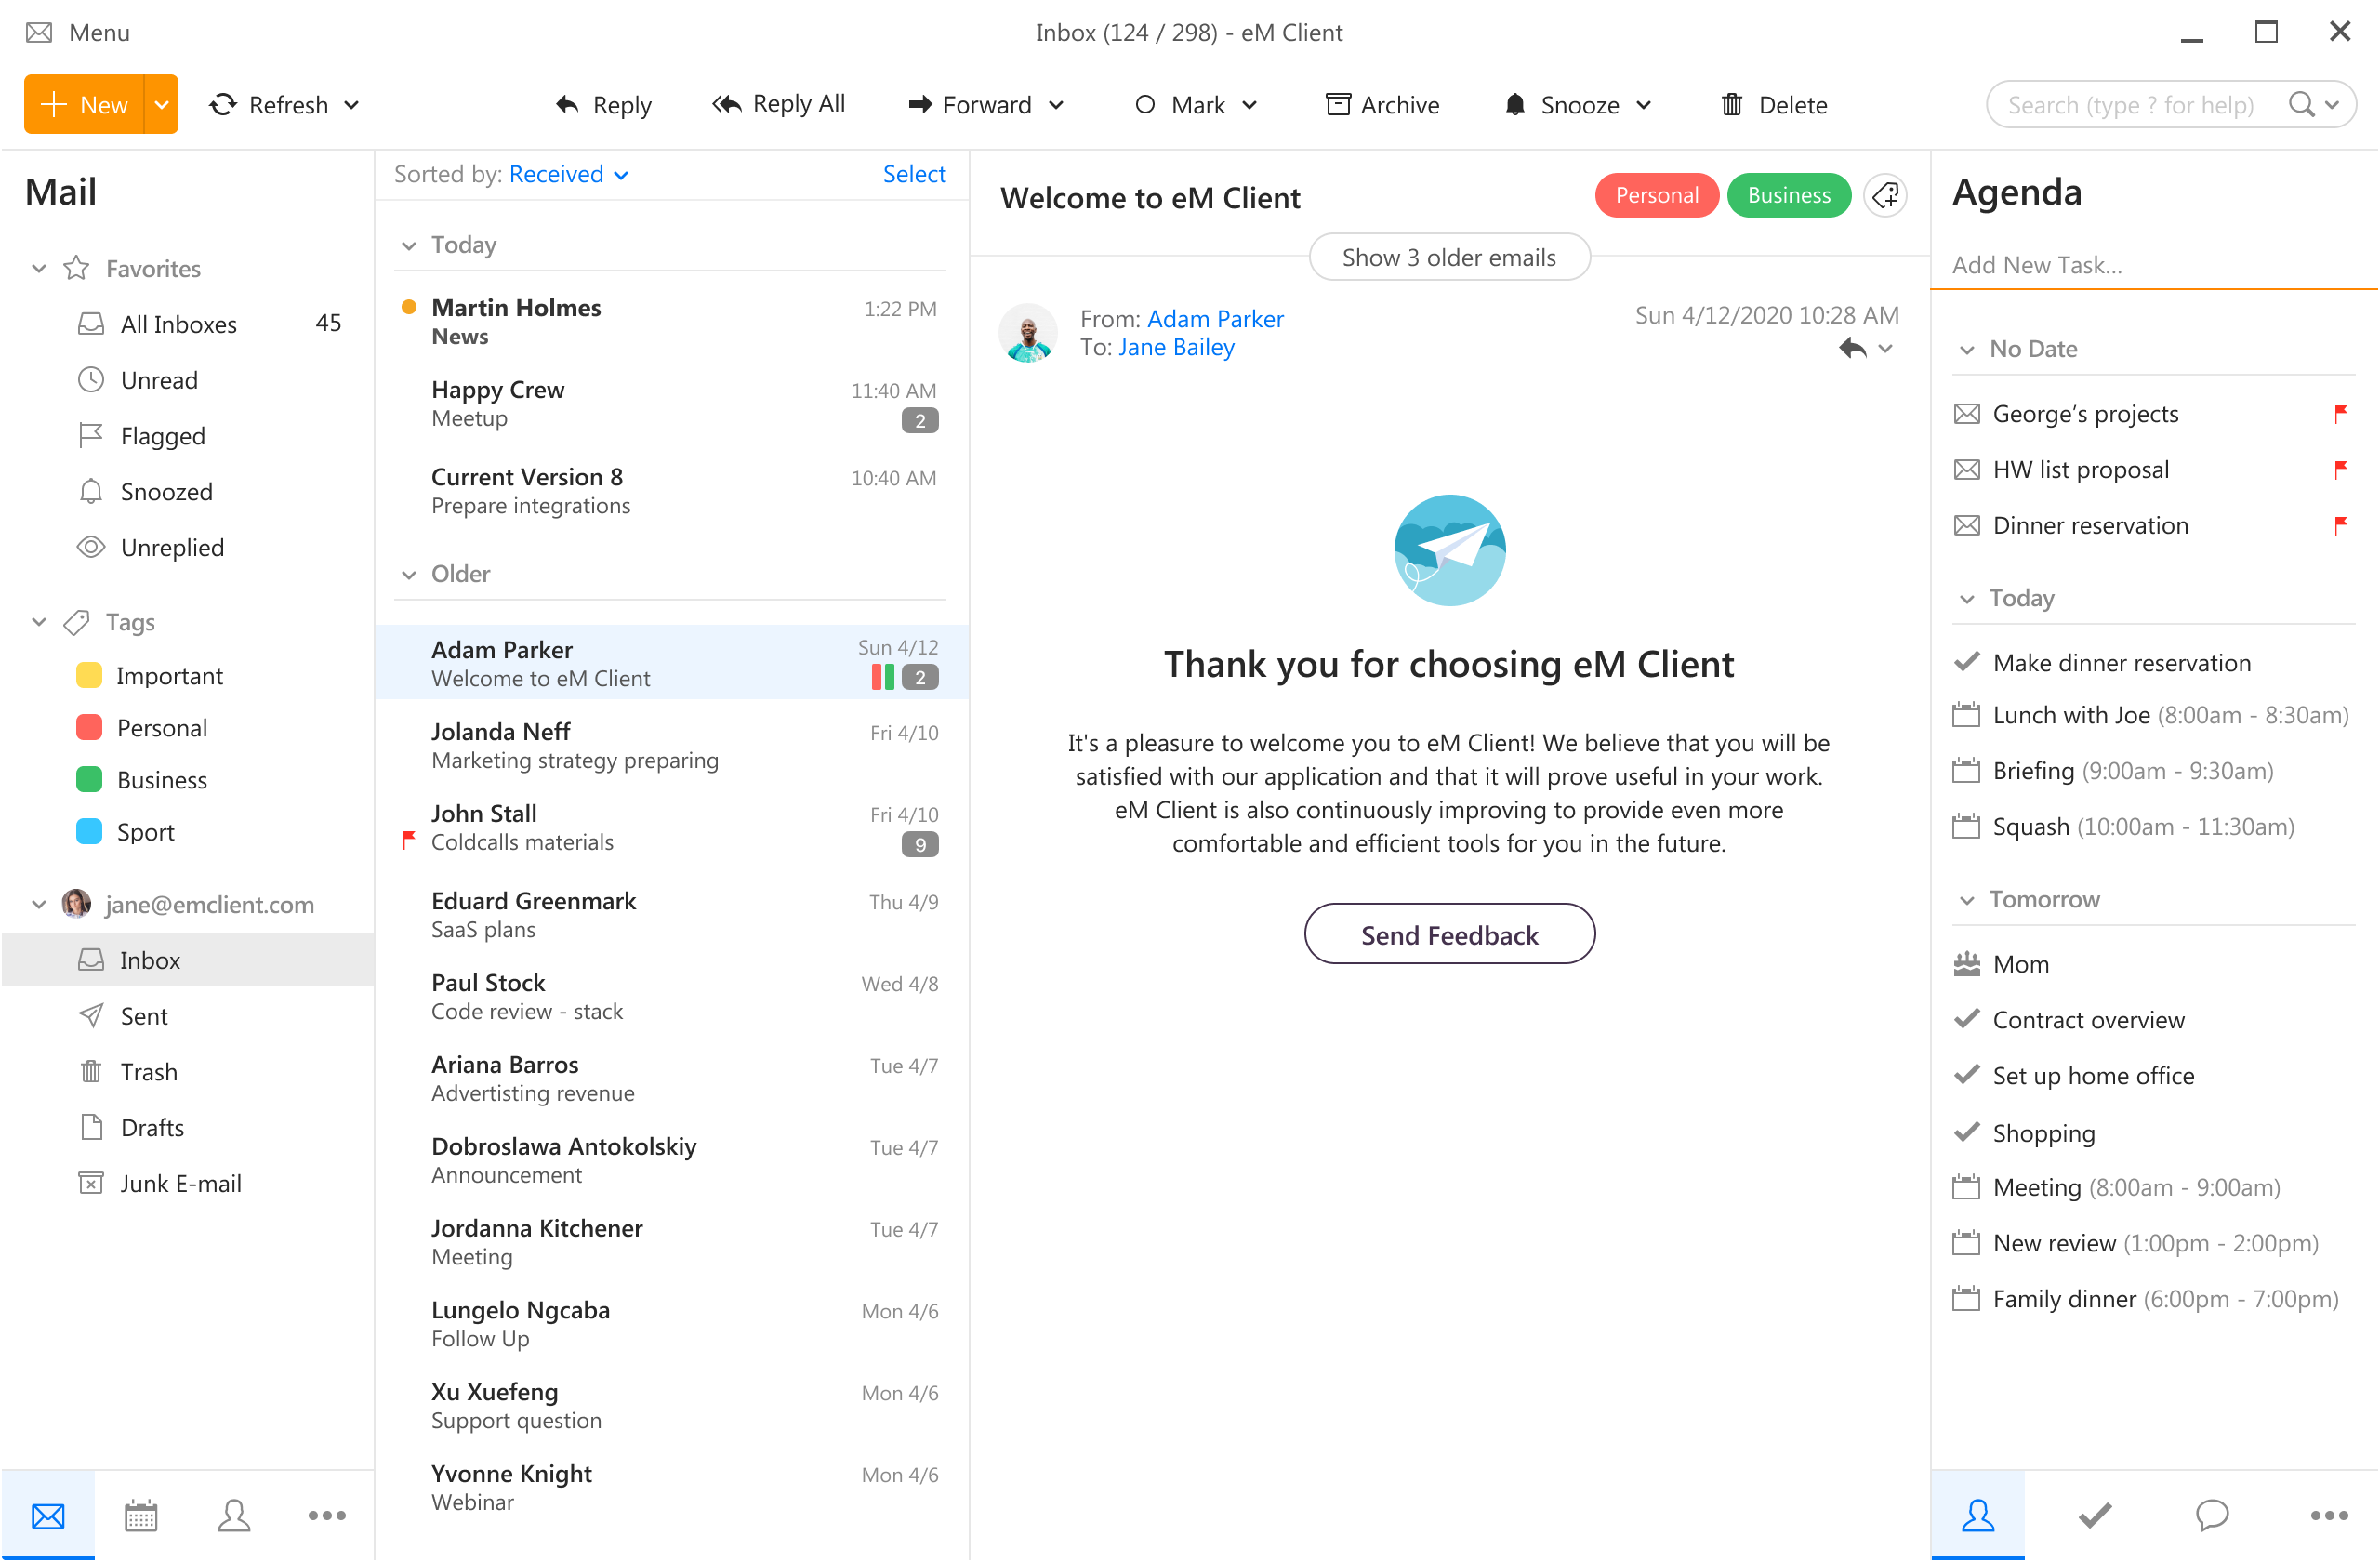
eM Client offers a wide array of features, including a calendar, contacts, and chat. Support is provided for all the major email services including Gmail, Yahoo, iCloud, and Outlook.com. The latest version also offers PGP encryption, live backup, basic image editing capabilities, and auto-replies for Gmail. Its automatic system makes it very easy to get emails from other services since there is no manual setting, all that is needed is to type in your email and eM Client will do everything else automatically. A one-time purchase is not pricy and it could offer some features that some free clients are missing. Go check it out with a free trial and see if it is for you.

Mailbird

https://www.getmailbird.com mailbirdThis eMail client's main focus is the simplicity of use with visual appeal while tackling multiple eMail accounts. It has many built-in apps along with a customizable interface. Unlike some more Microsoft-centric email clients, Mailbird Business supports a diverse range of integrated apps, including WhatsApp, Google Docs, Google Calendar, Facebook, Twitter, Dropbox, and Slack, all making for a better-streamlined workflow. The downside of this client is the yearly subscription plan. I think people, in general, want to get away from software subscription plans so I will include this as a downside but bear in mind it is downside just in terms of a business plan not in the client itself.

Inky

https://www.inky.com/ inky eMail client
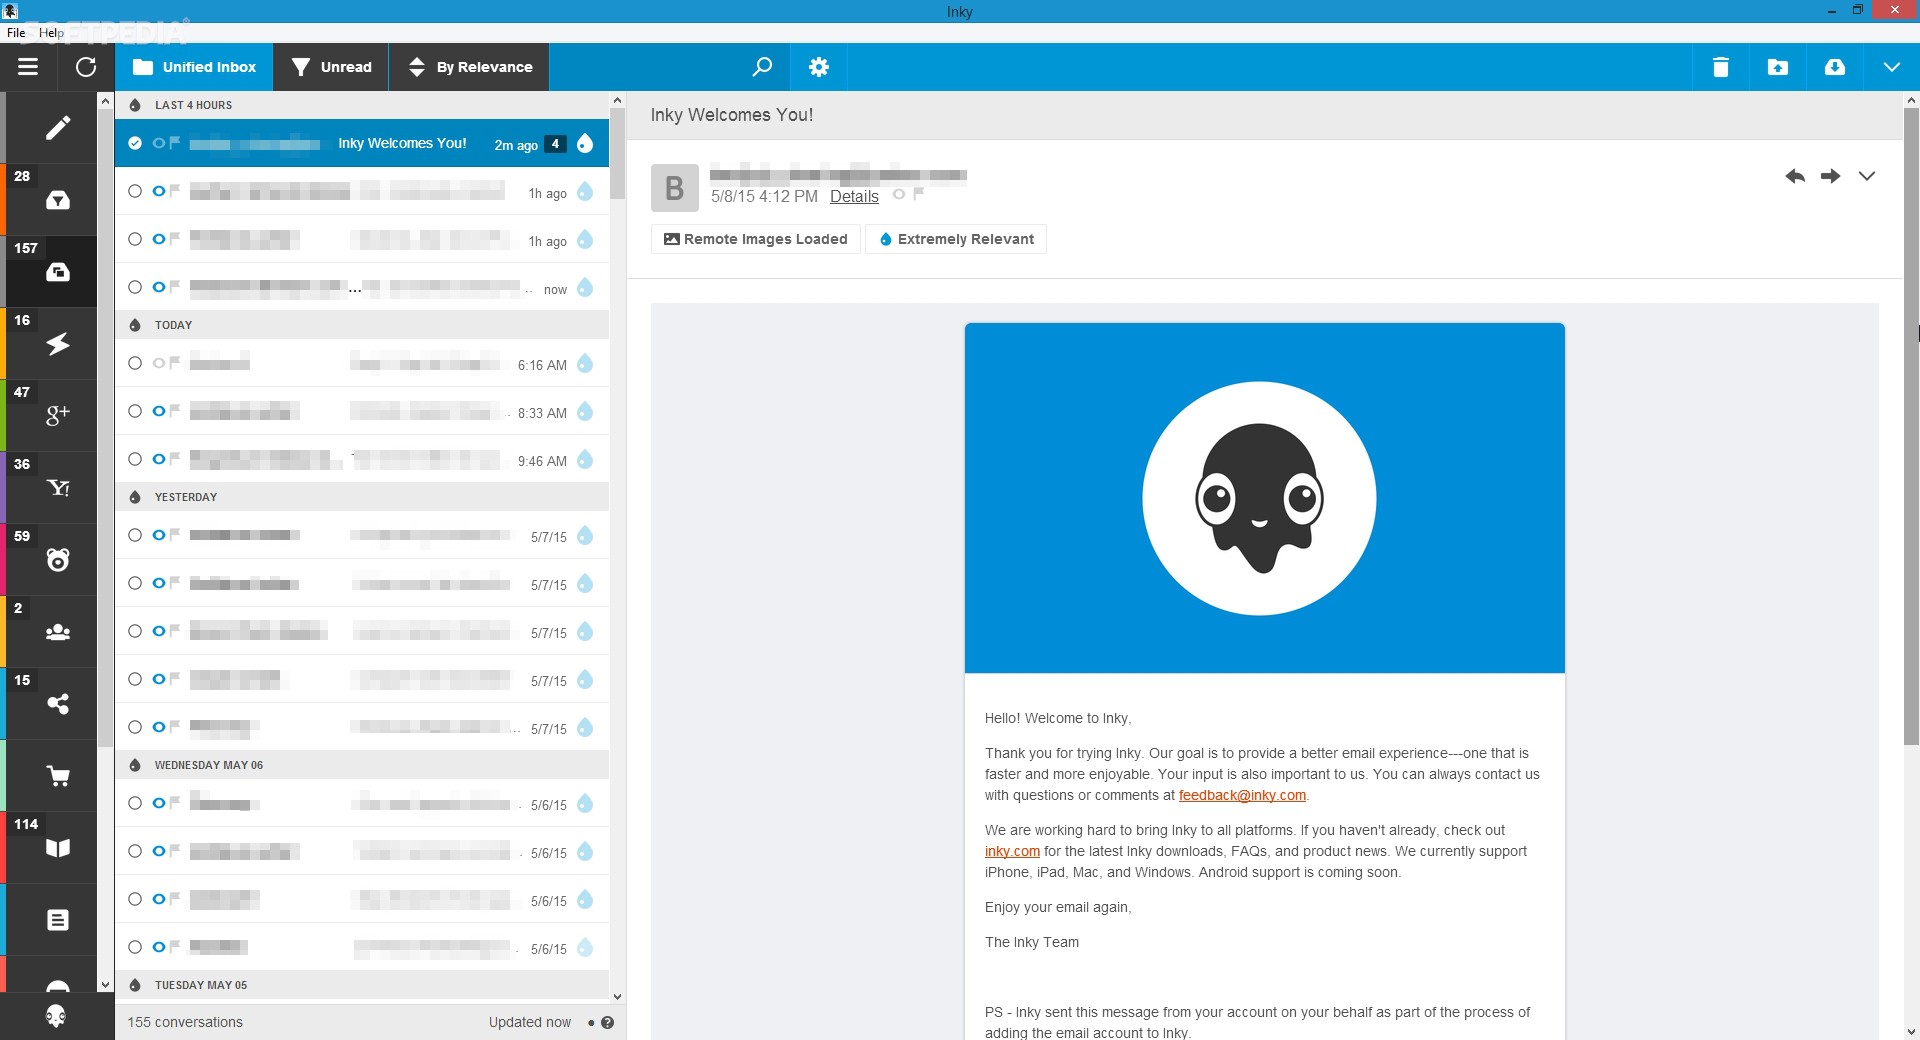
Inky is eMail client if you are looking for security. It uses AI along with machine learning in order to block all types of phishing attacks that can get through to other clients. The proprietary machine learning technology can literally read an email to determine if it has phishing content, and then is able to quarantine the email or deliver it with the malicious links disabled. It also takes things a step further and offers an analytics dashboard, which allows an administrator to see patterns of attacks based on dates, or targeted users. The downside is that client itself is so much focused on security that sometimes some nonsecurity features get overlooked and provide a poor experience but if you need a good and greatly secured eMail client Inky is one to check out.
Read More
Fix Update components must be repaired
Recently, a lot of users reported having an issue with Windows Update. According to these users, they got an error message saying, “Windows Update components must be repaired” after they run the Windows Update troubleshooter. So if you are also facing this issue then you’ve come to the right place as this post will guide you in fixing this problem. There are various suggestions you can check out to fix this problem – you can try running the Windows Update troubleshooter again but this time, in a Clean Boot State or you could also run System File Checker or the DISM tool to repair corrupted Windows Update files or reset the Windows Update components. For more information, refer to the given options below.

Option 1 – Run the Windows Update troubleshooter in a Clean Boot State

Repairing the “Windows Update components must be repaired” error is not that complicated. One of the things you can try is to run the Windows Update troubleshooter again but this time, in a Clean Boot State. Refer to the steps below to get started.
  • Log onto your PC as an administrator.
  • Type in MSConfig in the Start Search to open the System Configuration utility.
  • From there, go to the General tab and click “Selective startup”.
  • Clear the “Load Startup items” check box and make sure that the “Load System Services” and “Use Original boot configuration” options are checked.
  • Next, click the Services tab and select the “Hide All Microsoft Services” check box.
  • Click Disable all.
  • Click on Apply/OK and restart your PC. (This will put your PC into a Clean Boot State. And configure Windows to use the usual startup, just simply undo the changes.)
  • Now try to run the Windows Update troubleshooter again and see if the error is fixed or not.

Option 2 – Try to run System File Checker

If the Windows Update troubleshooter still failed to fix the problem, you can run System File Checker instead. It is a built-in command utility that helps in restoring corrupted files as well as missing files. It replaces bad and corrupted system files with good system files. To run the SFC command, follow the steps given below.
  • Tap Win + R to launch Run.
  • Type in cmd in the field and tap Enter.
  • After opening Command Prompt, type in sfc /scannow
The command will start a system scan which will take a few whiles before it finishes. Once it’s done, you could get the following results:
  1. Windows Resource Protection did not find any integrity violations.
  2. Windows Resource Protection found corrupt files and successfully repaired them.
  3. Windows Resource Protection found corrupt files but was unable to fix some of them.

Option 3 – Run the DISM tool

Running the DISM Tool helps in repairing the Windows System Image as well as the Windows Component Store in Windows 10. Using this built-in tool, you have various options such as the “/ScanHealth”, “/CheckHealth”, and “/RestoreHealth”.
  • Open the Command Prompt with admin privileges.
  • Then type in the following commands and make sure to hit Enter right after you type each one of them:
    • Dism /Online /Cleanup-Image /CheckHealth
    • Dism /Online /Cleanup-Image /ScanHealth
    • exe /Online /Cleanup-image /Restorehealth
  • Do not close the window if the process takes a while as it will probably take a few minutes to finish.
Note: If it happens that the Windows Update client is broken, you need to run the following command to repair it then restart your PC and click on Update once again.
DISM.exe /Online /Cleanup-Image /RestoreHealth /Source:C:RepairSourceWindows /LimitAccess

Option 4 – Delete the contents in the Software Distribution folder and Catroot2 folder

You can also delete the contents in both the Software Distribution and Catroot2 folders as it could potentially fix the “Windows Update components must be repaired” error.
  • Open the WinX Menu.
  • From there, open Command Prompt as admin.
  • Then type in the following command – don’t forget to hit Enter right after typing each one of them.
net stop wuauserv net start cryptSvc net start bits net start msiserver
  • After entering these commands, it will stop the Windows Update Service, Background Intelligent Transfer Service (BITS), Cryptographic, and the MSI Installer
  • Next, go to the C:/Windows/SoftwareDistribution folder and get rid of all the folders and files thereby tapping the Ctrl + A keys to select them all and then click on Delete. Note that if the files are in use, you won’t be able to delete them.
After resetting the SoftwareDistribution folder, you need to reset the Catroot2 folder to restart the services you just stopped. To do that, follow these steps:
  • Type each one of the following commands.
net start wuauserv net start cryptSvc net start bits net start msiserver
  • After that, exit Command Prompt and restart your computer, and then try to run Windows Update once more.
Read More
Mobile Hotspot does not show up or detected
As you know, the Mobile Hotspot feature is used to share the internet connection with other devices using Wi-Fi signals. These Wi-Fi signals are later caught by other devices using their Wi-Fi and then the internet connection is shared once they are connected. However, recently, some users reported that their devices weren’t able to see the Wi-Fi network even if their Wi-Fi is on. This kind of problem could be caused by several factors but one of the main ones include the frequency at which the Wi-Fi network is being broadcasted. If you are one of the users who are currently facing this problem, read on as this post will guide you on what you can do if the Mobile Hotspot or Wi-Fi connection does not show up or is not detected on your Windows 10 device. In most cases, there are only two frequencies at which a Wi-Fi network is broadcasted. They are broadcasted either at 2.4 GHz and 5 GHz. The ones that are broadcasted at 5 GHz need specific hardware since it is a newer technology compared to the ones at 2.4 GHz. There are several other pieces of equipment as well as electrical appliances that operate at 2.4 GHz that includes microwaves as well which causes disruption in the signal strength of the Wi-Fi network. Moreover, aside from signal interruption, this issue with the mobile hotspot might also have something to do with the network-related drivers in your computer. Thus, to fix the problem, here are some suggestions you should follow.

Option 1 – Try toggling the Network band or the frequency at which the Wi-Fi network is broadcasted

  • First, open the Windows 10 Settings app and then navigate to Network & Internet > Mobile hotspot.
  • From there, click on the Edit button located under the Network name, Network password, and Network band.
  • After that, set the Network band to be at 2.4 GHz and then click on the Save button.
  • Once done, restart the Mobile hotspot in your Windows 10 device as well as the Wi-Fi connection of the device that’s trying to connect to the hotspot.

Option 2 – Try running the Network Adapter Troubleshooter

If the first option didn’t work, you might also want to run the Network Adapter Troubleshooter. You can use it to troubleshoot the problem with the Mobile hotspot, to run it, follow these steps:
  • Open the Search bar on your computer and type in “troubleshoot” to open the Troubleshoot settings.
  • Next, scroll down and select the “Network Adapter” option from the right pane.
  • Then click on the Run Troubleshooter” button.
  • After that, your computer will check for any possible errors and will pinpoint the root cause of the problem if possible.

Option 3 – Try updating the Network adapter driver

As mentioned, the problem could also be due to the network-related drivers. So it probably might be the reason why you’re mobile hotspot did not appear or was not detected. That’s why it is recommended that you update the Network adapter driver and to do it, refer to these instructions: Follow the steps below to update your Network Adapter Driver:
  • Tap the Win + R keys to launch the Run window and then type in the “MSC” command and hit Enter to open the Device Manager window.
  • From there, expand the list of all the network drives and update each one of them.
  • Restart your PC and see if it helped in fixing the issue with the mobile hotspot.
Note: If updating the network drivers didn’t help in fixing the problem, you can also try to uninstall the very same drivers and restart your Windows 10 PC. After that, the system itself will reinstall the drivers you just uninstalled. Alternatively, you can also download and install the drivers from the manufacturer’s website directly.
Read More
Screen of death colors in Windows 10
Receiving a screen of death is not a pleasant experience at all and most users would agree that they would very much like not to face one during their work with the computer. Sadly PC is not a perfect machine and it is not working in a perfect environment so errors happen. The most famous and well-known death screen is blue which is also the most common one, my bet would be that there is not a user which has not been faced with this blue error screen. There is no simple explanation why these stop errors occur as several factors can be involved. However, it is known that the malfunctioning of hardware drivers or drivers that are installed by third-party software drive this unwanted change. But did you know that there is more colors for infamous death screens and not just blue one? Microsoft has coded different errors to different colors in the goal for the technical team to be aware right away of what type and kind of error they are dealing with. Color for screen errors are: Blue, Black, Pink, Brown, Yellow, Red, Orange, Green and White If you are interested in what color represents what keep reading.

BLUE

blue screen of deathA stop error or exception error commonly called the blue screen of death (BSoD) or blue screen, is an error screen displayed on Windows computers following a fatal system error. It indicates a system crash, in which the operating system has reached a condition where it can no longer operate safely. This is caused by many different problems, such as a general hardware failure or a crucial process terminating unexpectedly.

BLACK

black screen of deathOn Windows 10 systems, a Black Screen of Death can be caused by an unfinished Windows Update. To resolve this problem, simply hold the power button down on your PC or laptop to switch off the computer. A cold start should result in the system booting properly.

PINK

pink screen of deathIt is a diagnostic screen with a white type on a pink background. Pink Screen is mainly seen when the VMkernel of an ESX/ESXi host experiences a critical error, becomes inoperative, and terminates any virtual machines that are running. It is not fatal and generally considered more of a developer testing issue. When encountered, it can be fixed quickly by following the simple action of pressing and holding your computer’s power button to shut down the device.

BROWN

brown screen of deathThe Microsoft Windows 10 Operating System Brown Screen of Death is an on-screen fatal error notification with bug check codes which is seen when a computer crashes due to graphics hardware or software-related problems (failing graphics drivers).

YELLOW

yellow screen of deathIt affects the functioning of a browser, particularly Mozilla Firefox. The Yellow Screen of Death makes the appearance with a weird buzzing sound in the background when the XML parser refuses to process an XML document causing a parsing error and a weird buzzing sound. The issue persists unless the computer is manually rebooted.

RED

red screen of deathCommonly the Windows 10 red screen is caused due to the hardware error, particularly if you overclock your Windows PC/laptop. Despite this, sometimes the red screen of death is also caused by outdated or incompatible drivers or due to BIOS issues.

ORANGE

orange screen of deathThe Orange Screen of Death on Windows occurs due to fatal hardware errors. Multiple reasons have been reported for the Orange Screen of Death. Some had this issue when watching a YouTube video, some were not able to boot into Windows. It can even occur when waking up from Sleep.

GREEN

green screen of deathThe green screen of death only appears when you're running an Insider Preview version of Windows 10. It's the same as the blue screen of death, and it will show the same error messages. ... If you see a green screen of death (GSOD) on your PC, that's a sign you're using an Insider Preview build of Windows 10.

WHITE

white screen of deathThe White Screen on Windows is also an error where the screen of the computer just turns white and freezes. There can be several things that can cause the white screen to appear on the Windows laptop monitor. But the main issue could be because of malfunctioning of the graphics hardware.
Read More
Surefire Methods of Fixing Error Code 47

Repair Error Code 47

Error Code 47 – What is it?

It is a device driver error that users encounter when they use Windows 2000 operating system and its later versions.

The error occurs when the connected peripheral device, upon removal using the ‘Safe Removal Hardware’ program, hangs up a problem within the process. The error prompt you then see is referred to within the operating system as error code 47.

It usually pops up on your computer screen with the following message:

Windows cannot use this hardware device because it has been prepared for "safe removal", but it has not been removed from the computer. (Code 47)

Solution

driverfix boxError Causes

There are many factors responsible for the Error Code, the primary ones are listed below:

  • An incomplete program installation
  • An incomplete program uninstallation
  • System recovery from viruses
  • Corrupted Windows system registry entries

Further Information and Manual Repair

Error Code 47, like other device driver error codes, is relatively easy to solve. You can fix the error code in the following ways:

Method 1 – Reconnect the device to your computer

Unplugging and plugging the USB cable of the device into the computer is the easiest way to resolve the error.

Doing this will help refresh the system and increase the likelihood of the device driver files loading and function properly.

Method 2 – Restart your PC

Another simple method you can use to solve your PC error code is to simply restart your Windows system.

It may be that the error prompted upon connecting the device you have connected is merely a temporary problem, and upon restart, will resume functioning smoothly.

Method 3 – Manually uninstall then reinstall the device driver

If both of the above-listed methods fail to resolve the problem, you may have to resort to manually uninstalling and then reinstalling the device driver causing the problem.

This would be necessary since the remaining incomplete files due to a partial removal or installation of programs is what contributes to the error code. By uninstall and reinstalling the device driver program, it would lead to the completion of the files.

You can do this by firstly logging in as Administrator and open Device Manager. Select the device that is causing the problem and double click it and make sure that the peripheral is connected properly to the PC.

Upon opening, click on the ‘Driver’ tab and then select ‘Update Driver’. Make sure to refer to the system documentation that you received with your PC or computer to check for the motherboard details and driver specifics.

Method 4 – Use software to automatically download the driver

Manually uninstalling and reinstalling the driver will usually do the trick; however, it may be time-consuming especially when you would have to resort to your hardware user manual.

Therefore, using a program such as DriverFIX can save you a lot of time and frustration in having your device work properly on your computer.

DriverFIX, with its user-friendly approach to help you fix your PC issues, comes with an integrated database that detects which drivers you need to reconfigure within just a few seconds and downloads it automatically. It further ensures that your drivers are installed in their entirety leaving no room for any incomplete files to remain that create Error Code 47. It also has the added advantage of being able to backup and restores your files should there be the slightest possibility of system file damage. Thus, registry damage can be averted by letting the software roll back the system files to an earlier healthy checkpoint. DriverFIX is the answer to fixing your PC error codes accurately and quickly. Click here to download DriverFIX to fix Error Code 47 quickly and effectively!
Read More
Windows 10 tips and tricks for easy work
Hello everyone and welcome to our new Windows 10 tips and tricks article. Today we will be focusing on small Windows tricks that could prove very useful in everyday workflow and hopefully make your life easier by implementing them in your daily routine. I am very excited to share this with you all and I hope that you will use them from now on. That being said let us begin.

Tip 1: Minimize all open windows except one.

Daily to the daily routine can involve many opened windows on a desktop and sometimes things can get messy, if you want to minimize all windows to the taskbar except one do this: Click on one window thus selecting him, click and hold the left mouse button on that windows title bar, now shake it up and down and all other windows will escape down to taskbar leaving only one you are shaking on the desktop.

Tip 2: Open the Secret Windows menu.

Through our tutorials on various errors and fixes, we have used this method already but here it is again since it is worth mentioning. If you want to open the command prompt easy and fast, or device manager, event viewer, shut down, etc. In order to open this secret menu all you need to do is press ⊞ WINDOWS + X.

Tip 3: Create an Event without opening the calendar application.

You can easily create an event without opening a calendar application, all you have to do is left-click on the clock in the taskbar, click once on a date for the event, and under calendar in event field type event description. The event will show in the calendar application like it was entered there.

Tip 4: Taking a screenshot.

This one is my favorite and it speeds up workflow very very much. Typically you take screenshots by pressing the PrntScr button on your keyboard. Now, the problem with this approach is that the screen is placed in computer memory, in the clipboard and you will need another picture processing application in order to save it. Now if you would press ⊞ WINDOWS + PrntScr, the picture would be automatically saved in your pictures/screenshots folder. And if that is not enough, you can press ⊞ WINDOWS + S + SHIFT to start Snip & Sketch tool and select the area which you would like to screen capture, this method will also place pictures in the clipboard.

Tip 5: Open pinned applications in your taskbar with your keyboard.

We have covered this one in our Windows keyboard shortcuts tips and tricks here, but if you missed that article here is the tip again. By pressing ⊞ WINDOWS + number 1,2,3...0 you will start the application from your taskbar counted from left to right.

Tip 6: Check how much Hard drive space installed applications are taking.

Applications and temporary files grow over time and can slow the system and cause some other unpleasant experiences. Go to Settings > System > Storage, click on the Hard drive on which you have installed applications, and see how much each one is taking, you can remove it from this screen also freeing some space.

Tip 7: Remove ads from the START menu.

Windows has so-called suggestions in the START menu, no matter how Microsoft is calling them, let's face it, they are ads and in my opinion, they do not belong in my START menu. To turn them off, go to Settings > Personalization > Start. Toggle the setting called Show suggestions occasionally in Start to the off position.

Tip 8: Shut down background applications.

Some applications are running in the back and are taking system resources and can send telemetry information, if you want to turn them all off go to Settings > Privacy > Background apps. To stop all apps from running in the background, toggle Let apps run in the background to off. You can choose which apps to run in the background individually by going down the list on the same page.

Tip 9: Use Background scrolling.

Did you know that you can scroll on inactive windows? To do this, just hover over the inactive background window and roll your mouse when the content of the window should be scrolling even if it's not one you are working on. If by any chance this is not happening, go to Settings > Devices > Mouse, and toggle Scroll inactive windows when I hover over them to On.

Tip 10: Show file extensions in File Explorer.

By default extensions of files are hidden, so let's say that for example, you are in a folder with pictures, you have plenty of pictures there but you do not know are they JPG or JPEG for example, do not worry there is an easy fix to bring showing extensions back. Start File Explorer, click on view top menu item, click on options, Uncheck the box that says Hide extensions for known file types. Click Apply, and OK.

Tip 11: Use focus assist.

Set it up by going to Settings > System > Focus assist. Choose from three options: Off (get all notifications from your apps and contacts), Priority (see only selected notifications from a priority list that you customize, and send the rest to your action center), and Alarms only (hide all notifications, except for alarms). You can also choose to automatically turn this feature on during certain hours, or when you're playing a game.

Tip 12: Rotate your screen.

If you have multiple screens set up or you have the rotatable screen press and hold CTRL + ALT together, then use a directional arrow to flip the screen. The right and left arrows turn the screen 90 degrees, while the down arrow will flip it upside down. Use the up arrow to bring the screen back to its normal position.

Tip 13: Enable GOD mode.

Have you always felt limited with Windows settings? Don't be, Right-click on the desktop and select New > Folder. Re-name the new folder with this bit of code: GodMode.{ED7BA470-8E54-465E-825C-99712043E01C} To enter the "God Mode" window, double-click the folder.

Tip 14: Use Virtual Desktops.

Click on Task View (the icon next to the search box). This will separate all your open windows and apps into icons. You can then drag any of them over to where it says "New desktop," which creates a new virtual desktop. Once you click out of Task View, you can toggle between virtual desktops by pressing the ⊞ WINDOWS + CTRL + right/left arrows. To remove the virtual desktops, just go back into task view and delete the individual virtual desktops, this will not close out the apps contained within that desktop, but rather just send them to the next lower desktop.

Tip 15: Customize the command prompt.

Yes, you can customize the command prompt, in order to do so, open it and right-click on its title bar, choose properties and go wild. Special badge if you make it look like commodore 64 BASIC.

Tip 16: Dictate, not type.

If you have speech recognition ON, pressing ⊞ WINDOWS + H will bring up a voice recorder, just speak and see how you can easily "write" emails, etc.

Tip 17: Use sandbox.

In Windows you have a sandbox option, which will open another Windows instance inside Windows, what do you need this? Well once the sandbox is closed everything in it is closed and if you catch the virus or other dangerous software, closing the sandbox will destroy it not affecting your actual Windows. Use it for safety testing and enjoy an easy life. Enable Windows Sandbox inside the Control Panel.

Tip 18: Use a hidden game bar.

Press the ⊞ WINDOWS + G, you can pull up the new-and-improved Game Bar. This lets you switch your Windows PC into gaming mode, which pools system resources to the game, turns off notifications, and lets you record and broadcast your gaming, along with added panels for controlling your audio, monitoring FPS, and tracking achievements. And that's it, Our 18 tips and trick to make your Windows 10 life easier, more productive, and overall more enjoyable. I certainly hope you have enjoyed reading this article same as I was writing it. Until next time if I do not see you, good afternoon, good evening, and good night.
Read More
How to Fix Error Code 0xc004f210 in Windows 8

Error Code 0xc004f210 – What is it?

Error code 0xc004f210 occurs when Windows 8 users fail to activate their Windows operating system. Users will be able to identify error code 0xc004f210 because of the following common symptoms which occur:

Solution

Restoro box imageError Causes

If you enter an invalid product key or do not have a digital entitlement for the edition of Windows you are attempting to activate, you may experience error code 0xc004f210. Since this error usually occurs due to these main reasons, you will most likely find success resolving this issue by ensuring you use a valid product key or activate an appropriate edition of Windows based on the edition of your digital entitlement.

Further Information and Manual Repair

Error codes can be resolved through manual repair procedures that seek to fix the underlying issues causing the error. In the case of error code 0xc004f210, you should be able to resolve this error by using the methods below. You may also consider contacting a Windows repair technician if you have difficulty resolving the error code.

Method One: Enter Valid Product Key

To successfully activate your operating system and resolve error code 0xc004f210, you will need to enter a valid product key in the Update & security section of Windows. Follow the instructions below to enter the product key.

  • Step one: Click the Start button then select Settings
  • Step two: Select Update & security then Activation
  • Step three: Click the Change product key
  • Step four: Enter a valid product key

If the issue causing error code 0xc004f210 is related to the use of an invalid product key, you should be able to successfully activate your Windows operating system. Should the problem persist, however, you will need to attempt the next manual repair method explained below? Note: Failure to fix this error code might result in other Windows 10 error messages.

Method Two: Ensure Edition of Windows Matches Your Digital Entitlement

Digital entitlement allows Windows users to access activation without using a product key. This digital entitlement only affects Windows 8 users who are attempting to activate versions of Windows 10 that include Windows 10 Pro. Once you are using a genuine copy of Windows 8.1 and your edition of Windows matches your entitlement, you may proceed with the instructions below.

  • Step one: Click the Start button then select Settings
  • Step two: After selecting Settings, click Update & Security
  • Step three: Select Windows Update then the Check for updates tab
  • Step four: Click activate Windows 10 update

You should be able to activate your Windows update once you follow the instructions above. Remember error code 0xc004f210 is an activation code related to product keys or your digital entitlement so once these issues are rectified, you should have no problem activating your operating system of choice and enjoying the benefits it offers. If, however, the problem remains unresolved after you have attempted both manual repair methods, there may be unusual issues affecting your system. Contact Microsoft to rectify the issue or get help from a Windows repair technician.

Method Three: Download an Automated Tool

If you wish to always have at your disposal a utility tool to fix these Windows 8 and other related issues when they do arise, download and install a powerful automated tool.

Read More
Hearthstone lost connection to the game server
Since its release, Hearthstone has changed and innovated how digital card games are played. From its cross-platform matchmaking to interesting random mechanics and making the game free to play from day 1 have paved the road to Hearthstone's success. If you by any chance get lost connection to game server error and find yourself unable to play please stay awhile and listen Keep reading and try provided solutions as they are presented to fix this issue and continue gaming.
Read More
How to Fix Error Code 0x8007232B

How to Fix Error Code 0x8007232B

Error Code 0x8007232B (Code 0x8007232B) – What is it?

Error code 0x8007232B (Code 0x8007232B) is an error that occurs when you attempt to activate Windows Server 2008 or Windows Vista.

Common symptoms include:

  • Attempting to activate Windows 7, Windows 8, or Windows Server 2012 and you receive an error message.
  • The error message says: “Windows could not be activated. Key management services host could not be located in domain name system, please have your system administrator verify that a KMS is published correctly in DNS”
  • The error message says “The directory name, file name, or volume label syntax is incorrect”.

Error Causes

  • Error Code 0x8007232B occurs when you attempt to use media that is volume licensed to install: Windows 8, Windows 7, Windows Vista Enterprise, Windows Vista Business, Windows Server 2012, Windows Server 2008, Windows Server 2008 R2.
  • This error code also occurs when the activation wizard is unable to connect to a Key Management Service host computer.

Further Information and Manual Repair

Error code 0x8007232B can be seen when you are trying to activate windows, on several different operating systems. This problem can usually be easily corrected, but in the event that it can't, please contact a computer repair technician. When you try to install any of the previously mentioned Windows products, they use a generic product key to install the volume-based license software. If you do have a KMS host computer configuration and see these error codes, that means the correct DNS entries are not being seen on the computer. If there is not a KMS host computer setup, you need to do this setup, otherwise switch to a MAK product key method, and activate the volume license installation that way.

Method One:

Using a Multiple Activation Key as opposed to KMS activation

  1. Click the Start icon, click on All Programs, click on Accessories, right-click on Command prompt.
  2. Click on “Run as administrator”. Type in the password or provide confirmation if prompted for administrator password or confirmation.
  3. When asked for the command prompt, enter in the following and then hit the Enter buuton: slmgr -ipk xxxxx-xxxxx-xxxxx-xxxxx-xxxxx  Note: this placeholder represents the MAK product key.

Method Two:

Configure a KMS host server for the clients to activate against.

A KMS host server needs to be configured for the clients to activate against. When there are no KMS host servers configured near you, install and activate a KMS server key. After this, configure a computer on the network to host this KMS software and publish the Domain Name System (DNS) settings.

Method Three:

When the client cannot locate a KMS host on the network for activation:

1. Verify that your computer has the KMS host installed and activated by using a KMS key that is registered in DNS. You will follow these steps to do that:

  1. Click the Start button, click on All Programs, click Accessories, and then right-click on Command Prompt.
  2. Click on Run as Administrator. Type the password or provide confirmation if you are asked for an administrator password or for confirmation.
  3. In the command prompt box, type the following command and press ENTER: nslookup -type=all _vlmcs.tcp>kms.txt
  4. Then open the KMS.txt file generated by this command. The file will contain at least one entry that relays the SRV service location.

2.  A KMS host server registers a DNS SRV record once every 24 hours by default. You should check the registry to see if the KMS host server is registering with the DNS. Follow these steps to do so:

  1. Click on Start, type in regedit, and then press Enter.
  2. Locate HKEY_LOCAL_MACHINESOFTWAREMicrosoftWindowsNTCurrentVersionSL and then click on it.
  3. The KMS server does not register in DNS if the DisableDnsPublishing subkey is existing and has a value of 1. If this subkey is missing altogether, create a DWORD value called the DisableDnsPublishing. If the dynamic registration is suitable, the subkey value should be changed to 0. Right-click DisableDnsPublishing, click on Modify, enter 0 into the Value data box, and click OK.  
Congratulations, you have just fixed Error Code 0x8007232B in Windows 10 all by yourself. If you would like to read more helpful articles and tips about various software and hardware visit errortools.com daily. Now that’s how you fix Error Code 0x8007232B in Windows 10 on a computer. On the other hand, if your computer is going through some system-related issues that have to get fixed, there is a one-click solution known as Restoro you could check out to resolve them. This program is a useful tool that could repair corrupted registries and optimize your PC’s overall performance. Aside from that, it also cleans out your computer for any junk or corrupted files that help you eliminate any unwanted files from your system. This is basically a solution that’s within your grasp with just a click. It’s easy to use as it is user-friendly. For a complete set of instructions in downloading and using it, refer to the steps below Perform a full system scan using Restoro. To do so, follow the instructions below.
      1. Download and install Restoro from the official site.
      2. Once the installation process is completed, run Restoro to perform a full system scan. restoro application screen
      3. After the scan is completed click the “Start Repair” button. restoro application screen
Read More
1 2 3 162
Logo
Copyright © 2022, ErrorTools. All Rights Reserved
Trademarks: Microsoft Windows logos are registered trademarks of Microsoft. Disclaimer: ErrorTools.com is not affiliated with Microsoft, nor claim direct affiliation.
The information on this page is provided for information purposes only.
DMCA.com Protection Status