How to Fix Error Code 43

The solution to Error Code 43

Code 43 - What is it?

Code 43, Device Manager Error, is reported when Windows doesn’t recognize a hardware device such as the video card, USB, printer, or any other piece of external hardware attached to your PC.

The Device Manager stops the hardware if it reports some kind of unspecified problem. It is mostly displayed in the following format:

“Windows has stopped this device because it has reported problems. Code 43”

Solution

driverfix boxError Causes

Code 43 can be triggered due to several reasons. However, 95% of the times it is related to the device driver problems such as:

  • Missing Drivers
  • Corrupted Drivers
  • Outdated Drivers

Driver problems pop up when either new driver versions are available or drivers become damaged due to some underlying reasons like viral infections.

Other than driver problems, code 43 can also pop up when you install and remove the software. This can cause hardware conflict in the registry, altering driver communication.

Code 43 can hamper your ability to use your desired device smoothly.  Although Code 43 is not a fatal error code like Runtime and BSoD errors, it is still advisable to resolve it immediately to avoid inconvenience.

You can sometimes bypass error code 43 temporarily by a simple PC reboot but this will not fix the problem permanently. For a permanent fix, try the methods given below.

Further Information and Manual Repair

To help you repair code 43 permanently from your PC, below are some of the best, easy perform, and effective solutions. Simply follow the steps to get rid of code 43 from your PC.

Method 1 - Launch and Run the Troubleshoot Wizard

This is one way to find the exact nature of the problem that spurred error code 43 to pop up. To launch and run the Troubleshoot Wizard, here’s what you need to do:

  • Go to the start menu
  • Type Device Manager in the search bar and then press enter
  • Click on Device Manager to run it on your system
  • Now click on the ‘General Tab’
  • After that press Trouble Shoot to launch the Troubleshooting Wizard

The Wizard will diagnose the problem and provide you a solution to resolve it, all you have to do from there is to follow the Wizard’s instructions

Method 2 - Check the Hardware Documentation

If for some reason Method 1 doesn’t work,  another solution would be to check the hardware documentation for more information about diagnosing the problem.

Method 3 - Uninstall Faulty Drivers

If the underlying reason for code 43 is related to driver problems, then the best way to resolve it is to uninstall faulty drivers and then reinstall new drivers. One of the many ways to uninstall drivers is:

  • Click on the start button
  • Type ‘sysdm.cpl’ in the search box and then press enter to continue
  • In the System Properties dialog box open the Hardware tab
  • Click Device Manager and then double click Device Type
  • Now click on the problematic hardware device reporting code 43
  • After that go to the Driver tab and click Uninstall to uninstall that driver completely
  • Visit the manufacturer’s website and download the new driver version
  • Install it on your system by extracting the .ZIP file

Method 4 - Update Drivers Automatically

Identifying and updating new driver versions manually can be both frustrating and time-consuming especially if you are in a rush and no computer whiz.

Also, after you update the drivers, you need to keep checking them time and again to ensure they don’t become outdated. You need to update them every time new versions are available which can be stressful.

To avoid this hassle by repairing code 43 permanently, download DriverFIX. This is an innovative and user-friendly device driver software program exclusively designed to resolve all kinds of driver problems.

Whether code 43 occurs on your PC due to missing or outdated drivers, DriverFIX can resolve the problem easily.

The intelligent programming system embedded in this software enables it to detect problematic and outdated drivers in seconds.

It matches new and compatible versions and updates the drivers immediately, automatically, and on a regular basis in just a few clicks. This resolves code 43 and also ensures that all your drivers remain up to date.

DriverFIX is compatible with all Windows versions.

Click here to download DriverFIX to repair and resolve code 43 right away.

If you like to learn and find out more about various Windows errors, and how to repair them go to our vast archive or use search to find articles that will explain and help you in solving your issue.
However, if you prefer to do things fast and with automatization then we are proposing to use an automated solution for your issues. The application that we are recommending is Advanced System Repair Pro
Advanced System Repair utilizes multiple tools all in one to give you a quick, simple, reliable, and very thorough diagnosis of your PC. It brings you all the tools you need in one program to clean, fix, protect, optimize and boost your PC!
1-Click Maintenance
All the tools to make it simple and easy! It's like having a professional technician at the click of a mouse.

Junk Cleaner
Keeping your computer free from unnecessary clutter also helps make your computer last longer. Like any other machine, if you keep it clean and take care of it, it will serve you better for longer!

Optimize background apps
Optimize applications background activity with the built-in Application Optimizer feature.

Disk Defrag
With a simple 1-click, Advanced System Repair speeds up your PC by assembling fragmented files on your machine and organizing them more efficiently.

Malware Removal
Finds and removes all types of harmful malware including trojans, worms, bots, adware, spyware, PUPs, and more!

Privacy Cleaner
The all-in-one privacy suite to Clean Your Tracks & Protect Your Privacy! Make your computer safe, secure, and more efficient!

System Tweak/Optimizer
ASR will analyze your complete system and settings to adjust your PC to function at its maximum performance.

Registry Cleaner
Over time, as you install and uninstall applications, the registry can become cluttered with old entries and broken settings which can result in program crashes, and annoying messages and slow the computer down.
Visit our Advanced System Repair Pro Download page to inform yourself about all the benefits of this software and get a free trial copy of it.
advanced system repair pro

Advanced System Repair Pro

One-click automated PC repair solution
ASR logo
With Advanced System Repair Pro you can easily
Replace damaged files
Restore performance
Free disk space
Remove Malware
Protects WEB browser
Remove Viruses
Stop PC freezing
DOWNLOAD
Privacy Policy | Terms of Use | Uinstall
Advanced System Repair Pro is compatible with all versions of Microsoft Windows including Windows 11

Share this article:

You might also like

The PrintNightmare vulnerability finally fixed
PrintNightmare vulnerability has been a struggling issue for Microsoft in the past weeks, each time it seems to be addressed and fixed something new popped up and it still had issues. Microsoft finally addressed the issue but with a price. The default behavior of Point and Print is changed. From this fix onward, the Point and Print driver installation and update behavior will require administrator privileges, which should prevent the exploit to the Windows Print Spooler that could be used by malicious individuals to gain administrative privileges in Windows. The drawback of this fix from Microsoft is that non-elevated users may have difficulty adding or updating printers. Microsoft feels that the security risks caused by PrintNightmare are worth the tradeoff, though. If you really want to let non-elevated users add printers, you can follow the instructions in this Microsoft Support article to disable this mitigation with a registry key. However, doing so will expose you to this known vulnerability and isn’t recommend.
Read More
Fix Memory error 0x0000001A on Windows
One of the hardest issues you can encounter on your Windows computer is the Blue Screen of Death error. There are various kinds of BSOD or Stop errors and one of them is the “Memory Management Error 0x0000001A” error. This kind of Stop error might signify a hardware problem in your computer and is most likely caused by an issue with RAM or hard disk or even malware that takes up all your computer’s memory, thus, making it crash and display a BSOD error like the Memory Management Error 0x0000001A. Moreover, this kind of Stop error can also occur during the Windows upgrading process. So in this post, we’ll show you what you can do to fix the Memory Management error on your Windows 10 PC.

Option 1 – Run the Blue Screen Troubleshooter

The Blue Screen troubleshooter is a built-in tool in Windows 10 that can be found on the Settings Troubleshooters page. To use it, refer to these steps:
  • Tap the Win + I keys to open the Settings panel.
  • Then go to Update & Security > Troubleshoot.
  • From there, look for the option called “Blue Screen” on your right-hand side and then click the “Run the troubleshooter” button to run the Blue Screen Troubleshooter and then follow the next on-screen options. Note that you might have to boot your PC into Safe Mode.

Option 2 – Update the device drivers

  • Tap the Win + R keys to launch Run.
  • Type in devmgmt.msc into the box and tap Enter or click OK to open the Device Manager.
  • After that, a list of device drivers will be displayed. Look for the device driver you and then select either “Update driver” or “Uninstall device”. And if you find any “Unknown device”, you need to update it as well.
  • Select the “Search automatically for updated driver software” option and then follow the instructions to complete the process.
  • If you have chosen to uninstall the driver, follow the screen options to complete the process and then restart your PC.
  • Connect the device and Scan for hardware changes – you can see this option under Device Manager > Action.

Option 3 – Run the Windows Memory Diagnostics Tool to test RAM

Since the issue concerns the memory of your computer, you can also try running the Windows Memory Diagnostics Tool to find out if the RAM module of your computer has become corrupted. To run this tool, follow these steps:
  • Tap the Win + S keys to open Search.
  • Then type “Windows Memory Diagnostics Tool” in the field and hit Enter to open the Windows Memory Diagnostics Tool.
  • After that select any of the following option from the prompt that appears:
    • “Restart now and check for problems (recommended)”
    • “Check for problems the next time I start my computer”
  • After that, if you find that your RAM is corrupted, you might have to purchase a new one or change the motherboard of your computer.

Option 4 – Run the DISM tool

There are cases when the Memory Management Error 0x0000001A error is caused by the Windows System Image so you need to repair it using the DISM or Deployment Imaging and Servicing Management tool. The DISM tool is another command-line tool in the Windows operating system that could help users fix various corrupted system files. To use it, follow these steps:
  • Open the Command Prompt as admin.
  • Then type in this command: Dism /Online /CheckHealth
  • Do not close the window if the process takes a while as it will probably take a few minutes to finish.

Option 5 – Run the SFC scan

  • Tap Win + R to launch Run.
  • Type in cmd in the field and tap Enter.
  • After opening Command Prompt, type in sfc /scannow
The command will start a system scan which will take a few whiles before it finishes. Once it’s done, you could get the following results:
  1. Windows Resource Protection did not find any integrity violations.
  2. Windows Resource Protection found corrupt files and successfully repaired them.
  3. Windows Resource Protection found corrupt files but was unable to fix some of them.

Option 6 – Try using System Restore

You can also try to perform a System Restore as it can also help you fix the BSOD error. You can do this option either by booting into Safe Mode or in System Restore. If you are already in the Advanced Startup Options, just directly select System Restore and proceed with the next steps. And if you have just booted your PC into Safe Mode, refer to the steps below.
  • Tap the Win + R keys to open the Run dialog box.
  • After that, type in “sysdm.cpl” in the field and tap Enter.
  • Next, go to the System Protection tab then click the System Restore button. This will open a new window where you have to select your preferred System Restore point.
  • After that, follow the on-screen instructions to finish the process and then restart your computer and check if the problem is fixed or not.
Read More
Increasing Virtual Memory
[vc_row][vc_column][vc_column_text]

How to Raise Virtual Memory

Hello and welcome to our Increasing Virtual Memory tutorial. Before trying to raise the quantity of virtual memory in your pc system, it's important to get a comprehension of its goal and use. This leads to the constant use of high-performing tasks in addition to keeping multitasking capability. The downside to this process is the fact that relatively, the HDD accesses information slower than a RAM module. Taking into consideration its use in a computer program and how virtual memory works, there isn't any amount of virtual memory allocation. The quantity of virtual memory to be defined for a unique computer program would be determined by the kinds of programs that are started and the quantity of multitasking done. The Microsoft Windows operating system yet does supply a recommended baseline memory based on the number of RAM installed and storage space of the HDD. Virtual memory allocation really indicates the upsurge in how big the paging file is. This file provides the pc program with all the essential instructions on the best way to act once all the installed RAM has been allotted to the running applications. In both Microsoft Windows XP (all variants) and Windows Vista environments, the method to control the paging file size is basically the same. To increase the quantity of virtual memory:
  • Click on the Start menu and choose the "Control Panel" alternative. When the Control Panel window is started, choose the "Operation and Maintenance" class.
  • Click on the "System" choice to create the Device Properties Window.
  • Click the "Advanced" tab and choose the "Settings" button under Operation. In the Operation alternative window, select the "Change" button under the Virtual Memory class.
  • Choose the hard disk where the Windows operating system is now installed. That can be the same place where in fact the paging file will be saved.
  • Test on the checkbox for the "Custom Size" to enable you to determine the number of virtual memory you need to use for your device.
  • Click the "OK" button thrice to shut all of the windows. Click the Start button and restart your machine to enable the upsurge in the number of virtual memory to be finished.
In establishing the number of virtual memory, you'll have to place a maximum value along with an initial. It is suggested that both values be equivalent in order to achieve the finest performance on your pc system.[/vc_column_text][/vc_column][/vc_row]
Read More
How to fix the Javaw.exe Error Code

Troubleshoot Javaw.exe Error

Javaw exe - What is it?

Javaw.exe is a type of executable file or a process used by Sun Microsystems. It is in charge of executing programs created with Java on Windows PC. It is a part of the Oracle Java Runtime Environment. The javaw exe error hampers your ability to run programs supported by Java. Common Javaw.exe error messages include:
  • "Javaw.exe Application Error."
  • "Javaw.exe is not a valid Win32 application."
  • “Cannot find javaw.exe.""Javaw.exe not found."
  • "Error starting program: javaw.exe."
  • "Javaw.exe is not running.""Javaw.exe failed."
  • "Javaw.exe has encountered a problem and needs to close. We are sorry for the inconvenience."

Solution

Restoro box imageError Causes

There can be many reasons for javaw.exe error code on your PC such as:
  • Viral infection
  • Malware attack
  • Invalid registry entries
Ignoring such error messages is not wise. You must resolve it right away as such errors can lead to serious PC threats like system failure and data security threats.

Further Information and Manual Repair

Scan the Javaw.Exe File For Malware

To fix Java Exe error on your system, first you need to find out the cause of the error. Is it triggered by malware or invalid registry entries? The best way to identify the cause is to check your system’s CPU usage. This can be done through assessing the Task Manager by pressing Ctrl+Alt+Del all at the same time. After that, click ‘Processes and locate the javaw.exe file. Remember this file does not require too much memory, so abnormal memory usage is a surefire sign that the java.exe file on your system is a virus. To resolve it, download an antivirus and run it to scan and remove viruses from your PC. However, running an antivirus may slow down your PC performance. On the other hand, if you find the memory usage is fine, then this means the error is not caused by malware but it occurred either due to old version system files on your PC or registry corruption.

Update the Javaw.Exe File

To remove the old version files, go to the start menu. Click Control Panel and then Add/Remove programs. Here find the Java program and uninstall it. Now after the program is completely uninstalled, go to Java’s official website and download the latest version of your desired program. Restart your PC after the installation is successfully complete.

Clean & Repair Registry

If the problem still persists, then the javaw exe error is mostly likely triggered due to registry corruption. The best way to resolve it is to clean and restore the registry. You can do it manually but you may find the manual procedure slightly time-consuming and complex especially you are not a computer programmer. Therefore we recommend you download Restoro.

Why Restoro?

Whether the javaw exe error occurs due to viral infection, invalid entries, or registry corruption, Restoro takes care of all. This is a new, cutting edge, and multi functional PC fixer deployed with multiple performance-boosting and system repair utilities including a powerful registry cleaner, an antivirus, a system optimizer, and Active X controls, and a Class ID detector. The registry cleaning utility wipes out all the unnecessary files, clearing up the cluttered disk. It cleans the registry and restores it. Simultaneously, the antivirus feature detects and scans all malicious software infecting your PC and removes them right away. The system optimizer module boosts the speed of your system and ensures your PC performs at its optimum pace. This is a safe, efficient, and bug-free tool. It has a user-friendly interface and easy navigation. Furthermore, it is compatible with all Windows versions. Click here to download Restoro and resolve Javaw exe error on your PC today!
Read More
How to remove EasyDocMerge from your System

EasyDocMerge Toolbar is a Browser Hijacker for Google Chrome. Usually, such browser extensions are installed without your knowledge. These types of Browser Hijackers are often the cause of many problems while surfing the Internet. The most common problems are unwanted pop-ups, underlined words, additional ads, sponsored links, to generate web traffic and earn revenue of the advertising networks by gathering the users browsing data and sending it back to the Mindspark ads network.

When installed this extension will hijack your home page setting it to MyWay.com, it will also change your new tab page to EasyDocMerge (Powered by MyWay.com Search).

About Browser Hijackers

Browser hijacking is a form of an unwanted program, commonly a web browser add-on or extension, which then causes modifications in the browser’s settings. Browser hijacker malware is developed for a variety of reasons. It redirects you to the sponsored internet sites and inserts adverts on your browser that assist its creator to generate earnings. A lot of people think that the browser hijacker is only a harmless website but that is not the case. Nearly every browser hijacker poses an existent threat to your online safety and it’s important to classify them under privacy dangers. They don’t just mess up your browsers, but browser hijackers can even modify the computer registry, leaving your computer susceptible to various other types of attacks.

Key symptoms that your web browser has been hijacked

There are various signs of web browser hijacking: the home page of the web browser is changed unexpectedly; new bookmarks pointing to porn websites are added to your favorite pages; the essential web browser settings are modified and unwanted or insecure resources are added to the trusted sites list; you’ll see many toolbars on your web browser; you see a lot of pop-up ads on your computer screen; your web browser has become unstable or starts running sluggishly; Inability to navigate to particular sites, particularly anti-malware and other computer security software sites.

How they infect computers

Browser hijackers infect computer systems by numerous means, including via a file-share, a drive-by download, or an infected e-mail attachment. They can also originate from any BHO, extension, add-on, toolbar, or plug-in with malicious intent. A browser hijacker may also come bundled up with some free software that you unintentionally download to your computer, compromising your internet security. Typical examples of browser hijackers include CoolWebSearch, Conduit, Coupon Server, OneWebSearch, RocketTab, Searchult.com, Snap.do, and Delta Search. Browser hijackers may record user keystrokes to gather potentially important information that leads to privacy issues, cause instability on computers, drastically disrupt user’s browsing experience, and finally slow down the system to a point where it will become unusable.

Removal

Certain browser hijacking could be simply reversed by discovering and eliminating the corresponding malware software from your control panel. In some cases, it can be a difficult job to identify and eliminate the malicious component because the associated file might be running as part of the operating system process. You should consider carrying out manual fixes only if you are a tech-savvy person, as potential risks are associated with tinkering with the system registry and HOSTS file. Installing and running antivirus programs on the affected computer could automatically erase browser hijackers and other malicious applications. Safebytes Anti-Malware contains a state-of-the-art anti-malware engine to help you prevent browser hijacking in the first place, and clean up any pre-existing issues

What you can do if Virus Prevents You From Downloading Or Installing Anything?

Practically all malware is bad, but certain kinds of malware do a lot more damage to your computer than others. Some malware sits in between your computer and the internet connection and blocks a few or all internet sites that you would like to visit. It will also prevent you from adding anything to your PC, especially antivirus software. If you’re reading this now, you might have probably recognized that a malware infection is the real cause of your blocked web connectivity. So how to proceed if you need to install an antivirus application such as Safebytes? Although this kind of problem can be difficult to get around, there are a few steps you can take.

Eliminate viruses in Safe Mode

If any virus is set to run automatically when Microsoft Windows starts, stepping into Safe Mode could block this attempt. Only minimal required programs and services are loaded when you boot your laptop or computer in Safe Mode. You will need to do the following to eliminate malware in Safe mode. 1) At power on/start-up, hit the F8 key in 1-second intervals. This should bring up the Advanced Boot Options menu. 2) Select Safe Mode with Networking using arrow keys and press ENTER. 3) When this mode loads, you should have the internet. Now, utilize your browser normally and navigate to https://safebytes.com/products/anti-malware/ to download and install Safebytes Anti-Malware. 4) Once the software is installed, allow the diagnostic scan to run to eliminate viruses and other threats automatically.

Obtain the security program using an alternate web browser

Some malware might target vulnerabilities of a specific web browser that obstruct the downloading process. The best way to avoid this problem is to pick a web browser that is renowned for its security features. Firefox has built-in Phishing and Malware Protection to help keep you secure online.

Run anti-malware from your USB drive

To effectively get rid of the malware, you need to approach the problem of running antivirus software on the infected computer from a different angle. Abide by these steps to run the anti-virus on the affected computer. 1) On a virus-free PC, download and install Safebytes Anti-Malware. 2) Plug the Flash drive into the clean computer. 3) Double-click the Setup icon of the antivirus program to run the Installation Wizard. 4) Choose the flash drive as the destination for saving the file. Follow the on-screen instructions to finish the installation process. 5) Remove the pen drive. You can now utilize this portable anti-virus on the infected computer system. 6) Double-click the antivirus program EXE file on the USB flash drive. 7) Simply click “Scan Now” to run a complete scan on the affected computer for viruses.

Protect Your Computer Against Viruses and Malware With SafeBytes Security Suite

Today an anti-malware program can protect your laptop or computer from different types of internet threats. But how to select the best one amongst countless malware protection software that is available out there? As you might be aware, there are several anti-malware companies and tools for you to consider. A few are really worth your money, but many aren’t. You need to choose one that is dependable, practical, and has a strong reputation for its malware source protection. Among few good applications, SafeBytes Anti-Malware is the strongly recommended software program for the security-conscious user. SafeBytes anti-malware is a powerful, highly effective protection application made to help end-users of all levels of computer literacy in detecting and removing harmful threats from their computer. After you have installed this software, SafeByte's sophisticated protection system will ensure that no viruses or malicious software can seep through your personal computer.

SafeBytes has fantastic features when compared to various other anti-malware programs. Listed below are some of the great features included in the software.

Real-time Active Protection: SafeBytes gives you round-the-clock protection for your personal computer limiting malware intrusions instantly. It will examine your PC for suspicious activity at all times and safeguards your PC from illegal access. Antimalware Protection: Safebytes is made on the best virus engine in the industry. These engines can identify and get rid of threats even during the initial phases of a malware outbreak. “Fast Scan” Features: SafeBytes’s high-speed malware scanning engine minimizes scanning times and extends the life of the battery. Simultaneously, it will effectively find and get rid of infected files or any internet threat. Web Protection: SafeBytes checks and gives a unique safety rating to every website you visit and block access to webpages known to be phishing sites, thus protecting you against identity theft, or known to contain malicious software. Low CPU Usage: SafeBytes is a lightweight application. It consumes an extremely small amount of processing power as it runs in the background so you are free to use your Windows-based computer the way you want. 24/7 Premium Support: Professional technicians are at your disposal 24/7! They will immediately fix any technical issues you may be encountering with your security software. Simply put, SafeBytes has formulated a meaningful anti-malware solution that is aimed to protect your computer against various malware. Malware trouble will become a thing of the past once you put this software to use. For top protection and the best value for money, you can’t get better than SafeBytes Anti-Malware.

Technical Details and Manual Removal (Advanced Users)

If you want to manually remove EasyDocMerge without using an automated tool, it may be possible to do so by removing the application from the Microsoft Windows Add/Remove Programs menu, or in cases of browser plug-ins, going to the browsers AddOn/Extension manager and removing it. You’ll likely also want to totally reset your browser to its default configuration settings. To be certain of complete removal, find the following registry entries on your computer and remove them or reset the values appropriately. However, this is a tricky task and only computer experts can perform it safely. Moreover, some malicious programs are capable to defend against its removal. It is highly recommended that you do the removal process in Windows Safe Mode.
Files: %UserProfile%\Local Settings\Application Data\EasyDocMergeTooltab %LOCALAPPDATA%\Google\Chrome\User Data\Default\Extensions\mabloidgodmbnmnhoenmhlcjkfelomgp %UserProfile%\Local Settings\Application Data\Google\Chrome\User Data\Default\Extensions\mabloidgodmbnmnhoenmhlcjkfelomgp %PROGRAMFILES(x86)%\EasyDocMerge_ex %PROGRAMFILES%\EasyDocMerge_ex %USERPROFILE%\Application Data\EasyDocMerge_ex %USERPROFILE%\AppData\LocalLow\EasyDocMerge_ex %UserProfile%\Local Settings\Application Data\EasyDocMerge_ex Registry: HKEY_CURRENT_USER\Software\AppDataLow\Software\EasyDocMerge_ex HKEY_CURRENT_USER\Software\EasyDocMerge_ex HKEY_LOCAL_MACHINE\SOFTWARE\Wow6432Node\Microsoft\Internet Explorer\Low Rights\ElevationPolicy\5e3ee57e-7d53-458f-a124-16aab06de2d6 HKEY_LOCAL_MACHINE\SOFTWARE\Wow6432Node\Microsoft\Internet Explorer\Low Rights\ElevationPolicy\64366ff9-336f-4002-a665-406a1d259cd3 HKEY_LOCAL_MACHINE\SOFTWARE\Wow6432Node\Microsoft\Internet Explorer\Low Rights\ElevationPolicy\87008eb3-6282-4075-9889-62f381451926 HKEY_LOCAL_MACHINE\SOFTWARE\Wow6432Node\Microsoft\Internet Explorer\Low Rights\ElevationPolicy\96107269-cd2e-4175-a61a-5c2e8540e8a5 HKEY_LOCAL_MACHINE\SOFTWARE\Microsoft\Internet Explorer\Low Rights\ElevationPolicy\2741d16e-6298-4345-8988-7979ffd45266 HKEY_LOCAL_MACHINE\SOFTWARE\Microsoft\Internet Explorer\Low Rights\ElevationPolicy\5e3ee57e-7d53-458f-a124-16aab06de2d6 HKEY_LOCAL_MACHINE\SOFTWARE\Microsoft\Internet Explorer\Low Rights\ElevationPolicy\64366ff9-336f-4002-a665-406a1d259cd3 HKEY_LOCAL_MACHINE\SOFTWARE\Microsoft\Internet Explorer\Low Rights\ElevationPolicy\87008eb3-6282-4075-9889-62f381451926 HKEY_CURRENT_USER\Software\Microsoft\Internet Explorer\DOMStorage\easydocmerge.dl.tb.ask.com HKEY_CURRENT_USER\Software\Microsoft\Internet Explorer\SearchScopes\8bf0dd5e-ea06-48db-97a4-df286e054079 HKEY_CURRENT_USER\Software\Microsoft\Internet Explorer\Approved Extensions, value: 389672DB-CD13-4CF2-AED1-3170BC0DD6EC HKEY_LOCAL_MACHINE\SOFTWARE\Wow6432Node\Microsoft\Internet Explorer\SearchScopes\8bf0dd5e-ea06-48db-97a4-df286e054079 HKEY_CURRENT_USER\Software\EasyDocMerge HKEY_CURRENT_USER\Software\Microsoft\Internet Explorer\LowRegistry\DOMStorage\easydocmerge.dl.myway.com
Read More
WslRegisterDistribution, 0x8007019e,0x8000000d
The Windows Subsystem for Linus, also known as WSL, is a useful and excellent tool for developers. However, it isn’t without flaws as users can still encounter some errors when using it. One of these errors is the error code WslRegisterDistribution, 0x8007019e,0x8000000d. Although it seems like the error is have something to do with the installation of WSL, it could be a false positive since some users who’ve installed WSL still encountered the same problem. Here’s the context of the error:
“Installing, this may take a few minutes… WslRegisterDistribution failed with error: 0x8007019e/0x8000000d Error: 0x8007019e/0x8000000d The parameter is incorrect. Press any key to continue.”
Error code 0x8007019e or 0x8000000d could be due to the absence of supporting Windows 10 features since the error does not even let one use the WSL-based command line. If you are one of the users facing this problem, then you’ve come to the right place as this post will provide you with a couple of suggestions to fix it. There are two options you can check out to fix the problem, but before you do that, you need to make sure that the Windows Subsystem for Linux feature is enabled. The two options include enabling WSL using the “Turn Windows features on or off” option and using the Windows PowerShell.

Option 1 – Try to enable the WSL using the “Turn Windows features on or off” option

  • To get started, search for “Turn Windows Features on or off” in the Start Search and click on the appropriate result to open a dialog box.
  • After that, you will see a populated list in the dialog box and from there, look for the “Windows Subsystem for Linux” option.
  • Once you find it, select OK. This will search and install the system files needed and ask you to restart your computer.
  • Restart your computer. The Linux distro should now work without any trouble.

Option 2 – Try to use Windows PowerShell

The next thing you can do to fix the error code 0x8007019e or 0x8000000d is to use Windows PowerShell.
  • Tap the Win + X keys and click on the “Windows PowerShell (Admin)” option to open Windows PowerShell as admin.
  • After that, execute this command to enable the Windows Subsystem for Linux feature: Enable-WindowsOptionalFeature -Online -FeatureName Microsoft-Windows-Subsystem-Linux
  • The command you entered will start to search for the required system files and install them.
  • If prompted, type “Y” to restart your computer. This should fix the problem.
Read More
Wallpapers by MyWay (wallpapers.myway.com) removal Guide

Wallpapers by MyWay is a browser hijacker, also known as Wallpaper Homepage adware. It was developed by Mindspark Interactive Network, Inc and it is widely promoted on the Internet as a genuine search engine powered by Google with an ability to customize homepage background and add some quick access links. This hijacker can be found in the most popular web browsers including Mozilla Firefox, Google Chrome, and IE. Generally Wallpaper by MyWay hijacker appears on the user’s computer without the user being fully aware of its modification.

While installed users will experience additional ads showing up in their search results, as well as sponsored content and pop-up ads. This extension has been flagged by several anti-virus scanners and it is recommended to remove it from your computer.

About Browser Hijackers

Browser hijack is a very common type of online fraud where your web browser settings are altered to allow it to do things you never intend. Browser hijacker malware is designed for many different reasons. These are generally used to force visitors to predetermined sites, manipulating web traffic to generate ad revenue. Nevertheless, it’s not that harmless. Your internet safety is jeopardized and it is also really irritating. Additionally, hijackers can make the entire infected system fragile – other harmful malware and viruses would take hold of these opportunities to get into your system very easily.

Signs of browser hijacker infection

Symptoms that your browser is hi-jacked include: 1. you see unauthorized modifications to your web browser’s home-page 2. you find yourself regularly directed to a different site than the one you meant 3. the default web engine and the default browser settings is modified 4. find new toolbars which you did not add 5. you notice lots of pop-up ads on your computer screen 6. your internet browser has instability issues or displays frequent errors 7. you’re blocked to access those sites of anti-malware solution providers.

Exactly how browser hijacker finds its way onto your computer

Browser hijackers can enter a computer by some means or other, for instance via file sharing, downloads, and e-mail also. Many internet browser hijackings come from add-on programs, i.e., browser helper objects (BHO), toolbars, or plug-ins added to web browsers to provide them additional functionality. A browser hijacker can be installed as a part of freeware, shareware, demoware and fake programs. An example of some popular browser hijackers includes Babylon, Anyprotect, Conduit, DefaultTab, SweetPage, RocketTab, and Delta Search, however, the names are often changing. Browser hijackers could record user keystrokes to collect potentially valuable information that leads to privacy issues, cause instability on systems, significantly disrupt user’s browsing experience, and finally slow down the system to a point where it will become unusable.

Browser hijacker removal methods

Certain types of browser hijackers can be quickly removed from your computer by deleting malicious programs or any other recently installed shareware. However, the majority of hijacking codes are certainly not easy to get rid of manually, as they go deeper into the operating system. Furthermore, manual removals require in-depth system knowledge and therefore can be a very difficult job for novices. Installing and running anti-malware programs on the affected computer can automatically delete browser hijackers and other malicious programs. One of the top tools for repairing browser hijacker infections is SafeBytes Anti-Malware. It helps you get rid of any pre-existing malicious software on your computer and gives you real-time monitoring and protection against new threats. Use a system optimizer (such as Total System Care) along with your anti-malware to fix various registry issues, remove computer vulnerabilities, and improve your computer overall performance.

How To Get Remove Malware That Is Preventing Antivirus Installation?

All malware is detrimental and the consequences of the damage will vary according to the specific type of malicious software. Some malware goes to great lengths to stop you from downloading or installing anything on your computer, especially anti-virus software programs. If you are reading this article, you may have infected by a virus that stops you from downloading a security software such as Safebytes Antimalware on your PC. Refer to the instructions below to remove malware in alternative ways.

Use Safe Mode to fix the issue

If the malware is set to run at Windows start-up, then booting in safe mode should avoid it. Only the minimum required applications and services are loaded when you boot your laptop or computer into Safe Mode. To launch your Windows XP, Vista, or 7 computers in Safe Mode with Networking, follow the instructions below. 1) After switching on the computer, press the F8 key before the Windows splash screen starts to load. This would conjure up the Advanced Boot Options menu. 2) Select Safe Mode with Networking with arrow keys and hit ENTER. 3) When this mode loads, you should have an internet connection. Now, make use of your web browser normally and navigate to https://safebytes.com/products/anti-malware/ to download and install Safebytes Anti-Malware. 4) After installation, do a complete scan and allow the program to remove the threats it discovers.

Switch to some other internet browser

Malicious code might exploit vulnerabilities in a specific internet browser and block access to all anti-malware software websites. When you suspect that your Internet Explorer happens to be hijacked by a trojan or otherwise compromised by online hackers, the most effective course of action would be to switch over to a different internet browser such as Google Chrome, Mozilla Firefox, or Apple Safari to download your chosen computer security software – Safebytes Anti-Malware.

Install anti-malware on a flash drive

Here’s another solution which is creating a portable USB anti-malware software package that can scan your computer for malware without needing installation. Adopt these measures to employ a flash drive to fix your corrupted PC. 1) On a clean PC, download and install Safebytes Anti-Malware. 2) Plug in the pen drive into the uninfected computer. 3) Run the setup program by double-clicking the executable file of the downloaded software, with a .exe file format. 4) Choose the flash drive as the destination for saving the software file. Follow the activation instructions. 5) Now, transfer the thumb drive to the infected computer. 6) Double-click the antivirus software EXE file on the thumb drive. 7) Click on the “Scan Now” button to start the malware scan.

How SafeBytes Anti-Malware Keep your Machine Virus Free

If you are looking to download an anti-malware application for your computer, there are plenty of tools on the market to consider but you just cannot trust blindly anyone, no matter whether it is a free or paid program. A few of them do a good job in eliminating threats while many will ruin your computer themselves. You must select one that is dependable, practical, and has a good reputation for its malware source protection. When considering commercial anti-malware application options, many people select well-known brands, like SafeBytes, and they are quite happy with it. SafeBytes is a powerful, real-time antivirus application that is designed to assist everyday computer user in safeguarding their PC from malicious threats. With its most advanced virus detection and repair technology, this software will help you protect your personal computer against infections caused by different types of malware and other internet threats, including adware, spyware, viruses, worms, trojans, keyloggers, ransomware, and potentially unwanted program (PUPs).

There are lots of wonderful features you’ll get with this security product. Some of them are listed as below:

Robust Anti-malware Protection: Using its advanced and sophisticated algorithm, this malware elimination tool can detect and remove the malware threats hiding within your computer system effectively. Active Protection: SafeBytes gives you round-the-clock protection for your PC limiting malware attacks in real-time. It will check your personal computer for suspicious activity at all times and safeguards your PC from unauthorized access. Fast Scan: This computer software has one of the fastest and most efficient virus scanning engines in the industry. The scans are very accurate and take a short amount of time to complete. Web Protection: Safebytes allots all sites a unique safety score that helps you to have an idea of whether the website you’re about to visit is safe to view or known to be a phishing site. Light-weight: SafeBytes gives complete protection from online threats at a fraction of the CPU load due to its enhanced detection engine and algorithms. 24/7 Customer Service: Expert technicians are at your disposal 24/7! They will quickly resolve any technical issues you may be experiencing with your security software. To conclude, SafeBytes Anti-Malware is really great for securing your PC against all kinds of malware threats. Malware problems will become a thing of the past once you put this software program to use. So if you’re looking for the best anti-malware subscription for your Windows-based PC, we highly recommend SafeBytes Anti-Malware software

Technical Details and Manual Removal (Advanced Users)

If you’d like to manually remove Wallpapers by MyWay without using an automated tool, it may be possible to do so by removing the application from the Microsoft Windows Add/Remove Programs menu, or in cases of web browser extensions, going to the browsers AddOn/Extension manager and removing it. You will probably also want to reset your internet browser to its default configuration settings. If you opt to manually delete the system files and registry entries, use the following checklist to make sure you know exactly what files to remove before performing any actions. Please keep in mind that this is for professional users only and might be difficult, with wrong file removal leading to additional system errors. In addition, some malware is capable of replicating or preventing deletion. Carrying out this malware-removal process in Safe Mode is recommended.
Files: %UserProfile%\Local Settings\Application Data\WallpapersMyWayTooltab %LOCALAPPDATA%\WallpapersMyWayTooltab %LOCALAPPDATA%\Google\Chrome\User Data\Default\Extensions\glhahjphgpghoefihgllamaapanabkmp %UserProfile%\Local Settings\Application Data\Google\Chrome\User Data\Default\Extensions\glhahjphgpghoefihgllamaapanabkmp Registry: HKEY_CURRENT_USER\Software\WallpapersMyWay
Read More
Intel to reveal roadmap during July 26 webcast
intel graphics
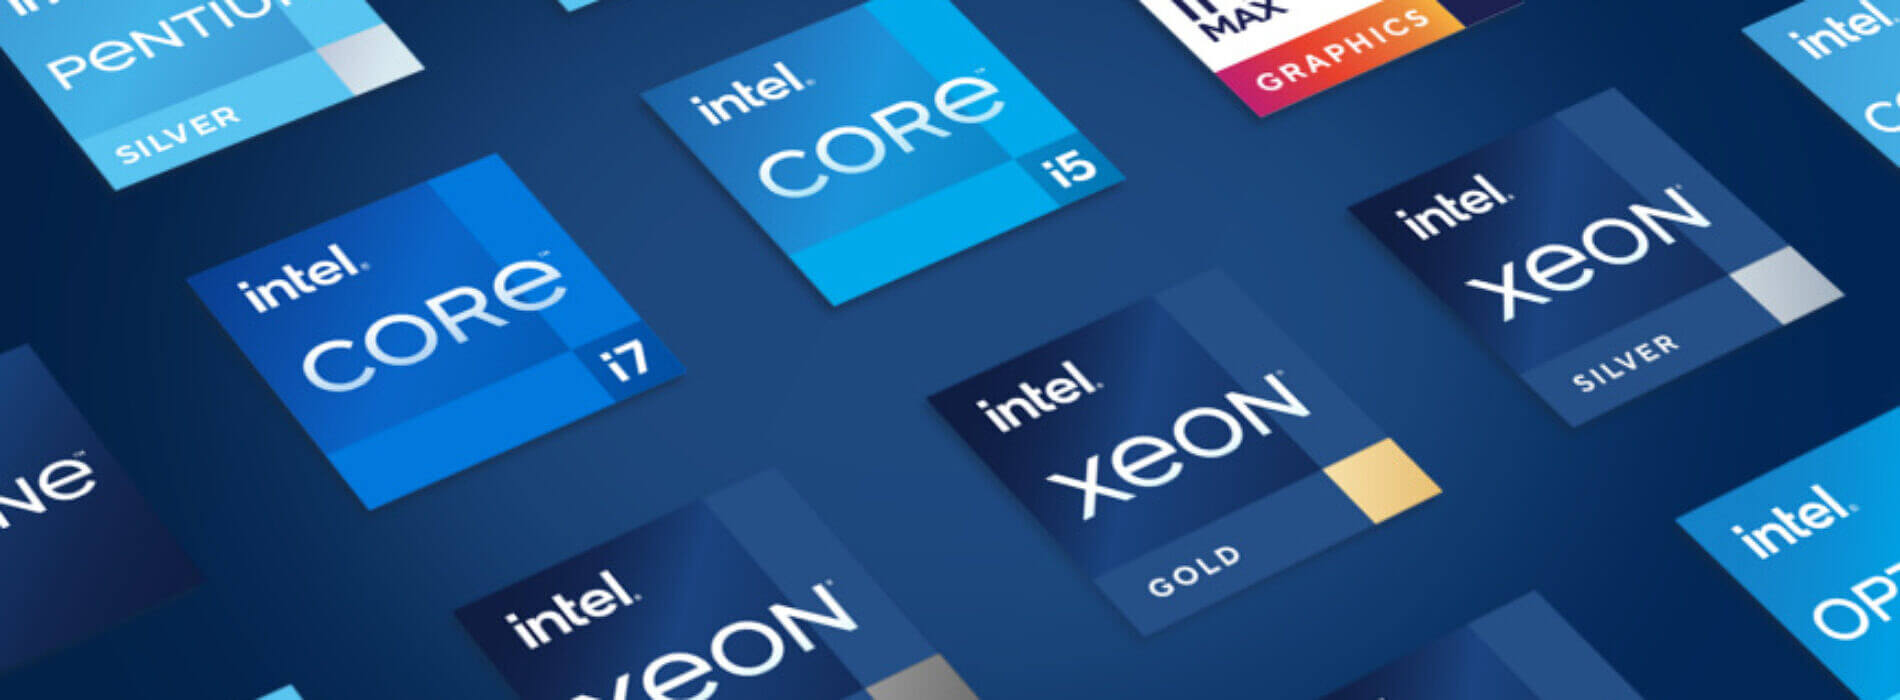
Intel announced that Pat Gelsinger (CEO) and Dr. Ann Kelleher  (technology Department head) will discuss Intel’s process and packaging innovations on an upcoming webcast that will happen on July 26th. The spokesman will talk and provide a deeper look at the process and packaging roadmaps for Intel. As we know Intel is planning to expand its production capabilities, outsource some of its technologies and offer foundry services to other chip design companies. The strategy will also include a shift to a 7nm process and Intel’s effort to set itself again as leader of CPU performance by 2024. There is also a chance that we will hear exact plans for Intel in the next three or four years. Intel didn't reveal much else about what Gelsinger and Kelleher plan to discuss during the webcast. The event will be streamed on July 26 at 2 pm PT via the Intel Newsroom; it will also be available to watch on-demand after the stream ends.
Read More
Remove the blue and yellow shield icon
If you suddenly see a system icon or an application icon that has a blue and yellow shield or icon overlay at the corner, this indicates that the application has to run with admin privileges and each time you run these kinds of applications, a UAC or User Account Control prompt will appear to confirm if you really want to run the application. Although this kind of behavior is for security reasons, it can get quite annoying especially if you use the application on a daily basis. To make it convenient for you, this post will walk you through how you can remove the blue and yellow shield icon from an application on your Windows 10 computer. The User Account Control or UAC setting is the one that ensures no program can run with administrative privileges unless it is allowed by the user. This stops any program that could be potentially harmful to the computer from making any changes which are why keeping this setting to its default state is for the best and making any changes in its setting is not recommended unless it is really needed. So if you really have to remove the icon overlay in an application, there are several ways you can do that. You can try reinstalling the program and set Compatibility or change the UAC level. For more information, refer to every option given below.

Option 1 – Try to reinstall the application and set Compatibility

As you know, the application icons where you can see the shields are shortcuts mostly and they signify that the User Account Control will appear each time you launch the app. Thus, if you have an app that you use regularly and you’re certain that the app can be trusted, you can try to reinstall the app and set its compatibility by following these steps:
  • You need to uninstall the app first and then install its latest version. You must not run or open the app after you reinstall it, not until you’ve completed the steps.
  • Next, you have to right-click on the shortcut icon of the app, and from the menu, select Properties.
  • Afterward, go to the Compatibility tab and look for the checkbox labeled “Run this program as an administrator” and uncheck it.
  • Now click on the Apply and OK buttons to save the changes made. This should remove the shield icon from the app.

Option 2 – Try changing the UAC level

  • Tap the Win + Q to open the search bar and type UAC to see the User Account Control setting.
  • From the UAC setting, lower the UAC level by selecting the settings that say, “Notify only when apps try to make changes to my computer”.
  • After selecting that option, you shouldn’t be getting any warning now when you run the app with the shield icon. But keep in mind that this is not a temporary setting which can be risky especially if the app can’t be trusted.
Read More
Fix Microsoft Edge Error 0x80200070
As you know, any software needs sufficient CPU power when it downloads, updates and installs so if you encounter an error code 0x80200070 when you tried to install or update the Microsoft Edge browser on your Windows 10 computer, then read on as this post will guide you on how to fix it. This kind of error occurs when the Edge browser installation does not get enough CPU power to update or install and the only way to fix it is to kill programs that are consuming a lot of PC resources as well as stop or remove any unnecessary programs that are running in the background. This kind of error can also be encountered in the new Microsoft Edge Chromium. For more details, follow each one of the options provided below.

Option 1 – Try to kill applications that consume high resources

  • Tap the Ctrl + Shift + Esc keys to open the Task Manager.
  • Go to the Performance tab and sort by CPU usage.
  • Next, close a few additional programs that are consuming maximum CPU power.
  • After that, try to update or install Microsoft Edge again and check if the error is fixed. If not, try to restart your computer and then start the installation or update again.

Option 2 – Try to remove or stop unnecessary programs and services

If the applications or processes that are consuming a lot of CPU resources reappear even after you kill them or end their processes, then you can try the following suggestions to remove or stop these unnecessary programs and processes.
  • The first thing you can do is to stop the Service. If the program happens to be a service, then you have the option to disable the Windows Service. All you have to do is open the Services Manager and stop the service. How? Refer to these steps:
    • Tap the Win + R keys to launch the Run utility and type “services.msc” in the field and tap Enter to open the Services Manager.
  • After that, identify which service is consuming a lot of power and then stop it temporarily.
  • The next thing you can do is to uninstall the problematic program. If the one that consumes a lot of resources is not a service but a program, then you can try to uninstall the program for the meantime until you’ve updated or installed the Edge browser. Once you’ve uninstalled the program, try to update or install Edge again.
  • You can also try booting your computer into Safe Mode and then update or install Microsoft Edge. This will make sure that all the unnecessary programs and services won’t consume a lot of CPU resources as well as memory.
Read More
1 2 3 162
Logo
Copyright © 2022, ErrorTools. All Rights Reserved
Trademarks: Microsoft Windows logos are registered trademarks of Microsoft. Disclaimer: ErrorTools.com is not affiliated with Microsoft, nor claim direct affiliation.
The information on this page is provided for information purposes only.
DMCA.com Protection Status