Guide to Patching Error Code 34

Guide to Fixing Error Code 34

Code 34 - What is it?

Code 34 is one of the several Device Manager error codes. This error code indicates that a hardware device on your PC is not properly configured.

This usually occurs when the device installed on your system is a non-plug and play. Non-plug and play devices don’t configure automatically and require manual configuration from the users end.

Error code 34 is usually displayed in the following format:

“Windows cannot determine the settings for this device. Code 34”

Solution

driverfix boxError Causes

Error code 34 may be triggered due to several reasons like:

  • Improper device configuration
  • Missing or outdated drivers

Device Manager error codes like code 34 are easy to fix. These error codes don’t indicate any serious PC problem, nor are they fatal like blue screen of death error codes.

Nonetheless fixing it immediately is advisable to ensure the proper functioning of the plugged-in hardware device. If you don’t resolve it, you may not be able to use the device.

Further Information and Manual Repair

When PC users experience error codes like code 34, they instantly think of hiring a professional for repair especially if they lack technical understanding.

If you are not a technical whiz and you are also thinking of hiring a professional for the repair job, then don’t! Here’s why, to begin with, Device Manager error codes can be resolved easily, better yet you can fix it by yourself without spending a dime even if you are not technically sound.

To help you, below is a list of easy and effective repair solutions for error code 34. Try them to resolve the issue.

Method 1 - Configure the Device by Using Device Manager

This is one of the best ways to resolve error code 34 on your system. The procedure will take 5 to 7 minutes. Simply follow the steps illustrated below to configure the problematic device on your PC.

  1. First off, go to the start menu
  2. Now type Device Manager in the search bar and press enter to continue
  3. Now in the Device Manager locate the problematic device and click on it
  4. Click on the resources tab to change the resource settings
  5. Now click on the Use Automatic Settings check box
  6. After that click on the Settings based on the tab and then click on the hardware configuration of the device you want to change
  7. Press resource type in the resource settings box to make further changes
  8. Once that is done, click change settings and type a new value for the resource type

Method 2 - Consult the Hardware Manufacturer for Resource Settings

You may not be able to configure resource settings for some devices in such an event it is advisable to consult your hardware manufacturer. Your hardware manufacturer can provide you with specific resource settings. Follow the manufacturer’s instructions to repair error code 34.

If the error continues to persist even after device configuration, then the problem may be linked to driver corruption. In that case, try method 3.

Method 3 - Download DriverFIX to Update Drivers Automatically

Whether code 34 is caused by outdated or corrupted drivers, simply download DriverFIX to resolve. DriverFIX is an advanced and user-friendly software program deployed with an intelligent programming system.

The software scans your PC to detect all problematic drivers. It finds and matches the latest and compatible versions and then updates the drivers accordingly that too automatically and on a regular basis.

Click here to download DriverFIX to repair Device Manager error code 34 on your PC automatically.

If you like to learn and find out more about various Windows errors, and how to repair them go to our vast archive or use search to find articles that will explain and help you in solving your issue.
However, if you prefer to do things fast and with automatization then we are proposing to use an automated solution for your issues. The application that we are recommending is Advanced System Repair Pro
Advanced System Repair utilizes multiple tools all in one to give you a quick, simple, reliable, and very thorough diagnosis of your PC. It brings you all the tools you need in one program to clean, fix, protect, optimize and boost your PC!
1-Click Maintenance
All the tools to make it simple and easy! It's like having a professional technician at the click of a mouse.

Junk Cleaner
Keeping your computer free from unnecessary clutter also helps make your computer last longer. Like any other machine, if you keep it clean and take care of it, it will serve you better for longer!

Optimize background apps
Optimize applications background activity with the built-in Application Optimizer feature.

Disk Defrag
With a simple 1-click, Advanced System Repair speeds up your PC by assembling fragmented files on your machine and organizing them more efficiently.

Malware Removal
Finds and removes all types of harmful malware including trojans, worms, bots, adware, spyware, PUPs, and more!

Privacy Cleaner
The all-in-one privacy suite to Clean Your Tracks & Protect Your Privacy! Make your computer safe, secure, and more efficient!

System Tweak/Optimizer
ASR will analyze your complete system and settings to adjust your PC to function at its maximum performance.

Registry Cleaner
Over time, as you install and uninstall applications, the registry can become cluttered with old entries and broken settings which can result in program crashes, and annoying messages and slow the computer down.
Visit our Advanced System Repair Pro Download page to inform yourself about all the benefits of this software and get a free trial copy of it.
advanced system repair pro

Advanced System Repair Pro

One-click automated PC repair solution
ASR logo
With Advanced System Repair Pro you can easily
Replace damaged files
Restore performance
Free disk space
Remove Malware
Protects WEB browser
Remove Viruses
Stop PC freezing
DOWNLOAD
Privacy Policy | Terms of Use | Uinstall
Advanced System Repair Pro is compatible with all versions of Microsoft Windows including Windows 11

Share this article:

You might also like

0x800ccc79 Error Code - A Quick Fix
[vc_row][vc_column][vc_column_text]

0x800ccc79 Error Code Repair

0x800ccc79 Error - What is it?

0x800ccc79 error is an error message that you may come across when sending emails through Outlook Express from Microsoft. This error message is accompanied by a notification that is displayed as ‘email was not delivered’ or ‘the server doesn’t support SSL connection’.

Solution

Download Available to Recover all Lost Outlook data

Restoro box imageError Causes

This error code 0x900ccc79 is triggered due to the following causes:
  • Problems related to email servers
  • Changes in the configuration settings
  • Corrupted Windows Registry

Further Information and Manual Repair

When you receive the error 0x800ccc79 it may hamper your ability to send emails. Therefore it is advisable to fix it to ensure your emails are sent and received without any difficulty.

This Outlook error 0x800ccc79 is quite easy to repair. By following the quick fix 0x800ccc79 error code solutions given below you can resolve this error in just a couple of minutes.

Here’s what you need to do to fix this error right away:

Cause: Configuration issues

Solution: If the error occurs due to Outlook Express being configured to use the SSL protocol while sending and receiving emails via the web, then to resolve it, you need to allow Outlook Express to bypass the Secure Socket Layer settings.

To do so, click on ‘tools’ and then on ‘Accounts’. Now select the email account that you want to modify.

Now select the ‘Properties’ tab and then click on ‘Advanced Settings’.

Here search for the following text message ‘This server requires a secure connection’. Once you locate it, uncheck all the checkboxes given next to this option. After that save the changes and restart Outlook Express to see bring the changes into effect.

Cause: Missing or Corrupt Registry Entries

Solution: If the error 0x800ccc79 occurs due to missing or corrupt registry entries, then the best way to fix this error is to download and install a good registry cleaner on your PC.

The registry cleaner will help you clean your corrupt and damaged Windows registry entries and get rid of this error right away. It is suggested you download the registry cleaner tool from a reliable website to avoid any malware or virus downloads simultaneously.

Once you download the registry cleaner on your system, click on scan. The cleaner will scan your computer completely for registry errors and show you the results in a list form.

After the scanning is complete, click on repair to fix the errors.

So, next time if you or anyone at your office comes across the Outlook Express error 0x800ccc79, you can try these solutions and fix the error immediately without waiting for the network personnel to come and resolve it.

[/vc_column_text][/vc_column][/vc_row]
Read More
Microsoft acquires Activision Blizzard
In the latest news, Microsoft has reached a deal to purchase Activision Blizzard for 67.8 billion. Now franchises like Warcraft, Starcraft, Overwatch, Call of duty, Diablo are now the property of Microsoft and I am sure that some of these games we can expect to be included in the Xbox game pass. microsoft activision blizzardThis is the second large game company acquisition by Microsoft, Acquiring Bethesda first and a big hit to Sony since Xbox will now have more games in its catalog and as exclusives. Of course, the sale has to go through the standard closing conditions and completion of regulatory review and Activision Blizzard’s shareholder approval before it’s finalized. Assuming that all goes well, the deal is slated to be completed during the fiscal year 2023, which is July 1, 2022, through June 30, 2023.
Read More
Media Player cannot burn some of the files
If you encounter an error while trying to burn files to a CD or disk on your Windows 10 computer, stating, “Windows Media Player cannot burn some of the files”, read on as this post will guide you in fixing the error. Here’s the complete error message:
“Windows Media Player cannot burn some of the files. To investigate the problem, click the icon next to the files in the burn list.”
As you know, the Windows Media Player helps you burn songs or audio files to CD or disk but it does not always end up successfully as you could encounter some setbacks such as this particular error. Usually, this kind of issue occurs if an audio file does not comply with some restrictions so the Windows Media Player pops up this error instead. You can encounter this error message if:
  • You include a file that’s not an audio file.
  • If the total time limit exceeds 80 minutes (even though a CD has 700 MB storage capacity, you can’t burn audio of more than 80 minutes long)
To resolve the error, you have to remove the unsupported files from the burning list, change the burning speed or execute some tweaks in the Privacy settings. For more details, refer to the instructions provided below.

Option 1 – Get rid of the unsupported files from the burning list

You must get rid of the unsupported files from the list of files to burn. This list can be found on the right-hand side of the Windows Media Player. One of the indications that a file is causing problems is when there is a white cross in a red circle next to the file. You can simply click on that icon to remove the file from the burning list. Once you’ve gotten rid of all the unsupported files, try to burn your files to the CD or disk once more.

Option 2 – Try to modify the Privacy settings

In case you don’t know, the Windows Media Player comes with privacy settings that help you in various situations. However, on rare occasions, those settings could also trigger errors and this might be the one that’s causing the “Windows Media Player cannot burn some of the files” to pop up. Thus, you can try disabling these options to resolve the error. How? Refer to these steps:
  • Open the Windows Media Player.
  • Then go to Tools > Options. If you aren’t able to find the Tools menu, just tap the Ctrl + M keys. On the other hand, you can also tap the Alt key to display the menu options.
  • Once you’ve opened the Options window, go to the Privacy tab where you can the “Enhanced Playback and Device Experience” section.
  • In this section, you can find the following options. Make sure to disable them all.
    • Display media information from the Internet
    • Update music files by retrieving media info from the Internet
    • Download usage rights automatically when I play or sync a file
    • Automatically check if protected files need to be refreshed
    • Set clock on devices automatically
  • After you disable the options listed above, click on the Apply and OK buttons to save the changes made and then try to burn the files again.

Option 3 – Try to change the burning speed

Since the burning speed is set to fastest by default, you can try to change the burning speed to resolve the problem. All you have to do is open the Options window and then go to the Burn tab. From there, select either Medium or Slow burning speed and save the changes made. Now try to burn your files to the CD or disk once again.
Read More
Application failed to initialize 0xc0000005
If you suddenly encountered an error saying, “The application failed to initialize properly (0xc0000005)” when you are using an application on your Windows 10 computer, read on as this post will provide you some potential fixes that could help you fix the error. You can encounter the “The application failed to initialize properly (0xc0000005)” error on many applications such as VLC, Chrome, Word, and any other executable files and even the operating system files. When you get this kind of error, you will see the following error message:
“The application failed to initialize properly (0xc0000005). Click on OK to close the application.”
This kind of application error can occur due to several reasons which include damaged installation of the application or system files may have gotten corrupted or damaged. It could also be caused by a malware infection. There are a couple of suggestions provided in this post to help you resolve the error. You can try to run both a System File Checker scan and the DISM tool or reinstall the problematic application or repair-install Windows 10 as well as run a malware scan. Note that the options provided below do not have to be followed in sequence.

Option 1 – Try to run a System File Checker scan

As mentioned, the error could be due to corrupted or damaged system files and one of the ways you can fix that is by running a System File Checker or SFC scan on your computer. To do so, follow these steps:
  • In the Windows Start Search, type “command prompt” and right-click on Command Prompt from the search results, and then select the “Run as administrator” option.
  • After opening Command Prompt with admin privileges, type the “sfc /scannow” and tap Enter to execute it.
  • Once the scan is finished, restart your computer and see if the “The application failed to initialize properly (0xc0000005)” error is fixed or not.

Option 2 – Run the DISM tool

You can try running the Deployment Imaging and Servicing Management or DISM tool to fix the application error. Using this built-in tool, you have various options such as the “/ScanHealth”, “/CheckHealth”, and “/RestoreHealth”.
  • Open the Command Prompt with admin privileges.
  • Then type in the following commands and make sure to hit Enter right after you type each one of them:
    • Dism /Online /Cleanup-Image /CheckHealth
    • Dism /Online /Cleanup-Image /ScanHealth
    • exe /Online /Cleanup-image /Restorehealth
  • Do not close the window if the process takes a while as it will probably take a few minutes to finish.

Option 3 – Try reinstalling the application

You might also want to uninstall the application and download its latest working version and then install it back again. Note that when you do this, you will lose all your app data.

Option 4 – Try to repair install Windows 10

  • First, you have to click this link and then click the Download Tool Now button.
  • Next, click the “Use the tool to create installation media (USB flash drive, DVD, or ISO file)…” option and follow the next given instructions on the screen.
  • Now select the ISO file option in step 5.
  • After that, you should now have an ISO file.
  • Next, go to the location where you’ve downloaded the ISO file.
  • Then right-click on the Windows 10 ISO file and select the Open with option and then select File Explorer.
  • Now click on “setup.exe” and follow the next instructions that appear on the screen. When asked, you have to select either Nothing (clean install) or Keep personal files only option. Take note that you must not select the “Keep personal files, apps, and Windows settings”.

Option 5 – Try scanning your computer using Windows Defender

It is possible that your computer is infected with malware which could be why you’re getting the “The application failed to initialize properly (0xc0000005)” error. Thus, you need to scan your computer using Windows Defender.
  • Tap the Win + I keys to open Update & Security.
  • Then click on the Windows Security option and open Windows Defender Security Center.
  • Next, click on Virus & threat protection > Run a new advanced scan.
  • Now make sure that Full Scan is selected from the menu and then click the Scan Now button to get started.
Read More
What is Windows Terminal and should you use it
Windows Terminal
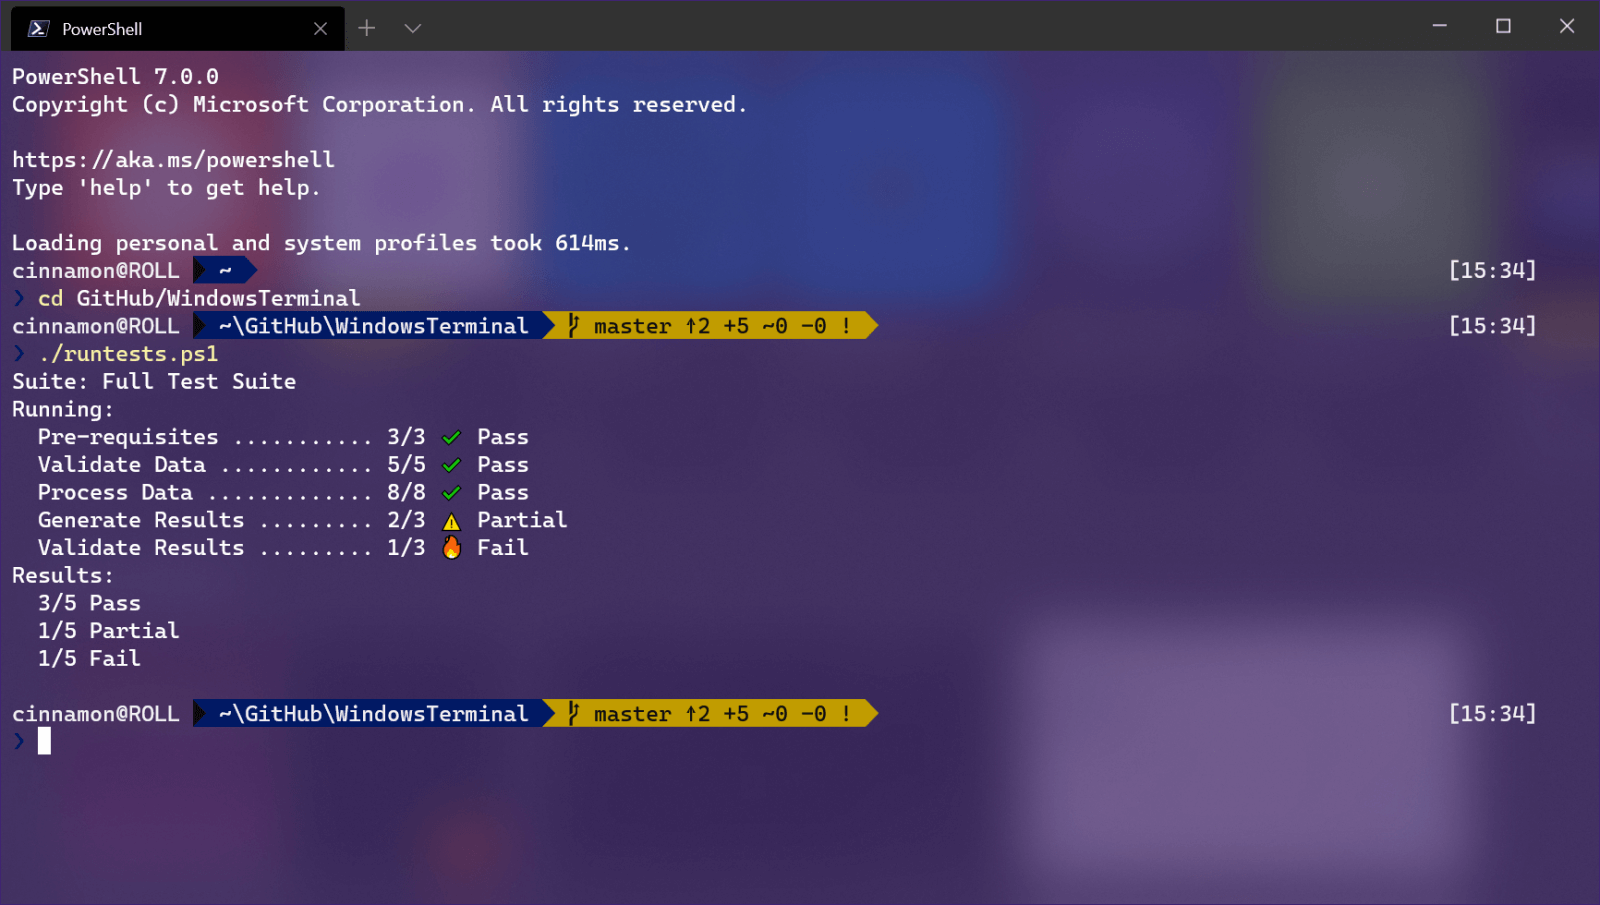
Windows Terminal is a new free Microsoft terminal sort of application. When you open either Power Shell or Command Prompt in Windows they will be opened in different windows, and if you want several of each you will have several windows of each on your screen. Windows Terminal fixes this by opening each of the Instances of Command Prompt and Power Shell as separate tabs inside itself making it much easier to manage multiple instances of named applications. You can also run both Power Shell and Command prompt tabs in the same Windows Terminal. Luckily running command prompt and power shell in different tabs is not the only thing you can do. Windows Terminal lets you choose your own theme, it has emoji support, GPU rendering, split panes, and many more customizable options. Windows 11 will have Terminal as the default command-line environment for opening Power Shell or Command prompt, even Windows Subsystem for Linux (WSL)

Setting Windows Terminal as the default application

If I was successful I have managed to show you that Windows Terminal is something that you should use even if you do not or cannot upgrade to Windows 11. You can use it inside Windows 10 also. First thing is to download and install it. You can get Windows Terminal from the official Microsoft website here: Windows Terminal page After download and installation are completed, open the Terminal app and select the down arrow menu, click Settings. Alternatively, you can use CTRL + + shortcut. Inside Settings by default Default Terminal application would be set to Windows Console Host Click on the Default Terminal application to bring a drop-down menu and choose Windows Terminal from the list. Now by default once opened Windows Terminal will use Power Shell as the default profile, however, you can change this by clicking on the drop-down for the default profile where you can choose between Command Prompt, Power Shell, Windows Power Shell, or Azure Cloud Shell. Pick one that you prefer, click on Save and it will be opened as default on the next run.
Read More
Disable WEB camera with PowerShell in Windows
Windows PowerShell is a powerful tool inside the Windows environment often overlooked by typical users which is a great mistake since it can offer a large array of functionality and usability and if used well can offer a unique working experience. Today we will be using PowerShell to turn the WEB camera off so it can not be accessed, completely disabling it for use. You might want to do this for security reasons or just want to learn few new things. Whatever your reason might be, I am welcoming you to this tutorial and please do keep reading.

Finding device ID

In order to disable the WEB camera first thing we need to do is to find a matching device ID. We will find this value inside the device manager, so press ⊞ WINDOWS + X to open the secret menu. keyboard with windows and x markedIn the menu choose device manager and click on it. Windows menu device manager
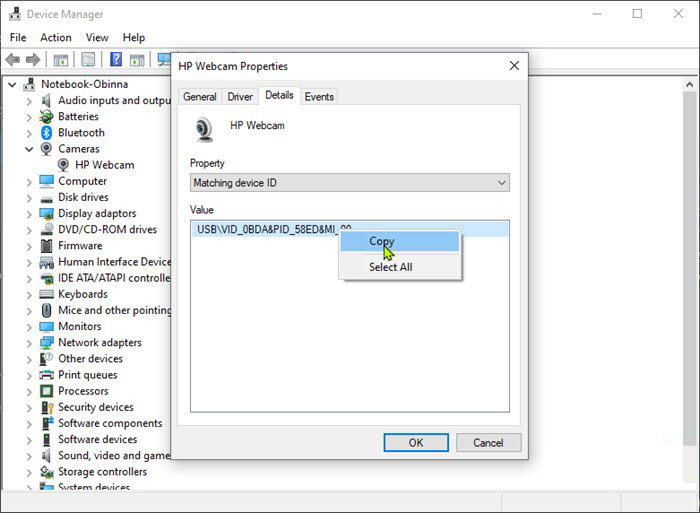
When the device manager opens, expand the Imaging devices or Cameras section. Right-click Integrated Camera or the primary webcam, and click Properties. Go to the Details tab. Under the Property section, click to select Matching device ID from the drop-down. Right-click the value and select Copy camera device managerThe next step is to download and install Windows Driver Kit (WDK)

PowerShell script

Create and run a PowerShell script with the following parameters/values to disable the camera. Substitute the <FOLDER> placeholder with the actual name of the folder where your copy of Devcon is residing
$id = (Get-CimInstance Win32_PnPEntity |

where caption -match '<PRIMARY CAMERA>').pnpDeviceID

$ppid = "{0}{1}" -f '@',$id

Set-Location c:\<FOLDER>

Devcon status $ppid

Devcon disable $ppid

Devcon status $ppid
To enable the camera device, run the command below in PowerShell:
devcon enable $ppid
Read More
Telnet not recognized as internal/external
In case you don’t know, a teletype network, also known as Telnet, is a protocol that is meant for internet or LAN communication which is used primarily to control other computers effortlessly. And it is available as a command-line utility in Windows and helps users in opening a command-line interface for the remote computer. However, a lot of users have reported an error that states, “Telnet is not recognized as an internal or external command, operable program, or batch file” when you try to use it. If you are one of these users, then you’ve come to the right place as this post will guide you on how to fix this error in Windows 10. This kind of error means that the Telnet utility is not installed on your computer but Telnet is a default feature in Windows 10 so the protocol mainly is not enabled yet. The Telnet client is disabled by default in Windows 10 and to fix this error, you can try to enable the Telnet Client via Programs and Features or try to install Telnet using an elevated Command Prompt.

Option 1 – Try to enable the Telnet Client via Programs and Features

The first thing you can do is to enable the Telnet client using Programs and Features since it is disabled by default. To do that, follow the steps below.
  • Tap the Win + R keys to open the Run dialog box and type “appwiz.cpl” in the field and hit Enter to open the Programs and Features window.
  • Next, select the “Turn Windows features on or off” from the options given on the left-hand side.
  • After that, look for the Telnet client from the list and check the checkbox next to it and then click on OK to save the changes made.
  • Now restart your computer.

Option 2 – Try to install Telnet via an elevated Command Prompt

If enabling the Telnet client using Programs and Features didn’t work, then you can try to do it using Command Prompt instead. To get started, follow the steps given below.
  • In the Windows Search bar, type “command prompt” in the field and right-click on Command Prompt from the search results, and select the “Run as administrator” option.
  • Next, execute this command to enable the Telnet client: dism /online /Enable-Feature /FeatureName:TelnetClient
  • Once the command has been executed, close the Command Prompt and restart your computer.
Read More
Applications you should remove from Windows
ApplicationsOver time Applications change, some for the better some for worse. Some of them even stop receiving updates and are old and vulnerable. Sometimes standards change and some file types are not used anymore. Software evolves along with technology and that is good. Keeping old and useless applications inside your Windows is not so good. From various exploits to simply taking up space, maybe even slowing down OS it is always wise and good to clean your Windows from unwanted old applications. In this article, we will be mentioning some relics of old and providing you with an explanation of why you should remove them from your system if by any chance you still have them on it.

Silverlight

Silverlight was meant to be a competitor for Adobe Flash, it is a WEB framework that enables rich media content inside your WEB browser. The issue is that it is not developed anymore and today's browsers do not support it. The only browser that actually can support it is internet explorer which itself is not supported and how there is practically 0 content on today's modern WEB that will require Silverlight, it is safe and recommended to remove it.

Adobe Flash

Speaking of Adobe Flash, you should remove it as well. Flash has stopped receiving support as of January 2021 and browsers have dropped support for it and even blocked it due to security issues. However, there still might be some local installation of Flash itself inside Windows along with the old Shockwave player that stopped receiving support in 2019. You should remove them both.

JAVA

Now this one is tricky, by itself JAVA does not present any security issues since browsers do not support it anymore and the desktop version is not really slowing down your computer. This one has simply put just another media runtime that is not used and simply takes up space and resources. However if you have some applications that you do use that rely on it (I can really just think of JAVA Minecraft at this point) leave it of course but in any other case, it is just purely not needed.

Quicktime

While we are at media runtime and stuff that just simply is not needed, Quicktime is one of them. Now this Apple Video player and codec is still pretty developed and active in Apple’s iOS environment, Windows version has not been updated since 2016 and it was discovered that it contains some critical vulnerabilities. Uninstall it and if you need a player that could play MOV files, just use a VLC player that can play them without any separately installed codec.

uTorrent

This one, the same as CCleaner was once a good application, as a matter of fact, it was the best torrenting application. Sadly it has fallen from its grace very low, from getting tons of ads in its interface to findings in 2015 that code of torrent client was packed with a crypto miner that used system resources of an installed computer to mine crypto without user’s awareness. You should uninstall this torrent client if you would like to get your PC back and not provide it for cryptocurrency mining for the company that developed it. Use qBittorrent or TIxati, open-source and free ones that have everything needed for any torrenting needs.

Toolbars and Browser extensions

There are a lot of toolbars for browsers and extensions that are malicious in nature or simply not updated providing security issues. It is very advisable to remove this as soon as possible.

WinRAR

WinRAR has gained its large popularity solely for the reason that you could download it from the official site like shareware and use it forever. The license never expired and you could use it indefinitely. Sadly not much has been improved in the application itself and it is slowly falling out in its range of what it can do. There are better open source and free options today like 7zip, PeaZip, ZIPvare, and more that are working the same as WinRAR if not even better.

Windows and manufacturers Bloatware

Yes, applications that come bundled with Windows and with some laptops that include manufacturers made software for different tasks like its own specific media players, calculators, etc. It is known that these applications are not better than their open-source rivals and there are too many of them including some that you will probably never use. It is the same as buying a new phone bundled with tons of applications that you do not need, did not ask for, and do not use. Delete all of them. Considering Windows there are also some Store application like Candy Crush Saga demo and other are safe to remove if not needed. That’s it, our advice for old and not needed applications so you can keep your PC safe and fast.
Read More
Calculator is not working in Windows
As you know, one of the basic apps in the Windows 10 operating system is the calculator and it can even be extended to a scientific calculator which makes it really useful for users. However, there are instances when you might encounter some issues while using this app. One of the issues about the Calculator app that’s been reported recently is that the Calculator app is not working. If you encounter the same problem, then you’ve come to the right place as this post will guide you on what you can do to fix the problem. Based on the reports, users claimed that the issue with the Calculator app occurred right after they’ve installed a feature update, while other users claimed that the Calculator app never really worked on their computers and there are also cases where the app opens but it either freezes or crashes. According to researchers, the main causes of the problem include a feature update that could’ve altered the settings. It could also be due to problems with the login account or corrupted and missing files, or the problem could also with the calculate app itself. To resolve this problem, here are some suggestions you can follow.

Option 1 – Run the System File Checker Scan

System File Checker or SFC is a built-in command utility that helps in restoring corrupted files as well as missing files. It replaces bad and corrupted system files to good system files that might be the reason why the calculator app is not working properly. To run the SFC command, follow the steps given below.
  • Tap Win + R to launch Run.
  • Type in cmd in the field and tap Enter.
  • After opening Command Prompt, type in sfc /scannow
The command will start a system scan which will take a few whiles before it finishes. Once it’s done, you could get the following results:
  1. Windows Resource Protection did not find any integrity violations.
  2. Windows Resource Protection found corrupt files and successfully repaired them.
  3. Windows Resource Protection found corrupt files but was unable to fix some of them.
  • Reboot your computer.

Option 2 – Run the DISM tool

You can also run the DISM Tool as it helps in repairing the Windows System Image as well as the Windows Component Store in Windows 10. Using this built-in tool, you have various options such as the “/ScanHealth”, “/CheckHealth”, and “/RestoreHealth” that could help in fixing the Calculator app.
  • Open the Command Prompt with admin privileges.
  • Then type in the following commands and make sure to hit Enter right after you type each one of them:
    • Dism /Online /Cleanup-Image /CheckHealth
    • Dism /Online /Cleanup-Image /ScanHealth
    • Dism (.)exe /Online /Cleanup-image /Restorehealth
  • Do not close the window if the process takes a while as it will probably take a few minutes to finish.

Option 3 – Try logging into your computer using a different User Account

You might want to try logging into a different User Account since it is possible that the issue could have something to do with your log-in account. Thus, you can isolate this possibility by logging into a different user account. If you don’t have any other user account, simply create a new one by clicking on the Start icon and then go to Settings > Account > Family & other users. From there, go to the Other user's section and click on the Add someone else to this PC option, and then inputs all the needed information and restarts your computer. Once your computer has restarted, log into your computer using the newly created user account.

Option 4 – Try to reset or reinstall the Calculator app

If the first three given options didn’t work, you might want to reset or reinstall the Calculator app. To do that, follow these steps:
  • Click on the Start button and go to Settings > Apps > Apps and features.
  • Next, look for the Calculator app from the app list and click on it to see its other options.
  • After that, select the Advanced options and go to the Reset section and then click on the Reset button to reset the Calculator app.
Note: You also have the option to reinstall the Calculator app. All you have the option to visit Microsoft Store and from there, uninstall the Calculator app.
Read More
Blu-ray player does not recognize the disc
So, you just made some popcorns, dimmed light, relaxed in from of the TV, pressed play on your application and Blu-ray drive can not read your movie. Your movie night failed sadly, but there is hope and in this article, we are going to explore and offer you solutions on what to do when something like this happens so you do not miss another movie night and some hard-earned relaxation. Please note that in this article we are assuming that you are using a Blu-ray player on your PC, so some of the solutions presented are meant only for this case. So the first thing that you are supposed to do is to check the disc itself. You can turn the disc around and visually check the disc for fingerprints and scratches which can be fatal for disc playing, alternatively, you can try to play the same disc on another device and if it fails there also it is not the disc, it is your drive. So if it is no issue with the disc let's see that seems to be a problem with the drive. The common thing that could stop disc reading are cables, check all connections and cables in the back of your device to be sure that everything is plugged in correctly and nicely. After checking cables if the issue persists lens cleaning is the next step. Over time lens from the Blu-ray, the device becomes dirty and dust accumulates on it, there are special cleaning discs on market made especially for this purpose, to clean the dirty lens of optical devices. If you have one put it in and clean your lens. After lens cleaning with a specialty disc, a good idea would be to use compressed air in a can to reduce the dust inside so no excess dust will accumulate quickly again on the lens itself.

So the device is cleaned and checked and still no disc playing?

Update firmware first. In order to accomplish this visit your device manufacturer's website and follow instructions there on how to upgrade firmware. If this did not helped also update or reinstall device drivers. Go to device manager and update drivers for your device by right-clicking on it and choosing update driver. If none of the things helped, go to command prompt as administrator and type in SFC /scannow, leave the process to finish, and reboot.
Read More
1 2 3 162
Logo
Copyright © 2022, ErrorTools. All Rights Reserved
Trademarks: Microsoft Windows logos are registered trademarks of Microsoft. Disclaimer: ErrorTools.com is not affiliated with Microsoft, nor claim direct affiliation.
The information on this page is provided for information purposes only.
DMCA.com Protection Status