Fix Page Fault in Non-Paged Area in Windows 10

Page Fault in Non-Paged Area is a blue screen error usually happening with faulty drivers but it can come from different issues like faulty RAM.

In this short article, we will cover usual ways on how to approach and solve this error.

Solving Page fault in Non-Paged Area

Page Fault in Non-Paged AreaRollback using system restore

Simple and easy solution, roll back to the previous system restore point where Windows was stable and working.

Fix Page Fault in Non-Paged Area using device manager

  1. Press ⊞ WINDOWS + X to open the hidden menu
  2. Click on device manager
  3. Find a device with a question mark and right-click on it
  4. Click on the rollback driver button

Fix via command prompt

  1. Press ⊞ WINDOWS + X to open the hidden menu
  2. Click on command prompt (admin)
  3. Inside command prompt type in SFC / scannow and press ENTER
  4. Wait for the process to be finished and then reboot the PC

Fix via DISM tool

  1. Press ⊞ WINDOWS + X to open the hidden menu
  2. Click on command prompt (admin)
  3. Inside command prompt type in DISM /Online /Cleanup-image /Restorehealth and press ENTER
  4. Wait for the process to be finished and then reboot the PC

Page fault in Non-Paged Area via a dedicated tool

Sometimes manual and provided solutions just simply cannot cut it because the issue is triggered also with something else and not just a single issue.

Use DRIVERFIX to fix this specific issue with a single click.

If you like to learn and find out more about various Windows errors, and how to repair them go to our vast archive or use search to find articles that will explain and help you in solving your issue.
However, if you prefer to do things fast and with automatization then we are proposing to use an automated solution for your issues. The application that we are recommending is Advanced System Repair Pro
Advanced System Repair utilizes multiple tools all in one to give you a quick, simple, reliable, and very thorough diagnosis of your PC. It brings you all the tools you need in one program to clean, fix, protect, optimize and boost your PC!
1-Click Maintenance
All the tools to make it simple and easy! It's like having a professional technician at the click of a mouse.

Junk Cleaner
Keeping your computer free from unnecessary clutter also helps make your computer last longer. Like any other machine, if you keep it clean and take care of it, it will serve you better for longer!

Optimize background apps
Optimize applications background activity with the built-in Application Optimizer feature.

Disk Defrag
With a simple 1-click, Advanced System Repair speeds up your PC by assembling fragmented files on your machine and organizing them more efficiently.

Malware Removal
Finds and removes all types of harmful malware including trojans, worms, bots, adware, spyware, PUPs, and more!

Privacy Cleaner
The all-in-one privacy suite to Clean Your Tracks & Protect Your Privacy! Make your computer safe, secure, and more efficient!

System Tweak/Optimizer
ASR will analyze your complete system and settings to adjust your PC to function at its maximum performance.

Registry Cleaner
Over time, as you install and uninstall applications, the registry can become cluttered with old entries and broken settings which can result in program crashes, and annoying messages and slow the computer down.
Visit our Advanced System Repair Pro Download page to inform yourself about all the benefits of this software and get a free trial copy of it.
advanced system repair pro

Advanced System Repair Pro

One-click automated PC repair solution
ASR logo
With Advanced System Repair Pro you can easily
Replace damaged files
Restore performance
Free disk space
Remove Malware
Protects WEB browser
Remove Viruses
Stop PC freezing
DOWNLOAD
Privacy Policy | Terms of Use | Uinstall
Advanced System Repair Pro is compatible with all versions of Microsoft Windows including Windows 11

Share this article:

You might also like

DDR5 what we know so far about it
DDR5 memory module
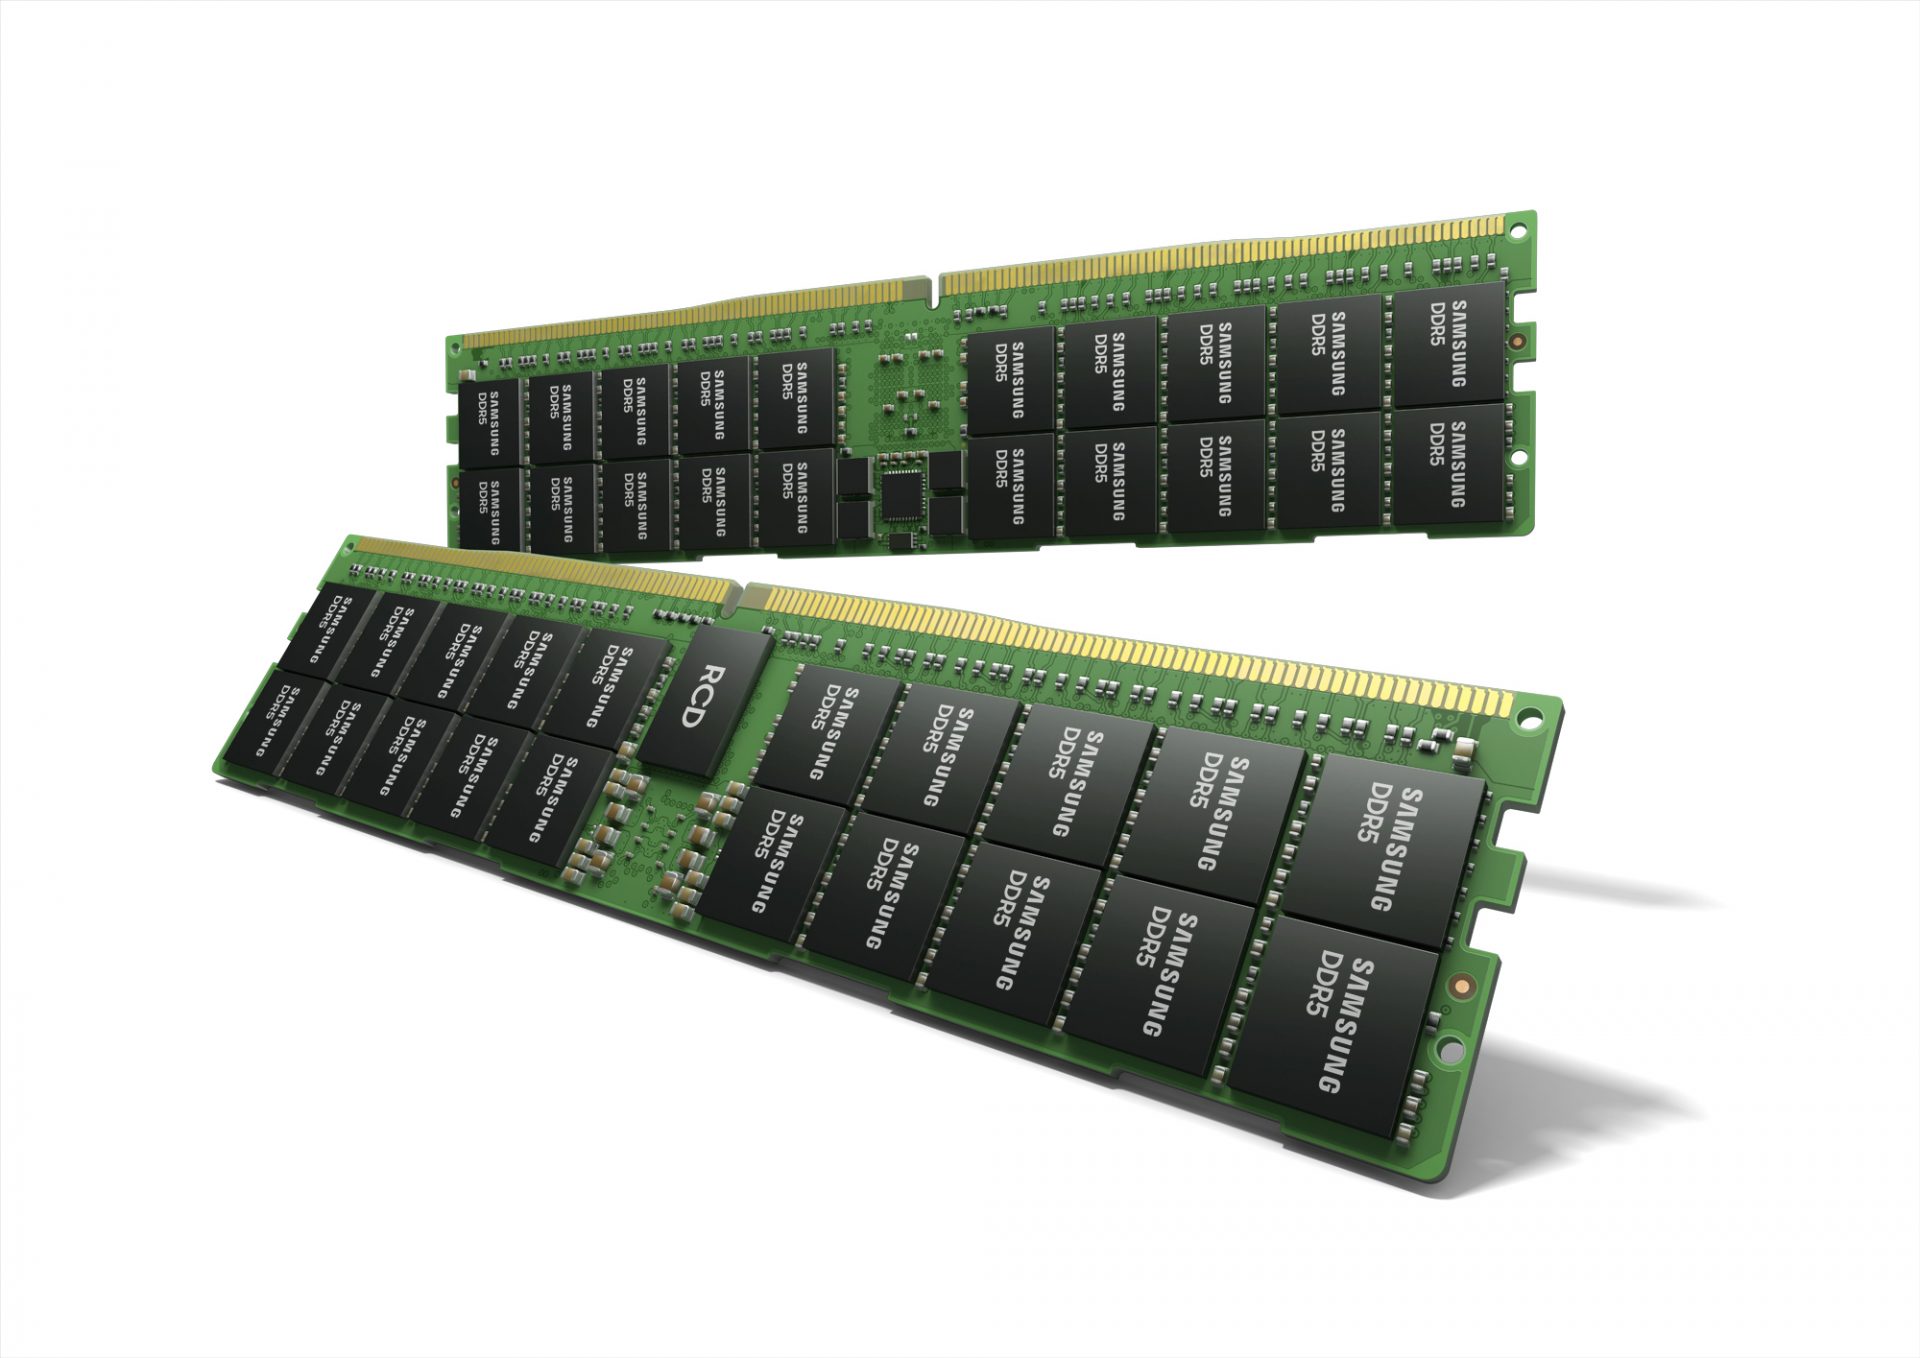
Next-generation of RAM, DDR5 supposed to hit shelves around late summer or fall in 2021if everything goes as planned. Its goal is to increase speed and efficiency, wants to pack more memory in a single stick, and have better power management.
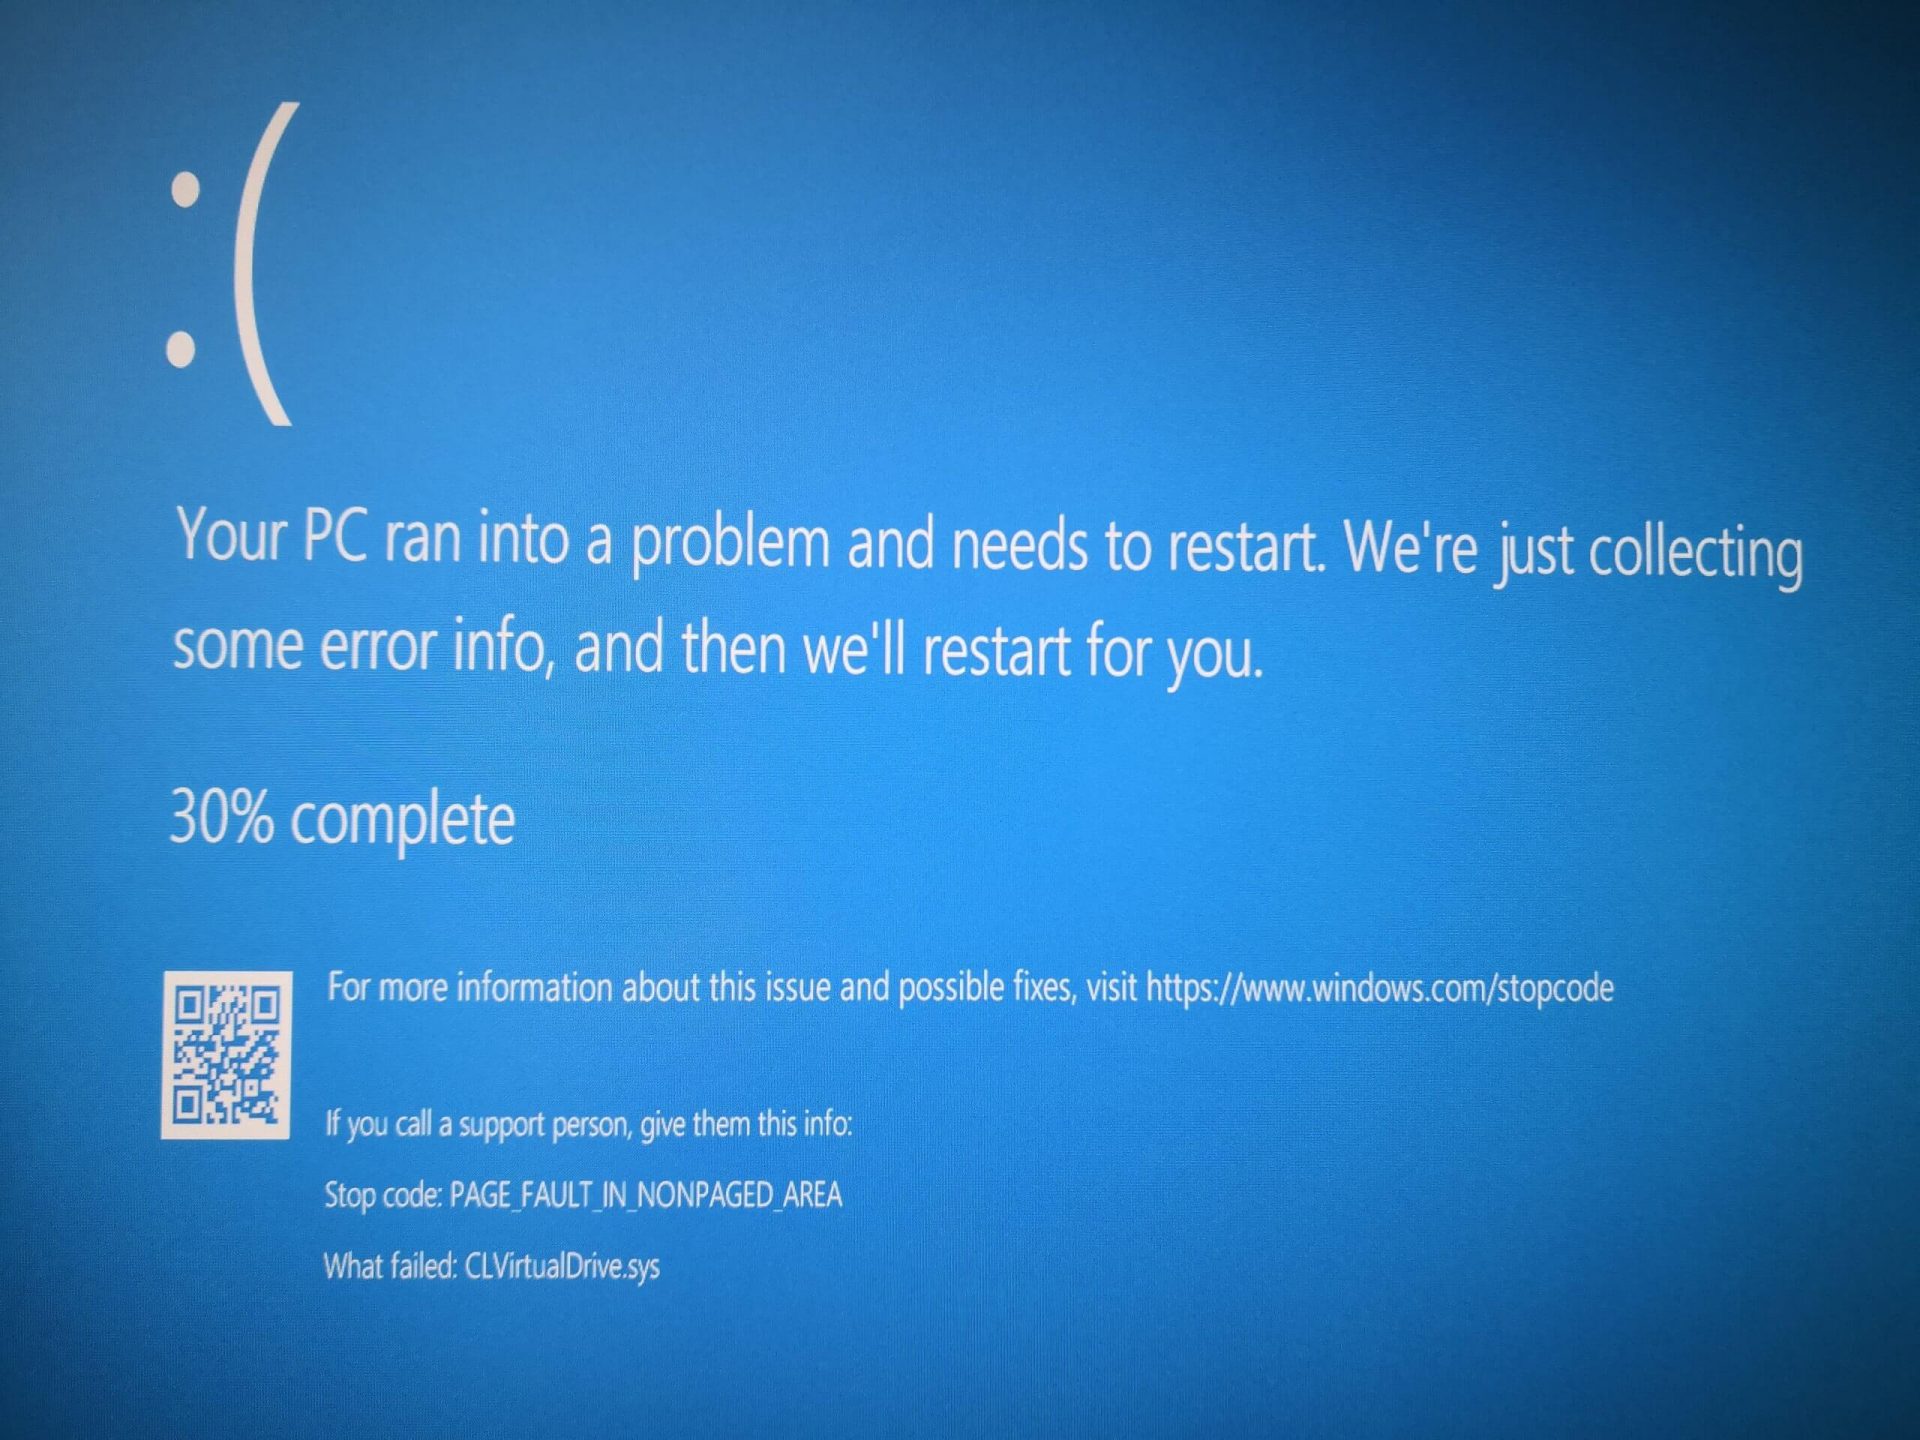
Hardware requirements for DDR5

Using the latest memory technology will require other hardware to follow certain standards and the first ones that will need to follow are CPUs and Motherboards. Intel is already prepared with its Alder Lake CPUs that suppose to come out also later this year. AMD on other hand has not stated anything at the time of this writing but it is a bet that their next generation that will come in 2022 will have full support. It is speculated that bot companies and their respective CPUs will have both support for DDR4 and DDR5. A story about motherboards is a little different. Motherboards will support DDR4 or DDR5 memory banks, not both, so make sure that your motherboard will support the memory you plan on getting.

Capacity of memory

The goal and aim for the DDR5 memory stick are to reach a whopping 126GB per stack. This will be done by using a dual in-line module or DIMM enabling larger capacity. That being said, the first modules that we will see are more likely to be 16GB as standard and 8GB as low entry ones.

Power consumption of DDR5 memory

The standard voltage that DDR4 operates under is 1.2V. DDR5 wants to lower this to 1.1V without sacrificing speed. Voltage regulation on modules themselves will be now integrated on memory banks instead of leaving that to motherboards which will help to detect memory errors directly on the memory bank.

Speed of memory

The most common speed of DD4 memory banks is 2,666MHz, more expansive ones go from 3,600 to 4,000MHz. DD5 aims to raise this bar to 4,800MHz and offers greater speed.

Should you get it right away?

Hardware is ever-evolving, we have PCIe 3.0 to PCIe 4.0, and taking into account that sometimes the newest tech can cause some unexpected behavior it is always the best strategy to wait for a little. Price for the newest tech has also been in its heist just when it is released and seeing how DDR5 will benefit mostly servers mostly since even today memory, processors, and other available equipment can tackle all daily tasks.
Read More
Fix System doesn’t have any USB boot option
Lately, some users reported getting an error that says, “System doesn’t have any USB boot option, Please select other boot option in Boot Manager Menu” when they tried to reinstall the Windows 10 operating system on their PCs or boot from an installation media. If you have the same problem, then this post should help. This kind of error is applicable to multiple devices by various OEMs and is mostly due to the Secure boot being enabled, or the Legacy or CSM support being disabled. It could also be that the bootable USB device was not correctly made and so on. Whatever the cause may be, here are some suggestions you need to check out to resolve the “System doesn’t have any USB boot option, Please select other boot option in Boot Manager Menu” error and reinstall Windows 10 successfully.

Option 1 – Disable the Secure Boot in the BIOS

Disabling the Secure Boot in the BIOS settings is definitely recommended to resolve the error. To disable Secure Boot, here’s what you have to do:
  • First, boot your computer into Windows 10.
  • Next, go to Settings > Windows Update. From there, check if there is anything that you have to download and install if you see any available updates. Usually, OEMs send and update the list of trusted hardware, drivers, and operating systems for your computer.
  • After that, go to the BIOS of your computer.
  • Then go to Settings > Update & Security > Advanced Startup options. If you click on Restart Now, it will restart your computer and give you all the advanced options.
  • Next, select Troubleshoot > Advanced Options. As you can see, this screen offers you further options including System restore, Startup repair, Go back to the previous version, Command Prompt, System Image Recovery, and UEFI Firmware Settings.
  • Select the UEFI Firmware Settings which will take you to the BIOS.
  • From there, go to the Security > Boot > Authentication tab where you should see Secure Boot. Note that every OEM has its own way of implementing the options so it varies.
  • Next, set Secure Boot to Disabled and set Legacy Support to On or Enabled.
  • Save the changes made and exit. Afterward, your computer will reboot.

Option 2 – Try to reset the BIOS or the UEFI Settings

If updating the BIOS didn’t help in fixing Error 0199, you can try to reset the BIOS instead.
  • Start your computer and tap the F10 key during the booting process to enter the BIOS. If it does not work, you can try tapping the F1 or F2 key as well as the Del key.
  • Once you’re already in the BIOS, tap the F9 key to get the prompt to RestoreLoad default configuration now for the BIOS.
  • Next, click on Yes and then follow the next on-screen instructions that appear to set the BIOS back to its default settings.
  • Once you’re done restoring the default settings of the BIOS, restart your computer and then check if it now boots properly.

Option 3 – Make a proper bootable USB Drive/Stick

To make a proper bootable USB drive, you need to use the Windows Media Creation tool. The Media Creation tool in Windows allows you to use the ISO installation file to make a bootable device that you can use to install Windows on your PC. Note that this is kind of different from the usual installation process as it could erase your computer’s current settings and data on the primary drive. Thus, before you proceed, you need to backup all your data into some removable drive and then use the Media Creation Tool to make a bootable drive.
  • After making the bootable drive, you need to plug it into your computer and then reboot.
  • Next, tap the F10 or Esc key to open the boot options.
  • Now set the boot priority of the removable drive the highest. Once the setup comes forth, follow the next onscreen instructions and install Windows without any problems.

Option 4 – Try enabling Legacy or CSM boot support

If the Legacy or CSM boot support is disabled, then it’s no wonder why you’re getting an error. Thus, you need to enable it by following these steps:
  • Open Settings and go to Update & Security > Advanced Startup options.
  • Next, click on Restart Now to reboot your computer.
  • After that, select Troubleshoot > Advanced Options where, you will see more options such as System Restore, Startup Repair, Go back to the previous version, Command Prompt, System Image Recovery, and UEFI Firmware Settings.
  • From there, enable Legacy Support and then save the changes and exit. This will restart the computer.
  • Once your computer has restarted, check if the error is now fixed.
Read More
Disable password asking in Windows 10
To turn password login in Windows 10 you will need approximately one minute of your time. So let's do it fast and efficient Press ⊞ WINDOWS + X to open the secret menu keyboard with windows and x markedClick on command prompt (admin) Windows menu command prompt adminType in command prompt following:
powercfg /SETDCVALUEINDEX SCHEME_CURRENT SUB_NONE CONSOLELOCK 0
press ENTER
powercfg /SETACVALUEINDEX SCHEME_CURRENT SUB_NONE CONSOLELOCK 0
press ENTER And you are done! Next time when you open your laptop from sleep you will no longer need to type in the password.
Read More
How to Fix Plugin.dll Error

Repair Plugin.dll Error

Plugin.dll Error - What is it?

Plugin.dll is a dynamic link library file associated with Adobe Photoshop CC powered by Adobe Systems Incorporated for the Windows Operating System. DLL are small programs similar to ‘exe’ files which allow multiple software programs to share the same functionality. It is used to call commands, load applications, and successfully execute applications. Plugin.dll error messages may appear during program installation, while a plugin.dll related software program (Adobe Photoshop CC) is running, during startup and shutdown.

Solution

Restoro box imageError Causes

Plugin.dll errors may occur due to multiple reasons such as:
  • Missing or corrupt Plugin.dll files
  • Viral infection
  • Issues in the Windows registry
  • Broken registry keys
Plugin.dll errors may appear on a Windows-based computer as the following:
  1. “Plugin.dll not found."
  2. “The file Plugin.dll is missing."
  3. “Cannot register Plugin.dll."
  4. "Cannot start Adobe Photoshop CC. A required component is missing: Plugin.dll. Please install Adobe Photoshop CC again."
All the causes of the plugin.dll error code are associated with the registry. It is advisable to repair this error before it causes serious damages to your system.

Further Information and Manual Repair

To repair the plugin.dll error on you system, you don’t have to hire a technician or be adept at computer programming. The best way to resolve this error code is to download Restoro. This is a new, innovative, high and multi-functional PC fixer integrated with powerful and performance-driven multiple utilities. It includes a registry cleaner, and system stability scanner. So, whether the cause of the error code Plugin.dll error on your system is missing DLL files or even broken registry keys, Restoro can help you repair all these issues in no time. It is user-friendly and can be operated by users of all levels. Dll files go missing and registry gets corrupt because of the data overload in the RAM/the hard disk. This happens due to poor PC maintenance. The registry tends to save all the activities performed on the PC this includes even the junk files, invalid registry entries and files from uninstalled programs. If the registry is not cleaned regularly, such files accumulate a lot of disk space which leads to registry malfunctioning. It damages .dll files and eventually corrupts the registry. By scanning your PC with a powerful registry cleaner, you can easily wipe out the files cluttering your PC and clear your disk space. Additionally, it also repairs the damaged plugin.dll files, fragmented disk and corrupt registry.  Thereby restoring your PC to its normal condition and resolving the plugin.dll error code on your system. Besides this, you can also run Restoro on your PC to resolve speed issues and Active X and class errors. It is safe, efficient and compatible with all Windows versions. Click here to download Restoro and resolve the plugin.dll error.
Read More
Your Windows license will expire soon
If you suddenly get a message telling you that “Your Windows license will expire soon, You need to activate Windows in Settings” on your Windows 10 computer but you know that your Windows 10 is already activated. Worry not for this post will help you get rid of that error message right away. Before you get started, make sure that you have the Windows product key with you. If you don’t, you can get it by running the following command in an elevated Command Prompt:
wmic path SoftwareLicensingService get OA3xOriginalProductKey
Take note of the product key and then proceed to the options given below.

Option 1 – Try activating Windows 10 again or use another product key

  • If you’re sure that you have the correct product key, click the Go to the Settings button.
  • After that, click the Activate button once again.
  • If you have another license key, you can also use that as well, just simply click on the Change product key.
  • Then enter the new product key and click on Activate. That should fix the problem, if it doesn’t, refer to the next option below.

Option 2 – Try to reset the licensing status

  • Click the Start button and then type “cmd” in the Search box and then tap Ctrl + Shift + Enter to open an elevated Command Prompt.
  • Next, type the “slmgr –rearm” and hit Enter to reset the licensing status.
  • Restart your computer and check if the error is now gone or not.

Option 3 – Try uninstalling the product key and re-enter it once more.

  • The first thing you have to do to uninstall the product key is to know the Activation ID of your Windows installation. To do so, open an elevated Command Prompt and type this command, and hit Enter – vbs /dlv
  • After you enter the command, you should see the licensing status and Activation ID. And to get all the Activation IDs of all the installed Windows versions, key in this command and hit Enter – vbs /dlv all
Note: The “/dlv” parameter will give you the license information for the installed operating system.
  • After you enter the second command, you should see a Windows Script Host window with all the Windows licensing and activation status. Take note of the Activation ID.
  • Next, in the same elevated Command Prompt, type this command – slmgr /upk <Activation ID>
Note: In the third given command, “/upk” stands for “uninstall product key”. This parameter uninstalls the product key of the current Windows edition.
  • Restart your PC. After that, your computer will be in an unlicensed state so you need to re-enter the product key again.

Option 4 – Try rebuilding the Tokens.dat file.

The issue might be caused by a corrupted Tokens.dat file. The Tokens.dat file is a digitally signed file that stores most of the Windows Activation files so if it is corrupted then no wonder you’re having activation issues. To rebuild the Tokens.dat file, refer to these steps:
  • From the WinX Menu, open an elevated Command Prompt.
  • After opening Command Prompt, you need to type each one of the following commands and after you type each command, hit Enter.
    • net stop sppsvc
    • cd %windir%ServiceProfilesLocalServiceAppDataLocalMicrosoftWSLicense
    • ren tokens.dat tokens.bar
    • net start sppsvc
    • exe %windir%system32slmgr.vbs /rilc
  • Now restart your computer.

Option 5 – Try running the Windows 10 Activation Troubleshooter

  • Go to Settings and then select Activation.
  • After that, click on the Windows Activation and then troubleshoot. This will help you address most of the commonly found activation issues in Windows devices.

Option 6 – Try activating Windows 10 via mobile phone

Activating Windows 10 can also be done using your phone. Just note that you have to call Microsoft to do so.
  • In the Start Search box, type in “Slui 4” and tap Enter.
  • Next, select your country and click on Next.
  • Keep the window open and call the toll-free number of the country you’re from.
  • Afterward, a confirmation ID should be given by the automated system which you must take a note of.
  • Finally, in the box on the window, type in the confirmation ID and click on the Activate button. That should do it.
Read More
A Quick Guide to Fixing Error Mswrd632.wpc

Error Mswrd632.wpc Fix Guide

Mswrd632.wpc - What is it?

Mswrd632.wpc is a Microsoft Office Word error message.  This error message is often displayed in the following format:
‘Word cannot start the converter mswrd632.wpc’
The error message mswrd632.wpc may pop up when computer users try to open certain MS Word documents using the .doc extension.

Solution

Restoro box imageError Causes

Error Mswrd632.wpc may be triggered due to several reasons. Some of the common reasons for the mswrd632.wpc error code include:
  • Issues with Microsoft Word application
  • MSwrd632.wpc file corrupted
  • Changes in the registry configuration settings
  • Issues with security updates
Sometimes when you attempt to access the Word file of the older version of the MS Word application after new security updates, you may experience this error code. This happens because the new security features that you have installed in the updated version blocks old files from being accessed.

Further Information and Manual Repair

If you can’t access important MS Word files on your PC, due to the error Mswrd632.wpc, then don’t you worry! The good news is that it is easy to fix and repair. By following a few simple methods, you can easily resolve this issue and access your MS Word files. Try the methods listed below to repair error Mswrd632.wpc on your system:

Method 1: Copy the MSwrd632.wpc file From Another Computer

The error may also occur if the MSwrd632.wpc file is corrupted. In such as situation, copy the MSwrd632.wpc file on your PC from another computer. You can usually find this file in the following path C:\Program Files\Common Files\Microsoft SharedTextConv. However, please note this method is not secure and may make your PC vulnerable to a possible security hack. Do it when your PC is not connected to the internet.

Method 2: Unregister the Text Converter

This issue can also be resolved by unregistering the converter. Here is a step-by-step guide to unregister the converter.
  • First, go to the start menu and select RUN.
  • Type REGEDIT and press the OK button.
  • Next, what you have to do is find and click on registry subkeys. Here are the keys that you have to click on
HKEY_LOCAL_MACHINESOFTWAREMicrosoftSharedToolsText ConvertersImportMSWord6.wpc (Windows 32 bit OS) HKEY_LOCAL_MACHINESOFTWAREWow6432NodeMicrosoftSharedToolsText ConvertersImportMSWord6.wpc (Windows 64 bit OS)
  • Choose the key according to your Windows bit operating system. After that, click on the Edit menu, select the Delete option and click ‘Yes’ to activate changes.
This change will effectively unregister the text converter and disable it for third-party applications and for Microsoft Office enabling you to access your desired MS Word files easily.

Method 3 - Download Restoro to Resolve Registry issues

If the error is related to the registry, then the best and most efficient way to fix it is to download Restoro. This is a powerful registry cleaner and a PC Fixer deployed with a user-friendly interface and compatible with all Windows versions. It scans and removes all registry errors and repairs the registry in seconds. Click here and download Restoro to resolve the MSwrd632.wpc error now!
Read More
Mapped network drives are not working
When you have to connect to a drive that’s on a different computer or on external storage, that’s where the mapped network drives come in. Mapped network drives make accessing files a lot easier. However, there are times when it won’t work for some reason. Windows will notify you about the unavailability of mapped network drives in several ways. For one, Windows might display a red X on the network drives or it could be that its status will be unavailable when you try to use it from the Command Prompt or via a notification. It is recommended that you run a few scripts when you log in to your PC as it may so happen that the network drive takes more than usual to connect. Before you start troubleshooting the problem using the given options below, keep in mind that some workouts might only work under certain scenarios. You might need some network access at logon or you might need access to the Group Policy settings. So you need to choose what you prefer more. You can try the given workarounds below if the mapped network drives are not showing or connecting or working on your Windows 10 computer. These workarounds use scripts to make sure that you are connected to them as soon as you start to use your PC. As mentioned, before you can troubleshoot, you need to create scripts first. There are two scripts here namely MapDrives.ps1 which is executed by the second script named MapDrives.cmd and is done at a regular and non-elevated Command Prompt. Follow the steps below to get started.
  • You have to create a script file named “MapDrives.cmd” first and then save it on a place where the files are safe. To do that, open a text editor like Notepad and then copy and paste the following script:
PowerShell -Command "Set-ExecutionPolicy -Scope CurrentUser Unrestricted" >> "%TEMP%StartupLog.txt" 2>&1 PowerShell -File "%SystemDrive%ScriptsMapDrives.ps1" >> "%TEMP%StartupLog.txt" 2>&1
  • After that, save the file and name it “MapDrives.cmd”.
  • Next, create a script file named “MapDrives.ps1” and then copy and paste the following content. Just make sure to save both scripts in the same folder.
$i=3 while($True){     $error.clear()     $MappedDrives = Get-SmbMapping |where -property Status -Value Unavailable -EQ | select LocalPath,RemotePath     foreach( $MappedDrive in $MappedDrives)     {         try {             New-SmbMapping -LocalPath $MappedDrive.LocalPath -RemotePath $MappedDrive.RemotePath -Persistent $True         } catch {             Write-Host "There was an error mapping $MappedDrive.RemotePath to $MappedDrive.LocalPath"         }     }     $i = $i - 1     if($error.Count -eq 0 -Or $i -eq 0) {break}     Start-Sleep -Seconds 30 } Note: Now that you’ve created the script files, it’s time for you to proceed to the options given below.

Option 1 – Try creating a startup item

Note that this option only works on devices that have network access at login. So if it’s not there, the script will fail to reconnect the network drivers automatically. To create a startup item, here’s what you have to do:
  • Open the Startup folder located at %ProgramData%MicrosoftWindowsStart MenuProgramsStartUp.
  • From there, copy and paste the MapDrives.cmd.
  • After that, open the Scripts folder located at %SystemDrive%Scripts copy-paste MapDrives.ps1 and then copy and paste MapDrives.ps1 in there.
Note: After you complete the steps above, a log file named “StartupLog.txt” will be created in the %TEMP% folder. Now all that’s left for you to do is to log out of your computer and then log back in. This will ensure that the mapped drives are open.

Option 2 – Create a scheduled task

It is possible to create a scheduled task that runs as soon as you log in to your computer. To create a scheduled task, follow the steps below.
  • You have to copy the MapDrives.ps1 script file to the scripts folder of Windows located at %SystemDrive%Scripts.
  • After that, open the Task Scheduler and select Action > Create Task.
  • Next, type a name and description of the task in the General tab.
  • Then click on the Change User or Group button and select a local user group and click OK.
  • Now check the box labeled “Run with highest privileges” and switch to the Triggers tab.
  • From there, create a new trigger with the “At Logon” option in the Begin the task drop-down menu and then click OK.
  • After that, switch to the Actions tab and create a new action then choose to Start a program.
  • Next, type “Powershell.exe” in the Program/Script field, and in the Add arguments (optional) field, type the following:
-windowsstyle hidden -command .MapDrives.ps1 >> %TEMP%StartupLog.txt 2>&1
  • And in the Start in the (optional) field, type “%SystemDrive%Scripts” as the location of the script file.
  • Now under the Conditions tab, select the “Start only if the following network connection is available” option and then select Any connection and click OK.
  • Restart your computer or log off from your account and then log back in so that the task will be executed.

Option 3 – Use the Group Policy settings

You need this option if the mapped network drives are defined via Group Policy settings. You have to update the action of the drive maps to Replace. As a result, it will delete the existing mapped drive and create the mapping on each logon again. However, any settings on the mapped drive that are changed from the Group Policy settings will be gone on each logon. So if the changes don’t work, you need to run the gpupdate command together with the /force parameter in order to refresh the Group Policy setting quickly.
Read More
Fixing PowerShell: File cannot be loaded ...
If you are using Windows PowerShell and it suddenly throws an error message saying, “File cannot be loaded because running scripts is disabled on this system”, then read on as this post will guide you on how you can fix this issue your Windows 10 computer. This kind of error in PowerShell is most likely due to the fact that your user account does not have the required permissions to execute the script. Although this does not mean that you need to have administrator-level permissions as it could also indicate that you have to be unrestricted to run these types of PowerShell scripts or cmdlets. Thus, to fix the error and carry out the task, you have to set the execution policy to be unrestricted. And to do that, you need to use the steps provided below as a reference. Step 1: To get started, you have to check what policies are set for the individual user groups on your computer by tapping the Win + X key combination or by right-clicking on the Start button and clicking on Windows PowerShell (Admin). You can also search for PowerShell in the Start Search and then right-click on Windows PowerShell and select Run as administrator. Step 2: If a User Account Control or UAC prompt appears, just click Yes to proceed. Once you’ve pulled up Windows PowerShell, type the following command to get the List of Execution Policy for all the scopes on your computer.
Get-ExecutionPolicy –List
Step 3: After you execute the command, it will give you a list of the User Groups as well as their Execution Policy status, and under the Scope column, look for “LocalMachine”. Once you find its Execution Policy you will notice that it’s either set to Undefined or Restricted. Step 4: Now that you’ve determined the Execution Policy, you need to set it to Unrestricted if it is set to Restricted. To do that, you have to enter the following command in the very same PowerShell window.
Set-ExecutionPolicy Unrestricted
Step 5: After you execute the command, you will see a message that asks for various permissions for which you either have to tap Y to say Yes to each one of the messages individually or tap the A key to say Yes to all the messages to once. However, if the command throws another error, you can just force the Execution Policy to change by executing the following command.
Set-ExecutionPolicy Unrestricted -Force
Step 6: Once you’re done, it will finally set the Execution Policy for the Windows PowerShell scripts as well as cmdlets to be Unrestricted and fix the “File cannot be loaded because running scripts is disabled on this system” error.
Read More
Mobile Hotspot does not show up or detected
As you know, the Mobile Hotspot feature is used to share the internet connection with other devices using Wi-Fi signals. These Wi-Fi signals are later caught by other devices using their Wi-Fi and then the internet connection is shared once they are connected. However, recently, some users reported that their devices weren’t able to see the Wi-Fi network even if their Wi-Fi is on. This kind of problem could be caused by several factors but one of the main ones include the frequency at which the Wi-Fi network is being broadcasted. If you are one of the users who are currently facing this problem, read on as this post will guide you on what you can do if the Mobile Hotspot or Wi-Fi connection does not show up or is not detected on your Windows 10 device. In most cases, there are only two frequencies at which a Wi-Fi network is broadcasted. They are broadcasted either at 2.4 GHz and 5 GHz. The ones that are broadcasted at 5 GHz need specific hardware since it is a newer technology compared to the ones at 2.4 GHz. There are several other pieces of equipment as well as electrical appliances that operate at 2.4 GHz that includes microwaves as well which causes disruption in the signal strength of the Wi-Fi network. Moreover, aside from signal interruption, this issue with the mobile hotspot might also have something to do with the network-related drivers in your computer. Thus, to fix the problem, here are some suggestions you should follow.

Option 1 – Try toggling the Network band or the frequency at which the Wi-Fi network is broadcasted

  • First, open the Windows 10 Settings app and then navigate to Network & Internet > Mobile hotspot.
  • From there, click on the Edit button located under the Network name, Network password, and Network band.
  • After that, set the Network band to be at 2.4 GHz and then click on the Save button.
  • Once done, restart the Mobile hotspot in your Windows 10 device as well as the Wi-Fi connection of the device that’s trying to connect to the hotspot.

Option 2 – Try running the Network Adapter Troubleshooter

If the first option didn’t work, you might also want to run the Network Adapter Troubleshooter. You can use it to troubleshoot the problem with the Mobile hotspot, to run it, follow these steps:
  • Open the Search bar on your computer and type in “troubleshoot” to open the Troubleshoot settings.
  • Next, scroll down and select the “Network Adapter” option from the right pane.
  • Then click on the Run Troubleshooter” button.
  • After that, your computer will check for any possible errors and will pinpoint the root cause of the problem if possible.

Option 3 – Try updating the Network adapter driver

As mentioned, the problem could also be due to the network-related drivers. So it probably might be the reason why you’re mobile hotspot did not appear or was not detected. That’s why it is recommended that you update the Network adapter driver and to do it, refer to these instructions: Follow the steps below to update your Network Adapter Driver:
  • Tap the Win + R keys to launch the Run window and then type in the “MSC” command and hit Enter to open the Device Manager window.
  • From there, expand the list of all the network drives and update each one of them.
  • Restart your PC and see if it helped in fixing the issue with the mobile hotspot.
Note: If updating the network drivers didn’t help in fixing the problem, you can also try to uninstall the very same drivers and restart your Windows 10 PC. After that, the system itself will reinstall the drivers you just uninstalled. Alternatively, you can also download and install the drivers from the manufacturer’s website directly.
Read More
A Guide to Resolving Error Code 35

Guide on Resolving Error Code 35

Error Code 35 - What is it?

Error Code 35 is a typical Device Manager error. It indicates information missing to properly configure your device.  Error code 35 is usually displayed in the following format:

“Your computer's system firmware does not include enough information to properly configure and use this device. To use this device, contact your computer manufacturer to obtain a firmware or BIOS update. Code 35”

Solution

driverfix boxError Causes

The 2 common reasons for Device Manager error code 35 are:

  • Outdated BIOS
  • Mis-configured, corrupted, or outdated Drivers

No matter what the reason may be, it is advisable to resolve the problem immediately without any delay otherwise you will be unable to use your hardware device.

Further Information and Manual Repair

Below is the list of the most effective and easy to perform solutions to resolve error code 35 on your PC. These solutions do not require any technical knowledge or understanding. Simply follow the instructions to resolve this error code.

Method 1 - Update the BIOS

BIOS (Basic Input/Output System) is the embedded software on the computer’s motherboard.

Though not all PCs have the same BIOS manufacturer, but the steps for updating the BIOS are similar for all versions. Before you get started with the updating process, first identify your current BIOS version.

  • For this, go to the start menu and type msinfo32, and press enter.
  • Now click System Summary to view your BIOS version. Here you will see the version number and date.
  • Now check your PC motherboard manufacturer’s website to download the BIOS update for the model you own. Also, download any Read Me Files and documentation. These contain guidelines and precautions that you should know before you update.
  • Backup all your data and existing BIOS before you update the BIOS version. This will keep your data protected in case the attempt to update BIOS fails.
  • Also, when updating, make sure to use an uninterruptible power supply. Remember power outage or even a small power fluctuation can corrupt the BIOS which is something you don’t want.
  • Now it’s time to perform the update. Run the downloaded installer for the BIOS updating software. Double click on the executable file.
  • Look for a button names Update, Flash, or Run.
  • Click on it to start updating the new version
  • After the update is complete, your computer will restart automatically.

This will hopefully resolve the problem. However, if the error still persists then there is a possibility that the error code is related to outdated drivers. To resolve, try method 2.

Method 2 - Download Driver Assist to Update Drivers Automatically

Update drivers to repair error code 35 on your PC by simply downloading DriverFIX. This is a cutting-edge program deployed with an intelligent programming system.

It is compatible with all Windows versions.

It scans your PC for problematic drivers and updates them with the latest and compatible versions automatically and in a few seconds thereby repairing all Device Manager error codes including error code 35 generated due to outdated/corrupted drivers.

In addition to this, it updates all device drivers on a regular basis, so you don’t have to stress over and keep a track of what drivers on your PC need to be updated and when.

Click here to download DriverFIX to resolve Device Manager error code 35 today!

Read More
1 2 3 162
Logo
Copyright © 2022, ErrorTools. All Rights Reserved
Trademarks: Microsoft Windows logos are registered trademarks of Microsoft. Disclaimer: ErrorTools.com is not affiliated with Microsoft, nor claim direct affiliation.
The information on this page is provided for information purposes only.
DMCA.com Protection Status