How to Fix Error Code HPQTRA08.exe

How to Fix Error Code HPQTRA08.exe

HPQTRA08.exe - What is it?

HPQTRA08.exe (Hewlett Packard Tray 08) is the Hewlett Packard Digital Imaging Monitor task. It is installed with the drivers of HP imaging products like PhotoSmart Printers.

It incessantly monitors and indicates the connectivity status with any recognizable HP product.

Simply put, HPQTRA08.exe is an exe (executable) file that contains step-by-step instructions that a computer follows to carry out a function.

HPQTRA08.exe error code is displayed in any of the following formats:

  • "Hpqtra08.exe Application Error."
  • "Cannot find hpqtra08.exe."
  • "Hpqtra08.exe not found."
  • "Error starting program: hpqtra08.exe."
  • "Hpqtra08.exe is not a valid Win32 application."
  • "Hpqtra08.exe failed."
  • "Faulting Application Path: hpqtra08.exe."
  • "Hpqtra08.exe has encountered a problem and needs to close. We are sorry for the inconvenience."
  • "Hpqtra08.exe is not running."

Solution

Restoro box imageError Causes

Error code HPQTRA08.exe can be triggered for several reasons. However, some of the most common causes include:

  • Corrupt Windows registry keys
  • Virus infection
  • Deleted, damaged, or corrupted HPQTRA08.exe file
  • HPQTRA08.exe file conflict
  • Corrupt or incomplete installation of Hp Digital Imaging

It is advisable to repair the error code HPQTRA08.exe on your PC immediately. Delays can lead to serious problems especially if the underlying cause of the error is related to registry corruption.

Further Information and Manual Repair

To resolve this error on your PC, you don’t need to hire a professional and pay hundreds of dollars for the repair. Simply try the DIY methods listed below to fix the problem right away.

Method 1 - Download and Install HPQTRA08.exe File

If the error cause is related to deleted, corrupted, or damaged HPQTRA08.exe file, then the best way to fix the problem is to install the HPQTRA08.exe file on your PC.

However, first, make sure the site you select to download the file from is reliable and trusted.

By downloading from an unreliable website you can expose your PC to potential malicious programs and risk your data security.

Method 2 - Remove all Viruses

Sometimes viruses and malware tend to disguise in the form of exe files such as the HPQTRA08.exe file.

In such a situation scan your entire PC for viruses and malware using a powerful antivirus. Remove all the malicious programs found to fix the issue.

Method 3 - Clean and Repair the Registry

The registry saves all PC-related activities and information including both important and obsolete files such as cookies, bad registry entries, invalid keys, internet history, and junk files.

If these files are not removed from the registry frequently, these accumulate in the registry and corrupt thereby triggering error codes. Error code HPQTRA08.exe is generated when the corrupt Windows registry keys are associated with the HPQTRA08.exe file.

To resolve, clean the registry and repair it. Although this can be done manually it can be time-consuming and tricky especially if you are not technically sound, therefore it is advisable to download Restoro.

Click here to download Restoro and resolve error HPQTRA08.exe.

Method 4 - Locate and Install the Driver

As was pointed out, you might need to reinstall the printer driver again. Using DriverFIX, you’ll be able to automatically update your computer system and install the drivers your computer needs to operate smoothly.

If you like to learn and find out more about various Windows errors, and how to repair them go to our vast archive or use search to find articles that will explain and help you in solving your issue.
However, if you prefer to do things fast and with automatization then we are proposing to use an automated solution for your issues. The application that we are recommending is Advanced System Repair Pro
Advanced System Repair utilizes multiple tools all in one to give you a quick, simple, reliable, and very thorough diagnosis of your PC. It brings you all the tools you need in one program to clean, fix, protect, optimize and boost your PC!
1-Click Maintenance
All the tools to make it simple and easy! It's like having a professional technician at the click of a mouse.

Junk Cleaner
Keeping your computer free from unnecessary clutter also helps make your computer last longer. Like any other machine, if you keep it clean and take care of it, it will serve you better for longer!

Optimize background apps
Optimize applications background activity with the built-in Application Optimizer feature.

Disk Defrag
With a simple 1-click, Advanced System Repair speeds up your PC by assembling fragmented files on your machine and organizing them more efficiently.

Malware Removal
Finds and removes all types of harmful malware including trojans, worms, bots, adware, spyware, PUPs, and more!

Privacy Cleaner
The all-in-one privacy suite to Clean Your Tracks & Protect Your Privacy! Make your computer safe, secure, and more efficient!

System Tweak/Optimizer
ASR will analyze your complete system and settings to adjust your PC to function at its maximum performance.

Registry Cleaner
Over time, as you install and uninstall applications, the registry can become cluttered with old entries and broken settings which can result in program crashes, and annoying messages and slow the computer down.
Visit our Advanced System Repair Pro Download page to inform yourself about all the benefits of this software and get a free trial copy of it.
advanced system repair pro

Advanced System Repair Pro

One-click automated PC repair solution
ASR logo
With Advanced System Repair Pro you can easily
Replace damaged files
Restore performance
Free disk space
Remove Malware
Protects WEB browser
Remove Viruses
Stop PC freezing
DOWNLOAD
Privacy Policy | Terms of Use | Uinstall
Advanced System Repair Pro is compatible with all versions of Microsoft Windows including Windows 11

Share this article:

You might also like

What to do if Mouse Pointer lags or freezes in Windows 10
Although there are several Windows 10 devices that are touchscreen-based, the mouse still remains to be an important part of usage for many users especially the ones who do some hardcore work on their Windows 10 computers or laptops. If you’re one of the users who often edit images or videos either for fun or work, using Touch is difficult as it’s a bit hard to drag on the screen so nothing really beats the mouse. However, as awesome as the mouse is, there are times when you encounter issues while using it. One of these issues is when your mouse pointer lags or freezes so in this post, you can try out a few tips that can help you resolve the issue.

Option 1 – Clean both the mouse and the mousepad

It might sound silly but it is a fact that either the mouse or the mouse pad themselves is the problem. Even though mouse balls are long gone, the laser lights that replaced them are not immune to some dirt which is why you need to clean the bottom of the mouse and then clean the mouse pad afterward.

Option 2 – Try changing the USB port

This is another basic thing you can do to resolve the problem since there are instances when USB ports where either your mouse is connected have gone rogue so you need to try switching to a different port and then see if the problem’s fixed or not.

Option 3 – Switch back to the default settings of the mouse

Switching your mouse back to its default setting is always a good idea since you are dealing with a pointer issue. To go back to the default settings of the mouse, here’s what you have to do:
  • Click on Mouse and Touchpad.
  • Next, click on Additional Mouse Settings located in the right pane.
  • After that, click on the “Use Default” option under the Pointer tab.
  • Then click on Apply and OK to save the changes made.

Option 4 – Try disabling Smooth Scrolling

You have to slow down both the horizontal and the vertical scrolling of the mouse in the settings which are called “Smooth scrolling”. This will help if you think that the websites you are visiting scroll up and down way too fast.

Option 5 – Try to update or rollback mouse drivers

If the first few options didn’t work for you, then it’s time to either update or roll back the mouse drivers. It is most likely that after you updated your Windows computer that your driver also needs a refresh. On the other hand, if you have just updated the mouse driver then you need to roll back the driver. Whichever applies to you, refer to the steps below. The problem may be caused by a corrupted or outdated driver. So you have to update or reinstall the mouse driver. How? Follow these steps:
  • Open the Devices Manager from the Win X Menu.
  • Then locate the Mouse and other pointing devices and right-click on the mouse driver to open the Properties.
  • After that, switch to the Driver tab and click on the Uninstall Device button.
  • Follow the screen option to completely uninstall it.
  • Finally, disconnect the mouse and plug it back in to reinstall the mouse driver.
Note: You can install a dedicated driver on your computer in case you have it or you could also look for it directly from the website of the manufacturer.

Option 6 – Try to check if your laptop is turning off the mouse

In case you don’t know, the power management can turn off the devices that are not in use to save battery power if you use a laptop. And this can also happen on USB-based devices like the mouse. Thus, you need to verify if your laptop is turning off the mouse.
  • Go to Device Manager > Universal serial bus controllers > USB Root Hub > Power Management.
  • After opening Power Management, uncheck the “Allow the computer to turn off this device to save power” option.
  • If you have lots of USB Root hubs, you can try changing each one of them and see if it works or not.

Option 7 – Try updating the Graphics Drivers

  • Tap the Win + R keys to launch Run.
  • Type in devmgmt.msc into the box and tap Enter or click OK to open the Device Manager.
  • After that, a list of device drivers will be displayed. If you see a red or yellow sign that shows up against the driver, right-click on the driver’s name and select “Update Driver Software” or “Uninstall”. And if you find any “Unknown device”, you need to update it as well.
  • Select the “Search automatically for updated driver software” option and then follow the instructions to complete the process.
  • Restart your PC.
Note: You also have the option to go directly to the website of your graphics card manufacturer and check if there’s a new update – if there is, download it.

Option 8 – Try setting the No Delay option for Touchpad

If you are using a laptop that’s touchscreen-based, you can try setting the delay to zero in the settings. To do so, simply go to Settings > Devices > Mouse and Touchpad. From there, you can set the delay before clicks to “No Delay”.
Read More
Microsoft vs Google & Facebook
microsoft hqMicrosoft wants to escalate the situation from Australia to the EU, what a surprise. Hello all and welcome to another news article, this time we are focusing on Microsoft pushing the EU to accept law proposition from Australia. For all of you who are not familiar with the given situation let me quickly explain. The feud began when the Australian government proposed a new law that targeted Facebook and Google specifically. The government said that it believed that both of the tech giants were using content from news outlets without paying. Have you ever seen the little news snippets that Google or Facebook sometimes show its users to keep them up to date? These are lifted directly from news websites, and the Australian government claimed that this practice meant that people didn't bother visiting the news website. This then staved news websites of revenue. As such, the government put forward a new law that would mean Google and Facebook would have to pay the source website for every time they displayed a news snippet. Facebook responded by removing its Australian news coverage in light of the law. Google, however, put up a fight. It argued that its snippets encouraged people to click on it to read more, thus driving more traffic to the news website. It also said that such a law would be too expensive to maintain in the long run. As such, Google threatened to remove itself from Australia if the law passed. This was likely a scare tactic, as 95 percent of Australian web users use Google; however, it actually opened the door for its rival, Microsoft. Microsoft saw how it could push its own search engine BING to replace google. It of course went and reached the Australian government to assure them that BING is more than capable to fulfill its needs and fully abide by the proposed law. Now Microsoft knows that if this law passes it could see a similar situation happening in Europe and it is pushing it. US News reported on how Microsoft plans to encourage EU countries to adopt this new law too. The company has teamed up with the European Publishers Council and News Media Europe to make the following statement: Publishers might not have the economic strength to negotiate fair and balanced agreements with these gatekeeper tech companies, who might otherwise threaten to walk away from negotiations or exit markets entirely
Read More
Blinking or Flashing Desktop After login - Windows 10 Upgrade

Blinking or Flashing Desktop After login - What does it mean?

Upon updating to Windows 10, some users might encounter a blinking or flashing desktop after logging in. This will result in a repetitive restarting of explorer or you won’t be able to make the start menu and shortcut keys work. In addition, the network icon might not appear in your taskbar as well. Other Windows 10 error messages include error code 0xc000021a.

Solution

Restoro box imageError Causes

Your blinking or flashing desktop after logging in might be the result of problems with the bushell.dll shell extension, which is a part of the Norton Security Suite. Another possible cause for this annoying problem is an issue with your display driver since not all systems will use the same display driver and will depend on what graphics card you use.

Further Information and Manual Repair

In fixing the bothersome blinking or flashing desktop after logging in problem, you can do a manual repair method to address the root problem. You need to be familiar with the Windows command line to successfully go through the process. However, if you are not knowledgeable or confident enough to do this on your own, it would be best to seek help from a professional. Or, you might want to consider using an automated tool to solve the issue.

You need to identify first what’s causing the blinking or flashing of your desktop after login to properly address the issue. The following methods can be done if your issue is caused by bushell.dll shell extension issue:

Method One: Forcefully Terminate Process

  1. Press on Ctrl+Alt+Del then select Task manager
  2. Start a Command Prompt as an administrator by choosing the File menu then Run New Task.
  3. Type exe. Make sure to tick the checkbox “Create this task with administrative privileges.”

NOTE: Text input is most probably affected by the explorer restarts so you might need to repeatedly type some letters or to carefully input texts.

  1. In the Command Prompt, type taskkill /f /im explorer.exe. This will stop the blinking or flashing.
  2. Type cd “Program Files” afterward, type dir /s bushell.dll to locate where the dll is. (For example, purposes, use c:\program files\Norton Security Suite\Engine6422.5.2.15 as the location)
  3. If the dll file is not found, you can try repeating step 5 but this time, use “Program Files (x86)” However, you can proceed with the next step if you already located where the bushell.dll is.
  4. Type cd ”c:\program files\Norton Security Suite\Engine 6422.5.2.15” to change the name of the directory you found the dll in.
  5. Type ren bushell.dll bushell-crash.dll
  6. Restart now the system by typing shutdown /r /f /t o in the command line.

Method Two: Uninstall Programs

  1. Log out then go to the sign in screen
  2. Press the Shift key as you simultaneously click on the Power button on the screen.
  3. Continue pressing on the Shift key as you click
  4. Continue pressing on the Shift key as you wait for the Advanced Recovery Options menu to appear.
  5. Once the Advance Recovery Options menu appears, click on Troubleshoot then select Advanced options.
  6. Click on the Startup Settings then select
  7. Boot on Safe Mode by pressing 4 on your keyboard.
  8. Log in then press Windows key + X.
  9. Select the Device Manager then expand Display Adapter.
  10. On your Display Adapter, right-click then select
  11. Exit Device Manager
  12. If in case you also have an older Antivirus utility, you should uninstall it as well.
  13. Restart

NOTE: You might need to download the latest Video Driver on a working computer. Save it in a thumb drive then copy and install it on your computer. If in case there is no native Windows 10 driver, you can also download the latest Windows 7 or Windows 8.1 video driver. Afterward, install it in compatibility mode.

Method Three: Use Microsoft System Configuration Utility

  1. Log out then go to the sign in screen
  2. Press the Shift key as you simultaneously click on the Power button on the screen.
  3. Continue pressing on the Shift key as you click
  4. Continue pressing on the Shift key as you wait for the Advanced Recovery Options menu to appear.
  5. Once the Advance Recovery Options menu appears, click on Troubleshoot then select Advanced options.
  6. Click on the Startup Settings then select
  7. Boot on Safe Mode but this time, choose 5 to start in Safe Mode with networking.
  8. Check if your problem is present or not in Safe Mode. If not, then you are on the right track.
  9. Press on the Windows key + R then type msconfig to start up your exe file.
  10. Click on the Services tab then choose Disable All. Afterward, click on
  11. Once you’re prompted to reboot your computer, go ahead and reboot in Normal Mode. Check if the issue is still present.
  12. If the blinking or flashing desktop after login is gone, then you can just do a process of elimination.
  13. Start-up on your exe again then begin bringing up services a few at a time.
  14. You can turn on all other services except for the following which causes the blinking or flashing desktop after login problem: Problem Reports and Solutions Control Panel Support •Windows Error Reporting Service.
Read More
How to Fix Error Code 0x8007042c

How to Fix Error Code 0x8007042c

What is Error 0x8007042c?

0x8007042c is a Windows Firewall error code. This error hampers your ability to turn on Windows Firewall on your PC. Firewall is a network security system. It establishes a barrier between a trusted, secure internal network and another network (the internet) that is assumed unsecure. Error 0x8007042c is displayed in the following format: “0x8007042c” error message when you try to start Windows Firewall

Solution

Restoro box imageError Causes

Error 0x8007042c may pop up on your computer screen because of many reasons. These include:
  • Firewall service is disabled
  • Malware infection
  • Registry corruption

Further Information and Manual Repair

The good news is that this error code is easy to resolve. To repair, you don’t to be technically sound or hire a professional for the job. Try our DIY methods illustrated below to fix the problem by yourself in a few minutes.

Method 1 - Start Firewall Manually

This method allows you to start Windows Firewall service manually and then make sure that it starts automatically in the future. This can be done by following these steps, first, go to the start menu and then type services in the search box. Right-click services and then click RUN as Administrator. Now scroll down until you see Windows Firewall. Then double click on it. After that, click the startup type box and then click Automatic. If ‘Service Status’ is stopped, then click Start. Now click ‘Apply’ and then press OK. Scroll until you see ‘Base Filtering Engine’, double click it. If again the ‘Service Status’ is stopped, click start. Press Apply and then OK to activate changes. Now restart Windows, Firewall will be enabled.

Method 2 - Remove Malware

If the error cause is a malware infection, use the Microsoft Safety Scanner to remove malware immediately from your PC. Download it from Microsoft’s official website, install, accept terms and then run it to perform a quick scan. The Microsoft Safety Scanner will scan and remove all malware infecting your PC. Once this is done, click Start and then type Windows Firewall in the Search box. Click Windows Firewall and the navigation pane of Control Panel; Click Turn Windows Firewall on or off. Click Turn on Windows Firewall for each network location and then press OK to activate changes.

Method 3 - Repair the Registry

Sometimes the underlying cause can be registry corruption. In such a situation, download Restoro. It is a PC Repair Tool deployed with a registry cleaner. It scans and removes all the bad entries and files infecting your PC, cleans and repairs the registry in a few minutes. Click here to download Restoro.
Read More
How to Fix Ehshell.exe Application Error Code

Repair Ehshell.exe Application Error

Ehshell.exe Application Error - What is it?

Ehshell.exe is a type of .exe (executable file). This file functions as an essential component of the Microsoft Media Center.  By default, it is located in a subfolder of C:\Windows. Ehshell.exe application error is an error code that pops up when tasks in the Media Center freezes. The Ehshell.exe application error is usually displayed on the screen in the following format:
“ehshell.exe – Common Language Runtime Debugging Services Application has generated an exception that could not be handled. Process id=0xa18 (2584), Thread id=0xa24 (2596).”

Solution

Restoro box imageError Causes

Ehshell.exe application error is triggered when PC users perform repetitive tasks in Media Center on a Windows XP Media Center Edition. The computer stops to respond and the error message is displayed. This error occurs if users perform one or more of the following repetitive tasks in the Media Center:
  • Repeated resize, restore and minimize the Media Center Window
  • Schedule TV shows to record
  • Repeatedly change the channel while Media Center is in a window
  • Ehshell.exe file corruption due to malware infection or registry issues
Though this is not a fatal error, to avoid any kind of inconvenience, it is advisable to fix the error right away.

Further Information and Manual Repair

To fix the ehshell.exe application error on your system, you don’t have to hire a professional and spend hundreds of dollars on repair. Here are some of the best and most effective do-it-yourself methods that you can try to resolve this issue on your PC immediately.

Method 1 - Install the Latest Service Pack for Microsoft Windows

To repair the issue, install the latest Windows service pack. A service pack is basically a Windows update, often combines previously released updates that help make Windows more reliable. These are offered free of charge on Microsoft’s official website.  To get started, simply log on to Microsoft’s official website and download the latest service pack compatible with your Windows version. The installation process may take 30 minutes to install. And you will be prompted to restart your PC about halfway through the installation process. Once the Windows Service Pack is installed, the ehshell.exe application error will be fixed. If the error still persists, then try method 2.

Method 2 - Scan for Malware

Ehshell.exe application error may also appear on your PC due to malware infection. Malware programs like viruses, Trojans, and worms deliberately give their malicious processes similar .exe file names, so it is hard to identify the malware. In such an event, it is advisable to download a powerful antivirus and scan your entire PC. Run it to remove all the hidden malware programs on your system. Once malware is removed, the ehshell.exe application error will be resolved.

Method 3 - Clean Registry

Sometimes .exe files can also get corrupt when the registry gets overloaded with unnecessary and obsolete files. If this is the underlying reason for the error code occurrence then it is advisable to download Restoro. This is a multi-functional and user-friendly PC Fixer deployed with a registry cleaner. It removed all the unnecessary files, cleans and repairs the registry in seconds thereby fixing all registry-related errors. Click here to download Total System Care and resolve the Ehshell.exe application error on your PC.
Read More
New toys in new PowerToys for Windows
A new update to popular Microsoft PowerToys has brought a few new features that are aimed at speeding up the workflow. PowerToys
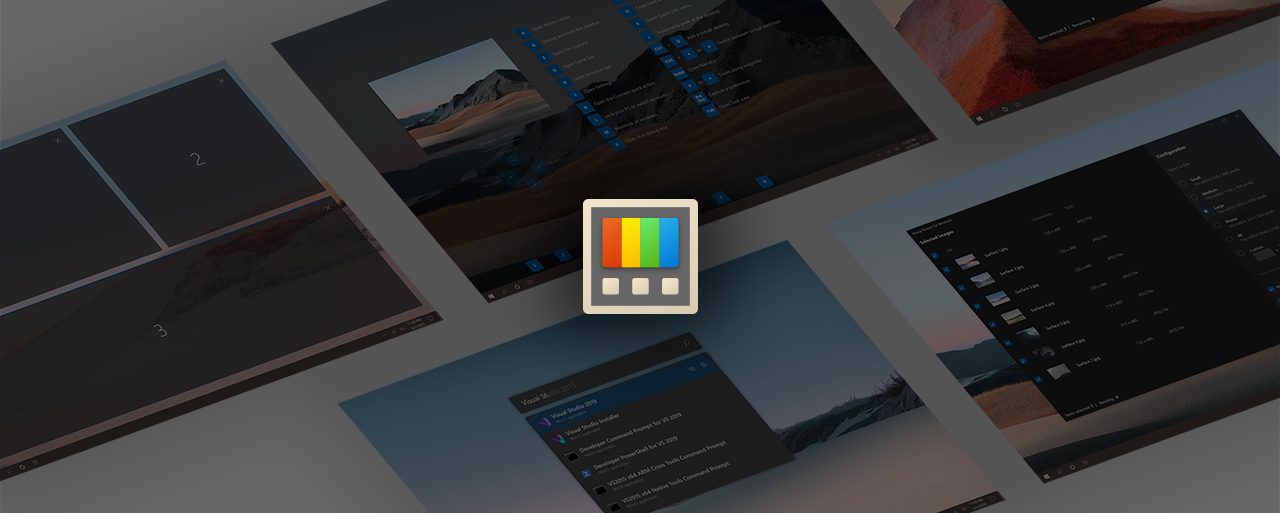
The first new feature that was slid in is Always on top utility. With this cool utility, you can keep the window as the name suggests, always on top of other windows. To enable this cool feature all you have to do is press the key combination of ⊞ WINDOWS + CTRL + T and an active window will be now always on top of all other windows. To reverse and unlock this window from being always on top just press key combination again. A second new feature is a really great one and my favorite thing to happen in power toys. Often we are making the search in our browsers to find stuff, things, maybe some explanations, information, etc. The newest update in power toys brings this to a whole new dimension. While you are on PC you just simply need to type ?? followed by questions like: ?? When doctor strange 2 is coming out and that will launch your default browser with your chosen search engine and provide you with the answer. Third and final thing is G-code support in the file explorer preview pane and thumbnails, meaning that if you work with CNC equipment you can now have a thumbnail preview of the code itself inside File Explorer. And that’s it for now, thank you for coming and reading, Take care and I hope to see you next time.
Read More
How to Fix Error Code 0xc0000142

What is Error 0xc0000142?

Error 0xc0000142 can occur in any of the Windows versions and usually occurs when an application fails to properly initialize.

This error can be critical for a computer as it signifies that the system is unstable. Error 0xc0000142 can cause slow performance in a PC, system freeze, startup and shutdown issues, blue screen and errors in installation.

Solution

Restoro box imageError Causes

Windows/Application Error 0xc0000142 can occur because of a number of reasons.

When a computer is an overload with data, or when system files get broken or missing, this error can occur and will result in startup and shutdown issues as well as the blue screen. Another reason, and one which is quite common, is improper computer maintenance.

This will cause a PC to perform slow, system freezes, and installation errors. This error displays ‘failed to initialize’ on either a Windows error box or the blue screen of death.

Further Information and Manual Repair

Error 0xc0000142 can occur at any time, but there are many ways to resolve it. For instance:

1) Clean the Registry

A corrupted registry is one of the major reasons why this error occurs. The registry is used by Windows to store information and settings on the computer, which is why it has a large database.

This database contains emails, wallpapers, saved passwords and much more in ‘file path references’. These allow Windows to run the common files in your system. A registry cleaner can fix any errors in the registry database.

2) Malware Scan

Viruses can cause certain applications to not function properly. Hence, download a strong antivirus and run a deep scan on your system and remove any potential infections and spyware.

3) Reinstall Applications

Non-critical applications in a computer are those that are installed by the user. If error 0xc0000142 displays in any of your installed programs, then you should reinstall these programs. Often applications have damaged or corrupted files which can slow them down. To resolve this, follow these steps:

  • From Start, click on Control Panel
  • Go to Add/Remove Programs and uninstall the programs
  • Restart your PC and reinstall the program

The third step is not recommended in case the error is caused by cmd.exe

4) Repair Windows

If the error is still on display despite following the previous steps, then you can repair Windows. This process allows Windows to retain all your data and information by simply replacing the program files and settings with fresh ones. This can stop error 0xc0000142 by allowing the programs access to use necessary files smoothly and effectively.

If you cannot resolve the error in any of these steps, then there is another way to do so if you have a computer that runs the Microsoft Internet Security and Acceleration (ISA) Server 2000. Follow these steps in order to resolve it:

  • Make sure that in Program Files and Microsoft ISA Server, a Clients folder exists. The ISA Server service will run on this folder
  • Confirm that Administrators and SYSTEM have Full Control assigned in the Program Files/Microsoft ISA Server/Clients folder
  • Confirm that Msplat.txt file is in the Clients folder. You can copy this file from other ISA Server computers if it is missing
  • If the Clients folder is damaged or is missing, or if you can’t copy the Msplat.tct file from another ISA Server computer, then reinstall the ISA Server 2000
Read More
Resume an Interrupted Download in Chrome
Where all have been there, we are downloading something and for any kind of reason chrome closes, internet breaks, etc. And our download is interrupted and gone forever, and we need to start again. You will be glad to hear that chrome has side a download manager which tracks each download you made and you can use this manager to resume interrupted downloads. Please note that some websites have certain scripts that will prevent you to resume interrupted downloads, in this case, using chrome's download manager will not work and you will have to start the download again. All of this being said, if your download has been interrupted, and went away, pin Chrome press CTRL + J to open download manager, find your interrupted download, and press the resume button. That's it, you have successfully resumed your download.
Read More
A Guide to Fixing 0x80042109 Error Code

Troubleshoot 0x80042109 Error Code

0x80042109 - What is it?

0x80042109 is a Microsoft Outlook error. The 0x80042109 error code occurs mostly while sending emails. The error message is often displayed in the following format:

“Sending reported error (0×80042109): Outlook cannot connect to your outgoing (SMTP) e-mail server.”

Solution

Restoro box imageError Causes

It is not easy to narrow down the cause for the error code 0x80042109. This error can occur due to many reasons. This includes:
  • Corrupt emails and PST files
  • Incorrect Outlook account settings
  • Unavailability of the mail server
  • Incomplete Outlook installation
  • Spyware or viral infection

Further Information and Manual Repair

To resolve the 0x80042109 error code on your PC, here are some easy and effective DIY solutions you can try:

Method 1 - Check Mail Settings

Check your mail settings to see if your outgoing server SMTP is selected or not. If it is not, then it could be the reason for the issue. To check mail settings and select the option, here’s what you need to do:
  1. Click Tools, select Account Settings, and then POP 3 account and click change.
  2. Now check your name field and email address.
  3. Check the incoming and outgoing mail server fields and make sure that it is correct.
  4. Now click on the outgoing server and make sure that the option ‘My Outgoing Server (SMTP) requires Authentication is selected.
  5. After that, click Advanced and tick the option that says ‘This server requires an encrypted connection (SSL).
  6. Now click OK to confirm settings.

Method 2 - Reinstall Outlook on your PC

The error may also occur due to incorrect Outlook installation. Therefore reinstall it on your PC. To do this first you will have to uninstall the software and then re-install it. Once the software is reinstalled try sending the email again. If it is sent successfully, then this means the error is related to incomplete installation. However, if the error still persists then it is advisable to restore the points by going to the System Restore option and choosing the option ‘Restore My Computer to an Earlier Time’ point. This will revert the changes.

Method 3 - Try Disabling Firewall

If you have firewall program installed on your PC, then try disabling it and then send an email through your Outlook account.

Method 4 - Scan for Viruses

Another way to resolve the error code is to scan for viruses. Viral infection and spyware and also affect your Outlook account and activities. However, installing an antivirus on your PC may slow down its performance as such programs are notorious for doing that. Therefore, it is advisable to download Restoro. Restoro is a next generation and a highly advanced PC Fixer embedded with powerful and multiple utilities including an antivirus and a system optimizer. Its intuitive algorithm enables it to scan your entire PC and remove all kinds of malicious software affecting your system including malware, adware, spyware, viruses and Trojans. The system optimizer utility works simultaneously and ensures your PC performs at its optimum speed. It is safe, bug-free, and efficient. It has a user-friendly interface which makes it simple and very easy to operate. You can download it on all Windows versions. Click here to download Restoro to resolve error 0x80042109 today!
Read More
How to Fix Propsys.dll Error

Propsys.dll Error Repair

What is Propsys.dll Error?

Isn’t it annoying when you get an error message pop up stating ‘Cannot find propsys.dll” or “propsys.dll not found” when you start your computer or open a particular program? The propsys.dll file is crucial to the Windows operating system. This file is located in one of the following locations: "C:\Windows", C:\Program Files, C:\WINDOWS\system32, or C:\Program Files\Common Files". And the propsys.dll error indicates that the propsys digital library file is damaged and corrupt. The propsys.dll error may lead to a very unstable operating system. It may also hamper your ability to access many programs on your computer, lead to program and system crash and slow down the system’s performance. Therefore, to avoid these system threats, it is advisable to fix the error immediately.

Solution

Restoro box imageError Causes

The common causes of propsys.dll file error are:
  • Registry problem
  • The propsys.dll file is damaged due to a virus or spyware
  • Improper software removal
  • Hardware Failure
The propsys.dll error message is displayed in either of the following forms:
  • Propsys.dll not found
  • Cannot find [Path]propsys.dll
  • This application failed to start because propsys.dll was not found. Reinstalling the application may fix this problem
  • The propsys.dll file is missing

Further Information and Manual Repair

There are many ways to fix the propsys.dll error. However, for optimum results from the fix, you must first identify the cause of the error and then choose the solution accordingly.
  • Recommended Solution for Registry Issue
If you use your system daily the resulting wasted/invalid/junk entries may dilate the registries. This can result in registry malfunctioning which may result in a propsys.dll error on your screen. When this happens, it is advisable to use a registry cleaner to fix the problem. Registry cleaner helps clean up the junk entries and repairing the corrupted registries. For this, you will first have to download a registry cleaner repair tool. Download and install the software on your computer. After downloading it, click the start scan button to run. This helps scan and diagnose system errors on your computer in seconds. Once the scanning is complete, click on the fix button to repair the registry problem.
  • Recommended Solution for File Damage and Corruption
Use the ‘System Restore’ option to restore corrupt and damaged files.  The ‘System Restore’ function will help you get a fresh copy back and simultaneously help fix the error. Here’s how to use and access the ‘System Restore’ function on your computer: Simply go to the start menu and in the search box type restore. Once you type, it will show you the system restore option. Now select ‘choose a different restore point’. After this, you will be presented with a list of restore points. Choose a point that you believe happened before the propsys.dll error. Confirm your selection and restart. Another alternative solution for file damage is to run a virus scan of your entire system; the damage could be related to a virus or malware infection.
  • Recommended Solution for Hardware Failure
If a propsys.dll error occurs due to hardware failure, then it is advisable to update the drivers for hardware devices that you think are related to propsys.dll. For example, if you receive the propsys.dll error when you play a 3D video game, then try updating the driver for your video card.
Read More
1 2 3 162
Logo
Copyright © 2022, ErrorTools. All Rights Reserved
Trademarks: Microsoft Windows logos are registered trademarks of Microsoft. Disclaimer: ErrorTools.com is not affiliated with Microsoft, nor claim direct affiliation.
The information on this page is provided for information purposes only.
DMCA.com Protection Status